We have struggled for a long time with AT&T reception issues in our office building. Finally we reverted to setting up an AT&T microcell. It seems natural that businesses would use the microcell but there’s not much support for running one in an office network environment. Running an AT&T microcell behind a Sonicwall TZ-170 requires some extra work that AT&T will not really give much help. I was able to get ours to work so follow along…
How to set up an AT&T Microcell to run behind a Sonicwall TZ-170 Firewall
Equipment:
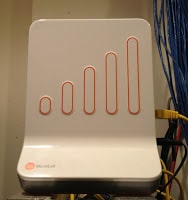
- AT&T 3G Microcell Cisco Model DPH151-AT, P/N: 4035800
- Sonicwall TZ-170
Model: APL11-029
Step 1: You must assign a static internal IP address for your Microcell.
I’m not going to go over how to do that in this tutorial but if you don’t have a consistent IP address your ports will not forward to the right location. I have it set up for our DHCP server to assign the microcell 192.168.0.111 based on the microcell’s MAC address. The MAC address is on the sticker on the bottom of the Microcell.
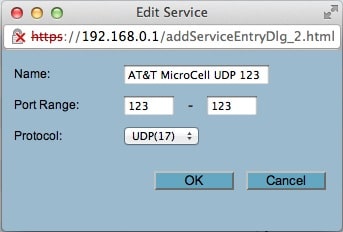
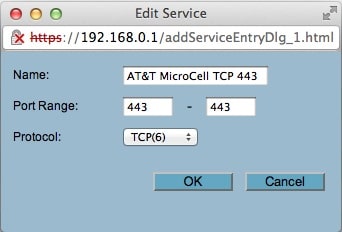
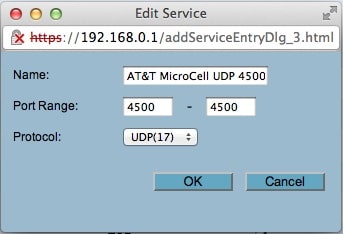
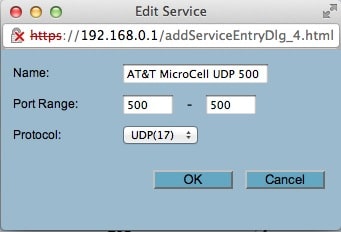
Step 2: You must create services for the 4 different ports you must forward
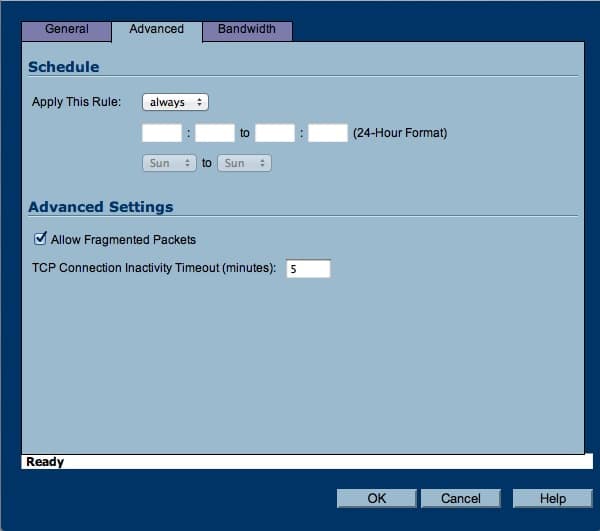

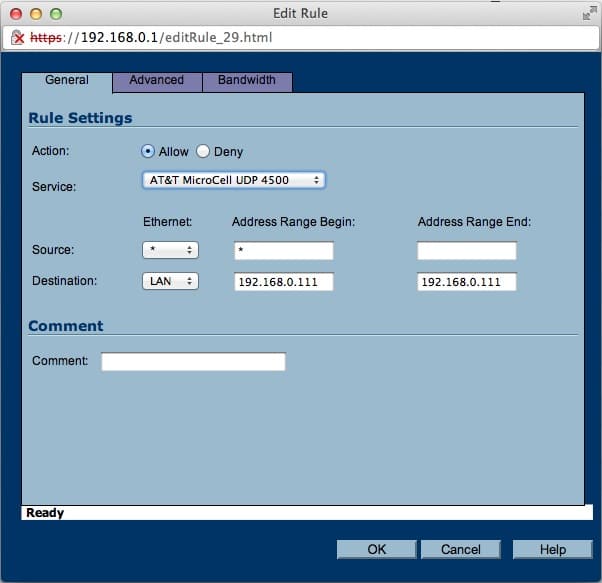
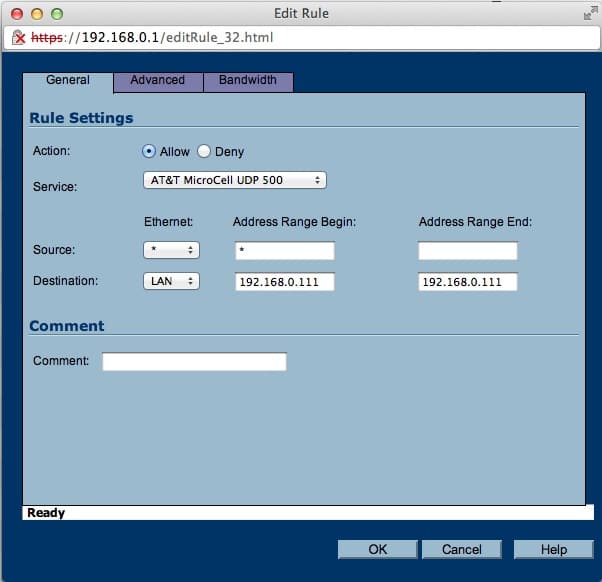
Step 3: Create access rules to forward the ports to the IP address you assigned your Microcell.


That should have you up and going.Something that might go wrong is the microcell not having the IP address you forward all the ports to. You can view the IP address that’s been assigned by looking for the microcell’s MAC address in the DHCP section of your Sonicwall administrative panel:
Sonicwall Setup > Network > DHCP Server > Current DHCP Leases SectionAnother thing that can snag you up is that the unit must be able to get a gps lock where ever you install it. I guess this is because they are only allowed to install these units in areas where they have existing coverage (maybe an issue with the FCC). Luckily our picked up a signal where we installed it the first time and that wasn’t an issue. They do make an external antenna you can connect to it.
Success:

Amazon Associate Disclosure: As an Amazon Associate I earn from qualifying purchases. This means if you click on an affiliate link and purchase the item, I will receive an affiliate commission. The price of the item is the same whether it is an affiliate link or not. Regardless, I only recommend products or services I believe will add value to Share Your Repair readers. By using the affiliate links, you are helping support Share Your Repair, and I genuinely appreciate your support.