Upgrading the HD in a 500 Gig Apple Time Capsule

I upgraded my Time Capsule back in October of 2010 but I didn’t have this blog at that time.  Since I took some pictures I figured I’d add it real quick.  When bought my Time Capsule I didn’t want to pay for a larger hard drive with the idea that I’d upgrade it later on.  The time came when I’d upgraded the HD in my MacBook Pro so finally I decided to see how big of a boy I could make my 500 Gig Time Capsule.  I did a little searching and decided to try to put a 2T drive in it that was on sale at newegg.com.  I followed some advice from the guys over at ifixit.com and here’s how it went.

Upgrading the HD in a 500 Gig Apple Time Capsule

Hardware:

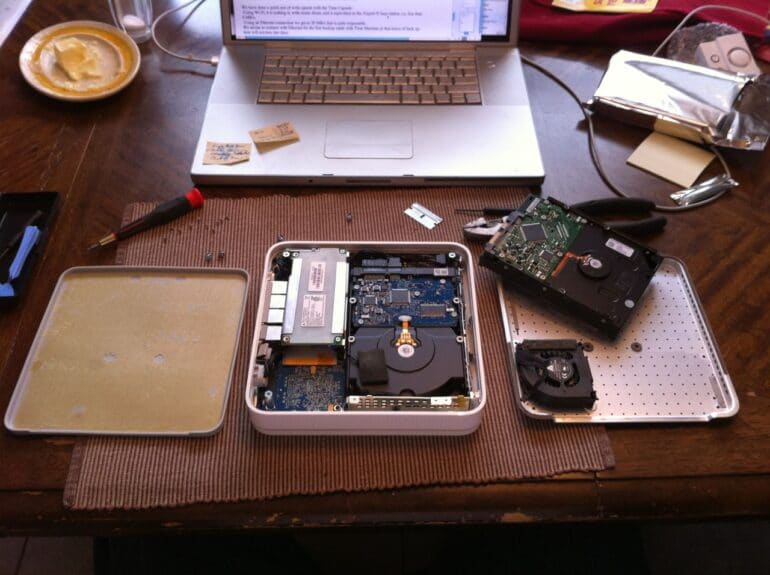
Apple 500 Gig Time Capsule
There are no exposed screws on the Time Capsule, and it’s just like Apple to go that way if they can:
Your opponent: sticky rubber pad
You must peel off the rubber pad on the bottom of it.  I periodically used a razor blade to give the adhesive a chance to peel off with the pad.  Some people have suggested using a hair dryer to warm up the glue before peeling it off but I didn’t and it came off pretty nicely for me anyway.  This exposes all 10 of the screws:
When you remove the bottom of the case be careful because the fan is connected to the bottom pan and must be disconnected via an easy-to-unplug connector:
The hard drive is actually held into place by the rubber grommets that sit down into the bottom pan of the Time Capsule.
My time capsule opened up–Do you like the butter dish in the background?
Before you attempt to lift the hard drive out make sure to disconnect the hard drive’s temperature sensor.  Look for the twisted wire that comes up and around the drive.  I was able to peel it off.  Lift out the drive and disconnect the power and SATA cable.  You will now need to remove the “slugs” that are screwed into the bottom of the original drive and transfer them onto the new drive.  The rubber grommets may have stayed on the slugs–simply put them back in their holes in the bottom pan.  Connect the new drive’s power and SATA cables and place back into the time capsule and reconnect the temperature sensor.  Reconnect the fan and then reinstall the bottom pan.  I was able to get the rubber pad to stick back onto the bottom without any problem.  After booting up the Time Capsule it detected the new drive, formatted it, and it showed all the new space:

Amazon Associate Disclosure: As an Amazon Associate I earn from qualifying purchases. This means if you click on an affiliate link and purchase the item, I will receive an affiliate commission. The price of the item is the same whether it is an affiliate link or not. Regardless, I only recommend products or services I believe will add value to Share Your Repair readers. By using the affiliate links, you are helping support Share Your Repair, and I genuinely appreciate your support.

Tags from the story
, , , , ,
Written By
More from John Mueller
How to Repair a Fraying MacBook Power Cord
Hardware: MacBook Power adapter electrical tape 1/2″ Head Shrink Tubing Fraying MacBook...
Read More

Leave a Reply

Your email address will not be published. Required fields are marked *