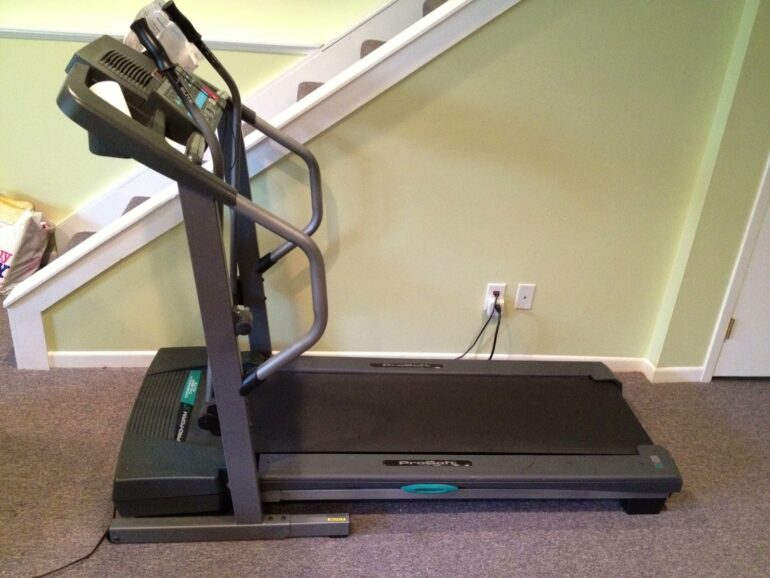
Our ProForm Crosswalk Caliber Elite Treadmill’s bearings in the rear roller were obviously going bad by the clicking and grinding sound coming from the right side of the rear roller. Click here to learn how to check your ProForm’s total mileage. I do all my own repairs so I replaced the rear roller and have written a step-by-step tutorial on how you can too…
How to Replace Rear Roller on ProForm Treadmill Model PFTL71505.0
Equipment:
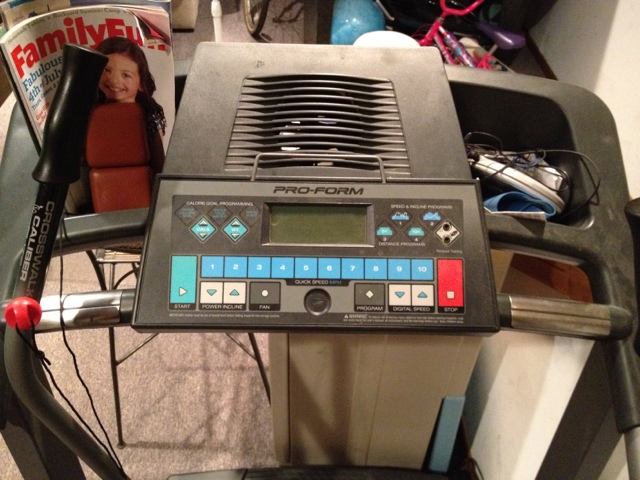
- ProForm Crosswalk Caliber Elite
, Model Number PFTL71505.0
Parts Needed:
Tools Needed:
- 1/8″ and 5.5 mm Allen Bits
- Cordless Drill
- Thick sharp knife (for prying up the prosoft stickers)
I shot a video of what it sounds like when your ProForm’s bearings are going out so you could get a feel for what it sounds like:
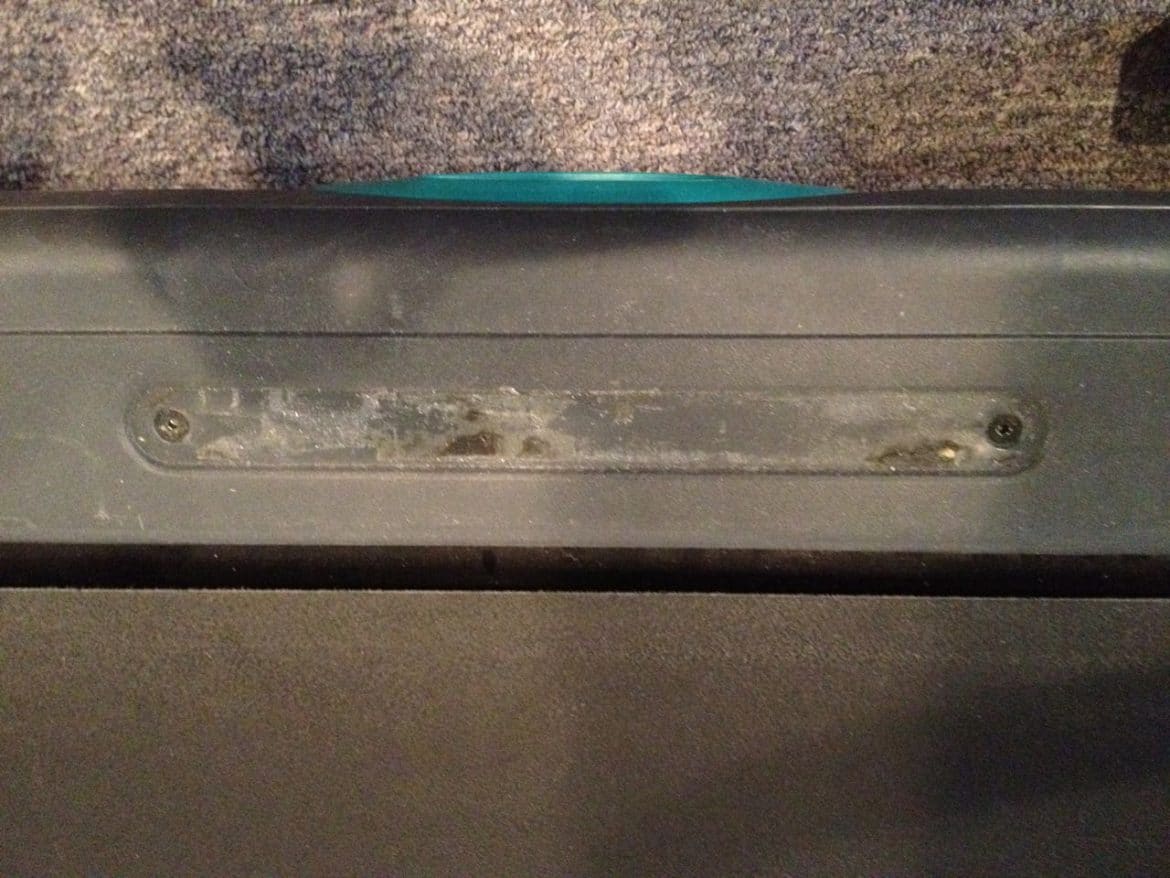
Step 1: Pop off the ProSoft Stickers on the foot rails on each side.
There are two screws hidden under these stickers so you must get them off. I have found it almost impossible to do this without cracking them. They are thick hard plastic and if you don’t pry up the whole sticker at once it will crack. This isn’t a huge deal but for appearance sake see if you can get them off in once piece. Both of mine are now cracked though 🙂
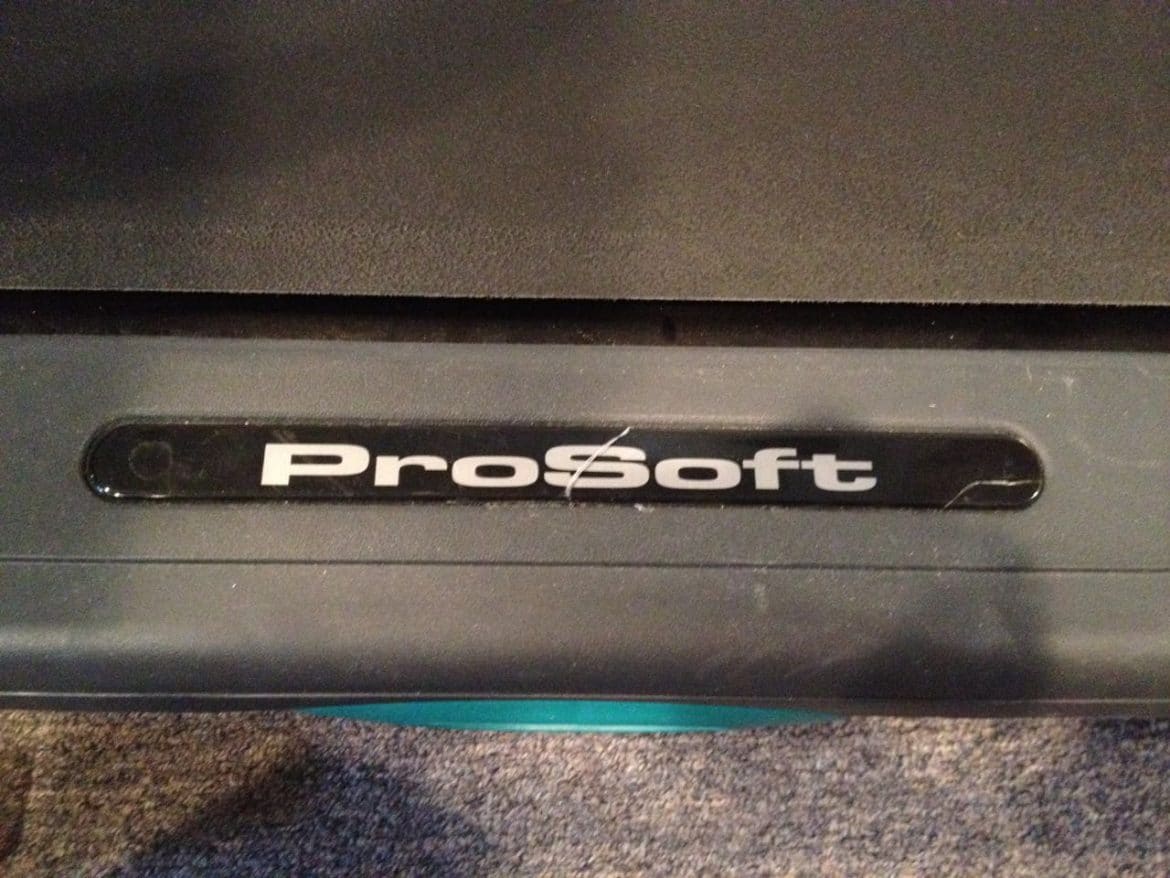
Brittle Sticker + very sticky backing = broken sticker for me. I got it off though:
Step 2: Remove the Ten 1/8″ allen headed screws.
Once you have the stickers off you can remove the 10 1/8″ allen key screws (use a CR-V1/8 bit).
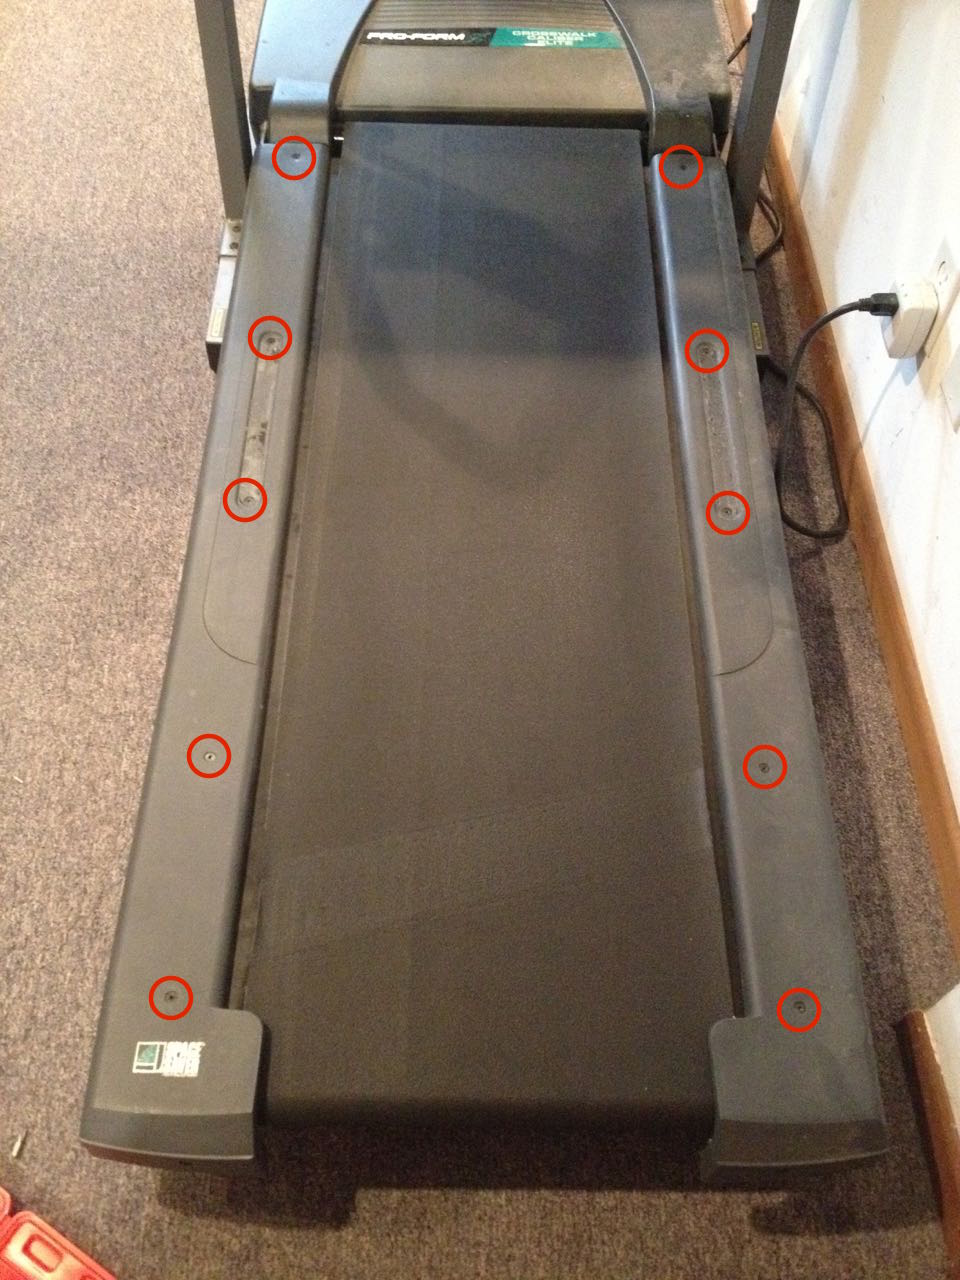
Here’s what it looks like with the foot rails off:

At this point, before I went any further I double-checked that I had the correct part, and I did:
Step 3: Take note of the belt tightness
You may want to take note of about how tight the belt is by lifting up on each side in the middle of the deck so you can get a feel for how tight to make it when you put it back together (that is if it was they way it should be before disassembly). This will help when you are reassembling it and wondering (like I did), “Now tight was the belt before?” Also note where the roller axel is along the roller adjustment bolt.
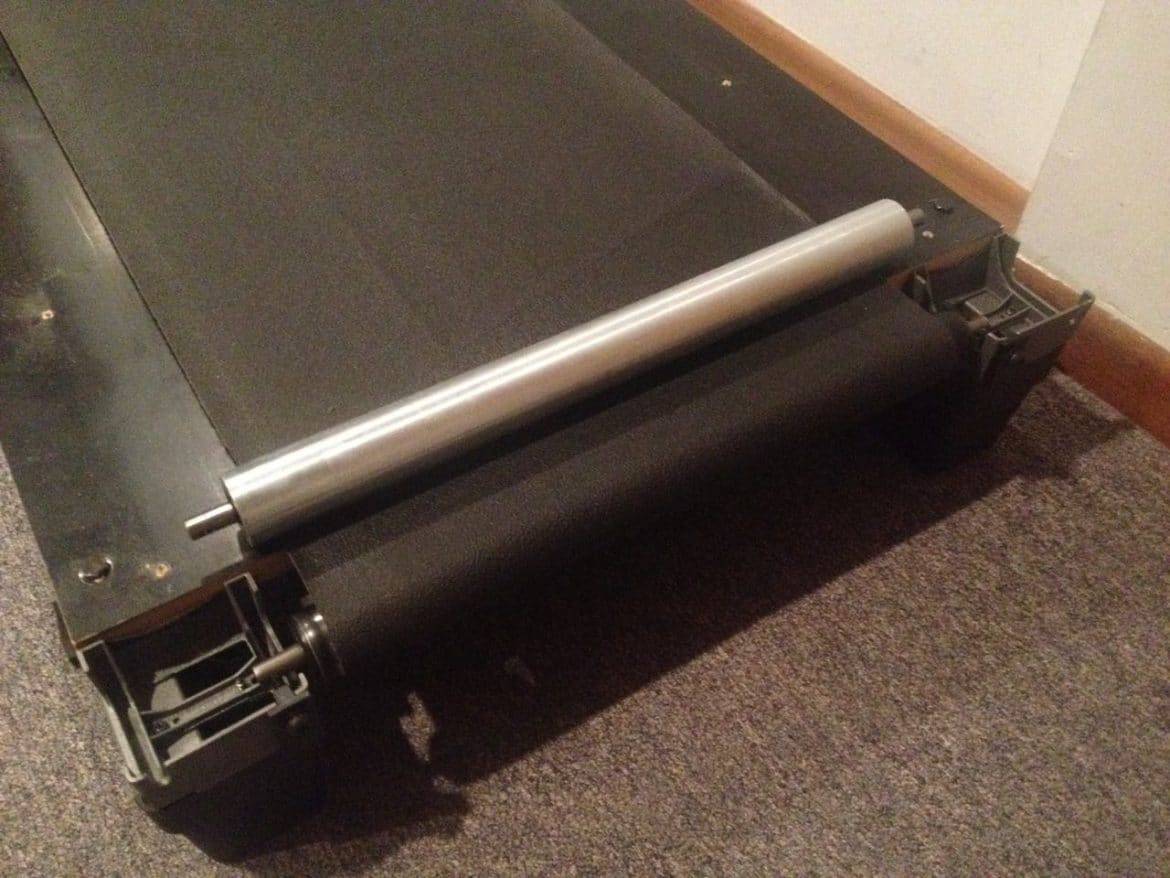
Step 4: Remove the rear roller.
You can easily remove the rear roller by removing the roller adjustment bolt on either end of the roller. The bolt uses a CR-V5.5 allen-key bit (or just a 5.5 mm allen wrench if you have one (but it takes longer than using a screwdriver):

Unscrew both roller bolts and slide out the old roller.
Step 5: Install the new roller.
Slide the replacement into the walking belt. I suggest starting the bolts by hand just to make sure you don’t cross thread them. Tighten them down until they are approximately where they were when you took them apart. Start the treadmill on a slow speed and adjust them for alignment. My belt shifts a bit each revolution when the splice comes by the roller but I think that is normal.
Step 6: Adjust the walking belt tightness.
I’ve been a bit unsure about how tight to make the belt. The manual says to tighten it until it lifts up 2-3″ on each side of the belt half way up the deck. This seems too tight for me. Each time I have messed with the adjustment I played around with it, running on it and then tightening if it slips when I stepped down. Here’s the page from the manual that covers the belt tension:

Step 7: Test out the treadmill
I would try running on the treadmill some before you put the foot rails back on just to test for belt tension. You can adjust the tension and the alignment even with the foot rails on, but I like to be able to see things better.
Step 7: Reinstall the Foot Rails
Lay them in place and reinstall the 10 bolts. Then stick the stickers back in place.
The front roller has gone out on this treadmill too and I’ve written up that repair as well:
How to Replace the Front Roller of a ProForm Crosswalk Caliber Elite Treadmill
Amazon Associate Disclosure: As an Amazon Associate I earn from qualifying purchases. This means if you click on an affiliate link and purchase the item, I will receive an affiliate commission. The price of the item is the same whether it is an affiliate link or not. Regardless, I only recommend products or services I believe will add value to Share Your Repair readers. By using the affiliate links, you are helping support Share Your Repair, and I genuinely appreciate your support.