I had this external floppy drive laying around from some old Mac parts I got off Craigslist and didn’t want it to go to waste but I don’t need an extra external drive because my Mac Plus has an external SCSI HDD. Anyway, I don’t have any diskettes to try in the deal so I could sell it on ebay so I opted to re-purpose it into an external HDD case. I have an old LaCie external USB HDD that is about the same size so I decided to see how things would match up. It so happens that the insides of the LaCie drive are very thin (and minimal) so it makes it fit easily in other enclosures.
How to Convert an Old Apple 800K External Floppy Drive to External USB Hard Drive
Hardware:
- Apple 800K External Drive, P/N: 825-1174-A, Model No. M0131
- LaCie Design by F.A. Porsche 301103U 500GB 7200 RPM USB 2.0 External Hard Drive (originally purchased back in 2007)
To open up the 800K floppy drive follow these steps:Update: My mirror of this tutorial on instructables.com was featured on lifehacker.com here.
Step 1: Remove the 4 phillips screws on the bottom side of the drive.

There are no screws under the rubber feet so leave those little guys in place (and you’ll never get them to stick again if you take them off). My drive was missing one of the rubber feet so I replaced it with a rubber bumper I bought at Home Depot.
Step 2: Lift off the top of the case.
Flip the drive over and then lift off the top of the case. The rubber grommet that fits around the SCSI cable simply fits into a slot on both halves of the case so just hold it in place while you lift off the top of the case.

Step 3: Remove the 2 screws on the top right and left of the case (as seen in the picture above).
There are only 2 screws that hold everything inside the drive. The front of the drive tucks under a couple tabs on the case.

Now that the guts are out of the diskette drive you can see that there is just enough room inside for an internal Hard Drive. I guess they had the 5.5″ standard 30 years ago already?!

Now we are ready extract the guts of the LaCie drive to put in here.
Step 4: Pry open the bottom of the LaCie drive.
A smooth butter knife would work best but all I had was my pocket knife handy and since I’m not going to reuse this case (at this point) I didn’t mind marring it up a bit. The bottom of the case has slots around its outside edge that the plastic from the case snaps into.

Above you can see, the slots in the case bottom that fit into the sides of the case. The case top and sides are plastic and the bottom is pressed aluminum. Put the knife into the slot on the bottom and pry the sides away from the bottom. There is one “catch” on the back side and none on the front, so you may want to start toward the front and work your way to the back. Here’s what it will look like when you get the case bottom off:

Step 5: Disconnect the SATA and Power cables and move the LED activity cable out of the way.
The HD activity LED is just set down into a slot so if you lift it straight up it will come out. You do not have to disconnect it from the board.

I found it easier if I unplugged the SATA cable from the controller board first and then from the drive:

Next unplug the power connector from the HD.
Step 6: Remove the 4 screws from the HD.
There are 4 screws that connect the HD to the metal shielding tabs that wrap around the HD (circled in red below). Unscrew these four screws with a phillips screw driver.

Keep track of these screws because we’ll be using them again.
Step 7: Lift the Hard Drive up and out of the case.
You can just put your thumb under the power connector on the bottom of the drive (in picture above) and lift and it will come right out.
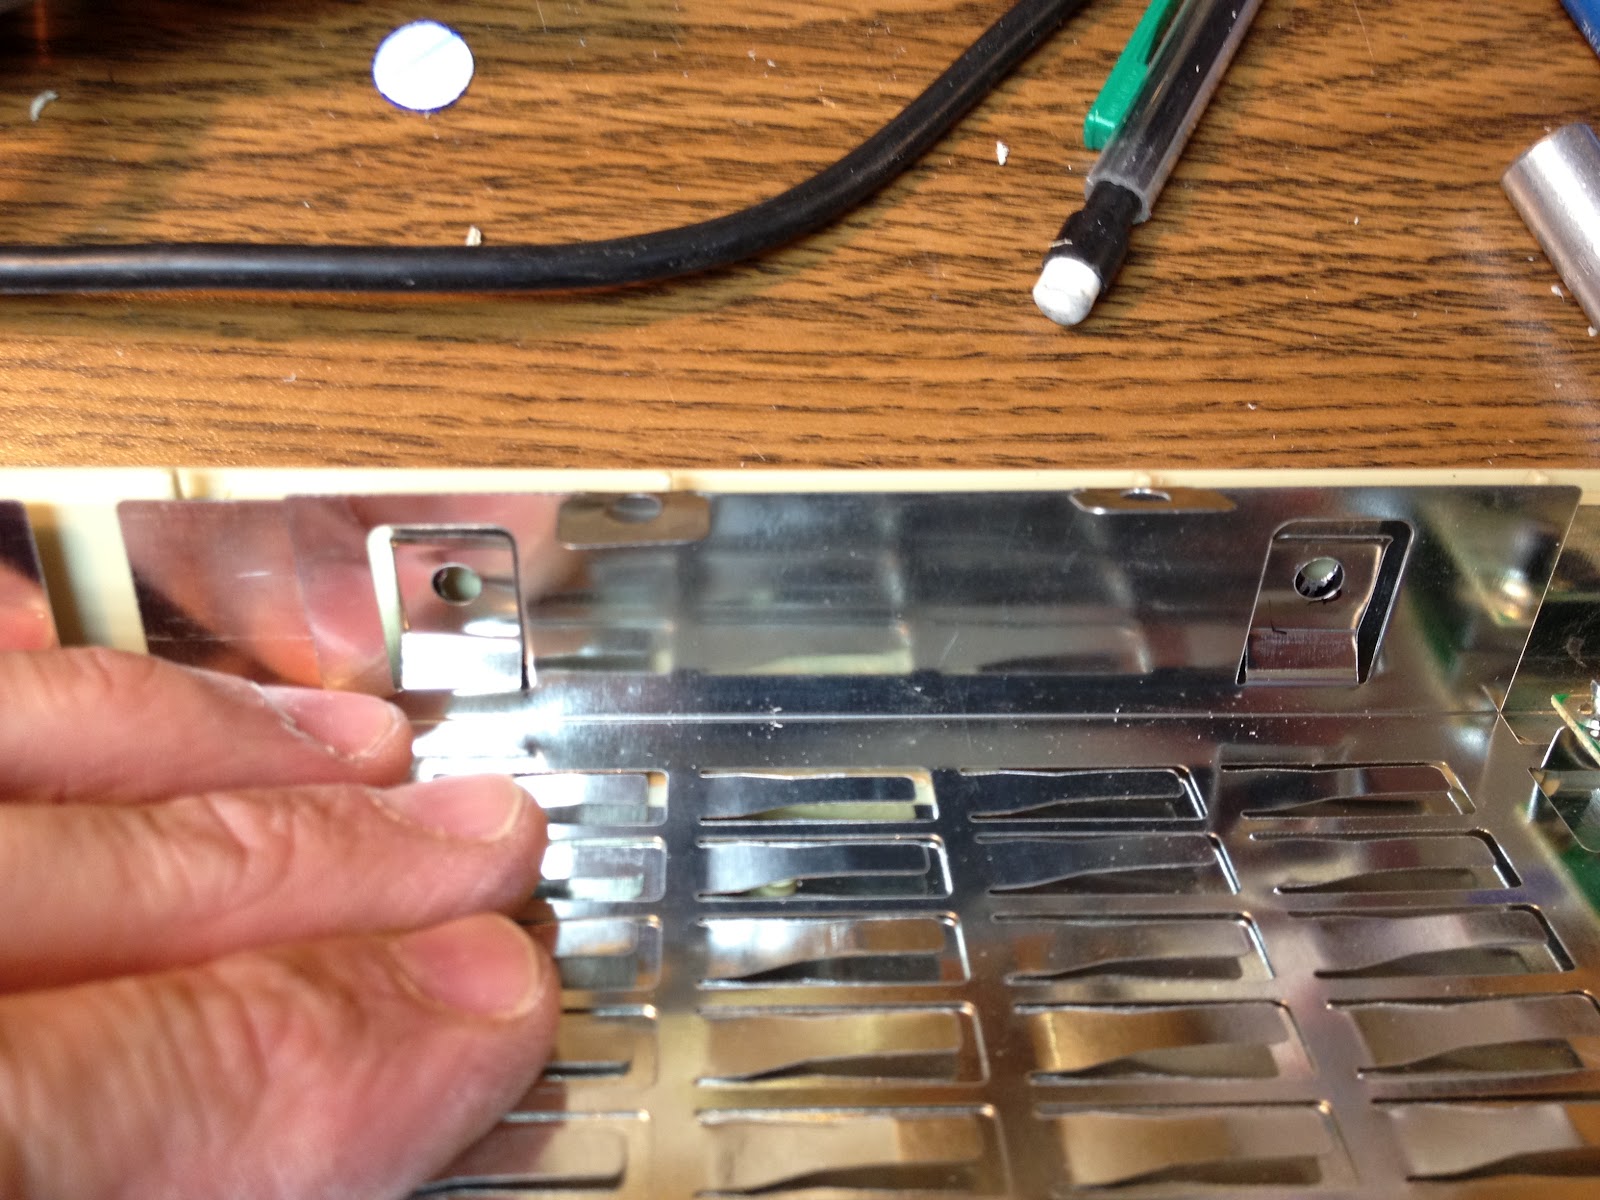
Step 8: Remove the shielding and controller board from the plastic case.
There are 4 tabs that fit down over posts that stick out of the sides of the plastic case that hold all this in place:

By pushing these tabs away from the sides you can lift the metal shielding up and out of the case (along with the controller board and connectors that are all part of it). This is what it will look like when you get it out:

Step 9: Prep the diskette drive case by removing the shielding and extra plastic from the back end.
We will need to remove the shielding from the end. I chose to use a Dremel tool with a disk cutter to cut it off at the very corner.

This is what it looked like when I was done. I wasn’t able to cut all the way along the edge (without cutting into the side, which I want to keep) but just cut as far as I could and then bent the tab back back and forth till it broke off:

Now take a wire clippers and clip off all the extra plastic that was under the piece you just removed:

I then used an exacto knife to clean it up and it turned out pretty good:

Now you can slide the insides of the LaCie Drive in and see how it matches up:

It turns out that the power button of the LaCie drive lines up perfectly with the hole left from the SCSI cable of the diskette drive. This only leaves us with needing to make holes for the power and USB connectors.
Step 10: Make holes for the drive’s connectors.
I first made a pattern off of the LaCie’s case in order to help me with the spacing and size of the holes needed.

I cut out the shapes and then transfered this template to the inside of the diskette drive case by the use of double-sided tape (taping it to the front of the LaCie fram and then pressing it into place on the inside of the diskett drive case):

I then transferred the shapes to the case with a magic marker:
Now time for the Dremel. I first drilled some holes to get started:

And then used my router bit to remove the remainder of the material:

After removing some of the material, do a test run and then go back and remove some more:

For the final size-up put the connectors in to make sure there is enough clearance for the plugs:

Step 11: Mount the LaCie insides in the diskette drive case.
There are no posts to snap the tabs onto but we can drill some holes in the diskette drive’s shielding and use hot glue to secure the LaCie’s insides into the diskette drive. First line up the shielding on to the holes you just made in the case and insert the plugs and then mark where the holes in the tabs show up on the insides of the diskette drive.

Mark all four holes, remove the LaCie insides from the diskette case and then drill through the diskette drive’s shielding where you marked the holes. Be careful not to drill through the diskette drive’s case (that would be sad):

Here you can see the holes matching up:
I made sure to line everything up and then used a piece of packing tape to hold everything right where I wanted it:

Now we are going to shoot some hot glue into those holes making a bead on both sides, which will essentially bolt everything together. Don’t put too much glue on the insides because it will get in the way of the drive (I know).

The hot glue will run (and get in the way) so you’ll want to glue each side and then let it set with the inside of the side facing up before glueing the other two.
Step 12: Mount the hard drive.
Slide the hard drive in from the open end and up under the tabs. Place the two clear plastic sheets back under the tabs and align them with the screw holes (these insulate the drive’s controller board from the metal shielding. Reinstall the 4 screws that secure the HD to the case.

Step 13: Make a diskette to protrude from your drive for fun.
I wanted a floppy disk sticking out of my drive to add a little color to the project just for fun. There’s not enough room for the diskette to protrude inside the case so I first determined how much I wanted sticking out and marked the diskette where I was going to cut it off (take note of how much space is available for it to protrude inside the case).

Then I cut it with my Dremel using a cutting wheel. Make sure to wear eye protection when using your Dremel because you could easily get molten plastic in your eye.

De-burr the end of the floppy you want to keep. Line up the floppy in the slot and hot glue it in place. I used some packing tape to hold the floppy in place when I was glueing. It didn’t hold it as firmly as I wanted but it helped support it none-the-less.

The view from the outside:

This drive would have never read this type of diskette (1.44 Meg double sided) but that doesn’t matter 🙂
Step 14: Reconnect the cables.
Everything will reconnect exactly like it was in the original LaCie drive.
You can just leave the LED cable off (since Apple’s don’t have LED’s flashing to indicate hard drive access) or you can try what I did and that is to have the LED light up the (top) of the opening of the floppy disk slot. Straighten the leads of the LED so it shines straight forward and then hot glue it in place:

You may want to test drive your hard drive at this point before you close everything up.
Step 15: Put the case back together.
Unfortunately the screws you took out to open up the case will not work to put it back together since we took out the metal frame. I opted to run a thin bead of hot glue around the inside of the case and glue the top on the case. It can be pried apart later if it’s necessary to get in there again. Here’s how the connectors look on the back. It’s pretty easy to push the power button with your pinkie finger.

And the final product:

That is going to be fun to have sitting on my desk now with an all new (useful) purpose!
Update 10/16/13:
I now have to say that the LaCie external drive I used for this is not a good drive to use. Twice now I’ve had the drive controller board go bad on it. I replaced it with a used one I purchased on ebay. It is my guess that this hard drive controller board is not meant to drive such a big hard drive (2 TB) as I installed instead of the 500 gig drive that came with it. Both times it quit working there were power issues in the building (a brown out).
Amazon Associate Disclosure: As an Amazon Associate I earn from qualifying purchases. This means if you click on an affiliate link and purchase the item, I will receive an affiliate commission. The price of the item is the same whether it is an affiliate link or not. Regardless, I only recommend products or services I believe will add value to Share Your Repair readers. By using the affiliate links, you are helping support Share Your Repair, and I genuinely appreciate your support.