Materials Required:
- mouse (in this case, a cheap Ativa Model 611405 Wired Optical Mouse)
- mercury tilt switch (from an old thermostat)
- old 12-volt automobile ignition coil
- 3+ conductor cable (around the same diameter as a mouse cord)
- wire nuts (the smaller the better)
- almost any random on/off switch (for disabling the mouse once you have it assembled)
Tools Required:
- wire stripper
- wire clippers
- soldering iron (optional)
- hot glue gun
- black permanent marker
- drill and very tiny drill bit

This idea came out of a project I did back in college–a shocking present (wrapped gift). The present would shock you when you would move it if you were touching any two opposite sides. I’d get it out every year at Christmas 🙂 It contained an ignition coil from an old junk car, a 6-volt lantern battery, and a mercury switch to close the circuit when the person shook or tilted the present. I thought I ought to be able convert it into a shocking mouse instead and here are the details of the conversion. The basic schematic of the project is as follows:

The coil steps up the voltage way up but because we are using a small 6 V battery the current is really low. BTW: Be careful with this thing. I can’t take any responsibility with what you do with it. Do not use this on someone with heart trouble or a pace maker–that would not be funny.
The overall plan for the shocking mouse version (your wire colors will vary of course):

Details of the mouse (the wire colors follow the same scheme as above):

Step 1: Choose a mouse. The first time I made this project I used an old PS/2 mouse but now an archaic looking manilla colored mouse being placed at their desk looks pretty suspicious so I’ve wanted to upgrade it to a black usb optical mouse for some time. The only constraint is that you’ll need to be able to fit all the components inside the mousing housing, but there isn’t that much to cram in there though. Finally I ran upon a donor when I was cutting some cable (zip) ties and actually severed the mouse cord, oops:

Step 2: Disassemble the mouse. In my case there was just one screw on the bottom side of the mouse to remove:

The front of the top cover hooked onto two tabs on either side of where the cord exits the case. Here’s the inside:

Step 3: Prep the insides of the mouse for the project. Go ahead and cut the mouse cord flush with the mouse’s circuit board. We won’t be able to re-use the mouse’s cord because the wire is to lightweight to mess with. When I made the PS/2 shocking mouse I actually was able to use the original mouse cord but I had problems with arching between the wires. I’m going to keep part of the circuit board so that the mouse roller will remain in place, allowing the mouse to have all the feel and function as it did originally.

I then cut the circuit board in half width-wise to make room for the mercury tilt switch. I kept the plastic lens so that the mouse looks totally real from the outside. I clipped out almost all of the plastic tabs from the top and bottom of the mouse to make room for the surprise we’re going to put inside!

Step 4: Drill holes for the contact wires. We are going to run a fine wire on each side of the mouse, in the seam, right where your hand grips:

The seam actually belongs to the top half of the mouse case. This is important because we are going to drill holes in that lip that overlaps inside the seam.

We are going to drill 2 very small holes on each side of the mouse (left and right) along the edge in the seam of the top half of the mouse case. One hole for where the bare wire comes out of the case and another where it will go back in. I used some Dremel bits that are very tiny (just slightly bigger than the strand of wire I’m working with). The bit I chose was actually smaller than any of the Dremel chucks I own so I had to use my cordless drill.
Drilling hole 1:

Drilling hole 2:

Holes 3 and 4 are the same except on the other side of the mouse case.
Step 5: Prepare the contact wires (the wires that do the shocking).
Strip enough insulation off the wire of the new mouse cord (this is the cable I used, except a grey version I had laying around) so that you can go out one hole and in the other and then have enough to bend the wire over so it stays in place. The first time I made this mouse I actually used a paperclip for the contact wires, but that mouse had a bigger seam. You’ll also want to use a black permanent marker and paint the wire black to disguise it in the gap (versus having a copper colored wire) if you have a black mouse like mine.

Step 6: Run the contact wires. Run the wire pictured above out the first hole (from the inside) and shape the wire so it runs tight along the seam and then back in the other hole. Here it is tacked in place with hot glue and coming out the first hole:

Here it is with the case closed (and the wire sticking out straight at you):

Here is the first wire in place (I apologize that it is a bit blurry in the middle):

Run the second wire out its first hole:

Sizing up the other end to go back through the other hole:

I bent the wire in preparation to go back in the hole:

Here the wire is in place and the case is closed:
Step 7: Secure the mercury switch inside the mouse and make the proper connections. You will need to find a good place to mount the mercury switch. The reason we are using a mercury switch is because we want the shocking mouse to be “off” when it is sitting there and we want the mouse to activate when it is moved (or better yet–when the unsuspecting user moves it back and forth quickly wondering why the cursor is not moving on the screen). When the mercury connects the circuit—Zap! You’ll have to play around with how you are going orient your mercury switch but the more horizontal the better (verses orienting it top to bottom) because people tend to move the mouse back and forth (left/right), versus up and down, when they grab a mouse and move it. You want to make sure the glass end of the switch is lower than the top because you want it off in the natural/flat position. You’ll also want to look at how the contact points are oriented inside the glass bubble because you want them pointing down. Here’s the way I mounted mine (this picture is of the final project actually, because I had to readjust the switch after the first run):

Connect the wires as shown in the diagrams and move them so there is clearance to put the mouse back together. I used wire nuts to connect the wires because they are less work than soldering and heat shrink tubing but they take up a lot more space and I had to hot glue them in place to keep them from getting in the way when I was closing up the case.
Step 8: Connect the battery and ignition coil. Follow the diagram and color coding to connect everything. You’ll probably need to solder the wire to the output of the coil. I soldered this connection a long time ago and have just left the wire connected and re-attached it to my various projects.Below is what mine looked like when I was done. I placed a switch between the negative of the battery and the black wire in order to be able to switch off the mouse so I don’t shock myself (anymore than I already have in testing the thing) and so I can transport it without running down the battery. I placed everything in a box and added some cardboard to fill in the gaps so the parts don’t roll around. You definitely don’t want to try taking this with you on a flight because you’d make the evening news!

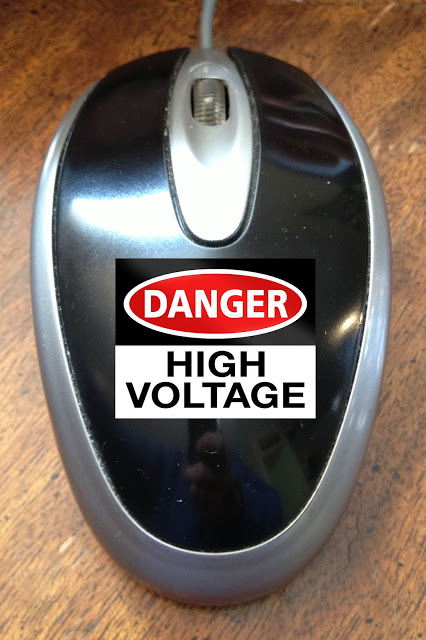
Step 9: Pick your victim. Be careful who you choose–this does shock you!?!? When they are not around, replace their desktop computer mouse with this one and then wait for them to come back to their computer 🙂 At my office we used to look forward to the next new hire so we could initiate him into the group with a nice shock!
Never mind the contraption on the table in the background, can you google something for me quick?

Amazon Associate Disclosure: As an Amazon Associate I earn from qualifying purchases. This means if you click on an affiliate link and purchase the item, I will receive an affiliate commission. The price of the item is the same whether it is an affiliate link or not. Regardless, I only recommend products or services I believe will add value to Share Your Repair readers. By using the affiliate links, you are helping support Share Your Repair, and I genuinely appreciate your support.