
About 5 years ago my wife brought home some big pumpkins and we decided to carve them. I wanted to do something real fun so I searched the web for pumpkin carving templates and found this really elaborate spider web. I didn’t have any pumpkin carving tools and this was going to require more than a kitchen knife so I looked around my shop to see what I could scrounge up and I ended up with some very good pumpkin carving tools.
Tools Required:
- Heavy wire cutters (don’t use your favorite wire cutters though–you might damage them cutting the spring steel of a saw blade.)
- Pliers
- Vice (very handy but not absolutely necessary)
Materials Needed:
- Coping Saw blade
- Dowel or some other long slender piece of wood or plastic
Simple Pumpkin Carving Tool
Step 1: Locate a coping saw blade.

Step 2: Cut the pumpkin carving tool blade.
 |
| The correct orientation of the teeth–cutting on the push stroke (tip is at top) |
 |
| Incorrect orientation of the teeth |
I chose to cut at the very end of the coping saw blade to give me a better point on the end. Again, make sure you choose the correct end of the blade so the teeth point correctly. I am holding the end that you should cut:

Cutting:

Tip detail:

It turns out that the “clipping off” of the saw blade with the cutters actually creates an “edge” on the blade like a knife–handy for stabbing into pumpkins.
Step 3: Cut the handle end of the cutting tool.
Now you could do something like wrap the other end in tape but I’d prefer to do something a bit cleaner. You also have to choose how long you want to make the total blade, making account for how much is going to stick into your handle, a dowel in this case.

I cut the handle end in the shape of a point as well because I’m going to be pressing it into a hole in the handle and a point will make it the easiest for us.

Step 4: Choose a handle.
I just happened to have a bag of 1/2″ dowel pins laying around from a project where I was repairing some furniture so that is what I chose to use but you could use a section of a plain dowel or even a rectangular block of wood or plastic for that matter.


Step 5: Drill the handle for the blade.
You’ll want to pick a drill bit size smaller than the width of the blade so that it fits securely in the handle without any movement. I chose a 5/64″ bit.

Place your dowel in a vice to hold it still while you drill it. You want to be real careful if you don’t have a vice or something to hold it with. If you don’t have a vice, use a vice grip. You don’t want the dowel to tip and stab yourself with the five-sixty-fourth!

It’s not imperative that you drill straight in but drill it as centered and straight as you can.

Step 6: Insert the blade into the handle.
With the dowel still in the vice take the blade and grip it with a pliers and press it into the handle.

As it turns out, I ended up pressing the blade about 7/8th of an inch into the handle and it is real tight.

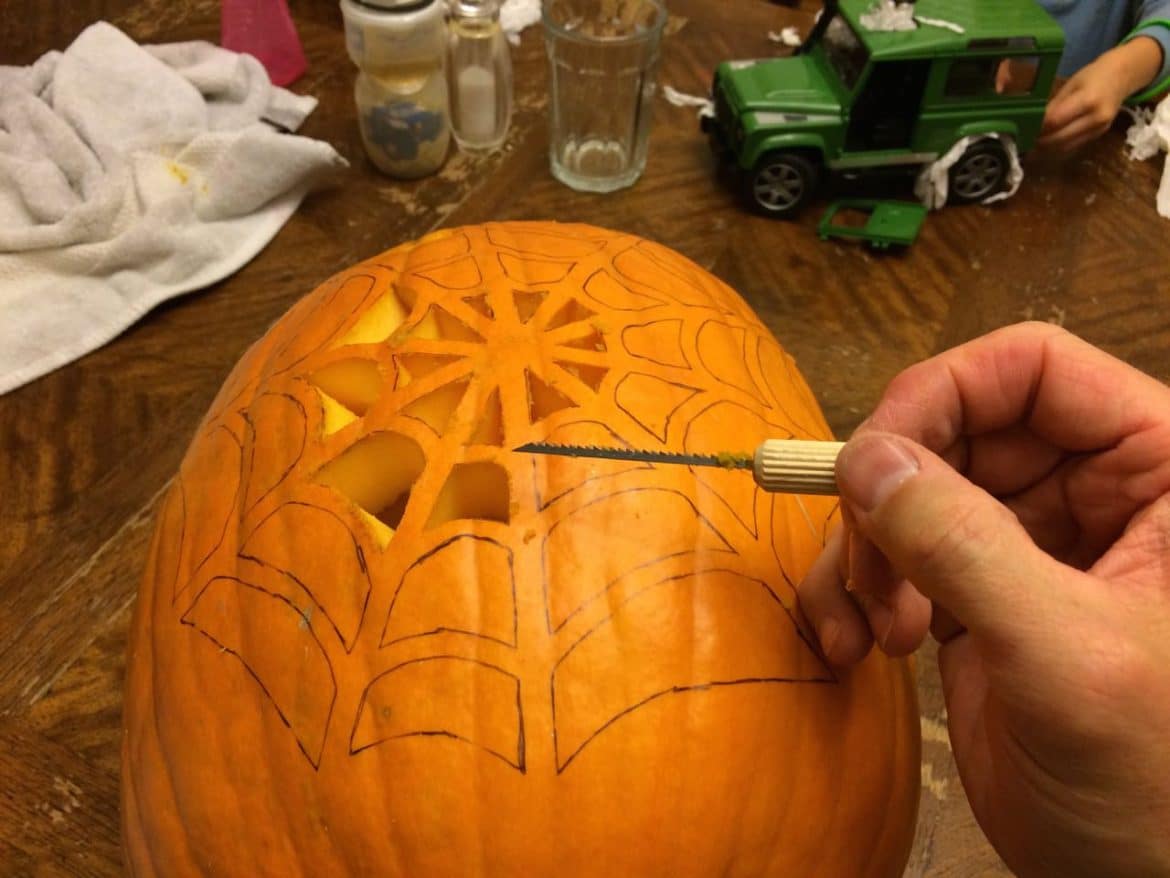
The final product, better than you can get in the store.

Step 7: Carve something fun like this.

10/31/2015 Update:
I used these homemade tools again this year and this is how it turned out:

Amazon Associate Disclosure: As an Amazon Associate I earn from qualifying purchases. This means if you click on an affiliate link and purchase the item, I will receive an affiliate commission. The price of the item is the same whether it is an affiliate link or not. Regardless, I only recommend products or services I believe will add value to Share Your Repair readers. By using the affiliate links, you are helping support Share Your Repair, and I genuinely appreciate your support.