Who wants to order a new sim card and go through the whole process of getting on the phone and transferring your number to a new sim card when you can just cut it down? It is easy to cut down your sim card and if you have a MiniSim and you buy a new phone most likely you are going to need to cut it down to either a MicroSim or a NanoSim (if you have an iPhone 5 or 5S).
Tools Needed:
This is a DIY post, like most of my posts, but if you just want to buy a tool to do this for you, you can buy a sim cutter here.
I’ve already written up a tutorial on how to cut down your SIM to a nano sim and you can read that post here: How to Cut a Micro Sim into a Nano Sim. If you are curious about the size differences I took picture of 3 different sizes for educational purposes:
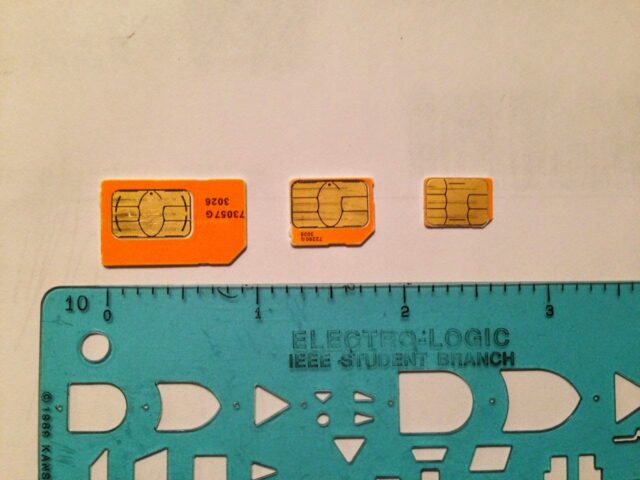 |
| Left to right: MiniSim, MicroSim, NanoSim |
How to Trim a Mini Sim Down to a Micro Sim
Step 1: Download a template.
You will find a lot of templates if you search google for them but they aren’t all that good. I found a great template for that handles all the sizes here (or a pdf here).
Step 2: Print the image at 100%.
If you are using a Mac, open up the image in Preview and then use the keyboard shortcut command-p to bring up the print dialog. By default Preview will try to adjust the size to best fit the paper size but make sure to click on the “Scale” radio button and enter 100 in the box as seen below. The paper size should be “Letter.” It won’t matter if it can’t fit the entire image on the page (if it gives you a warning) because the stuff along the edge isn’t important. The important thing is the scale.
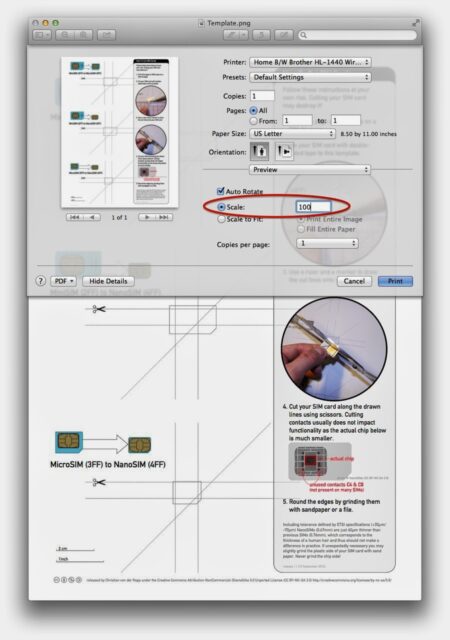 |
| Set the scale to 100% |
You will know it printed at the correct scale when your sim sits right down over the template and is the same size as the outline on the page.
Step 3: Tape your Mini-Sim to the template.
I didn’t have any double stick tape so I just rolled up some regular tape and stuck it on the SIM. Make sure the contacts are facing up.
 |
| You can make yourself some double-stick tape like this |
Step 4: Use a straight edge to draw lines that align exactly with the lines on the paper.
 |
| Lines drawn on a Mini-Sim to cut it down to a Micro-Sim |
Step 5: Cut the Sim on the lines.
 |
| A Mini Sim ready to be cut down to a Micro Sim |
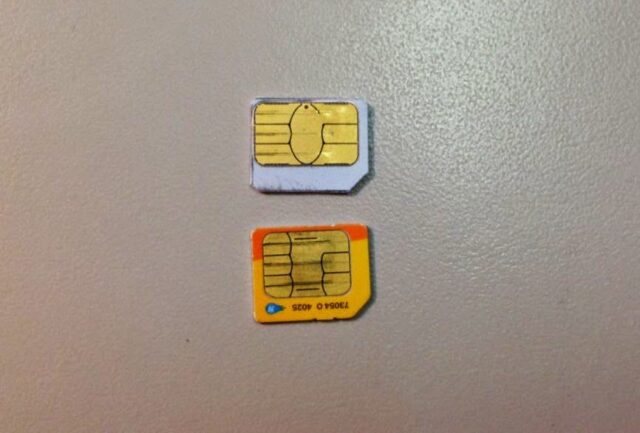 |
| On top, a Mini Sim cut down to a Micro sim and a real example below |
All my “Sim Trimming” posts:
Amazon Associate Disclosure: As an Amazon Associate I earn from qualifying purchases. This means if you click on an affiliate link and purchase the item, I will receive an affiliate commission. The price of the item is the same whether it is an affiliate link or not. Regardless, I only recommend products or services I believe will add value to Share Your Repair readers. By using the affiliate links, you are helping support Share Your Repair, and I genuinely appreciate your support.