I acquired a bunch of 27-Inch Late 2011 iMacs that had been mounted to the wall and therefore they came with Apple Vesa Adapter on them and I needed to remove the VESA mounts and reinstall the original stands. This process requires you to remove 8 torx head screws on each VESA mount’s “flange.” I’m not sure if the person who installed it stripped it or I stripped it, but none-the-less I ended up with the problem. Here’s how to recover from a stripped torx screw on a VESA mount flange and get that VESA mount off…
How to Fix Stripped Torx Screw When Removing VESA Mount Flange From 27-Inch iMac
Tools Needed:
- Drill bit, I suggest a Ryobi 21-Piece Titanium Drill Bit Set
- Drill, if you don’t have a good cordless one get one here
- Torx bit set, If you don’t have one, here is a great set that should cover all your repair needs: TEKTON 2841 Everybit and Electronic Repair Screwdriver Bit Set, 135-Piece
Hardware:
- Apple Vesa Adapter
- 27-Inch iMac
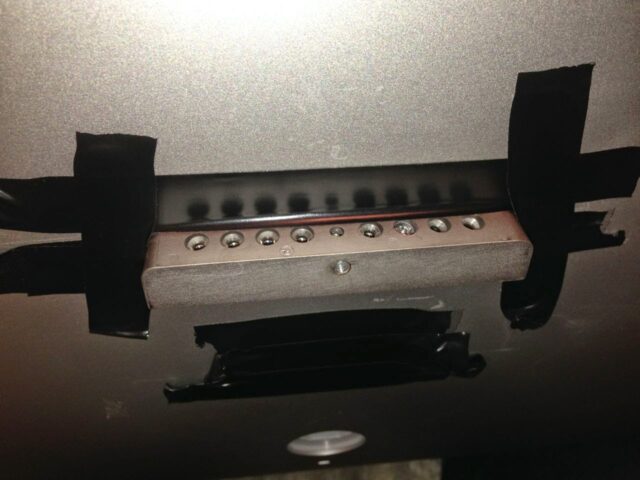
Step 1: Tape all around the VESA mount flange seam.
This is so that no metal shavings can accidentally get inside the machine. Make sure you overlap the VESA flange so you are keeping any metal shavings from going inside the iMac and possibly shorting out the motherboard.
 |
| Taping around the flange so you don’t get metal shavings inside the iMac |
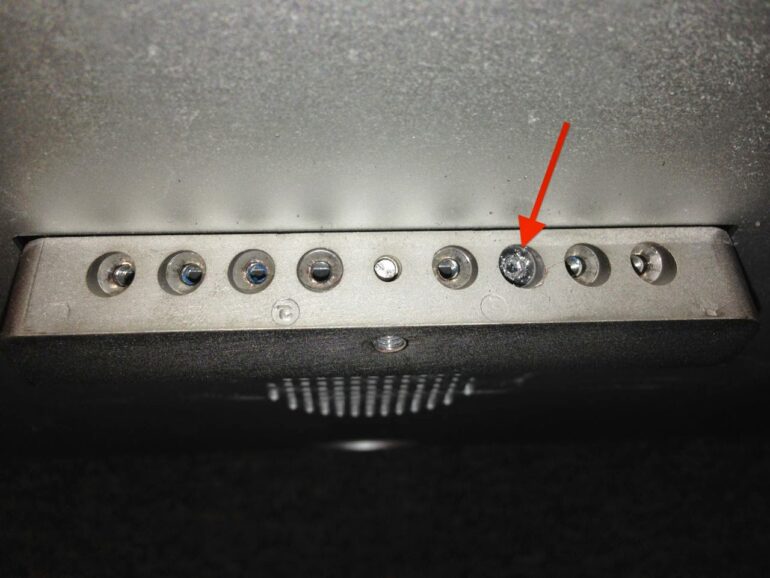
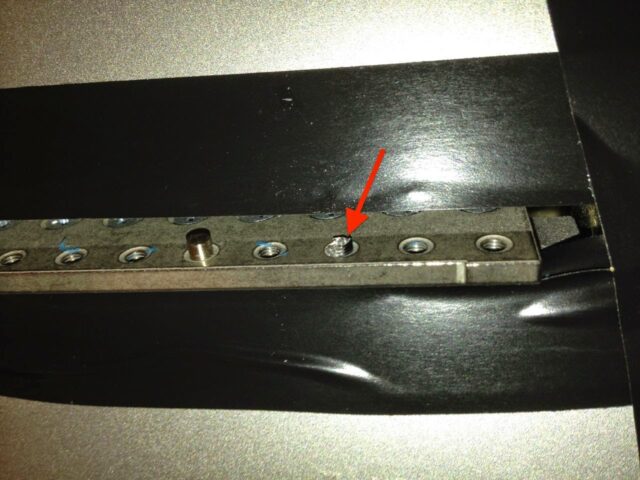
Step 2: Using a 5/32-inch drill bit, drill down into the head of the stripped screw.
Note: It is not necessary to drill all the way through. I chose 5/32″ because it is smaller than the screw and would be less likely to damage the threads. I intentionally didn’t drill all the way through because I was afraid it would punch through and drill into the back of the iMac. Go to step 3.
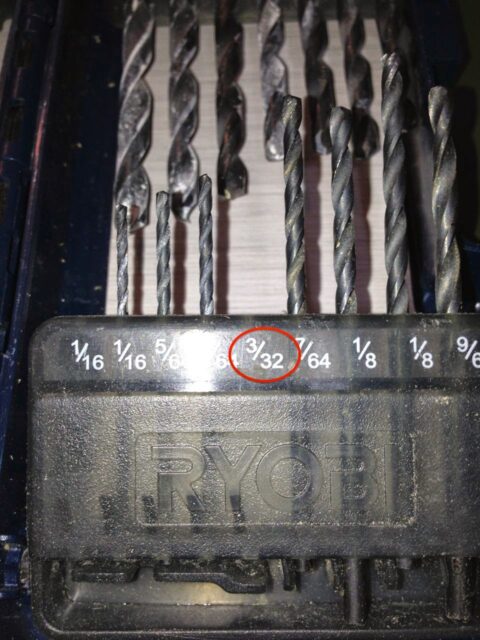 |
| Use a 5/32″ drill bit |
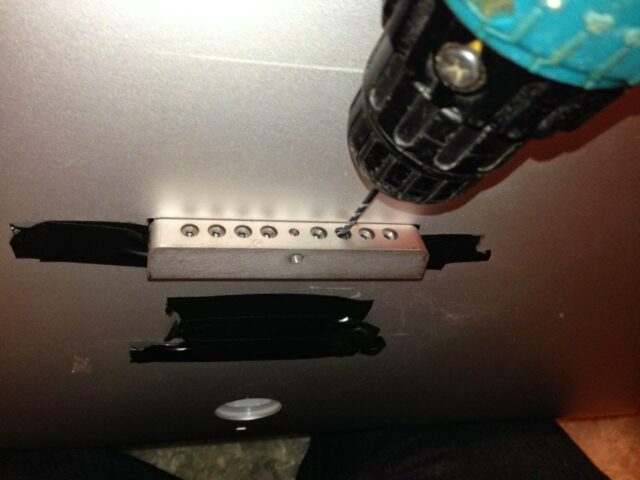 |
| Drilling out the screw on a VESA mount flange |
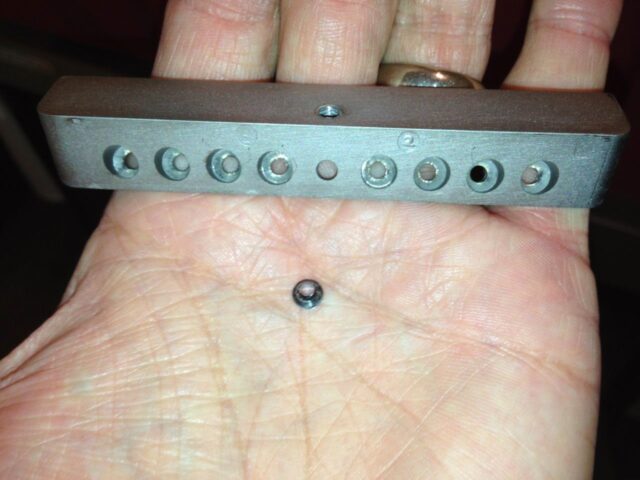
Step 3: Apply some pressure to the flange and break the head of the screw off.
I discovered this by accident. After I had drilled down into the screw head about 3/16″ I put some pressure on the VESA flange and the screw head snapped off and off came the VESA mounting block. This was what I was left with:
 |
| Remains of the torx screw after the head snapped off |
It turns out that by drilling into the screw head with a 5/32″ bit you leave the hollow screw with such thin walls that it is easy to break off. I don’t know if you would have been able to snap it off so easily if you had 2 or more screws stripped. You could use a larger bit and simply drill off the heads and would have had nearly the same result though.
 |
| VESA flange and the screw head that snapped off |
If you have a small easy-out you could probably extract the screw from the hole but I opted to just leave it and re-attach the stand with the other seven screws, which should be plenty.
Other resources:
- Apple Support Community: Imac VESA adapter stripped screw?
- Apple VESA Adapter Product Page
- VESA Mount Adapter – Installation Guide (pdf)
- Re-attaching an iMac Stand After VESA Mount Use
- One Blogger’s Funny Description of How to Install a VESA Mount
Amazon Associate Disclosure: As an Amazon Associate I earn from qualifying purchases. This means if you click on an affiliate link and purchase the item, I will receive an affiliate commission. The price of the item is the same whether it is an affiliate link or not. Regardless, I only recommend products or services I believe will add value to Share Your Repair readers. By using the affiliate links, you are helping support Share Your Repair, and I genuinely appreciate your support.
