I am installing some security cameras and purchased 1000 feet of cable that I need to install RG59 BNC compression cable ends on and so I purchased a tool. Well the tool didn’t ship with any instructions (not even a diagram) so I had to figure it out myself. Here’s what I learned. These instructions apply specifically to the connectors I have linked above and the tools linked above as well.
How to Install RG59 BNC Compression Coax Connectors
Hardware Needed:
- Valley BNC Male Compression Coax Connectors RG59 Pack of 10
, Part Number: B001C6HAUY
- Coax Compression Connector Adjustable Tool for RG59 RG6 F BNC RCA
- BestDealUSA Coaxial Cable Stripper Coax Stripping Hand Tool for RG59/6/7/11 CAT 5E CAT 6
- RG59 Coaxial Cable (for our security cameras): UL Listed RG59 Siamese 1000 ft. Coaxial CCTV Cable – Combo 20 AWG RG59 + 18/2 18AWG Power
The first thing I learned is that you ought to purchase a Cable Stripper Tool. I purchased this one on Amazon.
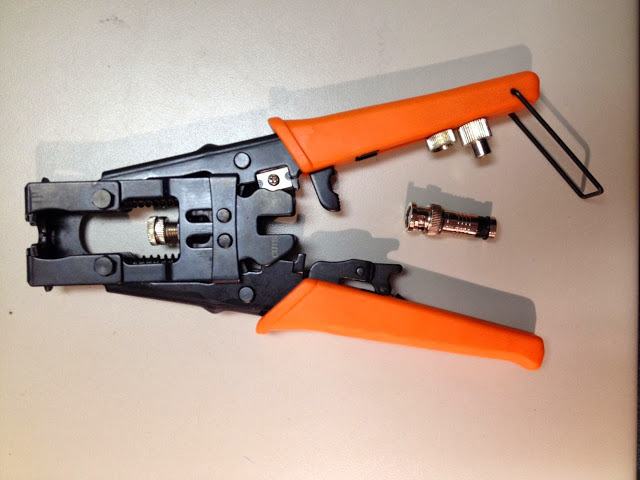
The Valley Compression tool comes with three different tips:
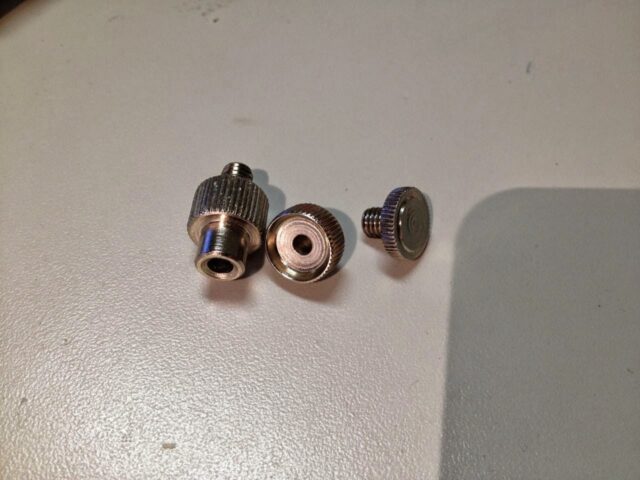 |
| Compression tool tips |
| Compression tool tip storage (threaded) holes |
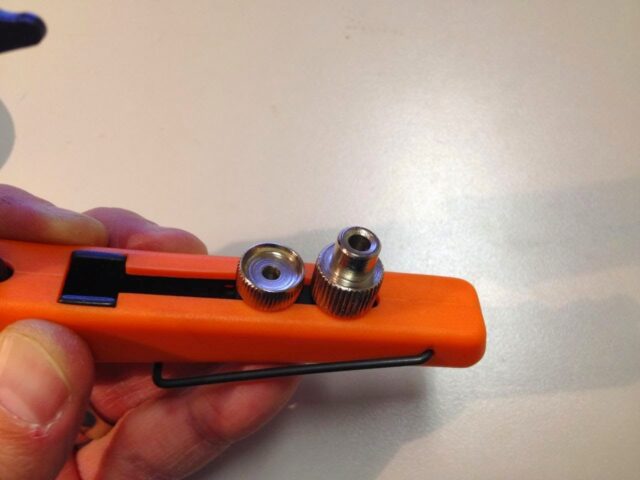 |
| Compression tool tips in storage on the handle |
Step 1: Install the flat tip on the tool as seen below:
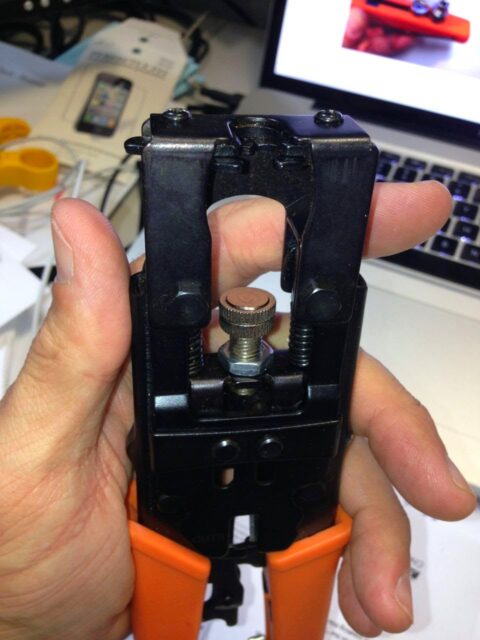 |
| Here’s the flat tip installed in the RG59 compression tool |
Step 2: Adjust the height to be as shown below by turning the bolt and then locking it in place with the nut.
The measurement is 5/8″ from the metal body of the tool to the top face of the flat tip.
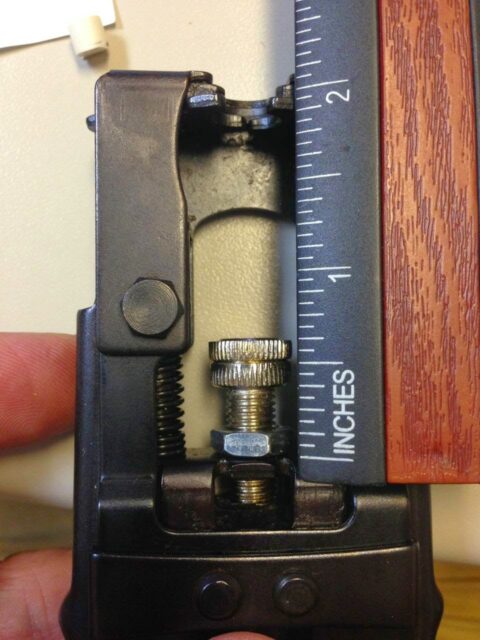 |
| Measurement for perfect installation of the brand of compression ends I link at the top of this post |
Step 3: Set up the coax stripper.
The cutter block can be oriented in two different ways, the 59 needs to be on top as shown below. If it is not slide it out, flip it over and reinsert. It will only slide out one side.
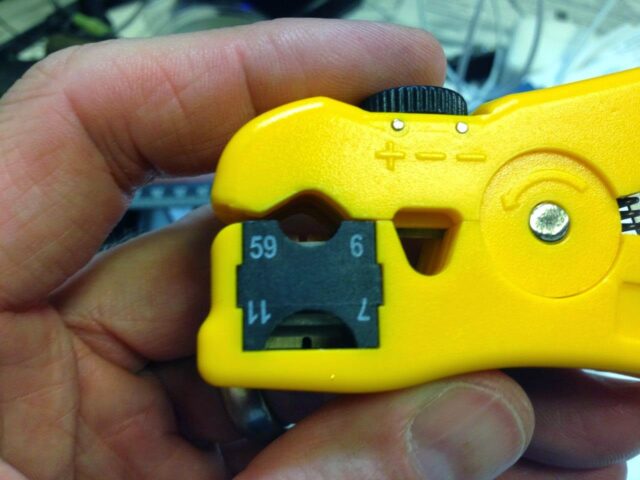 |
| Cutter block of coax stripper tool inserted for RG59 cables |
Step 4: Strip off the end of the coax.
Orient the cable as shown below. The important part is where you have the end of the coax lined up. My experience has been that usually I would have it overlapping too much and therefore the bare conductor would be too long.
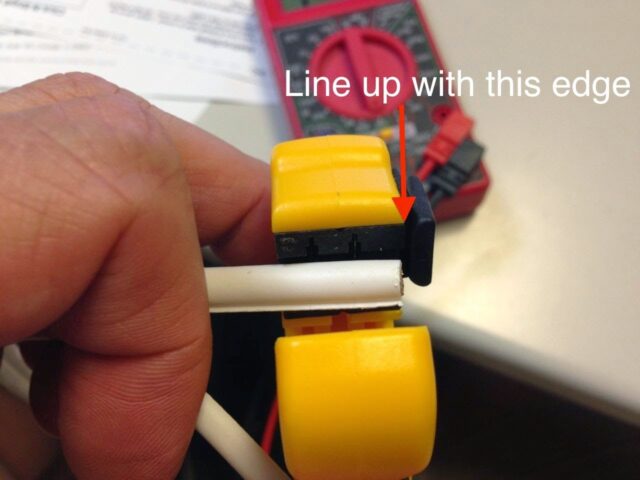 |
| Lining up the coax with the RG59 coax stripping tool |
Step 5: While holding the cable, spin the stripper around the cable to make the cut.
My tool never has done a good job of cutting the outside shielding and I’ve needed to do more work to cut all the way through.

For some reason the tool never did make a good cut through the exterior shielding:
 |
| It’s difficult to see but there is only a slight cut into the shielding |
There is another cutter on the tool with an adjustable depth blade that you can use to cut the exterior shielding. Adjust it so it doesn’t cut through the copper braiding (and you must line it up by eye on the cut you made in the beginning of this step:
 |
| Cutting through the exterior shielding |
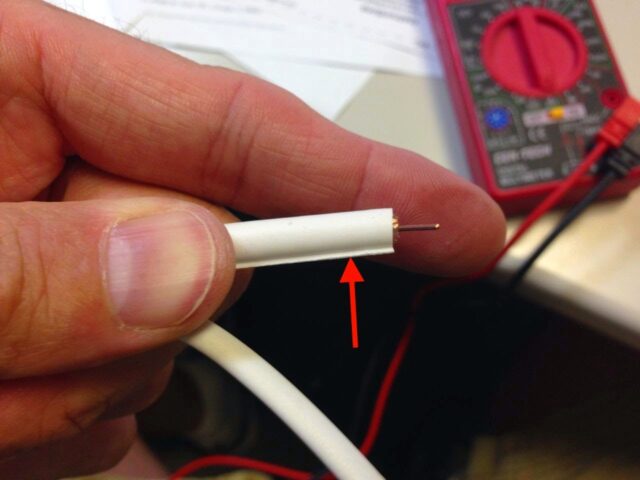
This is what you should have then. The exposed copper conductor should measure 1/4″.
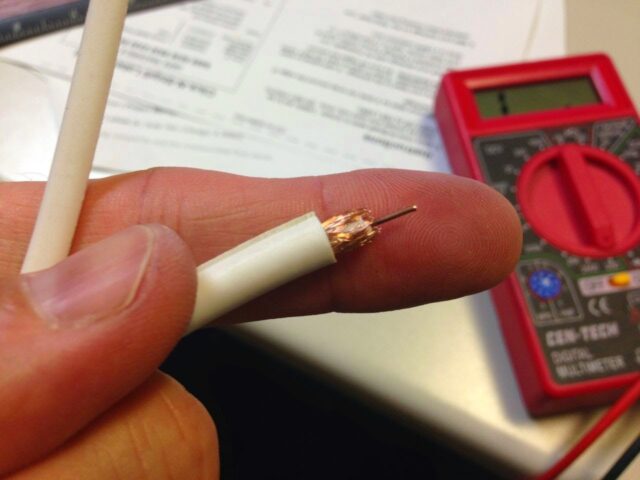 |
| Coax cable stripped |
Step 6: Fold the copper shielding back over the insulation.
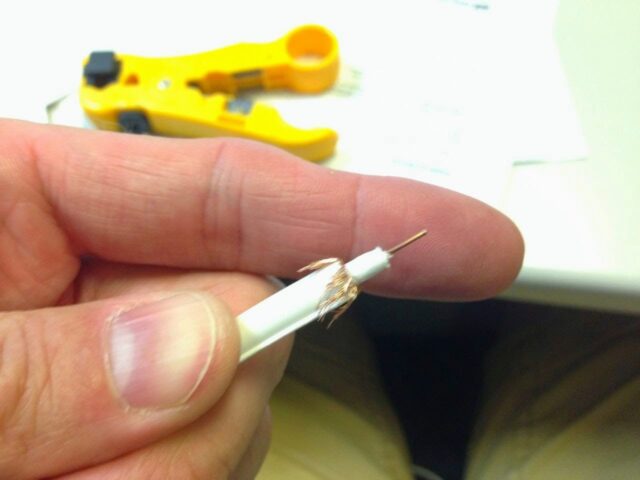 |
| The braided copper shielding folded back |
Step 7: Push the stripped cable into the connector by hand.
Important Note: make sure the conductor is straight before you push it on because the conductor will bend over and short out of you are not careful. You will feel the cable stop when it is inserted all the way.
 |
| The coax pushed up into the RG59 Connector by hand |
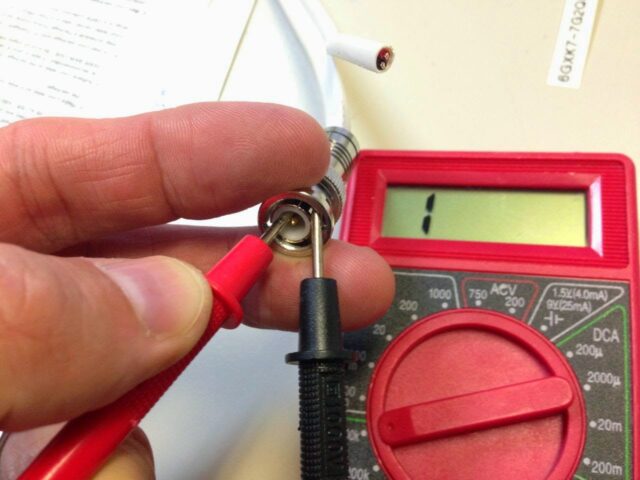
Step 8: Check for a short.
Once you have hand-inserted the cable into the compression fitting I recommend double-checking that you do not have a short between the center conductor and the shielding. If you catch it now you can keep from waisting a compression fitting and just pull out the cable and fix the problem and start back at 6. If you don’t catch it now you’ll need to cut off the connector and do it again and your cable will be an inch shorter and you’ll need to throw away the messed-up connector. I did this mistake a couple times when learning how to install these. The resistance reading should be nearly infinite:
 |
| Checking for a short |
Step 9: Apply the compression fitting.
Open the jaws of the tool as seen below.
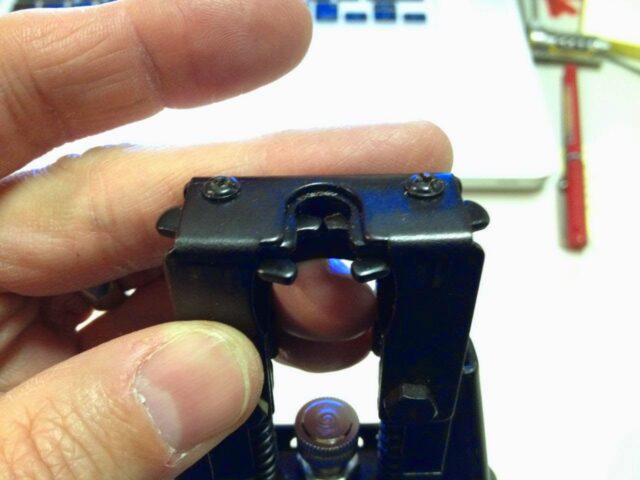 |
| Compression tool’s jaws open |
Insert the cable into the tool like this until the jaws close like this:
 |
| Compression tool clamped around cable |
Squeeze the handle of the compression tool until it clicks. Their should only be a (~1mm) thin black band remaining as seen below:
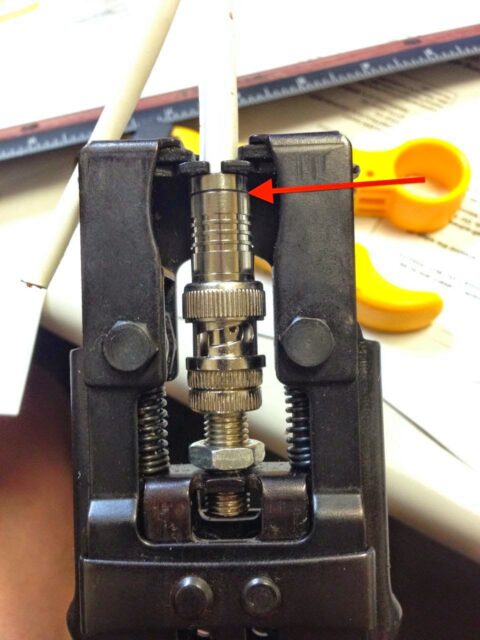 |
| Compression fitting applied |
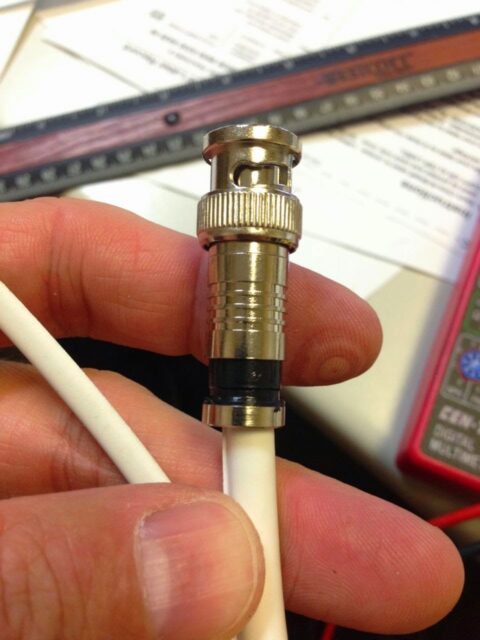
Once you do a few of these you’ll get good at them. Hopefully this tutorial helps you. This is what the finished product should look like:
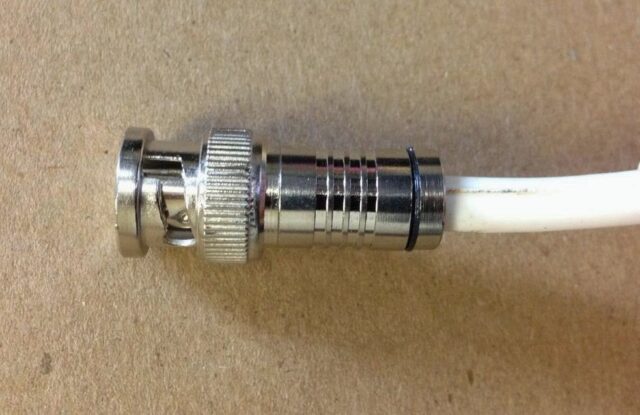 |
| Coax Cable with RG59 Compression Connector Installed |
Here’s a list of everything you’ll need:
- Valley BNC Male Compression Coax Connectors RG59 Pack of 10
- Coax Compression Connector Adjustable Tool for RG59 RG6 F BNC RCA
- BestDealUSA Coaxial Cable Stripper Coax Stripping Hand Tool for RG59/6/7/11 CAT 5E CAT 6
- RG59 Coaxial Cable (for our security cameras): UL Listed RG59 Siamese 1000 ft. Coaxial CCTV Cable – Combo 20 AWG RG59 + 18/2 18AWG Power
Amazon Associate Disclosure: As an Amazon Associate I earn from qualifying purchases. This means if you click on an affiliate link and purchase the item, I will receive an affiliate commission. The price of the item is the same whether it is an affiliate link or not. Regardless, I only recommend products or services I believe will add value to Share Your Repair readers. By using the affiliate links, you are helping support Share Your Repair, and I genuinely appreciate your support.

what about the center pin?
The center conductor is the center pin.
Happens if the braid isn’t folded back and you terminate it anyway? I know someone who insists it doesn’t matter.