So you just uploaded a folder of 35 pictures on Facebook to create an album and you would like to transpose the information from the file names onto each of those pictures–how do you do it? You could copy and paste each one individually but that is a lot of copying and pasting, even if you know your shortcuts. Here is a way to automate it using a utility called TextExpander. It’s a long tutorial but I went into extreme detail. Once you have figured it out you’ll get quick at doing it.
How to Automate Naming of an Album of Pictures on Facebook With TextExpander
Step 1: This assumes that you have a folder of pictures you want to upload and that the filenames contain pertinent information on the pictures.
The filename info could be dates or descriptions, etc.
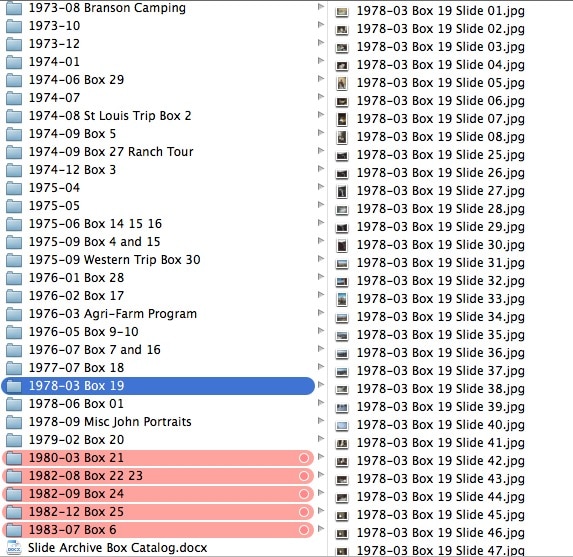 |
| Folder of Pictures to Post on Facebook |
Step 2: Post them to Facebook.
You can select all or selected files using the command key on a Mac or the Ctrl key on a PC. One thing to note is that (at least on a Mac) is that the way the files are sorted in your browsers file selection window is the order they will be uploaded. I’m assuming you have them sorted by filename (alphabetically). If you have them sorted by creation date here but below you create the file names alphabetically, nothing will match up in the end. Make sure they are sorted by name when you upload them.
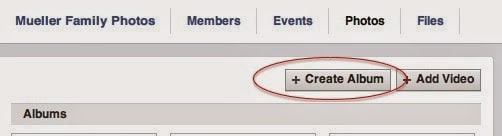 |
| In the Photos section of Facebook click on “Create Album” |
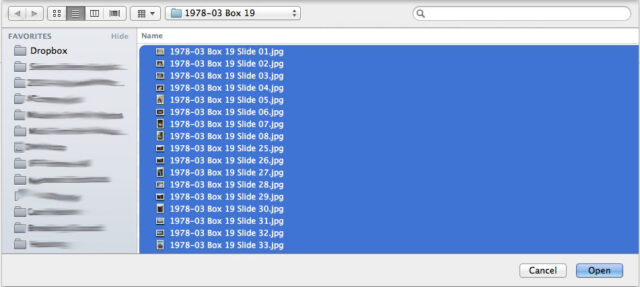 |
| Selecting the photos in your browser’s file browser |
Step 3: Let them upload in the background.
You must leave that window open for Facebook to complete the upload of all the pictures. Go on to step 4 now.
 |
| Uploading a folder of pictures on Facebook |
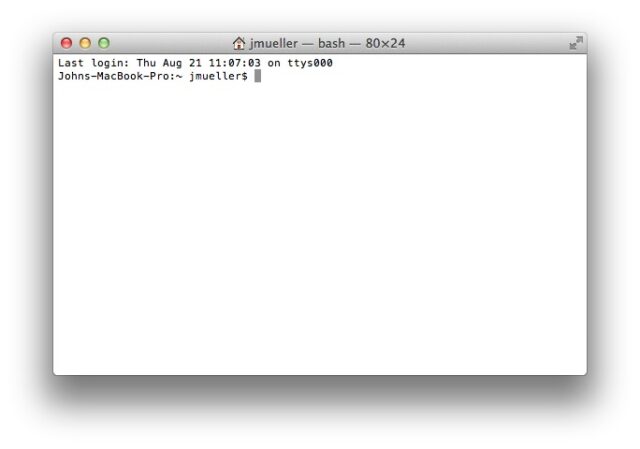
Step 4: Launch Terminal.
We want to get the file names of the images in a text file. The way I do this is through the Terminal in Mac OS X. Run terminal (in utilities folder or simply type Terminal in spotlight and then return).
 |
| Terminal is located in the utilities folder |
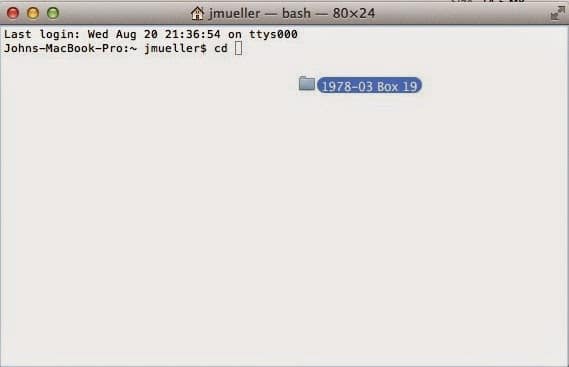
Step 5: Change to the directory where the pictures are located.
Type “cd ” (cd space) and then drag and drop the folder the pictures are located in from the Finder into the terminal window and it will insert the path for the folder.
 |
| Drag and drop the folder into the terminal window to paste in the path |
You can see the path inserted via the drag and drop below:
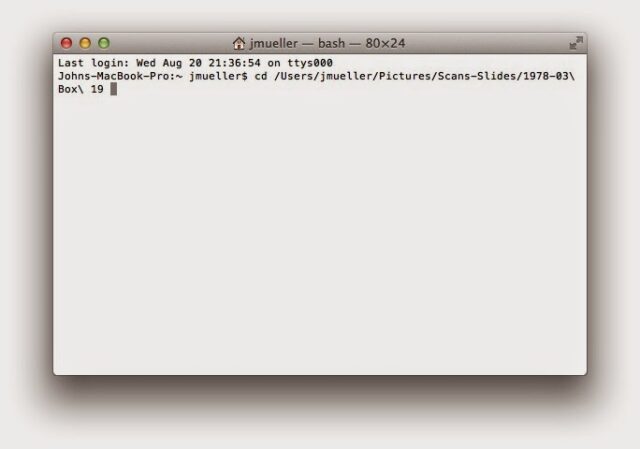 |
| Path inserted into command line via drag and drop |
Press the Return key after dragging and dropping the folder into Terminal to change to the directory and then you will see the path integrated into the prompt similar to below:
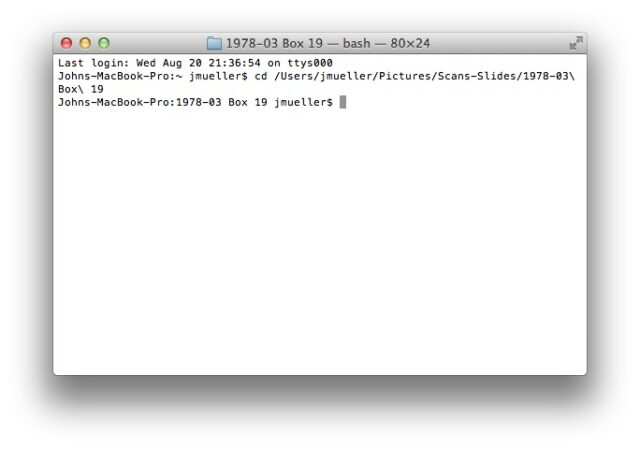 |
| Note that the directory is part of the prompt now |
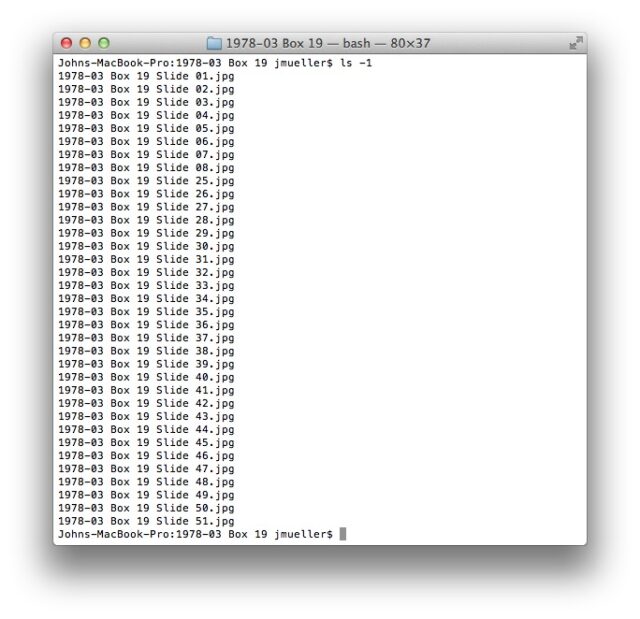
Step 6: Run the unix directory listing command.
If you come from the MS DOS world you’ll be tempted to type “dir” but that won’t get you anywhere on a Mac. Type the command “ls -1” (ie in all lower case: L S space minus one). That gives you the listing (directory) of the folder in one long list (if you don’t type the -1 you’ll get more than one column of names and that complicates getting them the way we want). Learn more “li” commands
here. The results will look like this:
You can click on the corner of the Terminal window to make it big enough to see more of the directory.
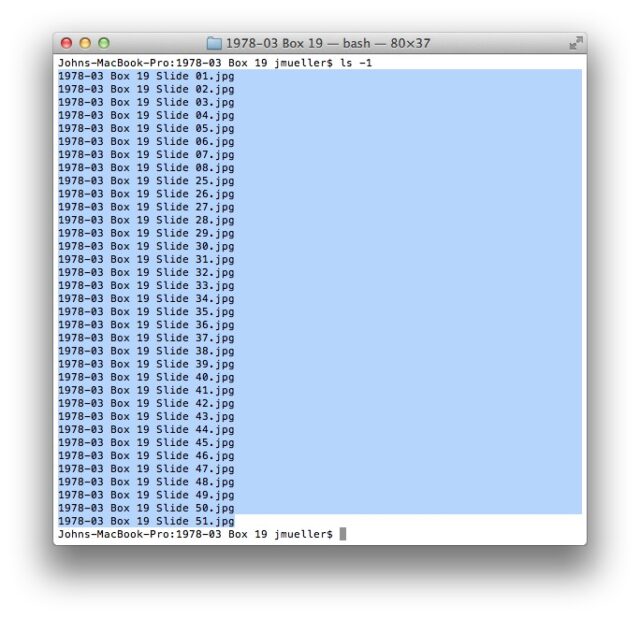
Step 7: Click and drag to select the file names and then copy them.
Use the keyboard shortcut Command-C or pick copy from the Edit menu at the top of the screen.
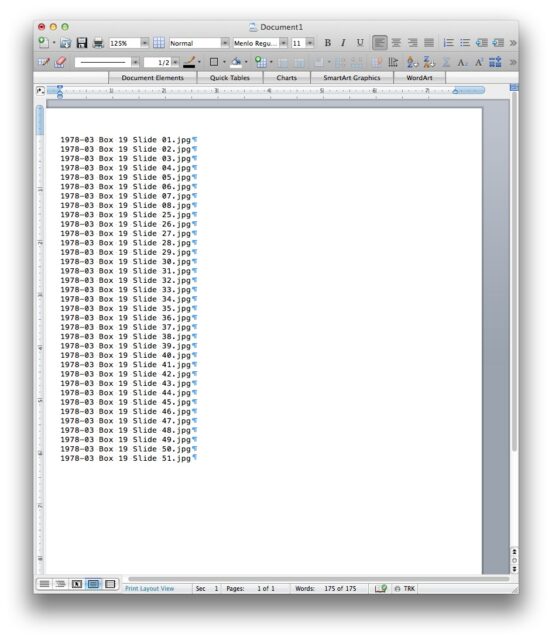
Step 8: Paste them into Microsoft Word.
We are going to use Word because of its great power search and replace, including hidden characters such as “paragraph marks.” Below you can see that I have hidden characters being shown (the blue pi’s at the ned of each line):
It is not necessary to have Word display paragraph marks to search and replace them though–I just like to know what is going on so I always have it show all hidden characters.
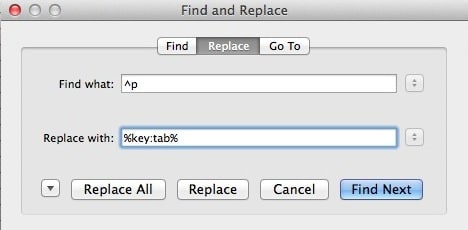
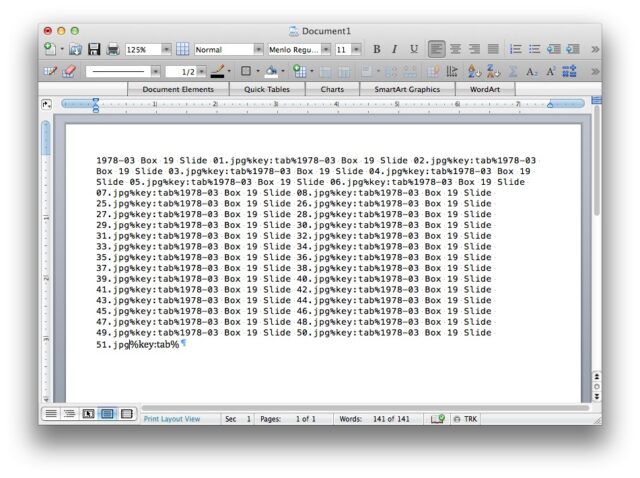
Step 9: Search for paragraph marks and replace with TextExpander tab wildcards.
Run a find and replace for the paragraph marks (^p) and replace the paragraph marks with TextExpander’s shortcut for a tab key (%key:tab%).
 |
| Search and Replace for paragraph marks, replacing them with TextExpander tab keystrokes |
Click “Replace All” and you will end up with something that looks like the following:
 |
| Your automation text in Word is almost ready to copy over to TextExpander |
Step 10: Delete the very last “%key:tab%” in the file because it is extra.
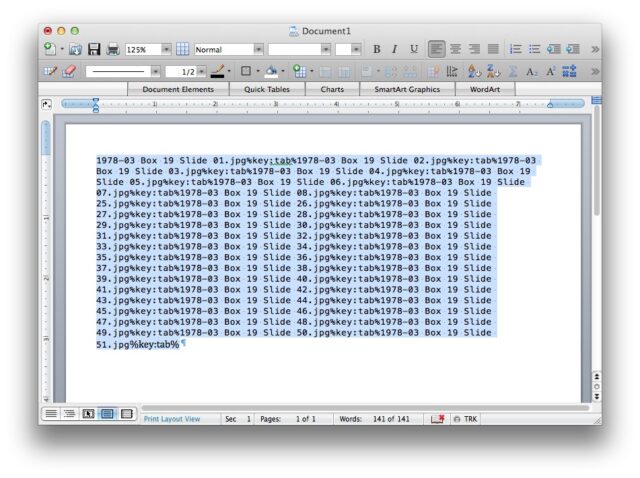
Step 11: Copy the text in the Word document.
Click and drag to select all the text and copy it (command-c or from the Edit menu select Copy).
 |
| Text selected (and copied) in Word |
Step 12: Open TextExpander.
You can find it in the menu bar at the top of the screen.
 |
| Open TextExpander from the menu bar item menu |
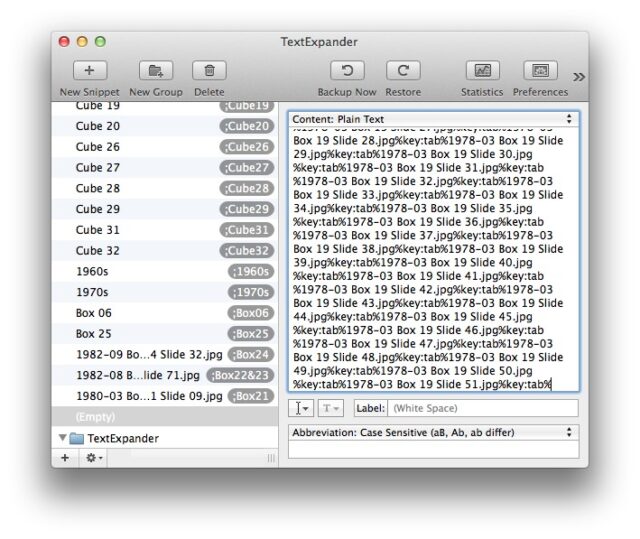
Step 13: Create a new Snippet with the text you copied from Word.
Paste the text you created in Word into the top-right “Content” window for the new snippet:
 |
| Creating a TextExpander Photo Album Naming Snippet |
Step 14: Enter an appropriate abbreviation for the snippet.
If you are going to re-use this snippet and keep altering the content (because it really is a one-time snippet) you can pick an abbreviation like “;fbnaming” or something like that. This is what you’ll have then:
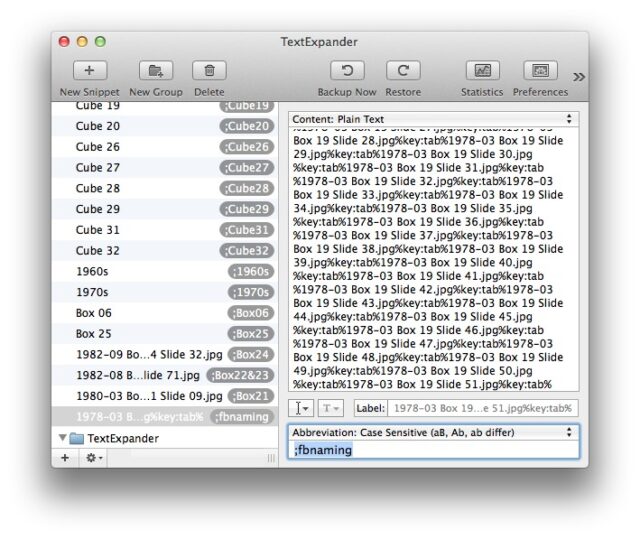 |
| Now you have an abbreviation to invoke the facebook photo album naming snippet |
Step 15: Close the TextExpander window.
If you don’t want to close the window you can put your cursor at the end of the abbreviation and press the return key to have it save the snippet.
Step 16: Go back to your Facebook album that should be uploaded by this time.
Scroll down to the bottom to make sure all the pictures are uploaded. The blue bar at the bottom should be all the way filled up.
 |
| Upload complete |
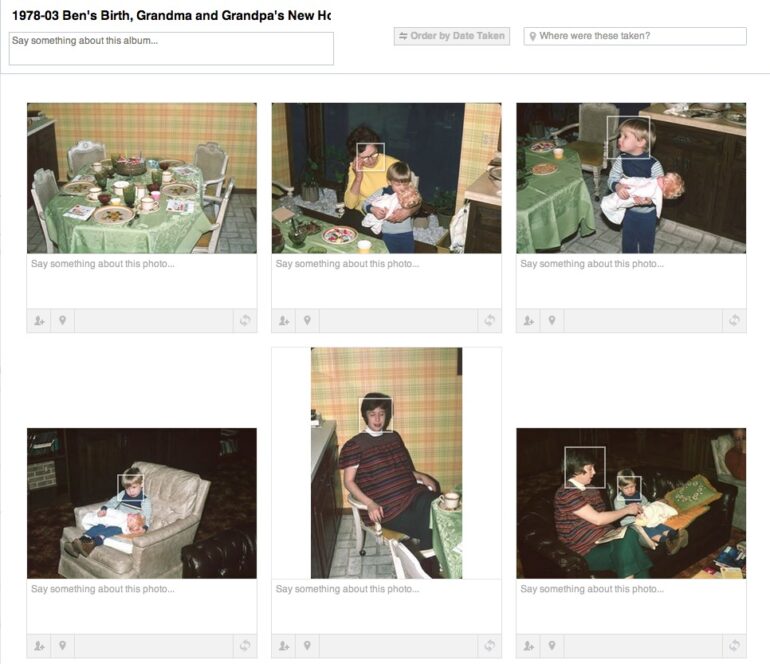
Step 17: Put your cursor into the “Say something about this photo…” field of the very first picture.
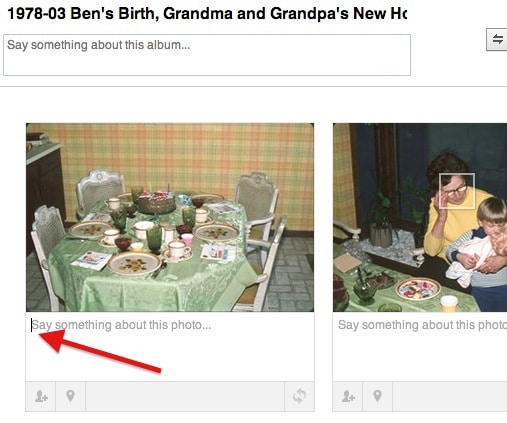 |
| Cursor in text field below picture #1 |
Step 18: Type your TextExpander abbreviation and watch the automation.
In my case I need to type “;fbnaming” (no quotation marks). Don’t switch programs or click anywhere because TextExpander will begin entering text (wherever it is at in the process) wherever the cursor is located. Below’s a video of it in real life. Note, these files were not all named sequentially 1, 2, 3, 4 all the way through but this names them exactly as they were uploaded, in alphabetical order.
Step 19: Post the newly named (via automation) album to Facebook.
 |
| Click “Post Photos” to complete the process |
If you have a lot of albums to upload this automation tip will save you a lot of time (and copying and pasting).
Troubleshooting tips:
- I’ve had this mess up before and skip a name. Take a look to make sure everything went correctly before posting. You can always just delete the album, re-upload, and then do the naming automation again.
All My TextExpander Posts:
Amazon Associate Disclosure: As an Amazon Associate I earn from qualifying purchases. This means if you click on an affiliate link and purchase the item, I will receive an affiliate commission. The price of the item is the same whether it is an affiliate link or not. Regardless, I only recommend products or services I believe will add value to Share Your Repair readers. By using the affiliate links, you are helping support Share Your Repair, and I genuinely appreciate your support.
Related