
Our organization has over 30 PC’s still running XP and the end of support date has come and gone so it’s overdue for us to upgrade. Here’s the steps I went through so you can do the same.
How to Upgrade Windows XP to Windows 7
Step 1: Determine whether your PC meets the minimum hardware requirements for Windows 7.
You need to consider is the Windows 7 minimum requirements for the machines you plan on installing it (from Microsoft’s Website):
- 1 gigahertz (GHz) or faster 32-bit (x86) or 64-bit (x64) processor
- 1 gigabyte (GB) RAM (32-bit) or 2 GB RAM (64-bit)
- 16 GB available hard disk space (32-bit) or 20 GB (64-bit)
- DirectX 9 graphics device with WDDM 1.0 or higher driver
 |
| Using System Properties to determine your machines specifications |
To determine whether your graphics device is DirectX 9 with WDDM 1.0 or higher is a little harder. I found an article on Microsoft’s website which notes that DirectX was released in August of 2004 so unless your computer is older than that you should be ok. Our oldest machines were purchased in September of 2006 so we should be ok.
Step 2: Determine the version of Windows 7 you will need.
|
| Windows XP My Computer System Properties Window |
Step 3: Purchase licenses of Windows 7.
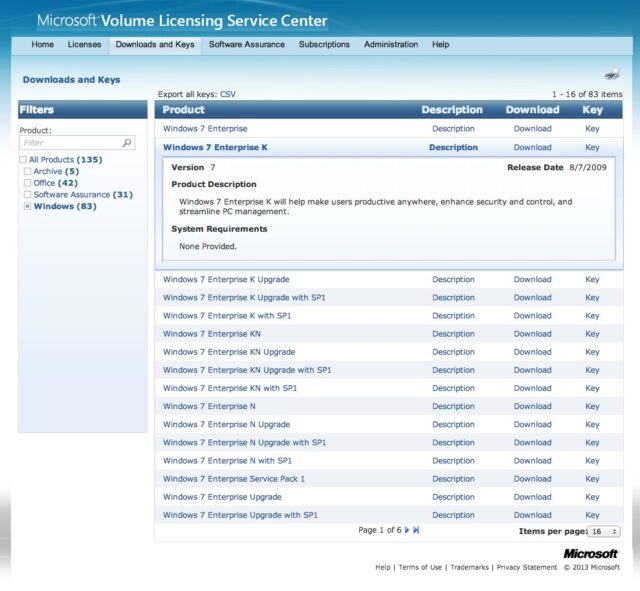
It turns out that the K, KN, and N are languages/market versions: K and KN for Korean, and N for the European market. The iso file is 2.4 GB:
| The Windows 7 Install File is a 2.4 GB iso Image |
Step 4b: Create a Bootable Medium.
The reason I say “medium” is because you can create a DVD or a USB drive. For creating a DVD I use the Apple Disk Utility to burn the iso image that I downloaded from Techsoup to a DVD. This was great until I discovered that all of our lab computers only have only CD drives. I then needed to make bootable USB drives from the iso file. Microsoft has created a utility for doing this on a PC and you can read all about it and download the software at the following link: Windows 7 USB/DVD download tool. Here I am creating a bootable USB Drive with a 4 GB USB Stick:
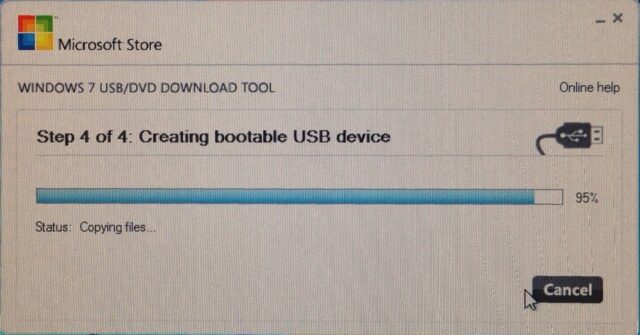 |
| Creating a bootable USB Windows 7 Installer Drive |
Step 4: Installing Windows 7.
Unfortunately you cannot “upgrade” a Windows XP installation to Windows 7–you must do a fresh install of Windows 7. Check out the upgrade paths on the Windows website here. If you try to upgrade Windows XP to Windows 7 you will get this message:
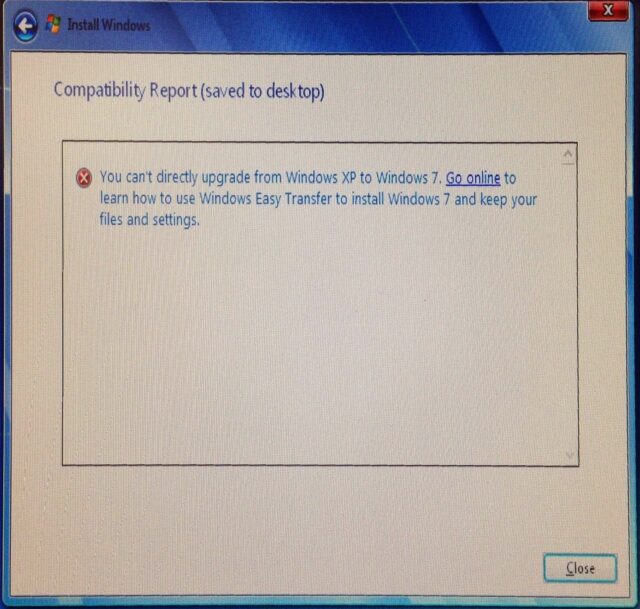 |
| Compatibility Report: You can’t directly upgrade from Windows XP to Windows 7 |
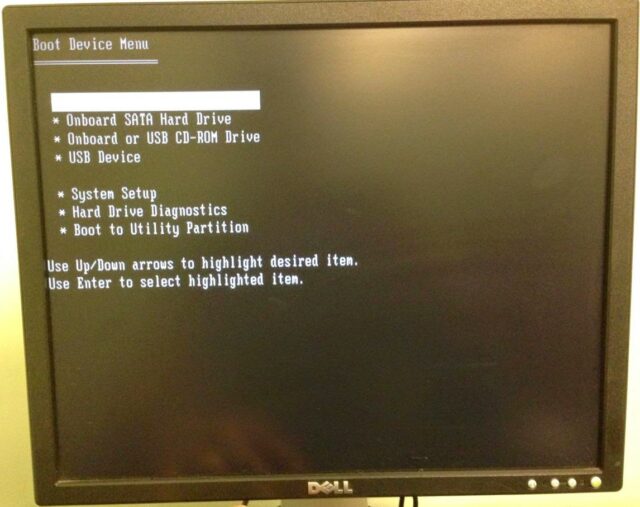
Step 5: Boot off your USB Installer you created in Step 4b.
I’ve found that if you don’t have the USB drive in the computer when you power it up it (the bios) won’t access it or offer it as a boot option. On our Dell machines you must press the F12 key while it is booting to have it give you the option to boot off a USB drive. Scroll down to “USB Device” using the arrow keys and press Enter.
 |
|
|
This is what you’ll see if the installer successfully loads from the USB drive:
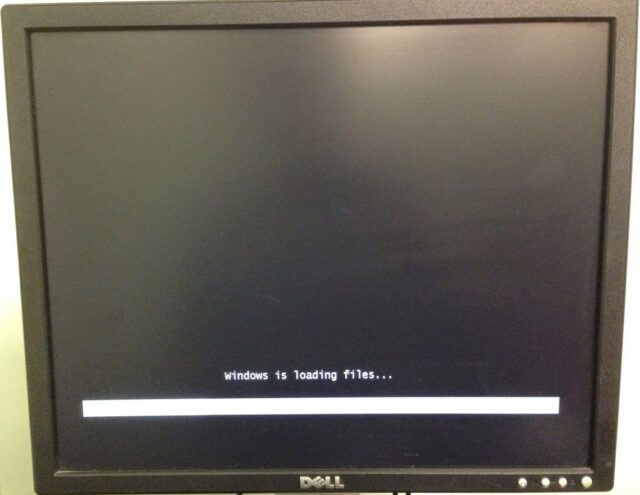 |
| Windows 7 Installer is getting started |
| Windows Logo shows up |
Step 6: Pick the language, time and currency format, and keyboard type from the drop-down menus.
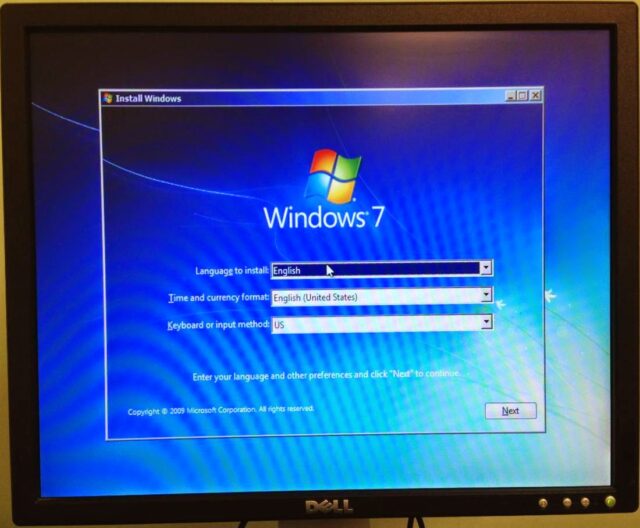 |
| First Windows 7 Setup Window |
Step 7: Pick the installation type.
Since you are upgrading from Windows XP you must pick the Custom (Advanced) option.
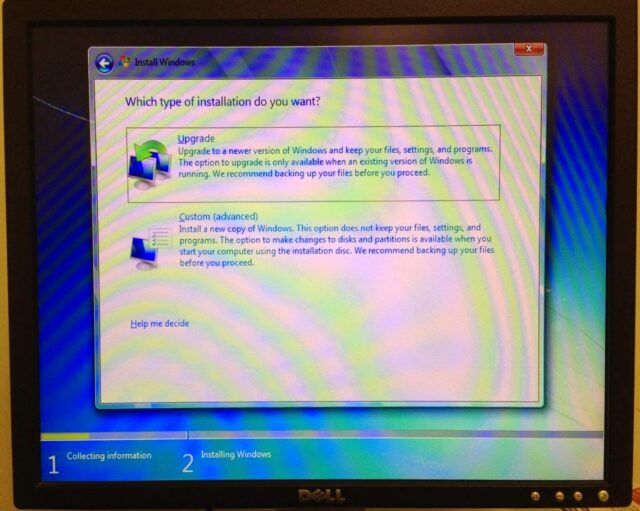 |
| Installation type choices: Upgrade or Custom (pick Custom) |
Step 8: Delete the old XP partitions.
If there are more than one partitions (especially if you didn’t specifically create the partition) then delete them all. There may be a small (recovery) partition and then another main partition. Click on “Drive options (advanced)” to show the options to delete partitions:
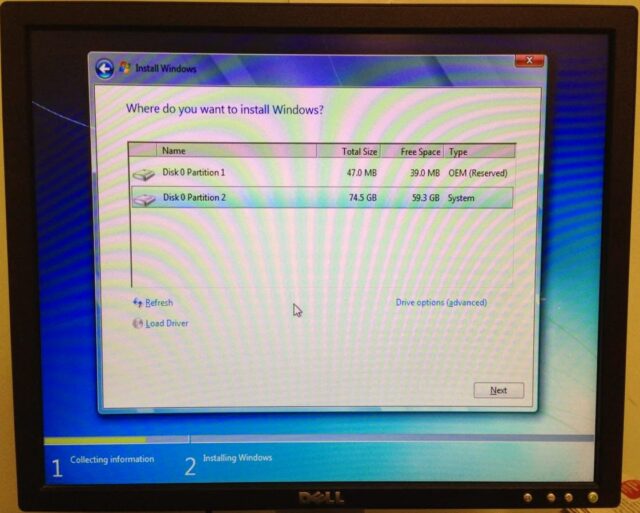 |
| Click on “Drive options (advanced)” so you can delete partitions |
Then a hidden menu will show up. Click “Delete” to delete the selected partition. It doesn’t matter which one you delete first but delete them both.
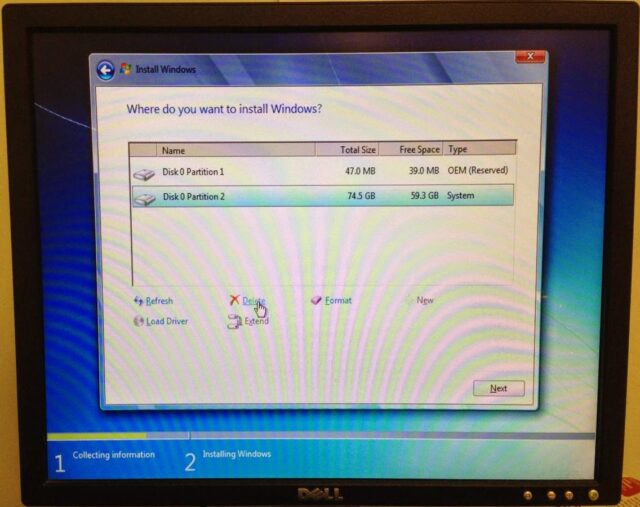 |
| Click “Delete” to delete the selected/highlighted partition |
After you click delete you’ll get a warning, like below. Click ok.
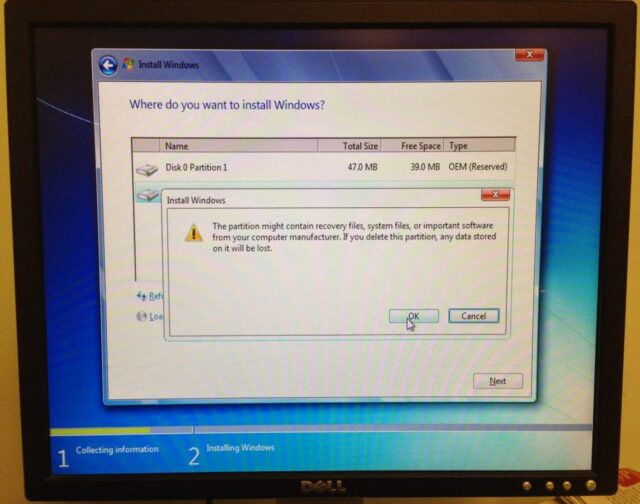 |
| Click the “Ok” button to verify that you really want to delete the partition |
Repeat these steps above for all the partitions until there is only one, Disk 0 (zero).
Step 9: Create a new partition of the entire hard drive.
Click the “New” link. It will then suggest a size of the entire drive, click Apply:
 |
| Click the “Apply” button to create the one single full-size drive partition |
After you click apply a window will pop up asking for permission to create an additional partition for Windows, click ok:
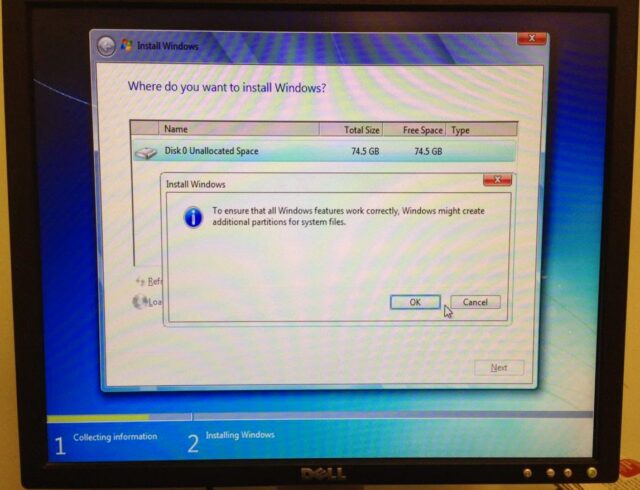 |
| Windows is asking for permission to create a little recovery drive partition, click the “Ok” button |
Step 10: Install Windows 7.
Click “Next” to do ahead and install Windows 7 on the larger of the two partitions (the “Primary” type partition, which should be selected by default):
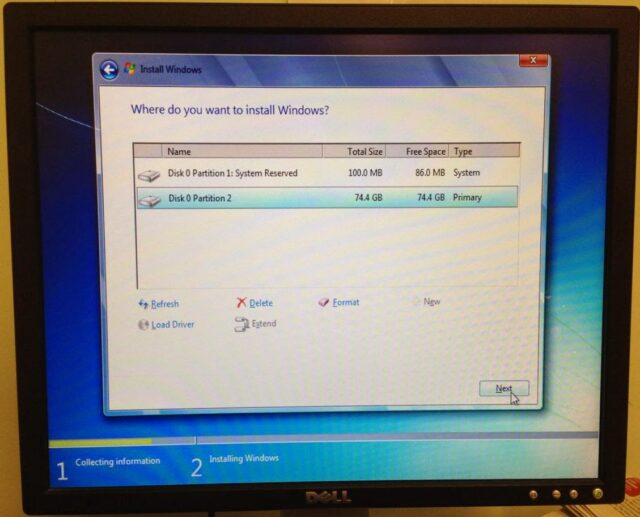 |
| Click the “Next” button to install to the Primary partition |
Step 11: Wait for Windows 7 to install.
You’ll see a progress bar like this:
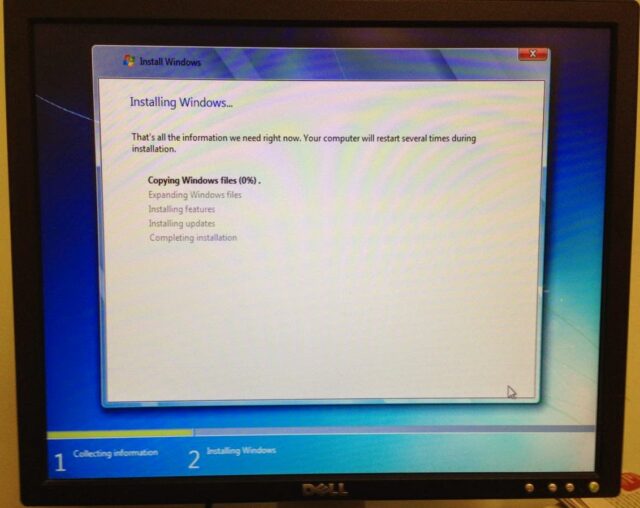 |
| Windows 7 Installer Progress window |
Step 12: Set up your new Windows 7 installation Part 1.
Choose the administrator’s username and the computer’s name. The username will be the main “administrator” account on the machine. In Windows 7 they don’t have an “administrator” user account like they did in XP so name this accordingly. Pick the machine name as well–this will be the machine name that shows up in the network list of machines.
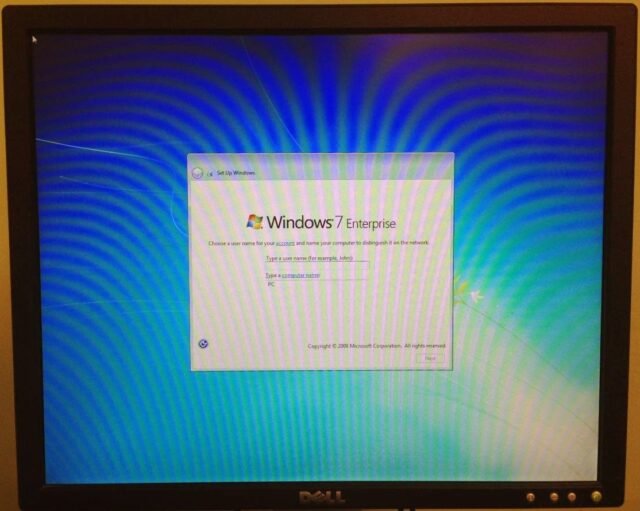 |
| Enter the administrator username and the machine/computer name |
Choose a password for the administrative account and a hint if you want to leave a hint of the password (I’d recommend not):
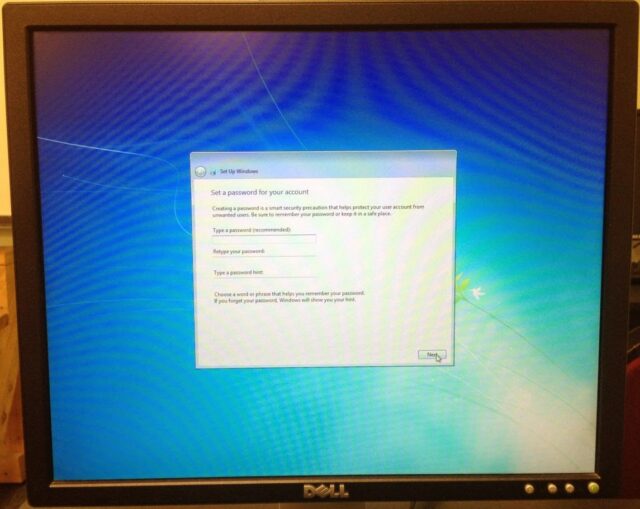 |
| Set the administrator’s password |
Step 13: Set up your new Windows 7 installation Part 2.
Select whether you want recommended settings, important updates only, or Ask me later. I’d recommend using the first choice, “Use recommended settings.”
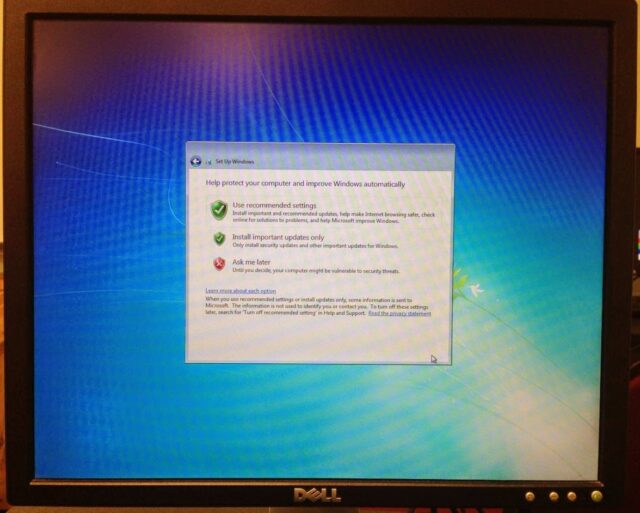 |
| Choose how you want the settings set |
Step 14: Set the time zone, date, and time.
You probably will only need to set the time zone because the bios was keeping the time .
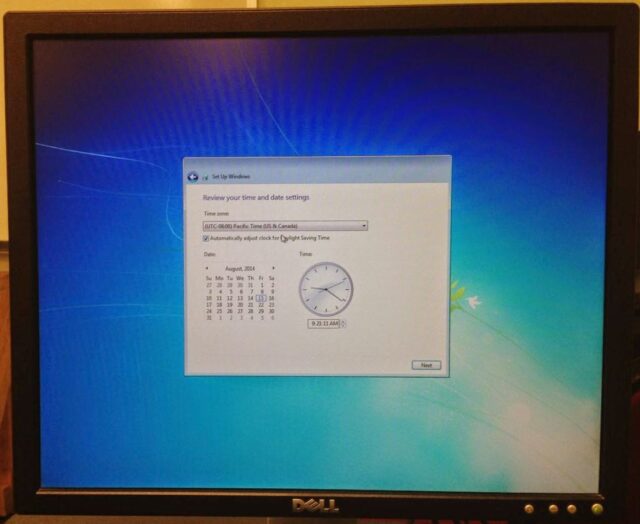 |
| Pick the time zone, date, and time (if necessary) |
Step 15: Choose the network type.
Choose whether you are setting up the machine to run at Home, at Work, or on a Public Network.
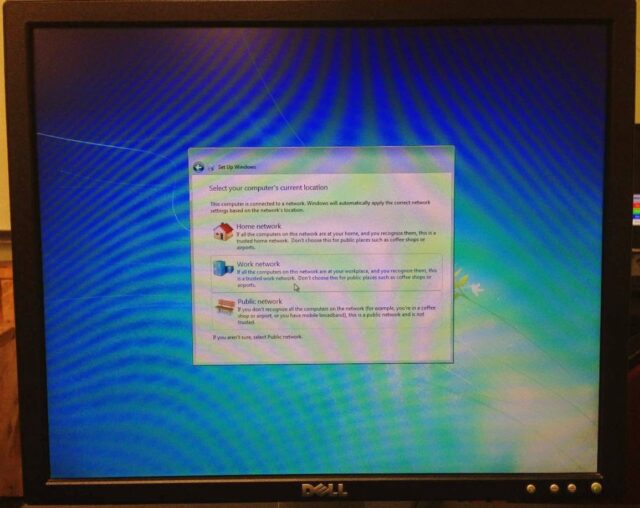 |
| Choose the network location type: Home, Work, or Public |
You’ll then see this screen:
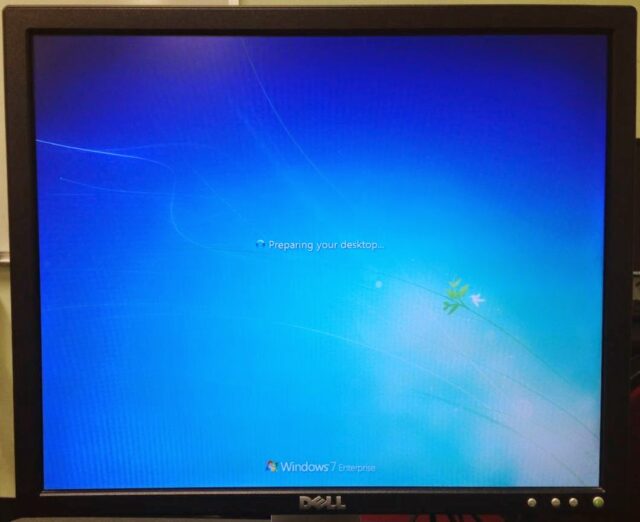 |
| Windows 7 Installation, Last step: Preparing your desktop… |
Here’s the newly installed Windows 7 desktop:
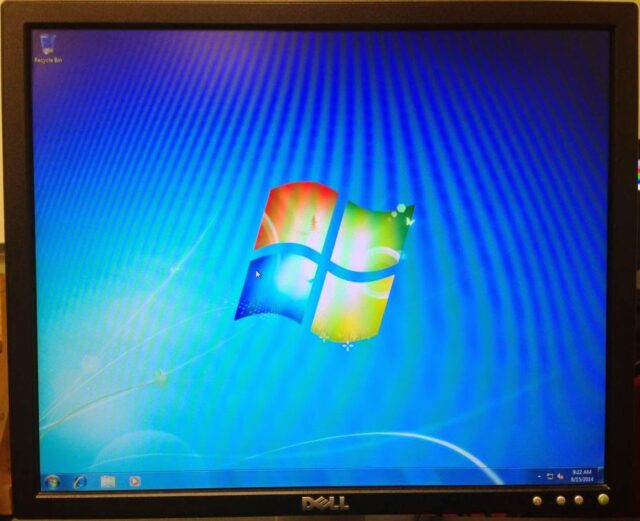 |
| Freshly Installed Windows 7 Desktop |
Step 16: Run Windows Update.
Microsoft no longer calls it “Automatic Updates,” it’s now “Windows Updates” and can be found in the control panel. The easiest way is to open the control panel and then type “Windows Update” in the top right search window:
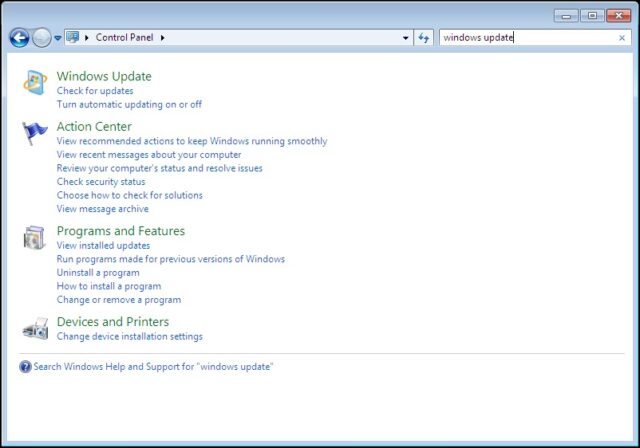 |
| Search for “Windows Update” in the Windows 7 control panel |
Run Windows Update until you are tired. Now you’ve installed Windows 7.
Amazon Associate Disclosure: As an Amazon Associate I earn from qualifying purchases. This means if you click on an affiliate link and purchase the item, I will receive an affiliate commission. The price of the item is the same whether it is an affiliate link or not. Regardless, I only recommend products or services I believe will add value to Share Your Repair readers. By using the affiliate links, you are helping support Share Your Repair, and I genuinely appreciate your support.