If you have a dripping Moen Renzo faucet then you don’t need to replace it–all you need to do is replace the cartridge inside. Follow my tutorial and save yourself a big plumbing bill.
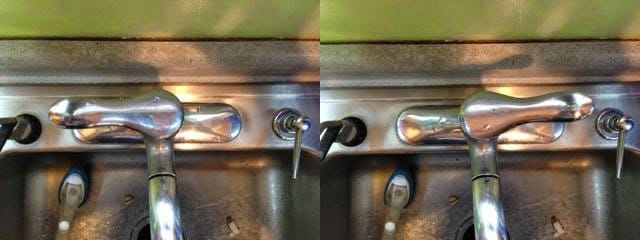
How to Fix Dripping Moen Renzo 87316
Hardware:
Tools Needed:
Good News – Your Parts Could be Free
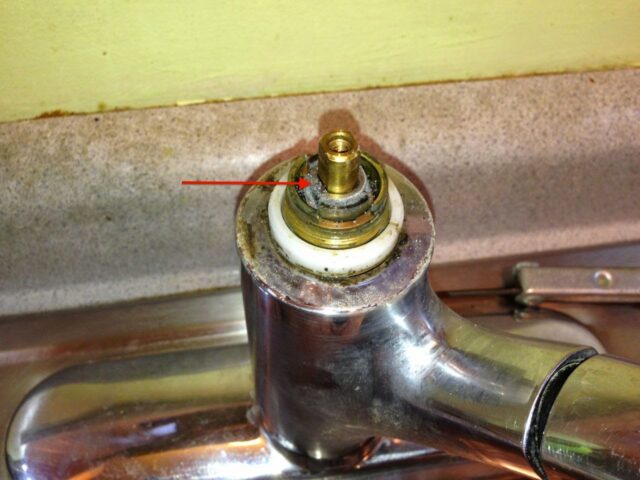
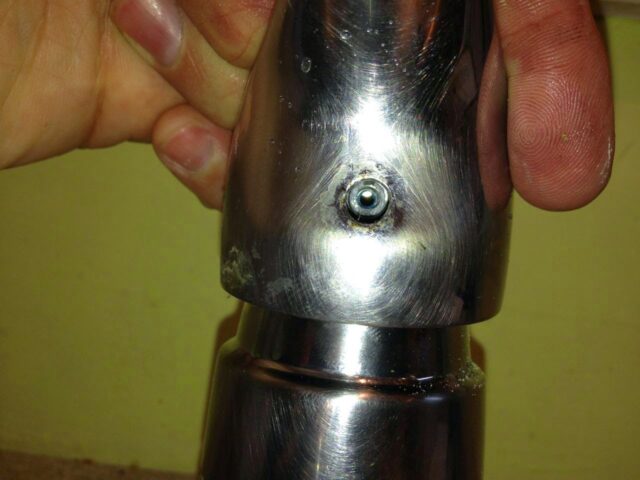
If your faucet is less than 5 years old, it is still under warranty and Moen will send you a new cartridge FREE of charge! I didn’t even need to produce a receipt. I contacted Moen by phone (800-289-6636) about the part needed and they informed me that there are two different models of the Moen Renzo, an older model, and a newer model. The way to tell which you have is to swing the on/off lever all the way to the left and the right. If it swings a full 180 degrees then you have the older model and need cartridge 1225 . If it only swings 110 degrees then you have the newer model and need cartridge 1255
 .
.
 |
| Older model Moen Renzo 87316C with 180-degree swing lever — requires cartridge 1225 (1225B works too) |
Bad News – The Manufacturer Instructions Do Not Help Much
The instructions they give you do not cover everything! The instructions I received were very general and tried to cover everything from kitchen sinks to bathroom sinks to showers and didn’t do it well. I also ran into some tricky issues that were not all covered by the instructions.
Good News – You’ve Found The Missing Instructions
Step 1: Shut off the water supply to the faucet.
It will be in the cabinet below the sink and there will be two valves. Newer valves will only require a quarter turn in the clockwise direction to turn them off (and the handle will point perpendicular to the pipe) and older valves will require you to turn the handle more, again in the clockwise direction. If you have the older type you may want to turn the faucet on while you are shutting off the valve so you can make sure to stop turning when the water stops flowing because those valves can be fragile.
 |
| Hot and cold water supply valves (currently in the “ON” position) |
Step 2: Put in the sink stopper.
It is probably a good idea to put in your sink stopper so that you don’t accidentally drop one of the small parts down the drain of your sink. There’s no point in creating more work for yourself!
Step 3: Remove the plastic plug from the faucet handle.
There should be a little plastic hot/cold plug on the front lower edge of your faucet handle. Ours used to have blue paint on half of it indicating the cold side but the paint has long ago worn off. I used a knife to pry it out.
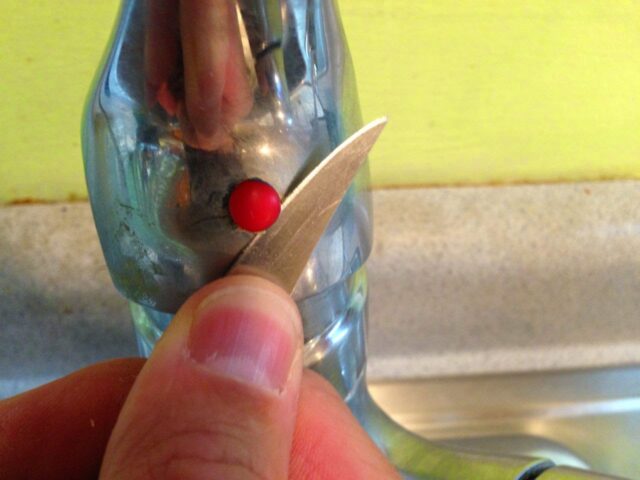 |
| Prying out the plug to reveal the access hole for the handle set screw |
 |
| The plug out–clean it if it’s as dirty as ours was |
Step 4: Completely remove the set-screw from the faucet handle.
To access the set-screw you need to lift up (turn on) the faucet handle. It is a hex head screw and you’ll need an allen wrench to remove it. If you need to buy an allen wrench set you can order one from amazon.com here .
.
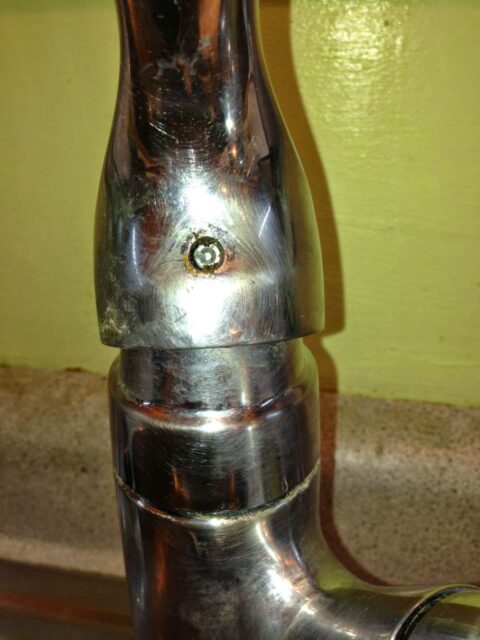 |
| Faucet handle hex-head screw location |
When I first did this repair I was not sure if I only needed to loosen the screw and then the handle would slip off or if I needed to remove it completely but you do need to remove it completely.
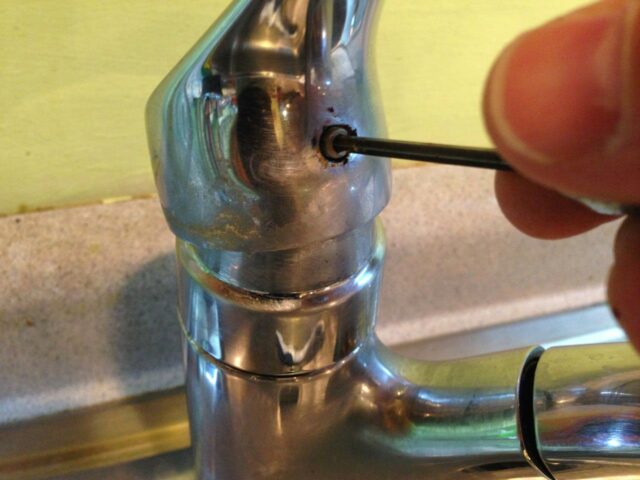 |
| Removing the handle set-screw |
Here is what is going on inside:
 |
| Inside view of the set screw in the faucet handle |
With the handle off:
 |
| Handle removed from Moen Renzo 87316 Faucet |
Step 5: Remove the phillips screw from the top of the faucet handle hinge assembly.
If you don’t have a good set of screwdrivers then you can get a good Stanley set here . After removing the screw you will be able to remove the handle hinge.
 |
| Removing the phillips head screw from the handle lever action |
 |
| Handle hinge removed |
Step 6: Unscrew the top of the faucet assembly.
This is the external chrome (or nickel or whatever finish you have) top of the faucet after the handle is removed. I was able to do this by hand and I would not recommend putting a wrench on it or you will really tear up the finish. Turn it counter-clockwise to remove it.
 |
| Faucet top “cap” unscrewed and removed |
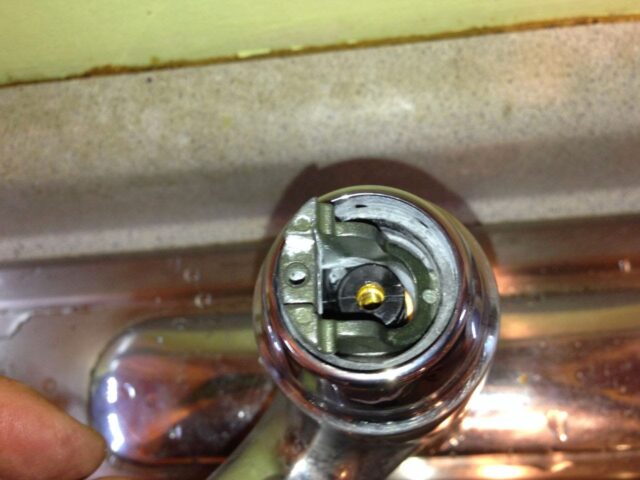
Step 7: Remove and set aside the metal washer.
It loosely sits down over the brass valve shaft:
 |
| Washer location |
 |
| Washer off |
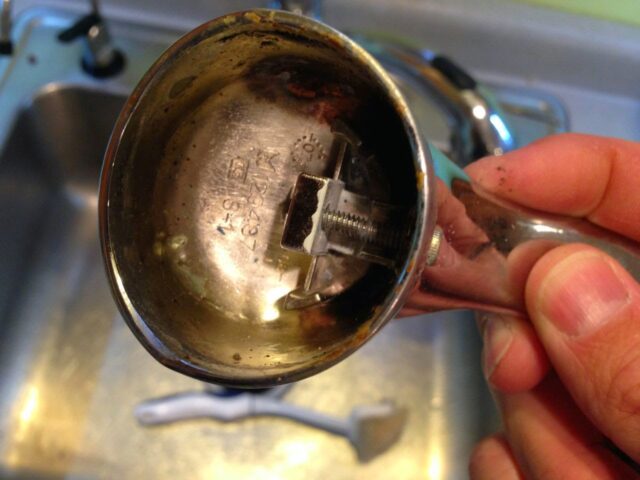
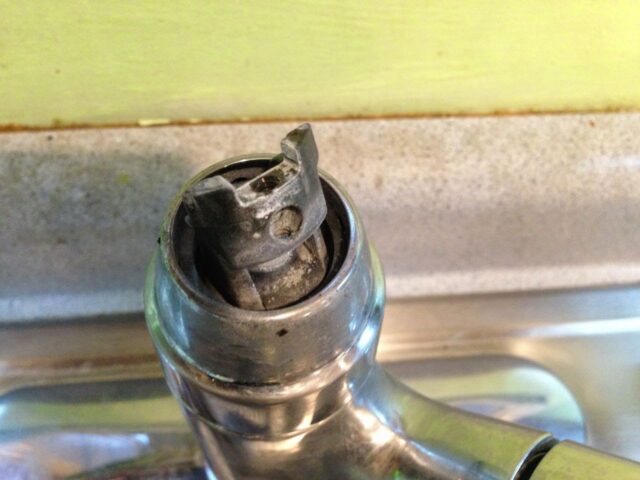
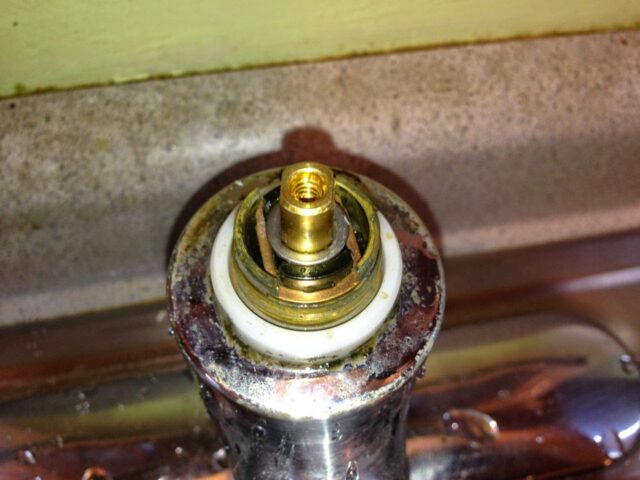
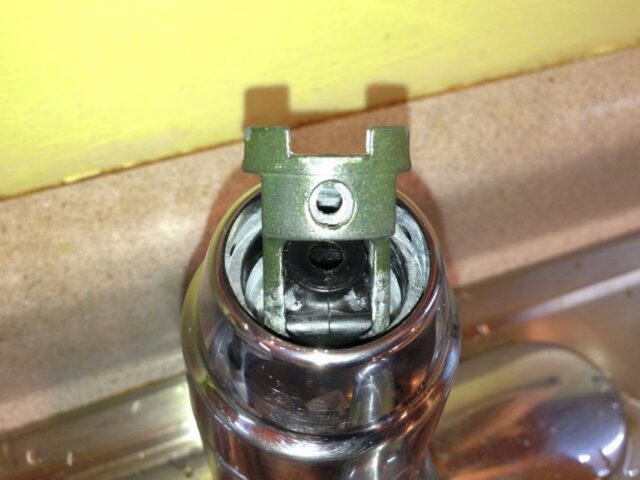
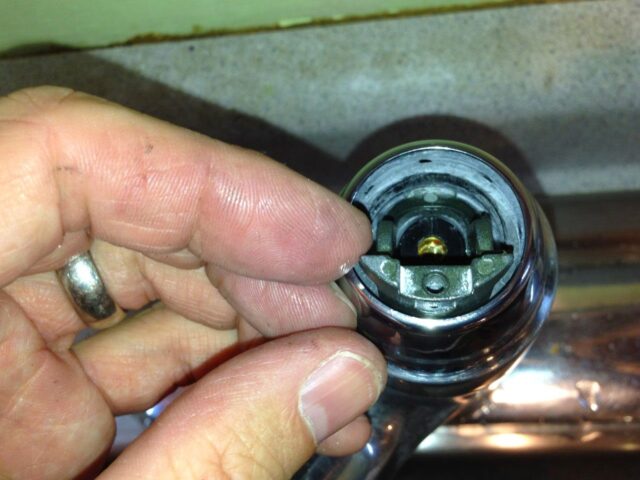
Step 8: Remove cartridge clip.
Take a knife or small screw driver to get it started. It should slide straight out.
 |
| Cartridge clip location and removal |
 |
| Cartridge Clip partially removed |
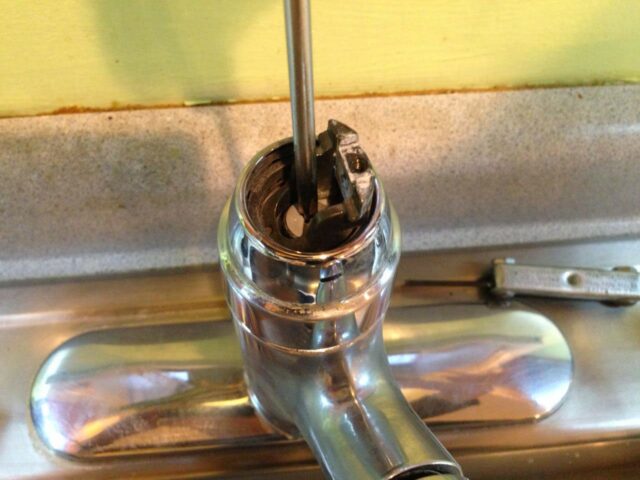
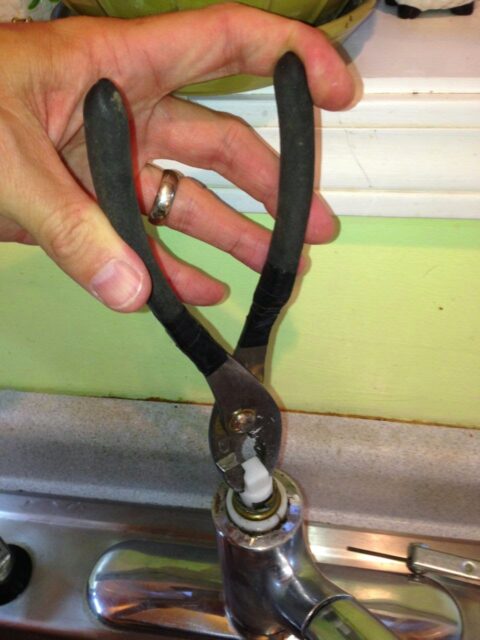
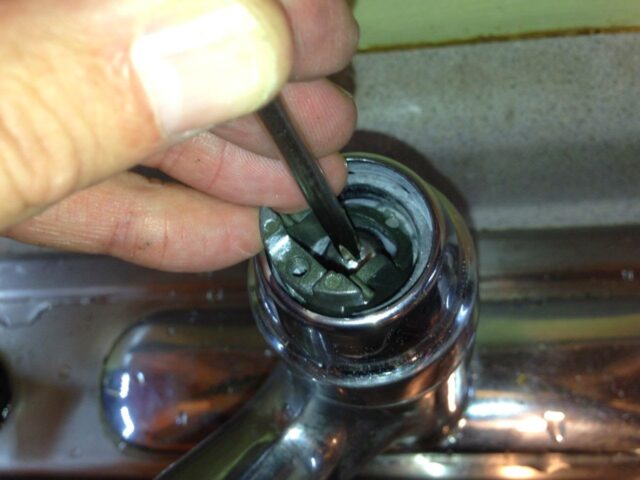
Step 9: Loosen the cartridge for removal.
The replacement cartridge I ordered came with a special “twist tool” for doing this without damaging the cartridge:
 |
| Manufacture’s “twist tool” for breaking free the cartridge for removal |
Place the tool down on top of the cartridge and twist it back and forth (~45 degrees each way) with a pliers. If you don’t have a good pliers you can pick one up here. It did not take much effort to do this for me. I think that if you have hard water and a lot of calcium deposits then this step may be more important for you.
 |
| Using the “twist tool” to loosen the cartridge for removal |
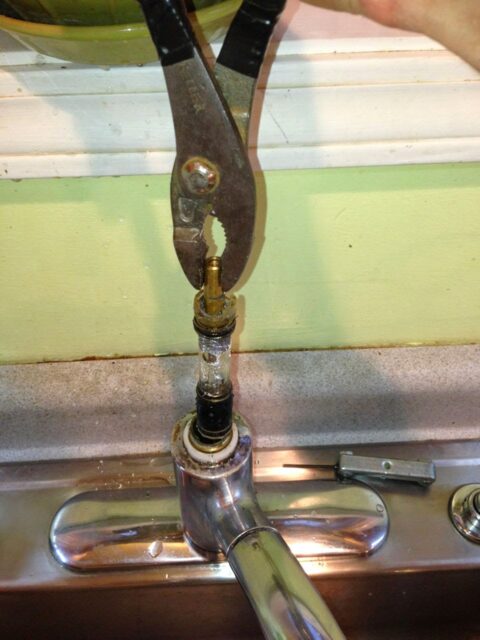
Step 10: Remove the old cartridge.
Take a pliers and grip the brass post that sticks out the top of the cartridge and pull the cartridge straight up and out.
 |
| Removing the cartridge |
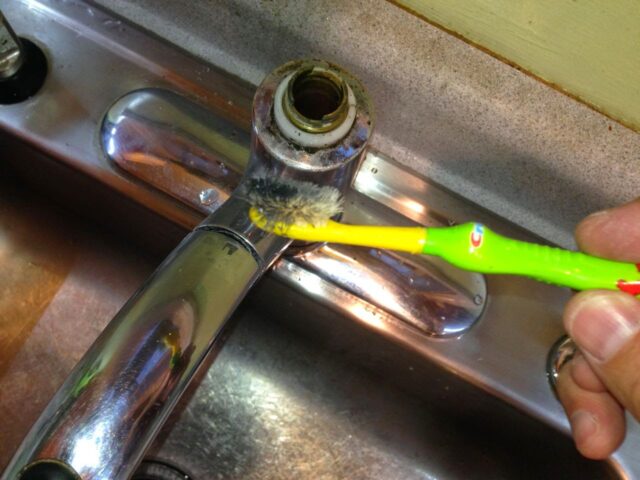
Step 11: Clean the faucet barrel.
This step is recommended by the manufacturer and is probably more important if you have a lot of minerals in your water. Use an old toothbrush and scrub the inside of the barrel to remove any mineral buildup. Once you have scrubbed the inside of the barrel, turn the water valve on very slowly to flush out any material you may have broken loose when you were scrubbing the barrel. Be careful where the water runs when it comes out of the barrel–I thought mine would run back into the sink but it did run out on the countertop.
 |
| Clean the barrel with an old toothbrush |
 |
| Flushing out the barrel |
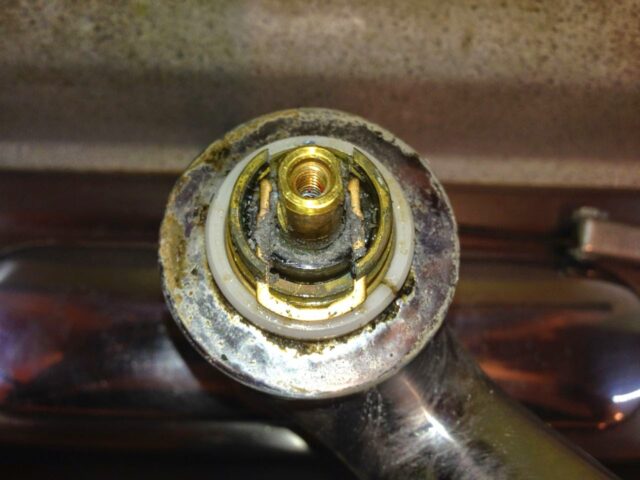
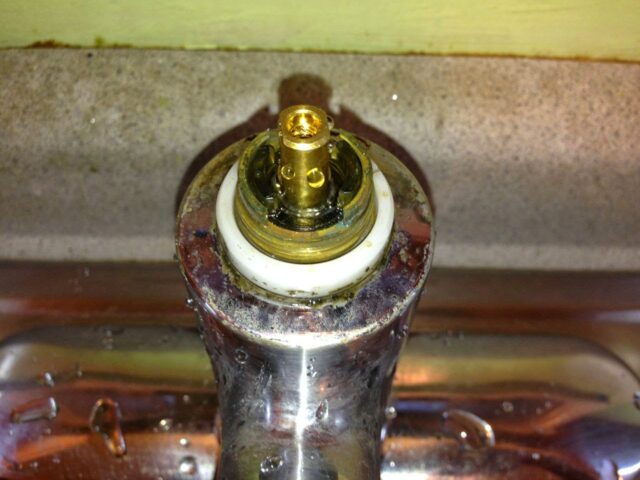
Step 12: Insert the new cartridge into the faucet.
 |
| New cartridge installed |
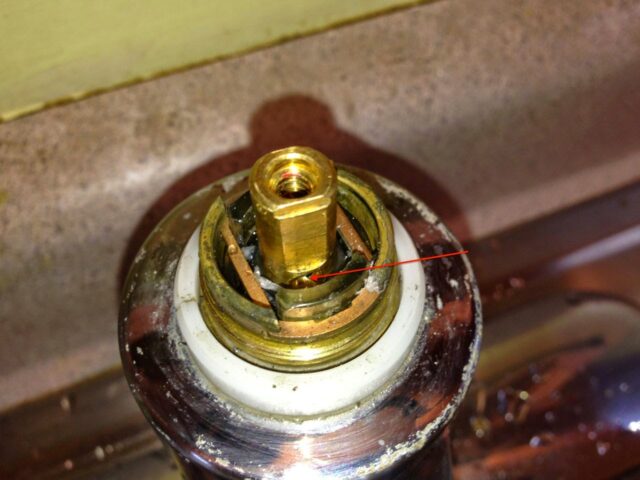
Step 13: Install the cartridge clip.
You may need to turn the cartridge to line it up–use the twist tool as necessary. The clip should go on either side of the clear plastic lip that sticks up on either side as shown below:
 |
| Reinstalling the cartridge clip |
Step 14: Reinstall the metal washer.
Simply slide it down on the brass cartridge shaft. I forgot to do this the first time–learn from my mistakes. Also take your toothbrush and clean the top edge of the faucet while you have it open.
 |
| Washer reinstalled |
Step 15: Set the hot/cold sides.
Depending on the way you orient the brass valve shaft you will determine whether the water puts out hot water when the handle is turned to the left/right. Based on the way our plumbing was piped, to make the faucet flow cold when the handle is turned to the right, orient the brass shaft so that the hole is on the front as seen below:
 |
| The way I had to orient my valve to make cold on the right and hot on the left |
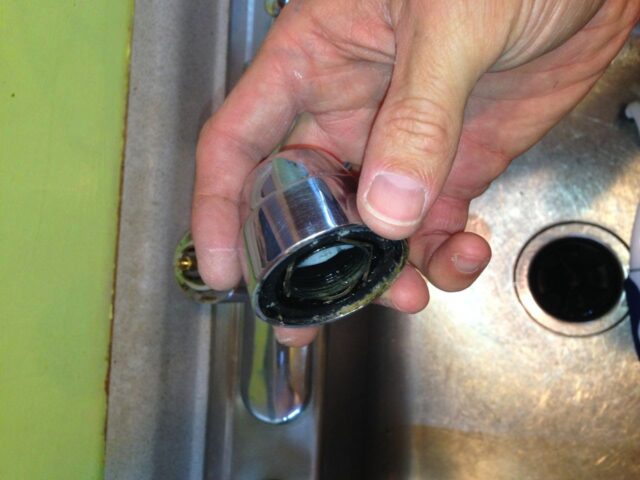
Step 16: Reinstall the faucet cap.
Screw it down tight. What happens when you screw down this part is that at one point the white ring inside the cap “catches” and locks into place. In my case, the white ring “caught” at the wrong point and locked in backwards. The “channel” should be on the back side once it is screwed down tight as seen below:
 |
| Channel in the white plastic ring correctly in the back/rear when screwed down |
If you run into the problem I had with the white ring locking into place backwards you can take a screw driver to hold the ring in place as you screw it down like this:
 |
| Keeping the white ring from locking in the backwards |
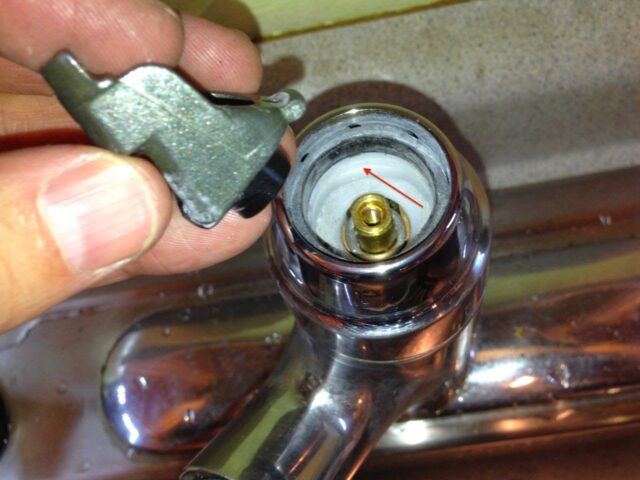
Step 17: Reinstall the faucet handle hinge.
This part was a bit tricky for me as well. You need to reinstall this hinge with the tab on the back into the groove I fussed about in step 16 and the “cap” of the hinge down onto the cartridge shaft (without turning the shaft 180 degrees and switching the hot/old sides you set in step 15).
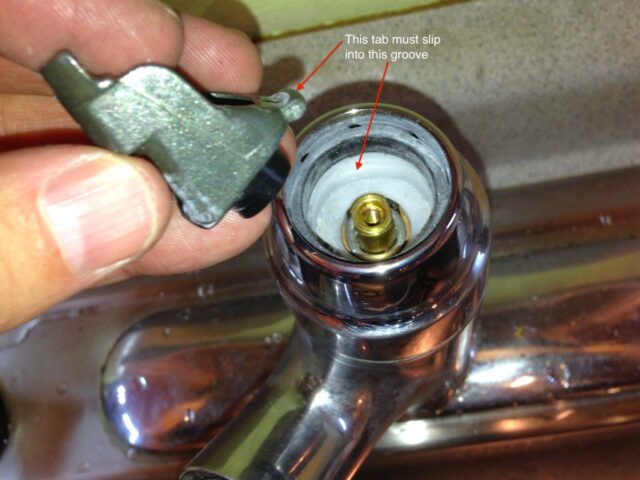 |
| Hinge tab and the groove it must fit into |
|
Slipping the hinge down onto the shaft and the tab into the back groove:
|
| Slipping the handle hinge down onto the shaft and the tab into the groove in the back |
If the hinge is correctly installed it should swing back and forth as seen below:
 |
| Hinge rotated all the way to the left |
 |
| Hinge in the center position |
 |
| Hinge swung all the way to the right side |
Once the hinge is installed, reinstall the screw on top:
 |
| Reinstalling the screw on top |
Step 18: Reinstall the faucet handle.
Line up the hole and reinstall the hex-head screw with your allen wrench set.
 |
| Reinstalling the faucet handle |
 |
| Reinstalling the handle set-screw |
The handle should not be loose at all when you have reinstalled the screw properly.
Step 19: Reinstall the plastic plug.
This is the plug that covers the handle screw.
 |
| Plastic plug reinstalled |
Step 20: Test the faucet.
Turn both the hot and cold water supplies on and test out the faucet. If the hot and cold are reversed the follow these steps backwards to step 17 and rotate the brass valve shaft 180 degrees and then follow the steps forward in putting the faucet back together. Now you should be done!
Your handle should swing from left to right as shown below:
 |
| Faucet handle swing–left to right |
Manufacture Links:
Amazon Associate Disclosure: As an Amazon Associate I earn from qualifying purchases. This means if you click on an affiliate link and purchase the item, I will receive an affiliate commission. The price of the item is the same whether it is an affiliate link or not. Regardless, I only recommend products or services I believe will add value to Share Your Repair readers. By using the affiliate links, you are helping support Share Your Repair, and I genuinely appreciate your support.
Related
Hi John, currently I have Moen M7800 model ( about 30 years old). The handle and spout were getting hard to turn so I ordered replacement kit from Moen – they did not charge me a single penny. The old water diverter did not want to come off, I had to use side cutters to cut it out, after replacing all parts with the new kit parts I have some water obstruction. When lifting the handle slowly there is almost no problem water flows ok, when lifting it fast and fully open it chokes for couple of seconds and then flows. Also I noticed that when I lift the handle to open the flow, the hole spout will move up by 1/8″, it looks like water pressure is raising it up. Any thoughts on what I did wrong? I am considering buying the Moen Renzo 1225 model as I see that the 1255 might have a problem with replacing the bottom O ring under the spout. Thank you so much.
Stan WA State
Stan, I’m sorry but I’m not going to be much help. I did this repair once years ago and I don’t even own that house anymore. I would backtrack and reinstall it and see if you can find the problem.
I can’t get the screw loose in step one. Any suggestions. Might be stripped??
Megan
Step 1 is turning off the water. Are you referring to the set screw in Step 4?
Thanks for your detailed instructions but I’m afraid they are way out of date. The newest version of this model CA87316 uses the 1255 cartridge (a shorter one) and has O-rings down on the outside of the plastic spout. I’m not sure how you replace those as it would (I believe) completely uninstalling the fixture. Great design. This would be an expensive fix if you have to hire a plumber. The old design is easier to fix.
Thanks for letting us know.
Hi John, thanks for the quick response. i actually meant to to show that as a direct reply to your response earlier to Leigh Ann. I must have not clicked on the ‘Reply’ button associated with it. I couldn’t see any way to edit it after posting so, my apologies.
Incidentally, my unit is the newer version and did not require the grub screw to be completely removed to detach the handle.
Hi, I realize this is an old thread but it’s sometimes possible to just replace the washer inside the shut-off valve instead of replacing the whole thing, especially if it’s a soldered connection. You can buy sets of washers at Ace hardware with various sizes.
You first need to shut off the water at the riser, or feed to hot water tank if it’s a hot water shut-off, then remove the cap where the shaft goes through. Then fully unscrew the handle, pulling gently until the shaft is fully removed. Make sure you have a container or towel to collect any water that runs out. Remove the old washer which is probably damaged and check for any debris remaining in the valve body, making sure to clean the inside surface. Place a new washer on the shaft and make sure that it is on correctly so that it fully clears the retaining lip of the shaft. I found that the easiest way to do this is to place it on a hard surface then push it on by using a 10mm long reach socket. Then make sure it is completely clear of the lip by pushing it down with the flat blade of a screwdriver. Reassemble and make sure it’s all tight then turn the water back on and check for any leaks.
Hope this helps someone,
Regards,
Al
Thanks for the tip Al, next time I’ll see if the washer will fix it.
Thank you for making this guide! I don’t know if I have this exact faucet but if I don’t, I have one that looks exactly like it. Finally the drip drip dripping has stopped! I had kind of resigned myself to just living with it like that forever, but I finally decided to Google it and see if maybe I could fix it. After I read this I discovered it actually wouldn’t be as difficult as I thought, so I did it and voila! Now I just have to work up the nerve to do the same thing for the bathtub faucet…
Great to hear Vincent, good work on persisting and fixing your dripping!
Thank you so much for posting this! It’s a tricky little faucet, I would habe been lost without your article. Well written, detailed, with pics showimg the complicated bits…so helpful!
Thanks for the feedback Jana, good job on fixing your faucet.
Thanks for the detail instructions. However, at step 6, the black piece of the faucet assembly was stuck on the unit and I could only screw the outer case; and therefore, I couldn’t continue removing the rest of the piece. and when I put it back, the hot/cold water got reversed, I am not sure how to solve the problem. If there is any input/advise I would appreciate it!
I’m pretty sure you need to go back through the steps and pull out the cartridge and then rotate 180 degrees, reinsert, and close it back up. I believe I had that same thing happen to me when I was reassembling but it’s been 4 years since I did this repair. Let us know if this fixes it for you.
Step 15 addresses your issue directly, btw.
Hi, John
you are a life saver, many thanks from Canada
John – Thank you so much for posting great instructions and photos. Fixed this afternoon while listening to Springsteen (what could be better!).The faucet no longer leaks and I learned how to do something new. Much appreciated.
John, thanks. Went just as described. Great to see the spirit of sharing that fueled the old internet is still alive and well.
I’m glad to hear it, thanks for sharing!
Thank you, this has been a huge help!! My downstairs bathroom remodel has been a huge (long) work in progress. I ran into this problem on the day that I was determined to finally finish. To say I was beyond pissed, is an understatement. I have had TWO failed trips to Menards because I had no idea what specifically I should be looking for to solve this issue. I’ve bought the hoses but still needed the adapters. Will be making a trip out to ACE tonight..Thank you, Thank you.
John, I’m a pretty handy guy but I was really struggling with this little project till I found your tutorial. Many thanks for shortening the time it took to make this repair. I would probably still be scratching my head without your thorough explanation of each of the steps.
Thanks for the feedback Eric, I’m glad my article was able to help. That repair did turn out to be more difficult than I originally thought it would be so I’m happy to share what I figured out with others.
I’ll add my gratitude to the list, John. Thanks to you, the hardest part of the job was getting the set screw out.
Hi John,
Thank you so much for your detailed instructions and troubleshooting tips. I had to replace the cartridge plus all the parts for this faucet from the Handle Hardware kit all the way to the faucet handle because of corrosion and I looked at at least a hundred videos and instructions and step by step photos and yours is the one that helped me get it done. So Thank you again.
I do have one question: After I turned the water back on all the way, although there is no leak and everything works fine, it seems like the pressure is lower than before. There isn’t any leaking under the sink any more (Yaaay!) Is there anything I should look for?
Thank you!
Leigh Ann
Leigh Ann, thanks for the feedback and I’m glad I was able to help you! As for the pressure difference, I have actually ran into that issue before and you know what it was–the water shut-off valve had gone bad and was not turning back on all the way. I actually ran into that very same problem when I originally installed this faucet when it was new–after I installed it and turned the water back on, the pressure wasn’t what it should be. I ended up having to replace the water valve below the sink. You may try turning the water off and back on again under that sink to see if it works. Mine was a cheap plastic handled water shut-off valve and I think they just don’t last more than about 10 years. I need to write that repair up here soon actually, “How to replace a sink water valve.” I will but I can’t tell you how soon it will be! Thanks again and keep coming back and note that my website now has a new name!
thanks John for taking the time to not only accomplish this for people like me, but to publish it. It shortened my troubleshooting time greatly!! Thanks Again!
From one John M to another, you are so welcome! Thanks for the note, I'm glad I was able to help.
Thanks John for posting the Moen cartridge replacement instructions. You saved me hours of frustration. You’re a good man and a great American.
Geoff
Bend Oregon
Thanks for the feedback Geoff, I’m glad I was able to help.