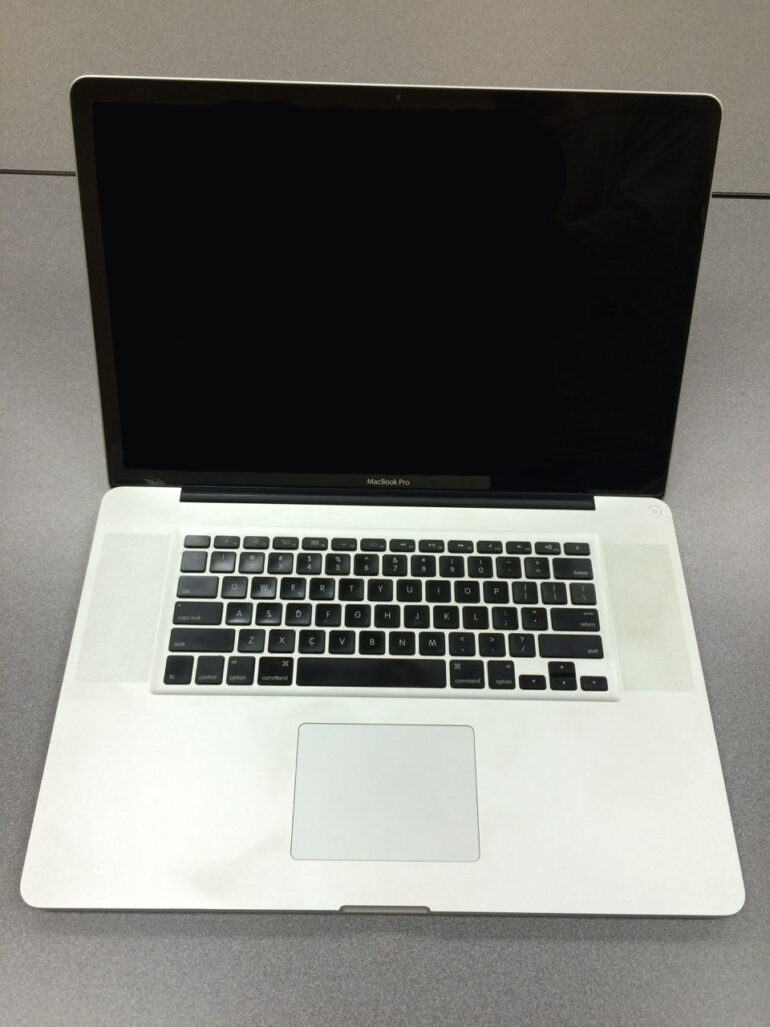
Follow along as I replace the entire display assembly on my Late-2011 MacBook Pro. I accidentally dropped a scissors over my MacBook and it caught the very bottom edge of my display and shattered the glass in the lower left corner 🙁 This is my main work and personal computer, which I plan to sell at some point when I choose to upgrade, so I would be killing my resale value having a broken display, even though it was only the glass that was broken and it was just in the lower corner:
 |
| Broken MacBook Pro Display Glass–ouch |
It turns out that the glass is installed with a very good adhesive, which must be heated in order to remove the broken glass. The problem is that the glass is surrounded by a heat-sensitive rubber gasket that also is what cushions the display when you fold the display down onto the lower case. So, overheating the area around the outside of the glass has a tendency of hardening and warping the rubber gasket. I did see one guy (who cusses a lot and is quite disrespectful I might add) who used a Hakko FR-801 SMD Solder Rework Station which uses hot air and is very precise (compared to using a heat gun designed for paint removal) but I looked up that tool on ebay and it is a couple hundred dollars at least (with no accessories). I also didn’t want there to be any chance at there being dust or glass shards on the LCD display when I replaced it. So, I opted to buy a good condition OEM display on ebay and swap out the entire thing. One thing to note is that there are people selling displays advertised as 95% new where I believe they have replaced the glass themselves. I don’t trust that as OEM quality so I opted to buy a used one in good condition. iFixit has a tutorial on how to replace a 17″ MacBook Display but the late-2011 model I own is different than the one they feature. So I normally don’t mirror the same repair that iFixit already has done, but in this case they are only showing you how to repair the pre-2011 models. Here we go…
How to Replace the Display on Late-2011 17-Inch Unibody MacBook Pro A1297
Hardware:
- Late-2011 17″ Unibody MacBook Pro A1297 with 2.5 GHz Intel Core i7, Model MacbookPro8,3
- Replacement display from ebay
Tools Needed:
- Precision Phillips Screwdriver
- T6 Torx Screwdriver (all the precision screwdrivers you’ll need for most electronic repairs here: Precision Screwdriver Set
)
- Clear tape (for taping the screws on the location they came from on the printed tutorial)
Time to Repair (for me): 1 Hour 14 Minutes (which included taking pictures for this post)
Step 1: Order a replacement display.
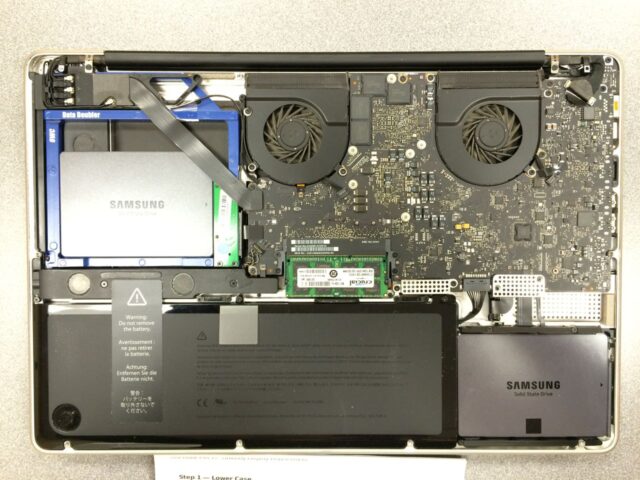
If you have a late-2011 A1297 17″ MacBook Pro, you cannot use a display intended for a 2010 model because in the 2011 model they moved one more antenna up into the display and therefore there is an extra coax cable on the 2011 model. If you take the lower cover off your MacBook and lay it with the hinge on top this is what you should see in the top left corner (note: one of the coax cables doesn’t run to the display) if you have the same computer as I do (but likely you will have the super drive in there an NOT the Data Doubler bracket I have installed so I can have a second SSD):
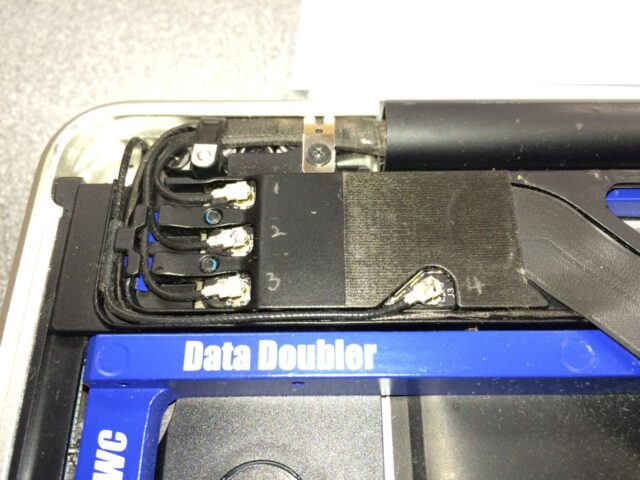 |
| Coax antenna cables on Late-2011 A1297 MacBook Pro |
The display should have 3 coax cables and another cable for the iSight camera:
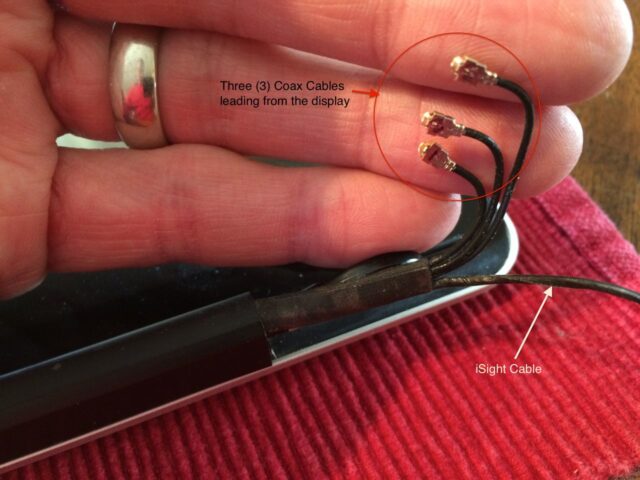 |
| Cables leading from the lower right side of the hinge (it will be on right side when the Mac is flipped over) |
I ordered mine from ebay. Make sure you ask the seller whether it has 3 coax cables! I ordered one that only had 2 and then tore my MacBook apart to find out I had the wrong display!!!
Step 2: Power off your MacBook.
You are going to disconnect the battery so you want to shut it down nicely.
Step 3: Download and print the pdf of the iFixit tutorial for the 17″ Unibody MacBook Pro.
You can simply click here to download the pdf. Once you have downloaded it, print it off.
Step 4: Remove the lower case screws.
Tape them on the picture on the iFixit tutorial you printed out like this:
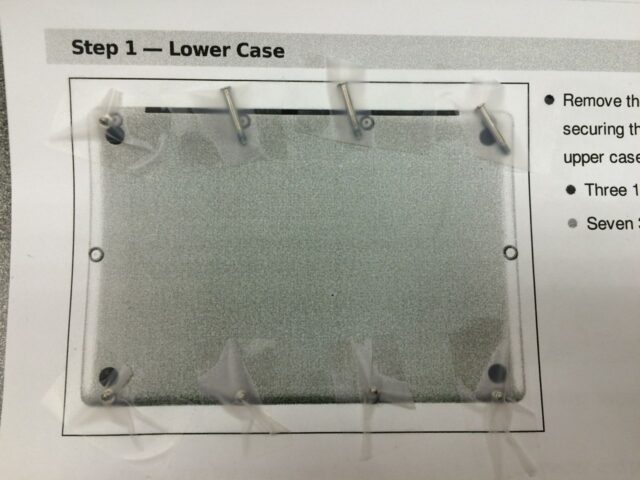 |
| Taping the screws on the image of the iFixit tutorial |
Step 5: Remove the Lower Case as directed by the iFixit tutorial.
By using your fingernails on the top (back) edge where the display hinge is you can pry it up. Be careful because you can bend the lower case.
 |
| Lower Case removed from Late-2011 MacBook Pro A1297 |
Step 6: Disconnect the battery.
This is important because I’ve read that there is power supplied to the display via the cables and you could accidentally short something out. For my late-2011 model this is another place where these instructions deviate from the iFixit guide because my machine was different from the model they were using, in what could be a very disastrous difference. Locate the battery connector:
 |
| Battery connector location |
In my MacBook the battery connector plugs straight down into the socket as so. Here’s a close-up of the connector unplugged. Use a plastic tool to pry the connector straight up and out of its socket.
 |
| Battery connector unplugged |
Step 7: Disconnect the iSight cable.
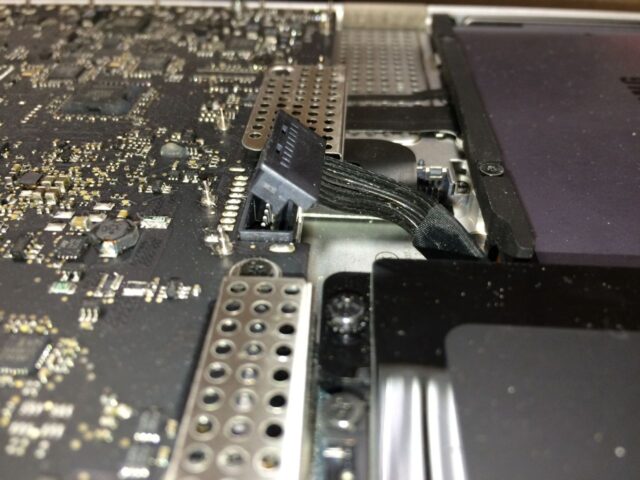
This also is different from the iFixit tutorial. There was no sticker on top of the cable in my case. It is located below and left of the left fan:
 |
| iSight cable connector location |
I used a plastic pry tool to gently pry on the two wings on each side of the connector and only used gentle force parallel with the motherboard. Be careful not to lift up or you will pry the socket off the board. Here I am removing it:
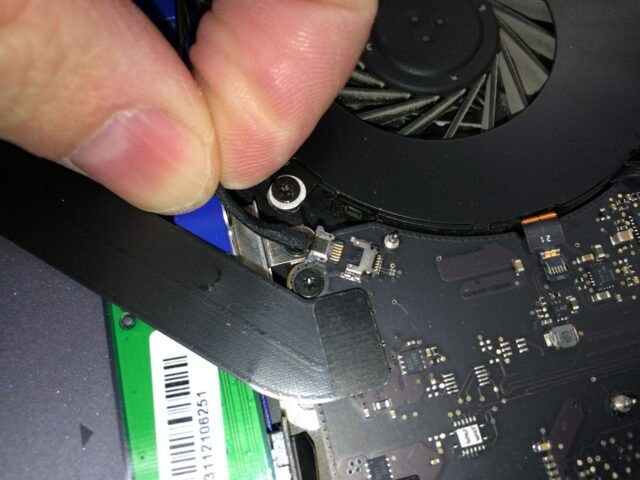 |
| iSight Cable unplugged |
Step 8: Disconnect the cable immediately below the iSight cable connector.
This cable pops straight up and out of its socket. I used a plastic pry tool to disconnect it but you could use your fingernail.
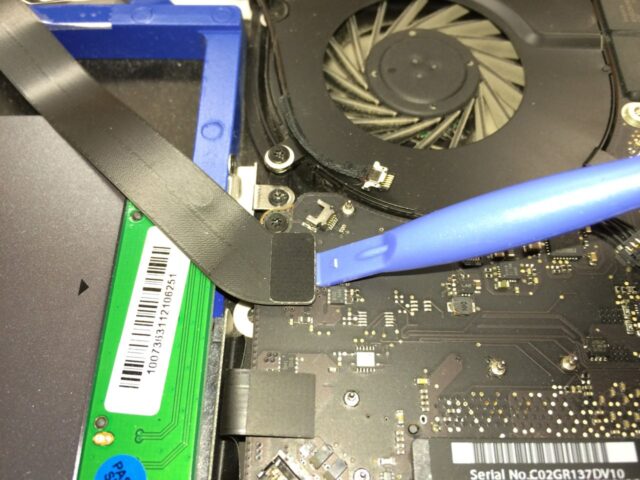 |
| Prying up the cable connector below the iSight cable (I’m not sure what it is called) |
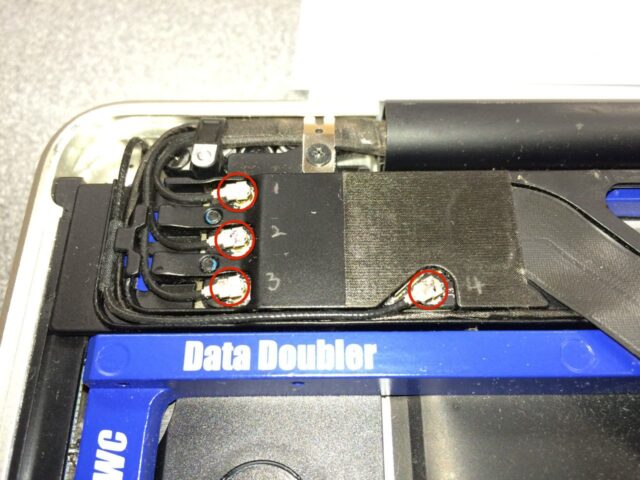
Step 9: Disconnect the left 3 coax connectors from the antenna bracket on the top left of the machine.
I used a plastic pry tool. Pry them straight up. The snap off (and on). You must disconnect the one labeled 4 below because the iSight cable runs underneath it in the bracket. It was around this point that the iFixit tutorial mentions some EMI foam that needs to be removed but mine doesn’t have it.
 |
| Coax antenna connectors to be removed |
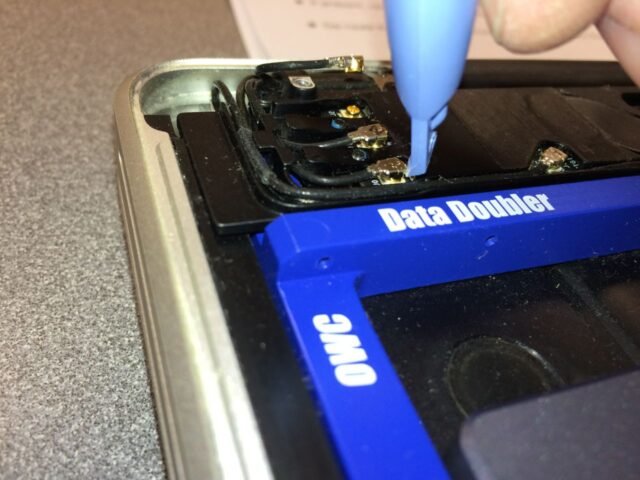 |
| Prying up the coax cable connector |
Step 10: Carefully lift out all the coax cables along with the iSight cable out of their channels in the antenna bracket.
In my case the iSight cable was at the bottom. Be careful not to use too much force as there are some places in the channel which are more narrow to hold them in place but they fit in there pretty tightly. Here they are removed:
 |
| Cables removed from the antenna bracket assembly |
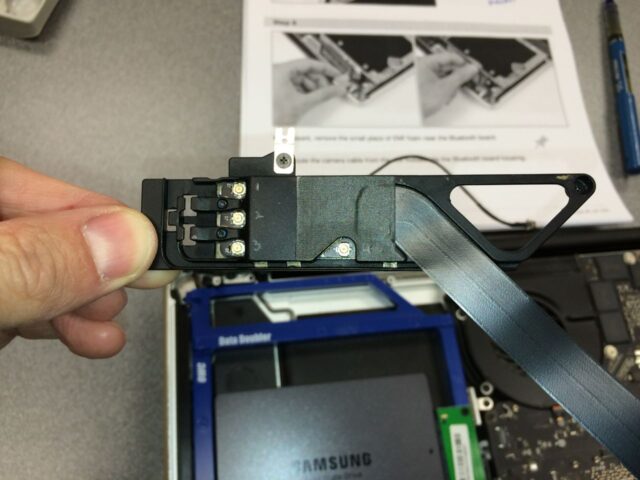
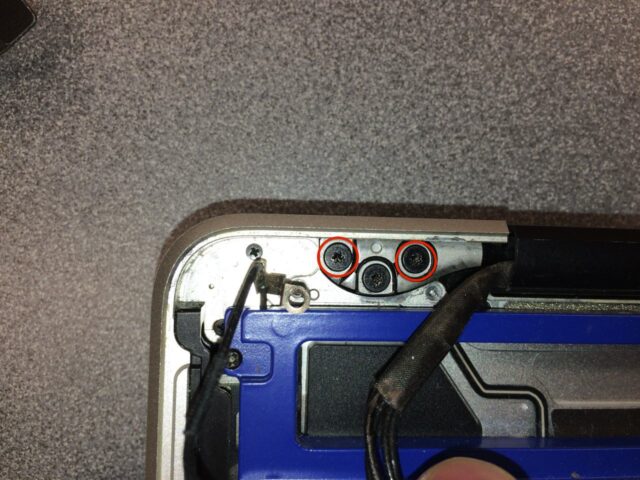
Step 11: Remove the two screws from the antenna bracket assembly and remove the bracket.
The shiny metal tab that holds down the cables on top will come with it–simply leave the screws in their holes once you have loosened them. Here are the two phillips head screw locations.
 |
| Antenna Bracket screw locations |
 |
| Here the antenna bracket has been removed |
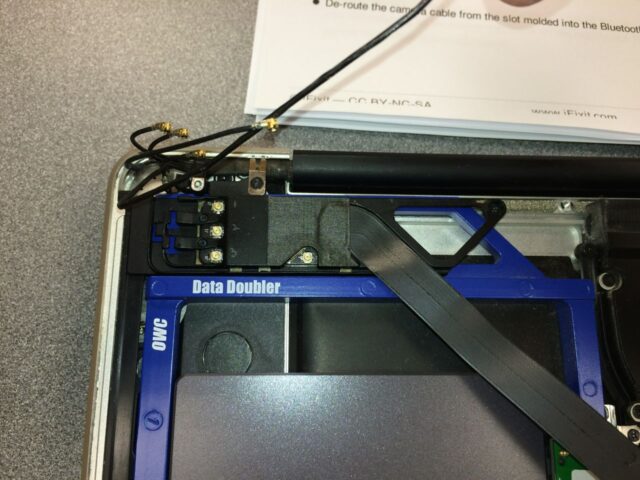
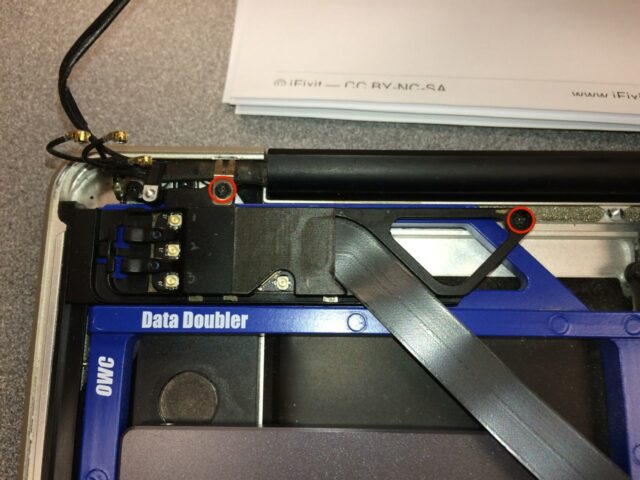
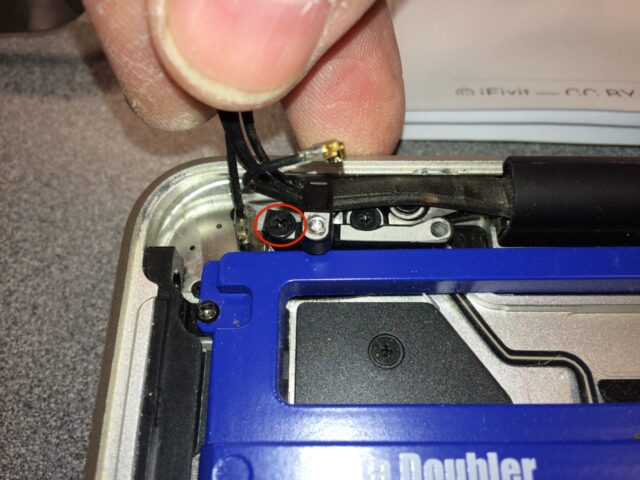
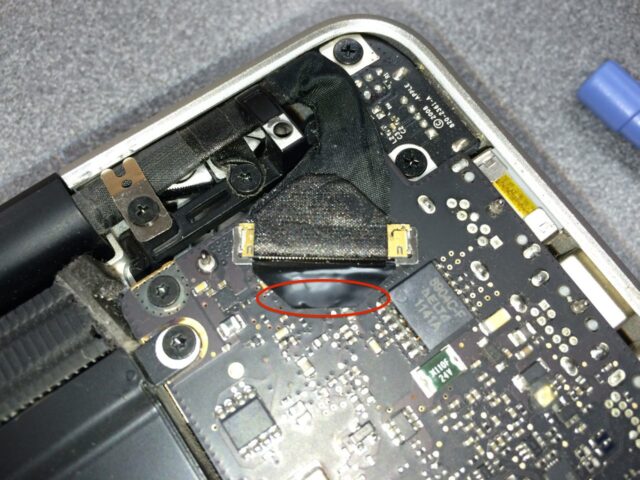
Step 12: Remove the remaining screw from the camera cable retainer bracket.
It goes through a ground loop, which will not come out with the bracket (so make sure to remove the screw before lifting out the bracket).
 |
| Camera cable retainer bracket screw location |
Note that the screw circled above goes through a ground loop, which will stay in place:
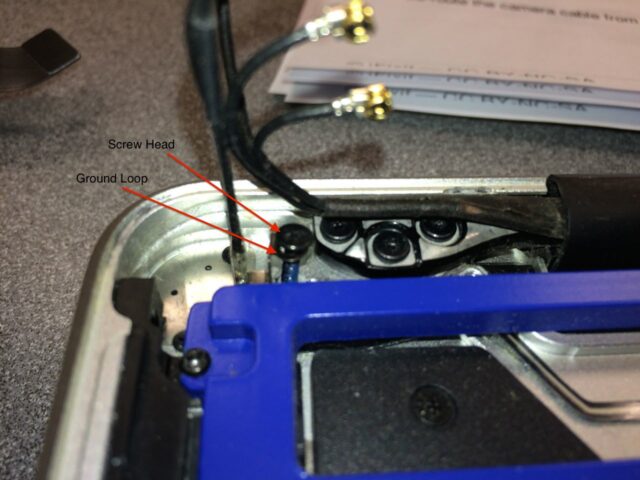 |
| Lift out the screw to release the ground loop |
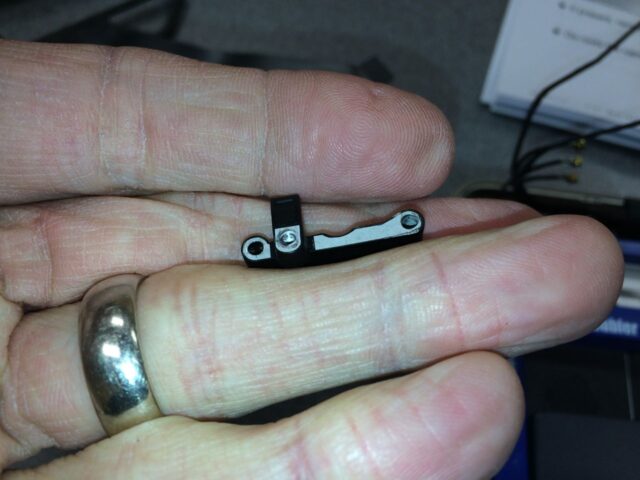 |
| Here’s the bracket removed |
Step 13: Disconnect the video cable connector.
Be very careful in this step not to pull the connector socket off the motherboard. There is a square metal “loop” that is hinged on one side and has a plastic tab on the other end of it that must be lifted up to release the cable to disconnect. Gently lift up on this plastic tab:
 |
| Display Connector locking tab |
Once you have lifted up the locking tab you can pull the display cable parallel with the surface of the motherboard toward the top right corner of the machine to disconnect it. The iFixit tutorial has some great pictures of this step (mine turned out blurry).
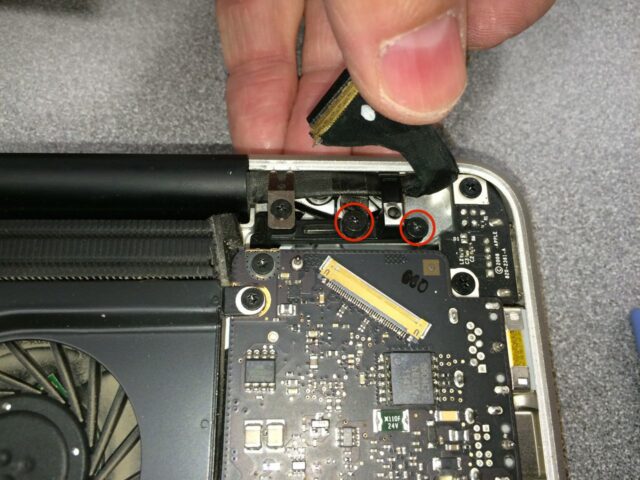
Step 14: Remove the right 2 screws from the display data cable retainer bracket and remove the bracket.
The left screw does not need to be removed. You’ll need to lift the display cable out of the way to see the right screw.
 |
| Display data cable retainer bracket screw locations |
The middle screw goes through a little “cloth” loop that is attached to the display cable. Remove that screw before lifting out the bracket. This is what it looks like:
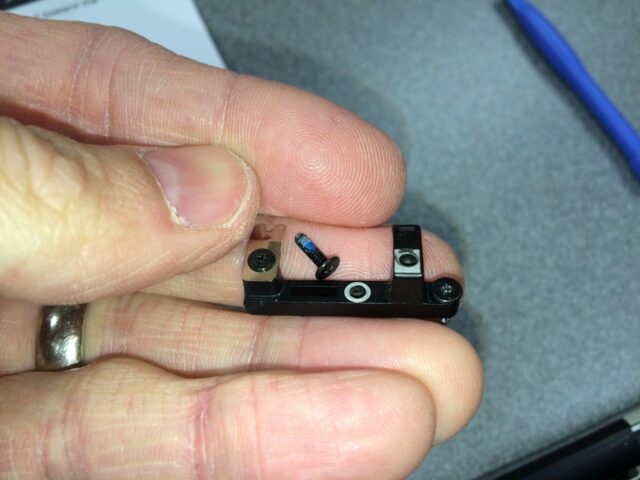 |
| Display data cable retainer bracket removed |
Step 15: Remove the two outside screws from each of the two display brackets.
Leave the middle screw on each side until later. They are T6 Torx head screws.
 |
| Left (from the bottom) display bracket screws |
 |
| Right (from the bottom) display bracket screws (I already removed them) |
I had read the some people had stripped them out when they were trying to remove them so I was very careful. I actually had one very stubborn one that twisted my T6 bit:
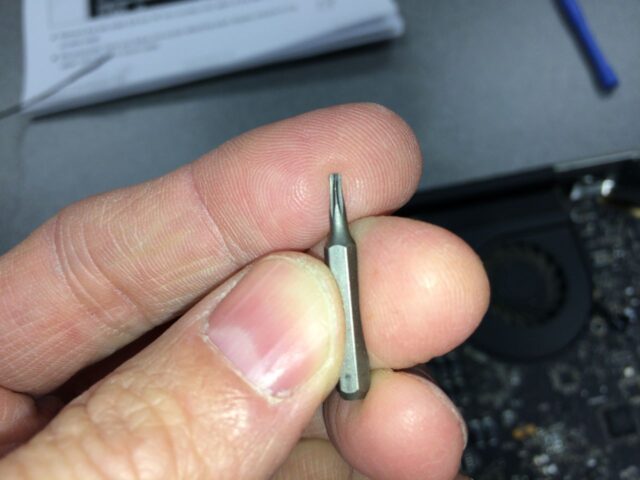 |
| Twisted T6 bit |
I switched to another bit I had on hand and then the screw came out fine. I think the second T6 I used was made of harder steel.
Step 16: Open the display at 90 degrees and lay the MacBook on its side.
It should look as seen below:
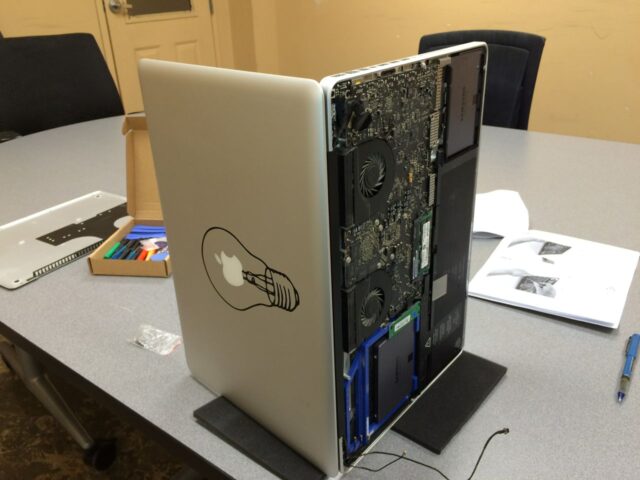 |
| MacBook on side for final 2 screw removal |
Step 17: Remove the lower display bracket screw.
The top screw will still be holding it together.
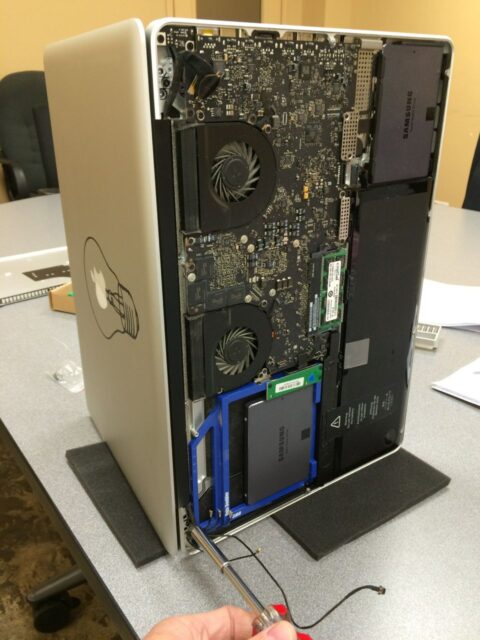 |
| MacBook on the side to remove the final 2 display bracket screws |
Step 18: Remove the upper display bracket screw.
Placing your hand on the top to hold the display and lower body together, remove the final display bracket screw.
Step 19: Carefully separate the display from the body.
Complete this step by holding the lower body in place and sliding the display straight down (down as in if it was sitting upright like normal). The iFixit tutorial has some good pictures detailing this step.
Step 20: Follow the steps in reverse order to re-assemble the display.
Here’s one tip on the order to do things:
- After you have re-installed the antenna bracket (removed in step 11 above), run the iSight cable through its channel first, then connect the coax cables starting with the top one first and then work your way down to the lower ones with longer cables.
Total Repair Time:
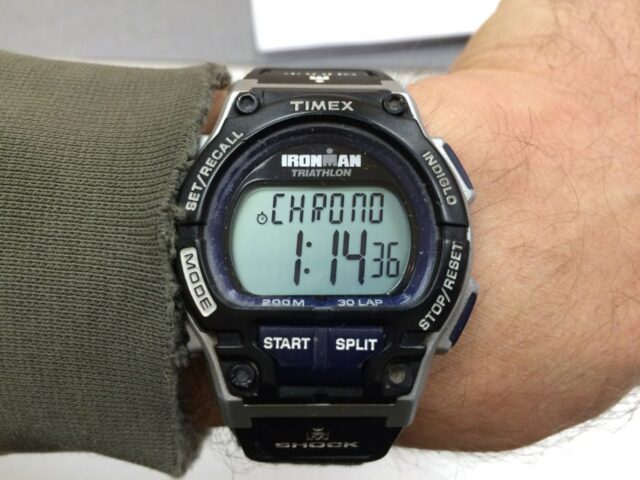 |
| It took me 1 hour and 14 minutes to replace the display on my 17″ MacBook Pro |
Amazon Associate Disclosure: As an Amazon Associate I earn from qualifying purchases. This means if you click on an affiliate link and purchase the item, I will receive an affiliate commission. The price of the item is the same whether it is an affiliate link or not. Regardless, I only recommend products or services I believe will add value to Share Your Repair readers. By using the affiliate links, you are helping support Share Your Repair, and I genuinely appreciate your support.
I have a Late-2011 MBP17. I’m not an expert at replacing things, aside from the RAM and HDD, which I’ve replaced with an SSD.
I go into System Profiler and it tells me I have no Facetime camera.
I’m guessing the first place to look would be those four cables, plus the one cable right next to the fan nearest the Superdrive/DataDoubler?
The iSight cable is noted in Step 7. It slides in place and is not easy to tell if it is fully in place because it does not really “snap” in place. It can be seen circled in red here:
I really appreciate you because I have to replace my glossy 17″ screen the Apple decided to put back on instead of my new matt screen they should have put back on. Also when I got my macbook back there was no airport card showing so I guess I need to do all this also.
Thanks for the comment Billy–I’m glad I was able to help. If your MacBook is a late-2011 model it is designed differently and has its antennas located in different places than the earlier models because they moved some of them up into the display.