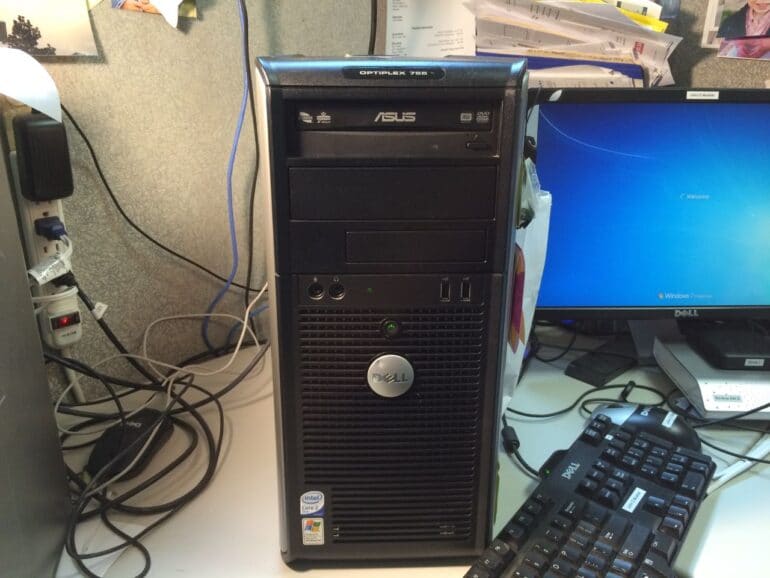
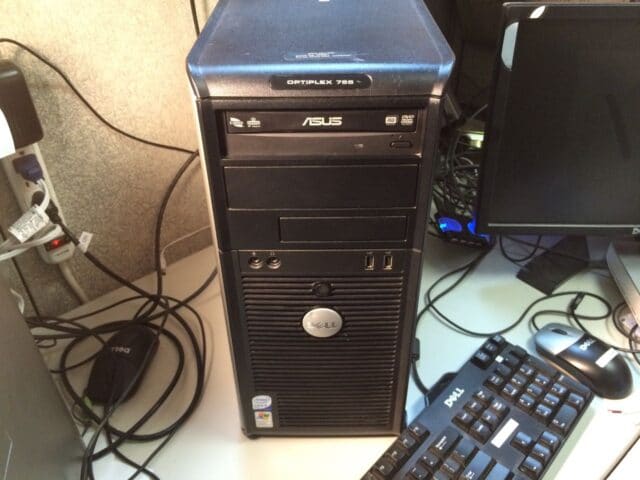
I came in to work and found my work PC making a strange noise the other morning. It didn’t sound like a hard drive going bad and so I figured it was one of the fans. Here is how I troubleshot and solved the problem…
How to Fix Dell Optiplex 755 Making a Grinding Noise
Parts Needed:
- Replacement Dell Power Supply Select Optiplex Desktops
(Model Number N305P-05, Ref. No. NPS-305HB A)
Tools Needed:
- Phillips Screwdriver
- 3M Electronics Service Vacuum Cleaner
(Optional, This vacuum is a safe way to clean the dust out of your electronics. The hose is grounded so you won’t accidentally discharge static electricity onto the electronics you are cleaning).
Step 1: Open the computer’s case to determine the source of the noise.
It most likely is a fan or a hard drive. I’ve had issues like this be as simple as an unused connector hanging down into the fan and all I had to do was move the connector out of the way. There is a latch on the back end of the top side that when slide toward the back of the machine, unlocks the right side:
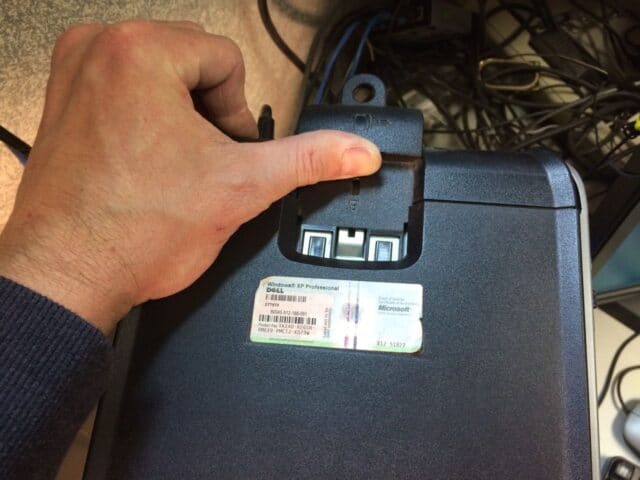 |
| Here I am unlatching the side |
The top edge of the right side will come lose and began to swing out. Open it up as far as shown below and then lift the side straight up and off the case.
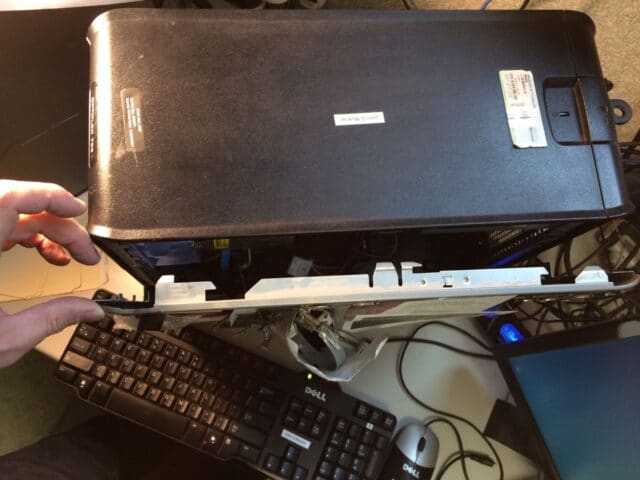 |
| Opening the case of a Dell Optiplex 755 |
 |
| Here the case side cover is off |
Step 2: Check each fan to see which one is making the noise.
There are only 2 fans inside a stock Dell Optiplex 755– the fan on the CPU heat sink and the fan on the power supply. Here is a video of me figuring out which one was making the noise:
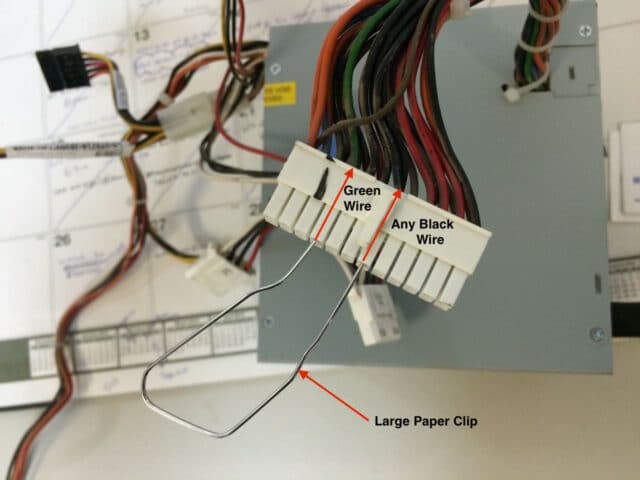 |
| Short the green wire to any black (ground) wire to fool an ATX power supply into powering up |
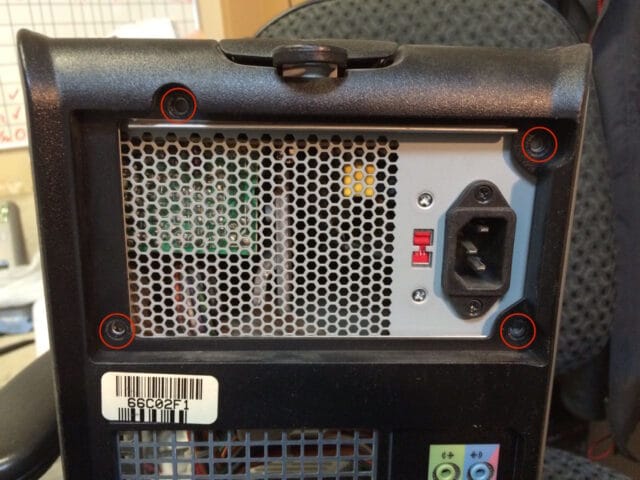
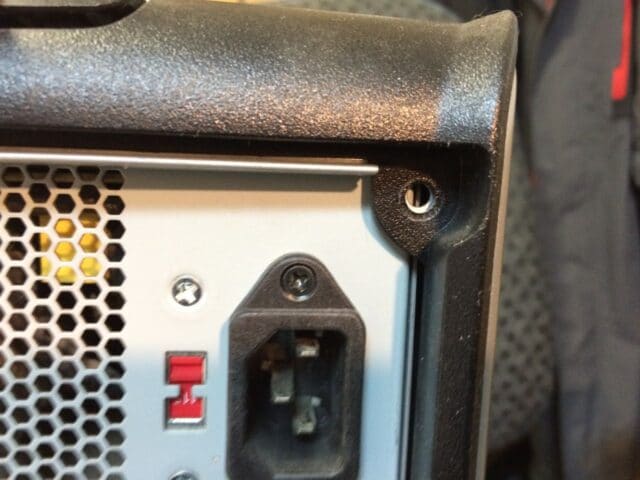
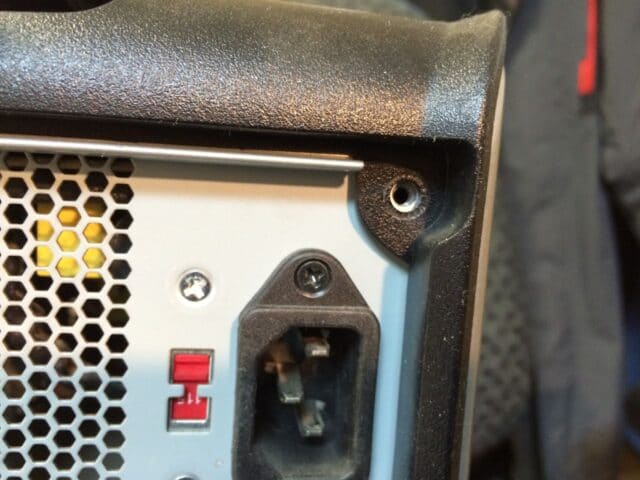
Step 3: Remove the 4 black phillips head screws from the back of the power supply.
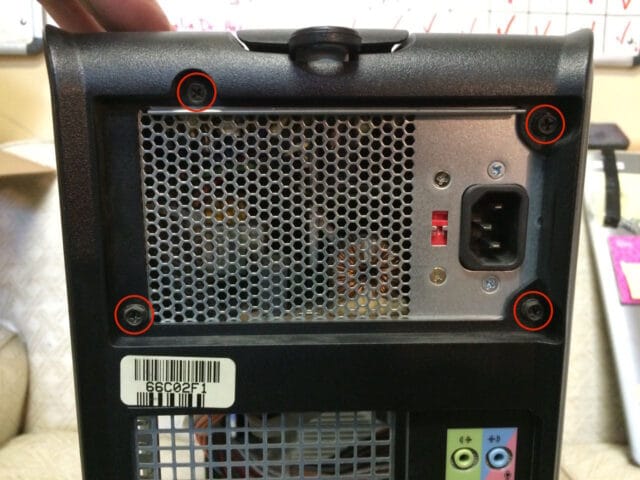 |
| Power Supply Screw Locations |
Step 4: Disconnect the optical drive power connector (if you have a CD or DVD drive).
It is circled in red in the picture below. It will pull straight out. There isn’t any locking device on that connector so it pulls out easily. You do not need to disconnect the SATA data cable (orange ribbon).
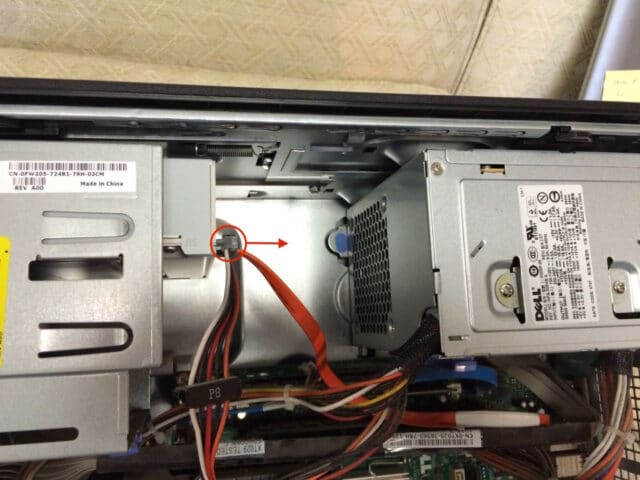 |
| Optical Drive power connector |
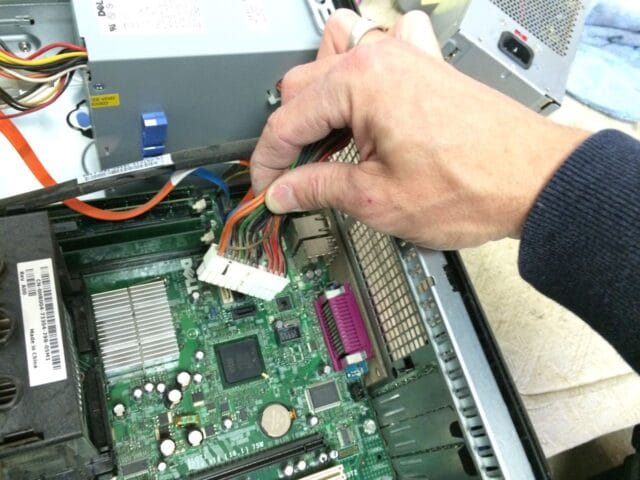
Step 5: Disconnect the main motherboard power connector.
Press the top of the tab on the side to unlatch the lock and pull up and rock back and forth (left to right) to ease it out of its socket.
 |
| Main motherboard power connector |
Here I am depressing the locking tab:
 |
| This is how you need to depress the latch to remove the main motherboard power connector |
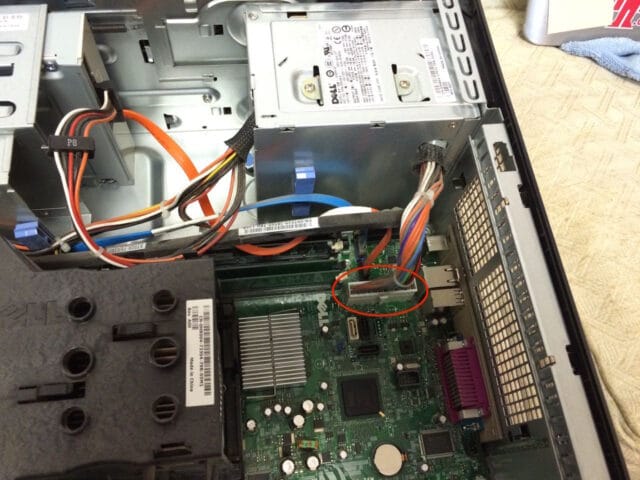
Step 6: Disconnect the hard disk power connector(s).
The hard drive power connectors are circled in red below. They are exactly like the optical drive connectors and pull straight off. You don’t need to disconnect the SATA data cable(s).
 |
| Location of Hard Drive Power Connectors |
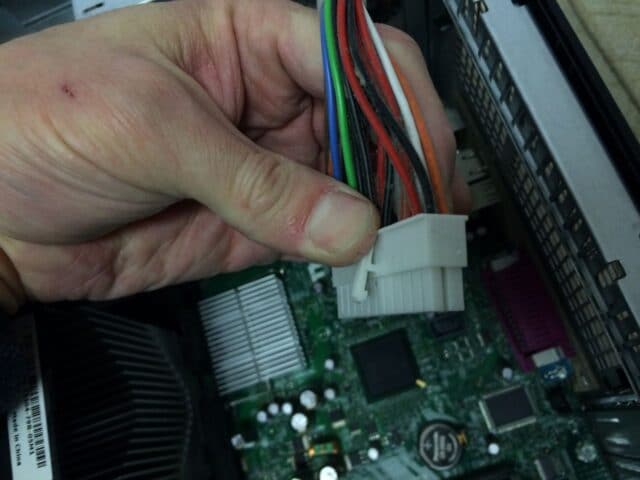
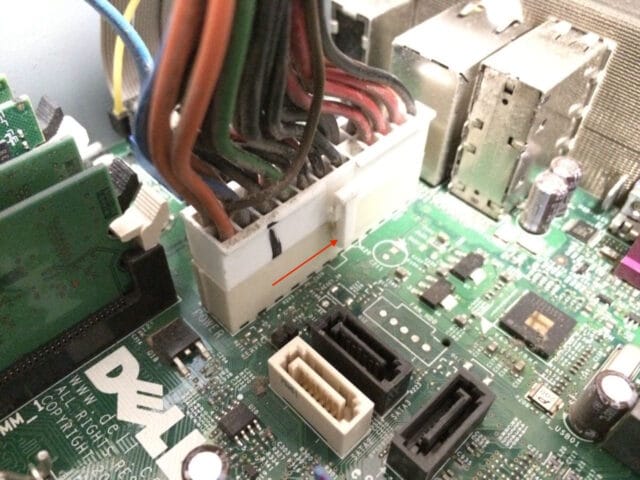
Step 7: Disconnect the secondary motherboard power connector.
Look for the yellow and black group of wires on the left end of where the RAM slots are located. The connector is square. There is a locking tab similar to the main motherboard power connector that you must depress in order to disconnect the connector.
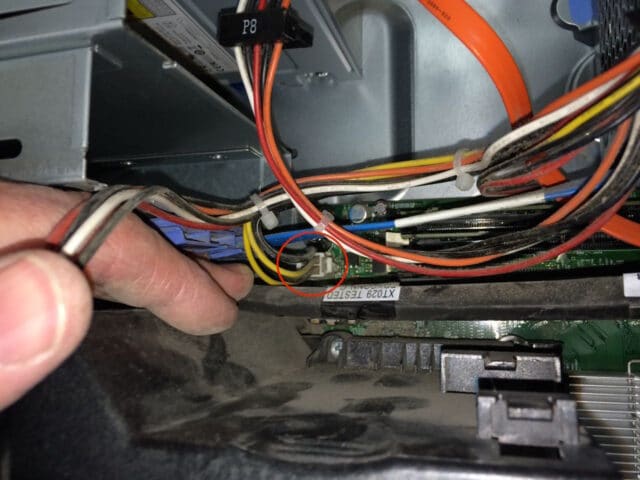 |
| Secondary motherboard power connector–to the left of the RAM slots |
Here is how the locking tab should be pressed in order to release it:
 |
| This is how you must squeeze the locking tab in order to release this connector |
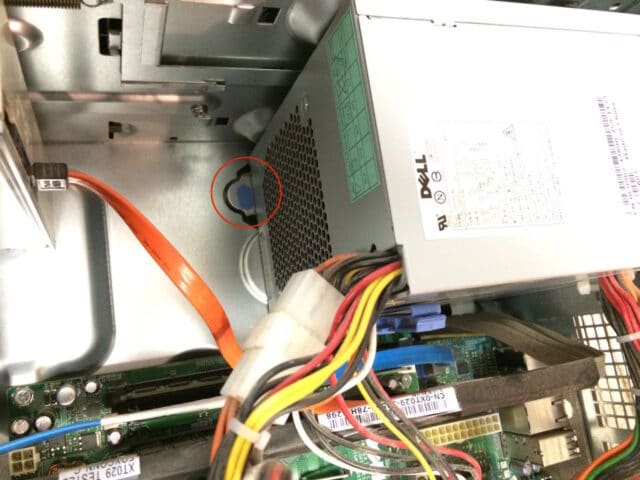
Step 8: Depress the power supply case locking tab and remove the power supply.
The tab is marked with blue paint:
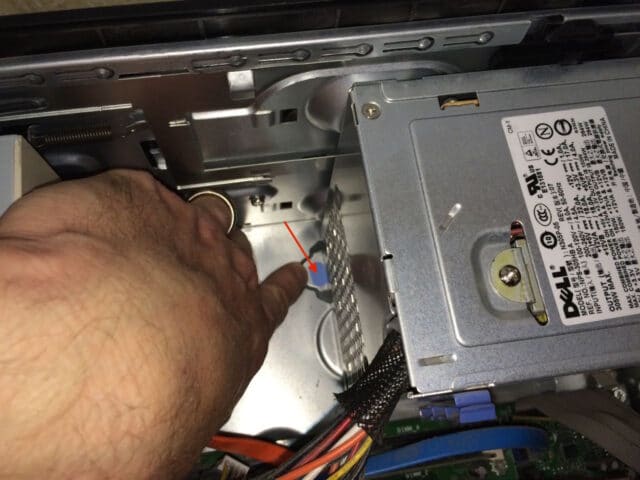 |
| Location of power supply locking tab, marked in light blue paint |
With the metal tab depressed, slide the power supply in (to the left in the picture above) and then you can lift it up and out of the case. Here’s a close-up of the label on the power supply:
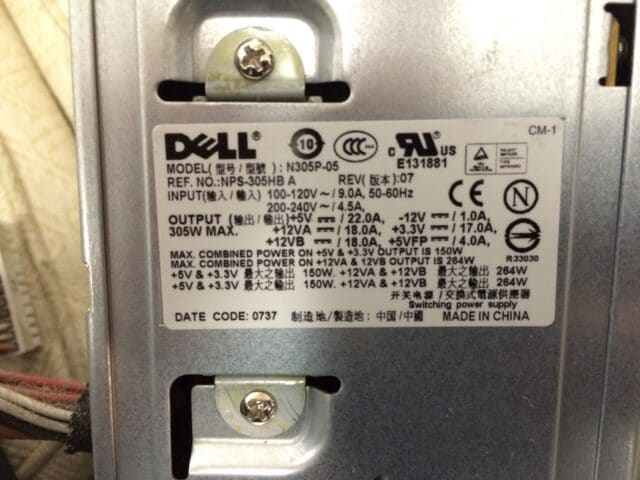 |
| Dell Optiplex 755 Power Supply Model N305P-05 305 Watt Max |
Step 9: While you have your computer open, clean out the dust.
I purchased a 3M Electronics Service Vacuum Cleaner many years ago after paying a service tech about what it cost to buy the vacuum to suck the toner out of a copier we had spilled toner in. I don’t like paying someone to do what I can do myself so I purchased this vacuum and have used it a lot since then. A problem with vacuums is that the hose will build up a static charge that can be discharged on whatever you touch it to and the electronic components on the motherboard of a computer are very sensitive to static discharge so you don’t want to ever use a standard vacuum on them because you can fry one of the components and render the entire motherboard useless. I highly recommend the 3M Electronics Service Vacuum Cleaner
.
Step 10: Lock the power supply back in.
Insert the new power supply and slide it to there right (towards the back of the unit) to where the tab you pressed in step 8 locks the power supply into place.
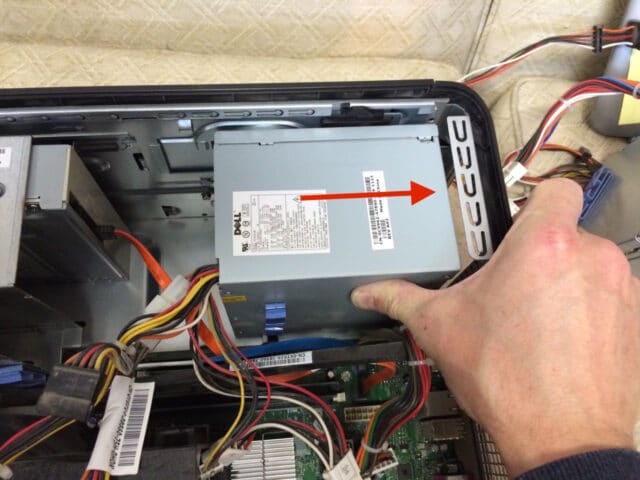 |
| Sliding the new power supply into place |
Here the locking tab has locked the power supply in place:
 |
| New power supply locked into place |
Step 11: Reinstall the 4 black screws into the back of the power supply.
 |
| Power Supply screw locations |
 |
| Screw hole wasn’t lined up at first |
I needed to reach inside the case and lift up the power supply to get the screw holes to line up:
 |
| Power supply screw hole lined up |
Step 12: Reconnect the main motherboard power connector.
Press it down until it clicks.
 |
| Reconnecting the main motherboard power connector |
Here’s a close up of the reinstalled connector, locked down:
 |
| Main motherboard power connector reconnected |
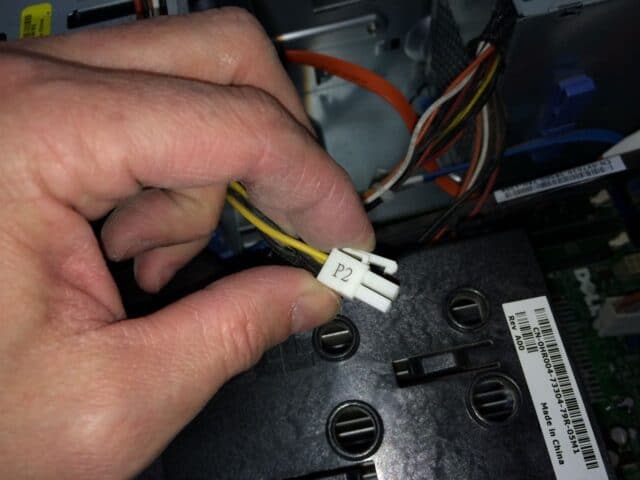
Step 13: Reconnect the secondary motherboard power connector.
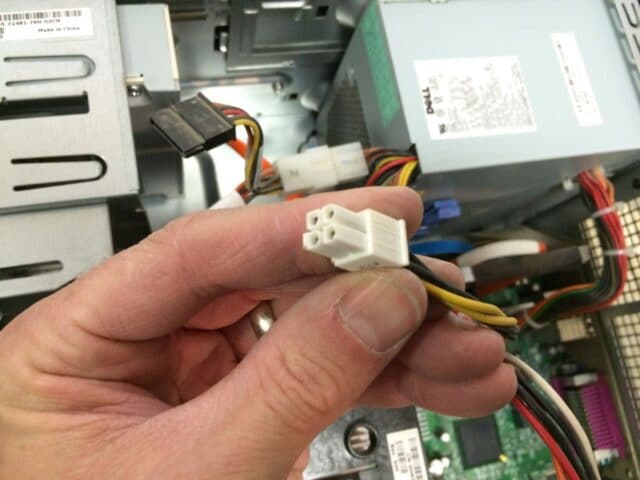 |
| Shape of secondary motherboard power connector |
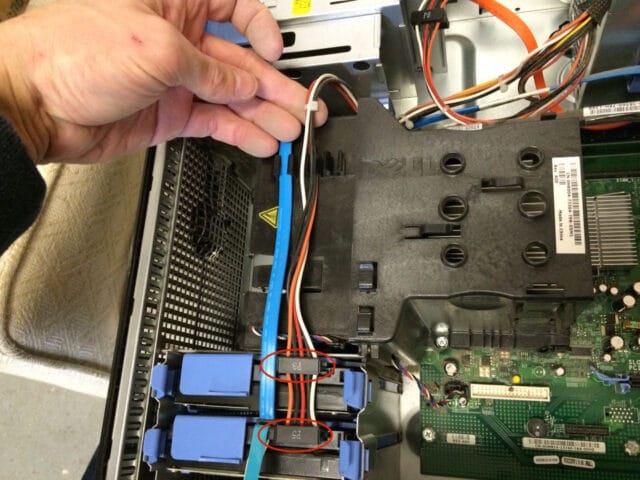
Step 14: Run the hard drive wires in their channels on the CPU heat sink housing and then reconnect the hard drive(s).
Make sure the SATA data cables are connected.
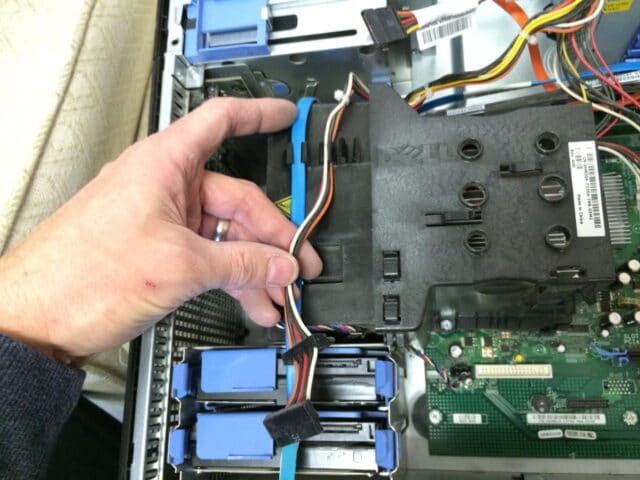 |
| Re-inserting the hard drive power wiring into the channel of the CPU heat sink assembly |
Step 15: Reconnect the Optical drive.
Make sure the data cable is still fully connected.
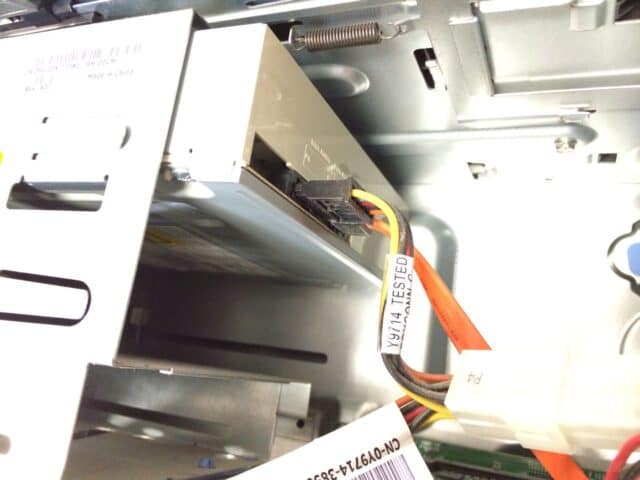 |
| Optical Drive reconnected |
Step 16: Secure any unused power connectors.
If there are any extra power connectors then tuck them under one of the extra tabs on the CPU heat sink housing tabs so that they don’t find their way into the CPU fan. The top right one circled holds the connector and the lower one just clips on the wire.
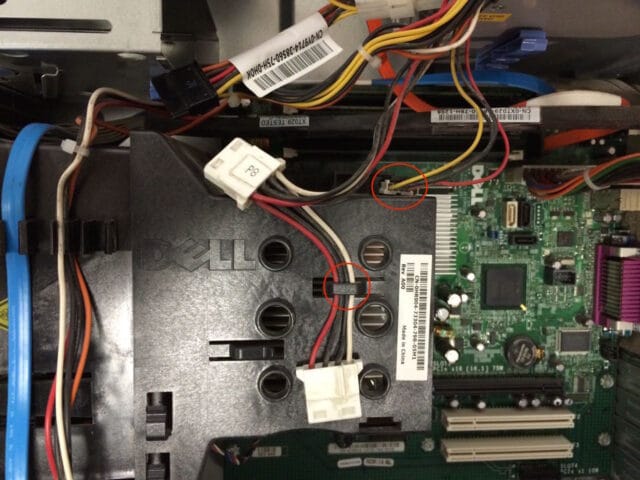 |
| The two extra power connectors secured |
Step 17: Reinstall the case side.
Set the bottom edge onto the tabs that stick up and then press the top edge straight in to lock it tight. Now you should be done.
 |
| Dell Optiplex 755 Repaired |
Amazon Associate Disclosure: As an Amazon Associate I earn from qualifying purchases. This means if you click on an affiliate link and purchase the item, I will receive an affiliate commission. The price of the item is the same whether it is an affiliate link or not. Regardless, I only recommend products or services I believe will add value to Share Your Repair readers. By using the affiliate links, you are helping support Share Your Repair, and I genuinely appreciate your support.