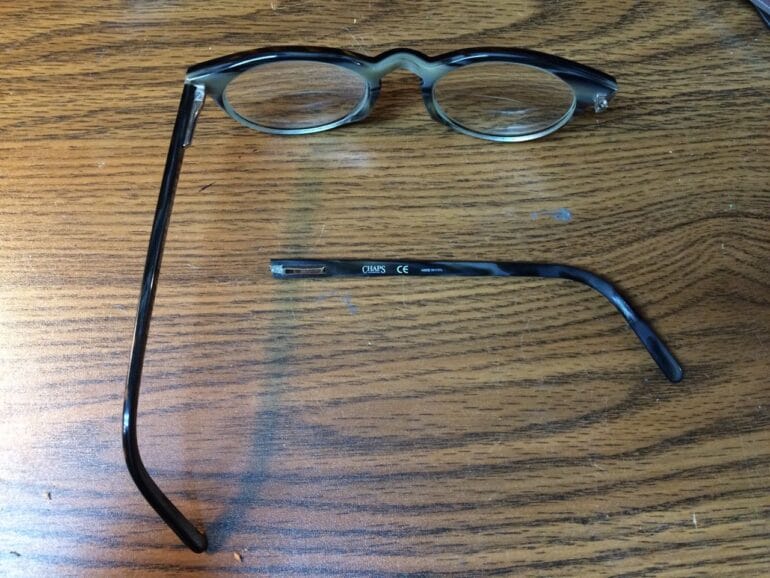
A coworker of mine asked me if I could take a look at a $200+ pair of glasses that they had accidentally smashed and broken the arm off. My first thought was to use some JB Weld on them and build them up but after looking at them I thought that there was a possibility to use a spring I had harvested from a Brother fuser unit I had disassembled (just to see what was inside!) Here’s how I put these glasses back on the face of my friend…
How to Repair Glasses With a Broken Arm
Tools Needed:
Parts Needed:
Step 1: Find a suitable spring.
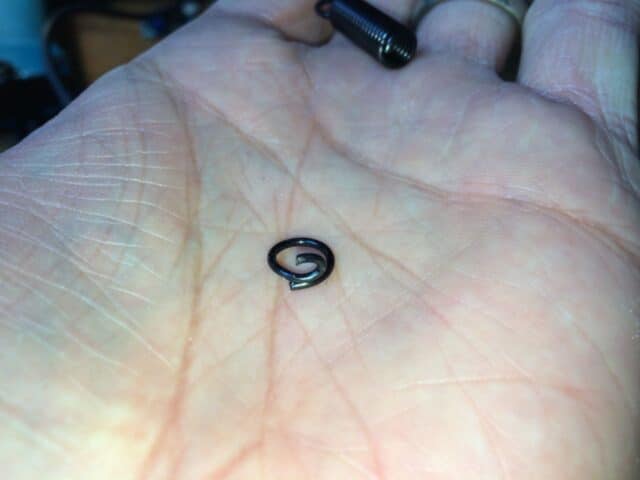
The spring needed to be thick enough but not too thick and the “loop” of the spring needed to be the right size. Here’s the one I harvested from a Brother fuser:
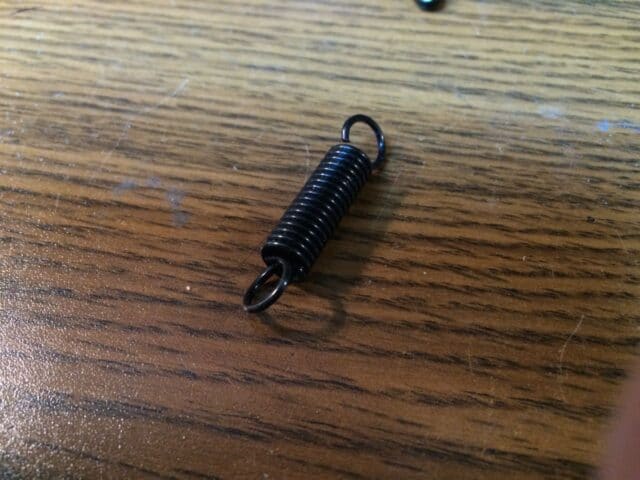 |
| The spring I used to fix a pair of broken glasses |
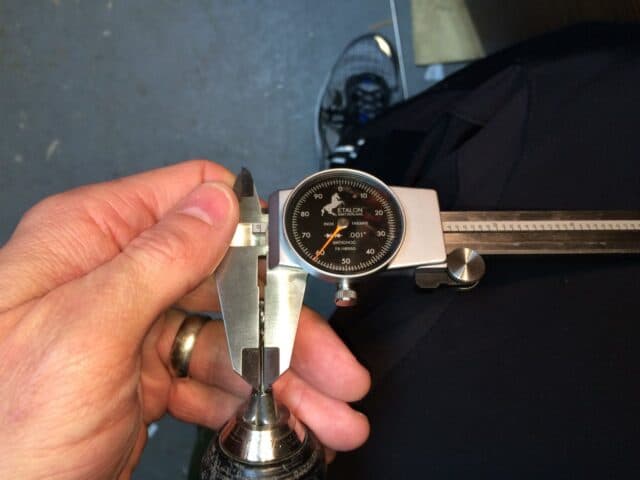
The wire thickness was .050 inches and loop on the end measured .349 inches on the outside:
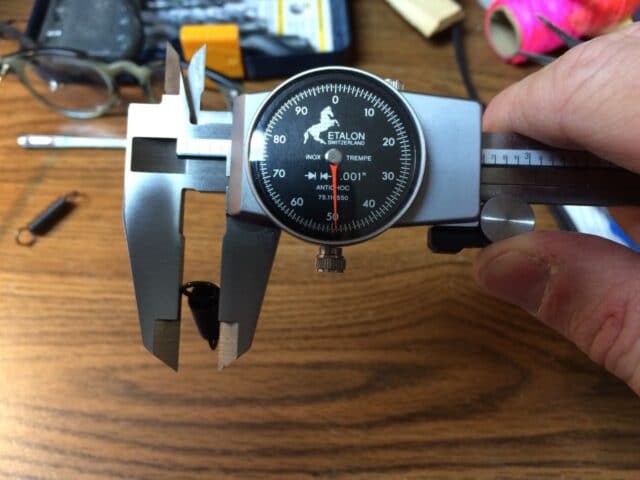 |
| The loop was .349 inches wide |
This spring seemed to be a perfect fit for these glasses because of the amount of material on the arm and the hole size on the main frames.
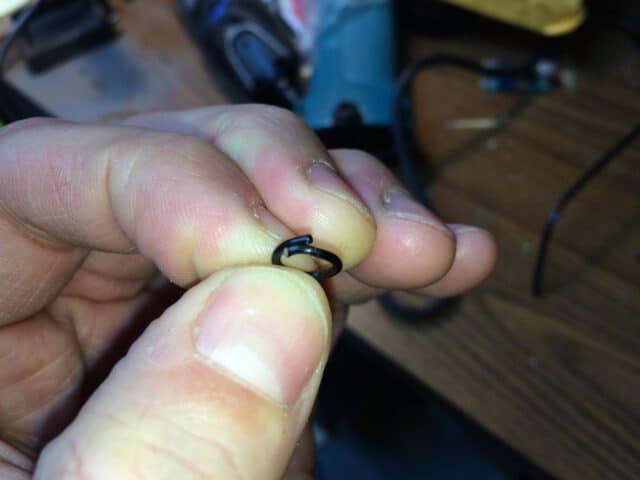
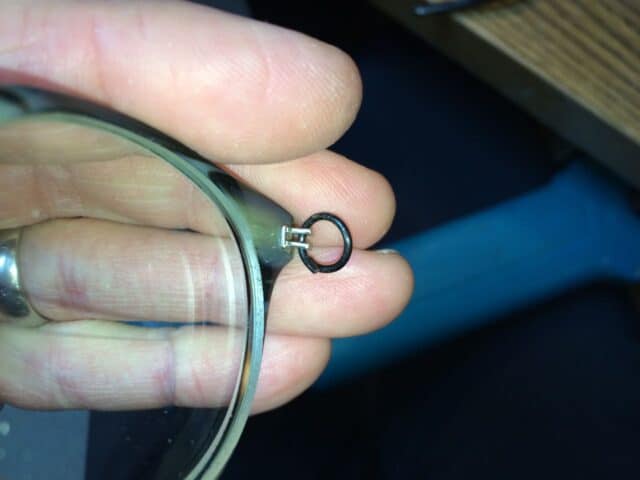
Step 2: Cut off the loop on the end of the spring. Important: You should wear safety glasses when cutting springs.
You could just cut one coil of the spring as well if your spring doesn’t have loops on the end like mine did. This is where I wanted to cut the spring:
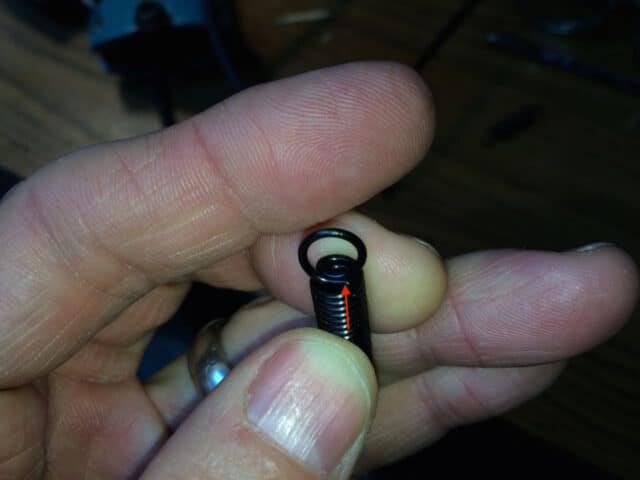 |
| Cut the spring a so the loop overlaps a bit |
I put it in a vice to get at where I wanted to cut:
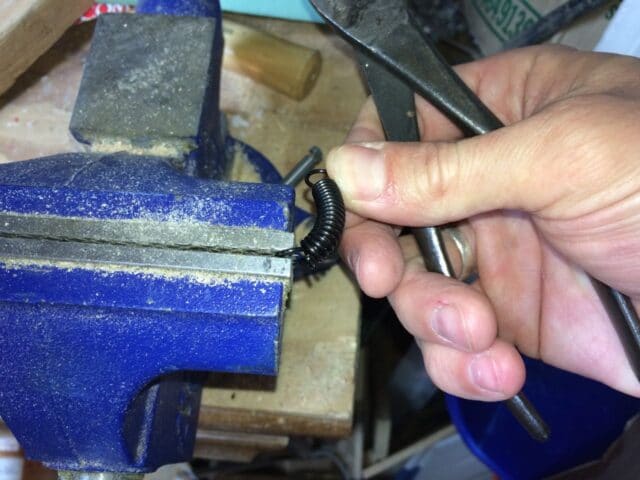 |
| Using a vice to hold the spring while cutting it |
I used a 30-year-old heavy pair of wire cutters that were originally my father’s. They are so heavy I can cut drywall screws with them without notching the cutters.
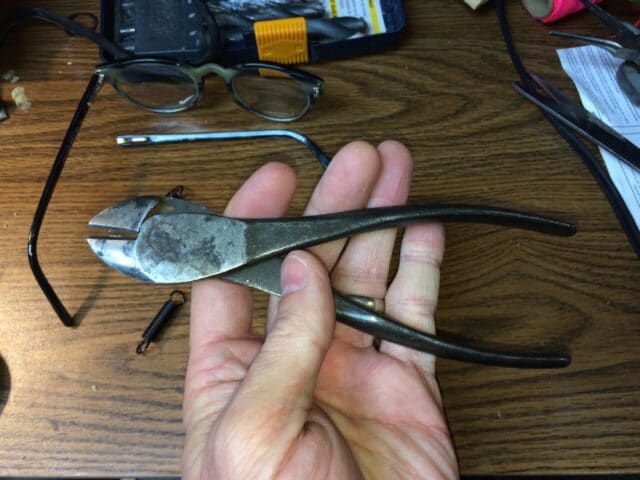 |
| Heavy Wire Cutter |
I opted to cut the spring a little long at first:
 |
| Spring Cut Off from Main Spring |
I then cut it again to trim it to length:
 |
| Spring Cut to Length |
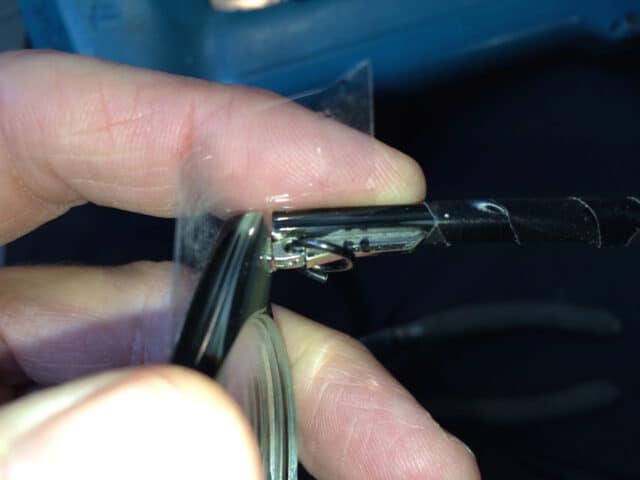
Step 3: Feed the spring through the hole on the frame of the glasses.
I tried to feed the spring through the hole on the glasses but then discovered that the second hole, which is threaded for the screw that used to hold the glasses together, was too small for the spring to fit:
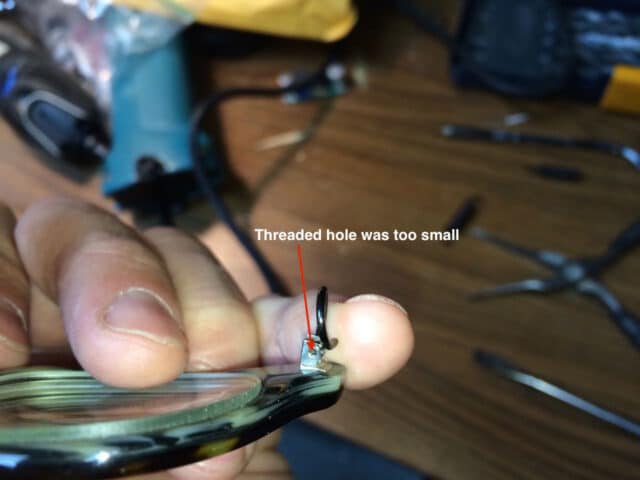 |
| The lower threaded hole on the frames was too small for the spring to fit through |
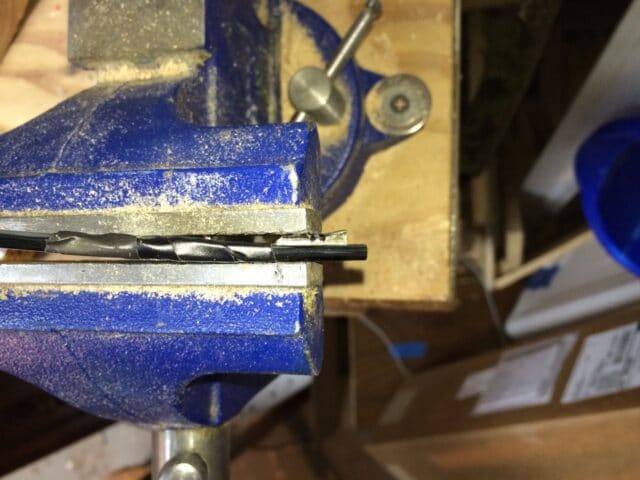
I then used some very small drill bits, made for my Dremel tool, and drilled out the second hole. I don’t have have a chuck that is small enough for my Dremel to fit these bits so I had to put it in my Makita drill:
 |
| .60-inch bit in my Makita Cordless Drill |
After drilling out the second hole I was able to feed the spring through the holes:
 |
| Spring fed through holes on the frames |
Step 4: Drill a hole in the arm for the spring to fit through.
After I had fed the spring through the hole in the frames I could line everything up to approximate the location I should drill the hole on the metal on the arm. I held the arm in place with a piece of tape and then approximated the location of the hole.
 |
| Marking the location of the hole on the arm |
I wanted the spring to be tight, so the glasses were held together but I didn’t want it to be too tight. I really just had to make a judgment and make a guess at where to drill the hole. I put some electrical tape on the arm to keep from scratching it up too much and put it in a vice to drill the hole:
 |
| Drilling a hole in the arm |
Make sure to wear safety glasses when drilling too. This is where I ended up drilling the hole, as close to the plastic frame as possible:
 |
| Hole drilled in metal part of arm |
Step 5: Feed the spring through the hole in the arm.
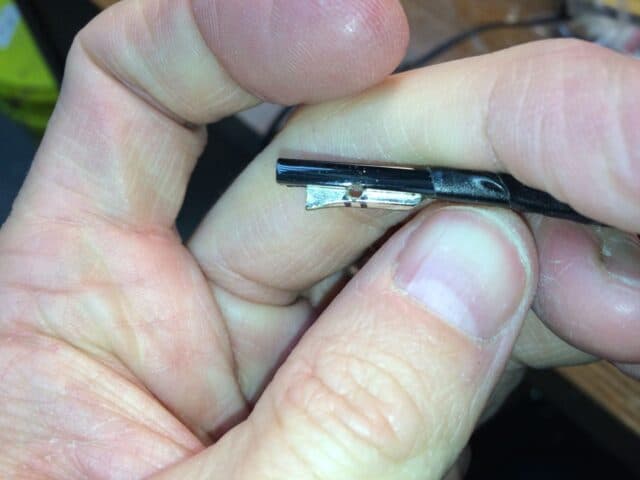
This was probably the most challenging part because the spring was “closed” and I didn’t want to scratch up the glasses while I was doing this. It was a bit like putting keys on a very firm keychain but everything was smaller. I opted to slip a flat head screw driver into the spring to pry it open:
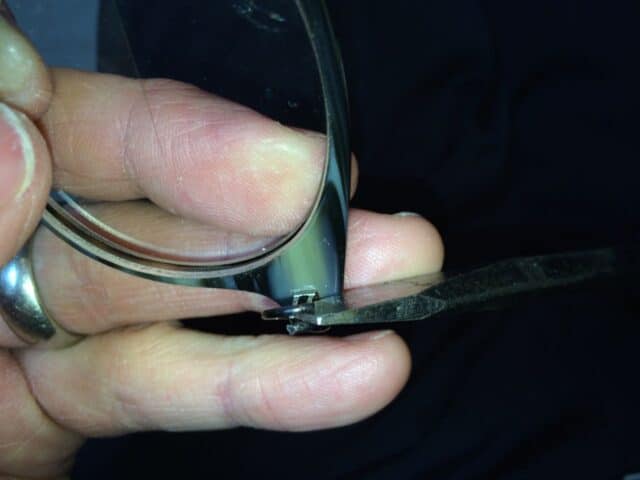 |
| Using a flat-head screw driver to open the spring |
This is what they looked like once I got them re-assembled:
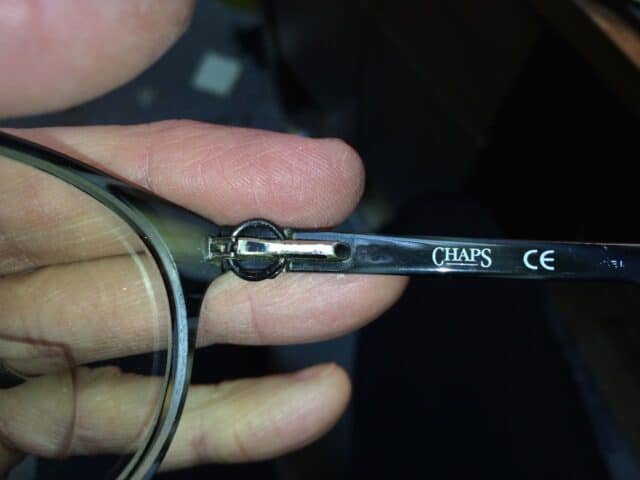 |
| Glasses Reassembled!! |
And they even fold back up and go in the case:
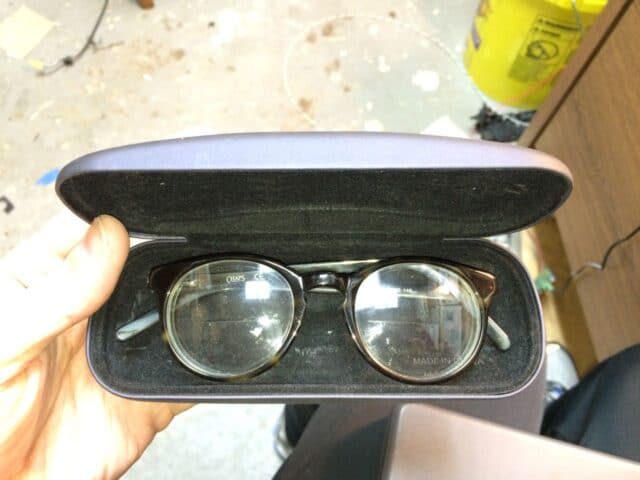 |
| Repaired Glasses Folded Back Up and in the Case |
And here they are on display on one happy customer (and you can hardly see the spring):
 |
| Repaired glasses on display |
Amazon Associate Disclosure: As an Amazon Associate I earn from qualifying purchases. This means if you click on an affiliate link and purchase the item, I will receive an affiliate commission. The price of the item is the same whether it is an affiliate link or not. Regardless, I only recommend products or services I believe will add value to Share Your Repair readers. By using the affiliate links, you are helping support Share Your Repair, and I genuinely appreciate your support.
Related
(required to fit tiny bits in Dremel)

I have a very old pair of Rayban sunglasses and the arm snapped off just beyond where the Rayban is written on the arm. I wondered if there would be an appropriate glue to use, the lenses are in perfect shape!
I don’t think you can glue the frames as there is so much stress in such a small area. Sorry I can’t be more help.