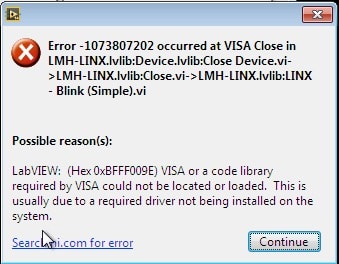
I’ve been working on my Sparkfun Inventor’s kit and have been running into all kind of problems in getting it set up. My experience has deviated from the instructional videos they offer so I’ve had to solve a bunch of problems. The latest is this error I get when I try running their Blink Example:
LabVIEW Error 1073807202
After typing in the Serial Port COM7 and clicking the green button, I get the error:
Error Text:
Error – 1073807202 occurred at VISA Close in LMH-LINX.lvlib:Device.lvlib:Close Device.vi->LMH-LINX.lvlib:Close.vi->LMH-LINX.lvlib:LINX – Blink (Simple).vi
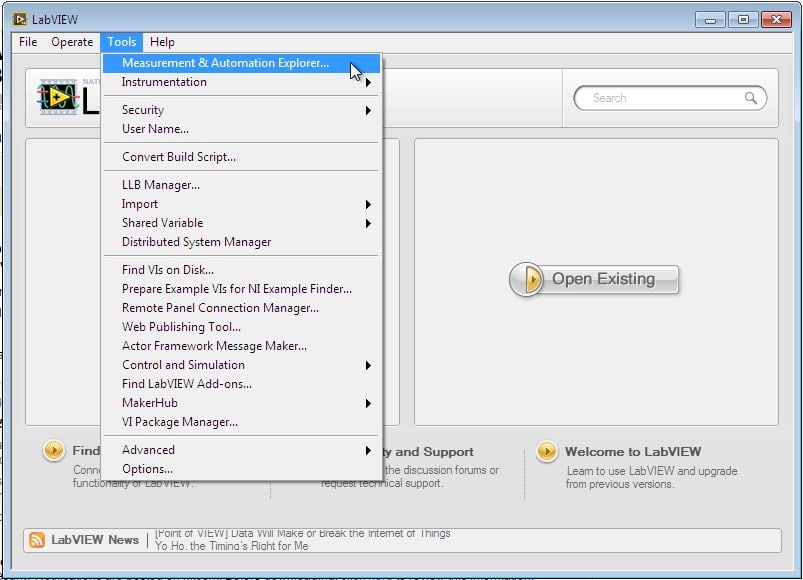
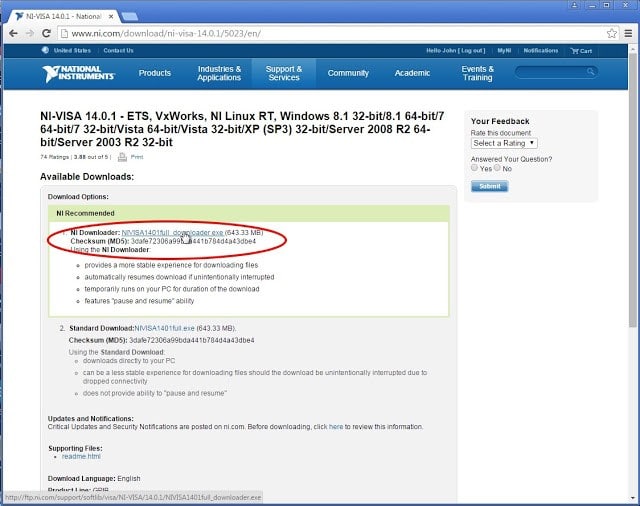
I did some research and finally figured out that NI-VISA wasn’t installed at all on my computer. You can check to see if it is installed by launching LabVIEW and then clicking on Tools > Measurement & Automation Explorer…
LabVIEW-Measurement & Automation Explorer
In the Measurement & Automation Explorer expand the Software section in the left column:
LabVIEW-Measurement & Automation Explorer
There is no NI-VISA installed! I solved this problem and have the step-by-step solution for you too…
How to Fix LabVIEW Error 1073807202 When Running Sparkfun RedBoard Manual Blink Example
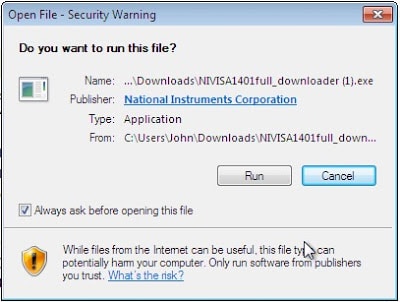
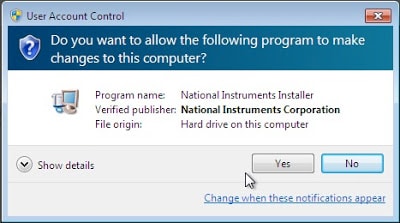
You’ll then get a “User Account Control” message. Click “Yes.”
Click Yes to allow the installer to run
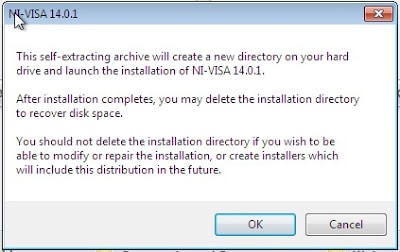
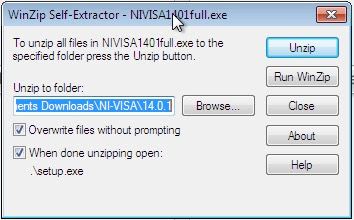
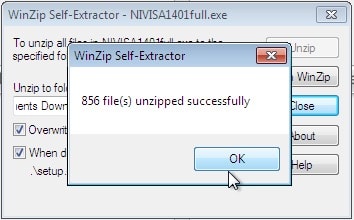
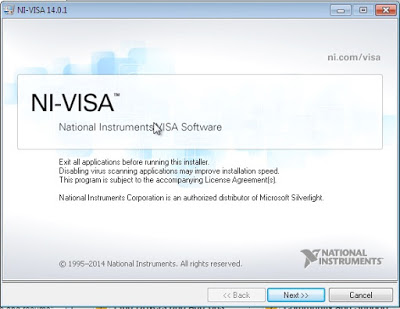
Step 9: Go through the NI-VISA Installation.
At the NI-VISA installation window click “Next >>”
Initial NI-VISA Installation Window–Click Next >>
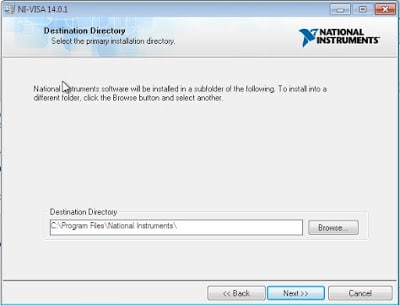
You can modify the Destination Directory or just click Next >>. I would suggest just clicking Next unless you are installing software to a different drive:
Click Next to begin the installation
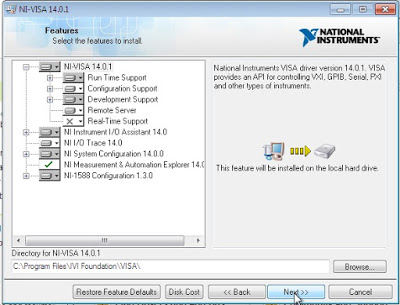
If you want to adjust the Features to install change them in this window and then click “Next >>”
NI-VISA Features
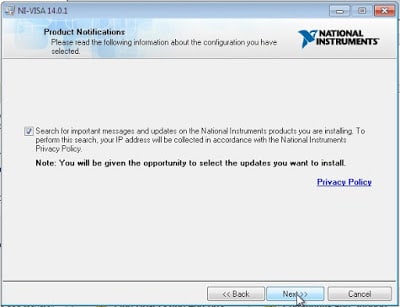
You will then get the option to unselect the “Search for important messages…” option, then click “Next >>”
Leave the check-box checked to receive product notifications–Click Next
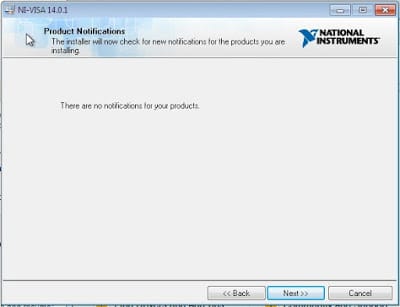
You will then either find out any new product notifications or see that there are no notifications for your products like I did:
No product notifications– Click Next >>
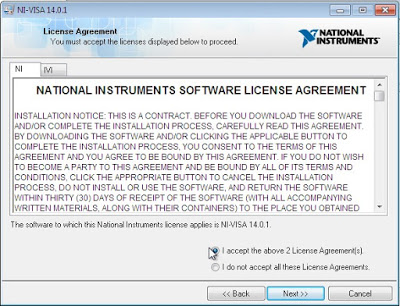
Accept the 2 License Agreements and then click “Next >>”
Accept the 2 License Agreement(s) and click Next >>
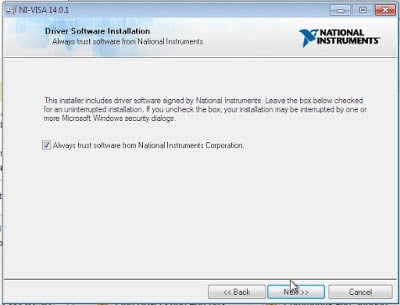
Check the “Always trust software from National Instruments Corporation” checkbox and click Next >>
Check the box to always trust National Instruments Corporation and then click Next >>
Click Next to begin the installation of NI-VISA:
Click Next >> to begin the installation of NI-VISA
If everything goes well you’ll get the “Installation complete!” window. Click Next >>
NI-VISA Installation Complete
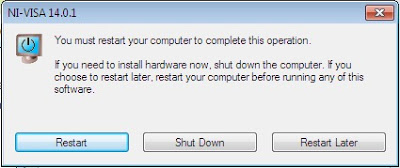
You’ll then be asked to Restart your computer. Click the “Restart” button:
Click “Restart”
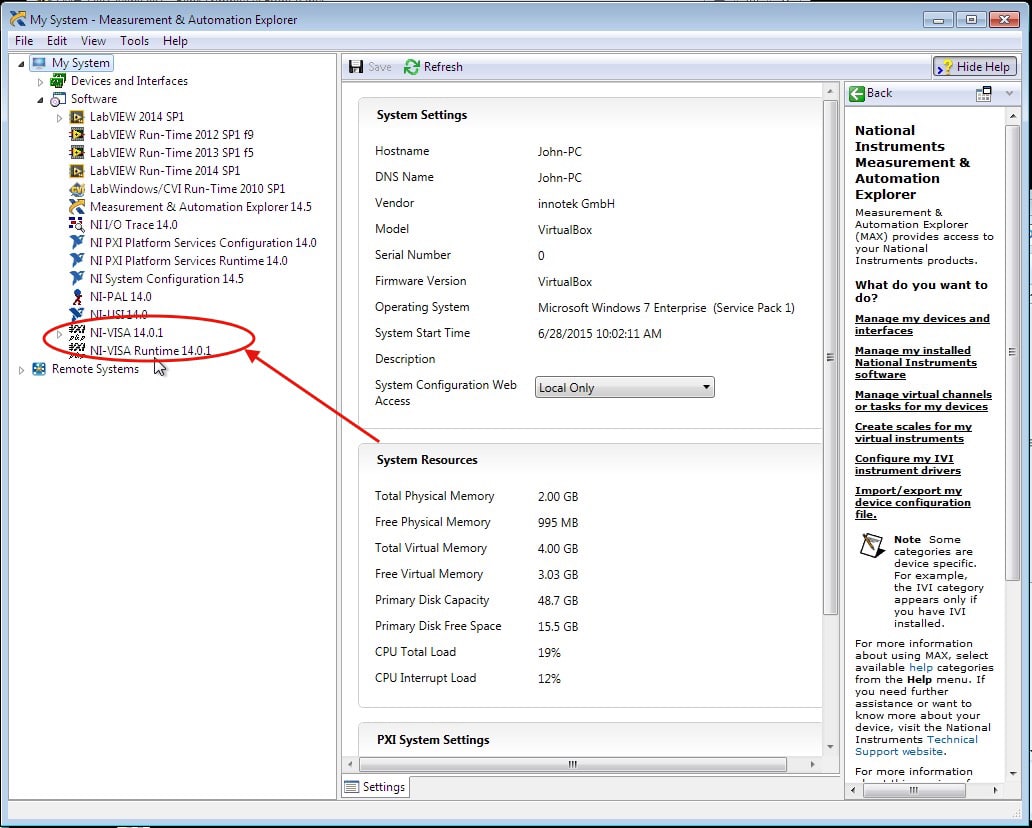
You can now relaunch the Measurement & Automation Explorer by selecting Tools > Measurement & Automation Explorer from the LabVIEW menu. Then expand the Software section in the left column an see that it’s been installed:
LabVIEW Measurement and Automation Explorer-NI-VISA Now Installed
Step 10: Open the Manual Blink .vi file Example and try it again.
You can find the Blink Example file on your hard drive in the following location: C:Program FilesNational InstrumentsLabVIEW 2014examplesMakerHubLINXLINX – Blink (Simple).vi
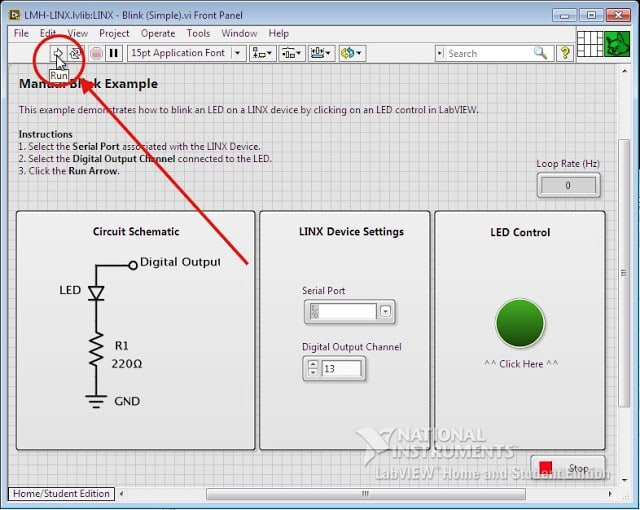
Step 11: Manually enter the COM port and make sure Digital Output Channel is set to 13.
Step 12: Click the right-pointing Run arrow to run the program:
Click the Run Arrow
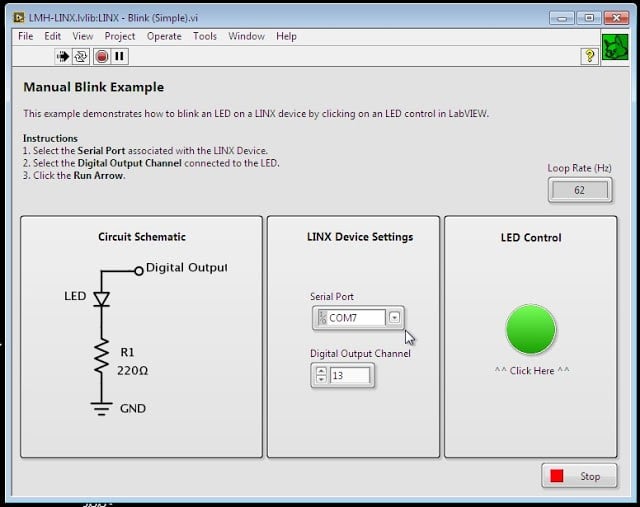
Step 13: Click the green circle to turn on the blue LED on the RedBoard.
The green circle will light up in the LabView window when the button has been clicked:
The green circle changes to a brighter shade of Green when the LED is on
And the LED on the RedBoard will come on (by pin 13):
The Blue LED light will come on
If your blue LED comes on you have installed NI-VISA correctly!
Amazon Associate Disclosure: As an Amazon Associate I earn from qualifying purchases. This means if you click on an affiliate link and purchase the item, I will receive an affiliate commission. The price of the item is the same whether it is an affiliate link or not. Regardless, I only recommend products or services I believe will add value to Share Your Repair readers. By using the affiliate links, you are helping support Share Your Repair, and I genuinely appreciate your support.