How to Resize VirtualBox HD on a Mac
- MacBook Pro running OS 10.10.3 Yosemite
- Oracle VirtualBox 4.3X
- Windows 7
Step 1: Shut down your VirtualBox operating system.
It must be listed as “Powered Off” and cannot be suspended/paused:
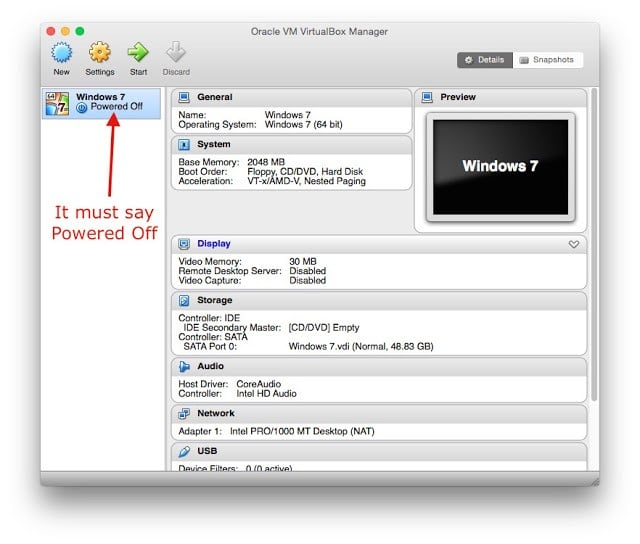 |
| Your virtual machine must say “Powered Off” in the VM Machine list of VirtualBox |
Step 2: Launch Terminal on your Mac.
You can easily launch it by clicking on the spotlight icon in the top right corner of the screen and type “Terminal” and then press the return key. This is what it looks like in OS 10.10.3 Yosemite:
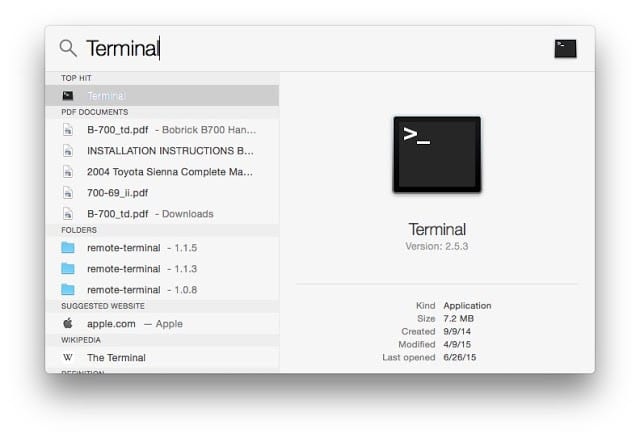 |
| Launch Terminal via Spotlight |
Step 3: Run a Terminal command to resize the your .vdi file.
In Terminal you need to type (or copy and paste) the following command:
VBoxManage modifyhd <virtual-drive-location> –resize megabytes
Where <virtual-drive-location> is the path where your .vdi VirtualBox virtual drive is located and megabytes is the new (larger) size of the drive in MB. For me this is exactly what I had to run (for a 50,000/50Gig drive):
VBoxManage modifyhd /Volumes/Mac 750G SSD/VirtualBox VMs/Windows 7/Windows 7.vdi –resize 50000
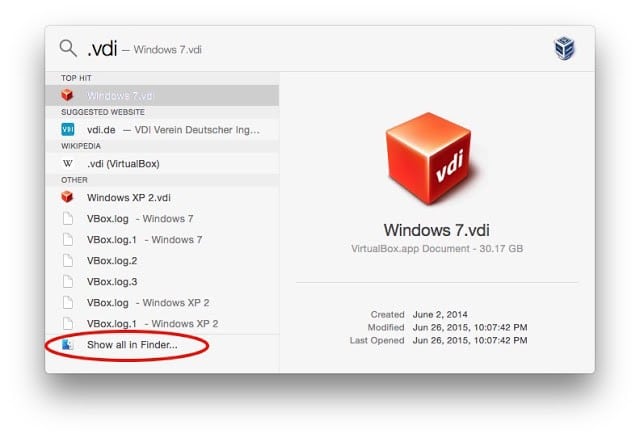
The easiest way to put the path of your virtual drive is to first type the following in Terminal (with a space after modifyhd):
VBoxManage modifyhd
… and then do a search in spotlight for .vdi to find your virtual drive. Scroll to the bottom of the list and double-click on “Show in Finder…”
 |
| Open up your Virtual drive in the Finder by searching in Spotlight |
Then drag and drop the file into the Terminal window:
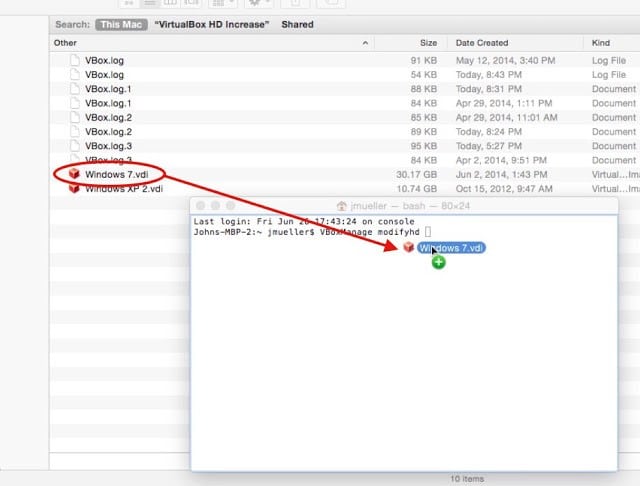 |
| Drag-and-drop the virtual drive into the terminal window to “paste” the drive path into the command line |
Then you’ll have something like this:
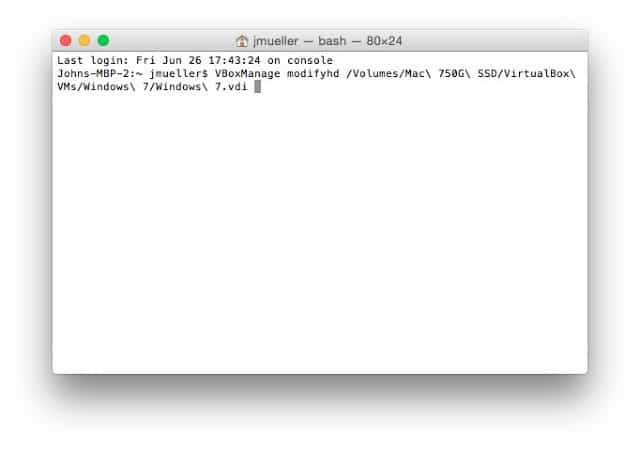 |
| Here the path has been pasted into the command line |
Then finish typing the remainder of the command by adding the following text:
–resize 50000
Again you’ll have something like this (all one string):
VBoxManage modifyhd /Volumes/Mac 750G SSD/VirtualBox VMs/Windows 7/Windows 7.vdi –resize 50000
Then press the “return” key. This was one step at which I ran into problems in following other’s instructions. Make sure to type TWO dashes before resize or you will get this error:
Syntax error: –resize: RTGetOpt: Command line option has argument with bad form at.
If you are successful you will see 0%… 10%… 20%… 30%… 40%… 50%… 60%… 70%… 80%… 90%… 100% as seen below in the red box:
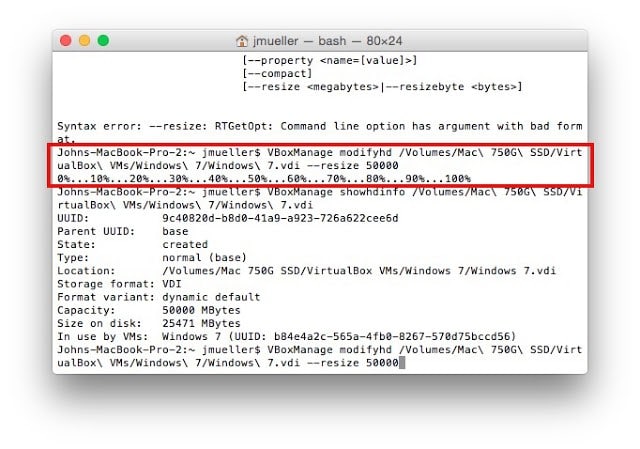 |
| Resize successful |
After you run the resize command you can see the Capacity listed in the Terminal screenshot above as 50000 MBytes. If you open up the drive’s preferences in VirtualBox you’ll see the increased size:
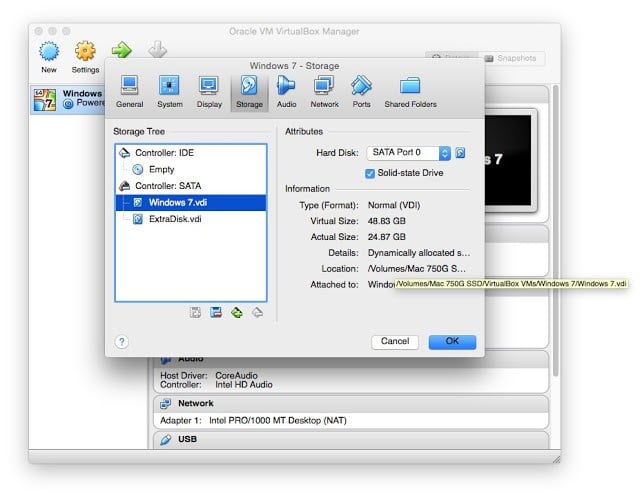 |
| The newly resized virtual drive is reported in the Preferences |
But if run your virtual machine you still won’t get that extra space!! Read on to find out how to fix that.
Step 4: Enlarge the partition size of the C drive in Windows.
Earlier you increased the allocated space for the virtual drive but you need to inform Windows of this by adjusting the partition size. Launch the virtual machine and click on the Start menu, in the “Search programs and files” box type compmgmt.msc, and then click OK.
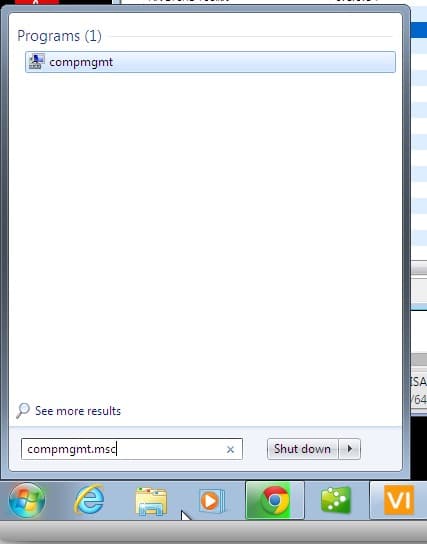 |
| Launch the Computer Management Application |
This will bring up the Computer Management window. Click on “Disk Management” under Storage in the left column:
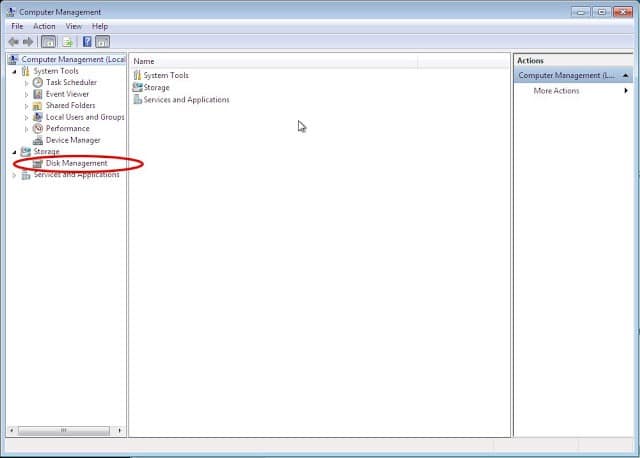 |
| Windows 7 Computer Management Window – Click on “Disk Management” in left column |
You will see something like this example image below (harvested off of google image search because I forgot to get a screenshot of it):
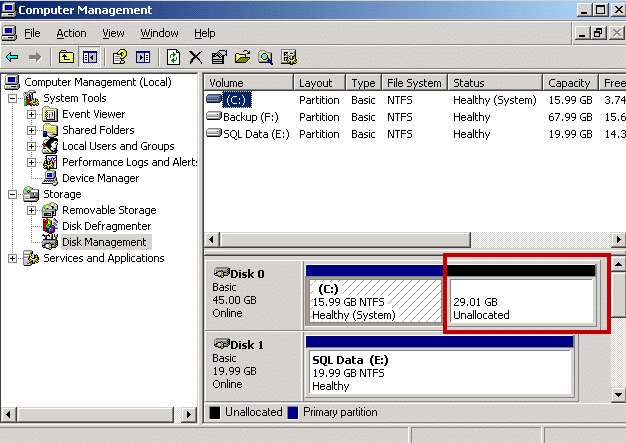 |
| Unallocated space in red box |
Click on the C drive to the right of Disk 0 in the middle window and then click on Action (top menu) > All Tasks > Extent Volume… Note, the picture below was taken after I enlarged the partition so it won’t match what you have at this point (you’ll have unallocated space showing to the right of the C section like the image above):
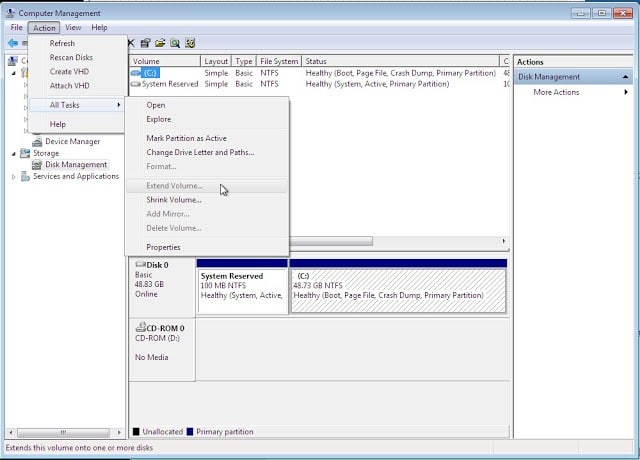 |
| Click on Action > All Tasks > Extend Volume |
Click Next and a Wizard window will pop up. Keep clicking Next until it finishes. You’ll then have enlarged the partition to take up the extra space you created above:
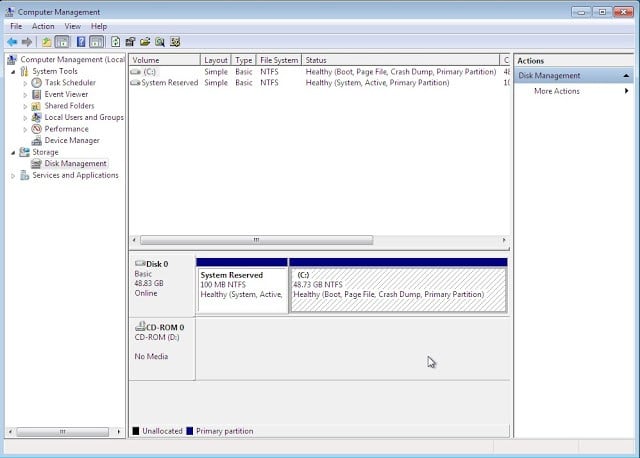 |
| The C drive now takes up all the available space |
And once you reboot the drive you’ll see the free space:
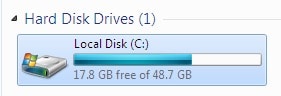
You’ve now enlarged your virtual drive!
Amazon Associate Disclosure: As an Amazon Associate I earn from qualifying purchases. This means if you click on an affiliate link and purchase the item, I will receive an affiliate commission. The price of the item is the same whether it is an affiliate link or not. Regardless, I only recommend products or services I believe will add value to Share Your Repair readers. By using the affiliate links, you are helping support Share Your Repair, and I genuinely appreciate your support.