Fix Bobrick B-700 Hand Dryer That Turns On and Off Randomly
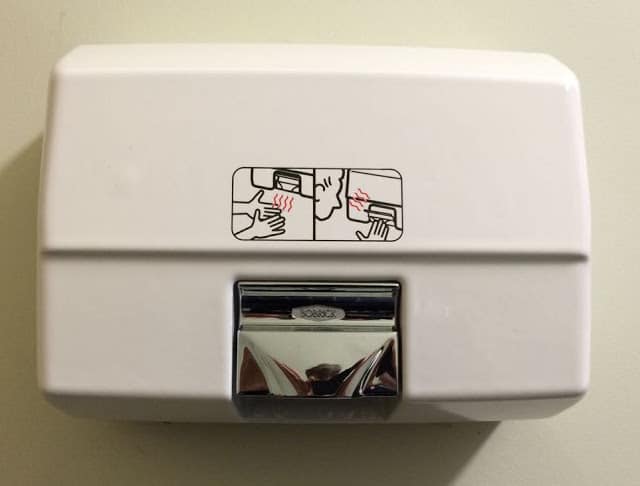
- Bobrick 700 Cast Iron AirCraft Surface-Mounted Automatic Hand Dryer, White Vitreous Enamel Finish, 115V
(buy it at the link if you don’t want to repair yours or you cannot repair it)
Tools Needed:
- 5/32″ allen bit and driver
- Phillips-Head Screw Driver
- Fluke 177 True RMS Digital Multimeter with Backlight
(the tool I used to verify that the power was off)
- Flush Cutter Wire Nipper
(what I used to cut off the zip tie)
- Hot Glue Gun
(to tack the circuit board back down)
Parts Needed
A word of caution–you could electrocute yourself working on these hand dryers. You could be electrocuted and die if you are not careful when working on these hand dryers–I just need to say that and now you’ve been warned. These dryers, if correctly installed, will be connected to their own 20+amp circuit. They power up automatically so there’s wiring inside that could become live at any moment, especially if it has not been working correctly, like the one I am working on. If you are not experienced and comfortable with working with electrical appliances please hand this repair off to someone who is.
Step 1: Locate the breaker box panel and turn off the circuit that powers the hand dryer.
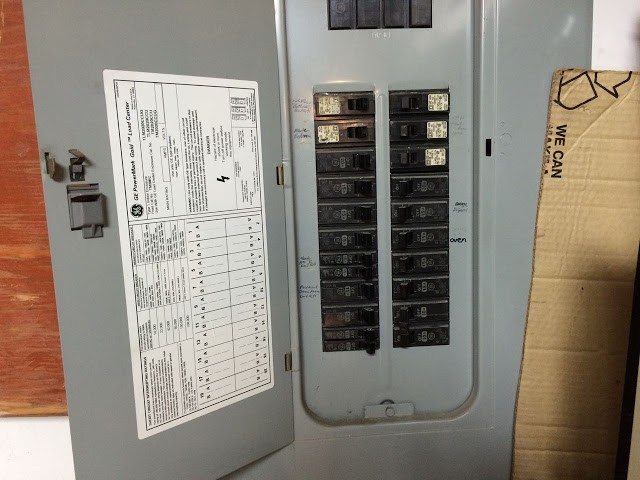 |
| This is what my home’s breaker panel looks like |
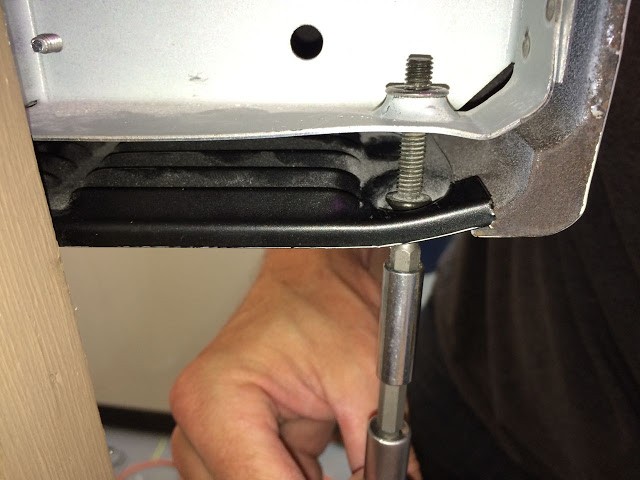
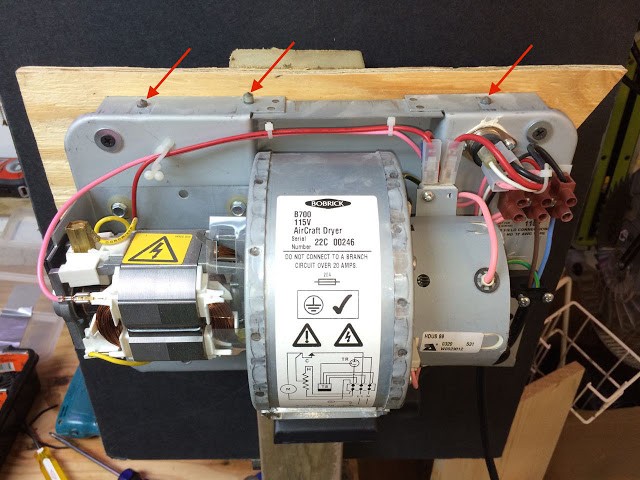
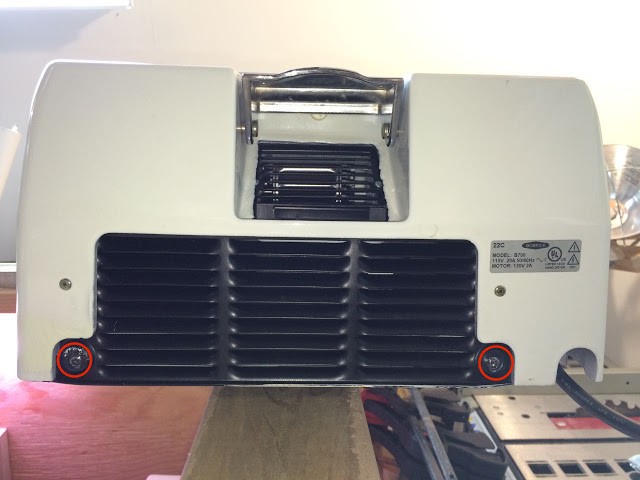
Step 2: Screw IN the two allen-headed screws on the bottom of the hand dryer.
This was the most difficult part of working on this Bobrick hand dryer–getting it off the wall! The pictures I have below are from when I re-mounted it on a piece of plywood in my basement to take a bunch of pictures for this write-up. When I was originally trying to remove it I kept unscrewing the screws but they won’t fit out the holes because you are supposed to SCREW THEM IN to remove the cover. You must tighten the screws to remove the cover. The screws are 5/32″ allen headed. Here’s a look at the cover screws from the bottom (while the dryer was sitting on my workbench):
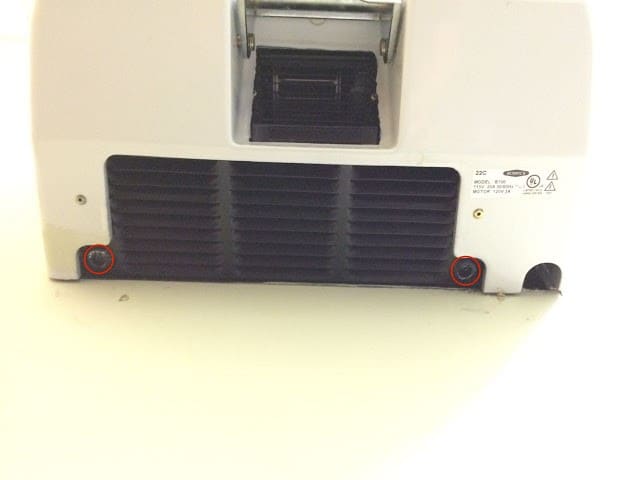 |
| The Cover locking screws are inside the holes circled in red |
Screw IN the two allen-keyed bolts to remove the cover:
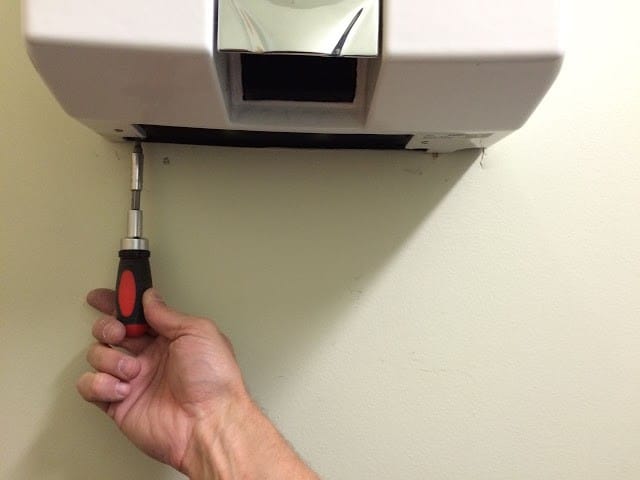 |
| Screw IN the lower bolts to release the cover |
Here’s a back-side view so you can see what’s going on–you’re raising up the head of the bolt out of the hole in the metal grating so the cover can come off:
 |
| The view from the back when you are raising up the heads of the cover locking screws |
You don’t need to screw them ALL the way in but you ought to give yourself a quarter of an inch of clearance.
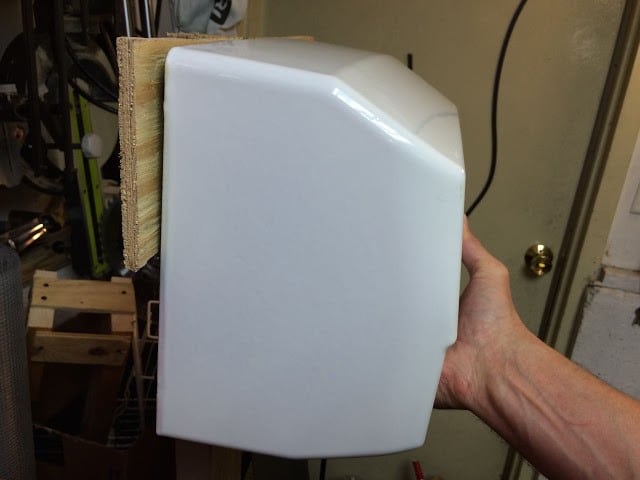
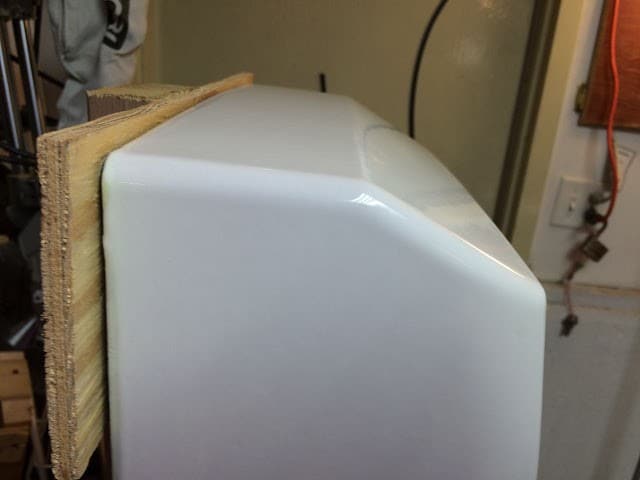
Step 3: Remove the cast iron cover.
This cover is SUPER HEAVY DUTY, is made of porcelain-covered thick cast iron, and weighs about 50 pounds so be careful. It’s a little bit tricky to remove the cover. The easiest way I found was to lift up on the cover and rock the top out so it unhooks from the spikes it hangs from:
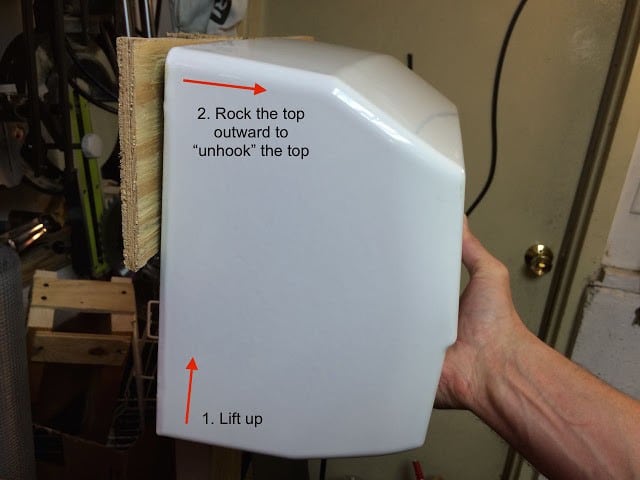 |
| Lift up and pull the top out |
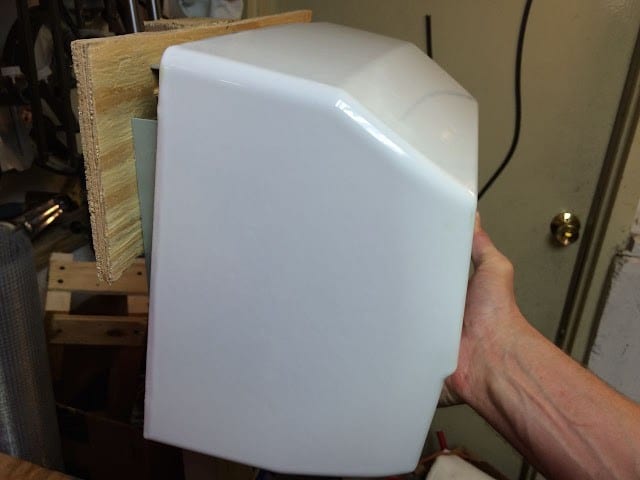 |
| Here the top is unhooked |
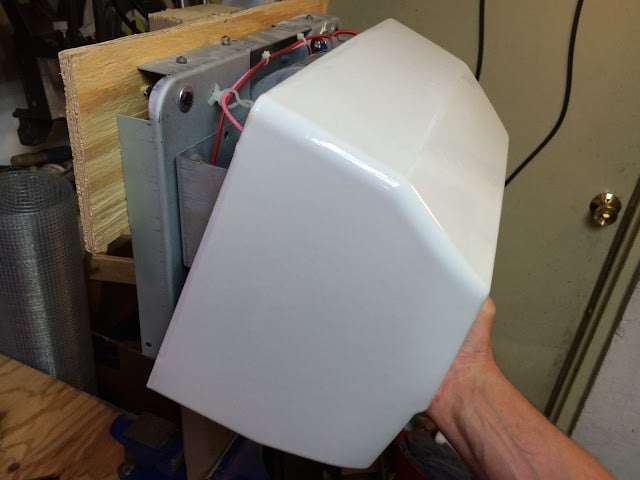 |
| The cover is coming off |
Here you can see the 3 spikes that the cast-iron top hooks onto:
 |
| A closer look at the spikes that the cover hooks onto |
Here’s what it looks like on the inside:
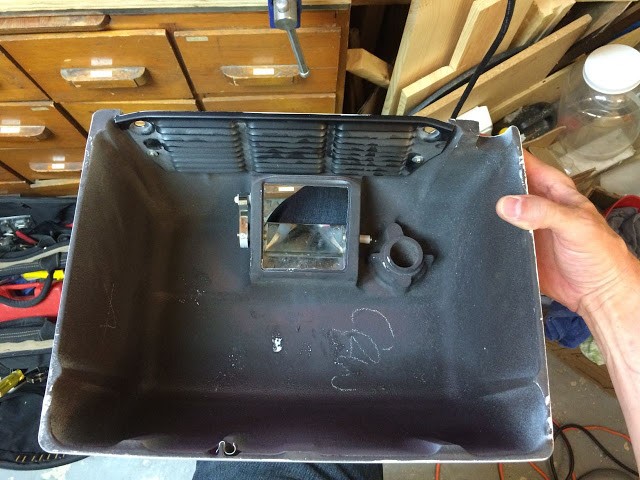 |
| The inside of the cast-iron Bobrick B-700 hand dryer cover |
Step 4: Double-Check that the power is off.
In the picture below I am testing to see that the power is off with my Fluke Digital Multimeter and magnetic strap on the right two electrical connectors–the power is on!
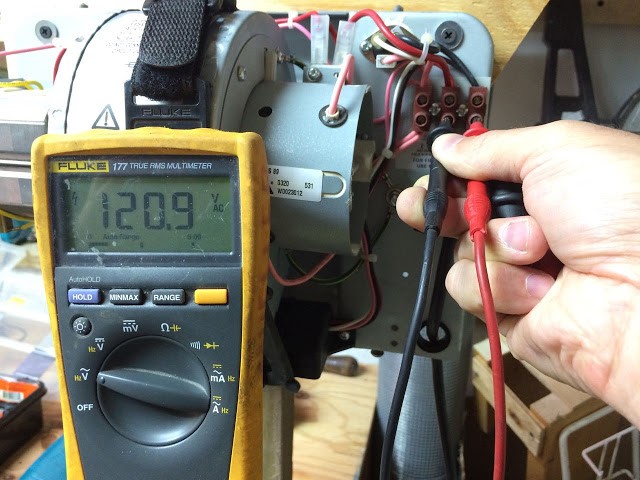 |
| Checking to see if the wires are hot–they are 120 Volts AC hot! |
I didn’t actually turn off the power when I uninstalled the hand dryer and just disconnected one wire at a time and put a wire nut on it. You need to be very careful if you are working with hot wires and it’s really not recommended unless you are a professional.
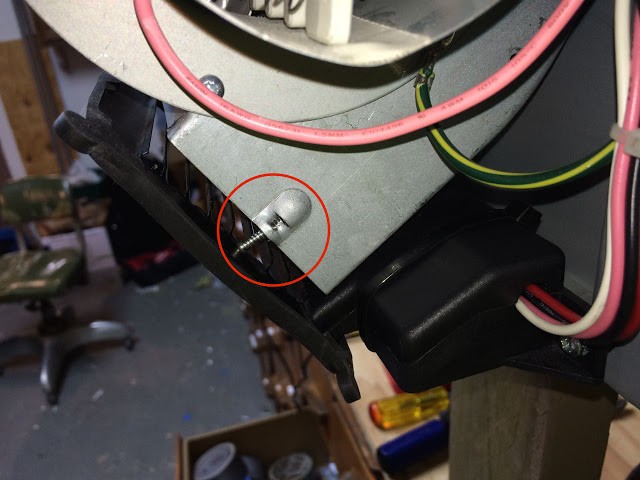
Step 5: Look for something that looks like the cause of the problem.
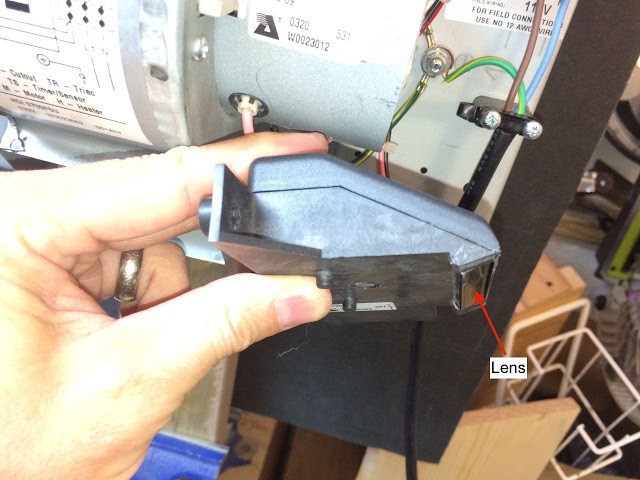
This was one of those repairs where I had never worked on this appliance so I was just going to take it apart and look inside. I knew it was operated by some kind of electric eye that detects when your hands are below it and I could see the LED’s for that:
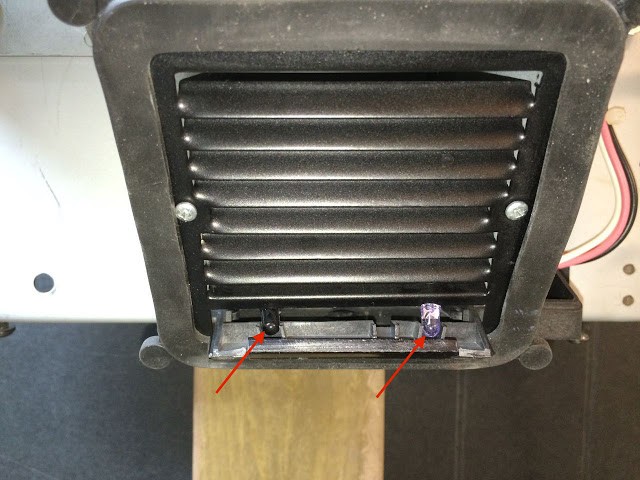 |
| The infrared LED and receiver LED that detects when your hands are under the dryer |
I honestly didn’t think anything looked bad when I looked at what you see in the picture above. Then I noticed that there was a loose plastic cover shoved back farther under the vent:
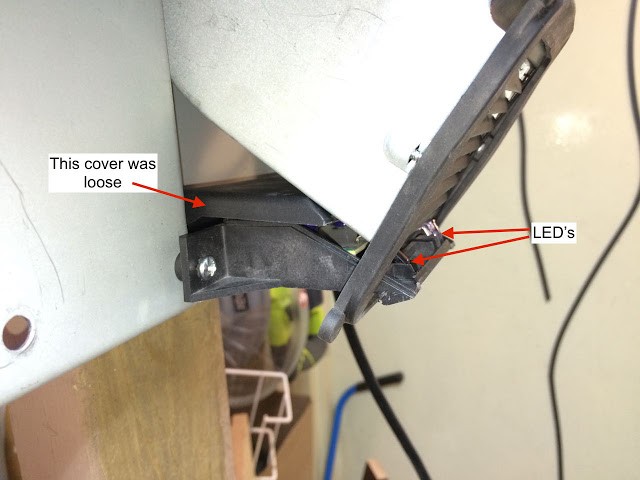 |
| The top of the plastic box that encloses the electric eye circuit was out of place |
The view from the other side:
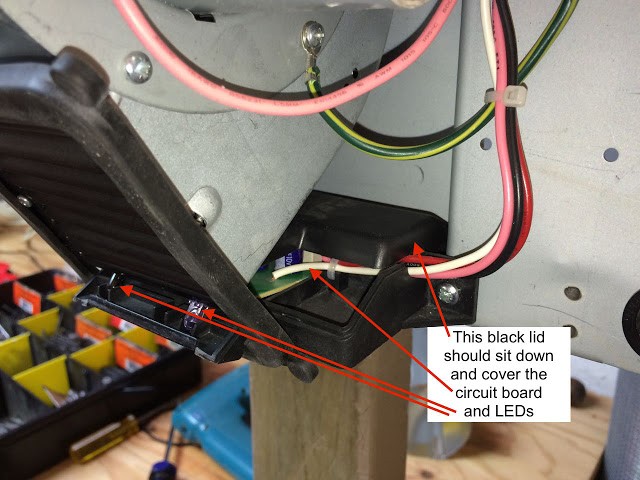 |
| The view of the out-of-place cover from the right side |
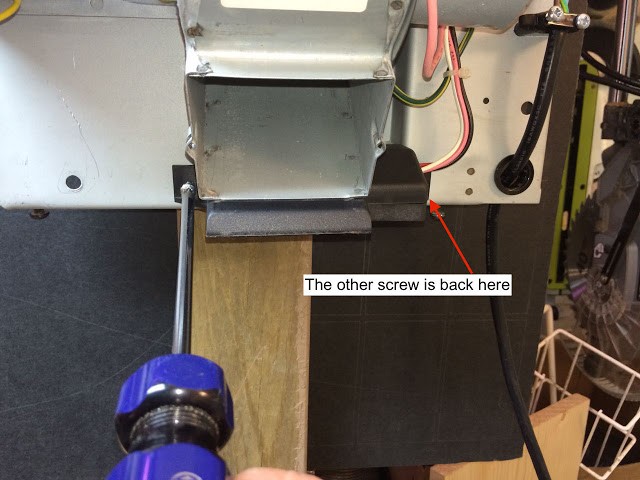
What was happening was that the cover that shields the LED that is sensing the reflection of the infrared light when you put your hands under the hand dryer was not shielding it and light was leaking in and constantly triggering the fan so that it would not come on when you wanted it to and would randomly come on at other times. Keep reading to learn how to fix it…Step 6: Remove the grill. Remove these two phillips-head screws from either side of the grill:
 |
| Remove the two grill screws |
Here’s the grill removed:
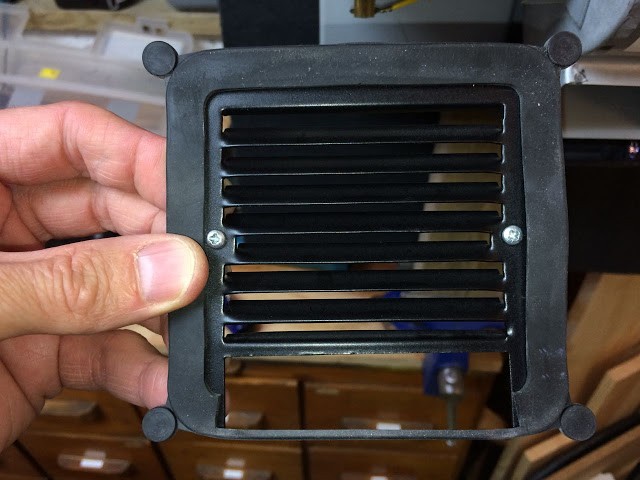 |
| The grill removed |
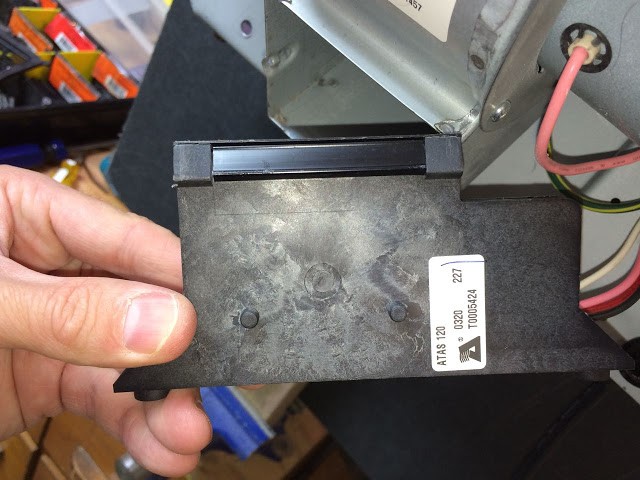
Step 7: Remove the two phillips-head screws from either side of the lower half of the circuit board enclosure box:
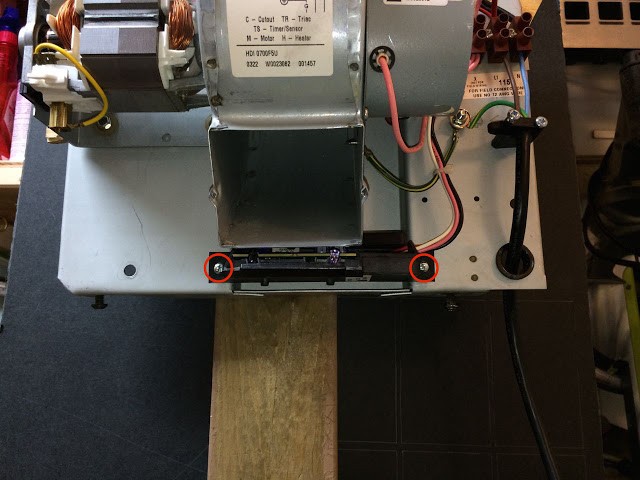 |
| Remove the two phillips-head screws from the lower half of the plastic circuit board enclosure |
Below is a closer look at the circuit board. I did a little reading on these circuits and what happens is that the IR phototransistor detects the infrared light when it is reflected back (by the user’s hands in this case), causing it to conduct current, triggering a relay and turning on the dryer:
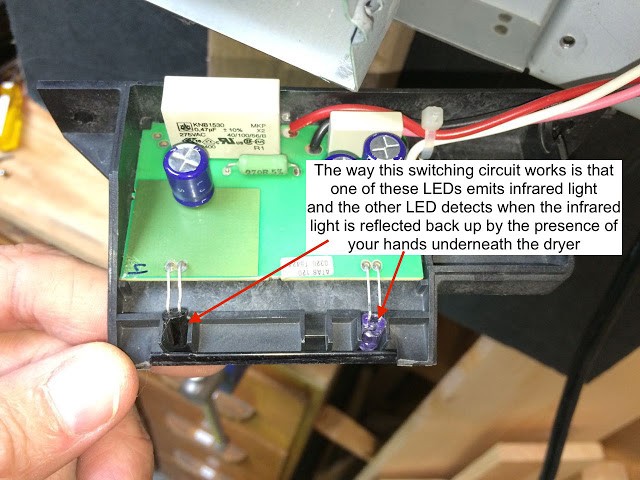 |
| A closer look at the switching circuit |
Step 8: Glue the circuit board in place.
This step is optional but I noticed that there was a dabble of glue on the front left corner that was not holding so I decided that while we were in here I might as well tack it in place with a little hot glue:
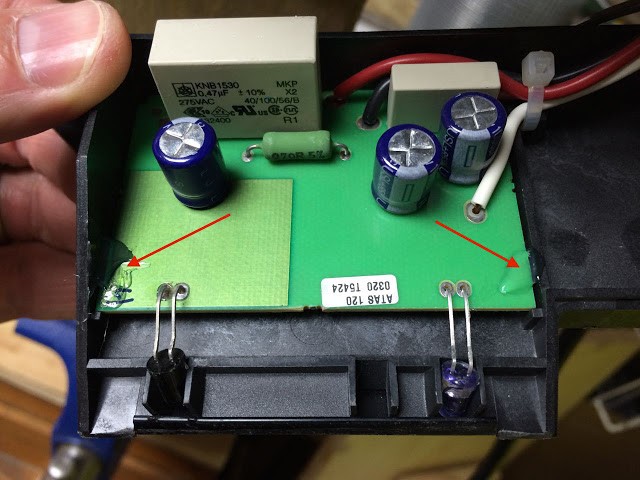 |
| Tack the circuit board in place on the lower right and left corners |
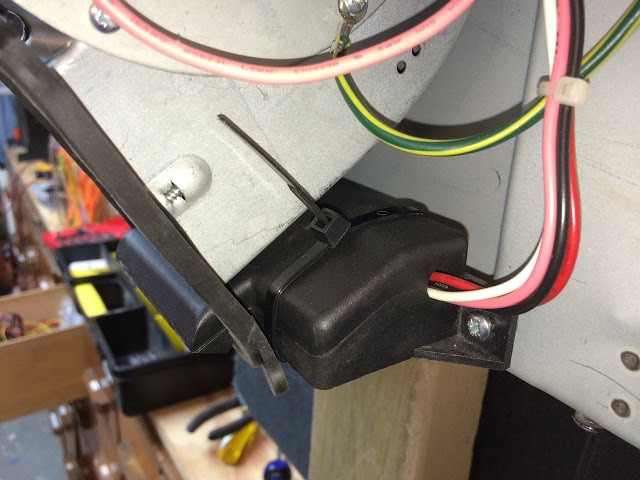
Step 9: Put the cover back on the infrared triggering circuit board:
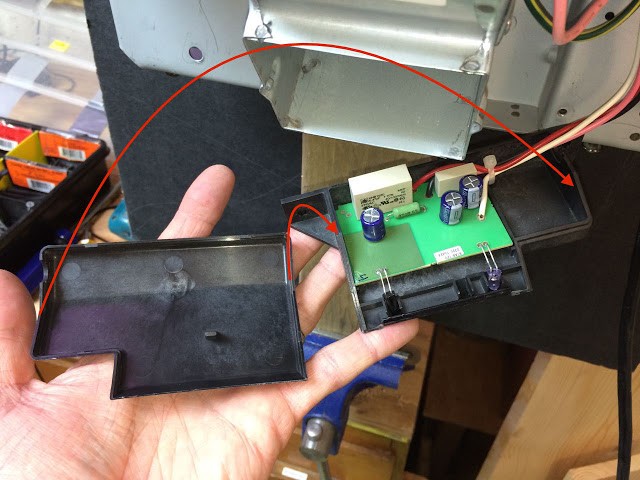 |
| Put the L-shaped cover back on the lower half to enclose the electric eye circuit |
Make sure all the wires are pass through the hole or the box will not snap together correctly:
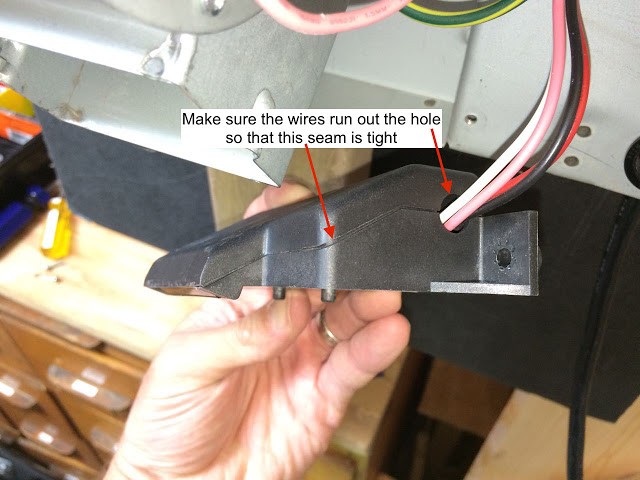
There is a dark plastic lens on the end of the box that allows the infrared to pass through. Here’s the other side of the box reassembled:
 |
| Here I have snapped the top on the black plastic box that encloses the circuit board–note the lens on the right side |
Here’s the view from the bottom:
 |
| The view from the bottom |
Step 10: Re-mount the switching circuit box by reinstalling the two phillips-head screws:
 |
| Re-mounting the box |
Step 11: Re-mount the dryer’s grill.
Make sure the rubber gasket that slips over the edge of the grill is back in place before you re-install it. Here you can see that on the lower right corner it has come off:
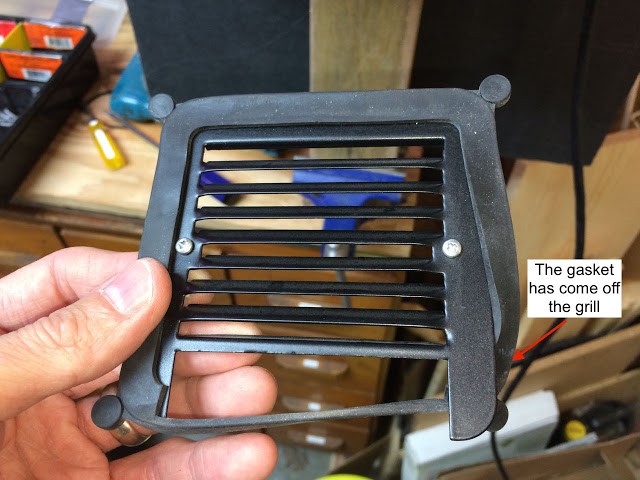 |
| Dryer grill gasket has come off the lower right corner |
Here the gasket is back on correctly:
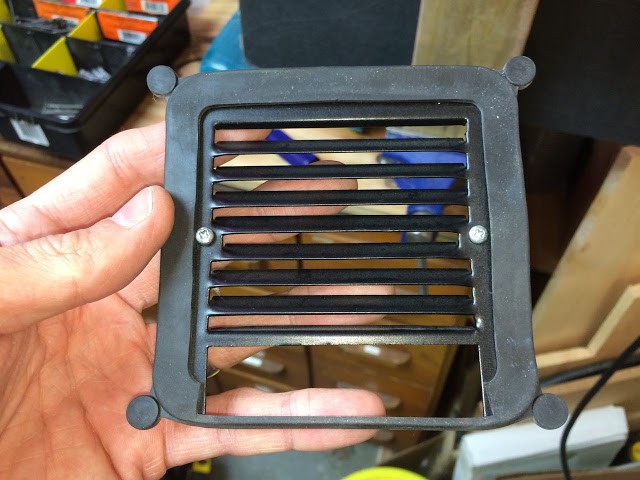 |
| The rubber gasket is correctly installed over the outside edge of the grill |
 |
| Grill Screw details |
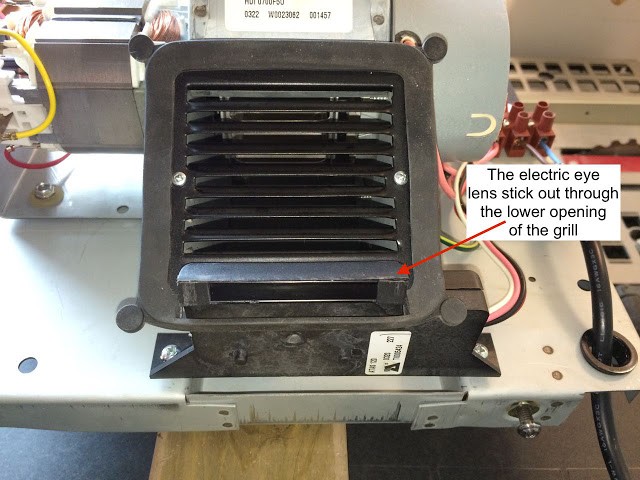
The grill fits around the LED eye lens that sticks out. Reinstall the two phillips-head screws on the grill:
 |
| Here the grill has been reinstalled |
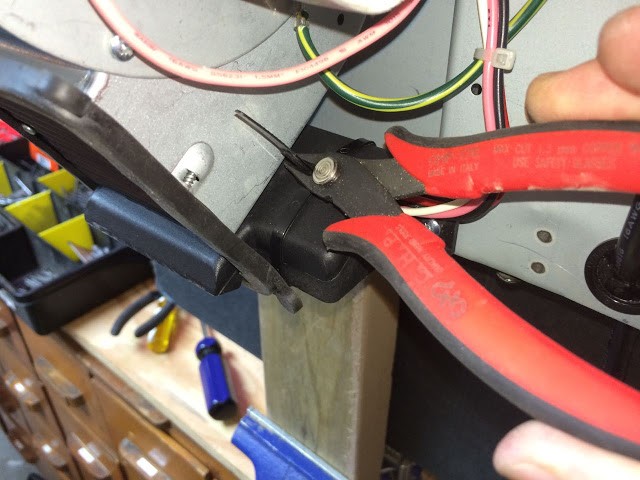
Step 12: Zip tie the cover on.
This is an optional step but somehow the cover found its way off and I didn’t want it to happen again so I put a zip tie around the cover as seen below:
 |
| Put a zip tie around the black box to make sure this doesn’t happen again |
Clip off the zip tie just to be neat:
 |
| Trimming off the zip tie |
Step 13: Test the Bobrick dryer.
Turn the power back on and put your hands under the vent. You must be careful because the wiring will be hot. You don’t want to put the cover back on before you test it! It should come on immediately when you put your hand under . I recorded a little video of me testing out this dryer so you can see how it is supposed to operate:
Step 14: Turn off the power to the dryer.
You don’t want to accidentally touch a hot wire with the cast iron cover and with the dryer working now it will activate on you and scare you to death!! I have to admit I went to put the cover on one time and the thing kicked on and it surprised me for sure 🙂
Step 15: Reinstall the cast-iron cover.
You would think that you should hook the top of the cover on the spikes that hold it in place and the rock the bottom down into place but the vent gets in the way. You need to start by putting the bottom part of the cover in place, over the vent opening and then raise up the top and hook it on the spikes. Put the cover on by leading with the bottom edge like this:
 |
| Start by leading with the bottom |
Push it on until the bottom edge touches the wall:
 |
| Keep pushing on the cover till the bottom edge comes into contact with the wall |
Now push the top edge towards the wall and lift slightly to help the spikes find their holes in the cover:
 |
| Lift up on the cover and push back the top toward the wall |
The cover should be flush with the wall:
 |
| The top should be flush with the wall |
Step 16: Lock the cover on.
Back out the two allen-headed bolts on the bottom until they press into the hole on the lower grill to lock the cover in place:
 |
| Back these screws out until they press into the hole, holding the cover in place |
Now you’ve repaired your Bobrick B-700 hand dryer! If anyone is interested I took a picture of the hand Bobrick’s schematic:
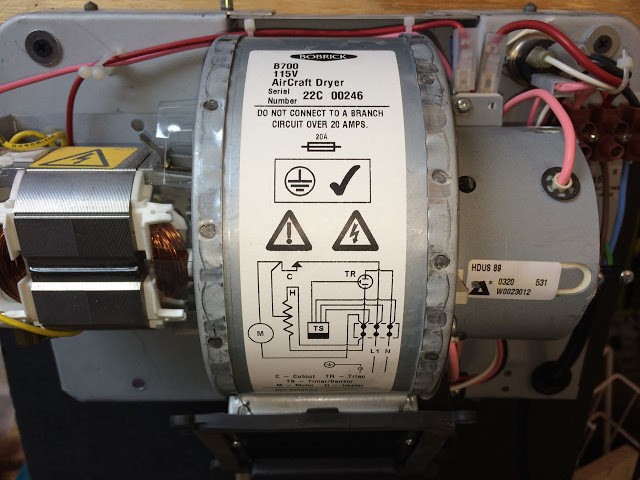 |
| Schematic for Bobrick B700 AirCraft Dryer 20A |
Other Relevant Links:
- Manufacturer’s Product page: B-700 115V AirCraft Surface-Mounted Hand Dryer
Amazon Associate Disclosure: As an Amazon Associate I earn from qualifying purchases. This means if you click on an affiliate link and purchase the item, I will receive an affiliate commission. The price of the item is the same whether it is an affiliate link or not. Regardless, I only recommend products or services I believe will add value to Share Your Repair readers. By using the affiliate links, you are helping support Share Your Repair, and I genuinely appreciate your support.