If you have a headlight out in your Toyota Camry you do not need to replace the entire headlight (like the old-fashioned cars)– you can just replace the high or low beam bulb. There is a separate bulb for the high beam (inside bulb) and low beam (outside bulb) and you can replace them individually. I’ll walk you through the steps…
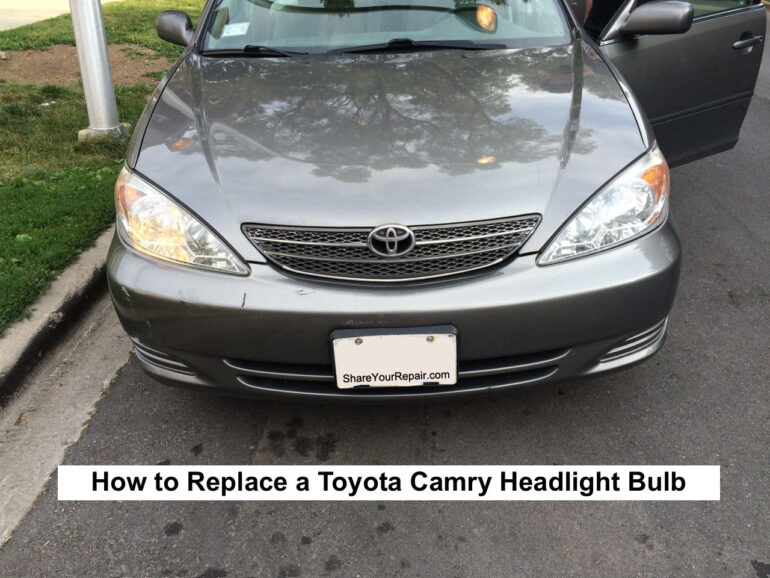
How to Replace Headlight Bulb on Toyota Camry 2001-2006
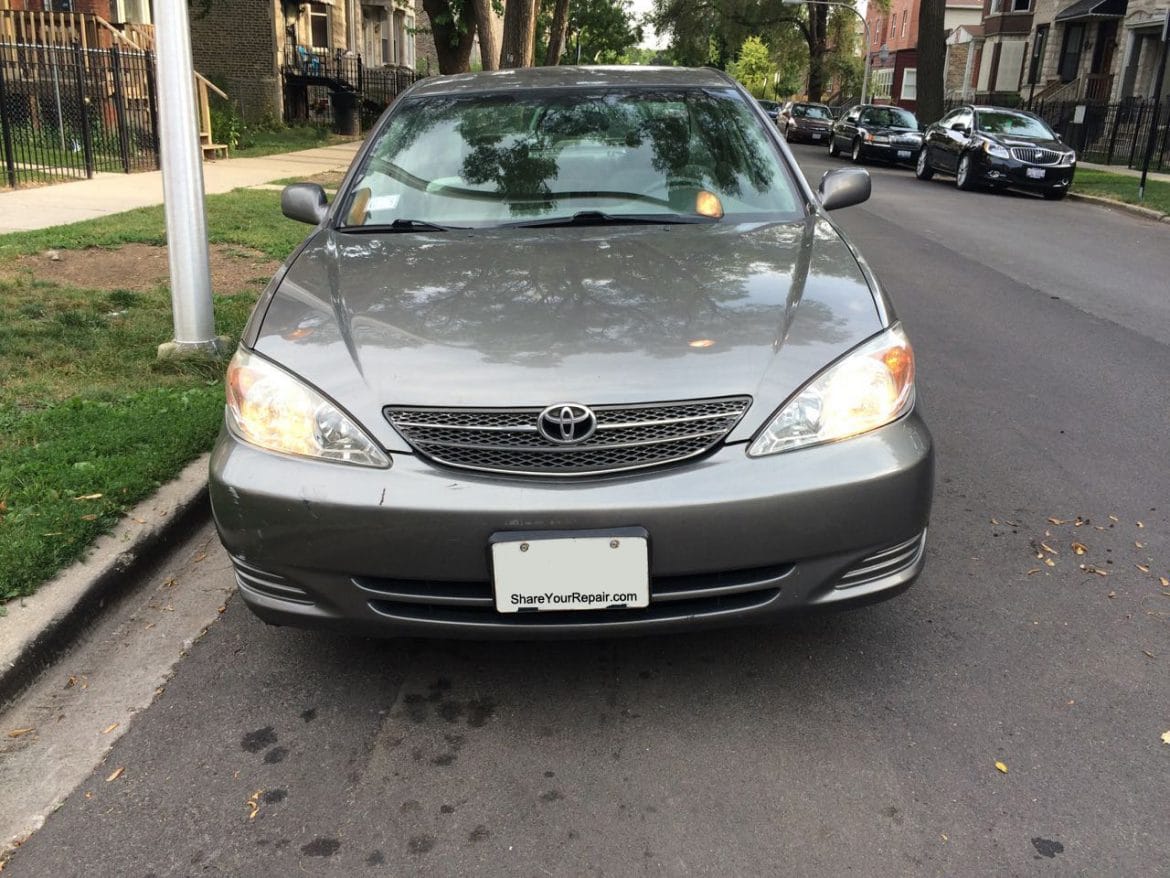
Vehicle:
- 2003 Toyota Camry (but all the years from 2001-2006 will be the same)
Parts Needed:
- Sylvania 9006 SilverStar Ultra High Performance Halogen Headlight Bulb, (Pack of 2)
(the low and high beam bulbs are the same–it’s the shape of the headlight lens that makes them shine differently)
Tools Needed:
- None!
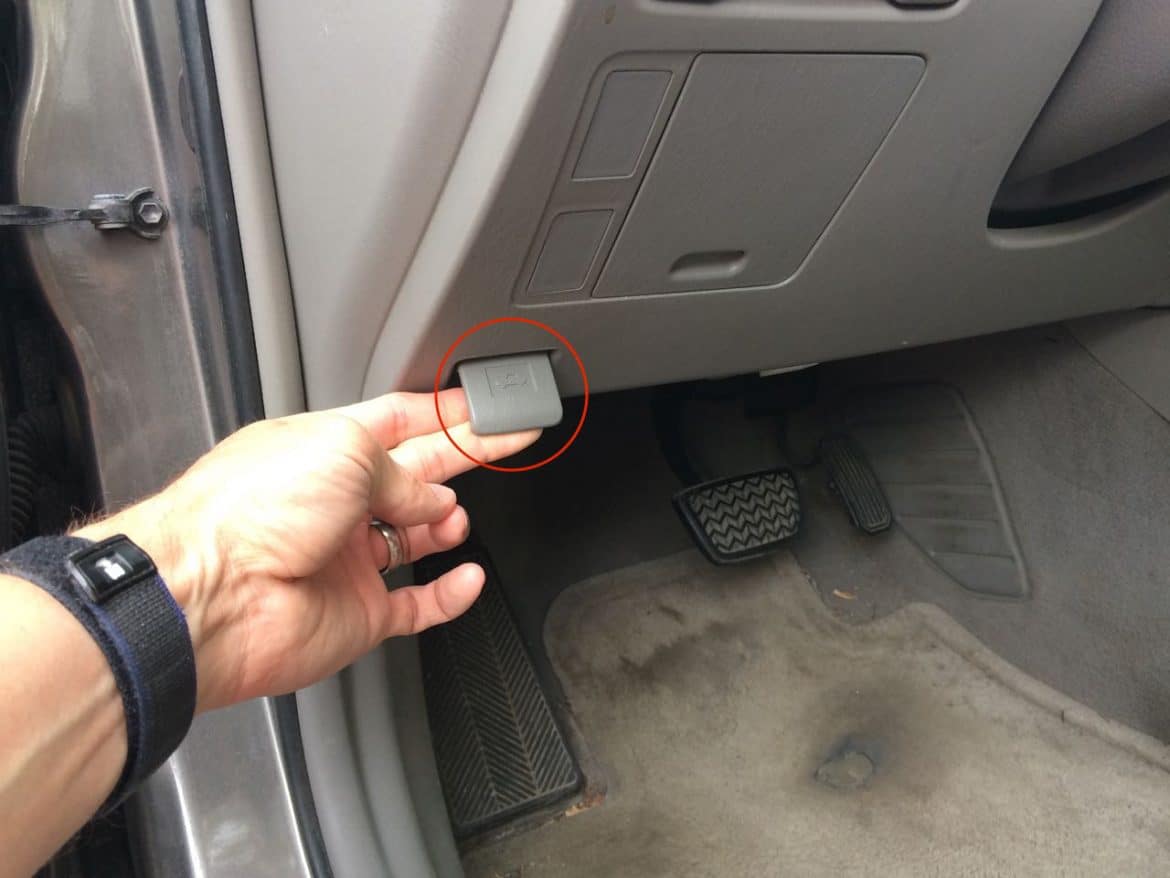
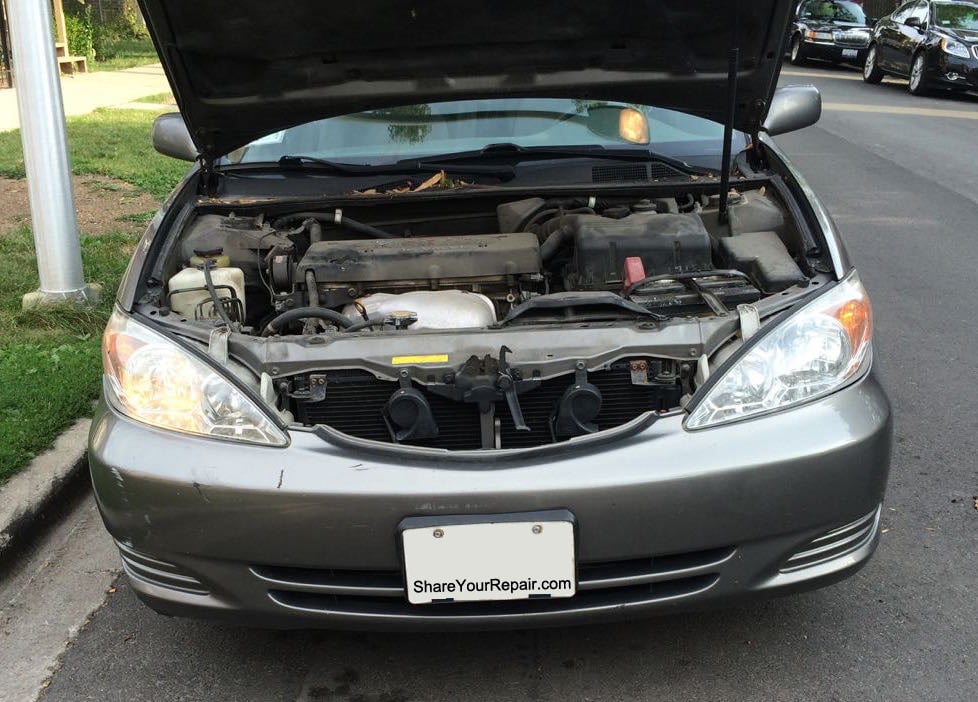
Step 1: Pop the hood.
The hood release handle is located by the driver’s left knee. You’ll feel a click as it releases:
Step 2: Release the hood safety latch and lift up the hood.
You will want to reach under the hood, under the grill area, just to the right (driver’s side) of the Toyota emblem, and lift up on a metal tab that releases the hood:
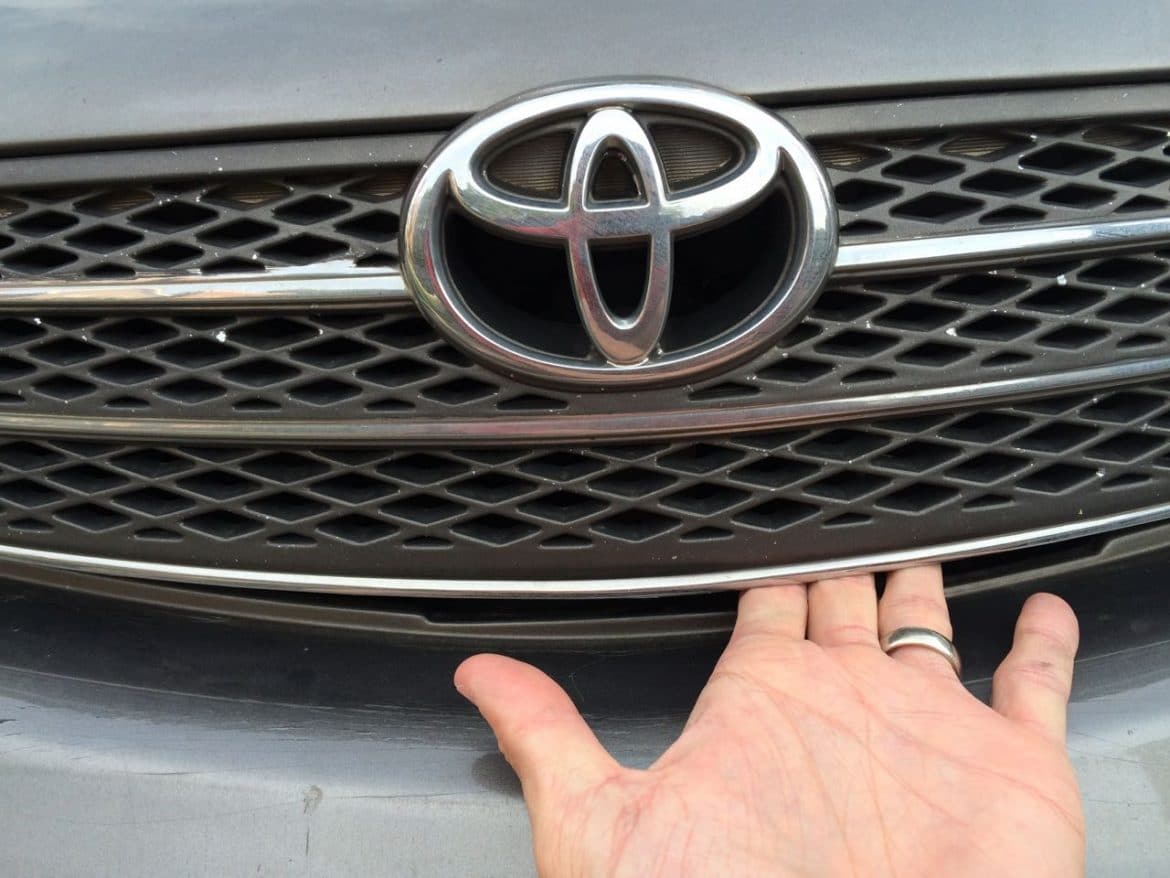
This is what you are looking to lift up on:
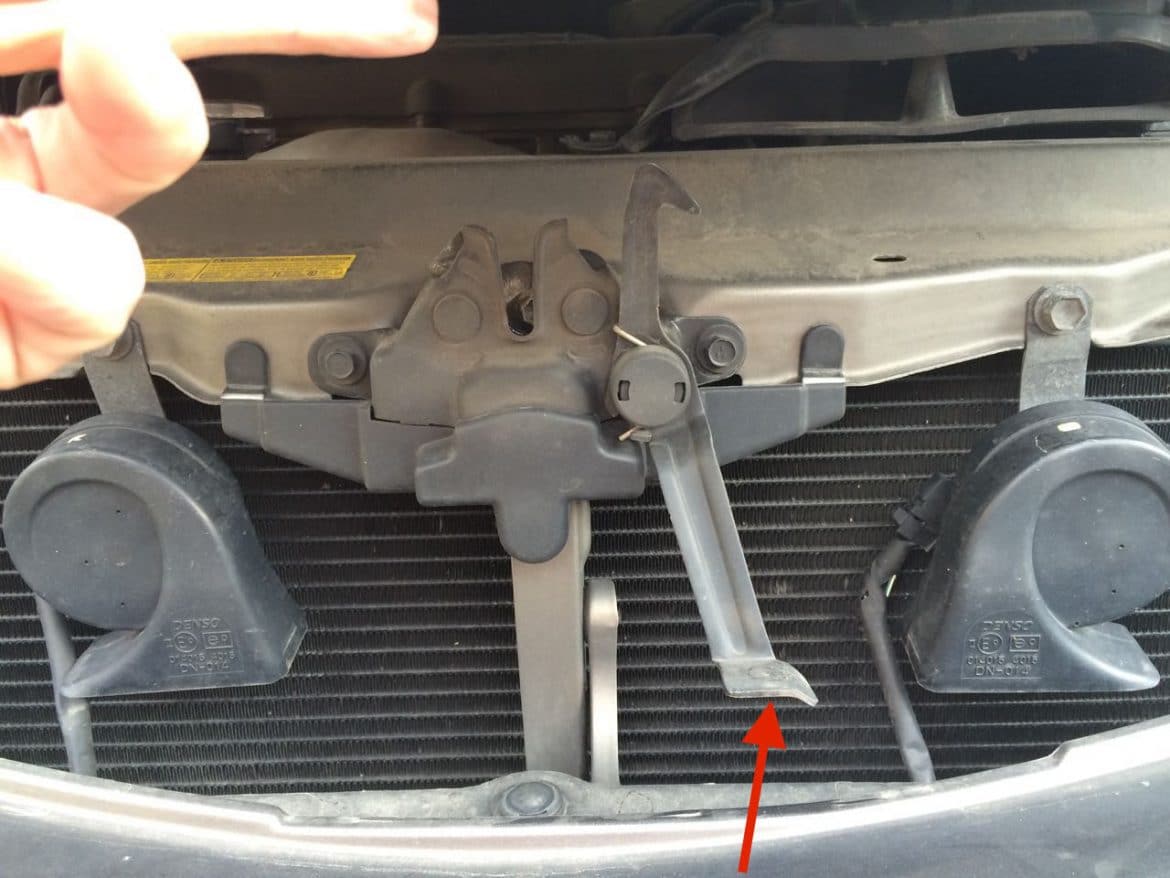
With that release tab lifted up, raise up the hood:
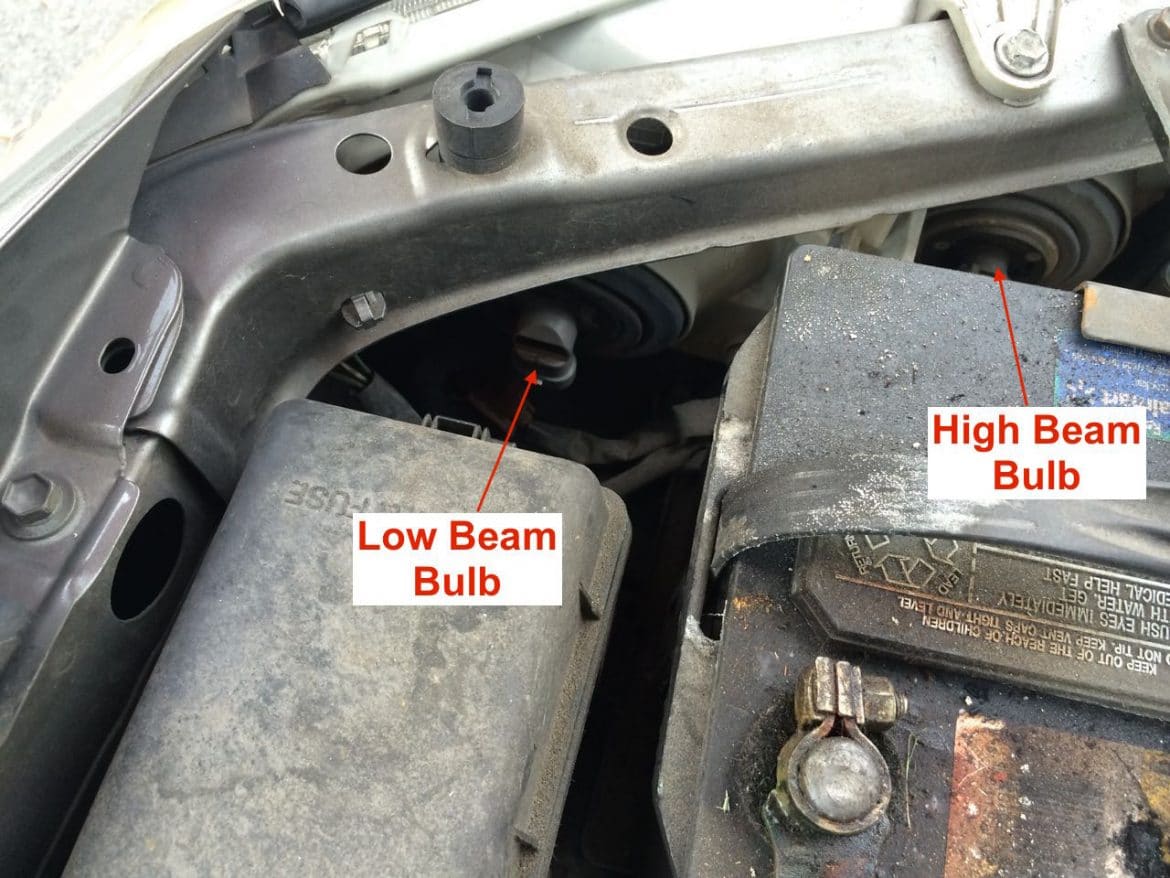
Step 3: Locate the access to the back of the burnt out headlight.
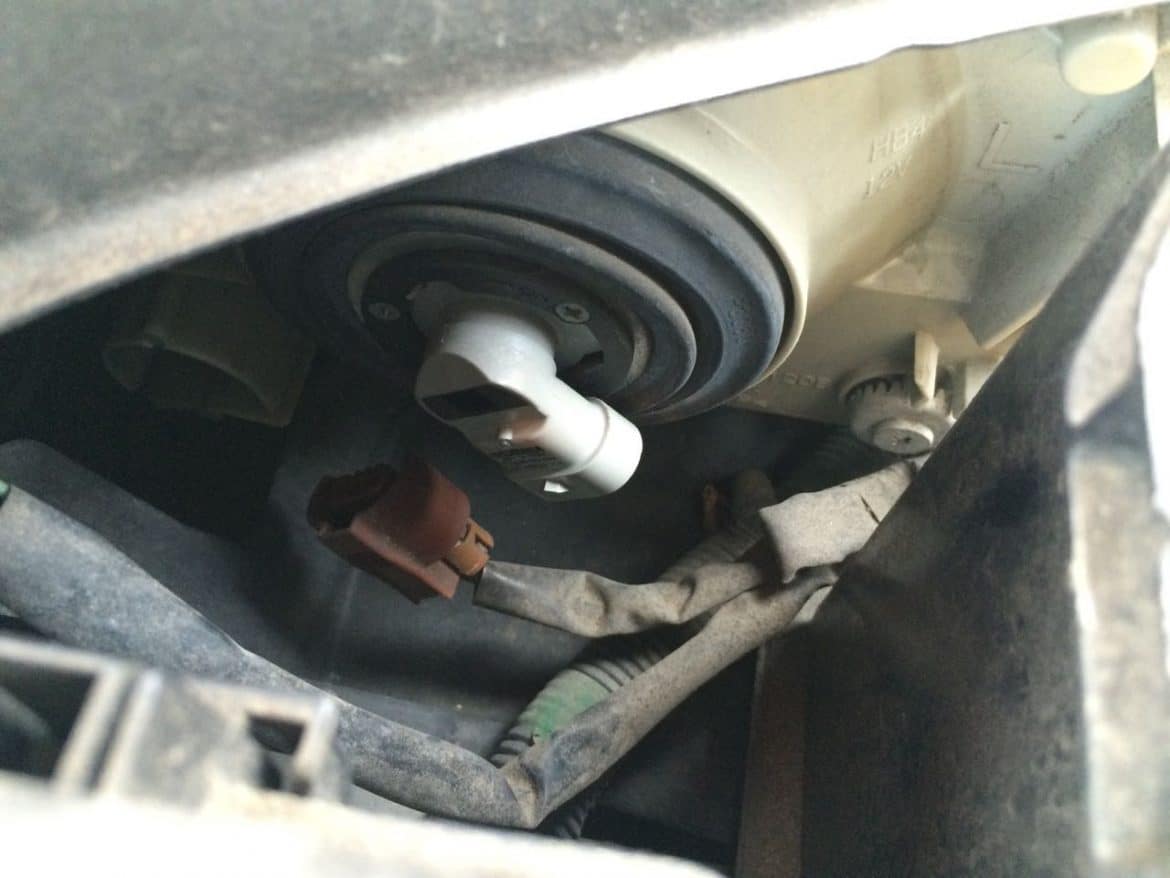
For the low-beam bulb you are going to want to look down between the battery, the fuse box and the metal frame of the car to see where the low-beam headlight bulb can be accessed:
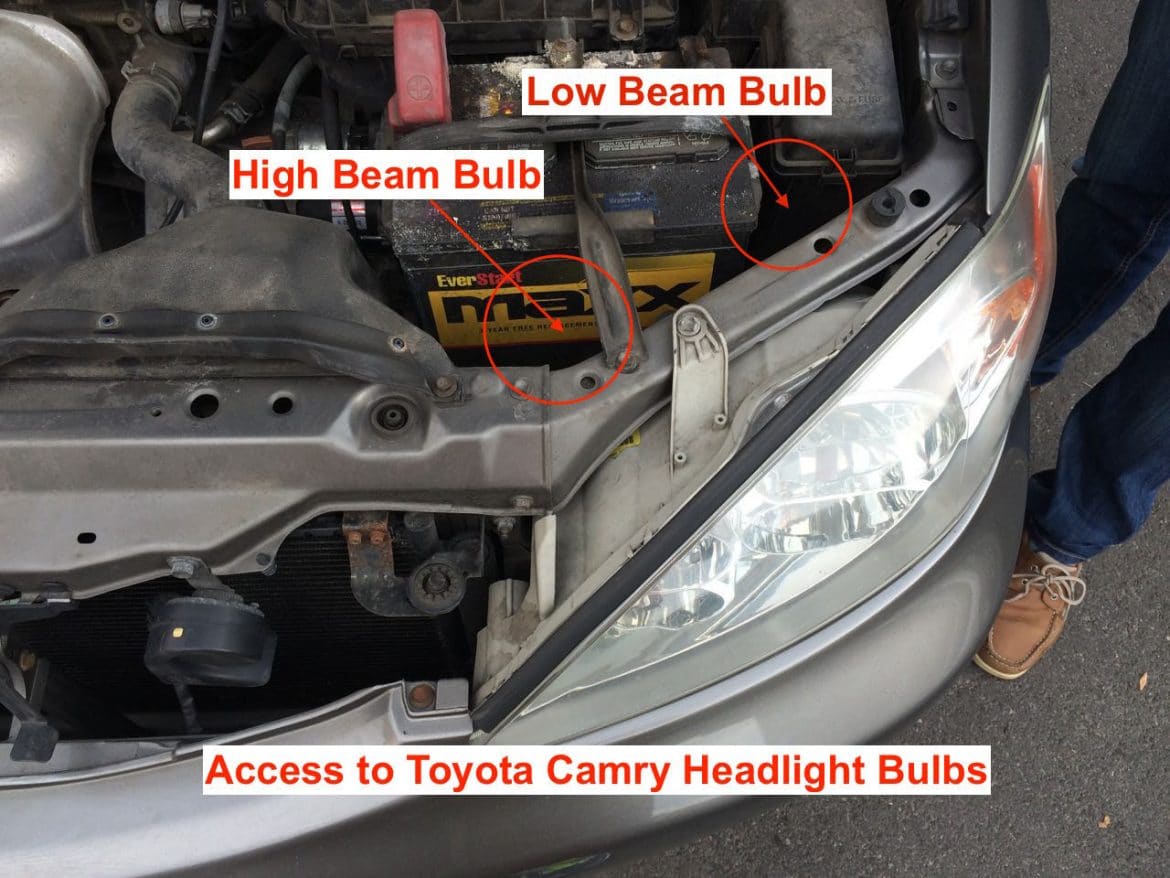
The easiest way to tell which bulb is which is that the low beam bulb will be in front of the fuse box and the high beam bulb will be in front of the batter as seen below (viewed from the engine compartment side looking towards the front of the vehicle):
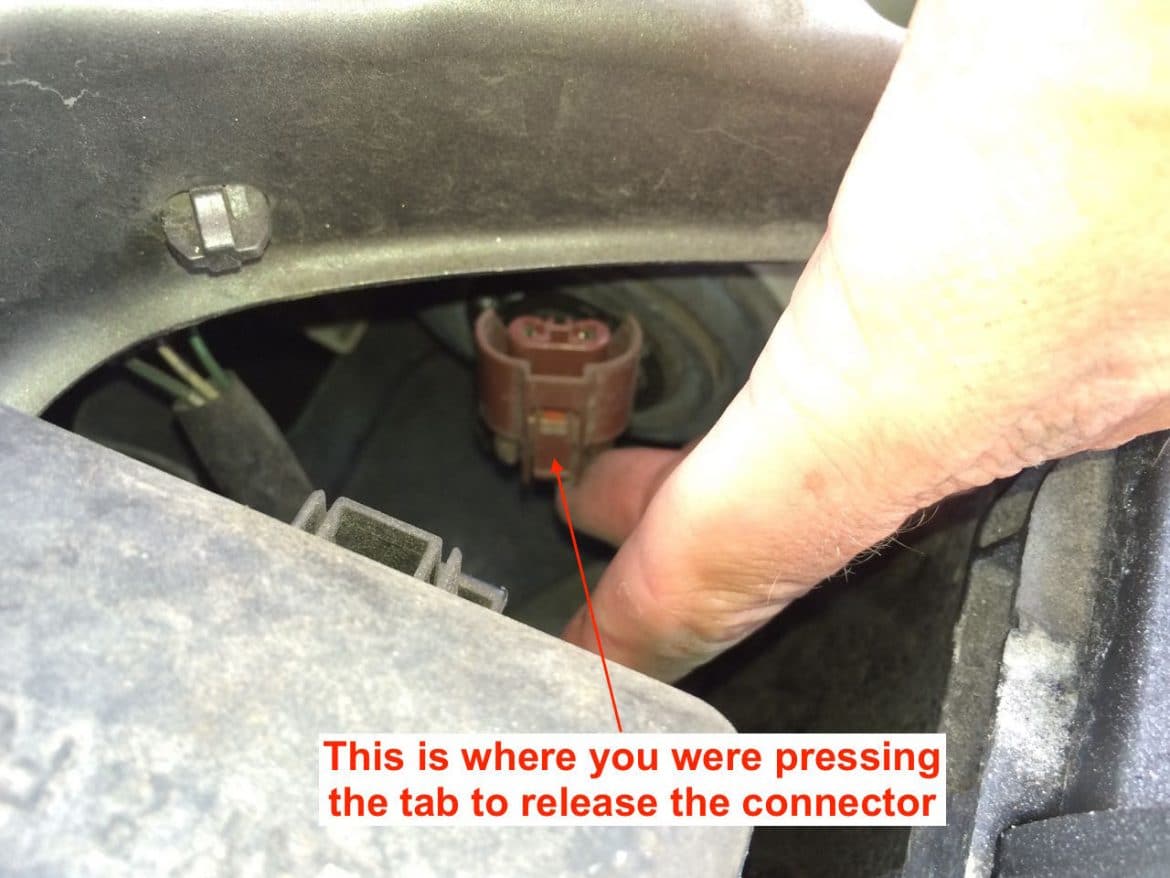
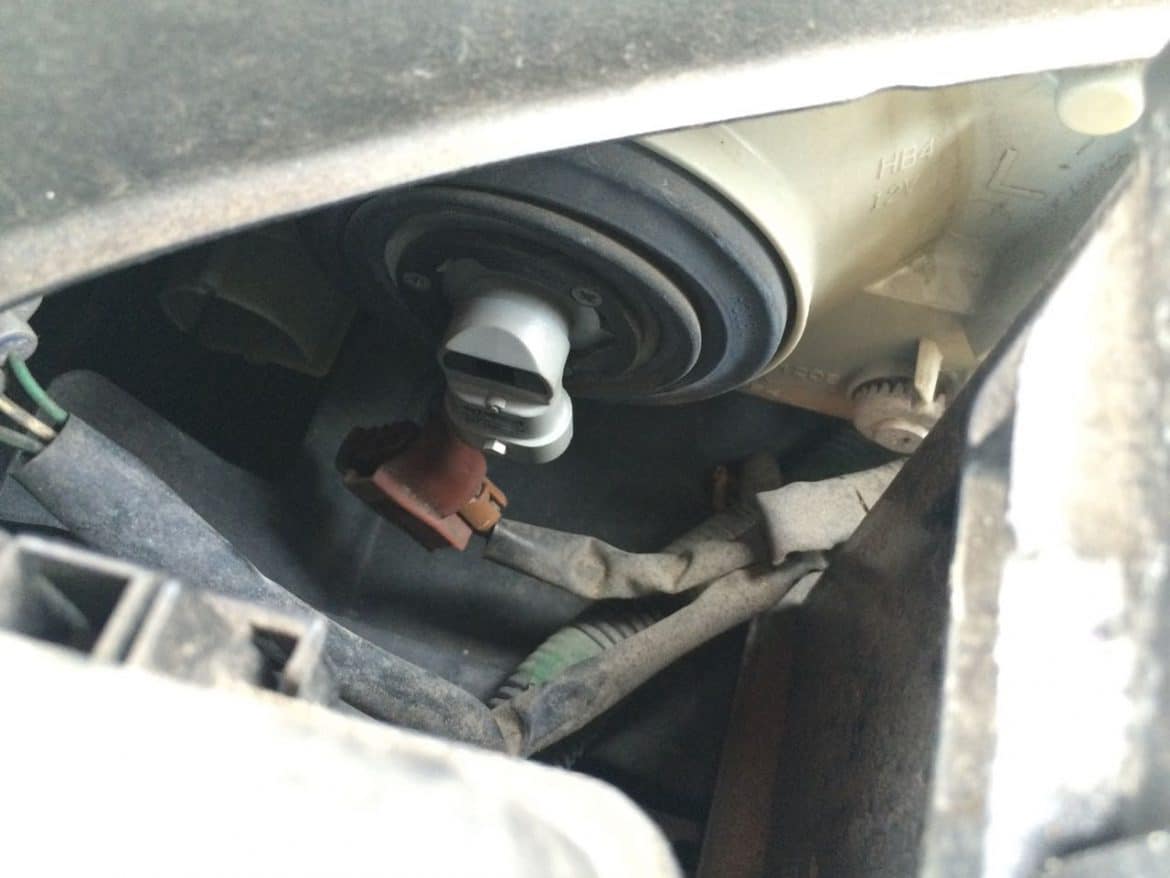
Step 4: Release and remove the headlight bulb wiring connector.
You want to disconnect the wiring connector from the bulb before you try removing the bulb. There is a tab that must be depressed first and then you can wiggle the connector down and off the bulb. Make sure not to pull on the electrical wiring, only pull on the plastic end connector:
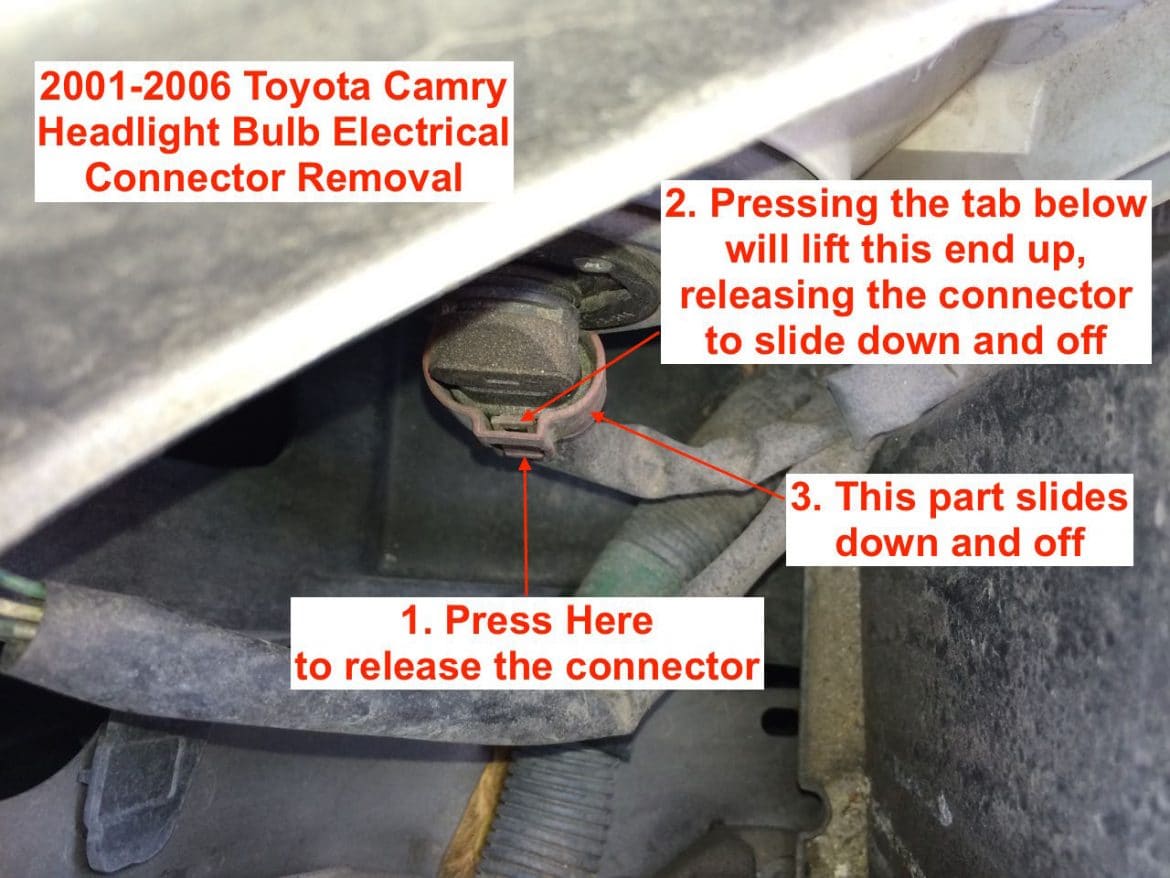
This is what it will look like when you get the connector released:
Step 5: Unlock and remove the headlight bulb.
For this driver’s side headlight you will turn the bulb 60 degrees, swinging the bottom of the connector towards the middle of the vehicle. If you are doing either of the passenger side bulbs you will swing the bottom end of the bulb’s connector towards the outside of the vehicle:
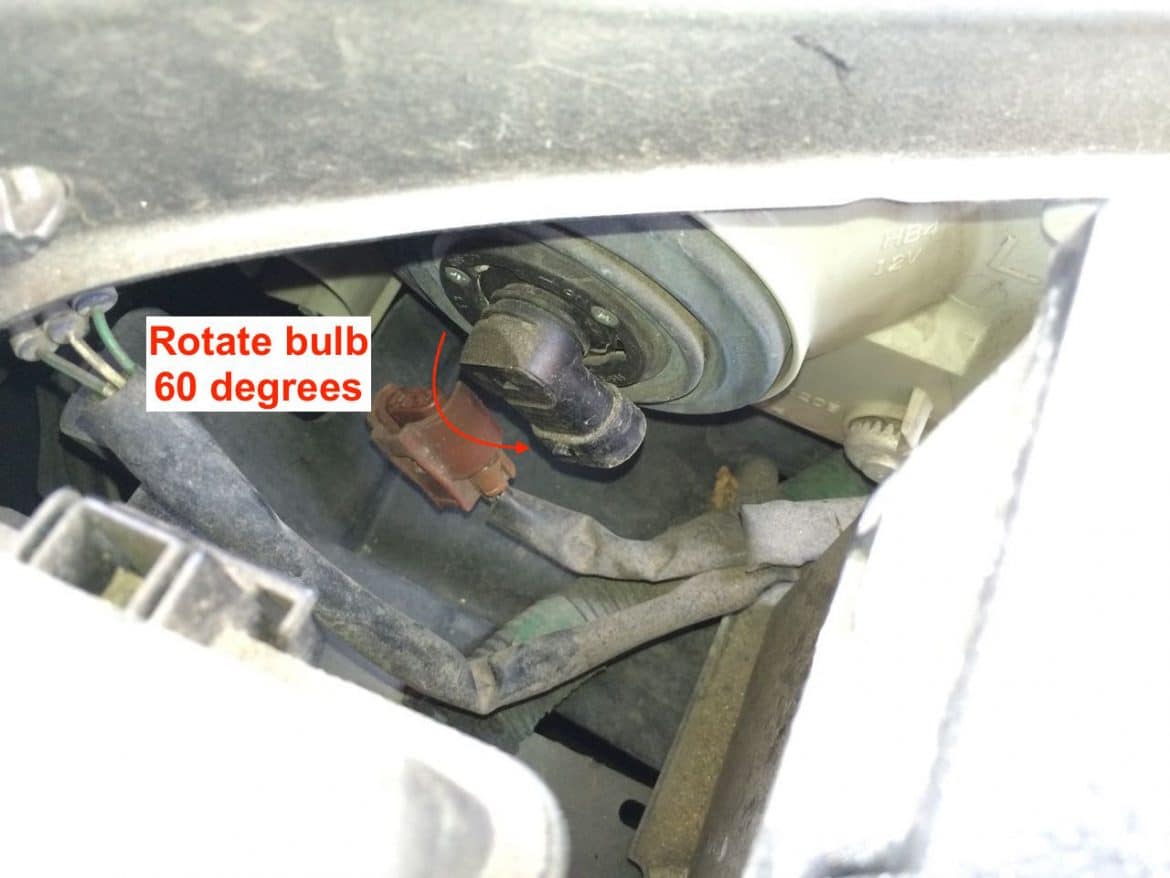
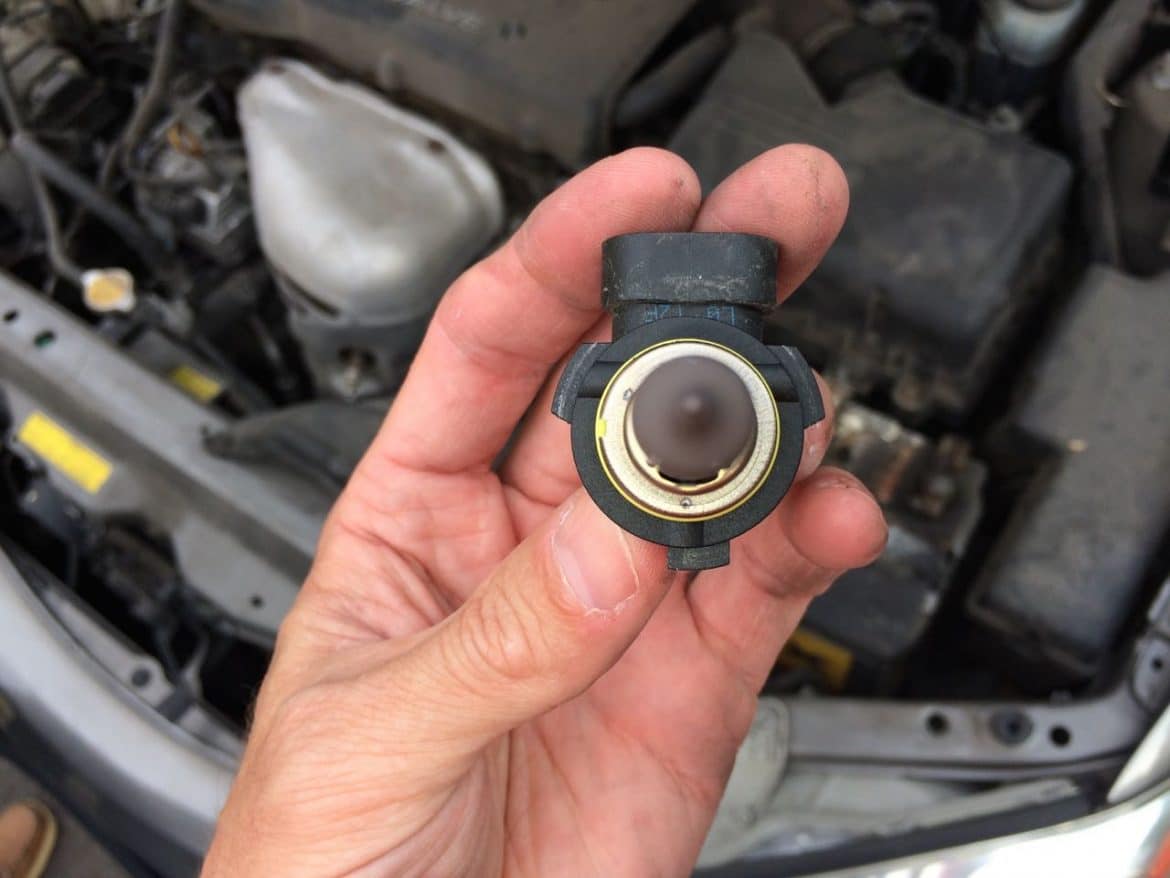
Once you have rotated the bulb you can pull it straight out (towards the fuse box) of the headlight fixture. Here’s the burnt-out bulb:
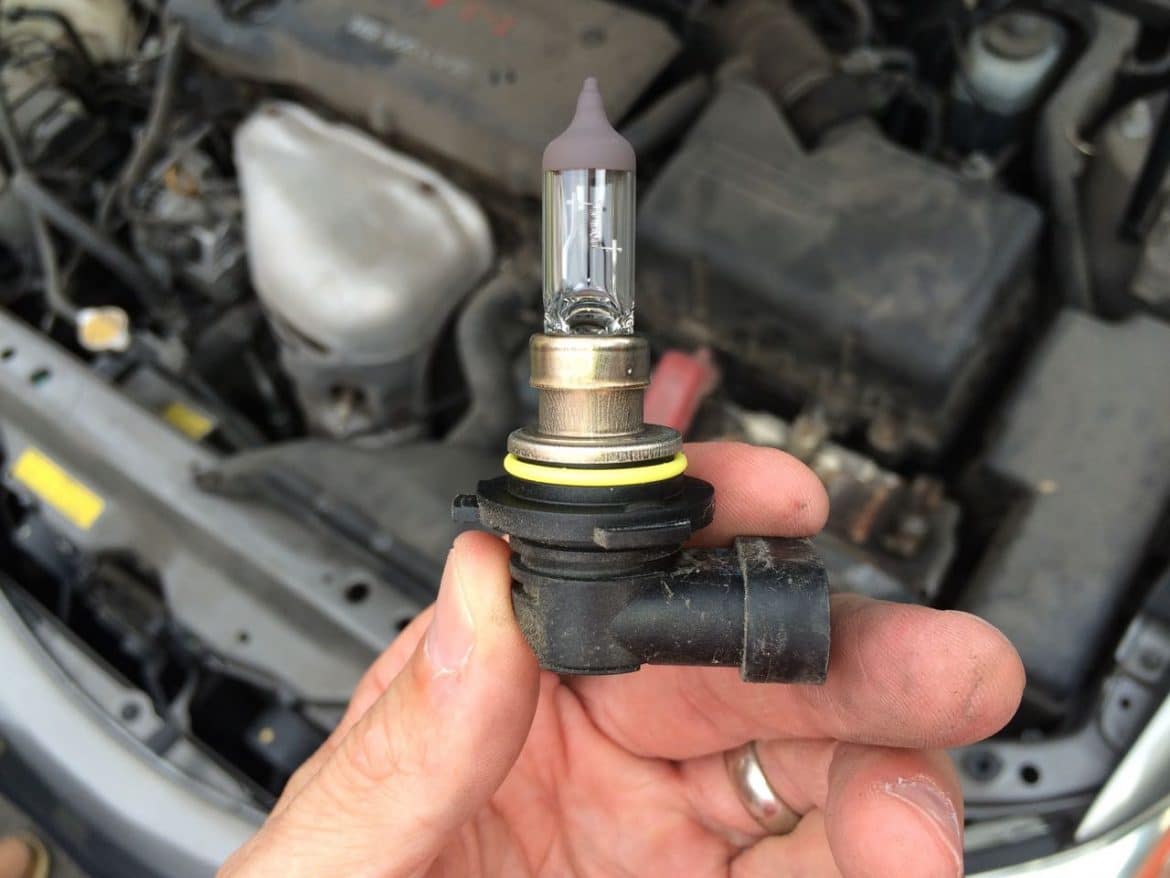
An interesting note about the bulb above, and all modern cars’ headlights–the end of it is painted so that the light doesn’t shine directly out at oncoming vehicles. How these headlights work is that the light is projected back into the headlight and the reflective lens at the back of the headlight focuses the light down the car’s path!
A look at the bulb from the end, note the three tabs that must fit into their slots in the headlight fixture:
Step 6: Insert new bulb into headlight and lock in place.
Cautionary note about bulb handling: I would NOT touch the glass of your new bulb. You don’t want any of the oil from your fingers cooking on the glass. You want these bulbs to last as long as possible.

Remember the angle you at which you pulled the bad bulb out (with bottom swung toward the middle of the car), insert the bulb at a 60-degree angle fitting the three tabs in their openings:
Then rotate the bottom connector end so it points straight down:
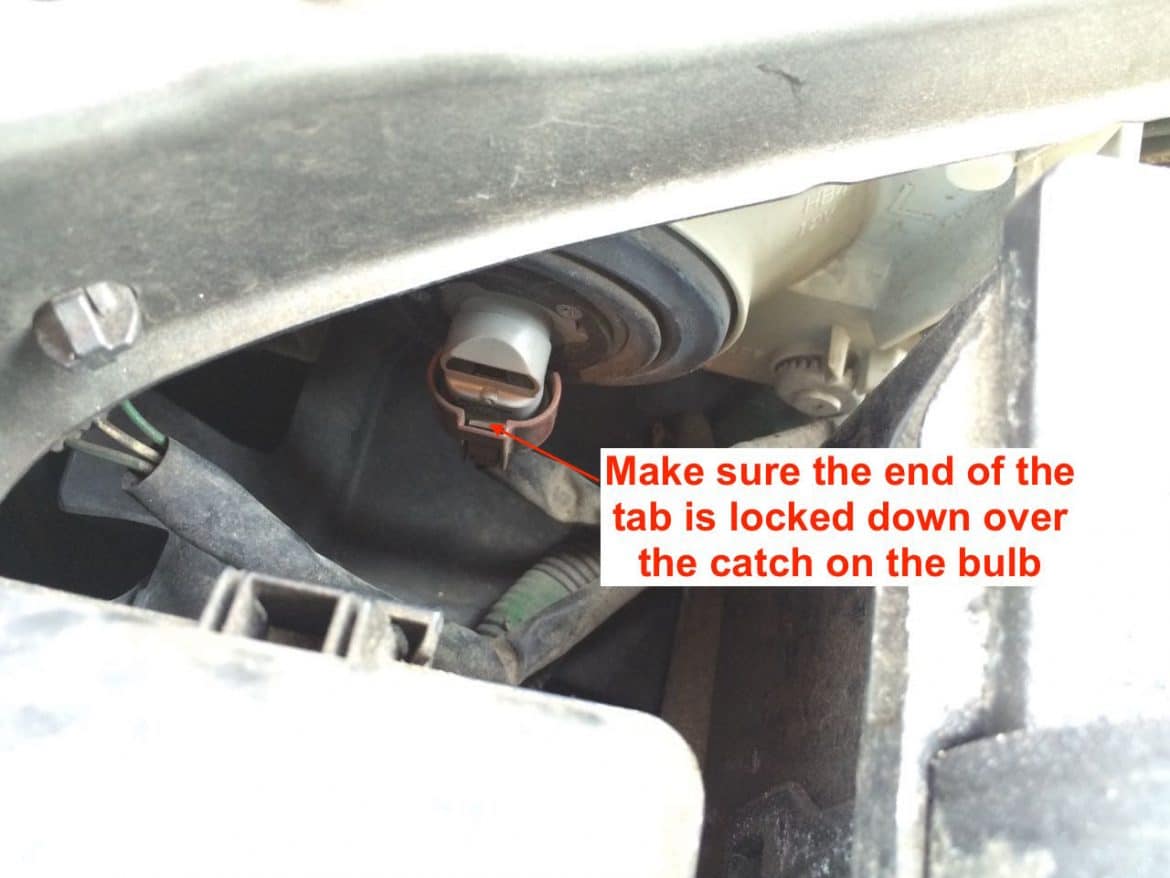
Step 7: Snap the headlight bulb electrical connector back on.
Push the headlight bulb electrical connector up on the bulb’s electrical socket from the bottom until the rocker tab latches on the bulbs tab to keep the connector from coming off:
Step 8: Test out your headlights.
Amazon Associate Disclosure: As an Amazon Associate I earn from qualifying purchases. This means if you click on an affiliate link and purchase the item, I will receive an affiliate commission. The price of the item is the same whether it is an affiliate link or not. Regardless, I only recommend products or services I believe will add value to Share Your Repair readers. By using the affiliate links, you are helping support Share Your Repair, and I genuinely appreciate your support.