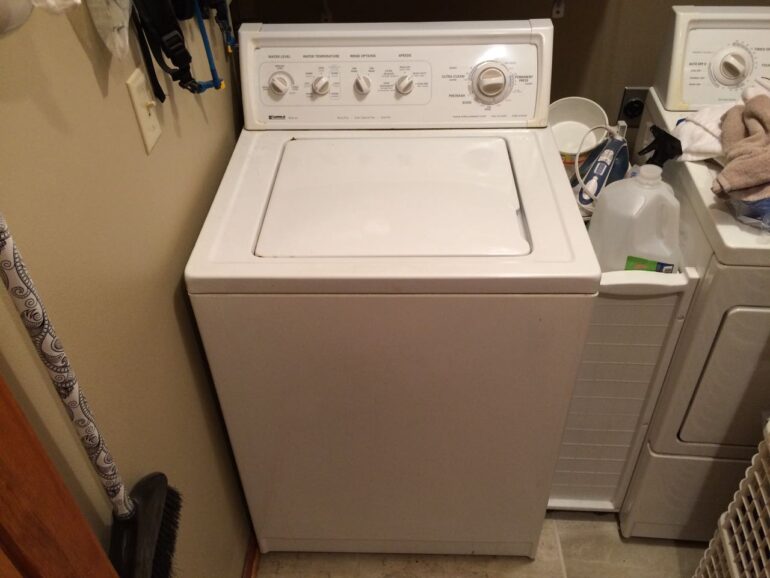
If your Kenmore 90 Series Washer fills slowly and/or makes a loud noise when the tub is filling, I have your solution . In our case it took at least an hour for the tub to fill up with water. If you opened the lid while it was filling up there was just a trickle of water on each side, where there should be a waterfall where the water pours into the tub. At times it also was making a vibrating noise. In troubleshooting the situation I disconnected the water lines from the washer and checked the water pressure coming out of the lines. By by running water through the lines into a bucket I could see that it had good flow–the problem was in the washer itself. It turns out that the water valves wear out over time, they are inexpensive, and are easy to replace. Follow along and I’ll show you how you can fix your Kenmore 90 Series washer and save some money by doing it yourself…
Kenmore 90 Series Washer Fills Slowly-How to Replace Water Inlet Valve
Equipment:
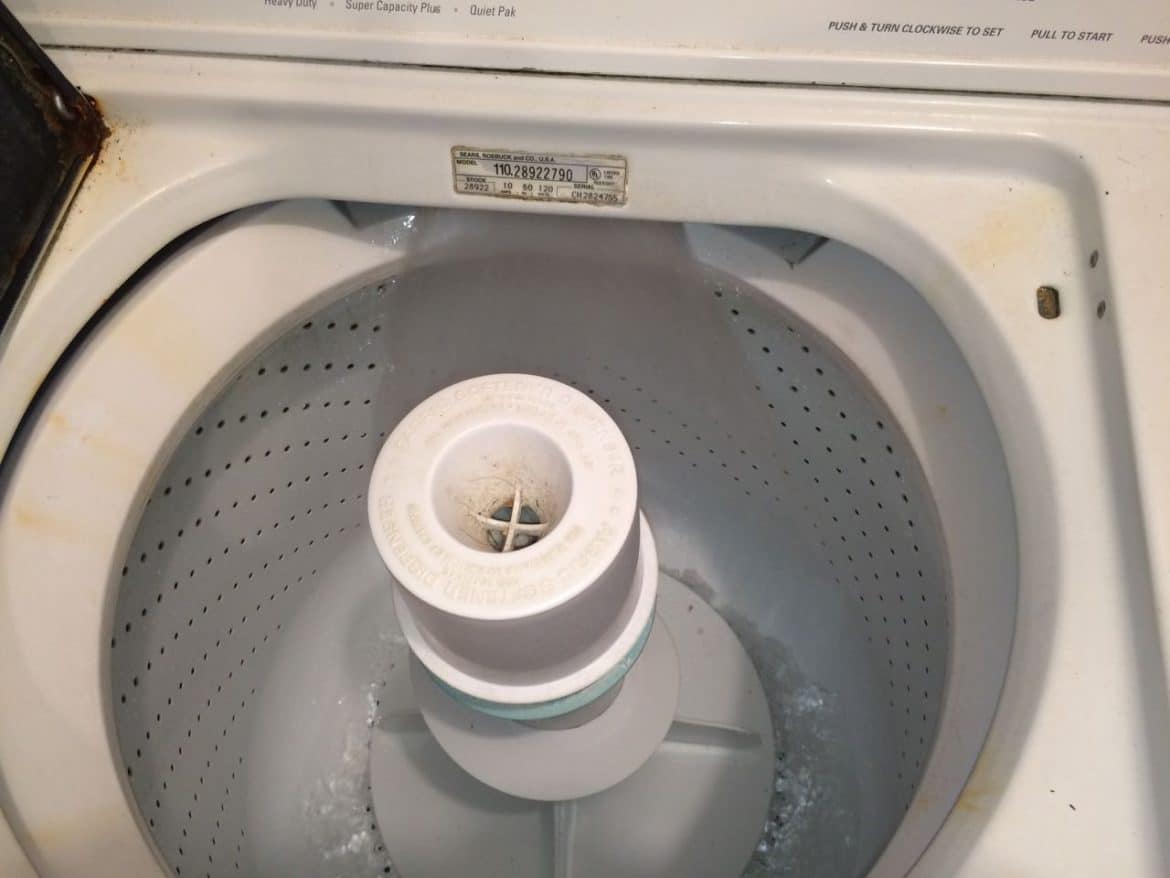
- Kenmore 90 Series Washer Model 110.28922790, there are identical Whirlpool Washers as well
Parts Needed:
Tools Needed:
- Channel Lock Pliers
- 8mm socket driver–get this tool and all the others you’ll need in this highly rated tool set
- Phillips Screwdriver
- Plastic Bucket
(to catch the water that drains out of the water lines)
- Scrub Sponge
(for cleaning the top of the washer once you lift up the control panel)
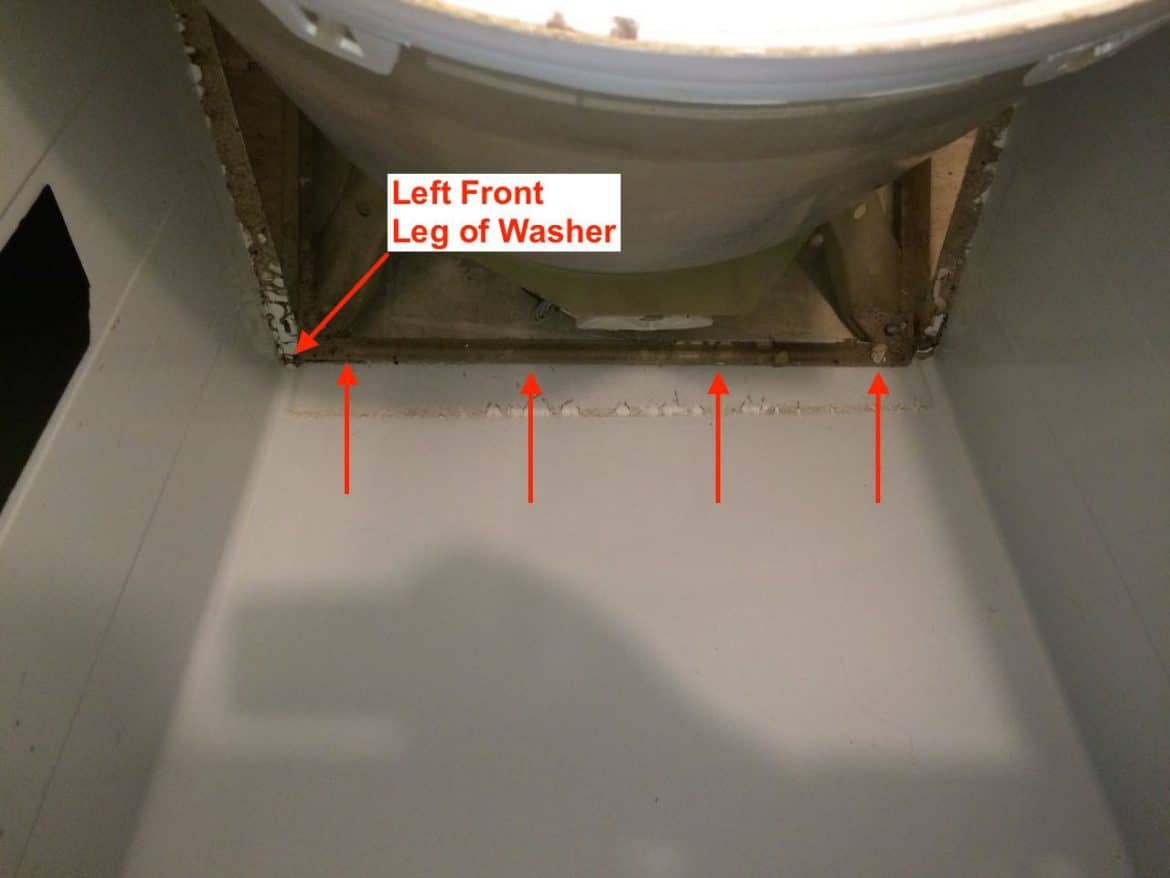
Step 1: Move the washer out from the wall
I moved this one out about a foot, to give me enough room to put my bucket back there on the floor below where the hoses connect to the washer. You can slide one corner at a time towards you in a zig-zag pattern to work it away from the wall.
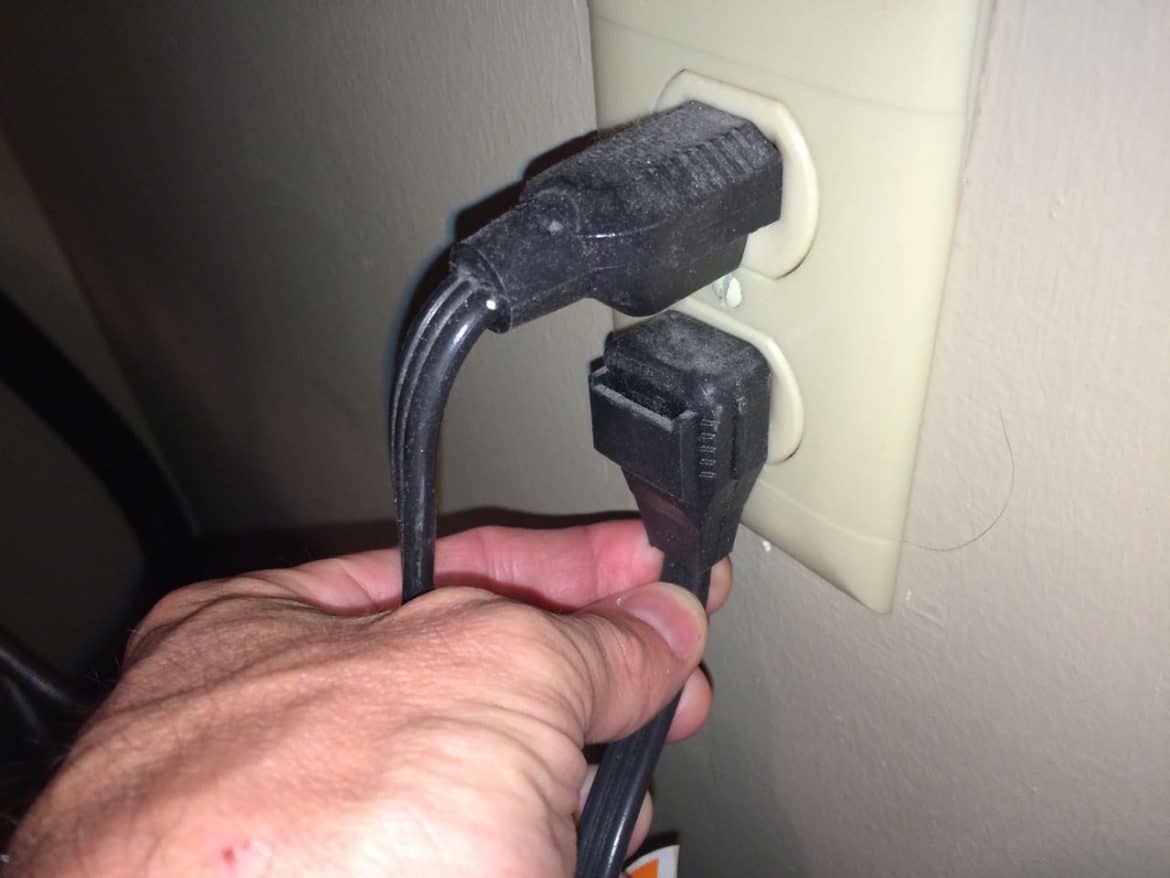
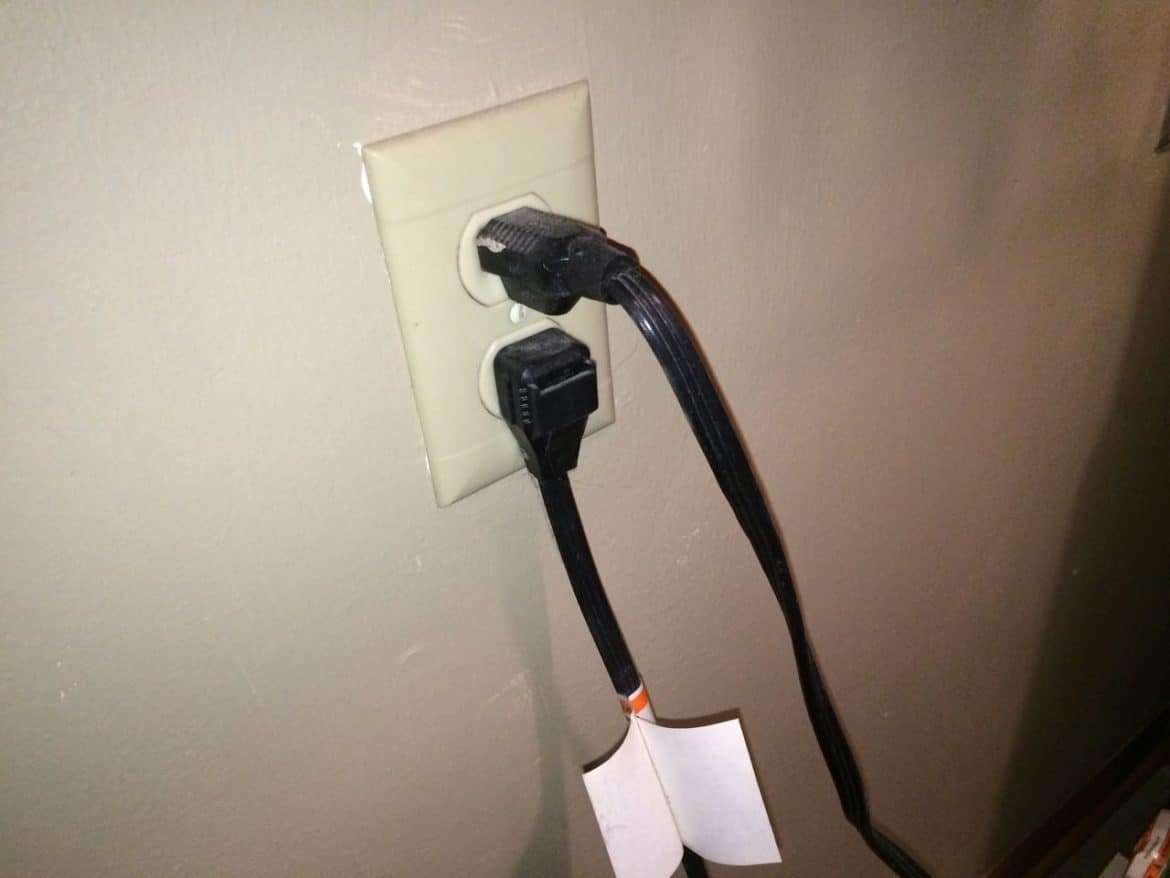
Step 2: Disconnect the power.
Don’t get shocked. We are going to handle what could be live wires. Make sure you unplug the washer from the wall:
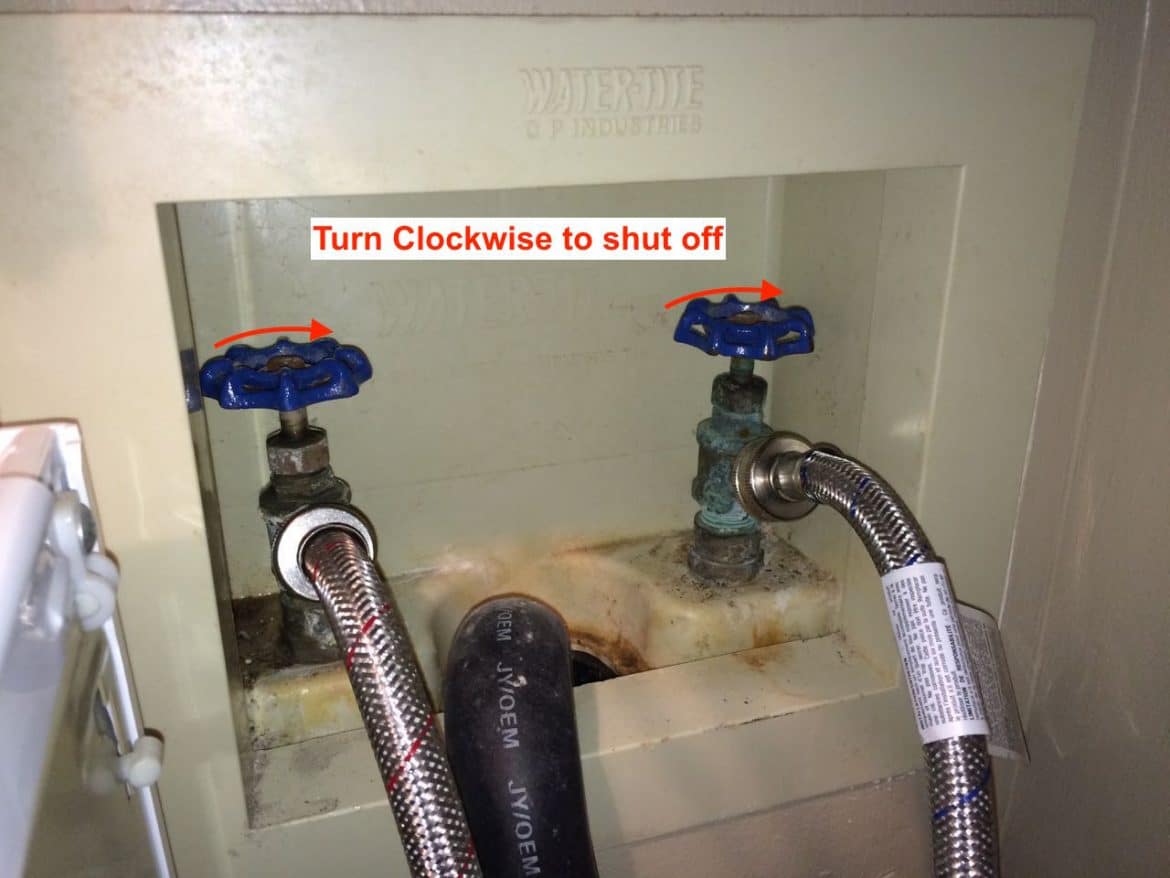
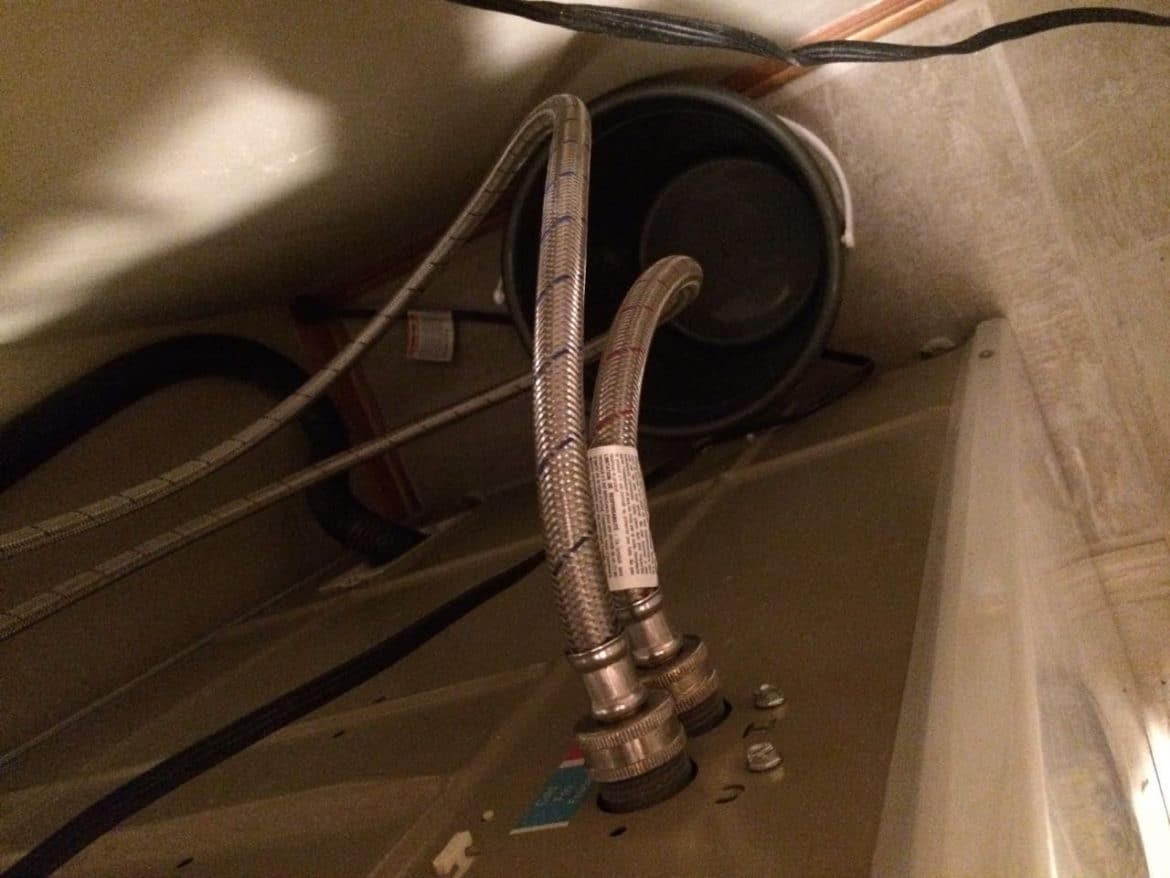
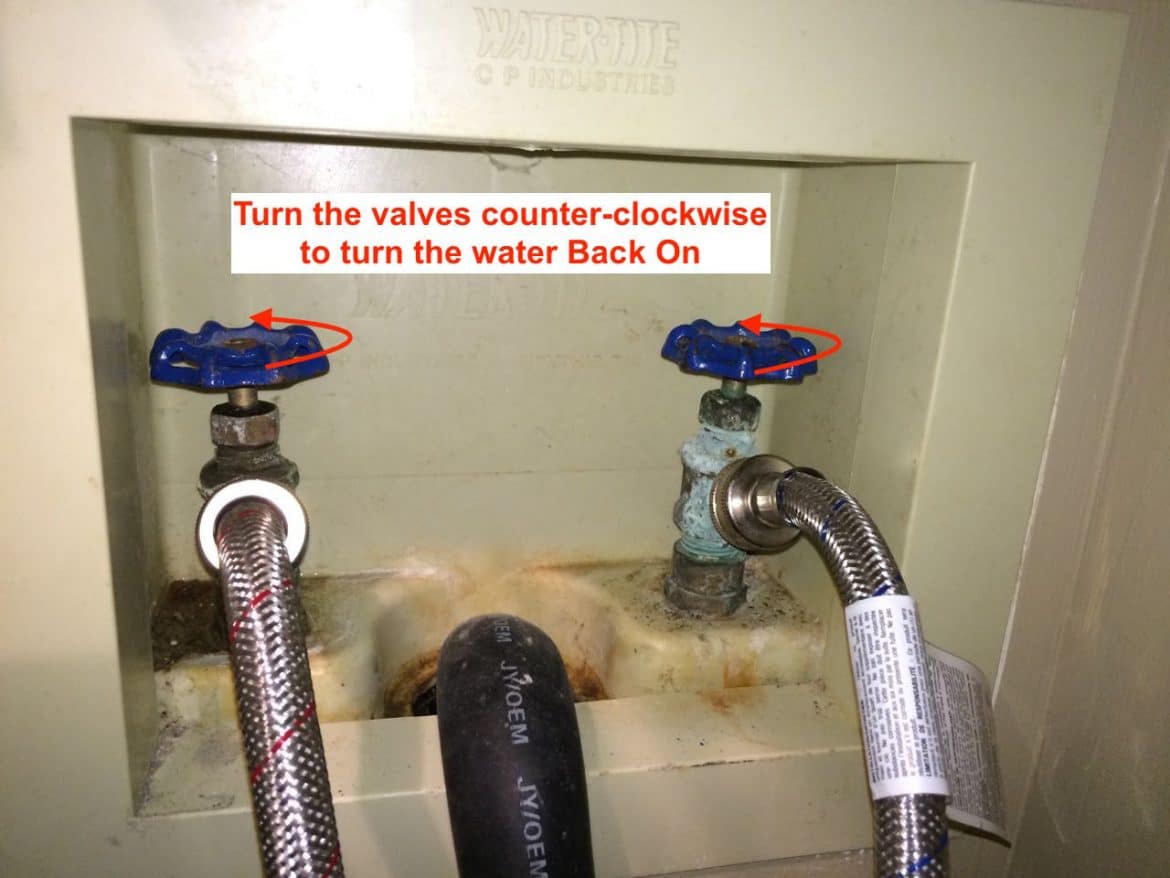
Step 3: Shut off the water valves.
Turn off the valves on the wall. If they have the round knobs like the spigot on your house you will need to turn them clockwise multiple times to turn them off. If they have a small valve handle then they probably only turn a quarter turn clockwise to turn them off. These were the hose spigot type valves so they took 4-5 turns to turn them off:
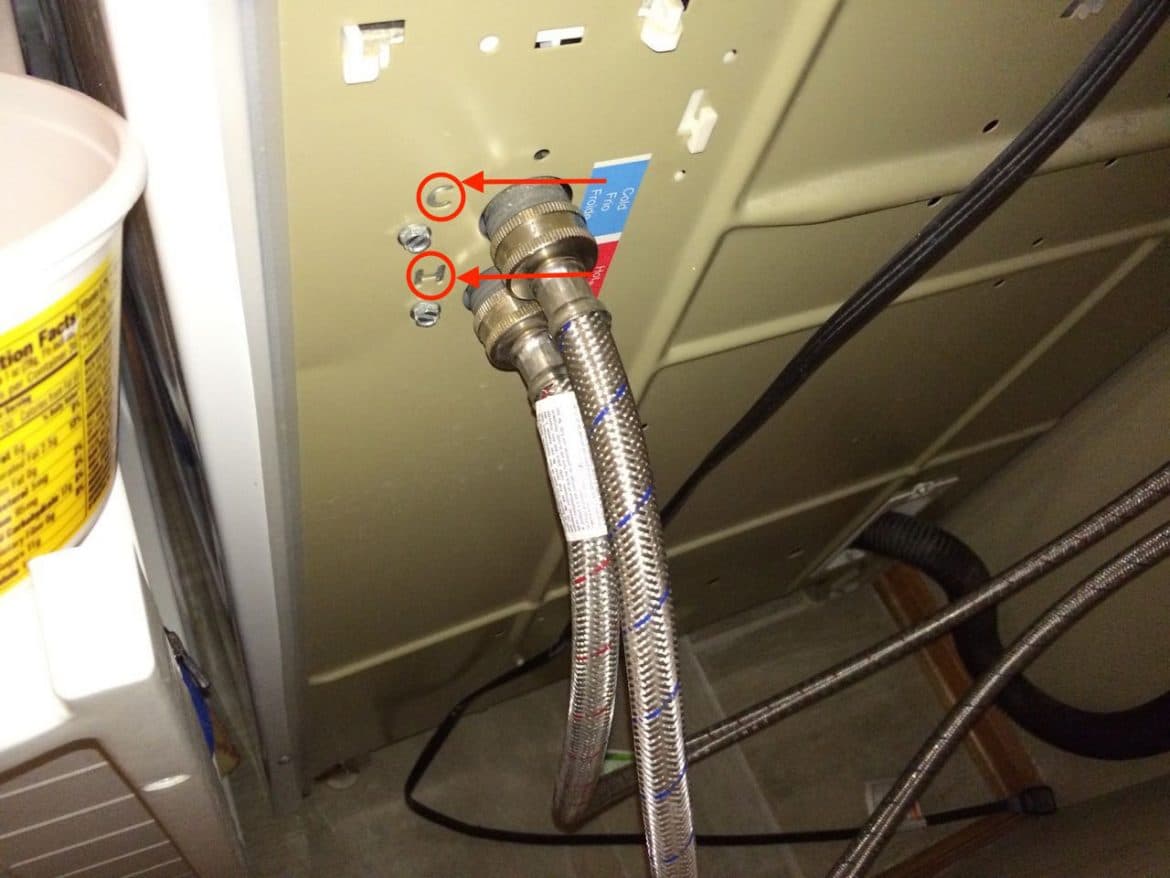
Step 4: Mark the Hot/Cold Water Lines
This was unnecessary in my case because my water lines were color coded with a blue/red strand threaded in the braiding of the hose, but you ought to take note of which is the hot and cold lines before you disconnect your lines. The cold connection is on top. Put a piece of tape on one hose to mark it so it will be easy when you put everything back together. You can look at the back of the washer to determine which is which is which (or look at the valve end, which could be labeled as well):
Step 5: Disconnect water lines from back of washer.
I had a plastic bucket ready to catch the water that was left in the lines after turning the water off. It’s not going to be that much water but it would good to have a bucket handy. It’s also handy in case one of the valves does not cut the water completely off and it continues to drip after you disconnect the lines.
I wasn’t able to loosen the hoses from the washer by hand so I carefully used channel lock pliers. Be careful not to squeeze any harder than necessary because you can bend the connector and/or really scrape them up too. When looking at them from the back you will turn the connector counter-clockwise to loosen them:
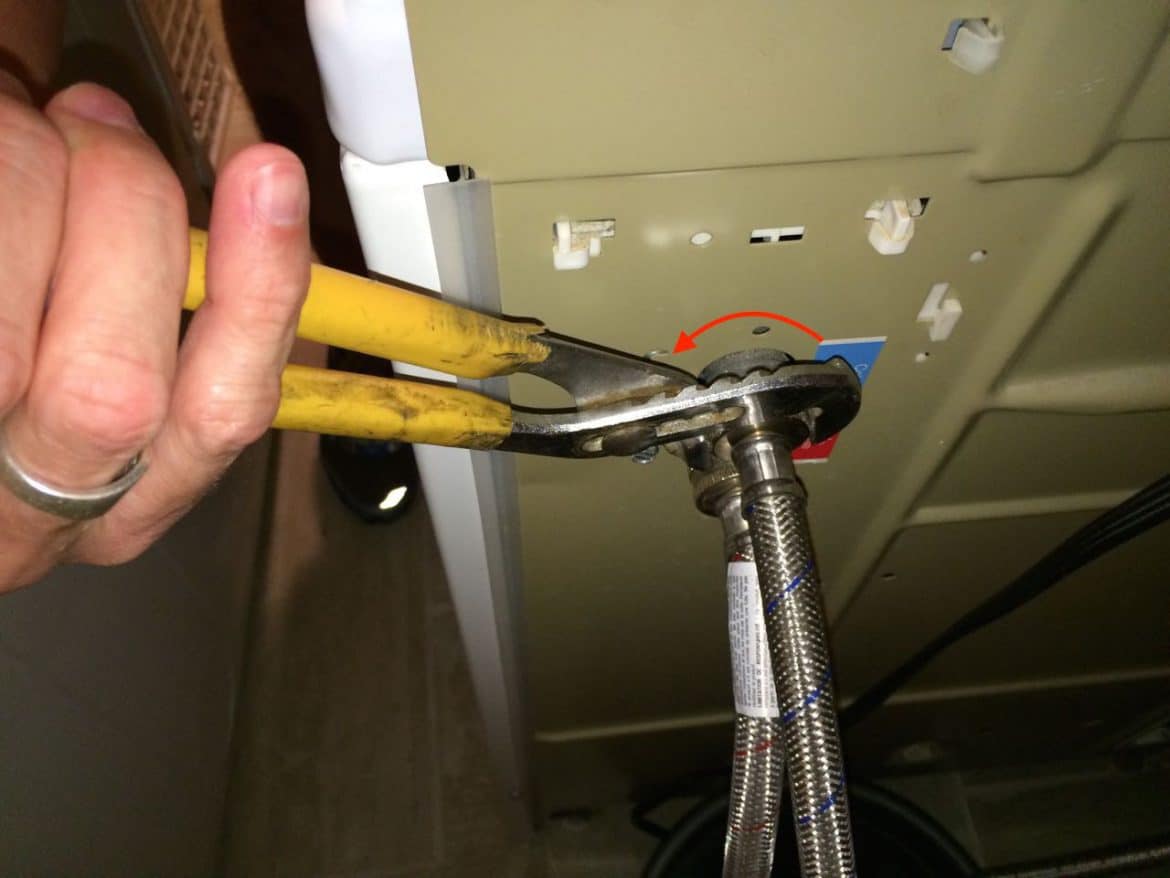
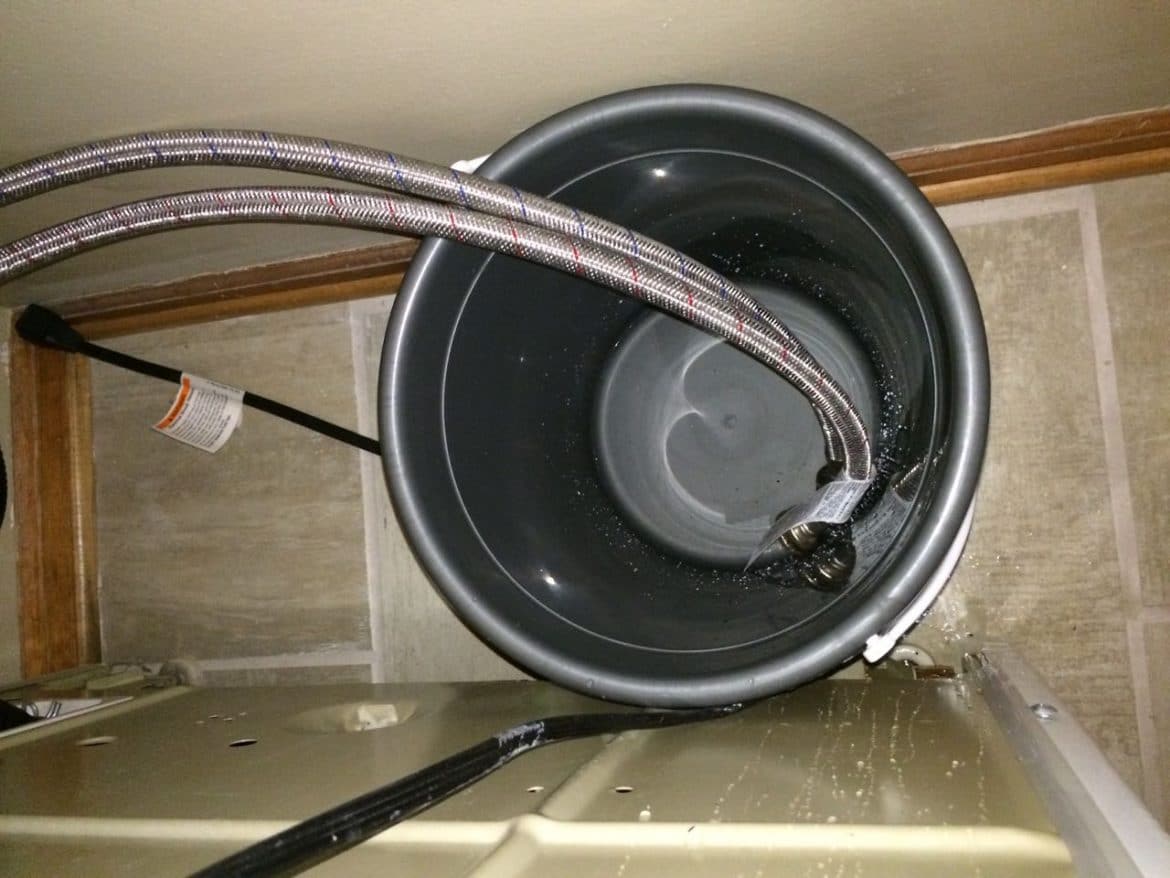
Drop the ends in your bucket behind the washer so it catches the water that drains out of them:
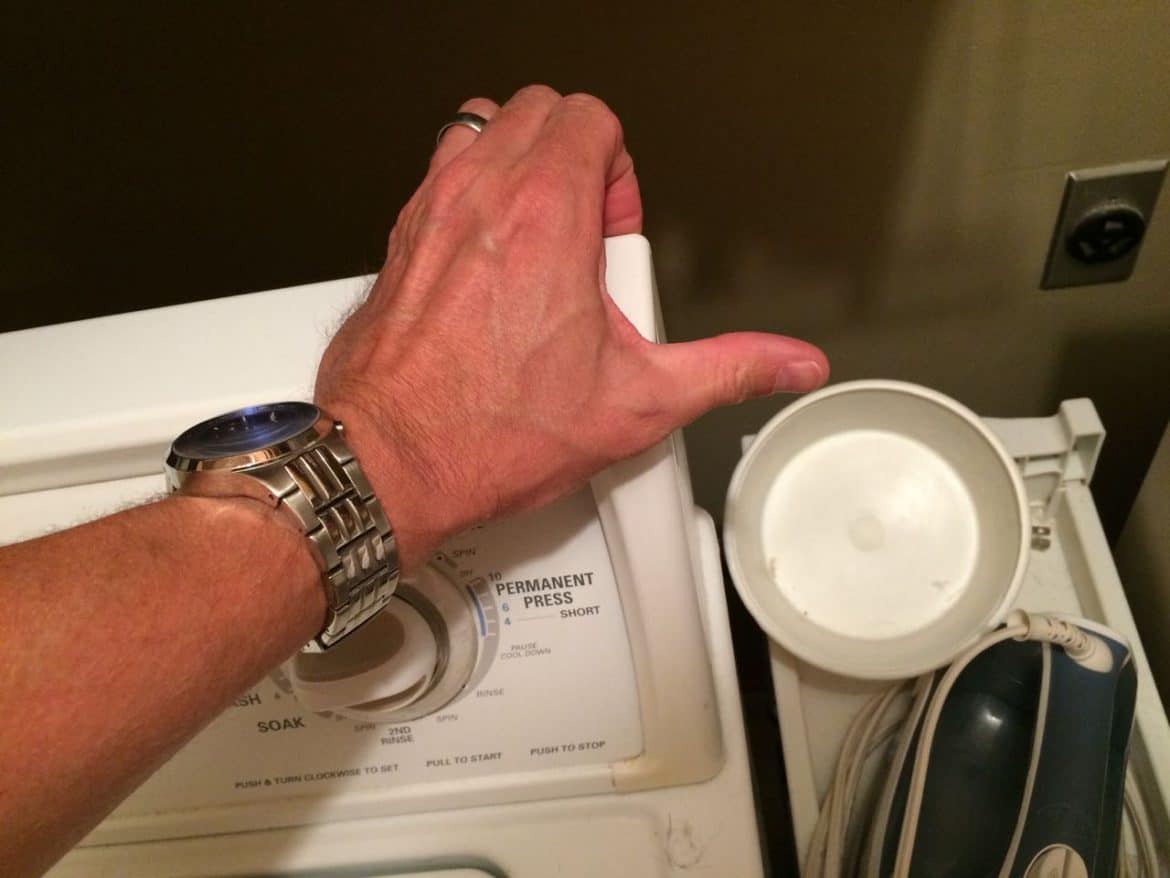
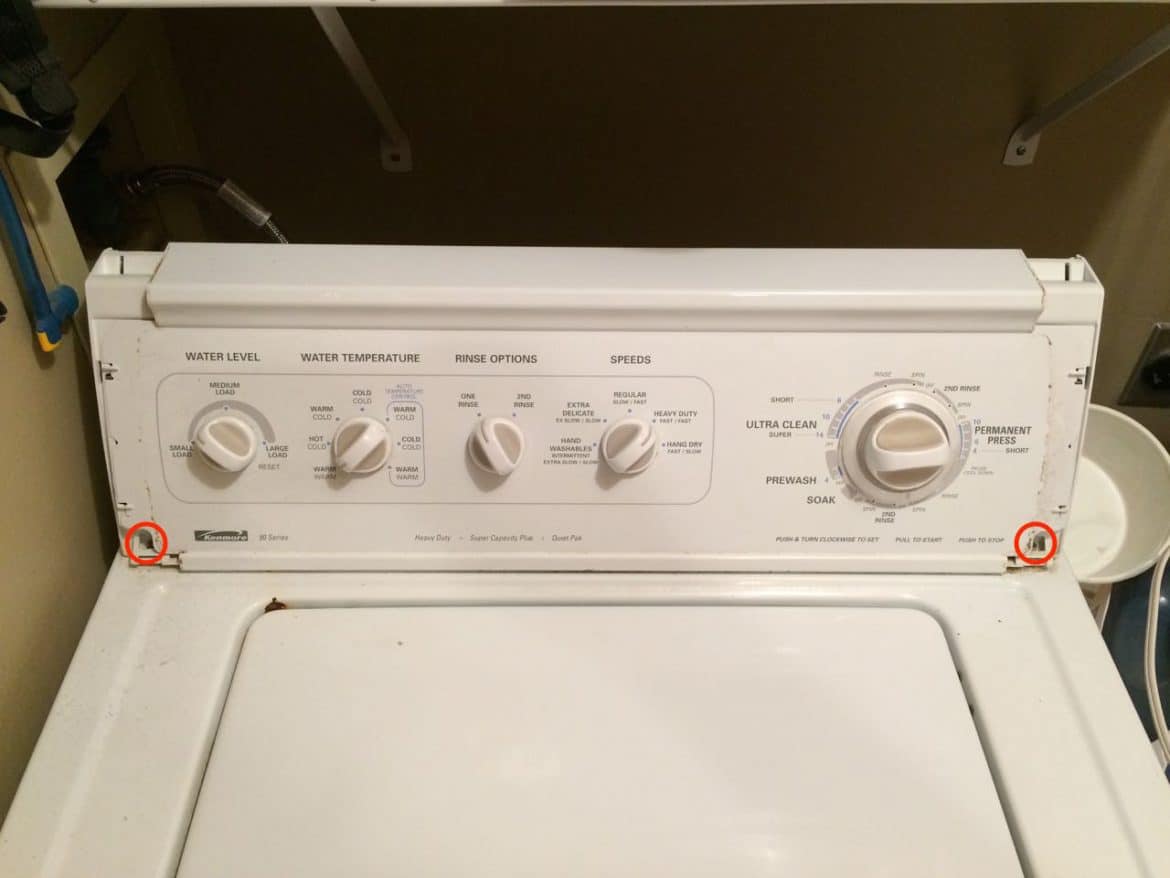
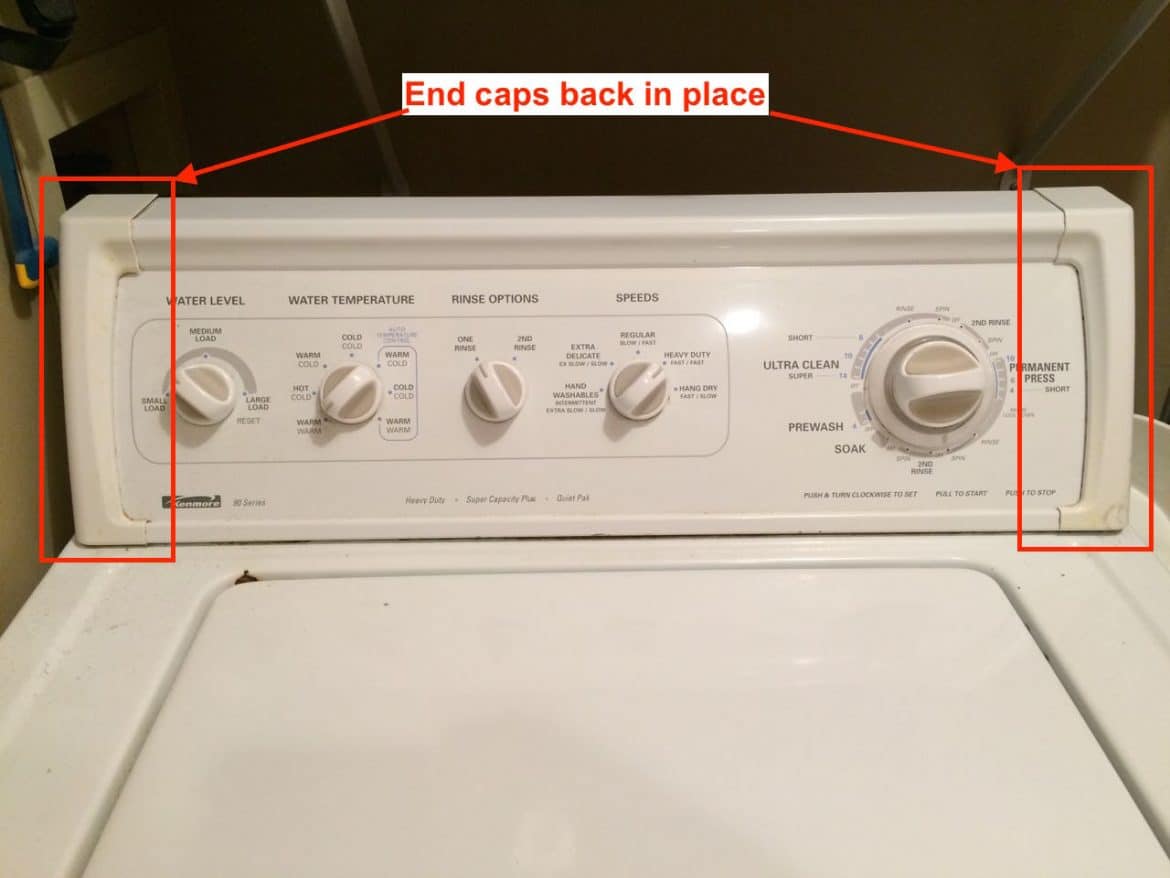
Step 6: Remove the bezel end pieces
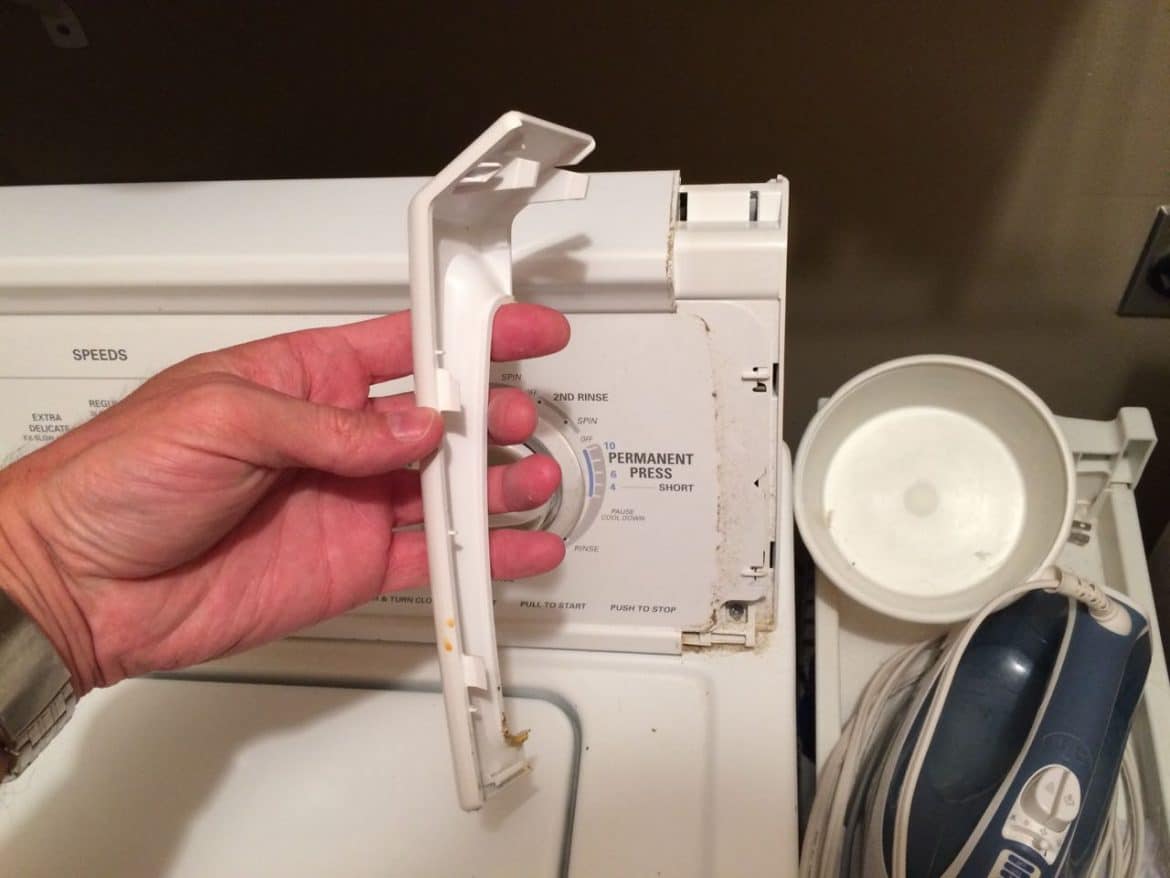
We are looking for two screws at the right and left lower corners of the control panel. In this model’s case you must pop off these two bezel pieces. You can grab them from the top edge or use your fingernails under the edge and then pull them straight off:
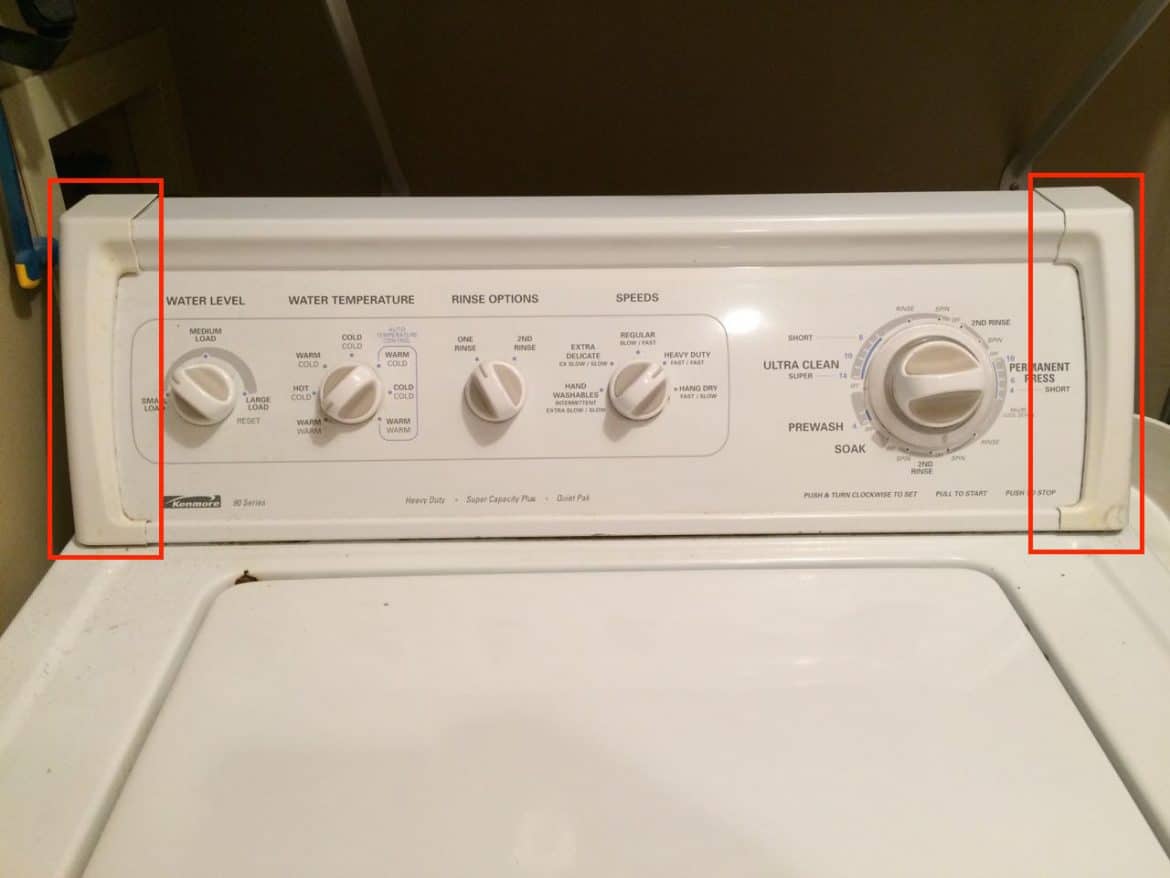
Method 1: You can pull them off by putting your fingernails under the face edge like this and pulling straight out:
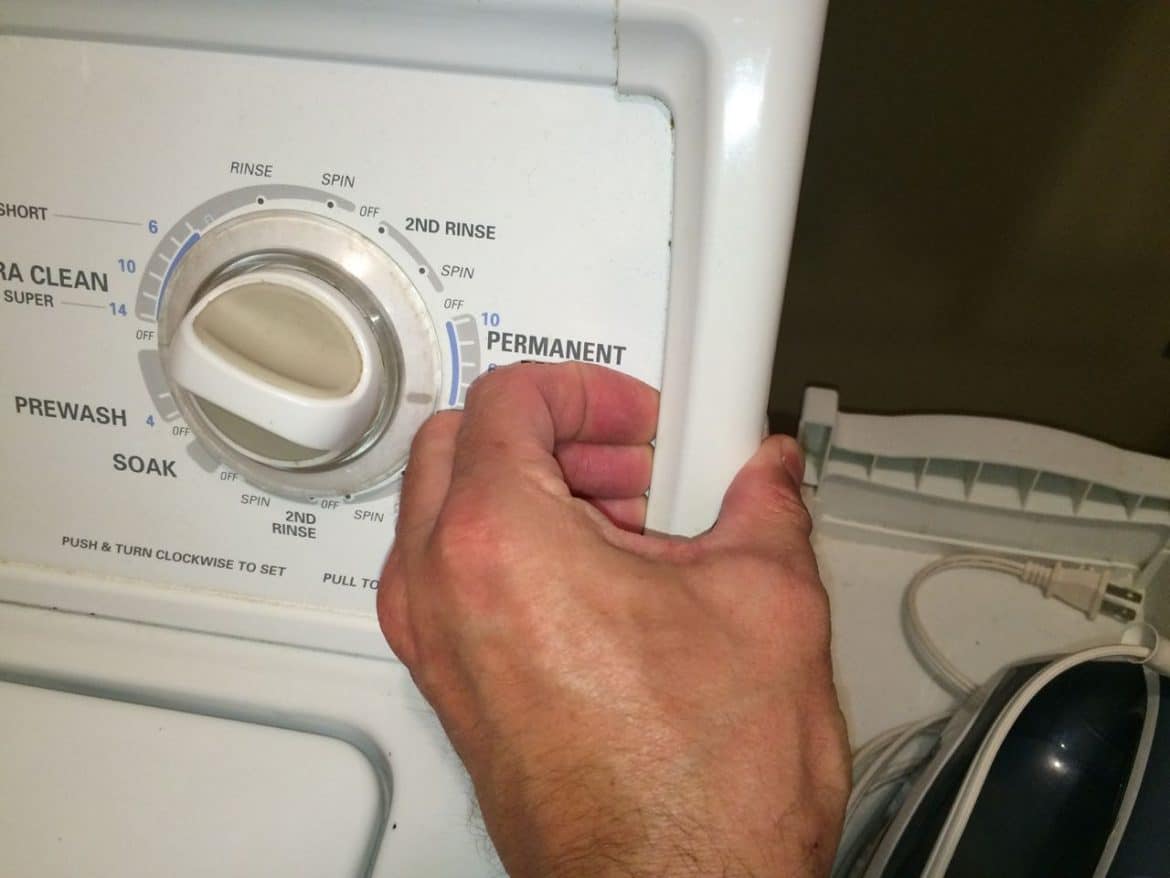
Method 2: Grab the top edge and pull forward:
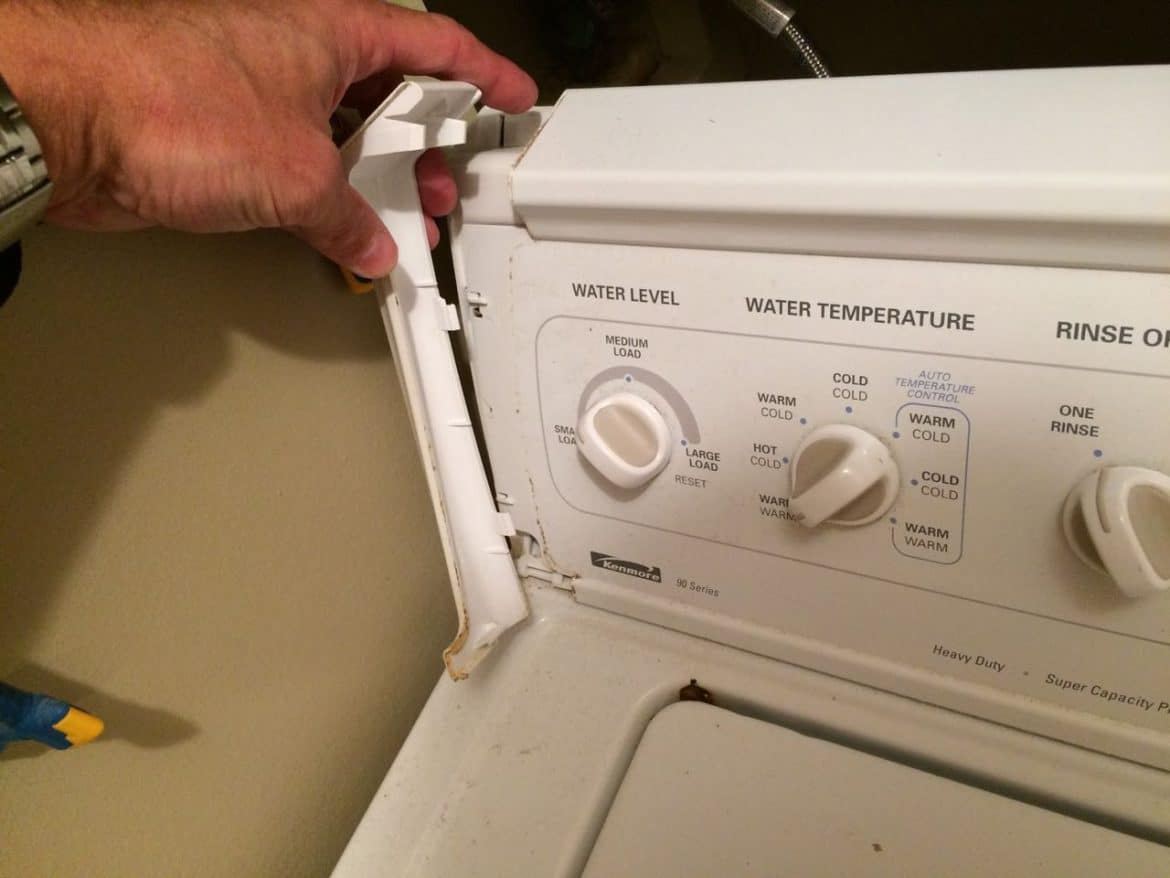
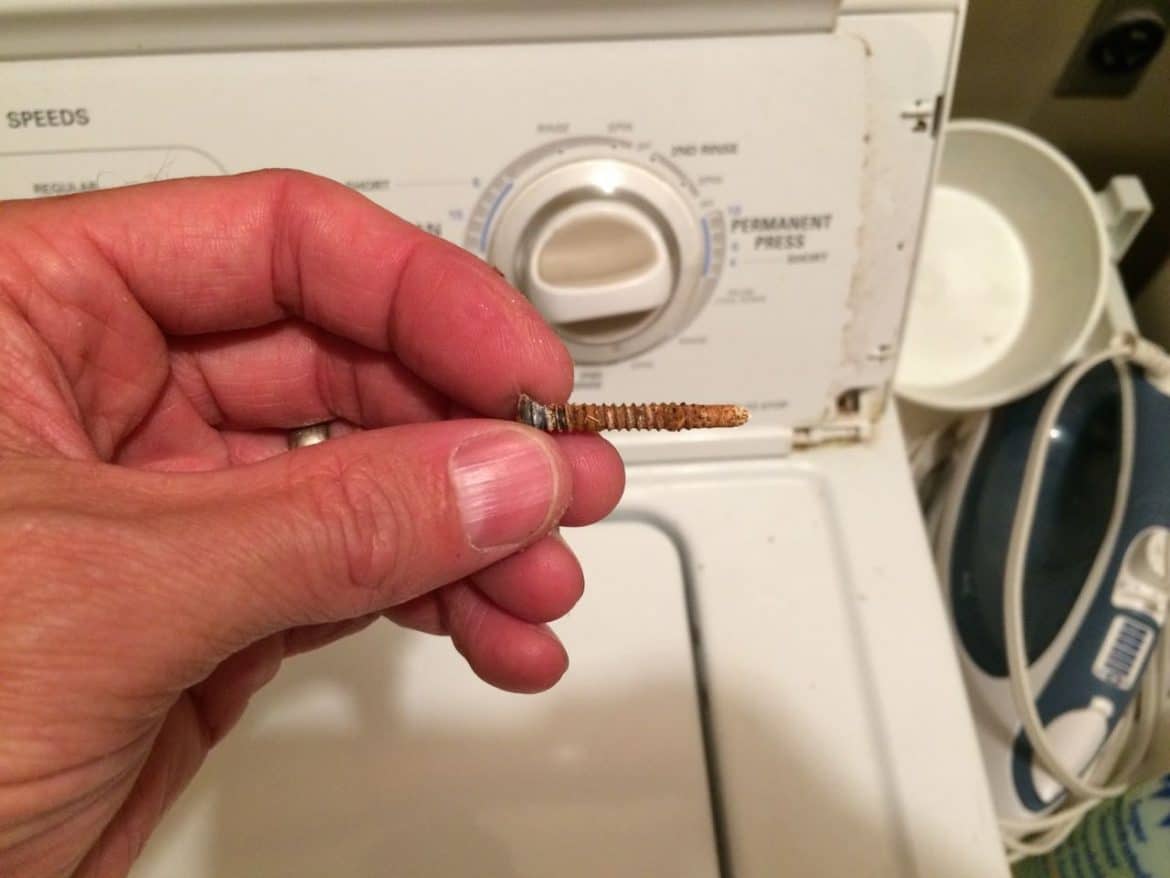
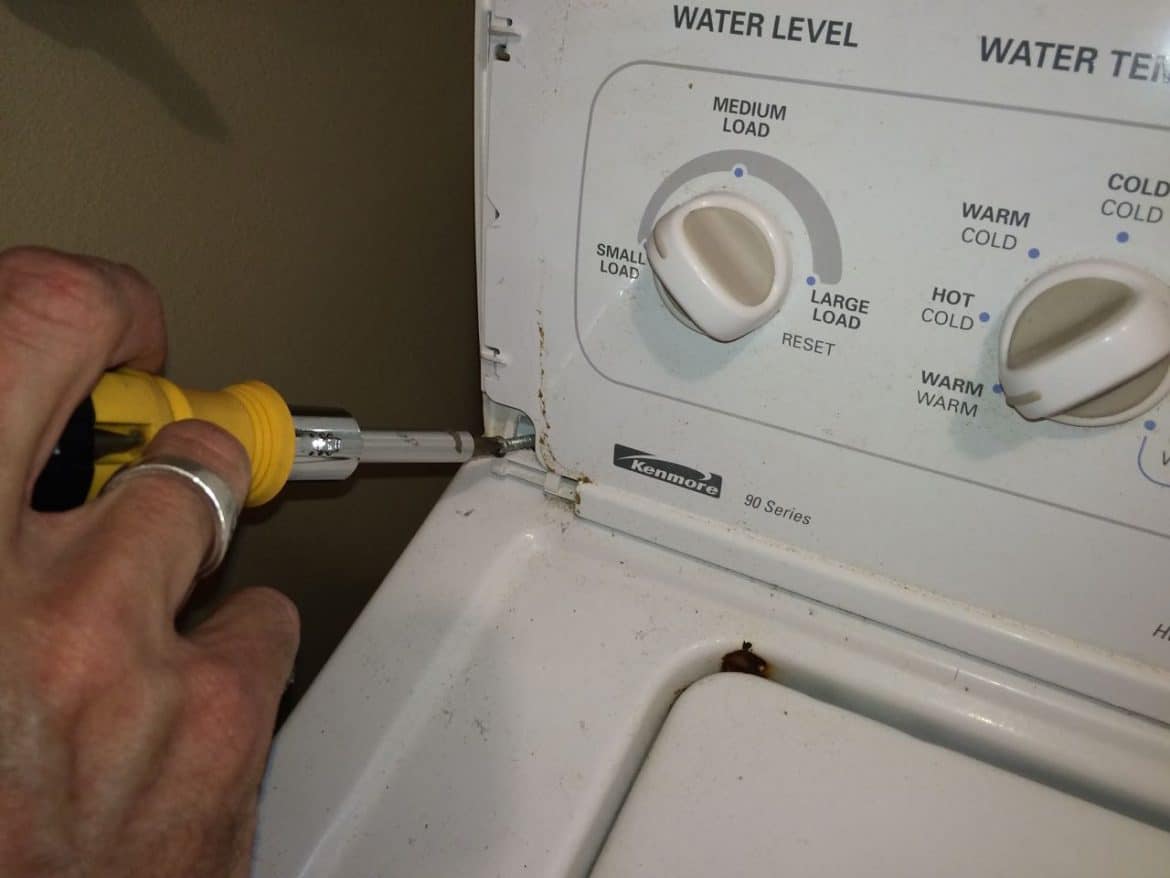
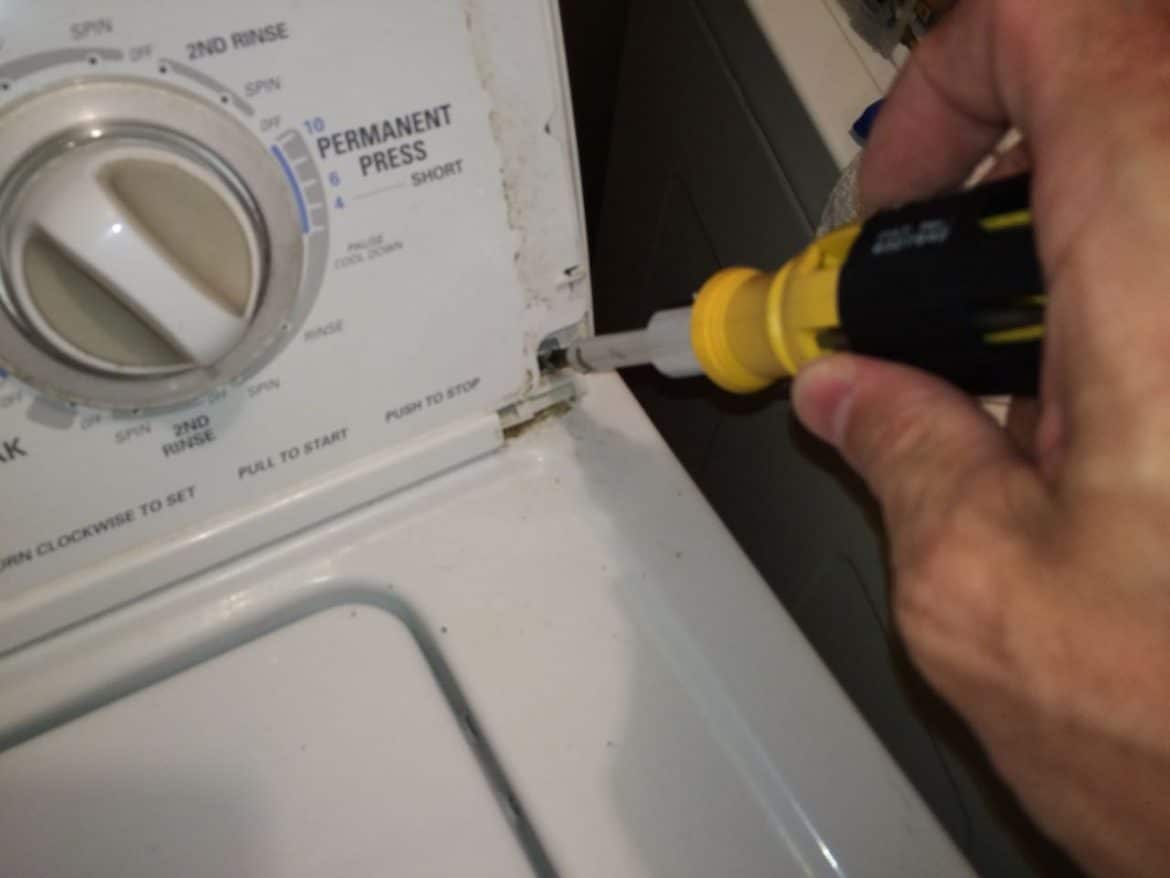
Step 7: Remove the two control panel screws
The are Phillips head screws slightly recessed at the lower right and left corners of the control panel:
One of them was quite rusted so be careful that you are using the right size Phillips screwdriver so you don’t strip the head;
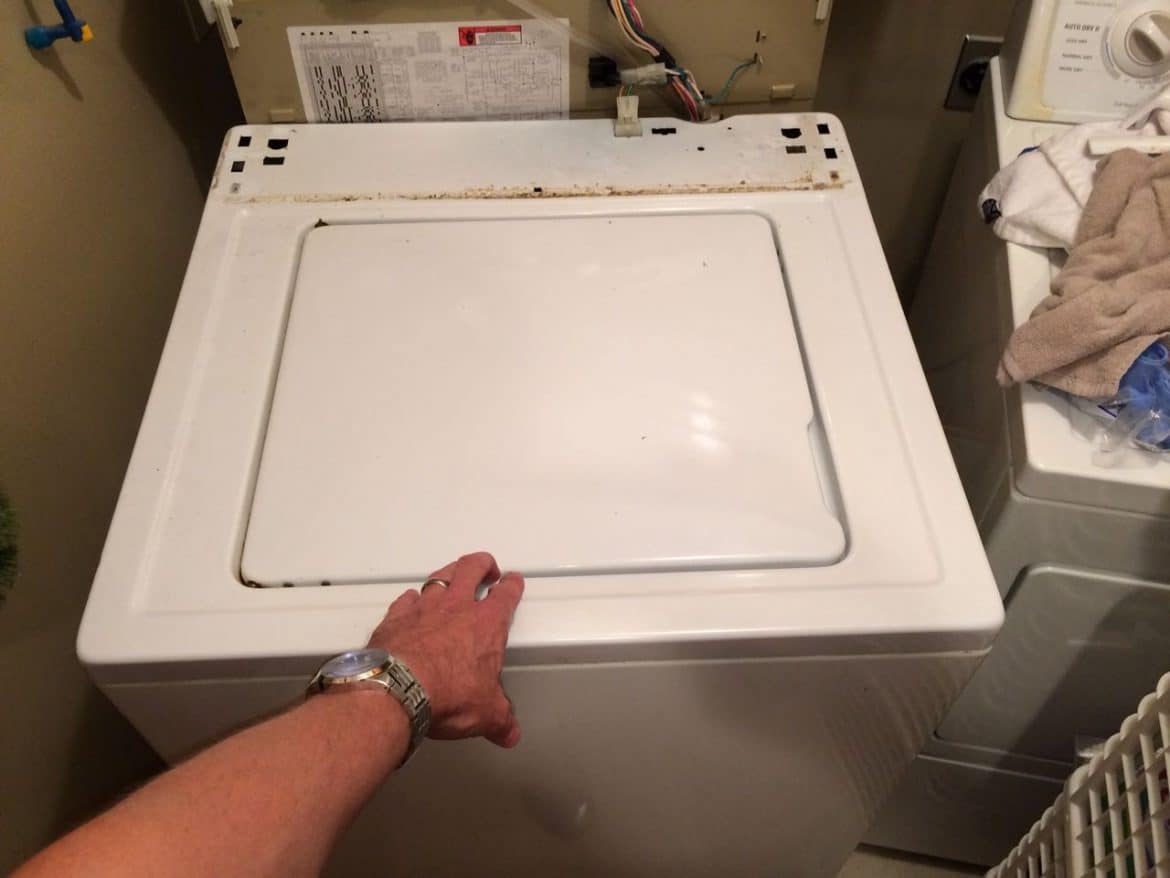
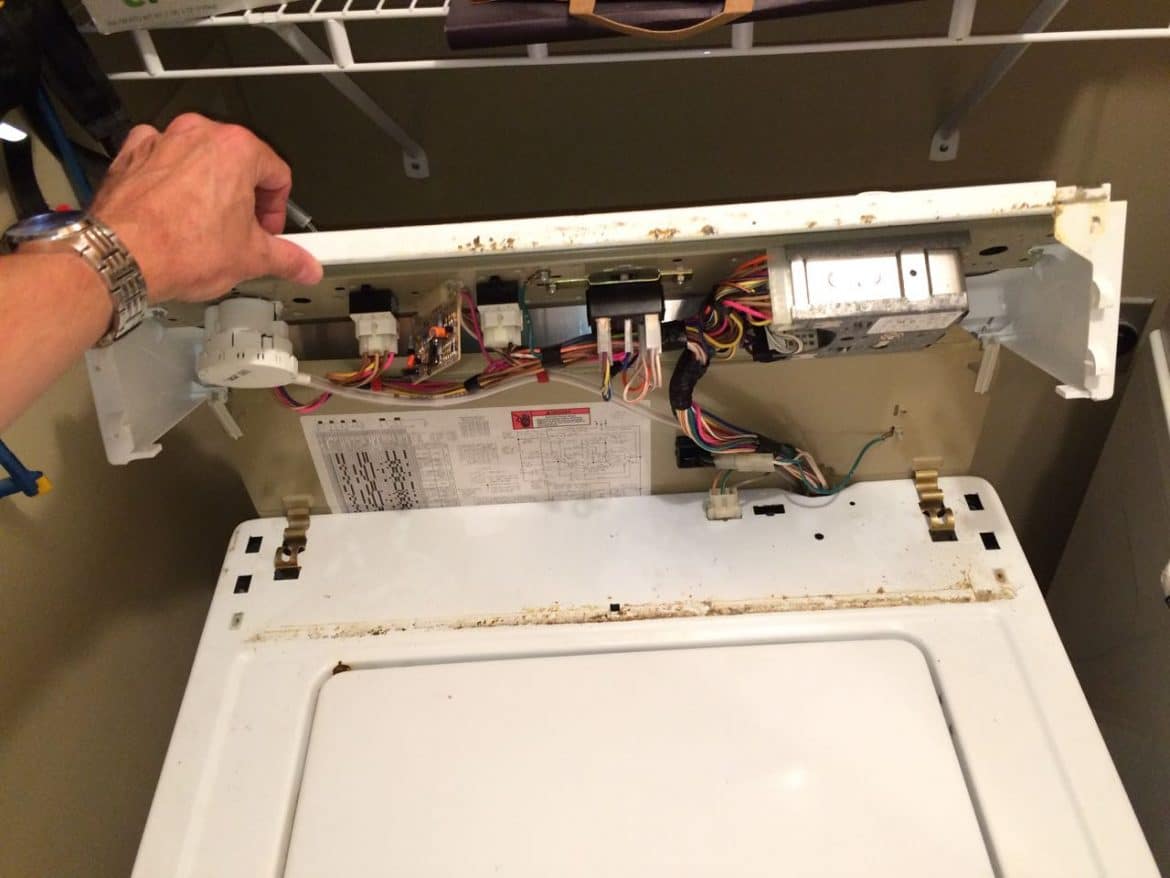
Step 8: Flip the control panel up
The control panel is hinged at the top back edge and you can just lift up on the bottom and flip it up and out of the way. First get the bottom started. You can actually lift the control panel straight up and then swivel the bottom out:
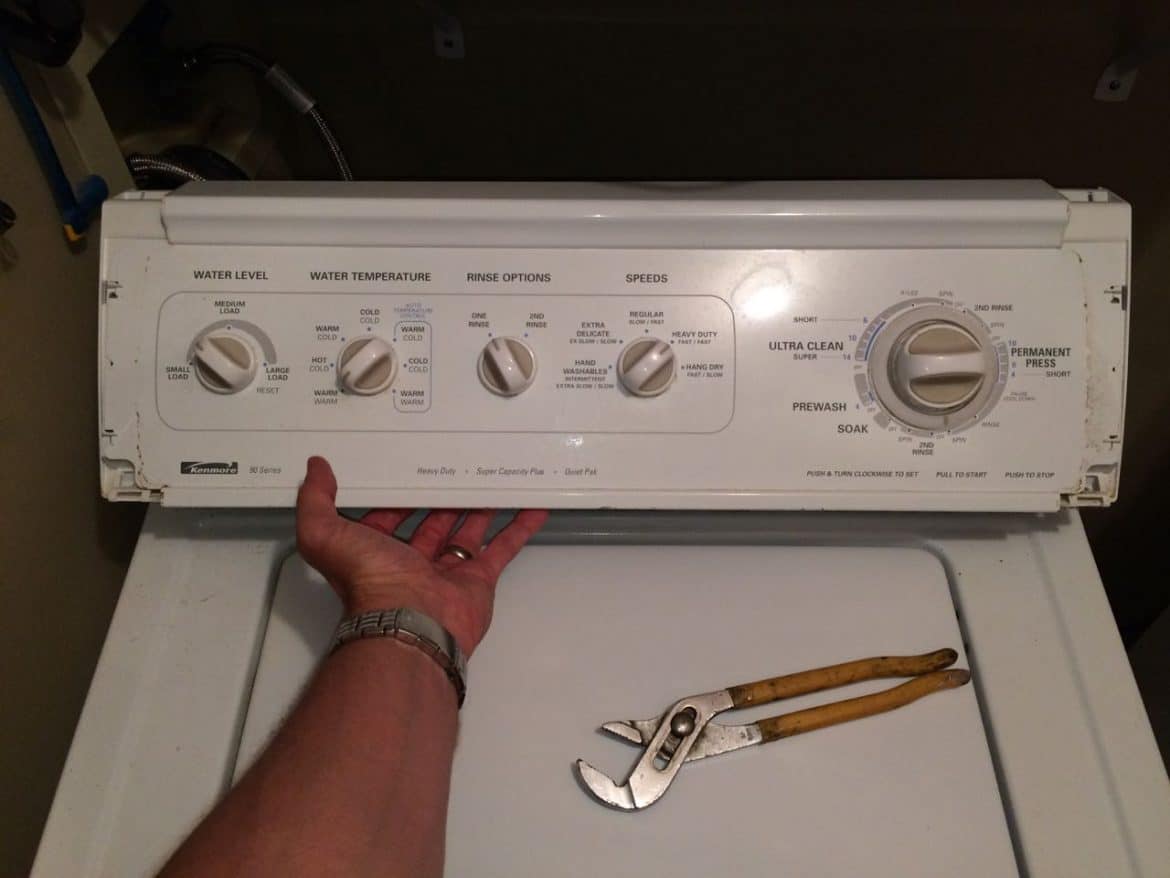
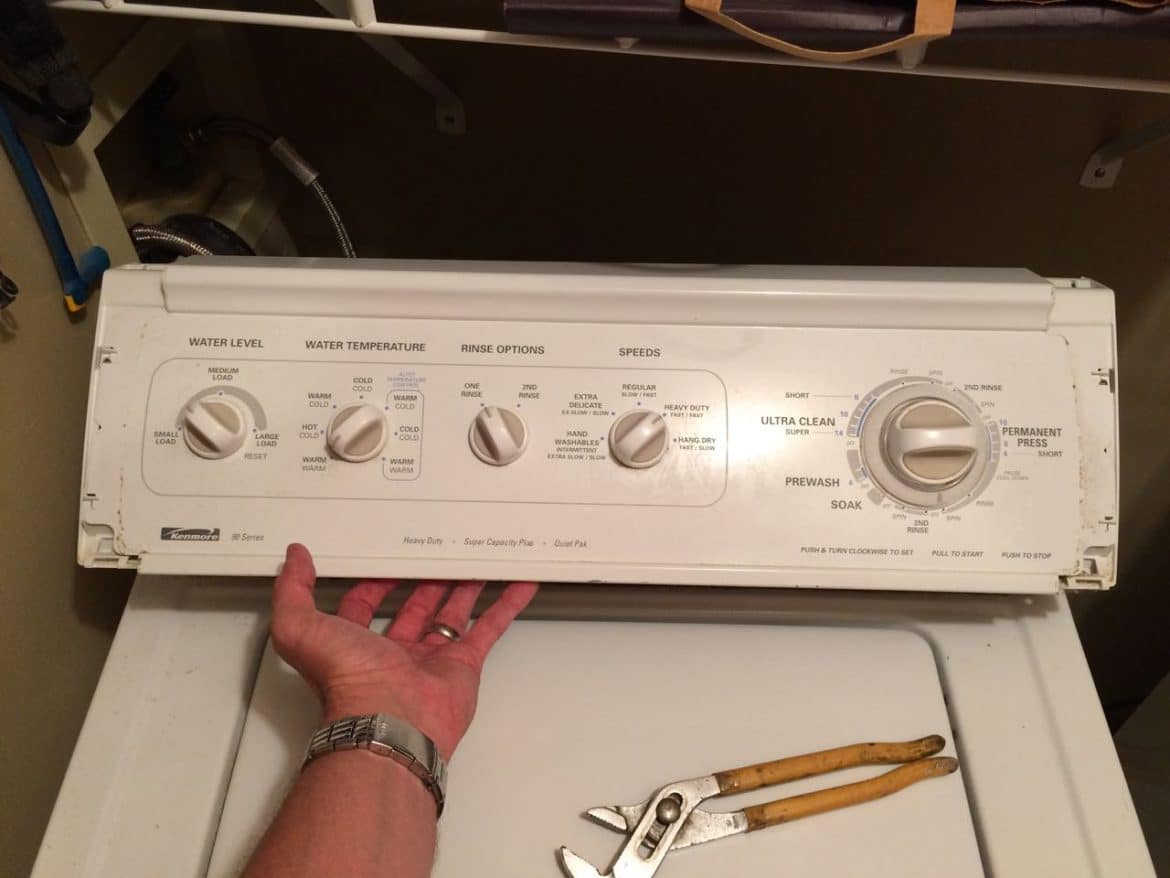
Once you have flipped it all the way up it will balance there:
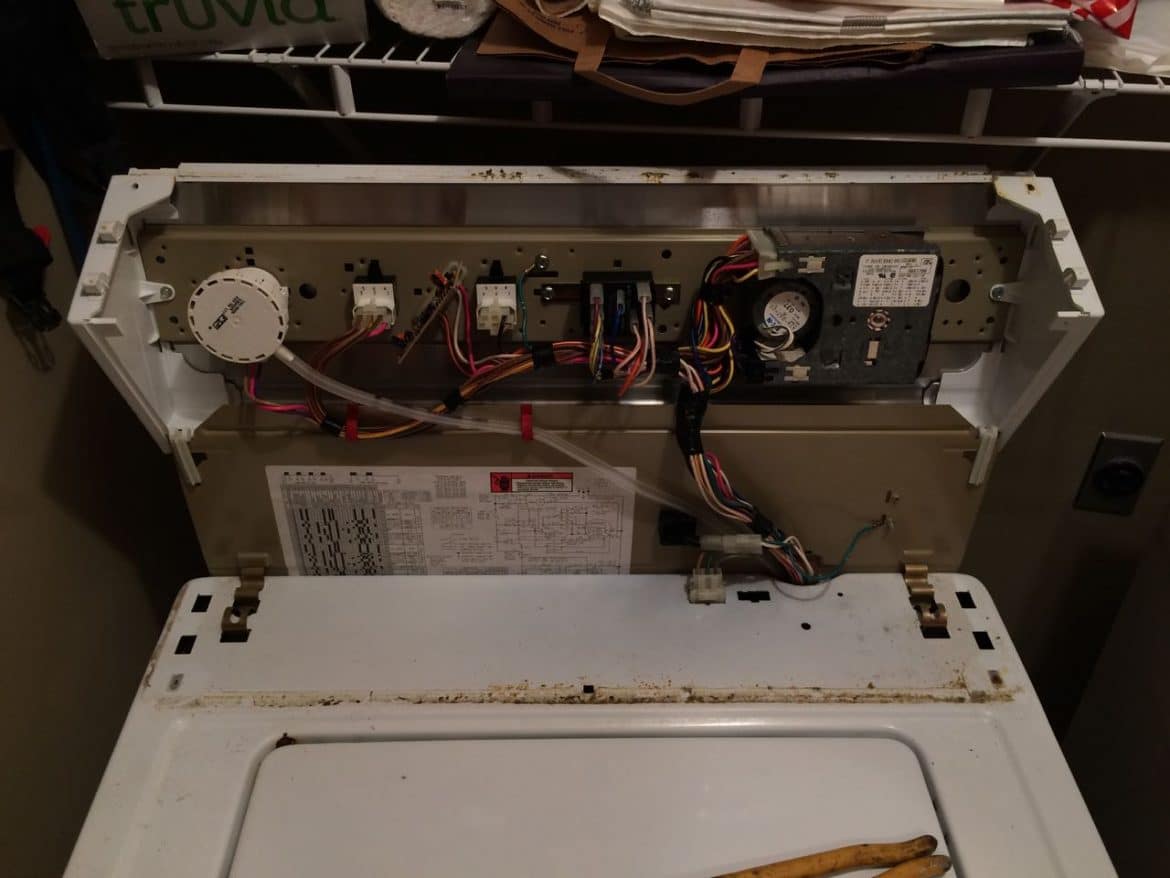
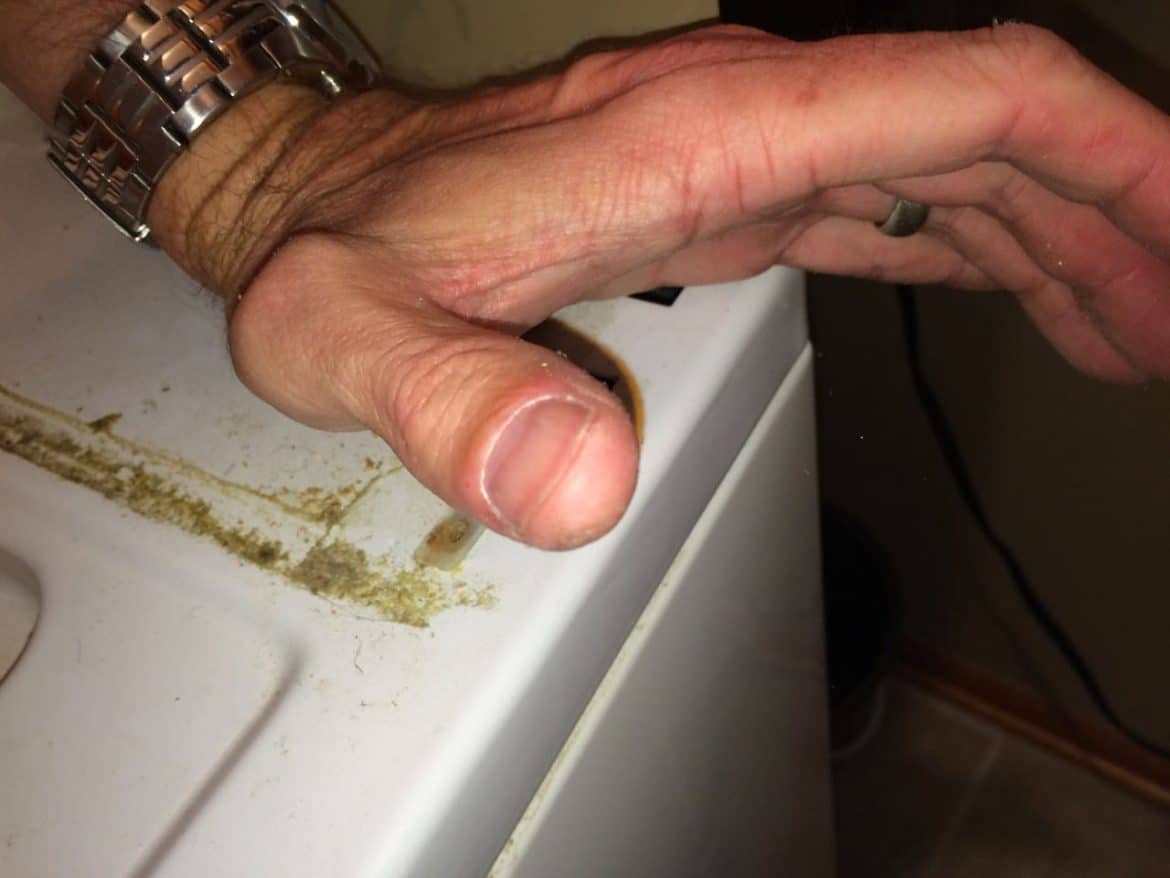
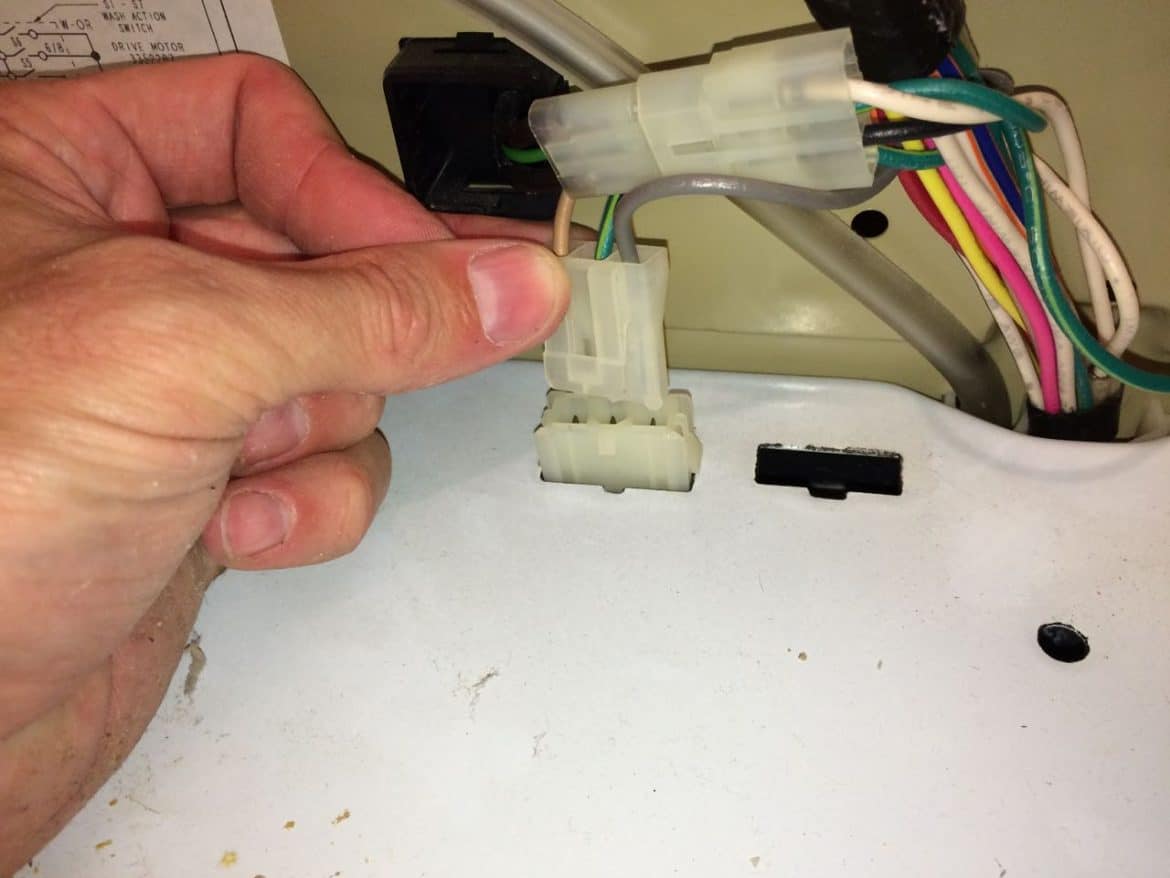
Step 9: Disconnect the washer housing electrical connector
The connector goes down into the top of the washer shell and is located all the way back and towards the right:
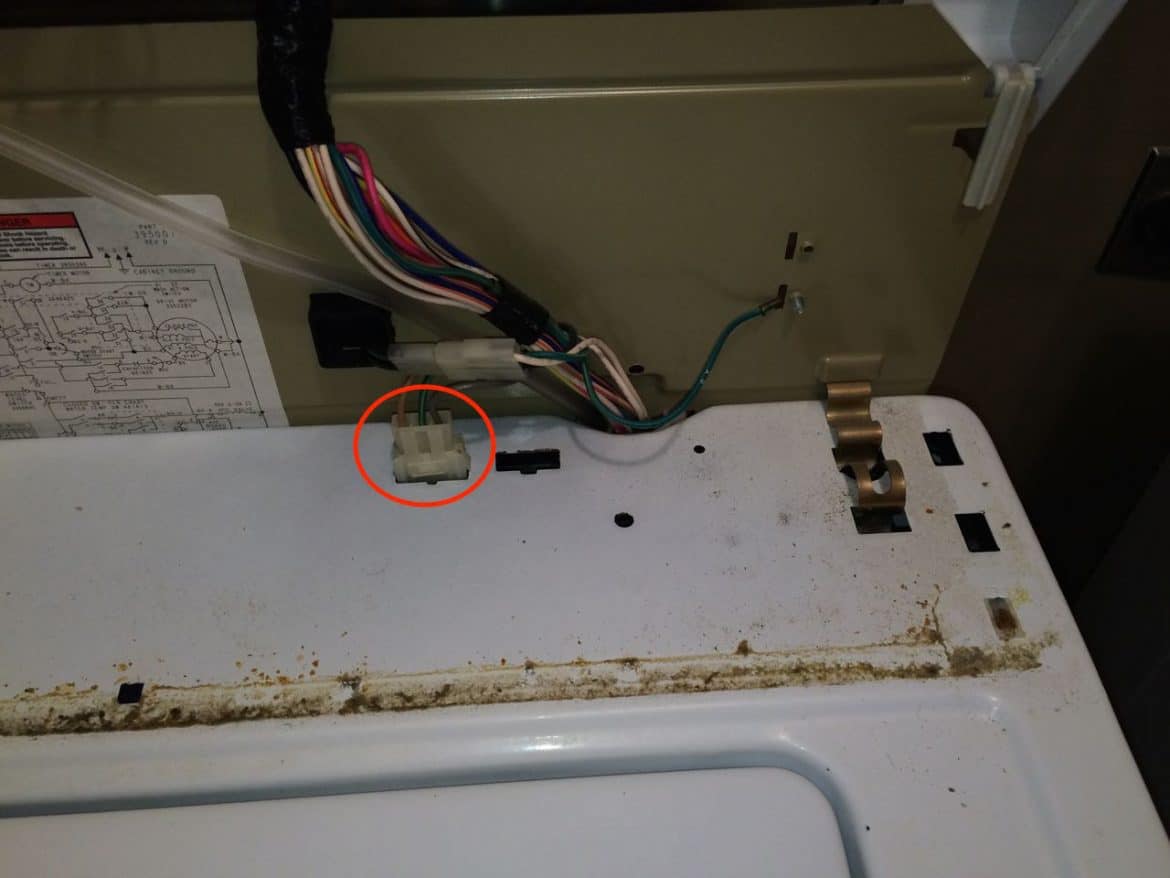
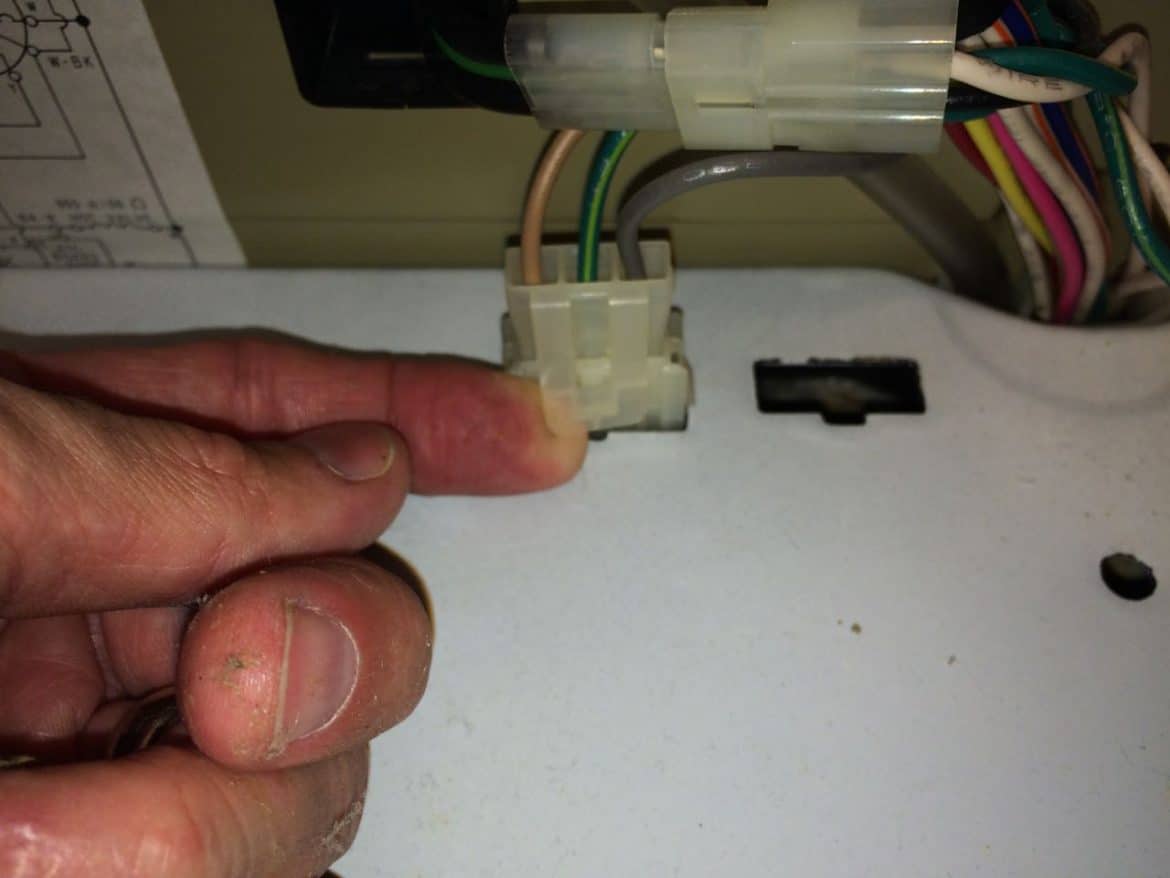
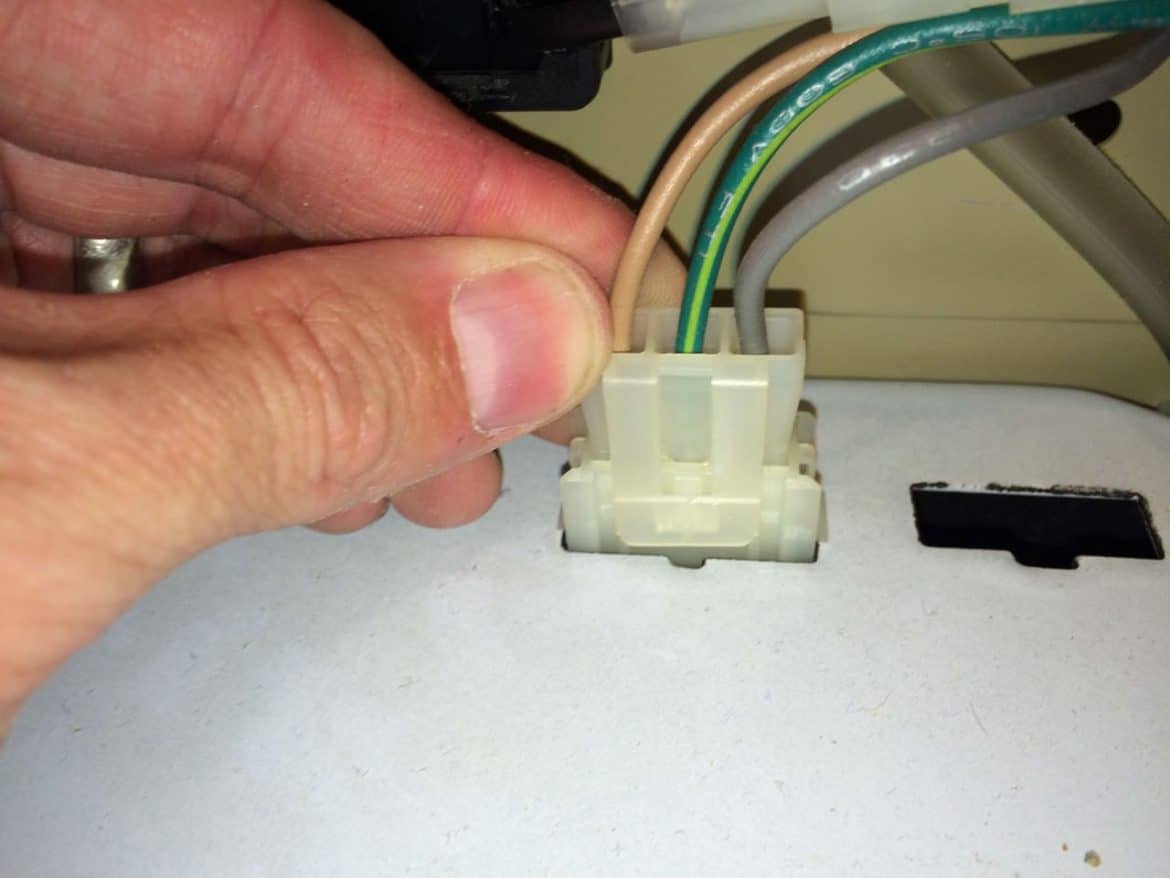
There is a tab that points down on the front face of the connector that must be lifted before pulling the connector straight up and off. Do not pull the connector by the wires but make sure to grab the plastic body of the connector because the wires will pull out of the connector.

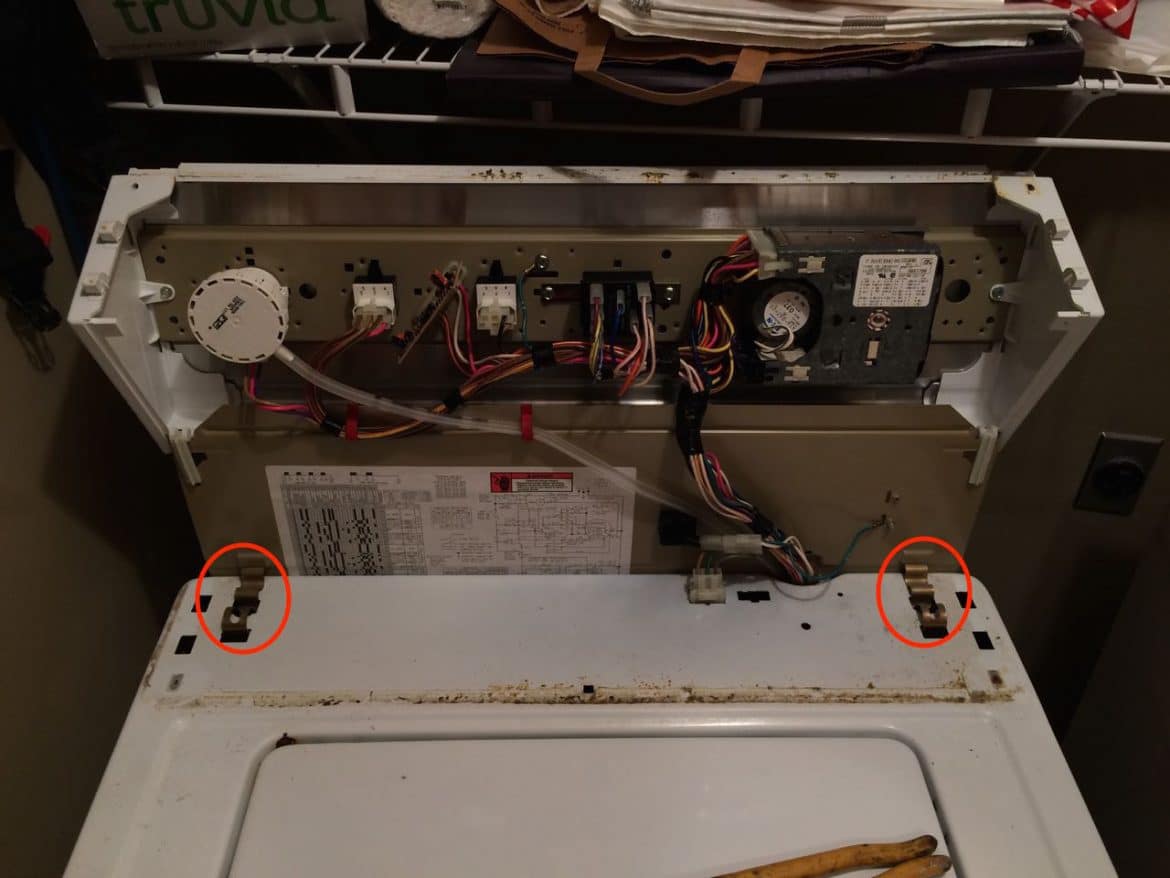
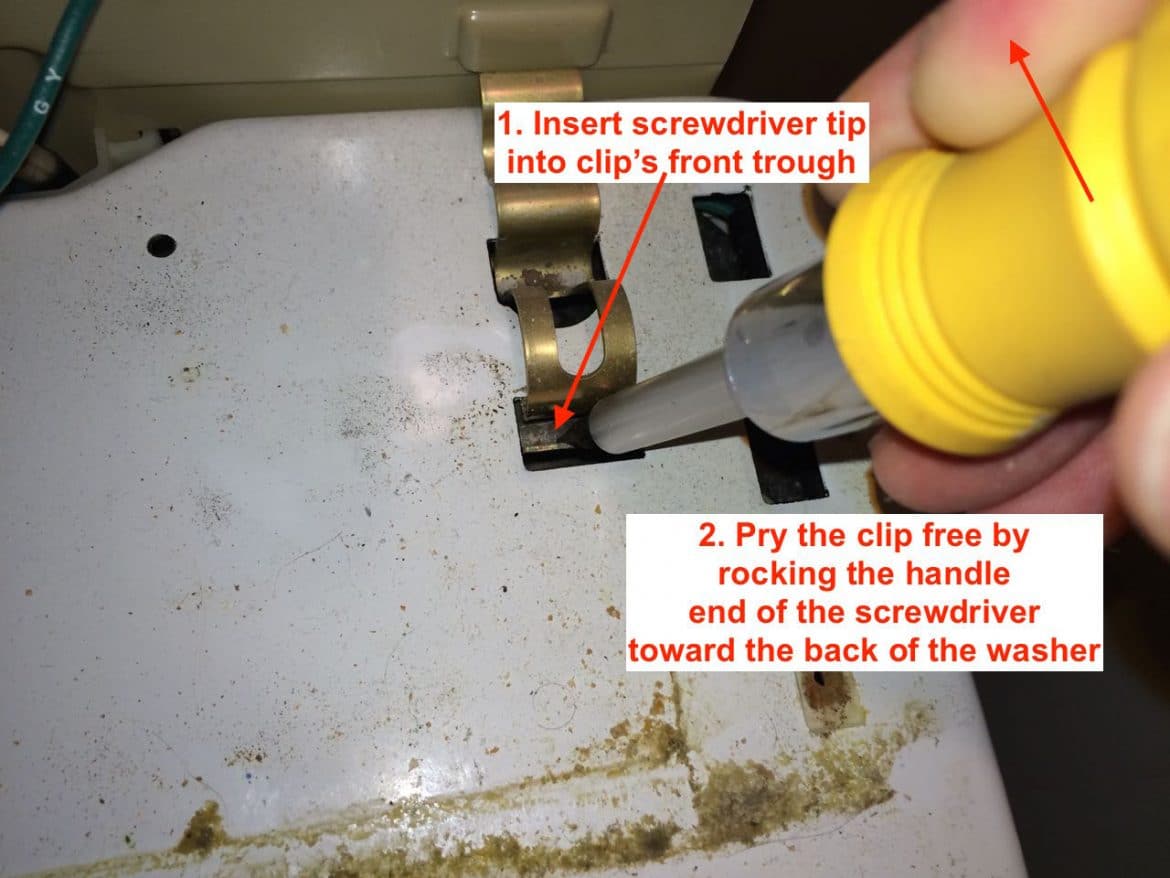
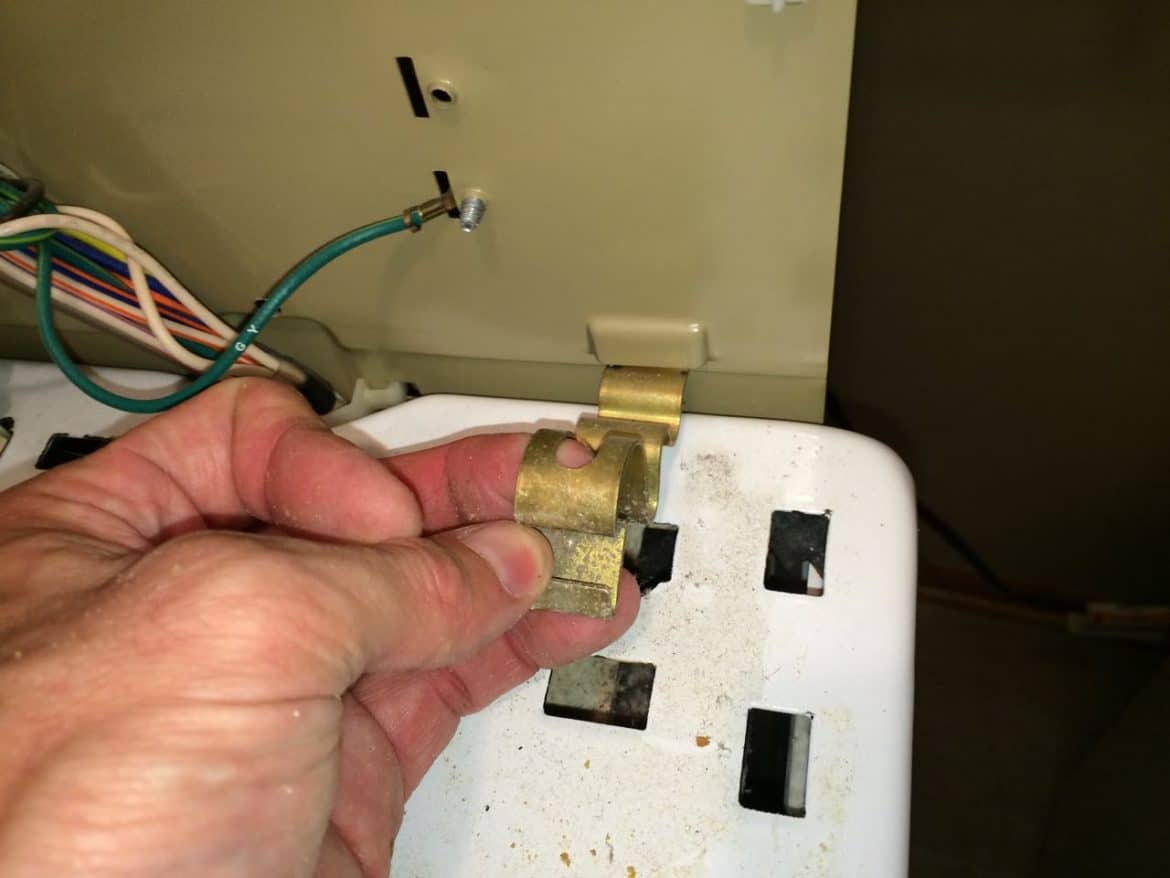
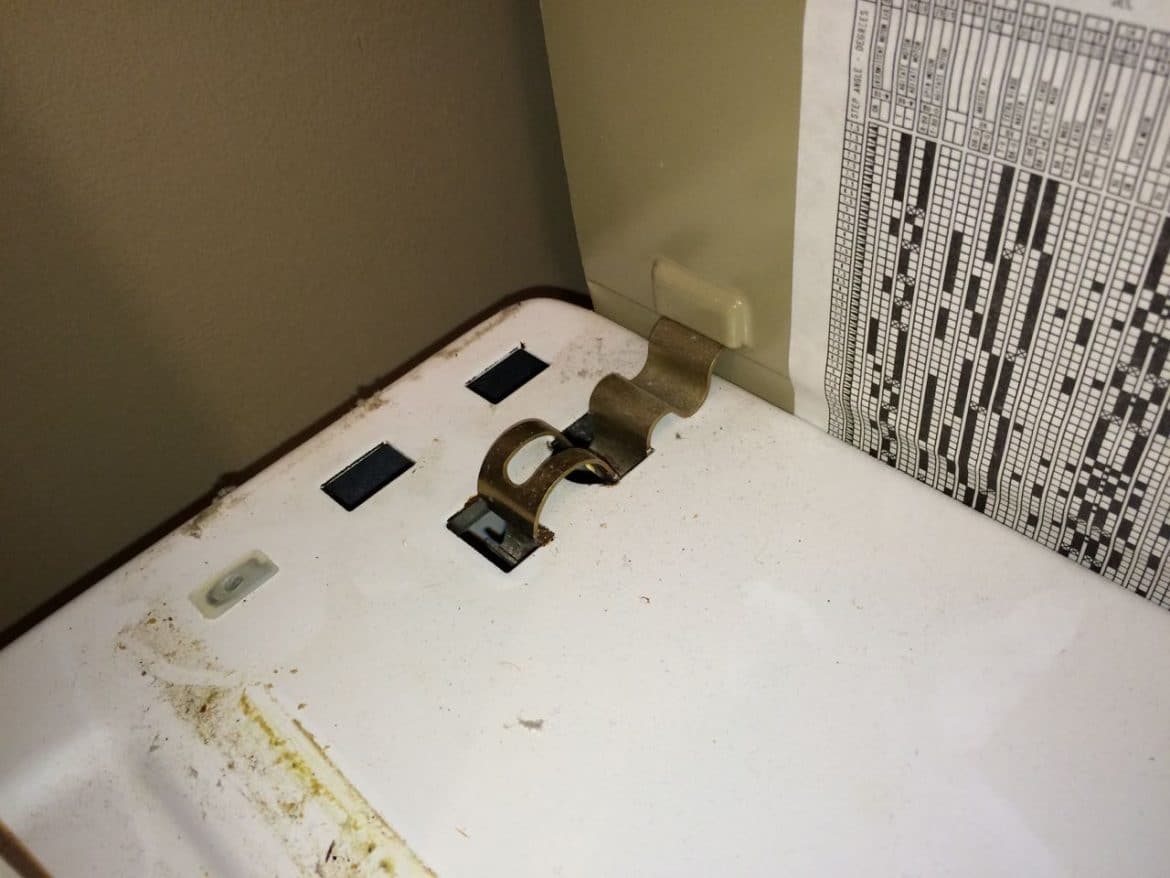
Step 10: Remove the two locking spring clips.
There are two spring clips that attach the washer shell to the back that must be removed:
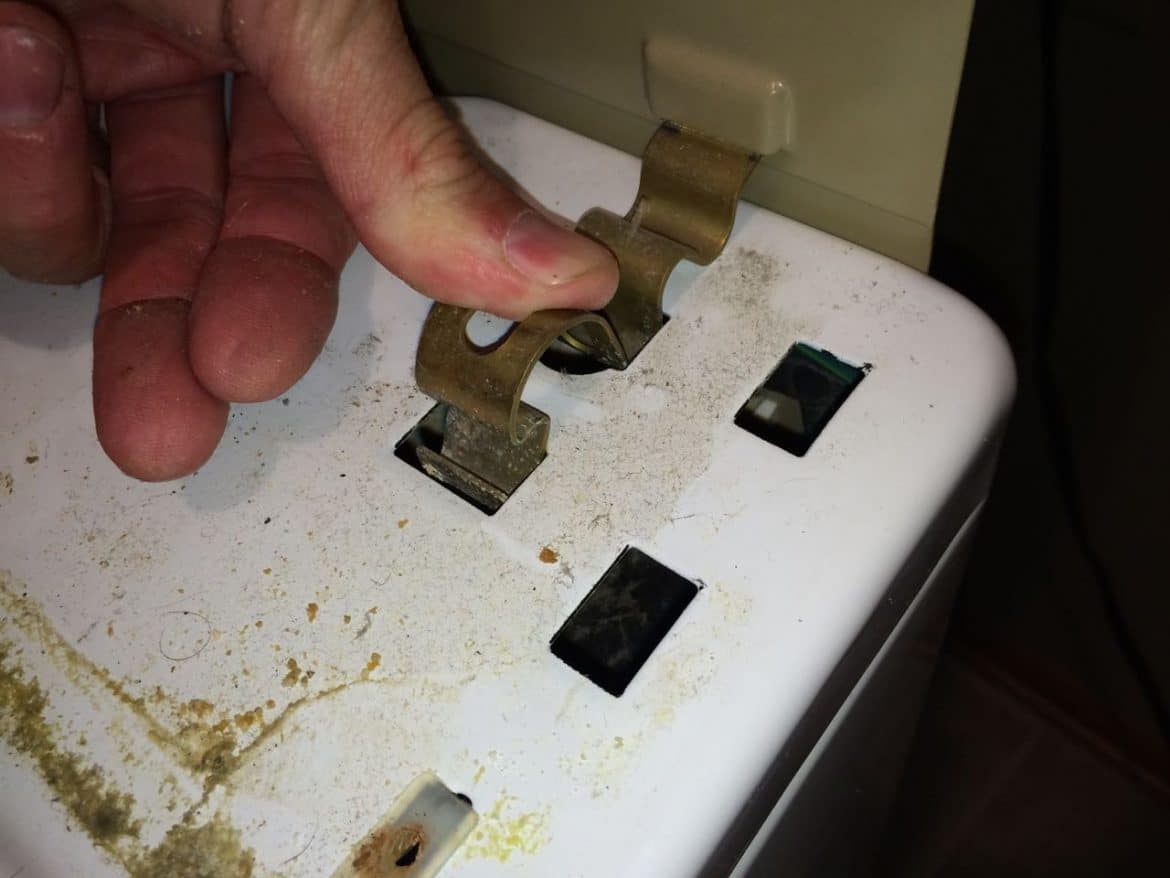
To unlatch and remove them insert a flat-head screwdriver down into the front trough part of the clip as seen below:
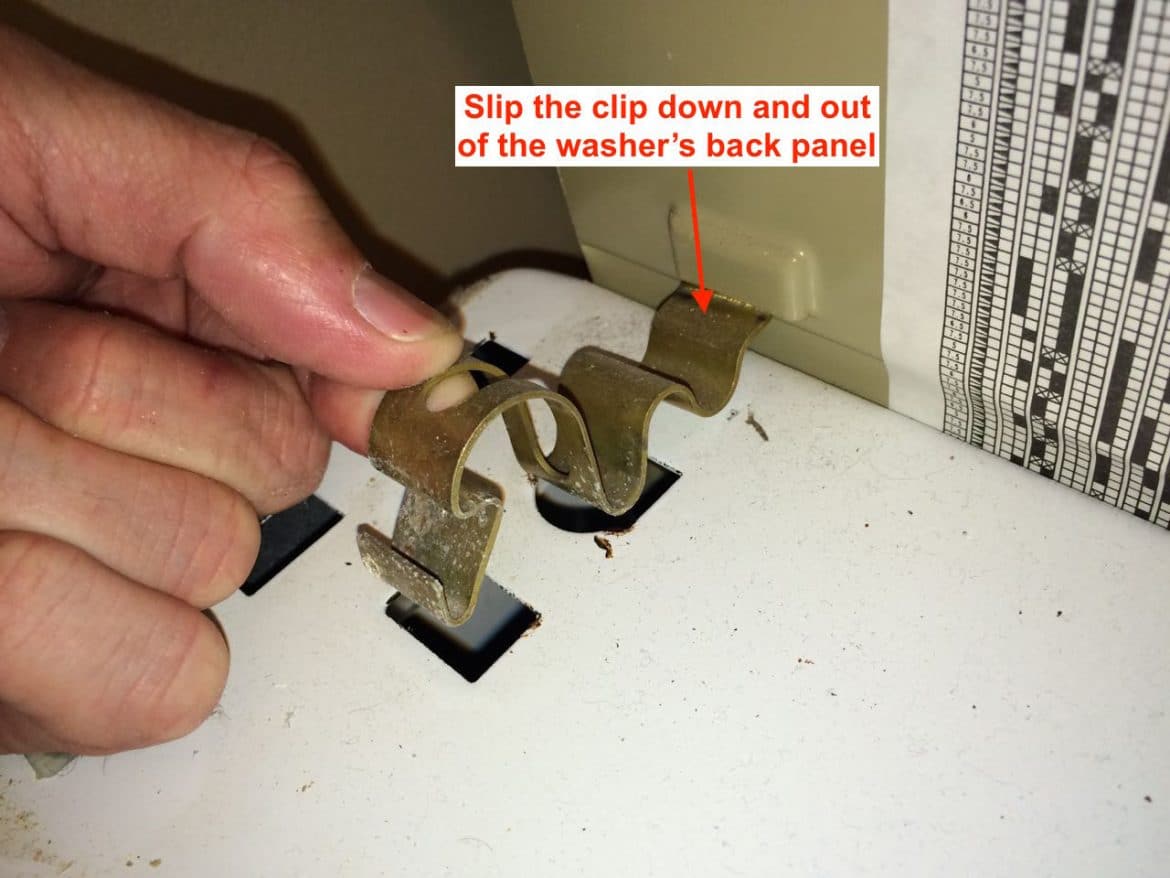
Once the bottom is unlatched you can slip the top end out of the back and it will come free:
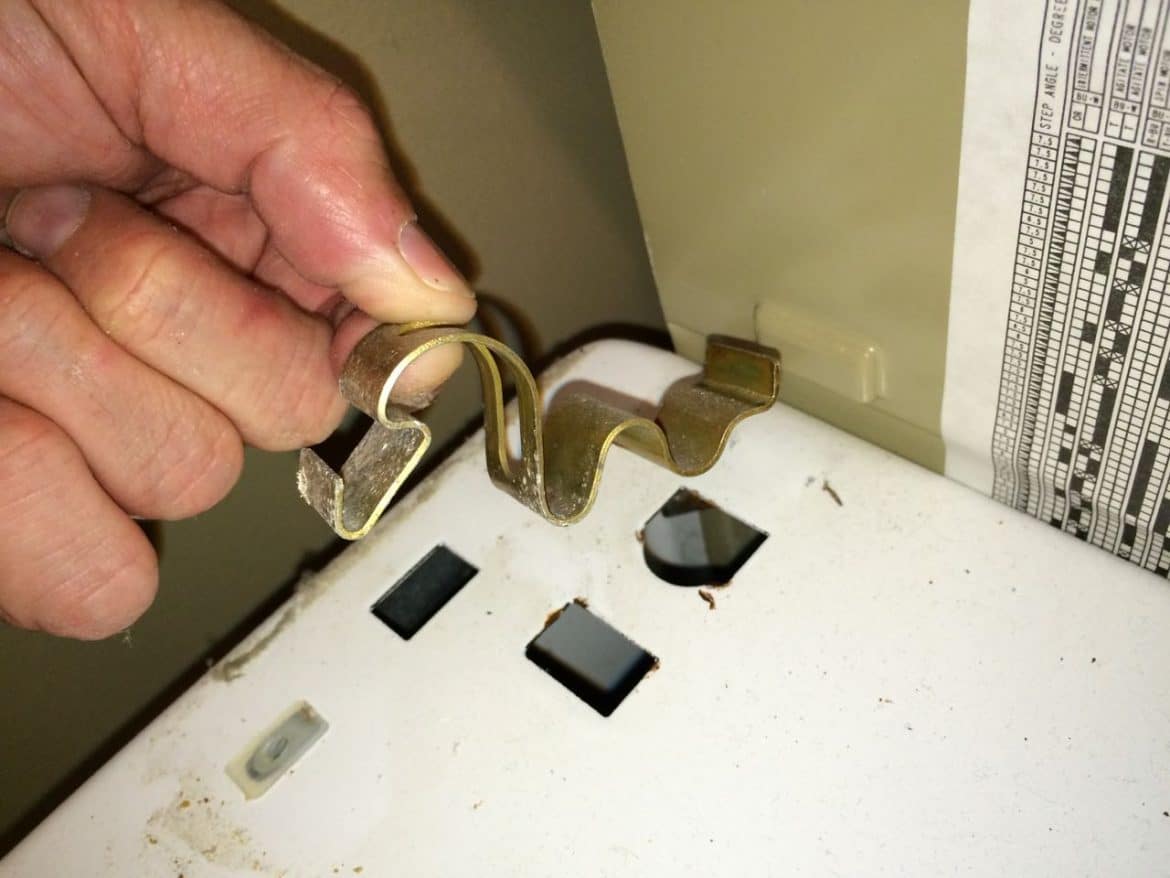
And here’s what it will look like when they have been removed:
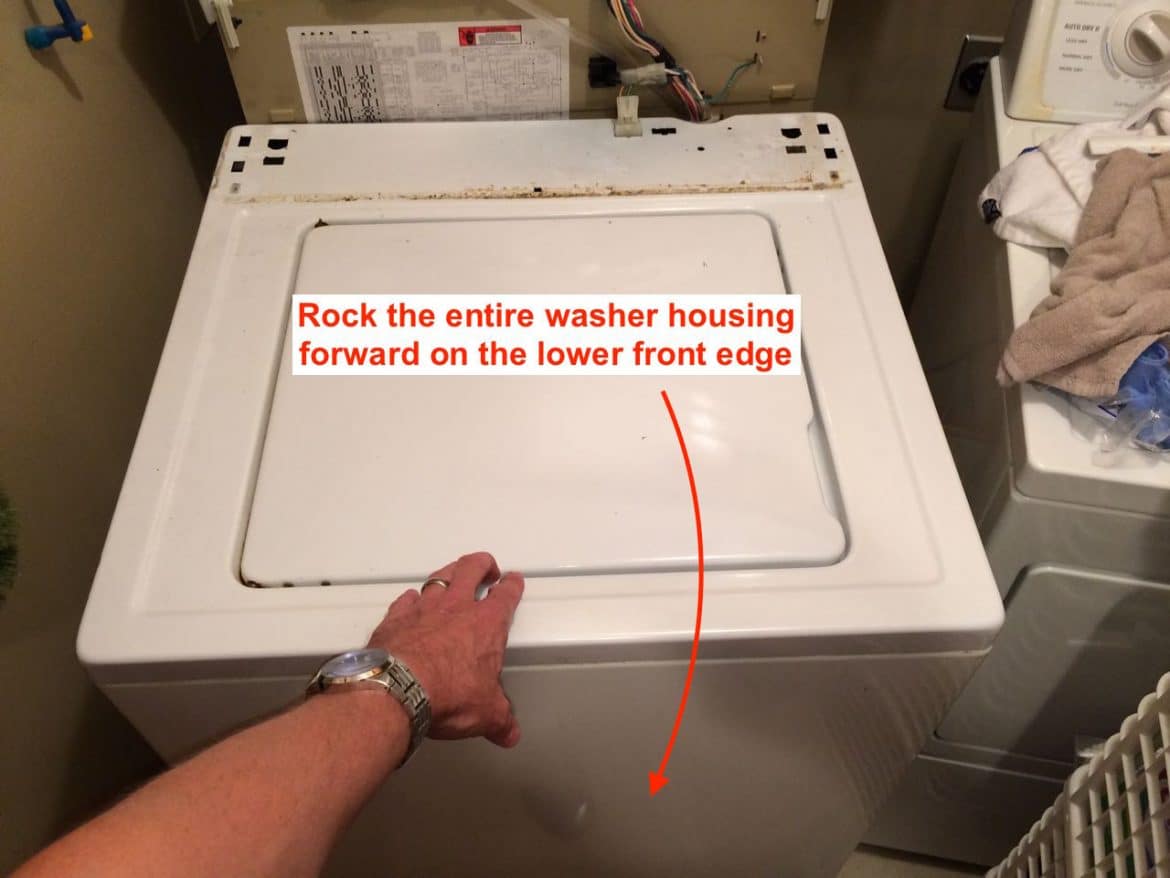
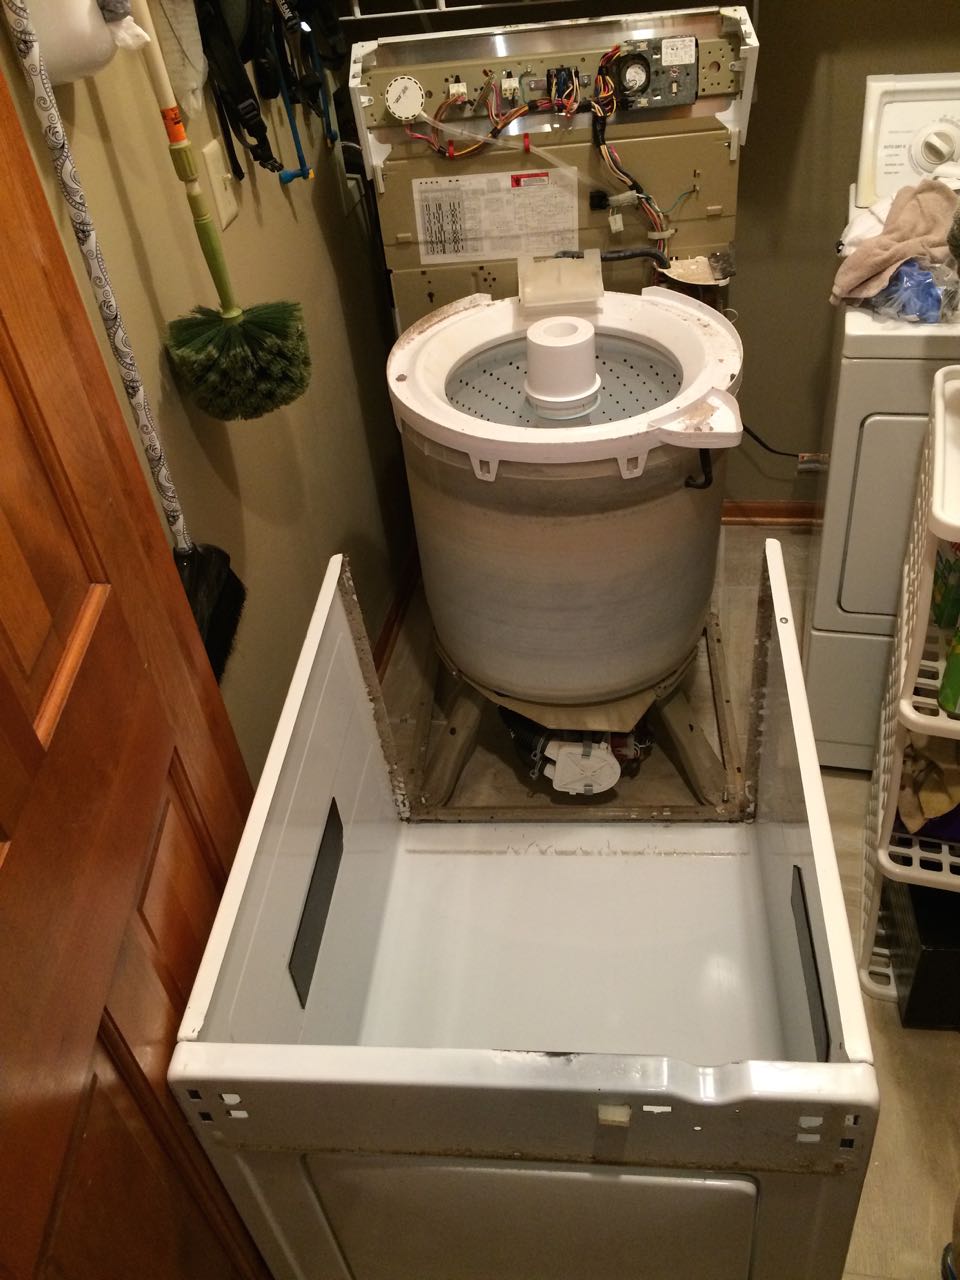
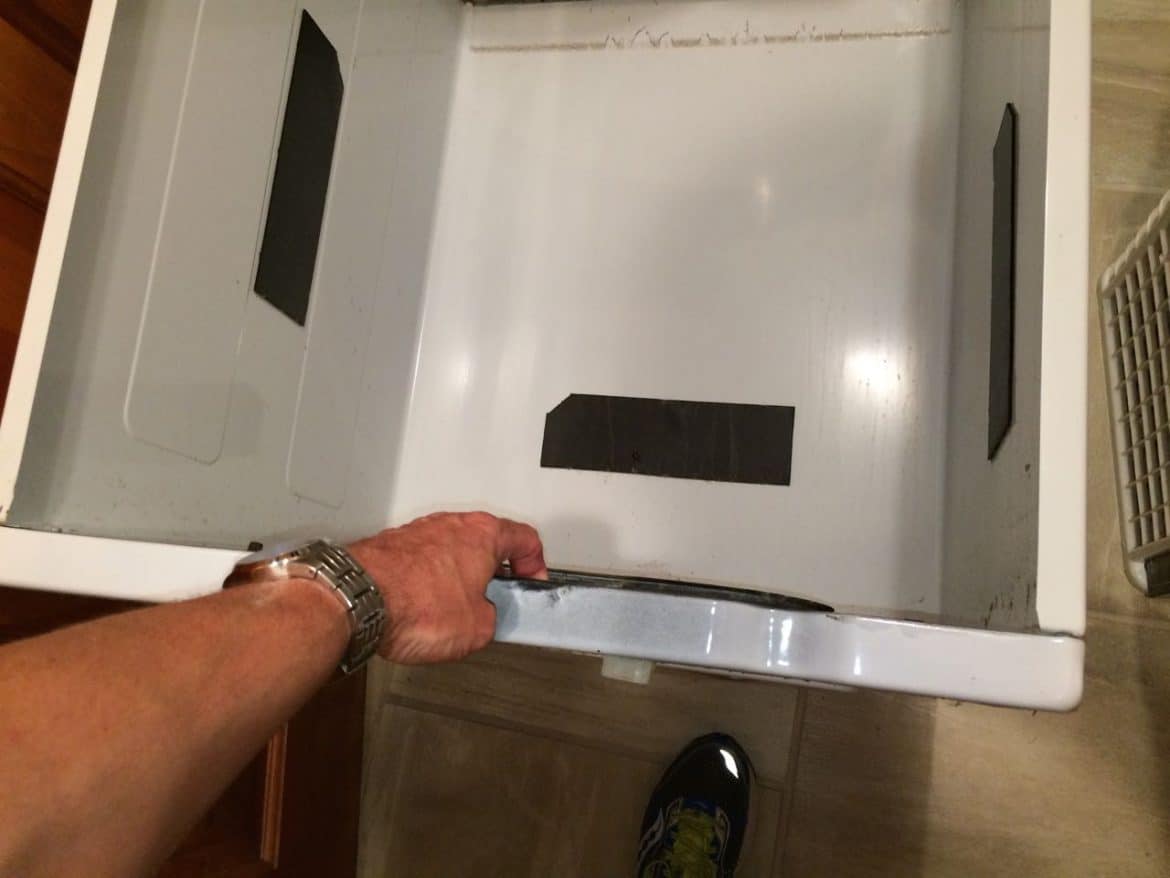
Step 12: Remove the external washer housing
The term that describes what you must do may be best described as “tipping the housing over.” You may want to lay a towel down on the floor in front of the washer, to lay the housing on if you want to be careful not to scratch it (if you have a hard surface or if there is any sand on the floor). Grab the front edge of the housing and pull it towards you and lay the front face down on the ground:
Here’s what you’ll have:
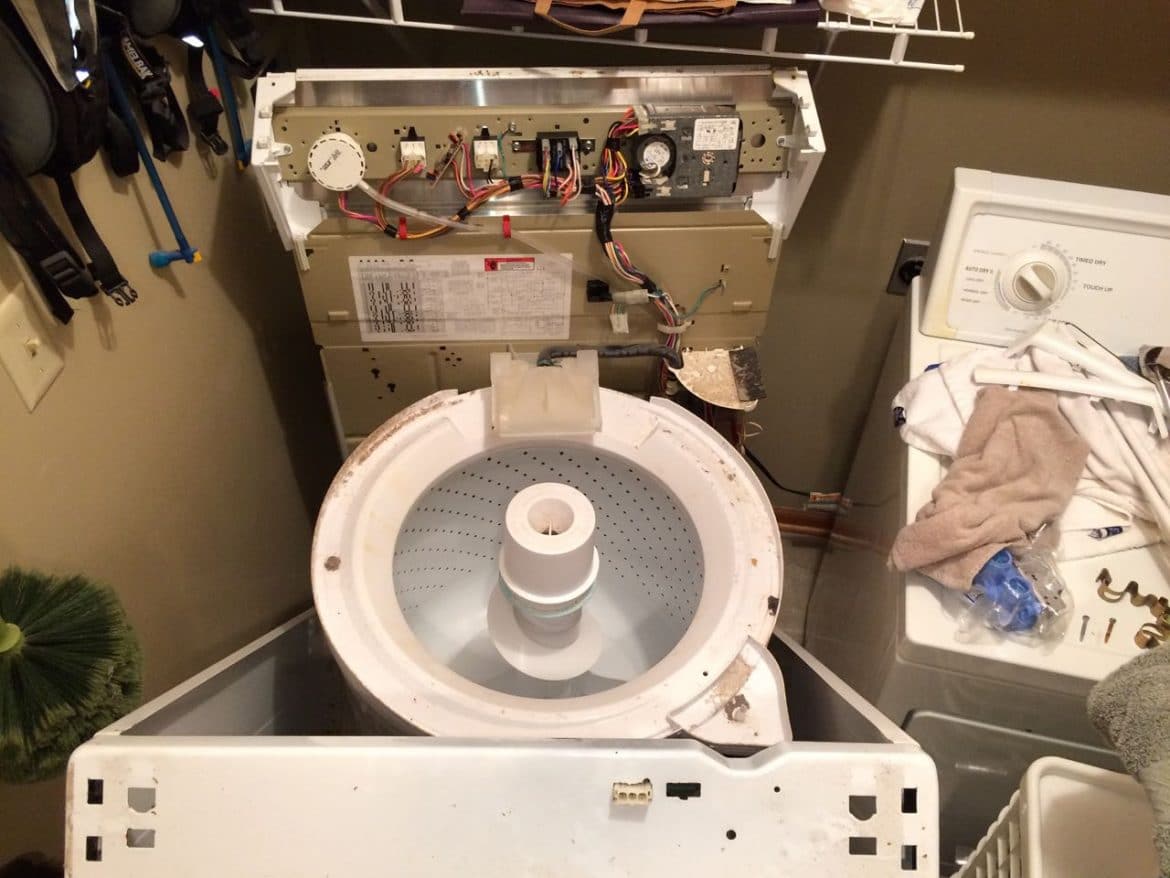
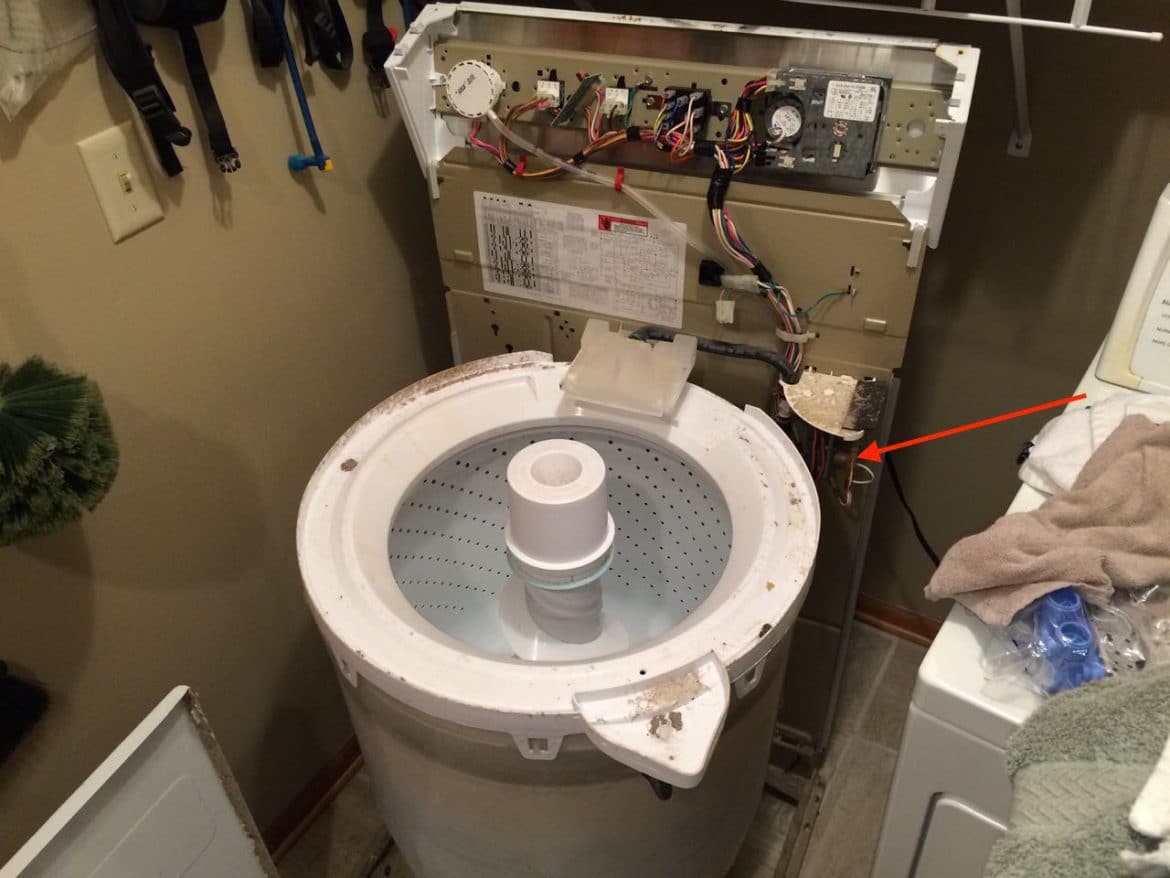
Step 13: Locate the water valve assembly.
The valve assembly is located on the back of the washer on the top right corner, just below the top rim of the tub:
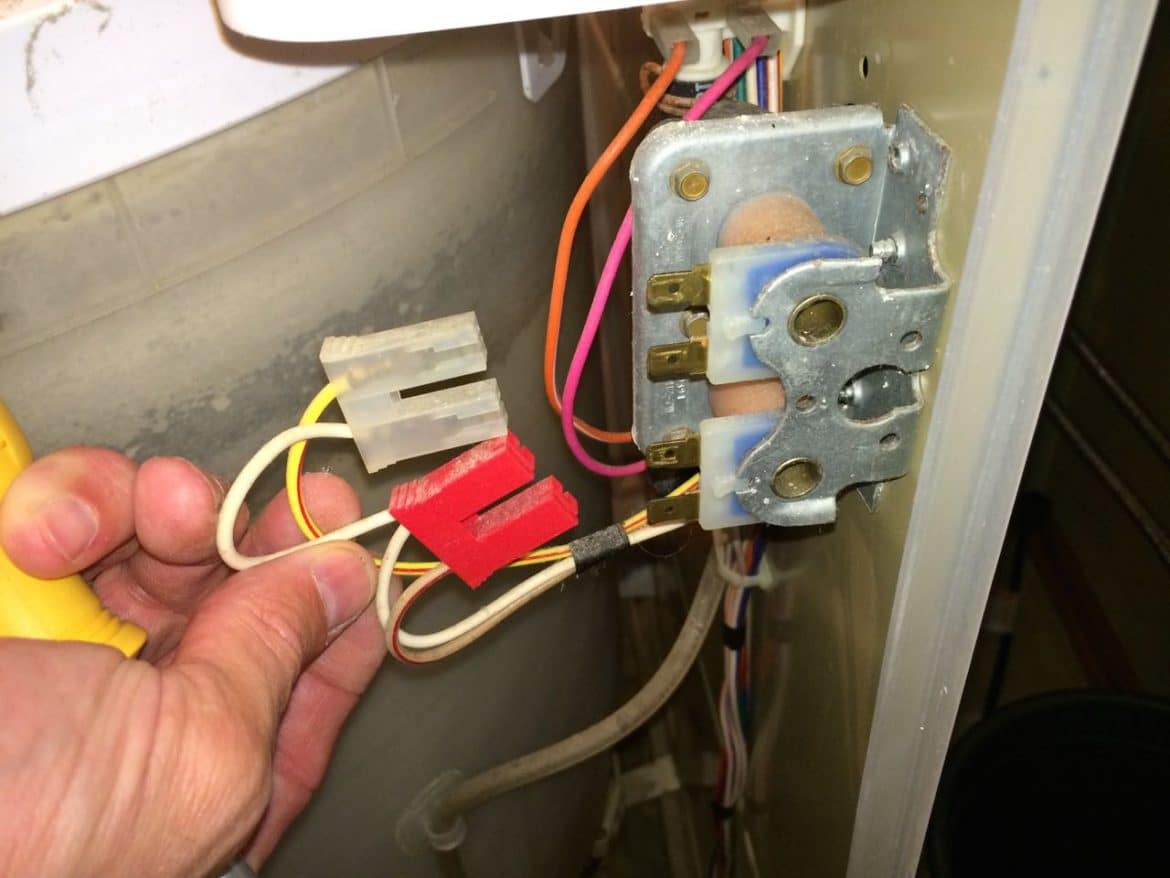
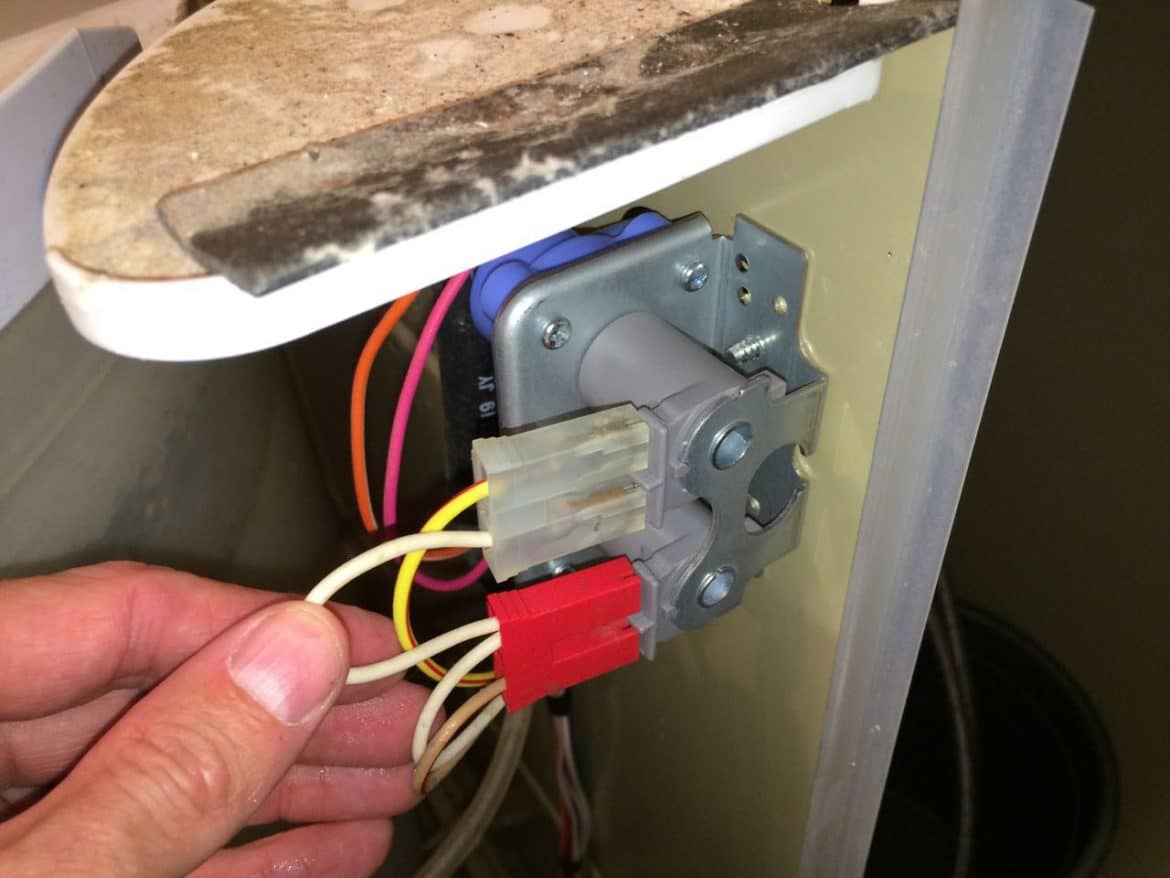
Step 14: Disconnect the wiring connectors from the water valve assembly.
There is one connector for the cold water valve (top) and one for the hot (bottom):
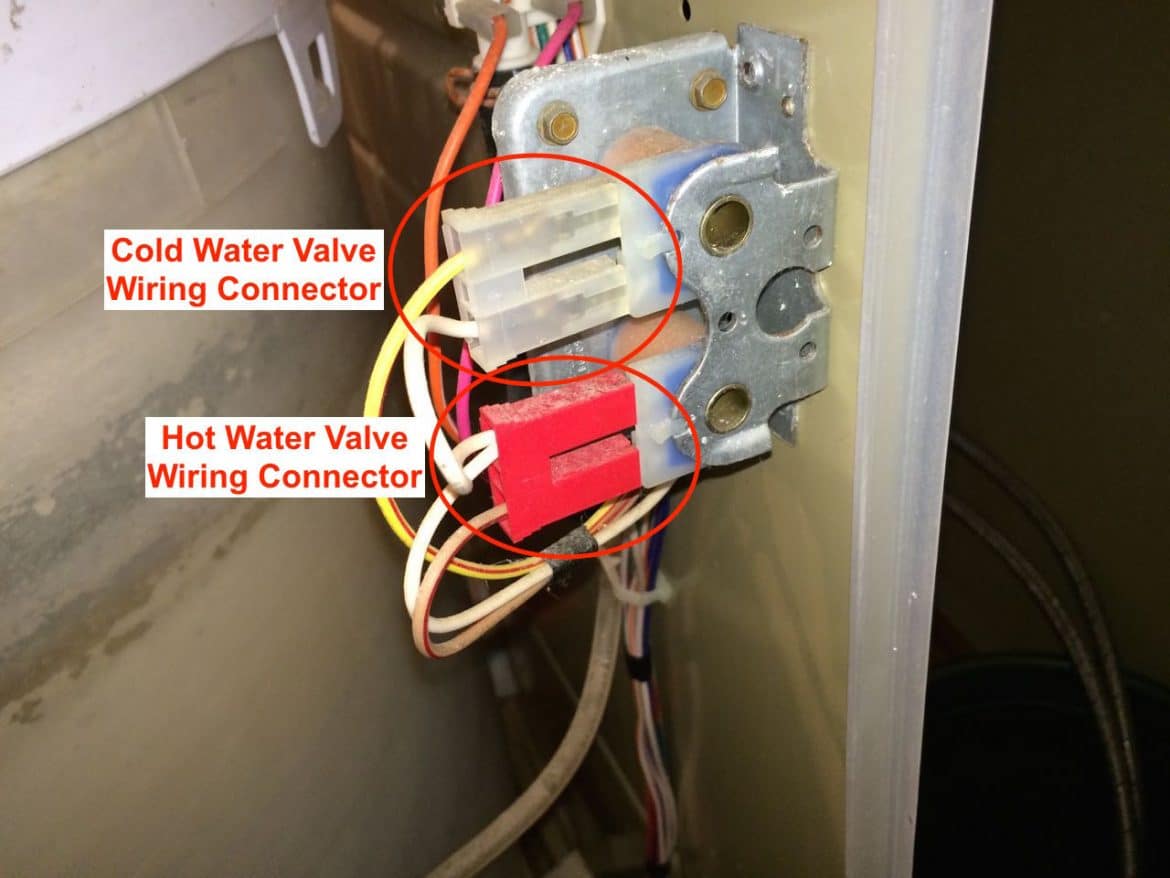
Make sure to pull the connectors off by the plastic connector body and NOT by the wires. Pull each connector straight out and off the valve. Here is what they look like disconnected:
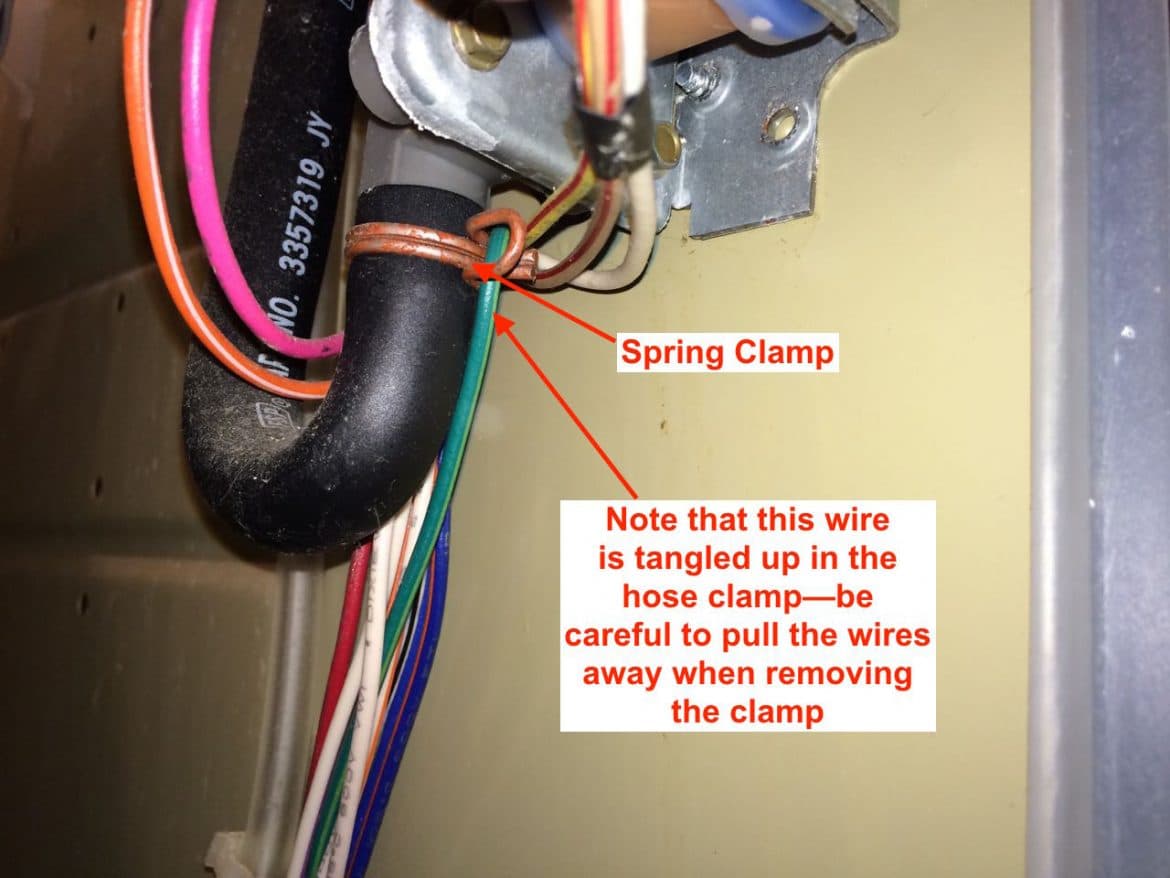
Step 15: Remove the water outlet hose from the valve assembly.
There is a spring clamp that must be removed first. Be careful that there are no wires in the way, like was the case when I went to remove this spring clamp in the image below:
Take your pliers and squeeze the spring clamp and move it down on the hose:
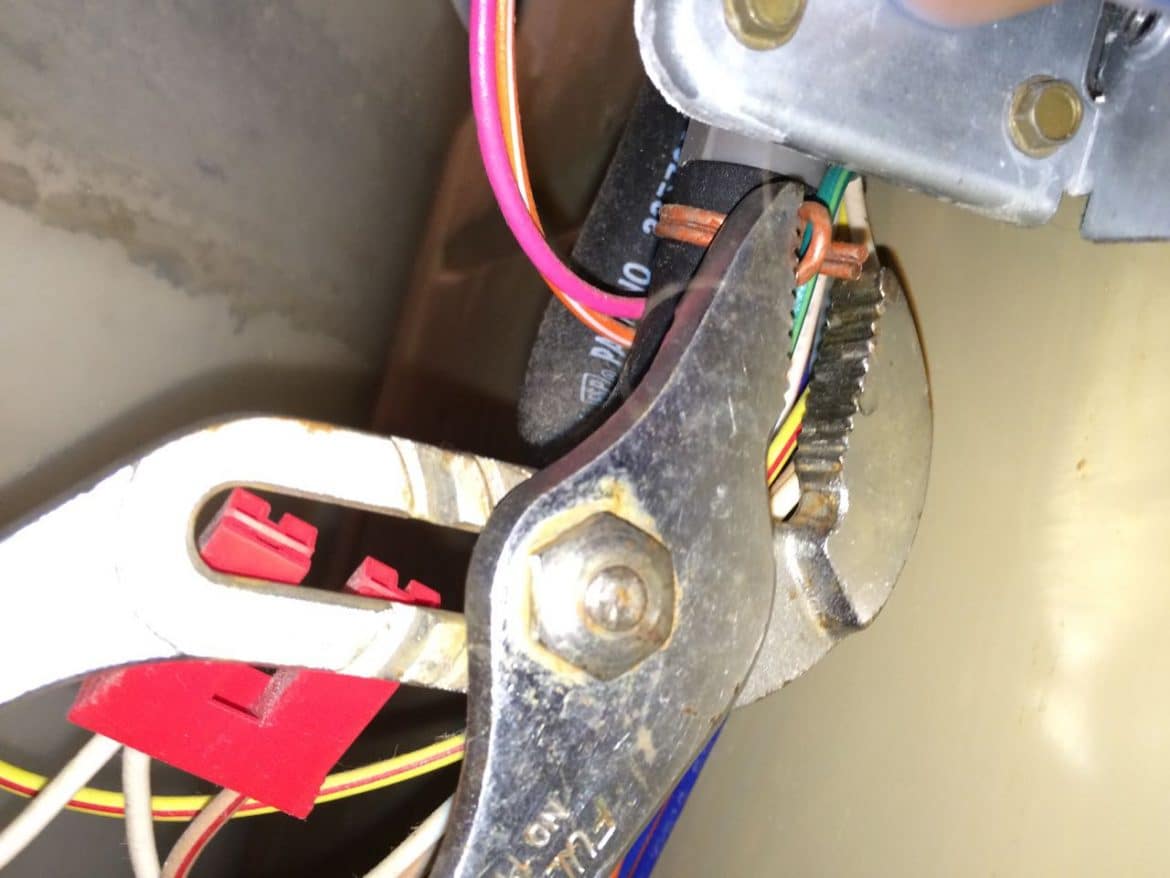
Here I’ve moved the hose spring clamp down off the valve so we can pull the hose off. I actually did this step out of the order I’m suggesting in this tutorial (learn from my mistake) because I’d already unscrewed the valve from the back of the washer when I took this picture:
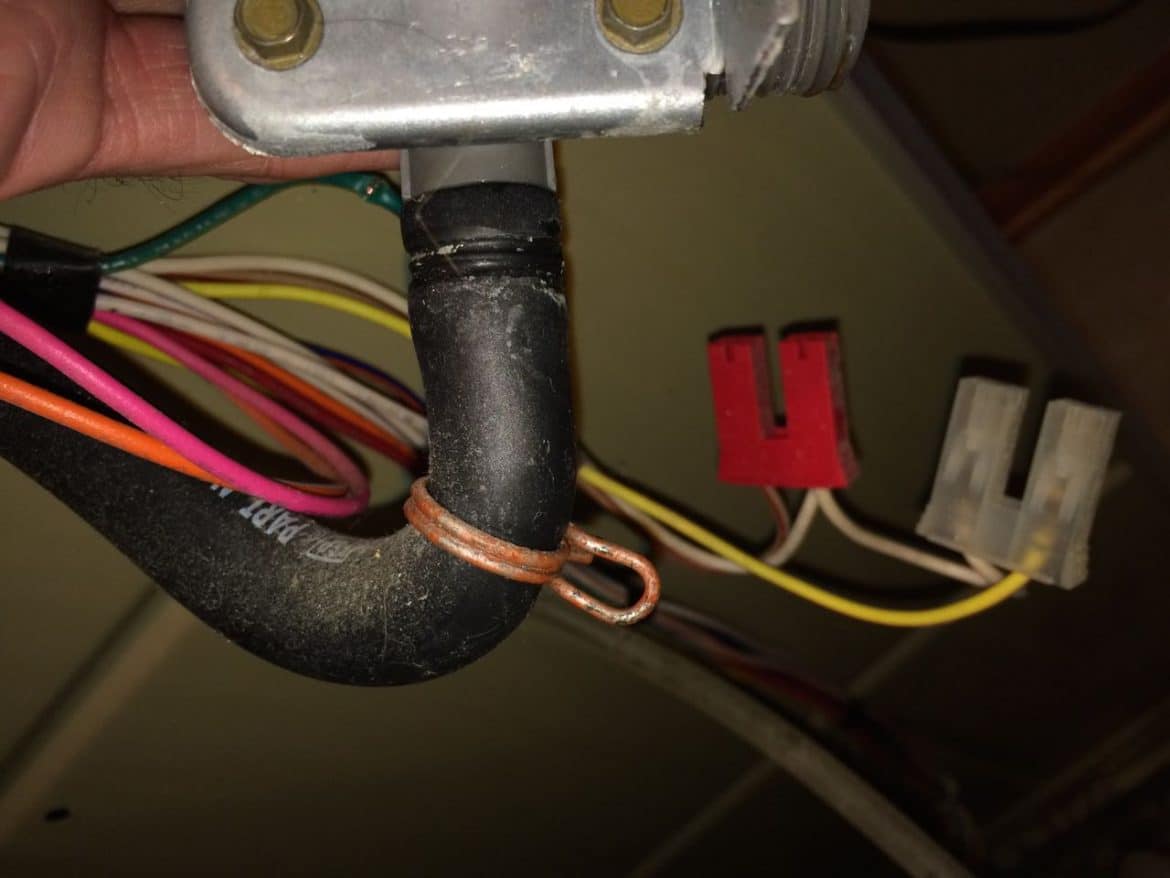
Once the spring hose clamp has been backed off the valve body you can pull the hose straight down and off the valve.
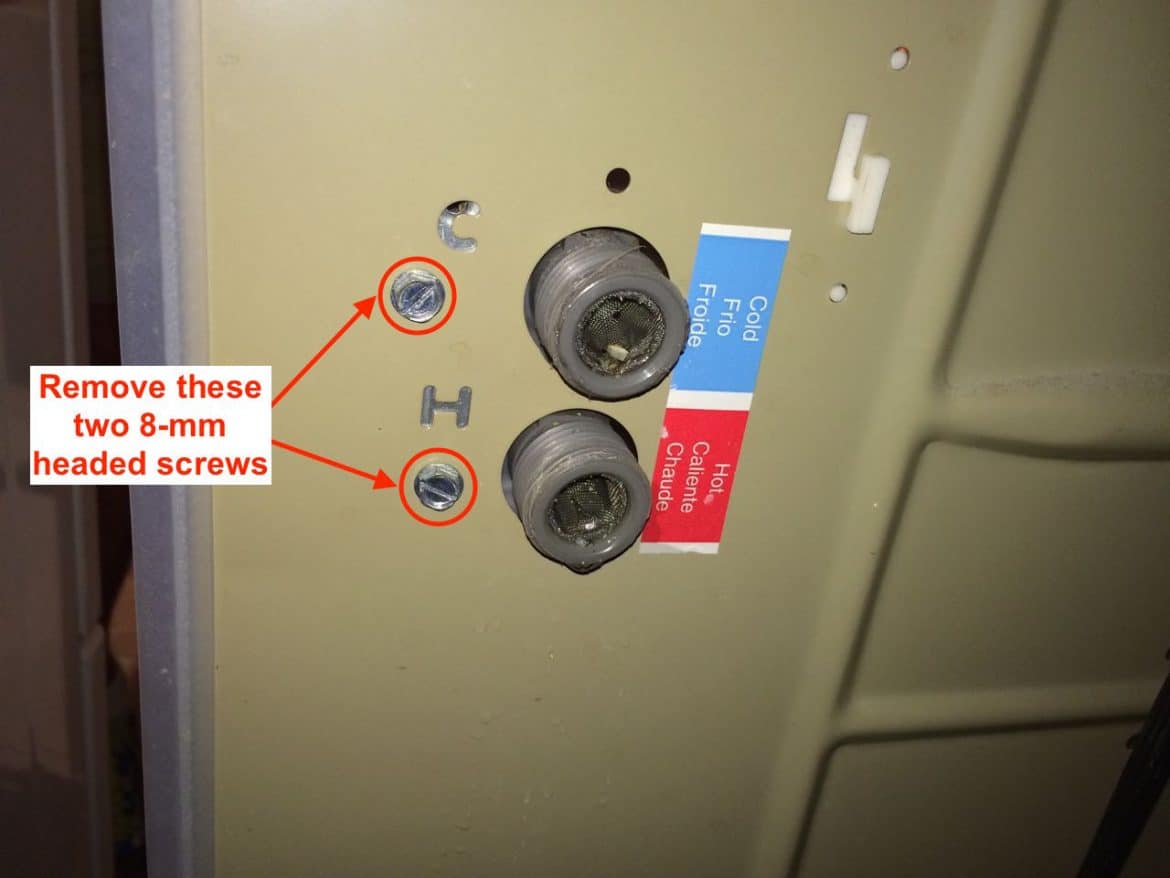
Step 16: Remove the two valve assembly mounting screws.
On the back of the washer there are two 8mm hex-headed screws securing the valve to the back of the washer. You could use a flat-head screwdriver but I do not recommend it as it is difficult to hold the flat-headed screwdriver on the head of the screws. If I had my own tools on this trip I would have used a 8mm socket on a screwdriver-type handle to remove them. Make sure to keep track of these screws as the new part will not come with them and you must reuse them.
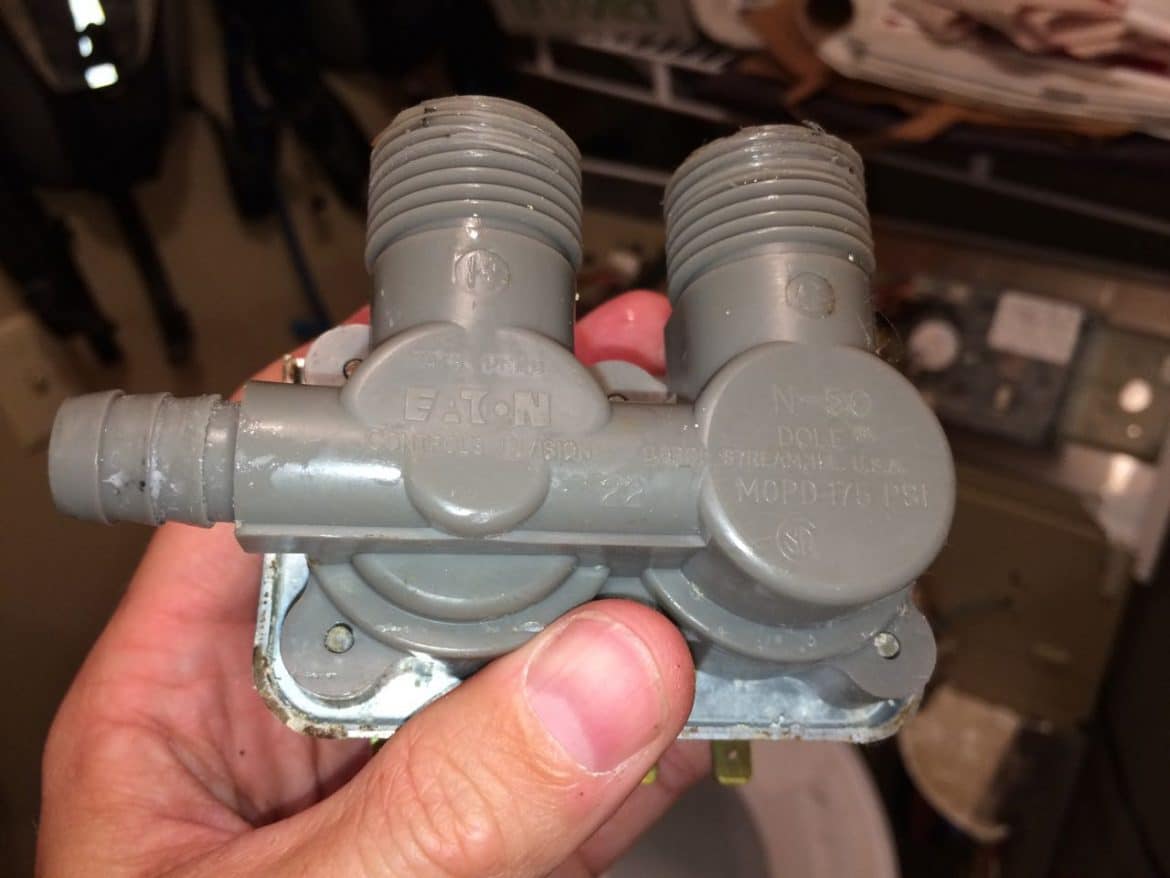
Once you have those two screws removed the valve will be free from the washer and you can take it out:
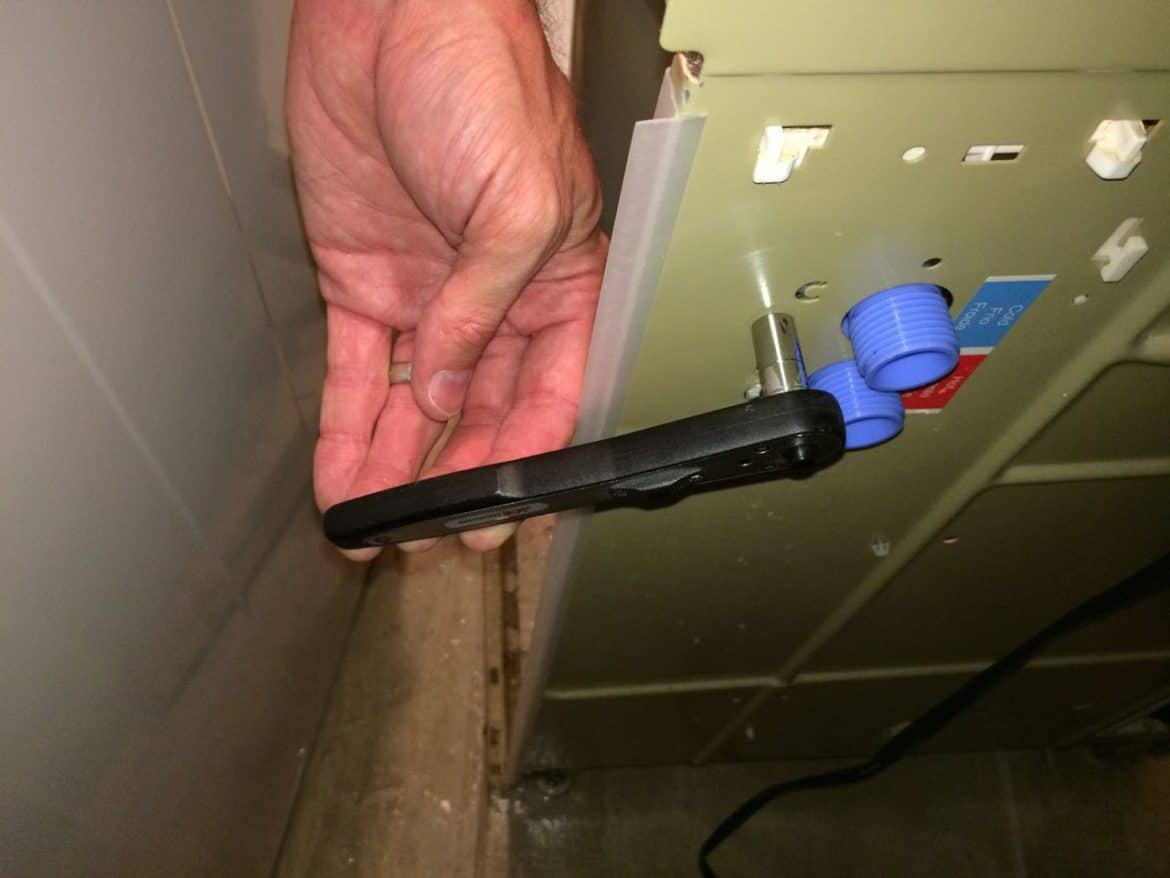
Step 17: Mount the new valve on the washer
Insert the washer valve hose connections through their holes in the back of the washer, with the single output hose connector pointing down and reinstall the two screws into the back to mount the valve. You may need to move the valve assembly around a bit to get the holes to line up (and there are additional unused holes):
Step 18: Reinstall the outlet hose on the new valve.
Slip the black hose up and on the new valve:
It should go on all the way until it runs into the larger part of the valve body:
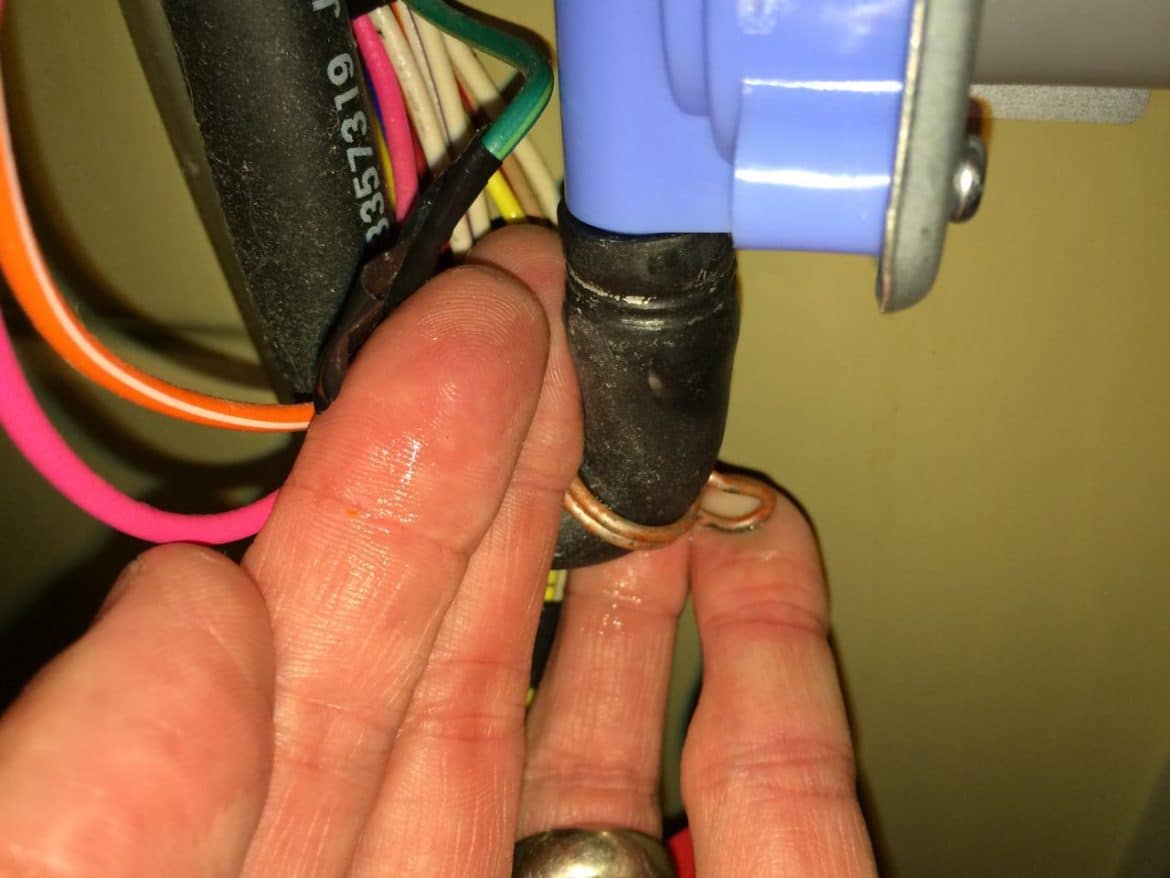
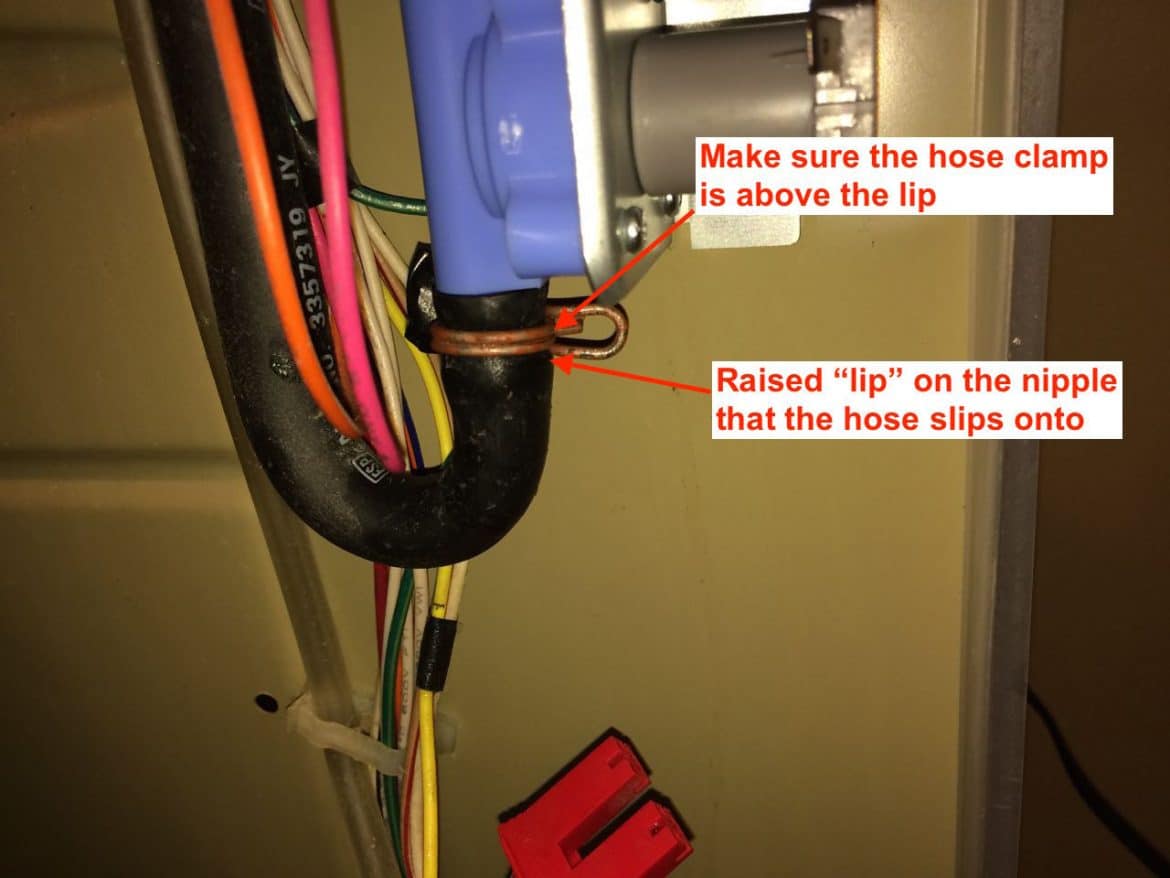
Then use your pliers to squeeze the spring hose clamp and slip it up and on the valve (past the “lip” on the valve nipple):

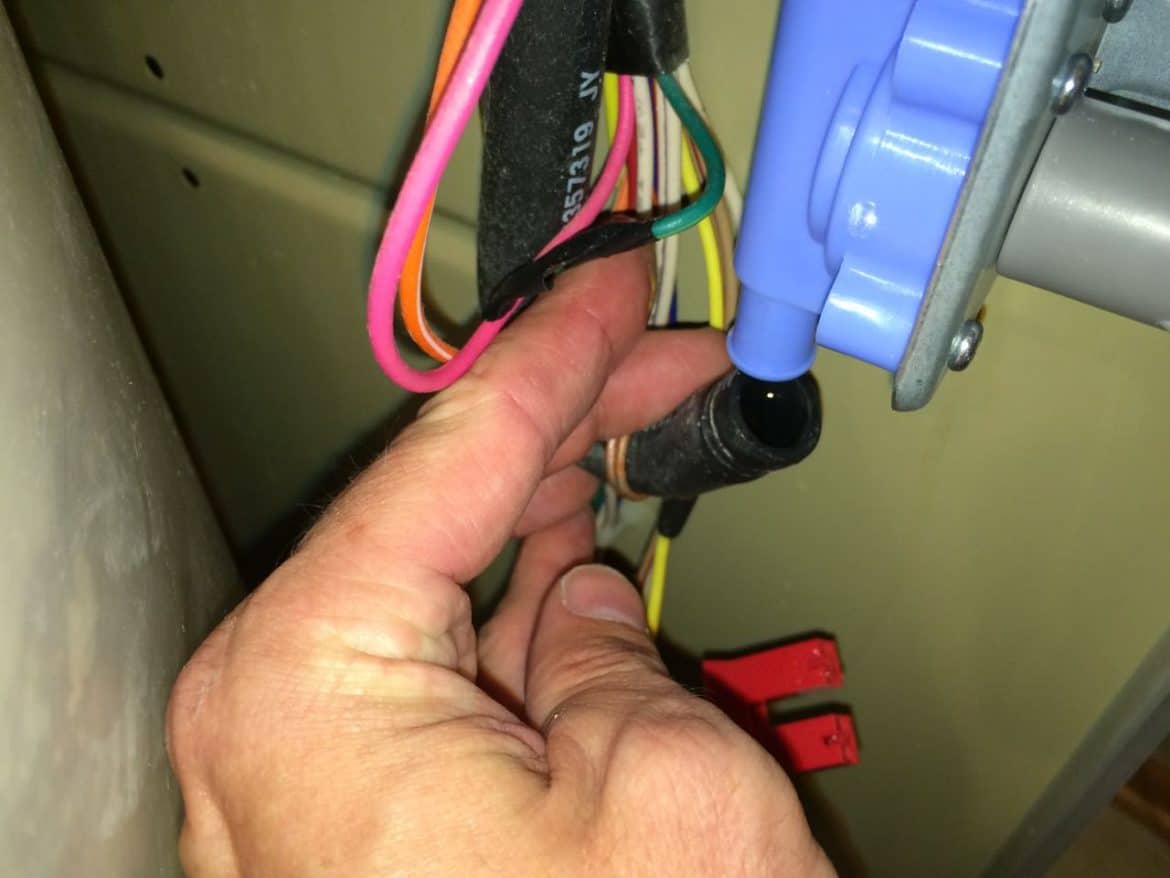
Step 19: Reinstall the electrical connectors on the new valve.
The red connector goes on the bottom and the white common wire (that jumps from the red connector to the clear one) goes on the two middle terminals exactly as seen below:
Step 20: Reinstall the washer metal housing
Begin tipping the front top edge of the housing up, keeping the far bottom edge up against the washer:
As you lift it upright scoot it up tight against the front of the washer as seen here, with it centered on the frame:
Then the housing sides should be up tight against the frame and the housing should be back in place. I reached around both sides of the washer with my hands and squeezed in the sides to make sure they were up tight against the frame. Press straight down on the back to make sure it is sitting all the way down.
Step 21: Reinstall the spring clips
Hook the back end of each spring clip into the back of the washer and then snap the clip down onto the washer housing top:
Align the spring clip with the two holes in the top of the washer housing and press it straight down to snap it into place:
I actually had to press the spring clamp with the palm of my hand to be able to apply enough force to get it to snap into place:
This is what they should look like when they are correctly snapped into place:
Step 22: Clean the top surface of the washer.
If you have your washer control panel lifted up then you should clean the junk off the top surface of the washer while you are in there. I didn’t do this because I was visiting on business and was in a hurry. The surface is porcelain so a green scratchy sponge should polish it up nicely.
Step 23: Reconnect the washer housing electrical connector.
With the plastic tab oriented on the front side of the connector, reinstall the electrical connector into the top of the washer housing:
Make sure that the tab snaps over the catch so it is firmly held into place:
Step 24: Flip the control panel down and into place
There are a couple things to keep in mind as you flip the control panel down and into place, which I’ll detail in steps 24a and 24b:
Step 24a: Make sure the hinges are hooked on the top
On both the right and the left there are plastic hinges that will slide up and down to allow you to return the control panel into its slots in the top of the washer but you must make sure the hinges “hook” over the top edge of the back of the washer:

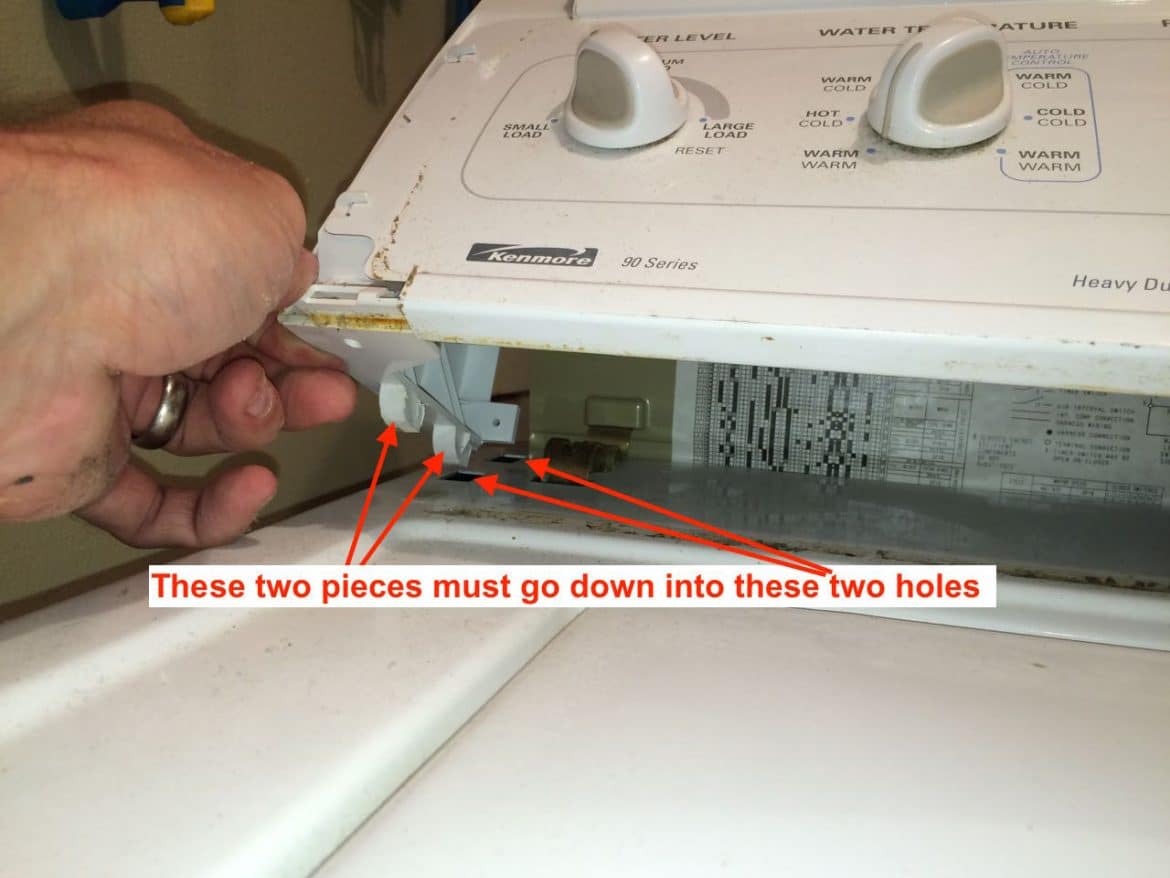
Step 24b: Make sure the notches on the bottom edge of the control panel go into the holes in the top of the washer housing.
On both the left and the right sides you must make sure the two pieces that stick out of the control panel go into the holes in the top of the washer housing:
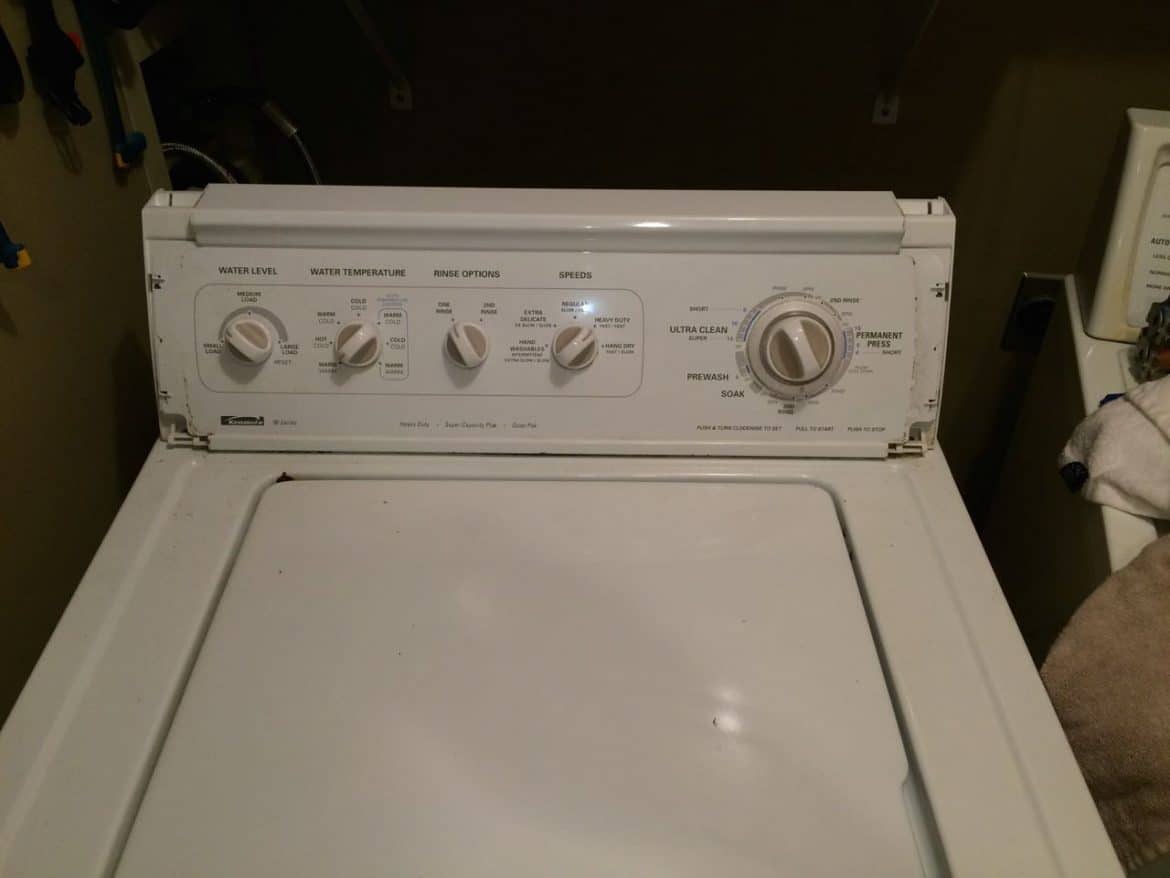
The control panel folded back in place–it should sit flush with the top of the washer housing:
Step 25: Reinstall the control panel screws
Reinstall the Phillips-head screws into the lower left and lower right corners of the control panel:
Step 26: Reinstall the plastic control panel bezel end pieces.
They snap straight on:
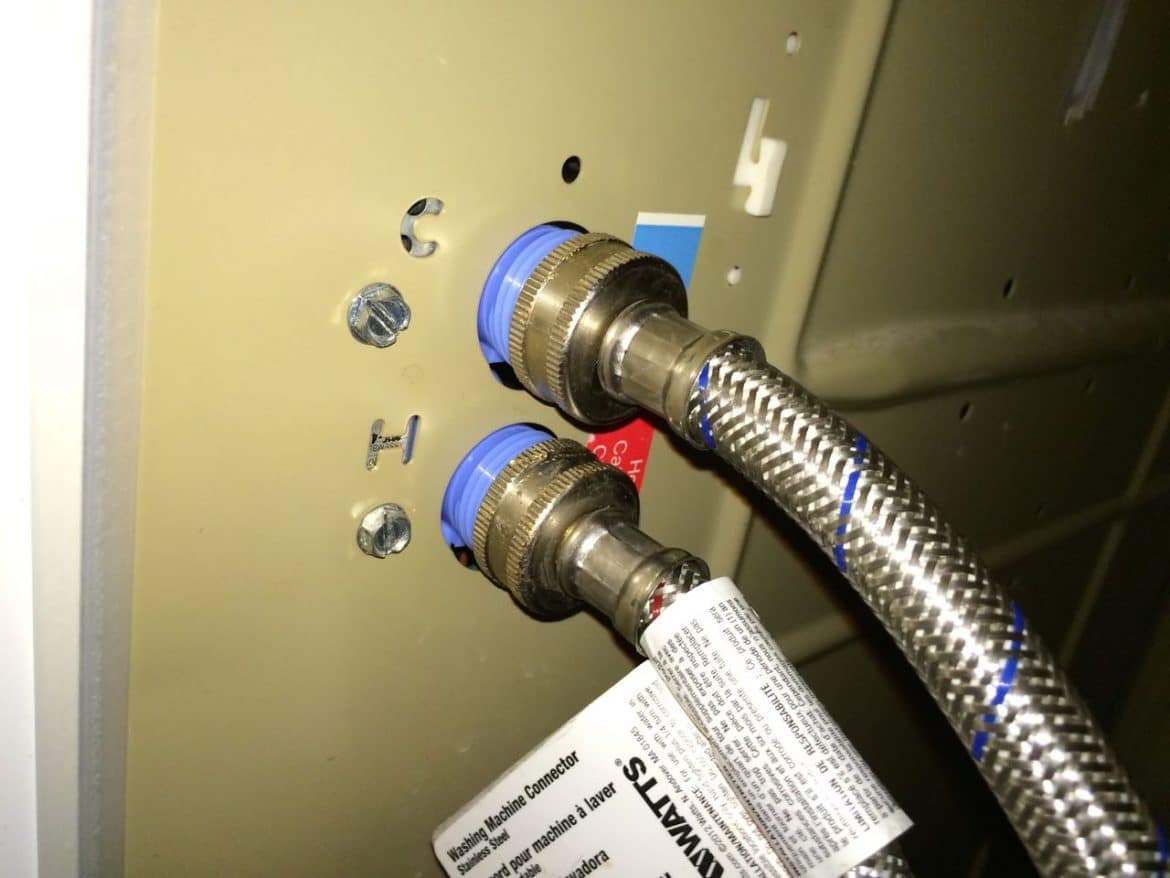
Step 27: Reconnect the water hoses to the back of the washer.
I would highly recommend starting the threads by hand (clockwise when looking at it from the back) so you do not accidentally cross-thread the hose connections.
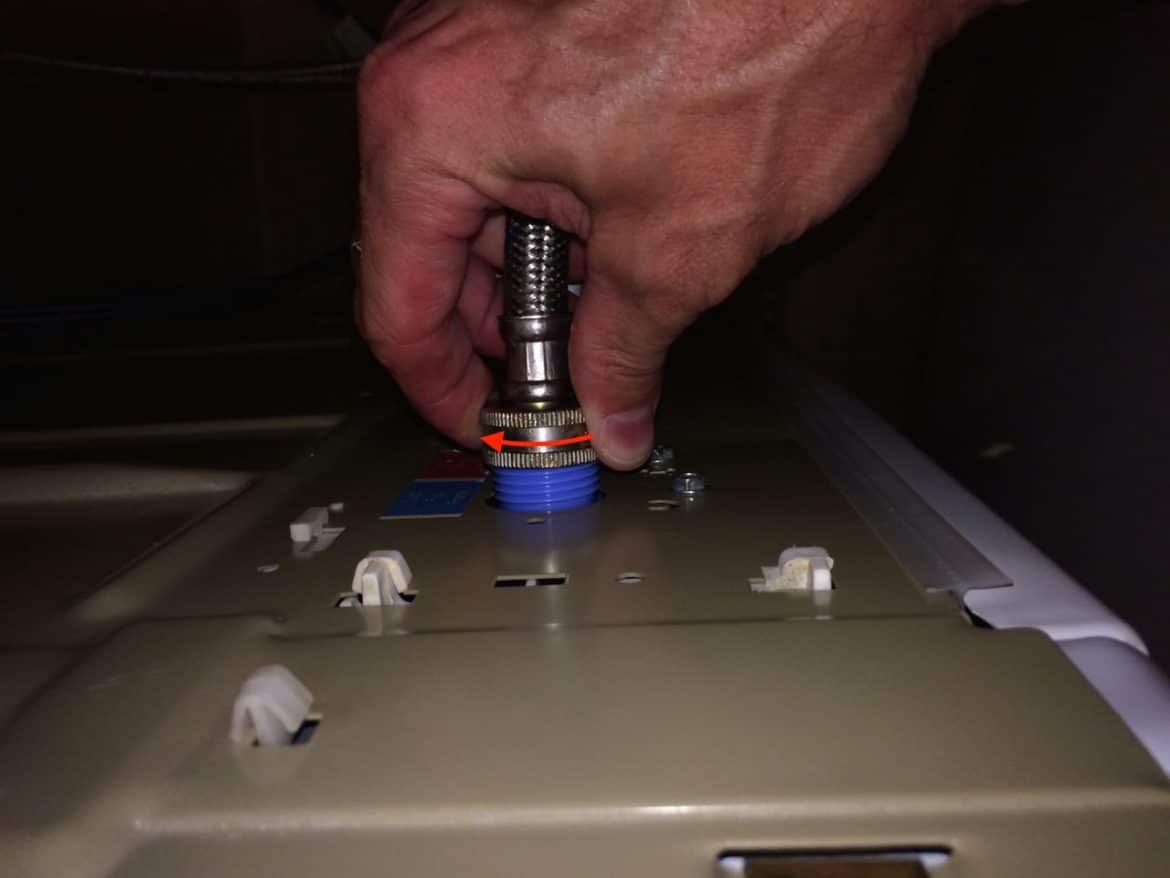
Once they are going on straight then I used my channel lock pliers to tighten them up. Make sure the cold connects to the top connection and the hot on the bottom:
Step 28: Turn the water back on.
Turn the valves counter-clockwise to turn the water on.
Step 29: Plug the washer back in.
Step 30: Test out the washer.
I would choose the warm/warm setting (so that both water lines are running equally) and the shortest run cycle to test it out. You can run this washer with the door open. You can also start it and let it run for a few seconds and then push the knob in to shut it off and leave it till the next time you use it. It was immediately evident that this had fixed the water flow problem because the water beautifully flowed into the tub like a waterfall, just like it should:
Other Helpful Links:
Amazon Associate Disclosure: As an Amazon Associate I earn from qualifying purchases. This means if you click on an affiliate link and purchase the item, I will receive an affiliate commission. The price of the item is the same whether it is an affiliate link or not. Regardless, I only recommend products or services I believe will add value to Share Your Repair readers. By using the affiliate links, you are helping support Share Your Repair, and I genuinely appreciate your support.
Many thanks for the well illustrated, detailed instructions. My repair of the 30 year old washer was a breeze!
One thing: the Whirlpool 285805 Inlet Valve is the correct replacement but at first it seemed an error. In Canada, that is. The metal mounting bracket didn’t align with the single retaining screw until the bracket was slid tightly behind the flanges at the base of the hot/cold threaded stems. The assembly was then tight and secure for installation.
Thanks again.
Thanks Jack, good work on your repair!
Successful repair, thanks to this outstanding video; probably wouldn’t have attempted the repair without it.
Thanks for dropping a note but there’s not a single video in this detailed step-by-step repair tutorial!