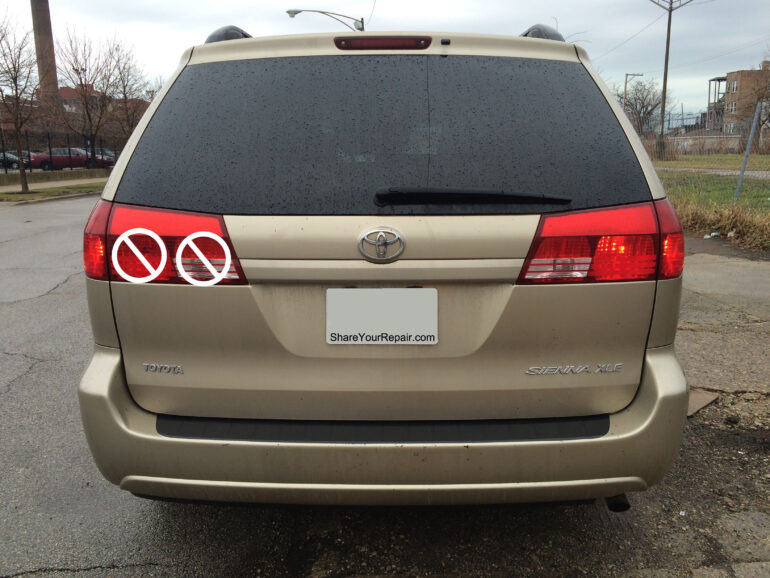
I noticed that one of the tail light bulbs located in the lift gate of my 2004 Toyota Sienna was burnt out. Follow along for a step-by-step tutorial on how you can change these bulbs yourself.
How To Replace Toyota Sienna Liftgate Tail Lights
Hardware:
Parts Needed:
- Outer Bulbs: Sylvania 168 (Incandescent)
, LED Equivalent 168
- Inner (Reverse Light) Bulbs: Sylvania 579 Equivalent (Incandescent)
, LED Equivalent 579
- Toyota Trim Panel Retainer Clips 90467-10188
(because you likely will break some when removing the inner door panels)
Tools Needed
- Flat Screwdriver
wrapped in electrical tape
(cheap door panel remover)
- 5-Piece Auto Trim Panel Removal Tool Set
(if you really like tools and want to have “real” door panel removal tools)
- Socket ratchet, 10-mm Socket, and 2″ extension, all included in a Stanley 99-Piece Socket Set
I wish I would have had this tutorial before I tore into my own van 🙂 I would have replaced all four bulbs with LEDs but I had to tear it apart to find the bulb type and had to pick from what the local auto parts store had. I would recommend replacing them with LEDs so you don’t need to worry about replacing them again.
Step 1: Determine which bulbs you are replacing.
Once you get the lift gate up you will start scratching your head if you haven’t taken special note of which bulb you are replacing. In this tutorial we will be replacing the both bulbs. I actually only had the far outside bulb burnt out but after I got the van torn apart I decided to replace them both while I was in there and so I could find out what the bulb size was for my readers.
These bulbs are so inexpensive that you really should consider replacing both pairs if you are going to go to all the work to tear into your Sienna!
Step 2: Pop the lift gate hatch.
One thing I learned is that if the ignition is on, the lift gate will not open, even if the doors are unlocked.
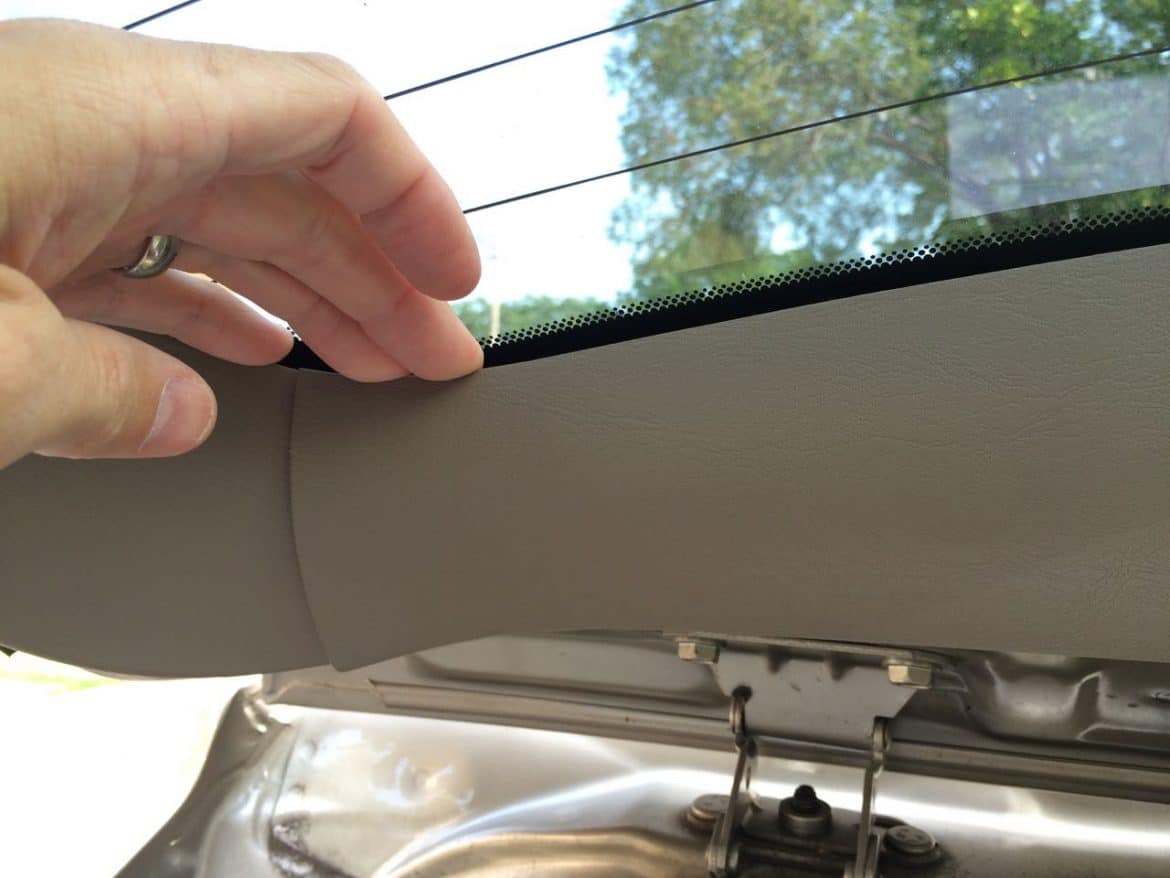
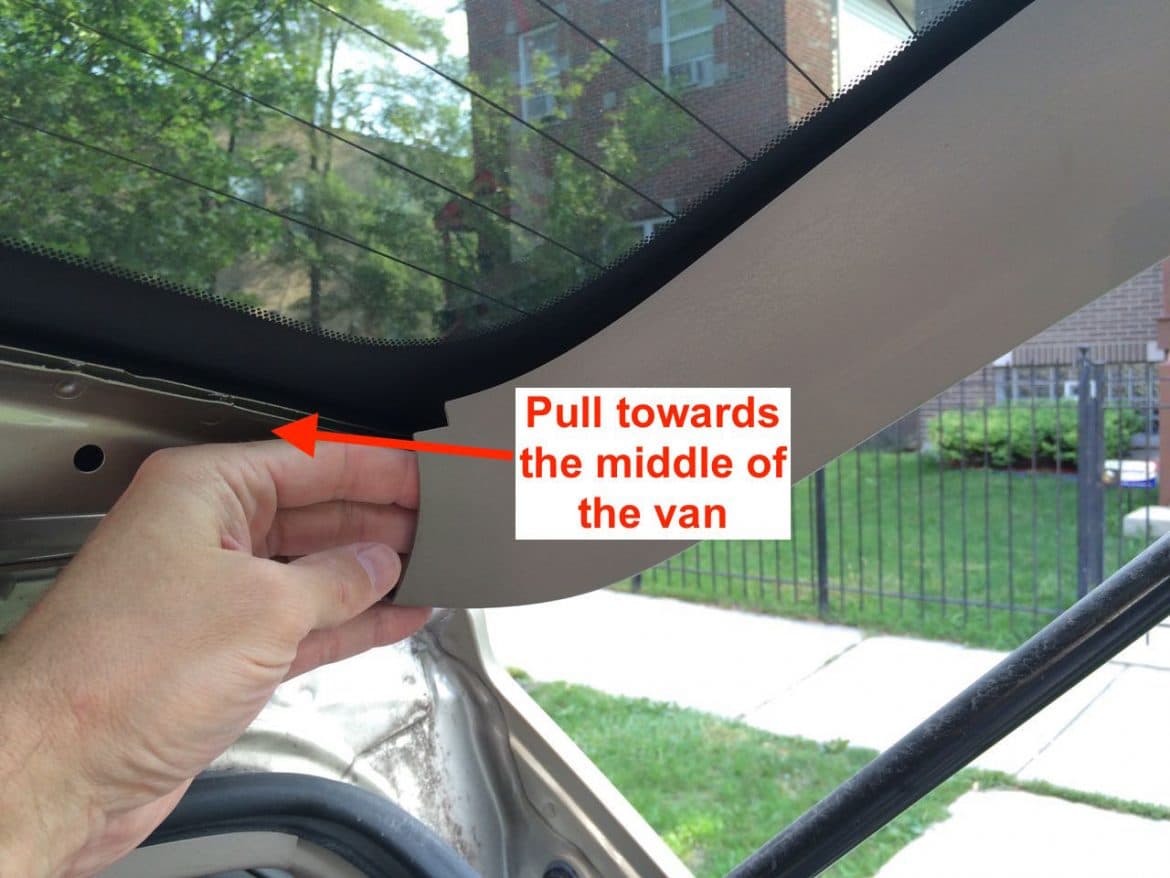
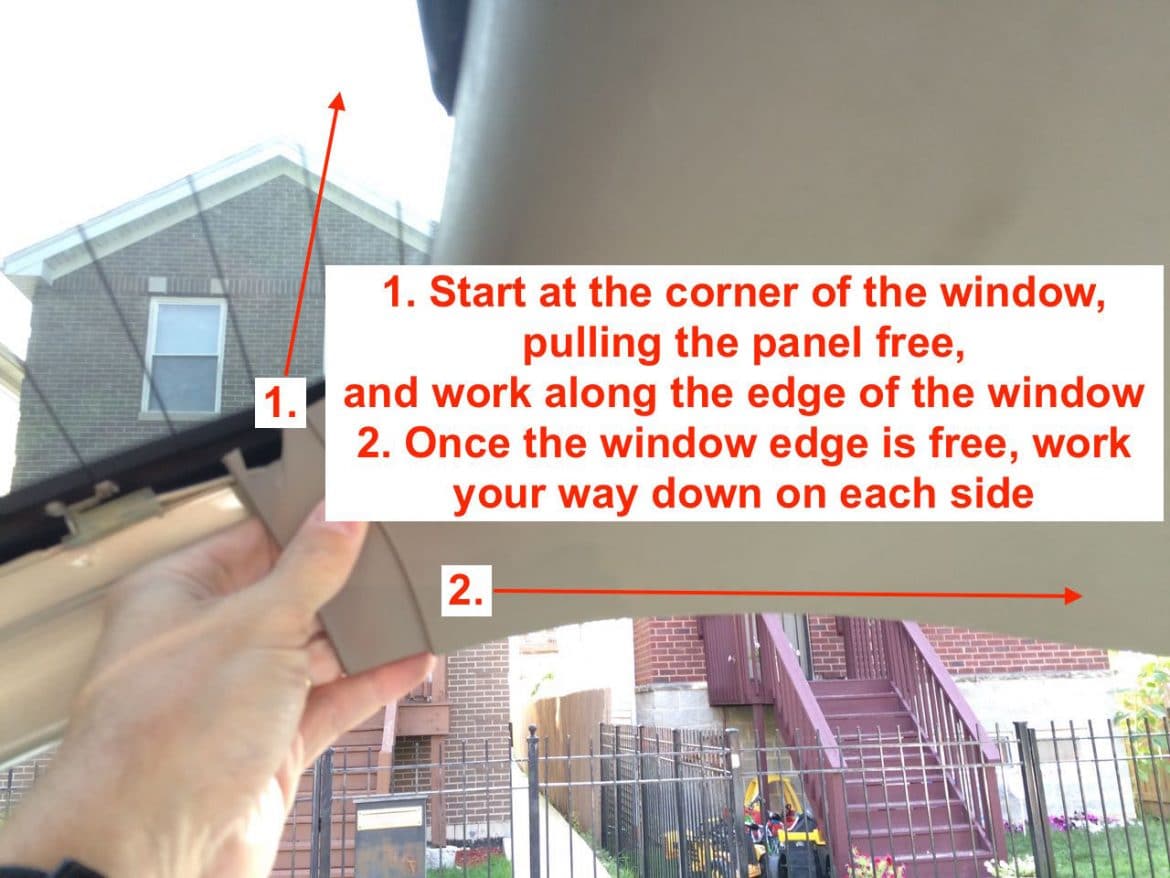
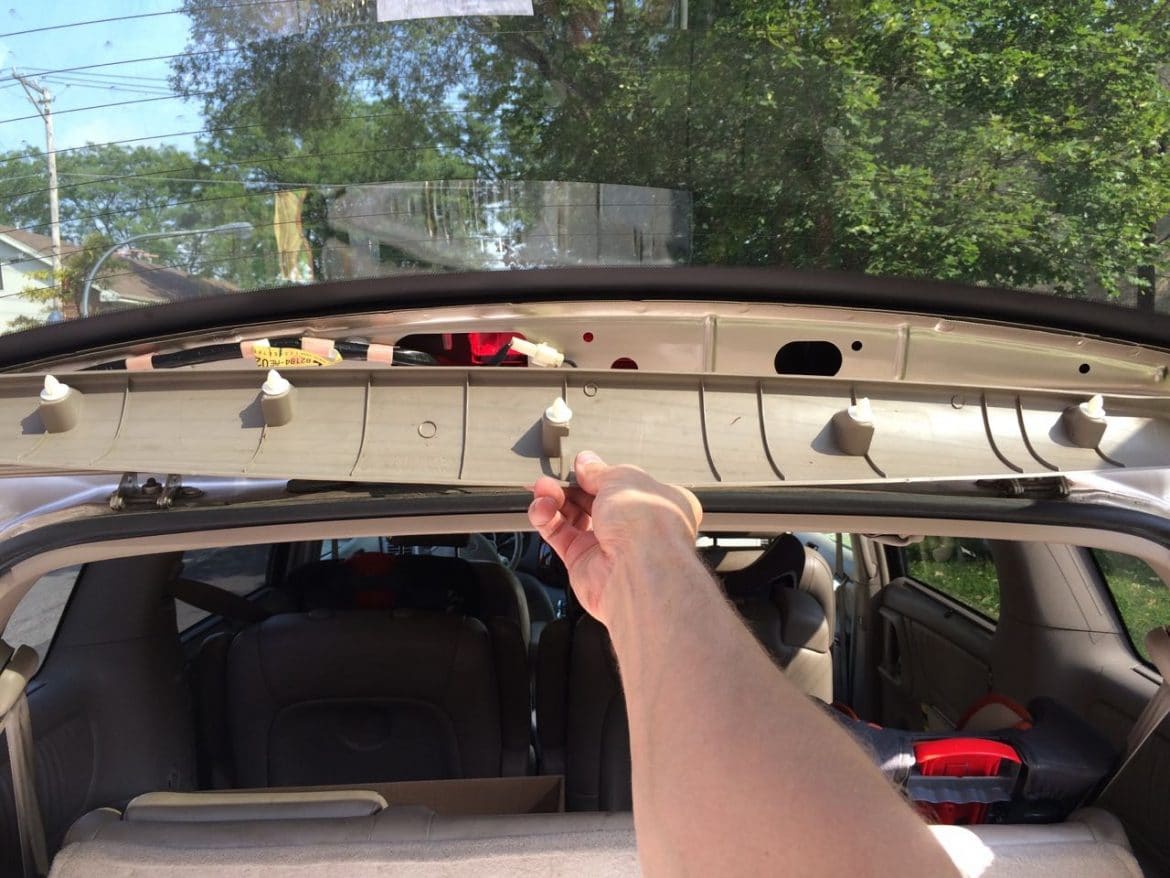
Step 3: Remove the back door garnish center.
“Back door garnish center” is what the manual calls it but I would call it the top center trim piece above the rear window:
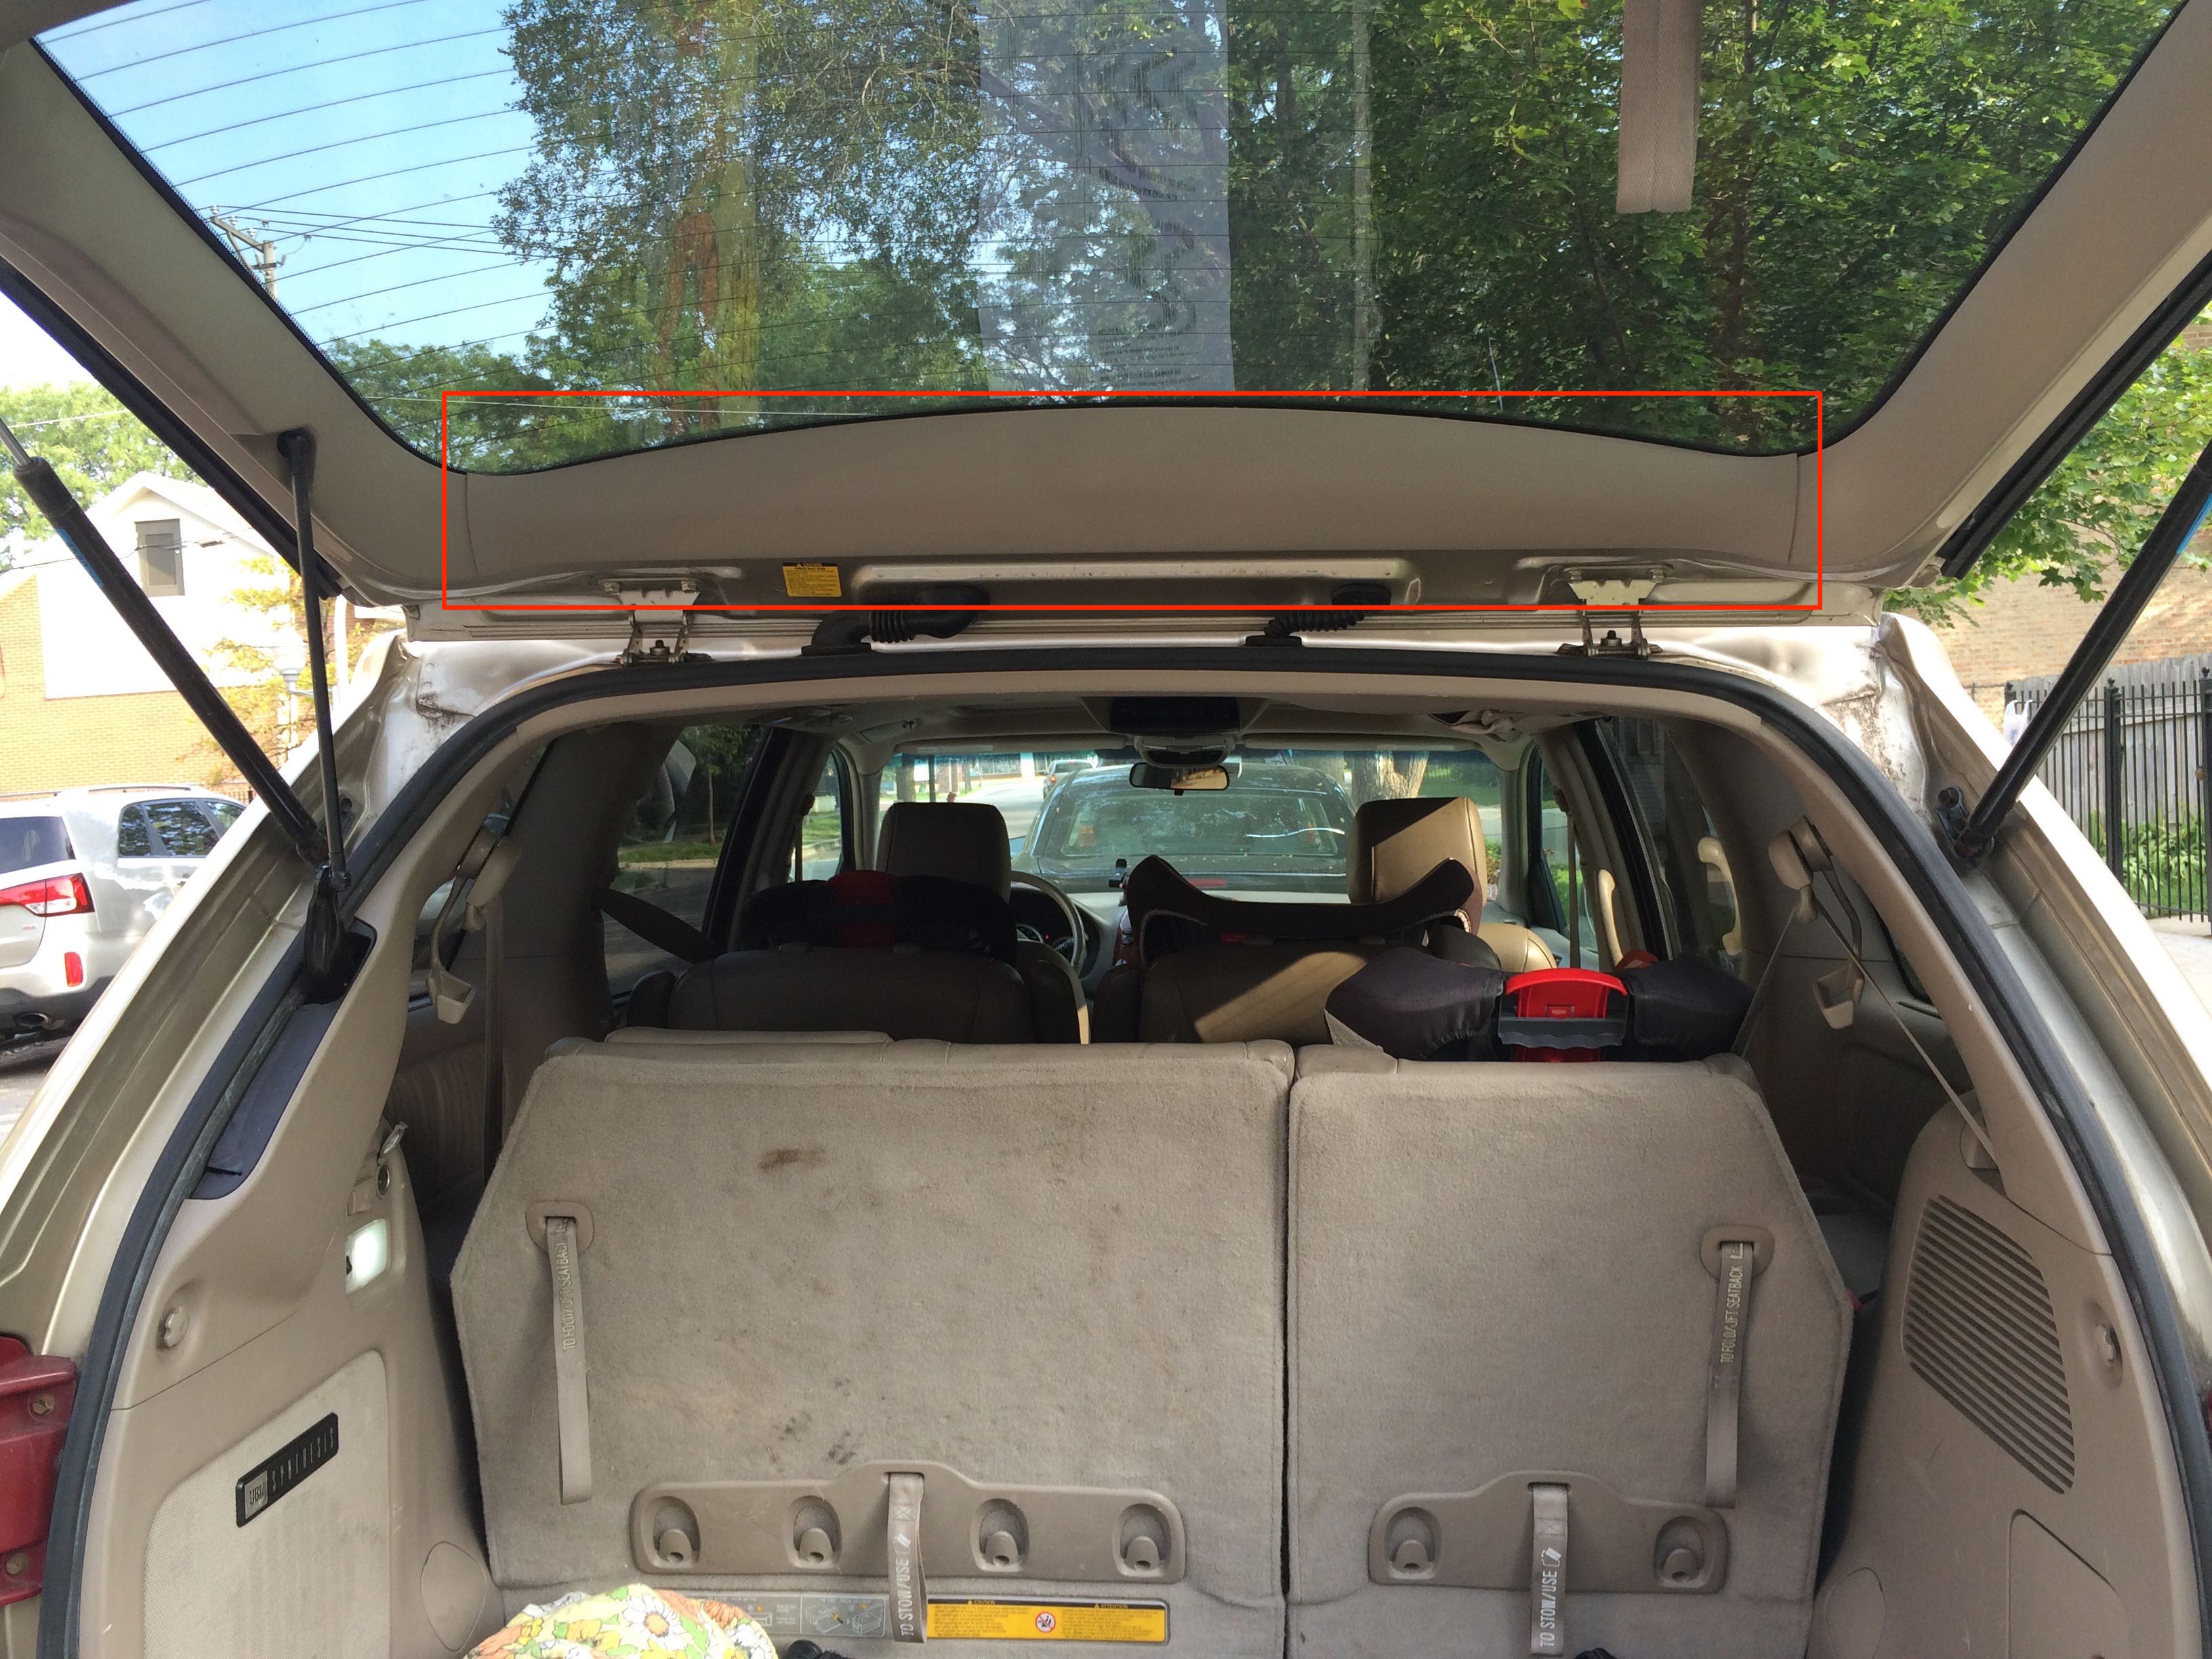
This piece is held in place by five clips. I just used my fingernails and grabbed along the window’s edge and began to pop them free:
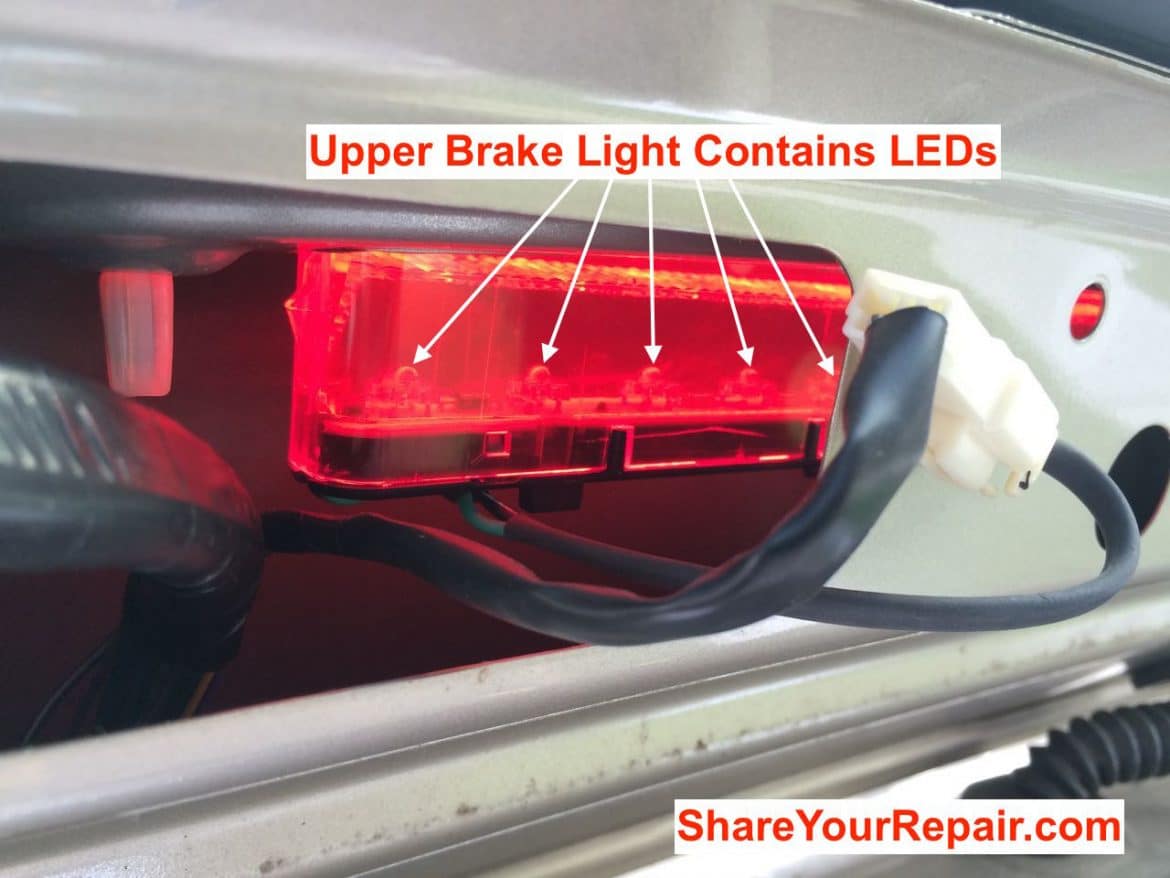
After removing this I noticed that Toyota was nice enough to use LEDs in the upper brake light so you won’t likely need to replace this hard to get at light:
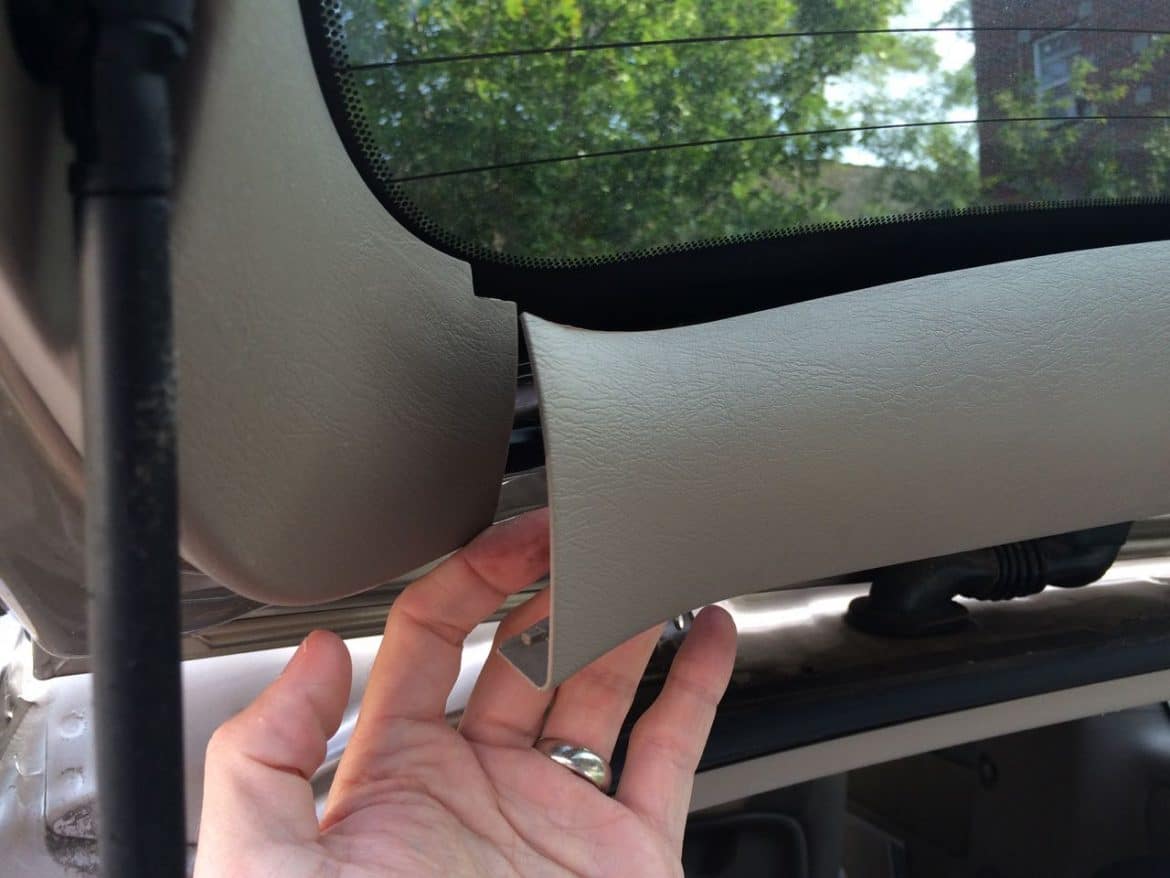
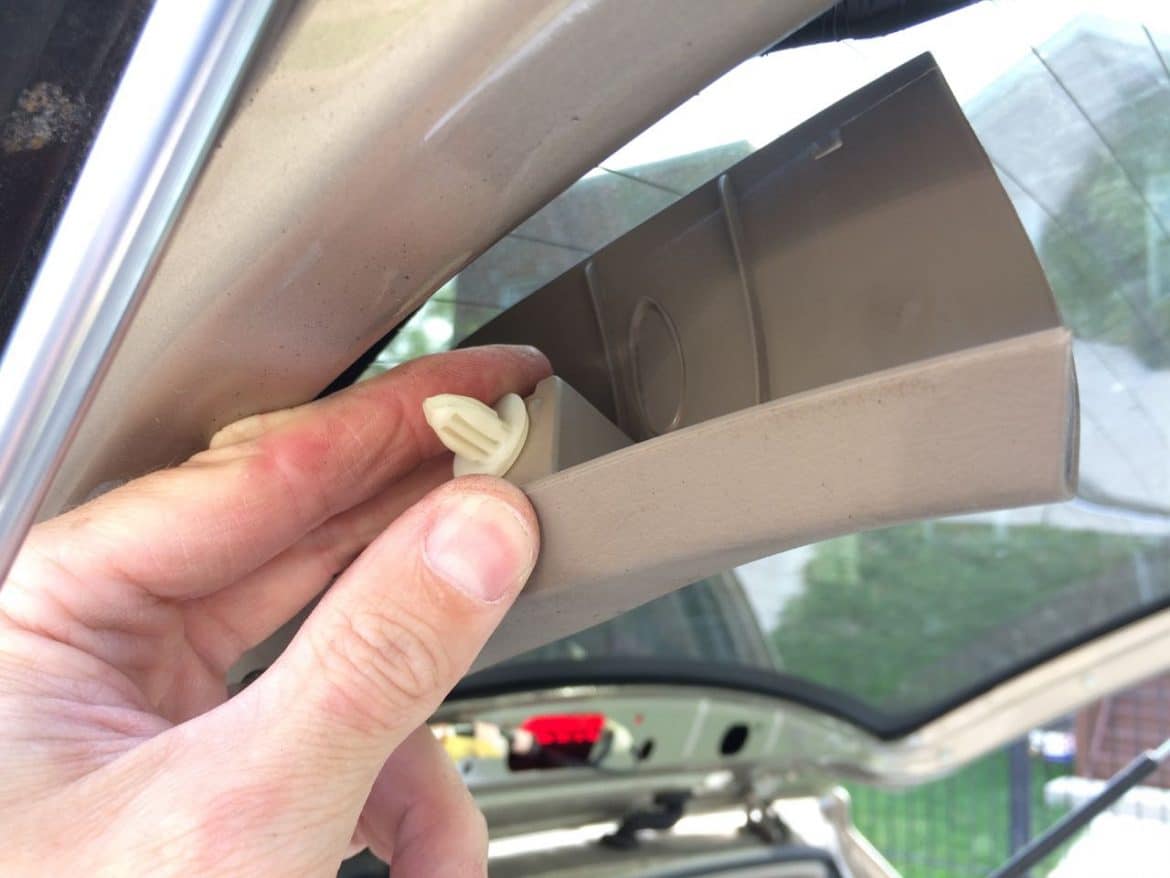
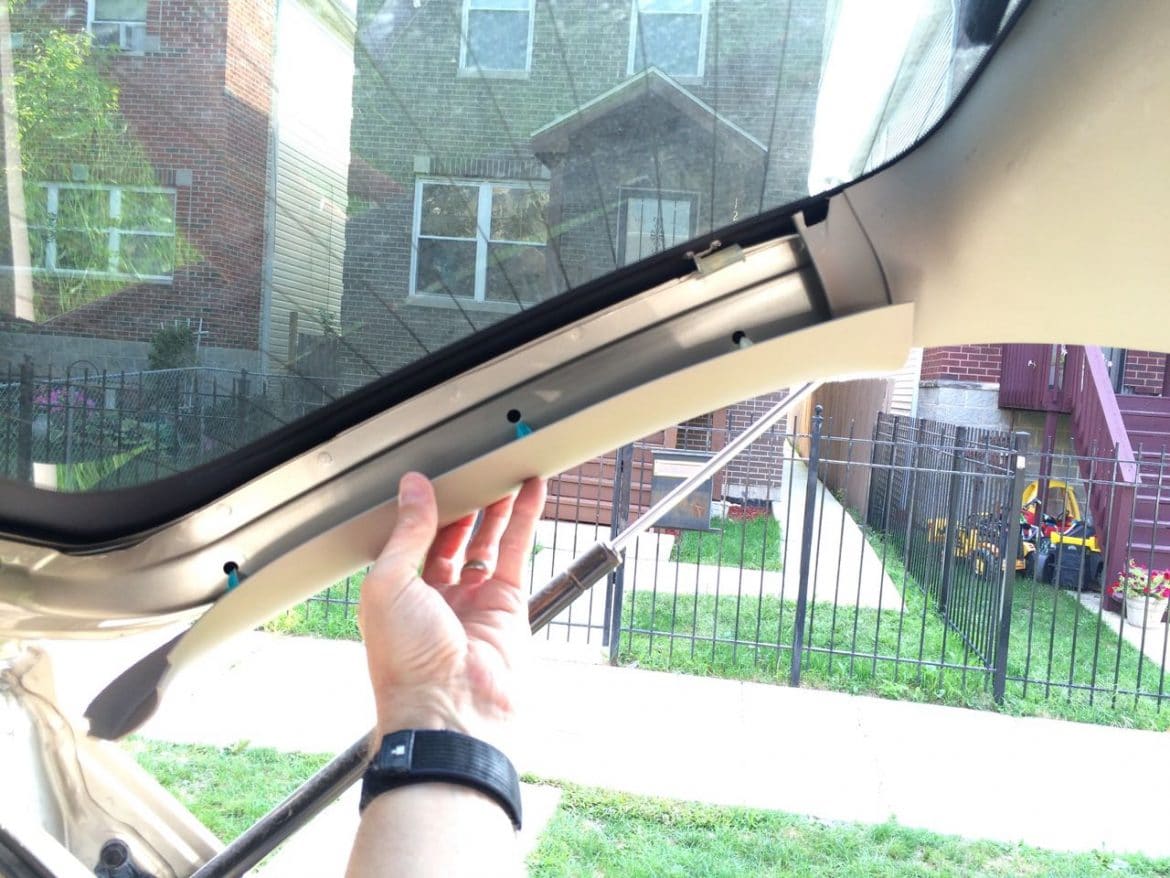
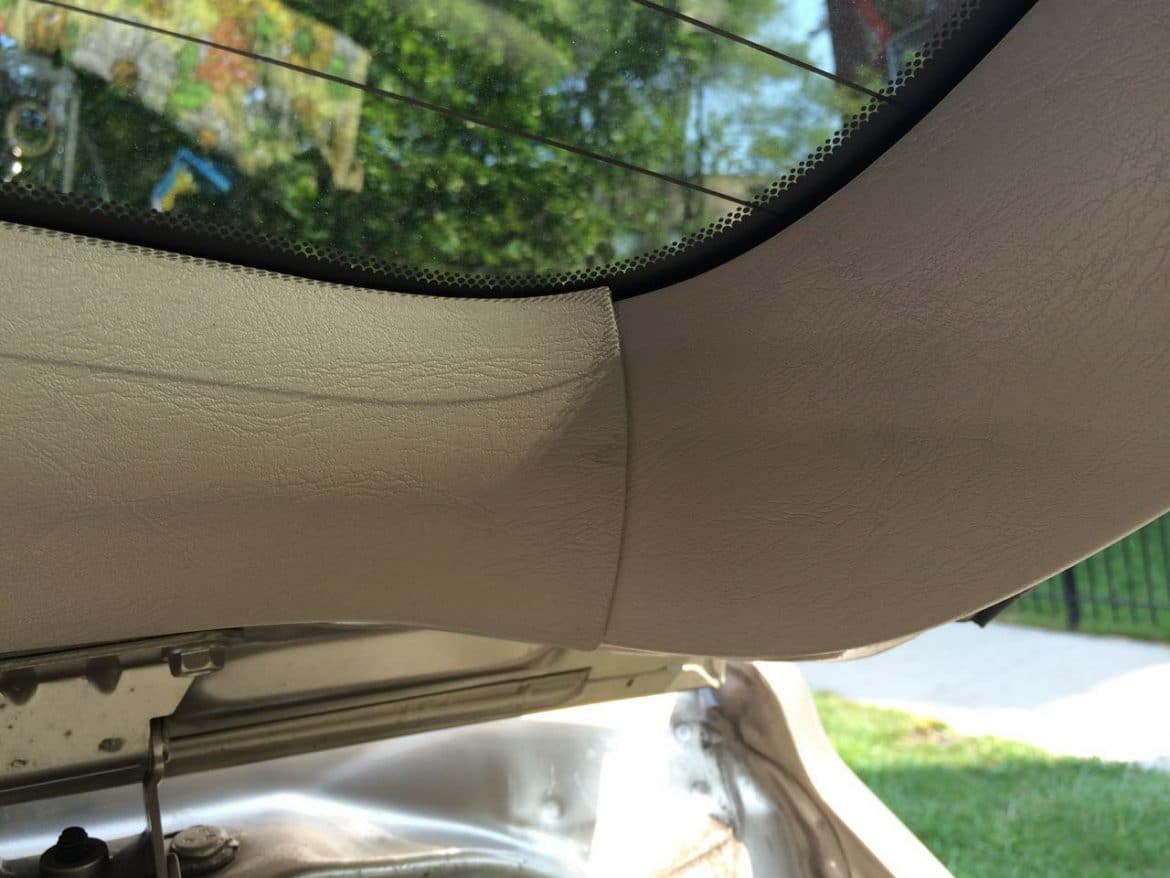
Step 4: Remove the right liftgate window side trim.
Pull the side trim pieces towards the centerline of the van, away from the post where they are attached.
I pulled down and two of the clips did not come off with the trim piece:
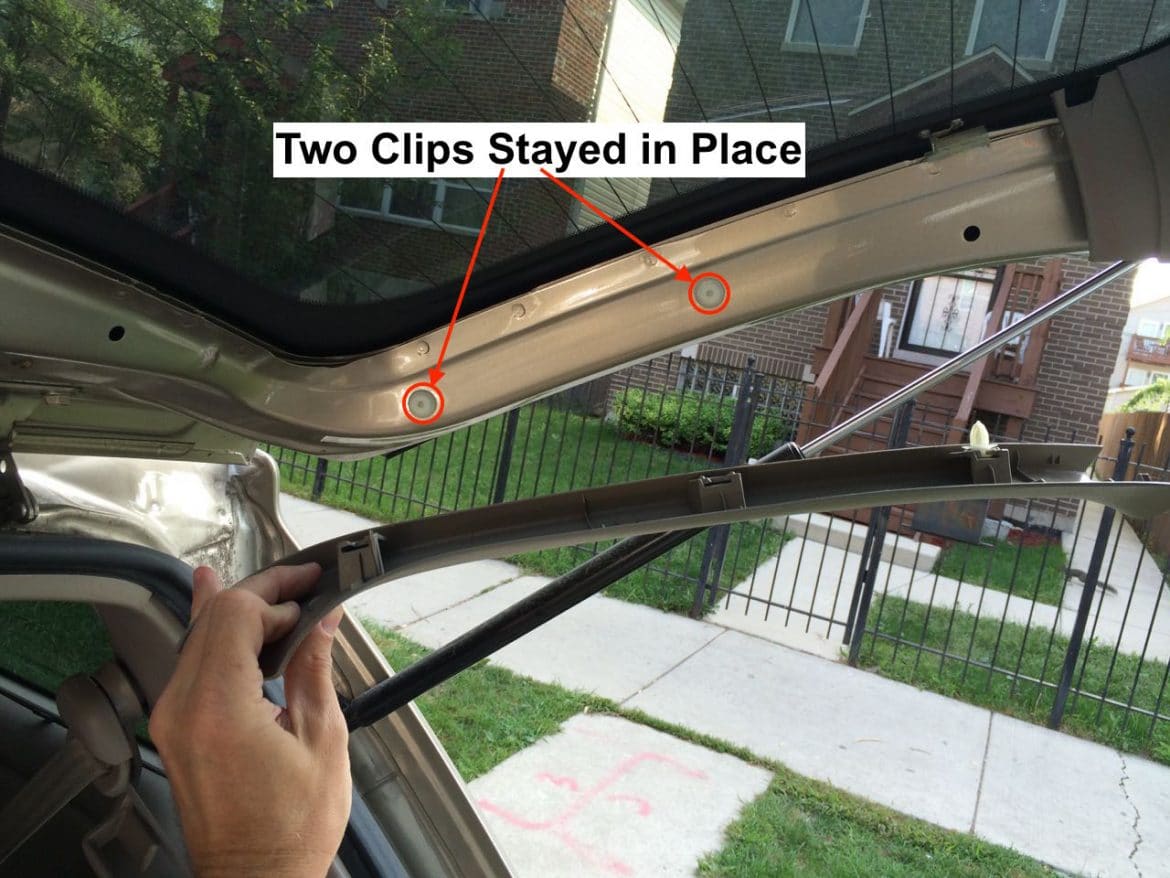
You will need to remove those clips from the door before reinstalling that piece. I did it right before reinstalling it.
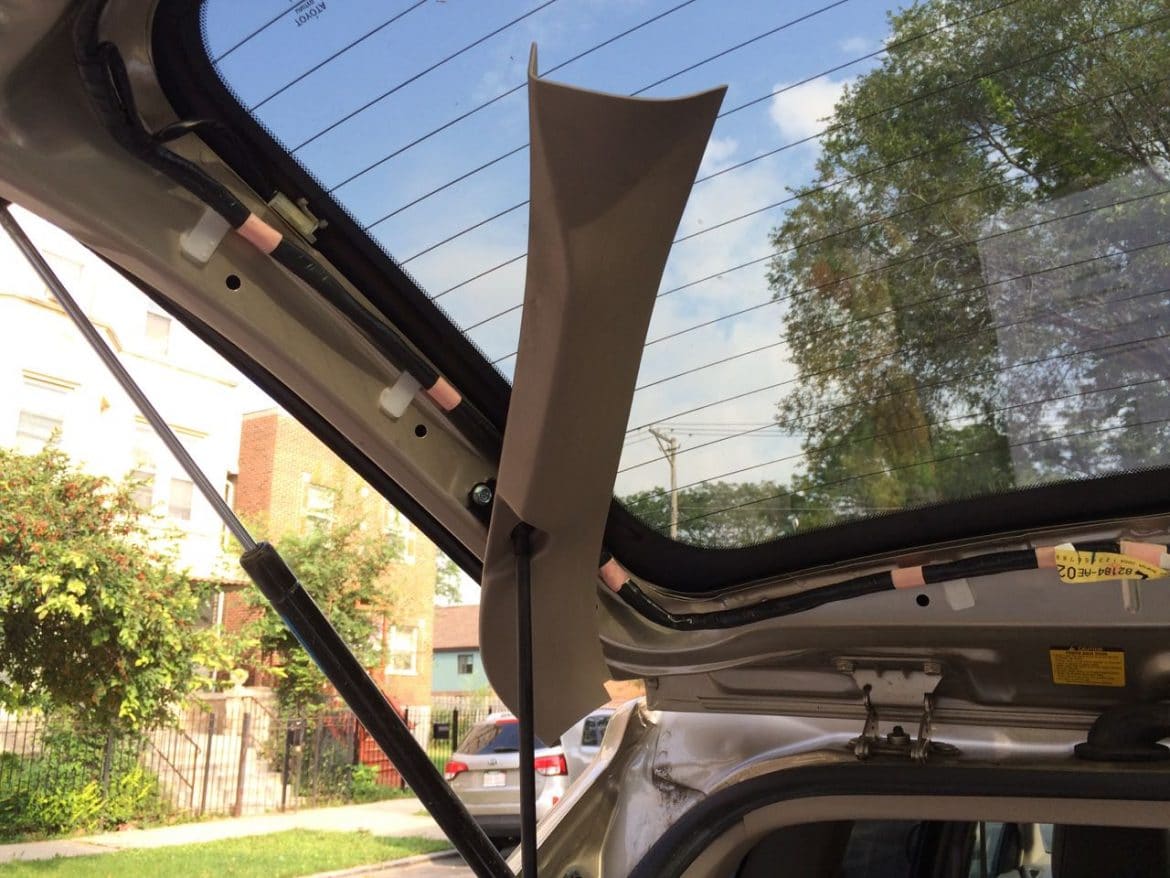
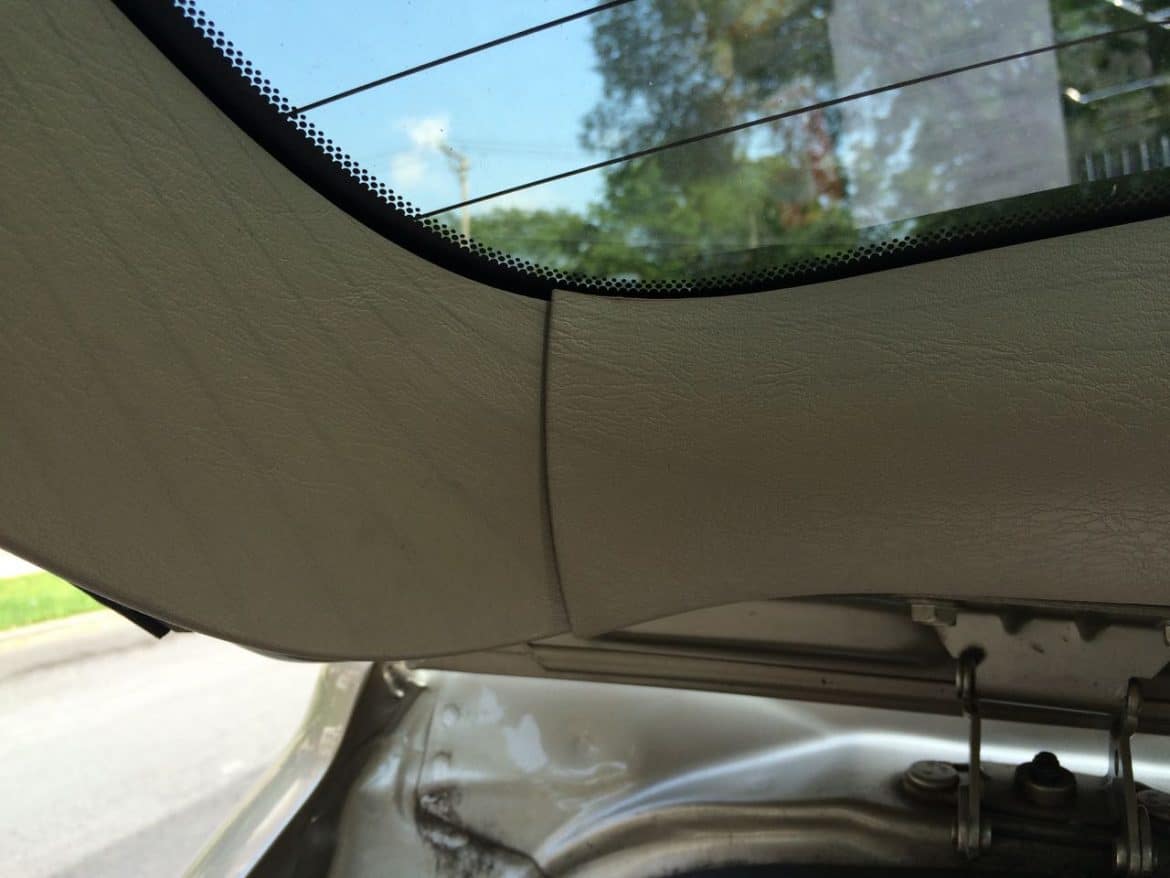
Step 5: Pop the left liftgate window-side trim piece free.
I don’t say “remove” it because the rod for the automatic liftgate door goes through it and I didn’t want to mess with disconnecting the rod so I could completely remove the trim piece.
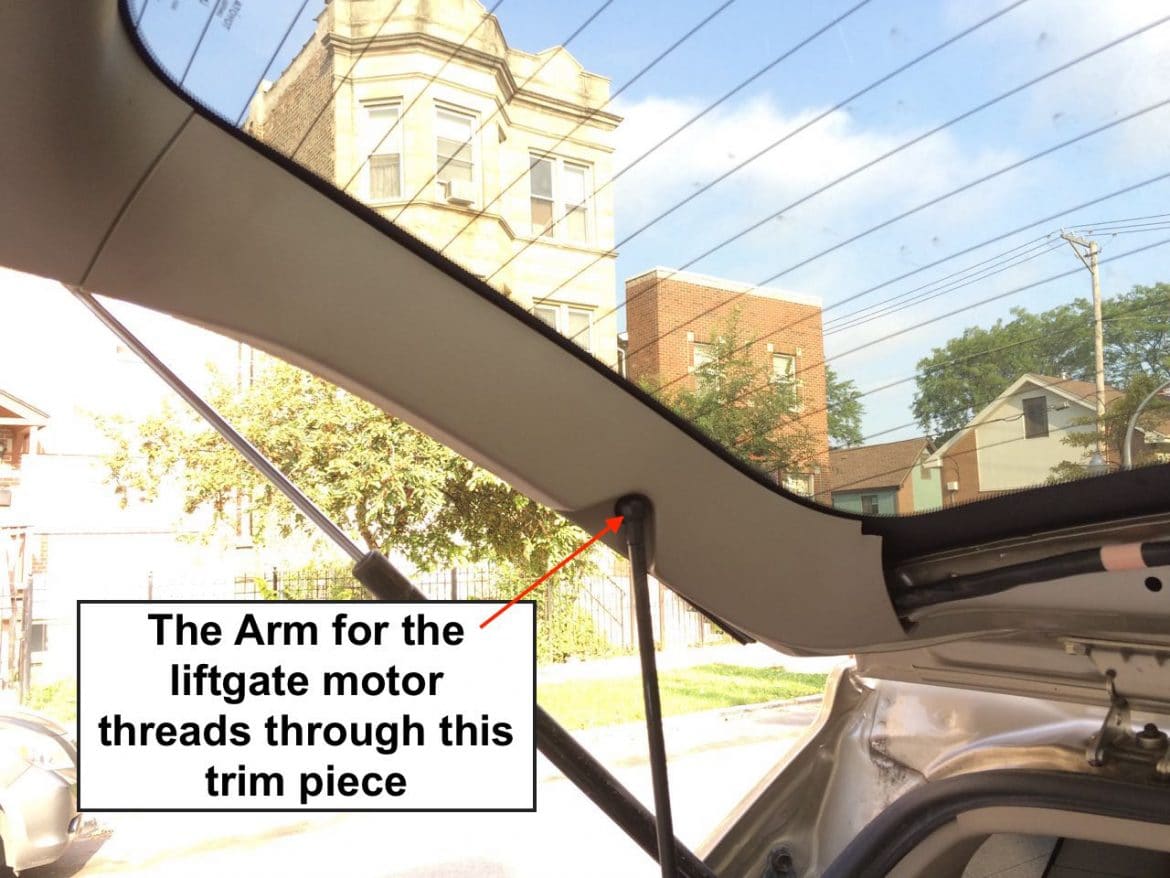
Pop this piece free just like I showed you for the right side. I was able to feed it over and down the power door rod:
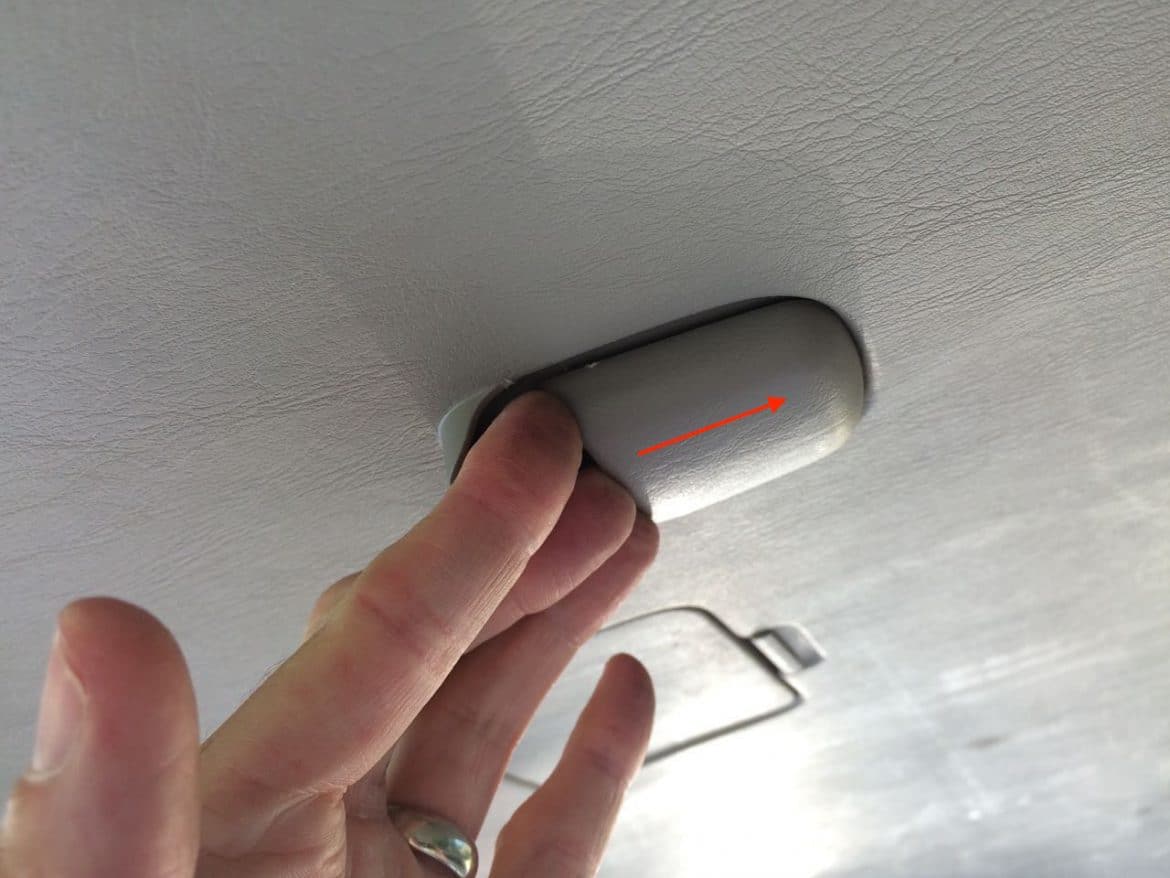
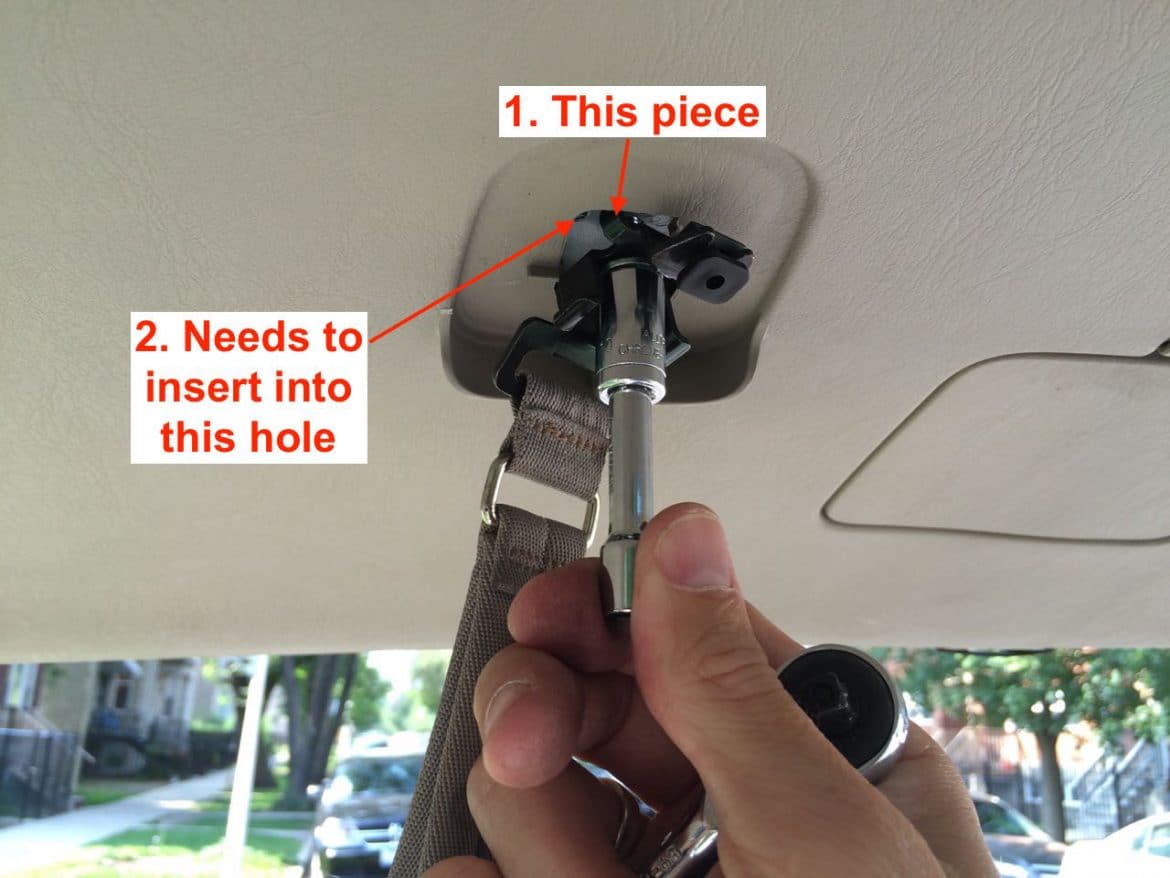
Step 6: Remove the back door pull strap
Push the cover towards the back window:
Here is the cover removed:
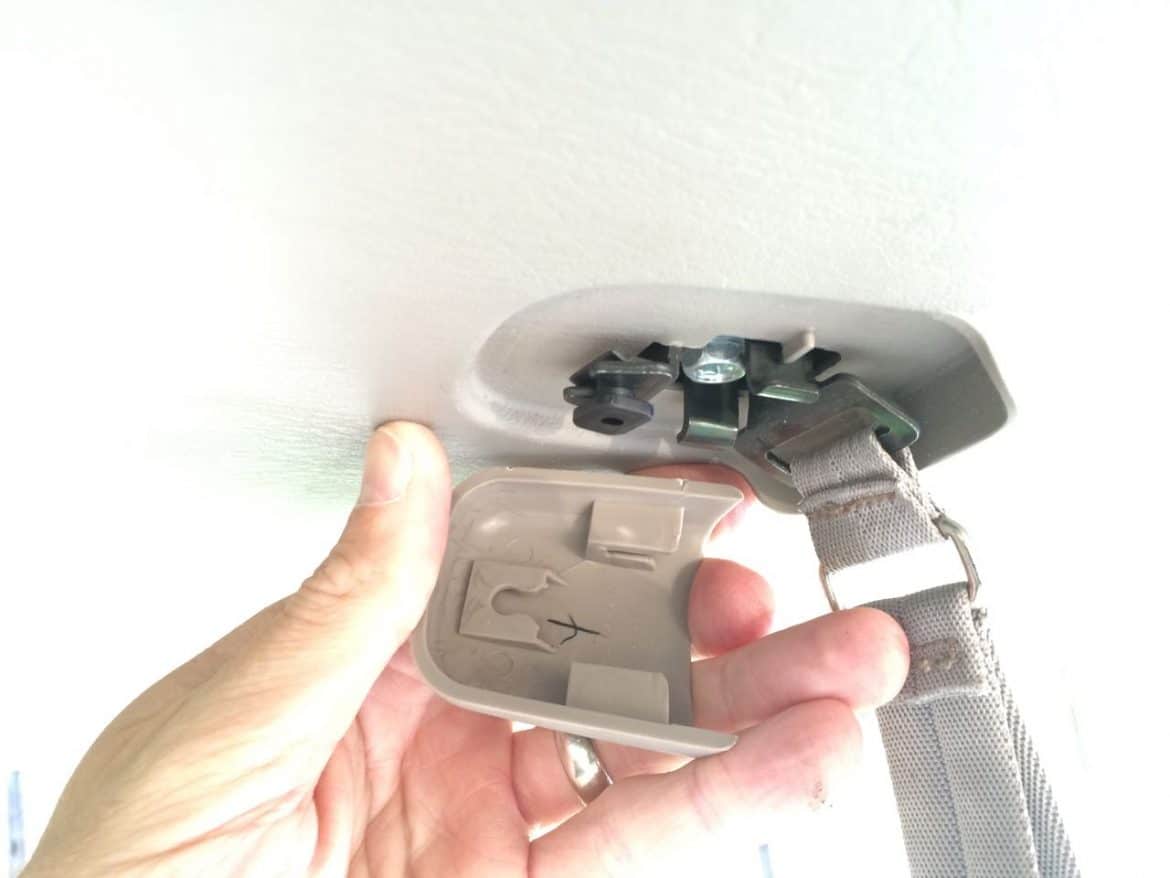
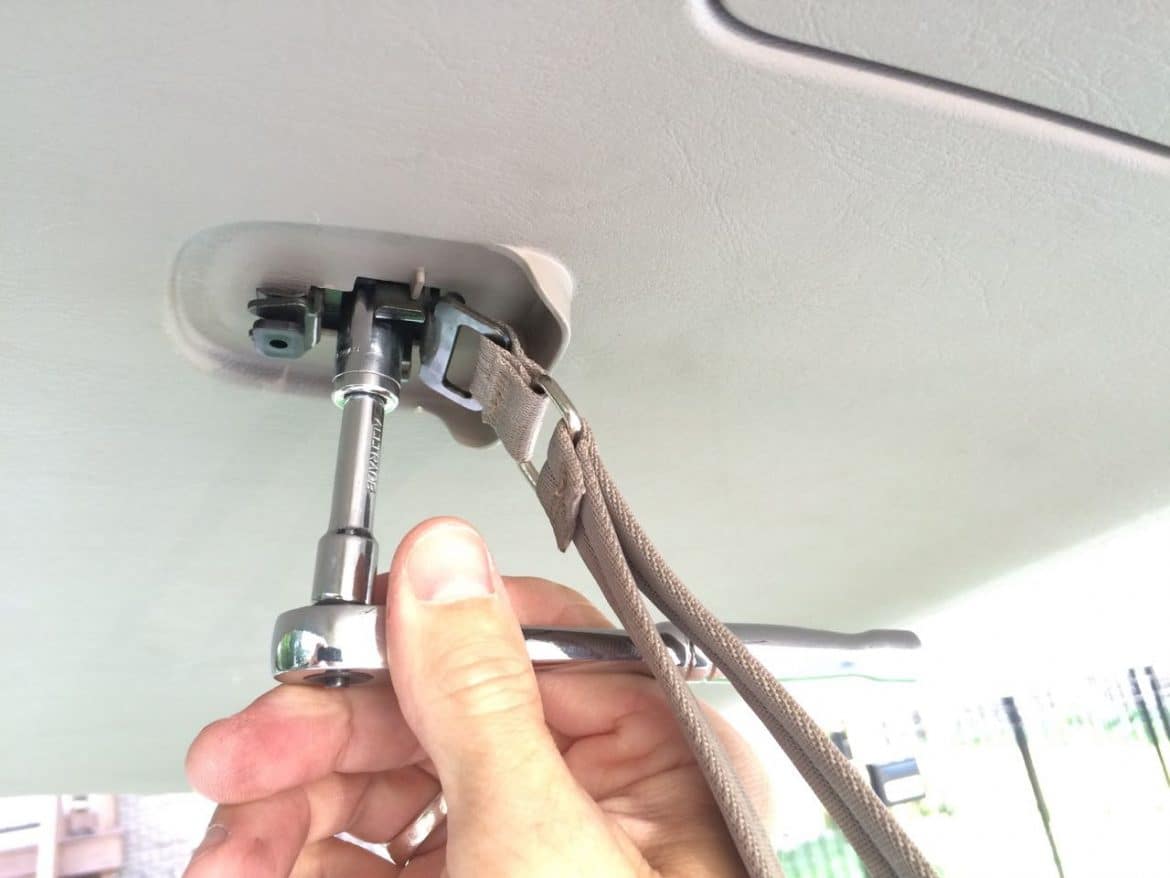
Remove the 10mm headed bolt:
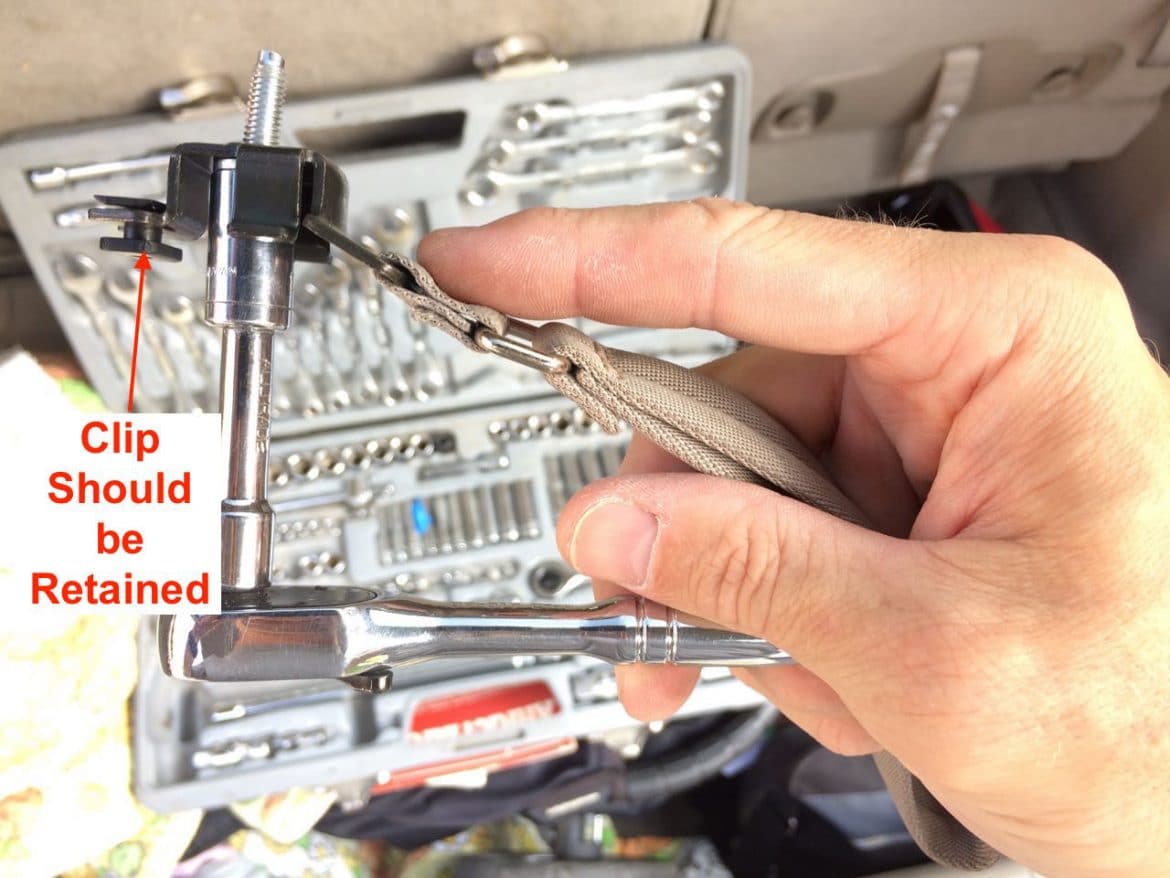
Make sure that the plastic clip is retained and set the pull strap and bolt aside for reinstallation when we are done:
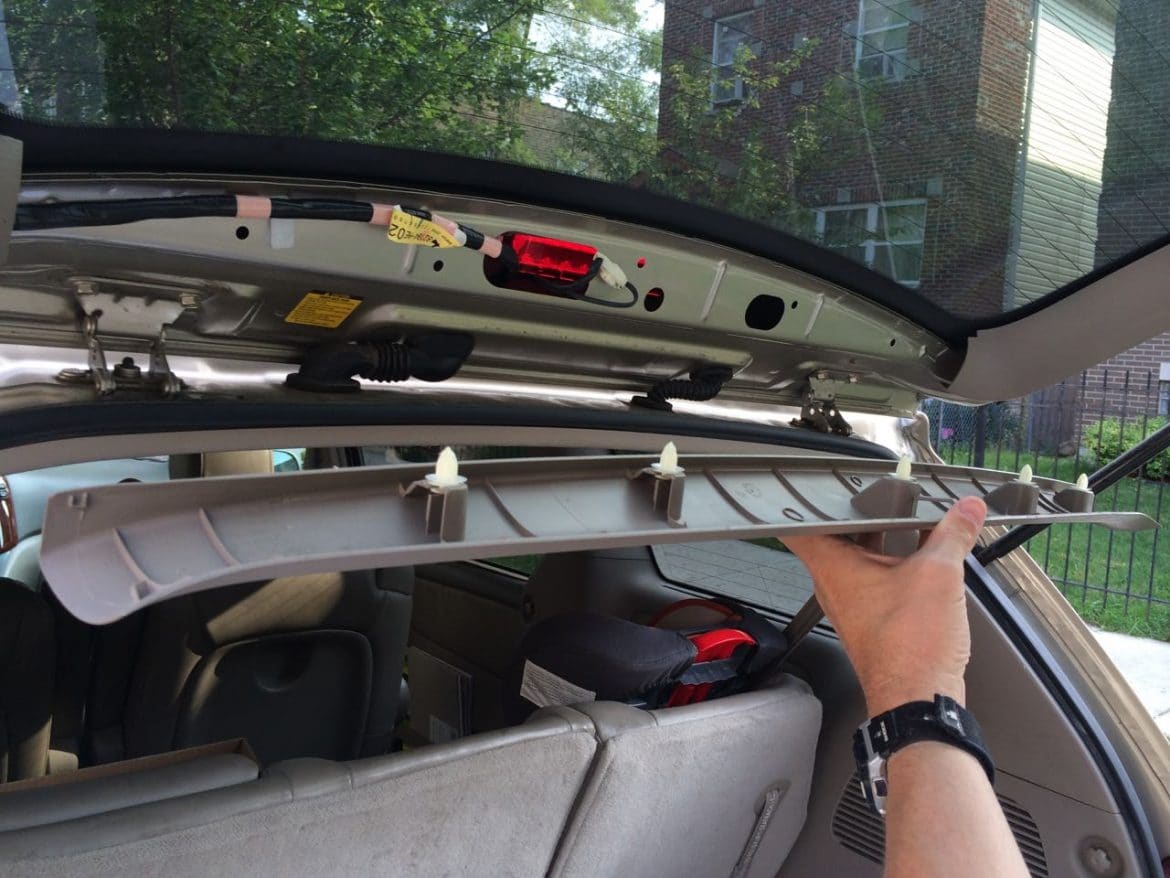
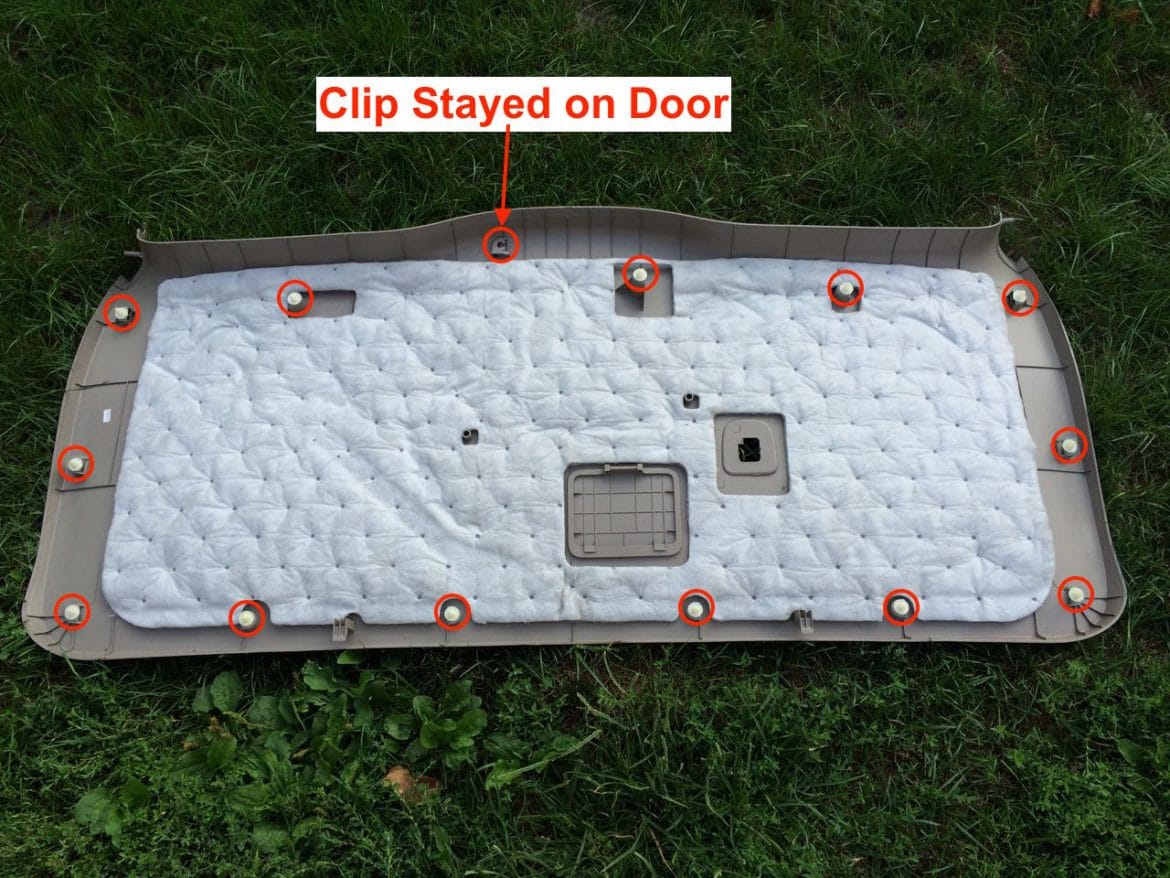
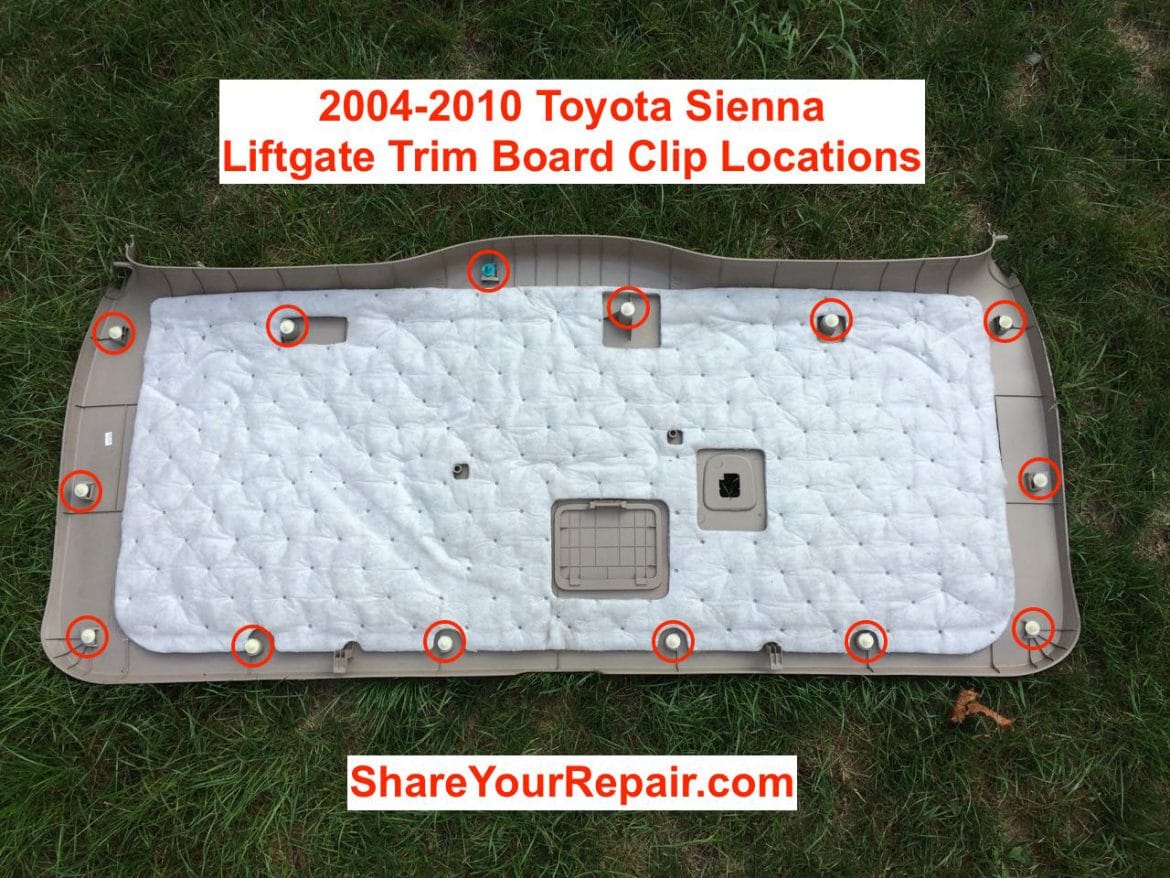
Step 7: Remove the back door main trim board assembly
This is the large plastic panel that the pull strap was in the middle of. There are 14 clips and two plastic catches that hold this panel on. You will want to start on the window edge because there are “catches” at the bottom (latch) edge that cannot be pulled free.
Once you have the 14 clips popped free you can lift the trim board assembly up and off the lower catches:

Here’s a look at the back door trim board removed from the van:
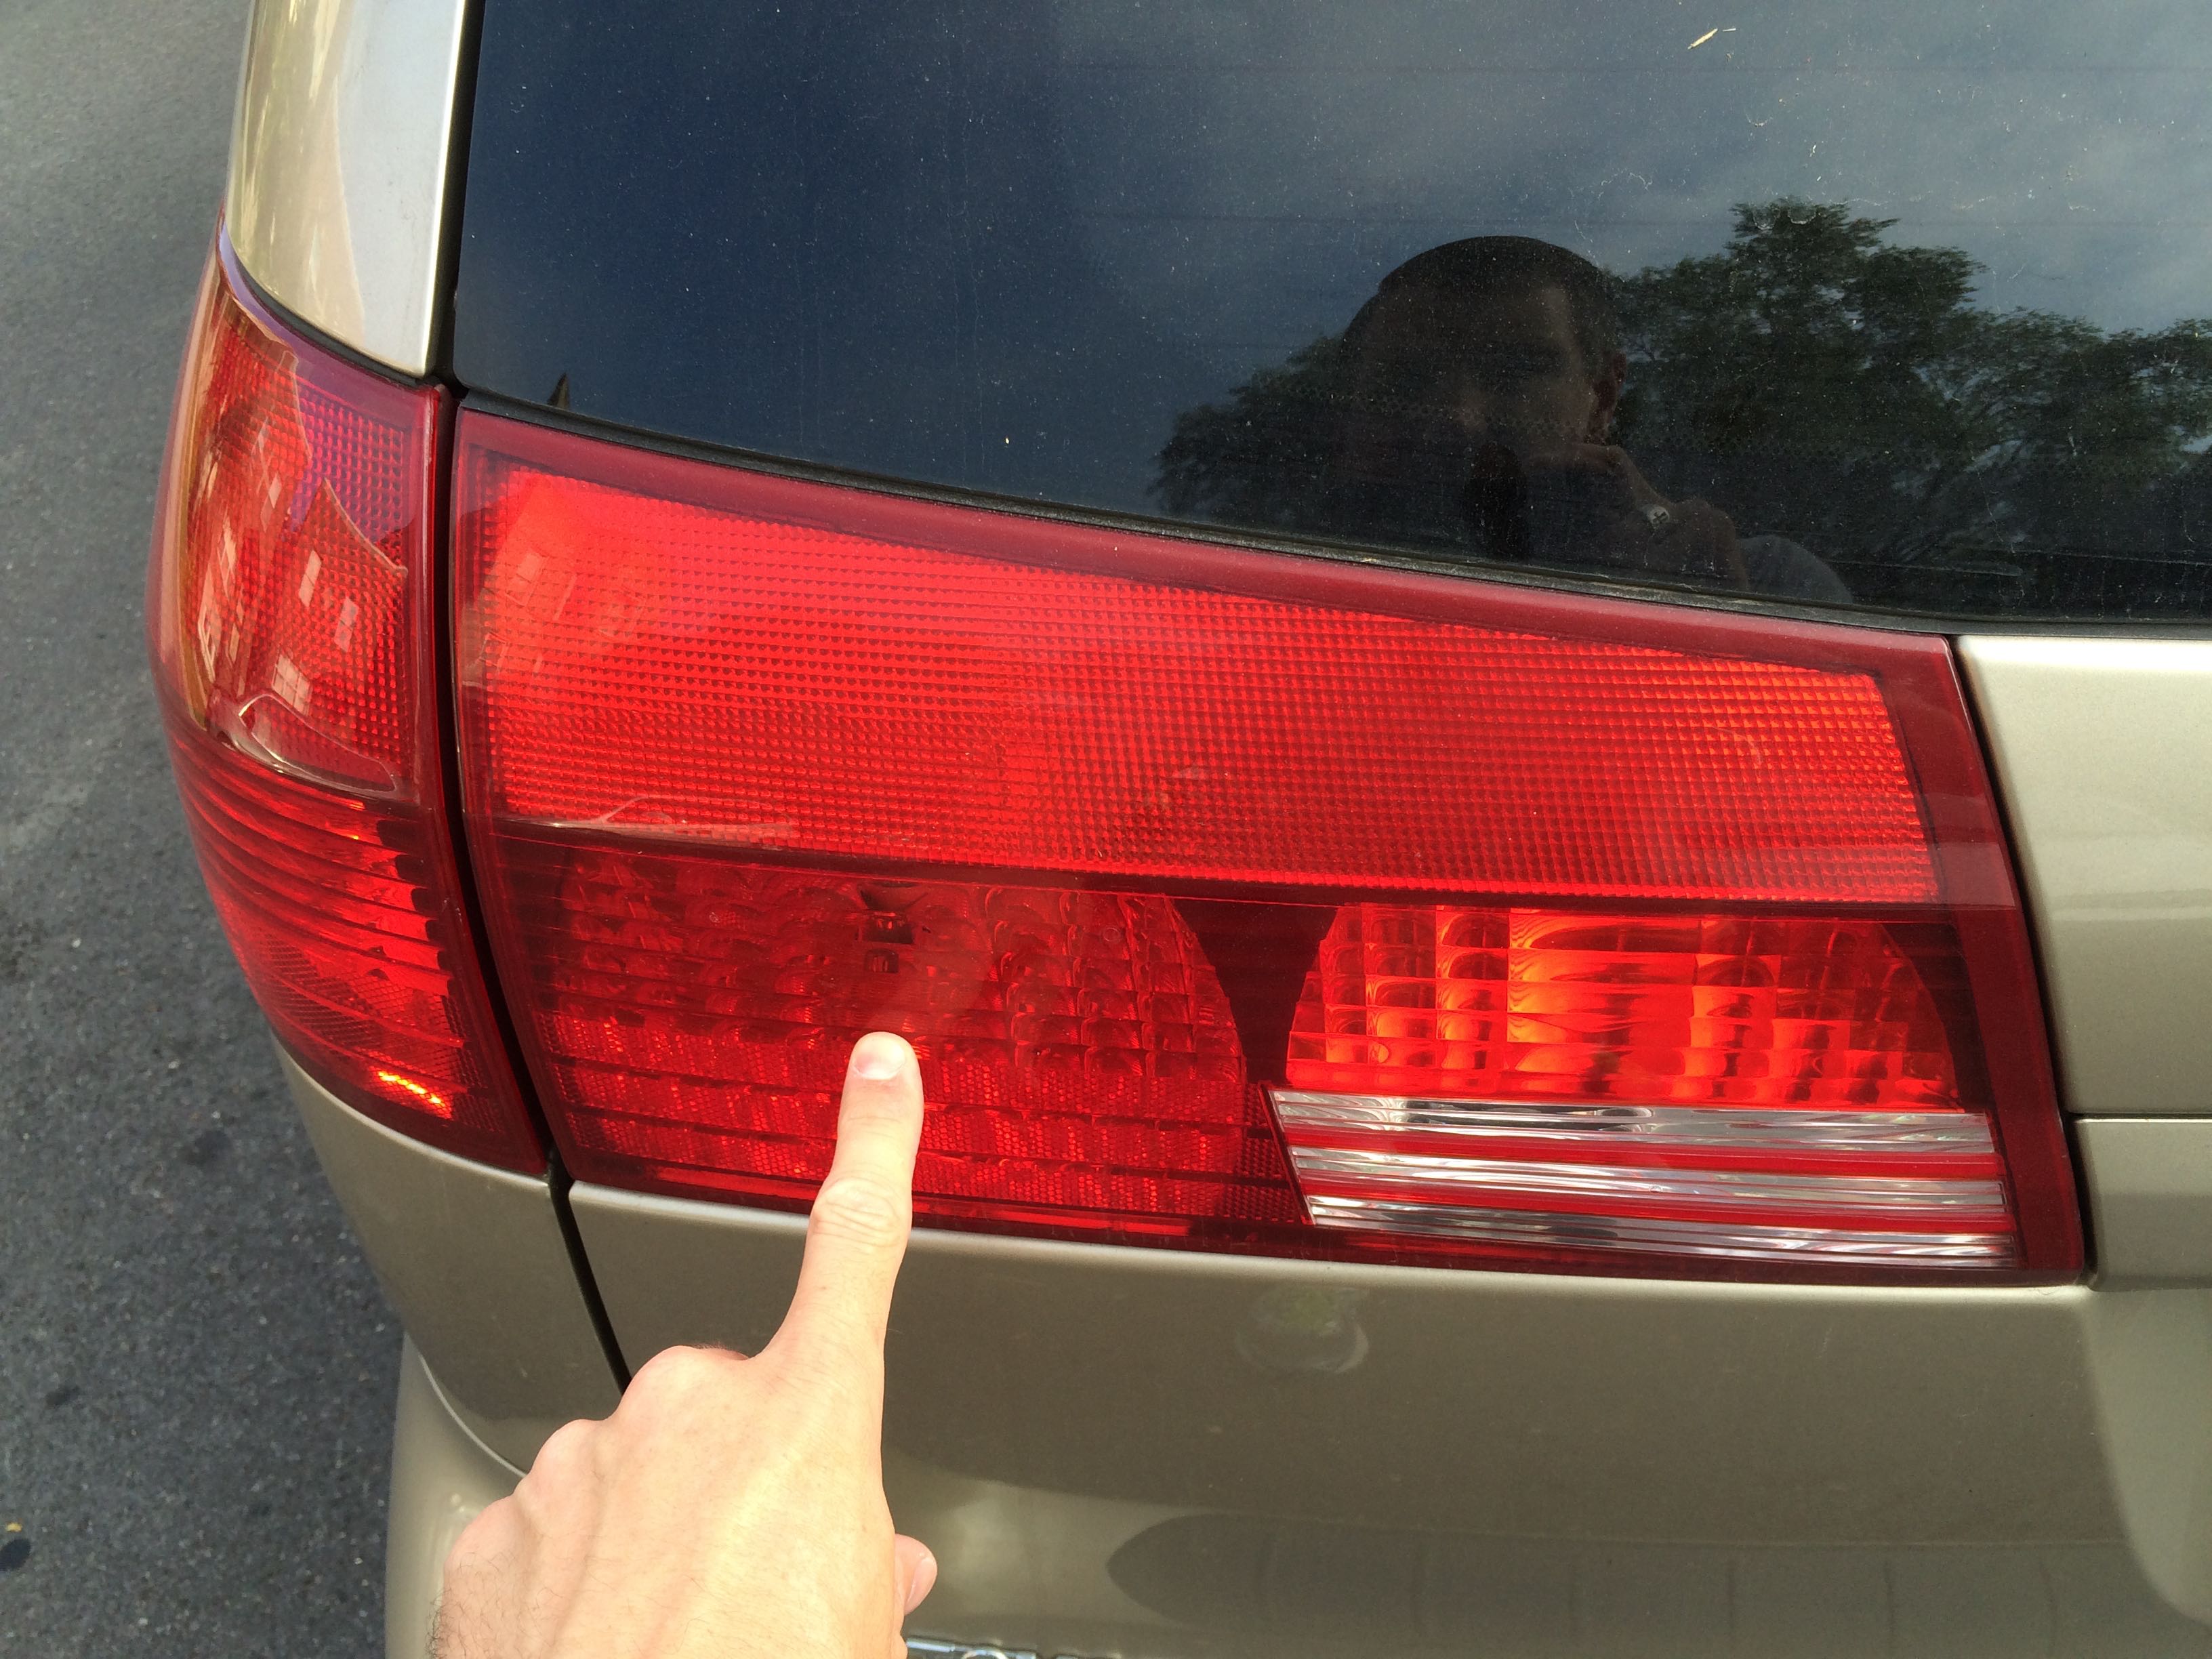
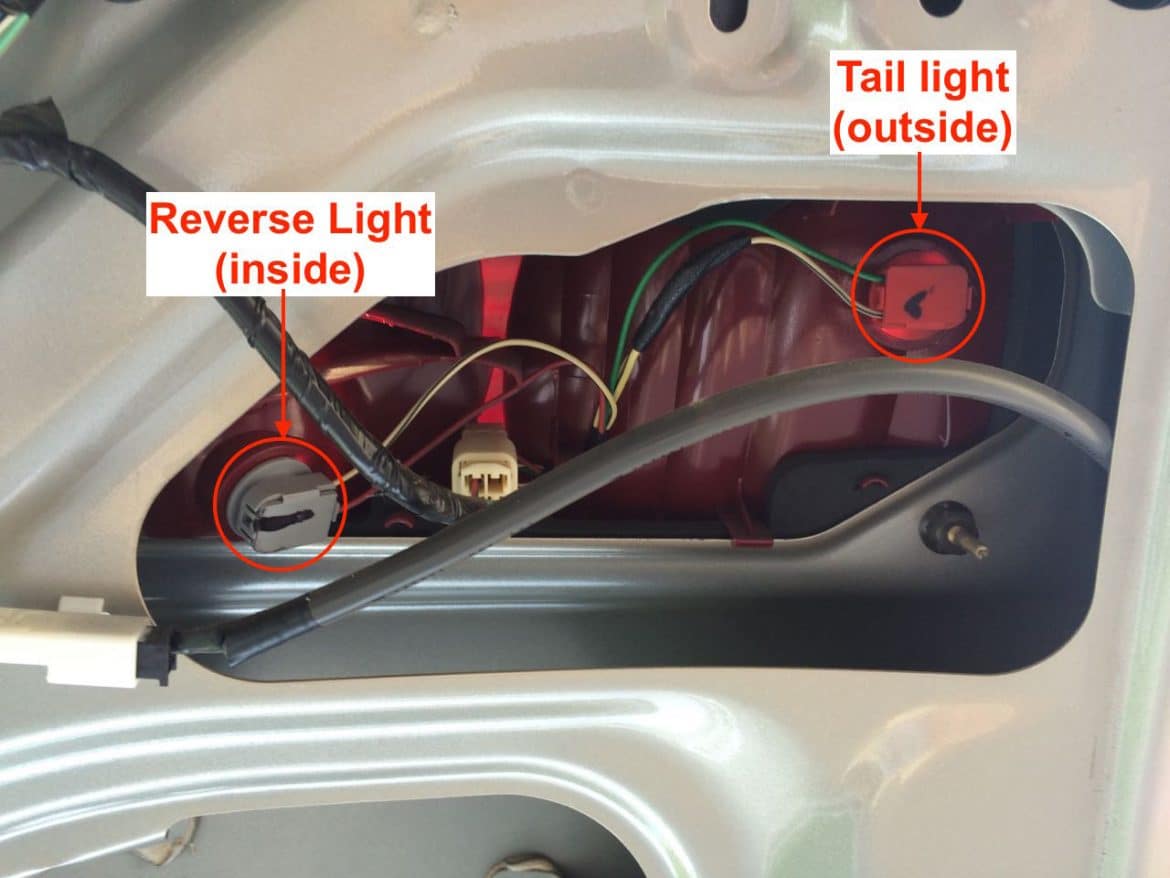
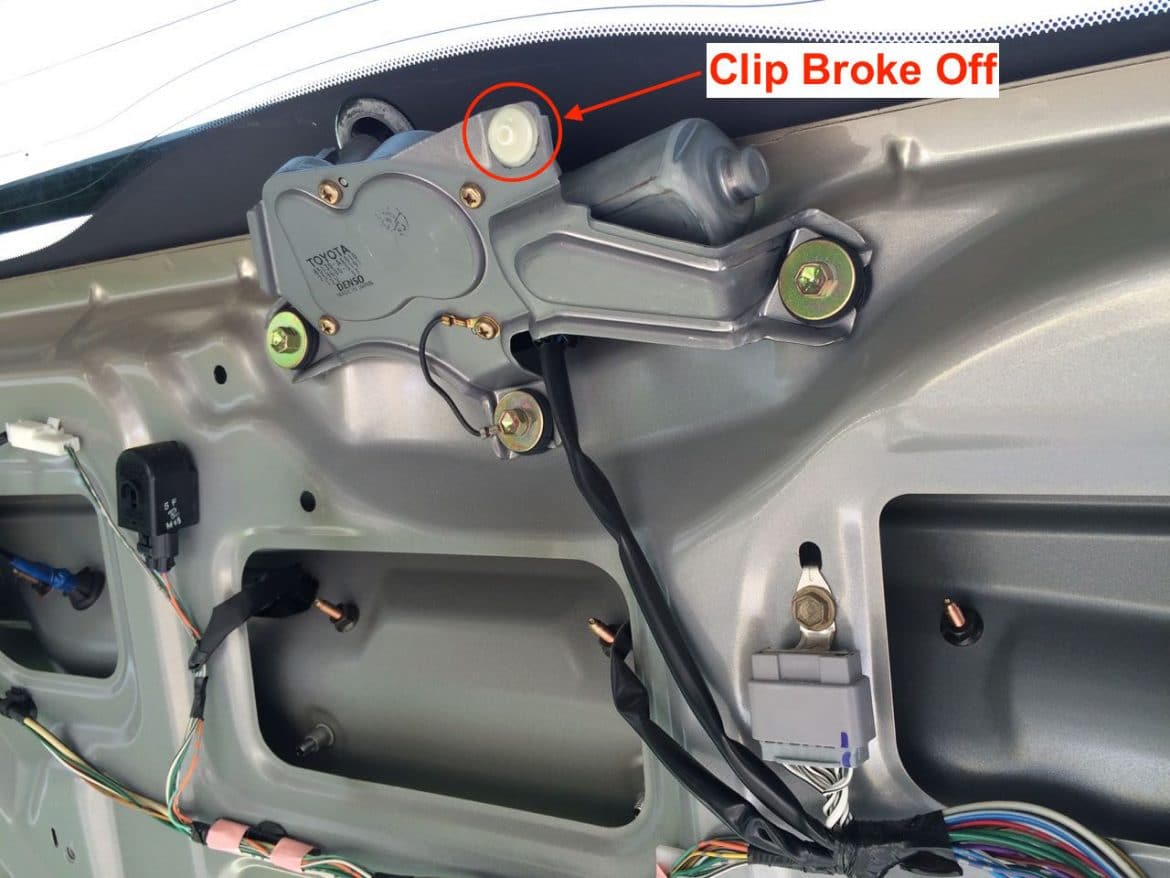
Step 8: Locate the tail light bulbs.
Here are where they are located. This is the driver’s (left) side:
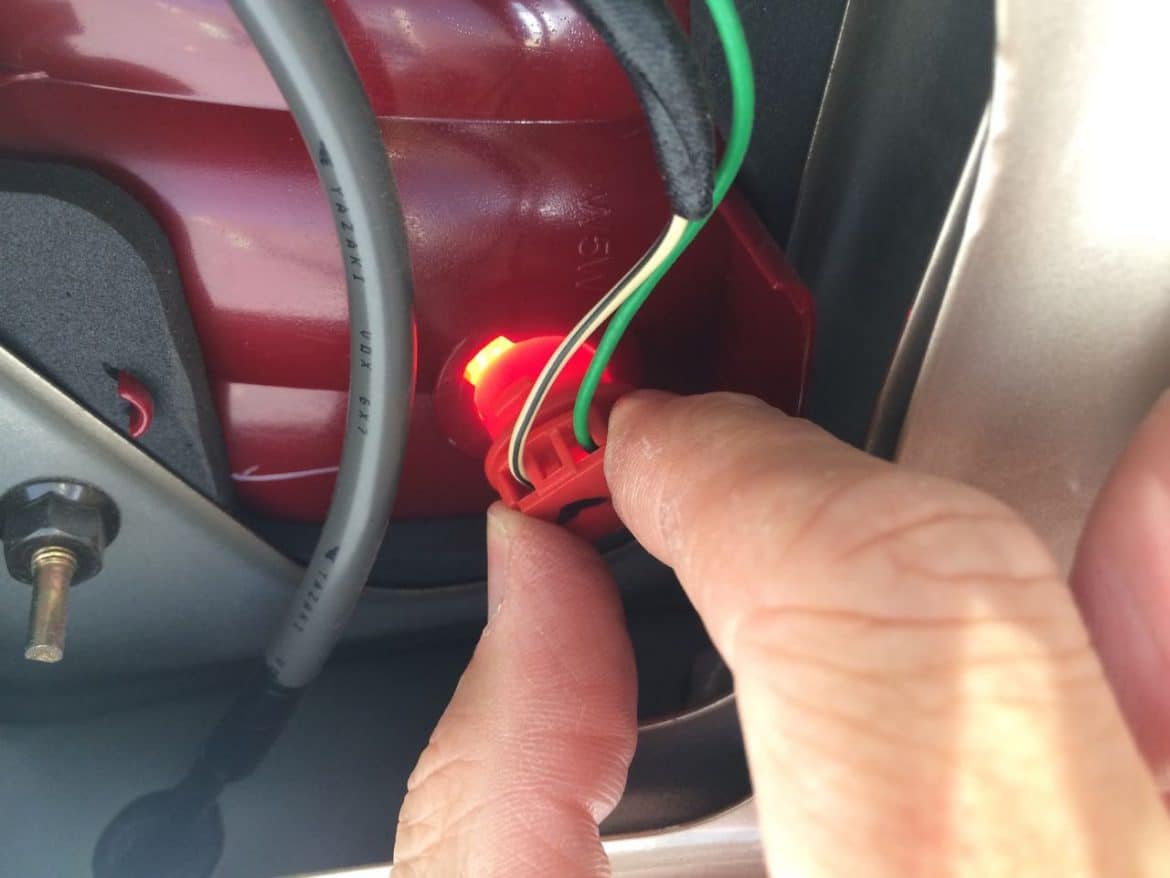
Step 9: Remove the burnt out bulb
To remove the bulbs you turn the base about 30-degrees counter clockwise to unlatch it. They snap into place and one of them I had a difficult time getting it to release.
Here is the base before I turned it:
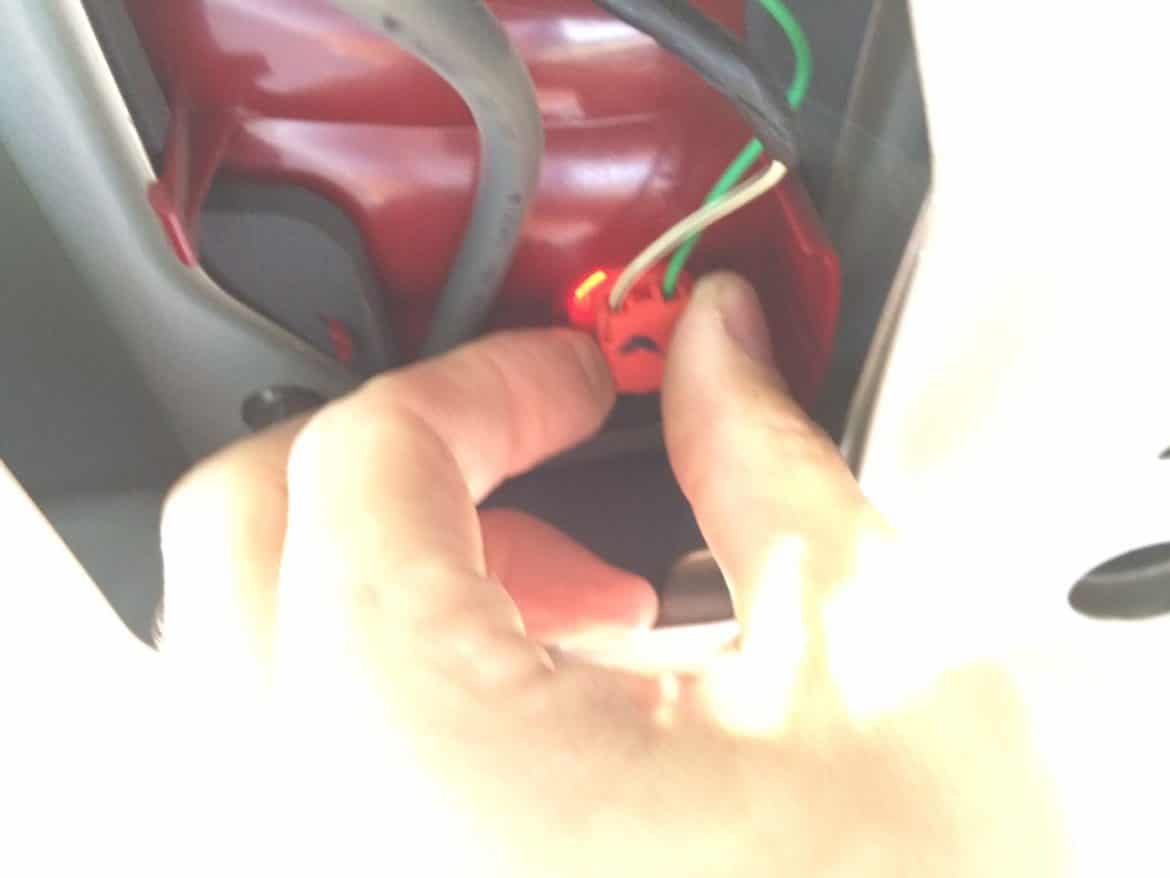
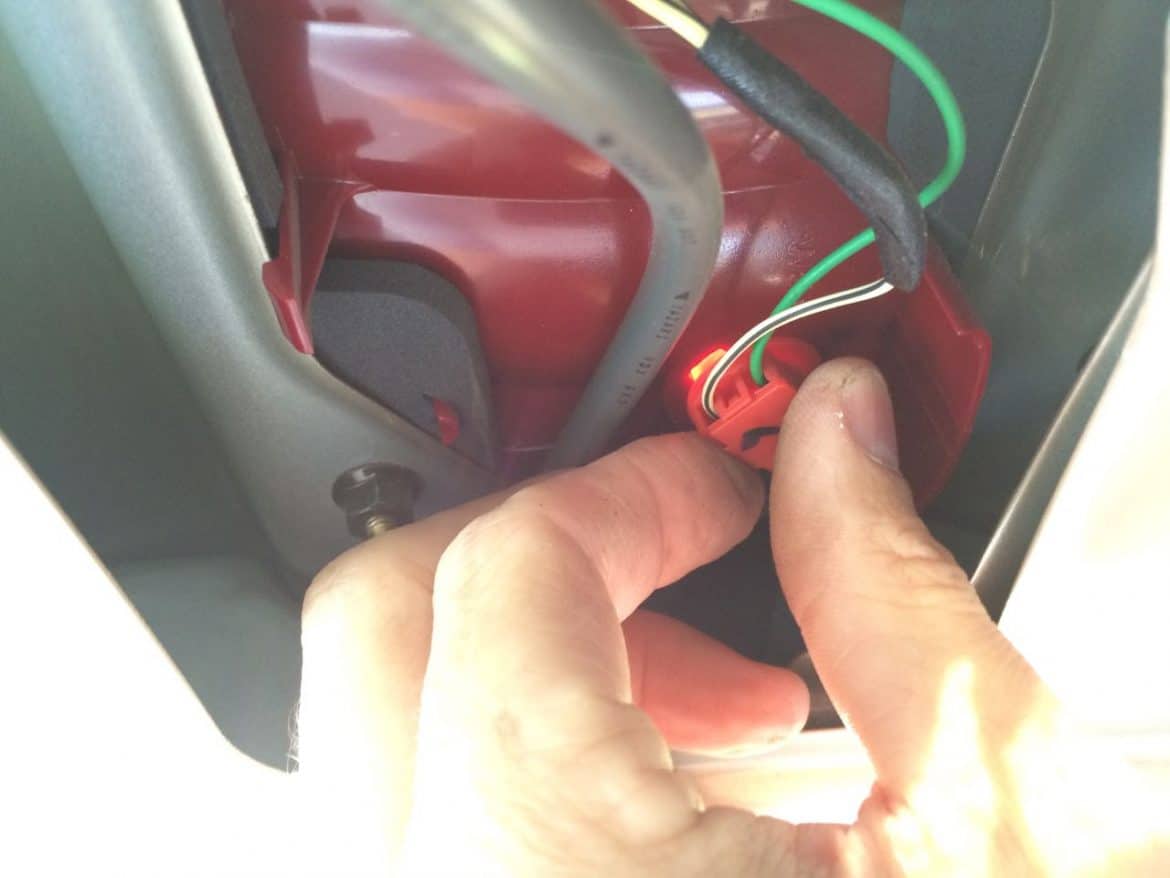
After turning it counter-clockwise you can pull it out:
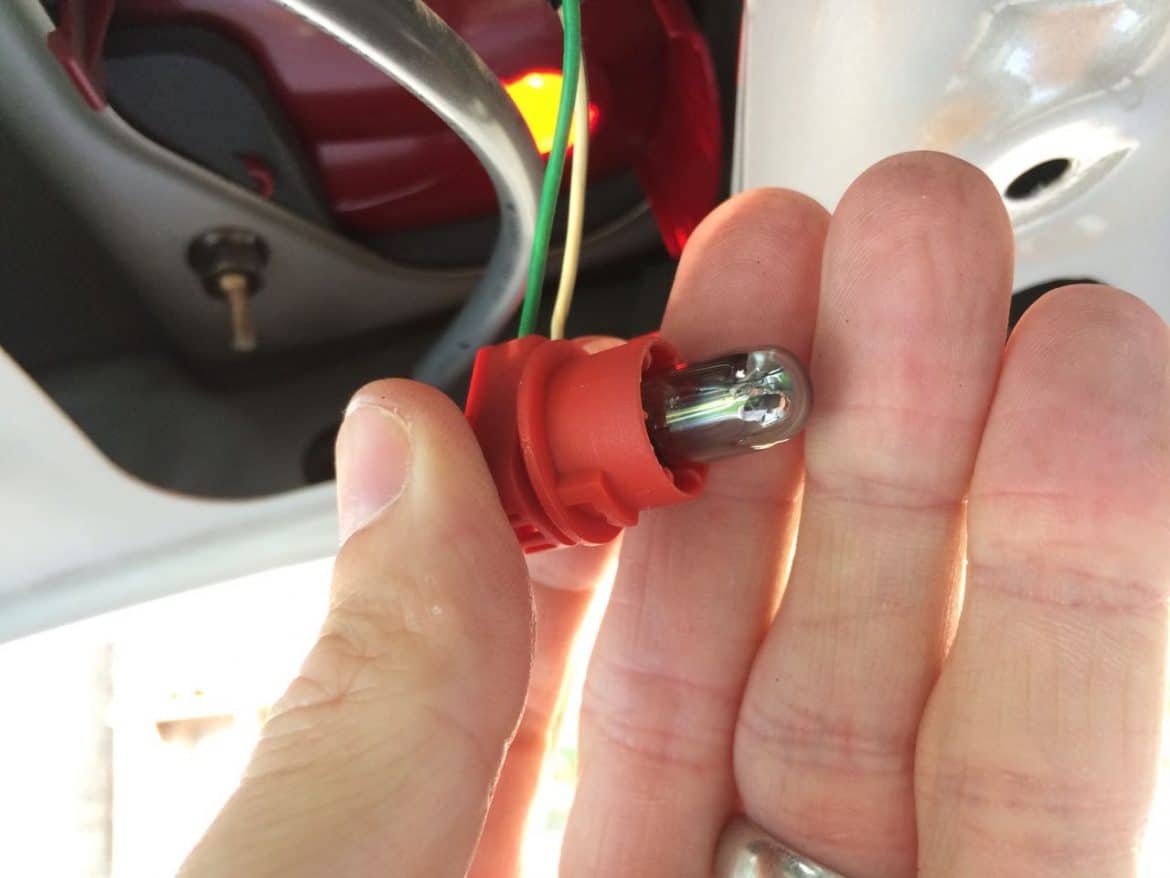
The bulb pulls straight out:
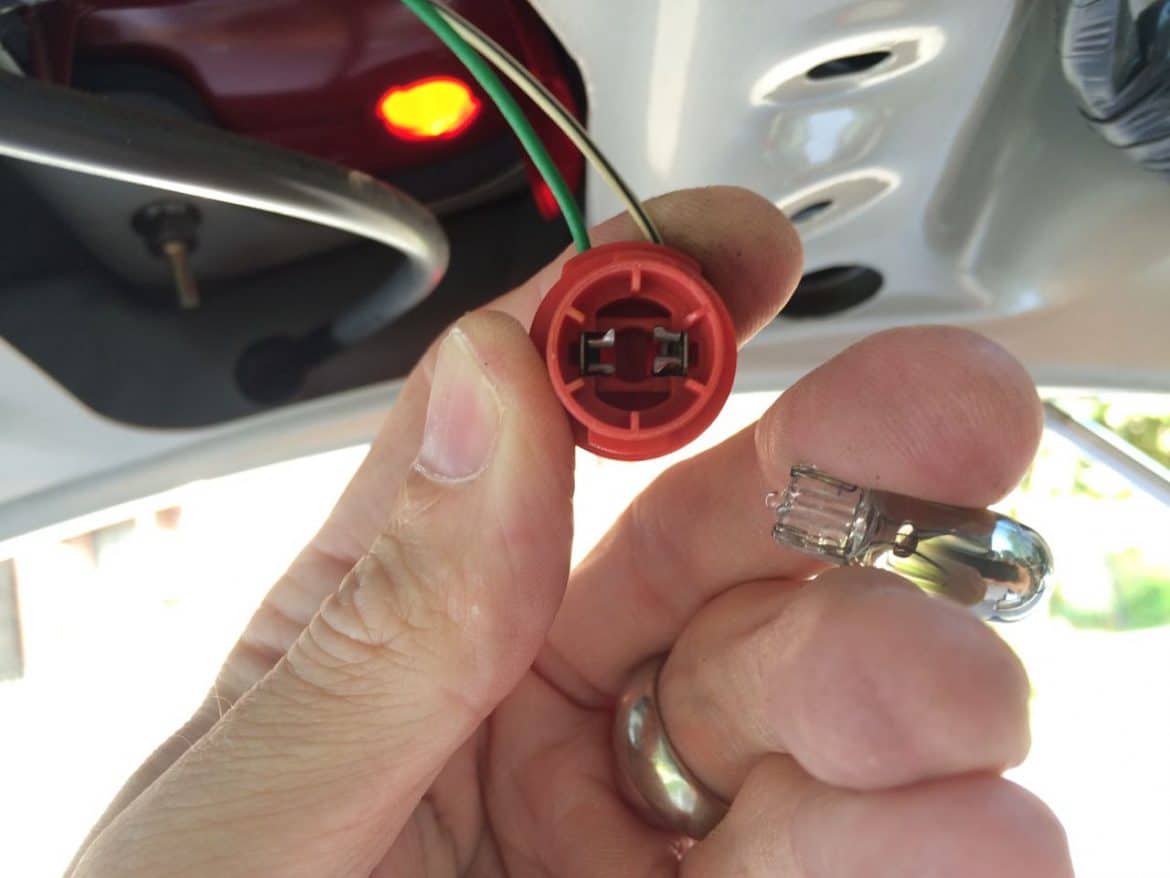
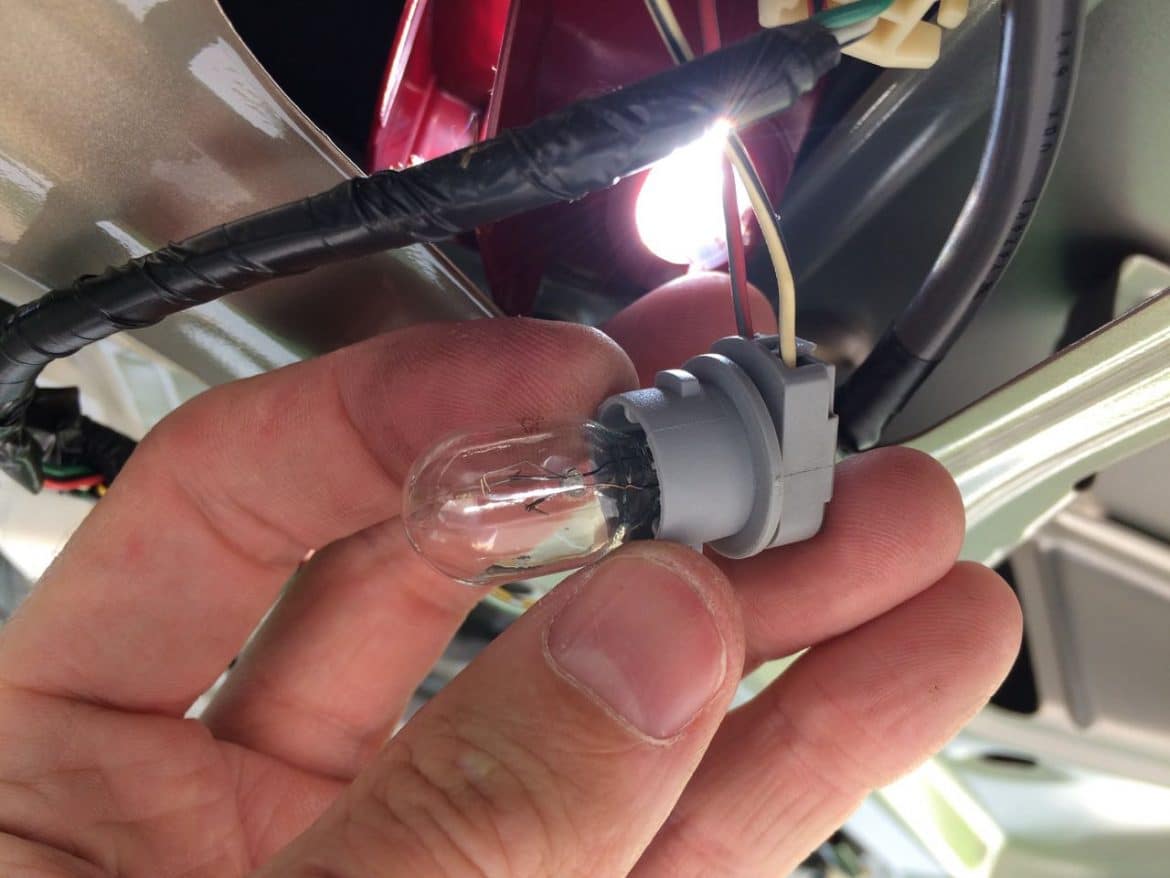
Step 10: Install a new bulb.
Like I shared in the introduction, if I would have had this step-by-step tutorial when I did this repair I would have already ordered LED replacement bulbs. I had to use standard incandescent bulbs from the local parts store. Insert the new bulb. If you are using incandescent bulbs you can put the bulb in either way so don’t worry about polarity, but if they are LEDs they will have a polarity. In the case of LEDs you can turn on your headlights and check the polarity with a multimeter or just test them and if they don’t come on flip them around because they should be ok if you insert them backwards.
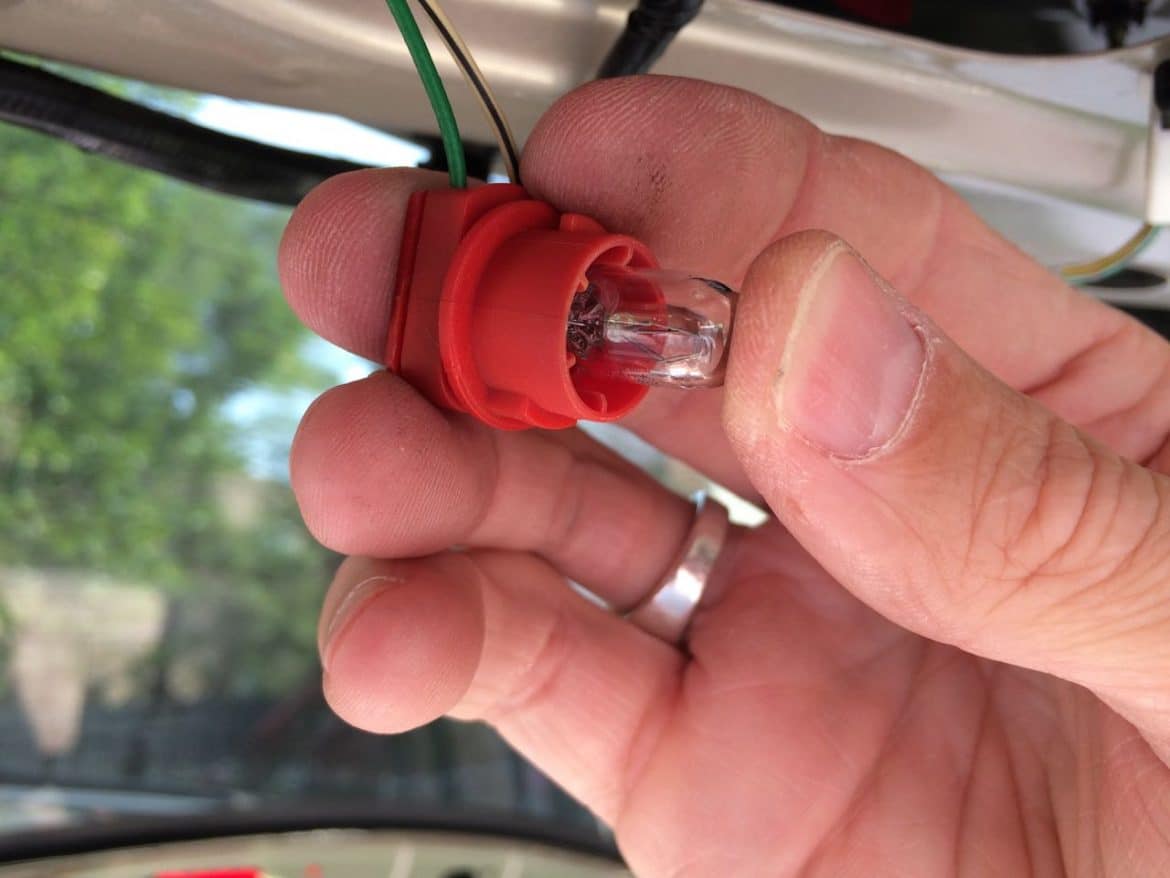
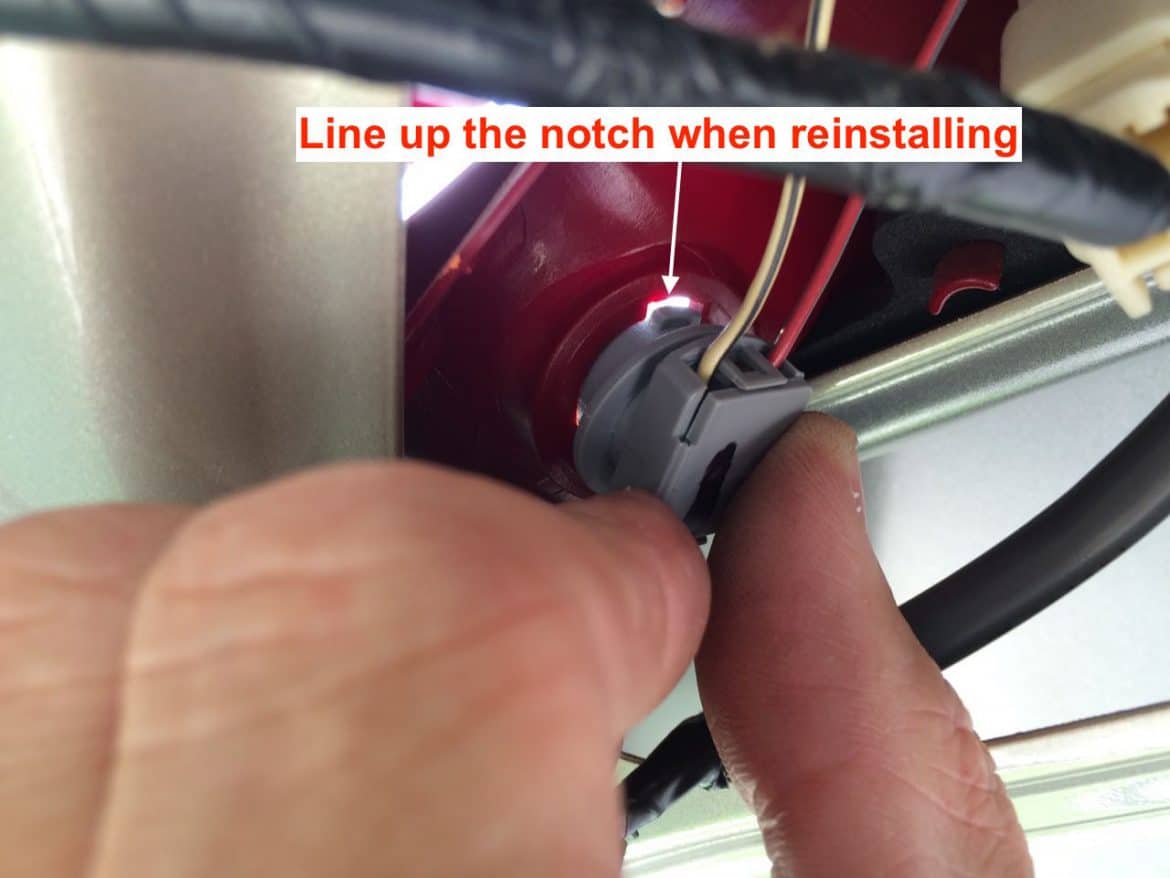
Line the base up with the notch, insert, and turn clockwise to lock in place:
Step 11: Repeat steps 9-10 for all the other burnt out bulbs
I went ahead and changed all four bulbs since I bought 2-packs of each and I went to all the work to open the van up. Here I am replacing the reverse light bulb. It has a push-in socket just like the other bulb:
Step 12: Get all the clips in the right place
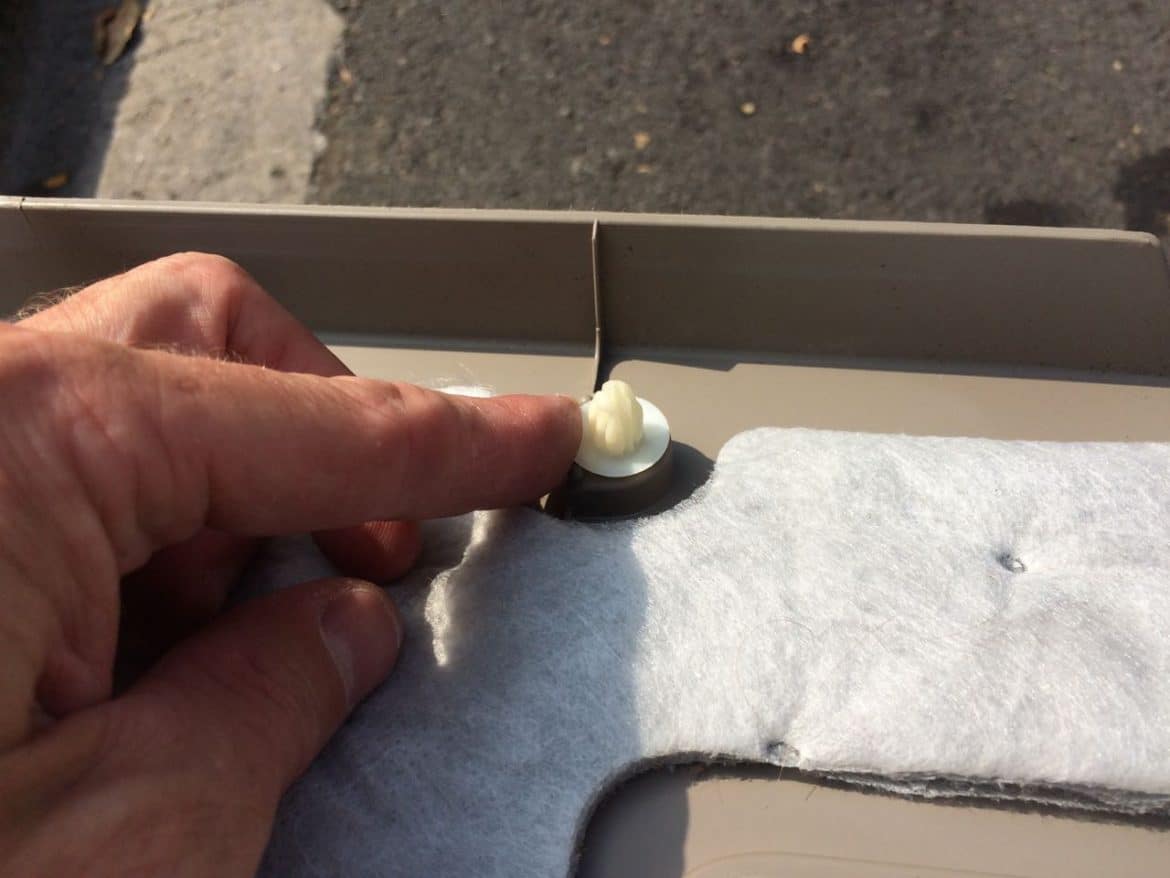
Before we can reinstall the plastic door panels we need to remove all clips that stayed on the door and replace them on the plastic door panel pieces. I didn’t reuse the clips that came off but used new ones. One of them broke off so it was good I had replacement ones on hand. You could probably reuse them if they are in one piece though. Here I am prying off one of them:
The top clip broke into two pieces when I removed the door panel:
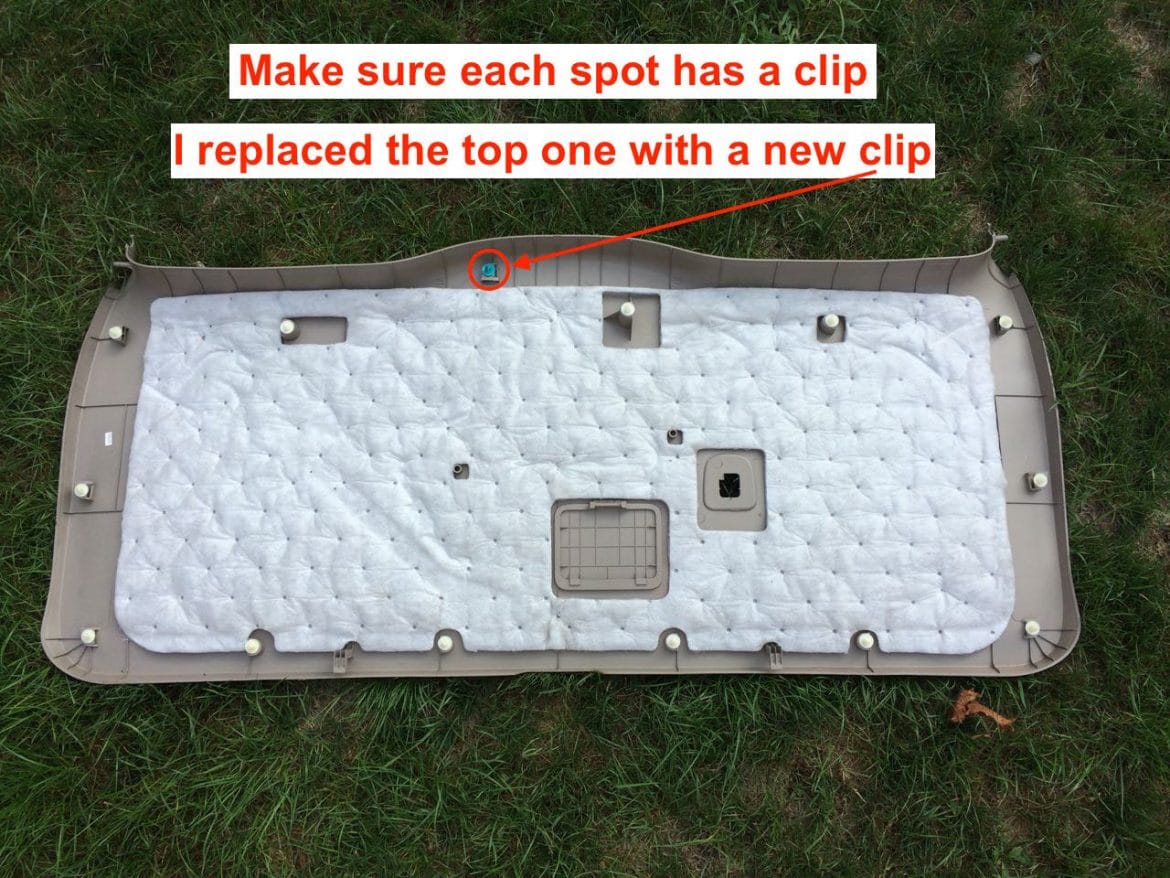
Make sure all the clips are snapped all the way into their slots so they line up correctly when we go to put the panel back on:
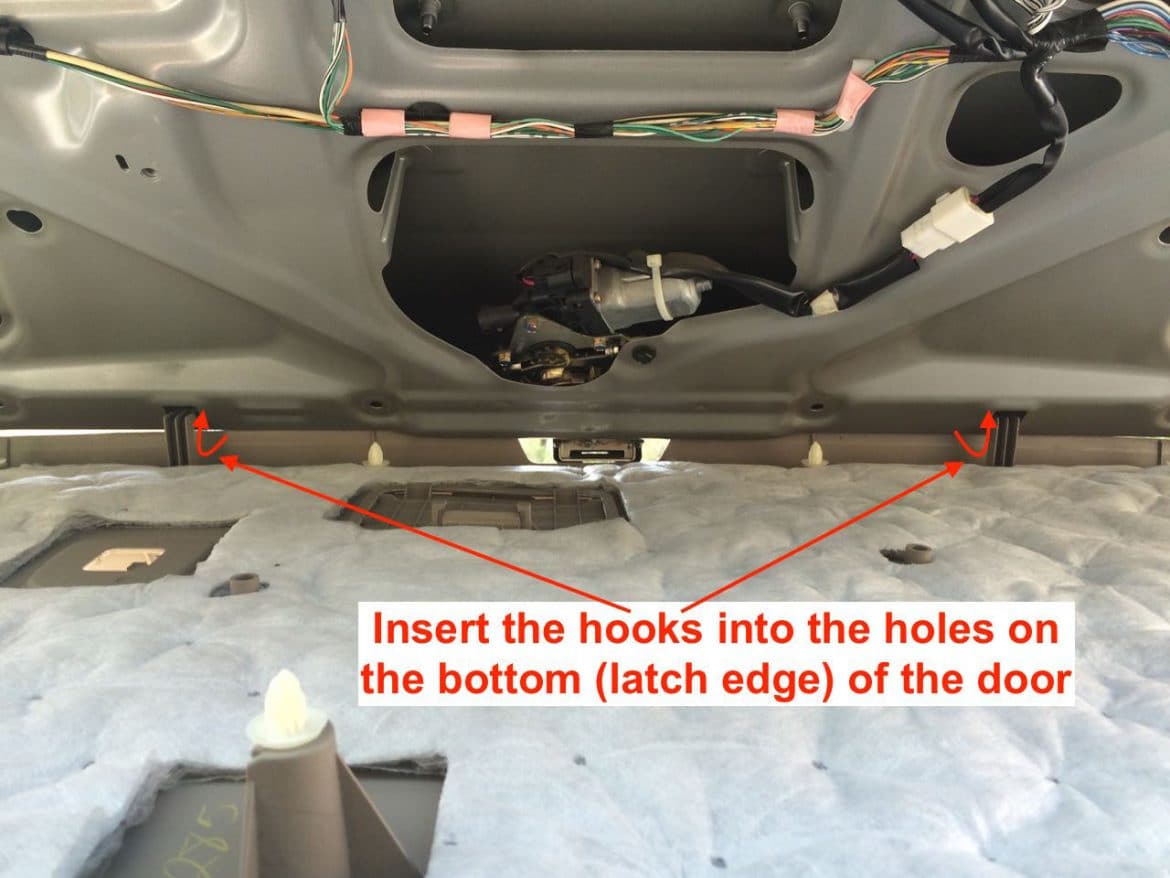
Step 13: Reinstall the back door trim board.
Start by inserting the hooks on the bottom and then carefully make sure the snaps line up with the holes in the door that they go into and begin snapping them in place.
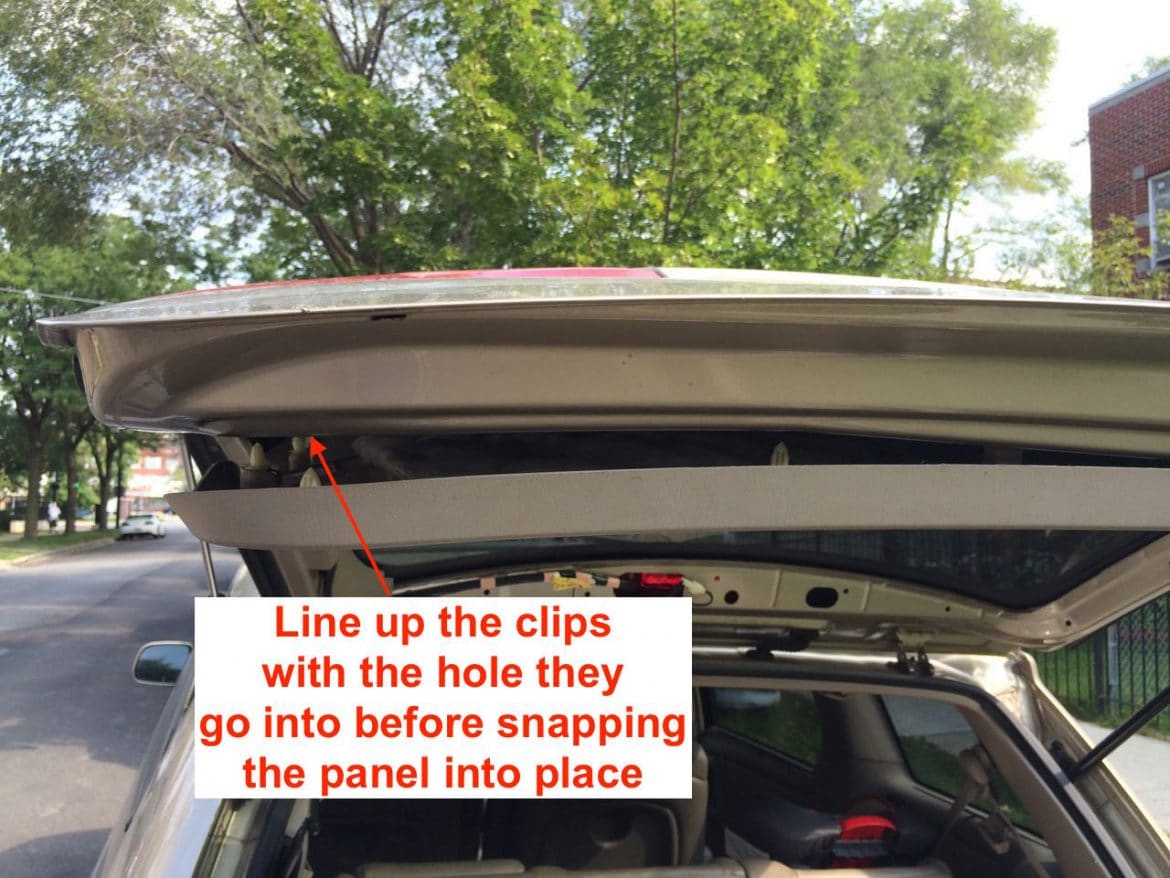
I use the palm of my had to snap the panel into place.

Work your way around the edge remembering where the clips are located:
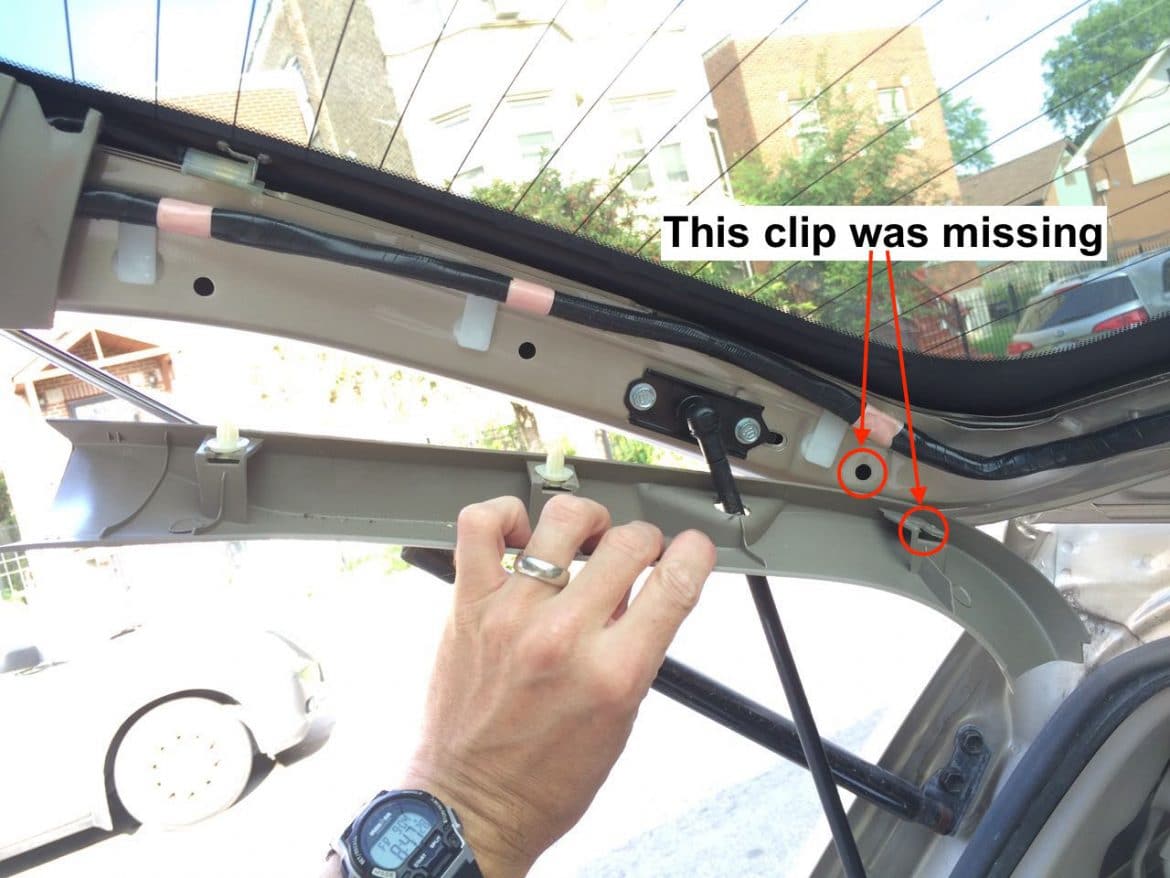
Step 14: Reinstall the side trim pieces.
The left one was a little tricky since I decided not do disconnect the power door rod. I found that if you put the piece at the angle I have pictured below, you can feed it up and over the control rod connection and put it into place:
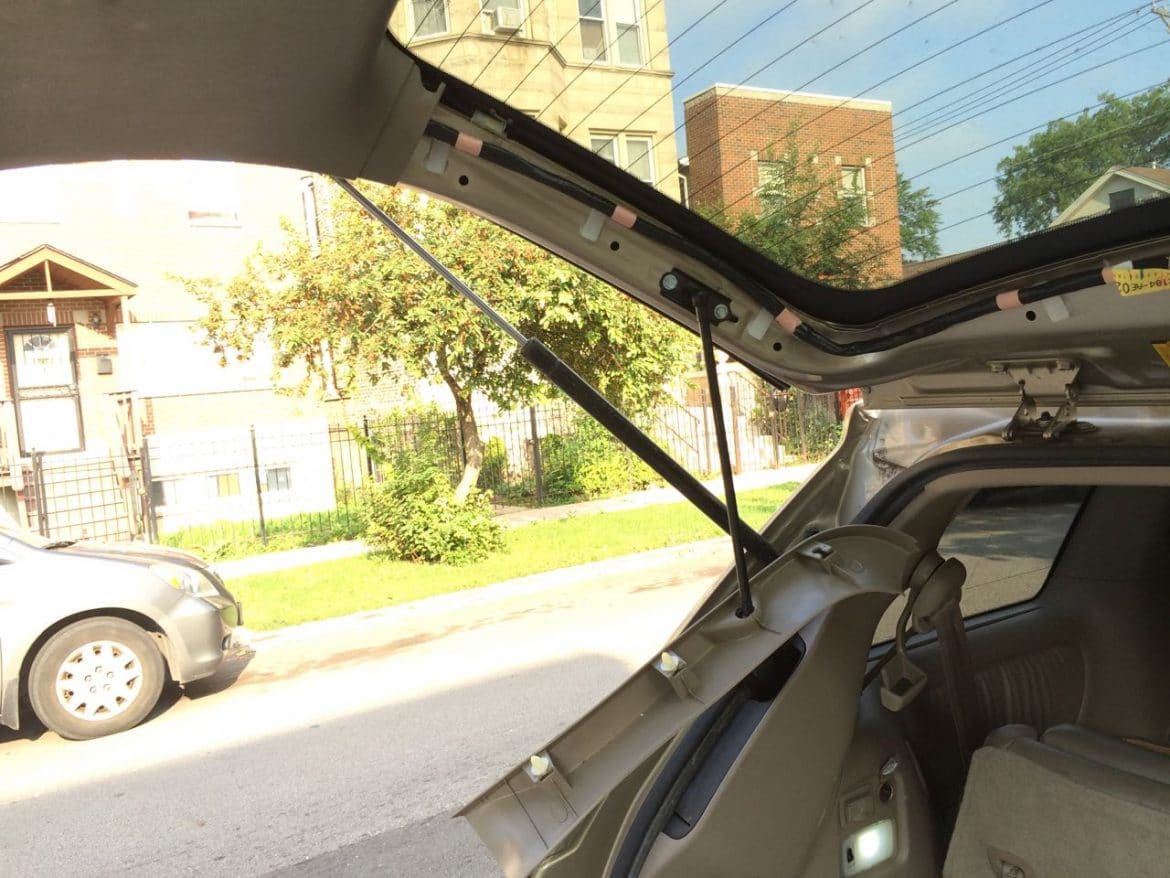
The clips on this piece will come off when you are feeding it up and over the control rod so I reinstalled them afterwards (3 total):
Reinstalling the right trim piece. You can see that I replaced the two clips (blue) that didn’t come off when I originally removed it:
These trim pieces should fit flush with the metal of the door if you have them installed correctly:

Step 15: Reinstall the back door pull strap.
Bolt the pull strap in place. It has a 10mm head on the bolt. There is a part of the metal bracket that must line up and insert into a hole in the door:
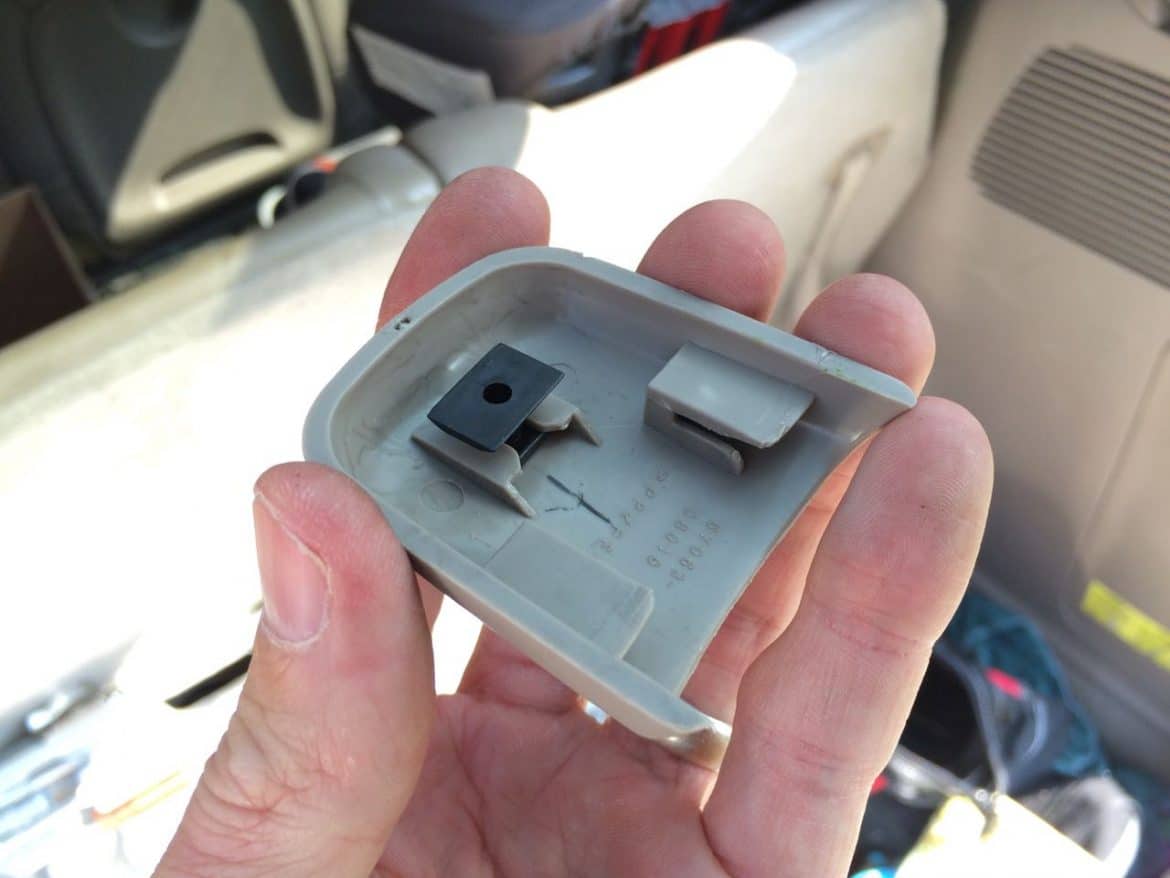
I found that it is easier if you transfer the black clip from the metal bracket of the pull strap and put it onto the cover before reinstalling:
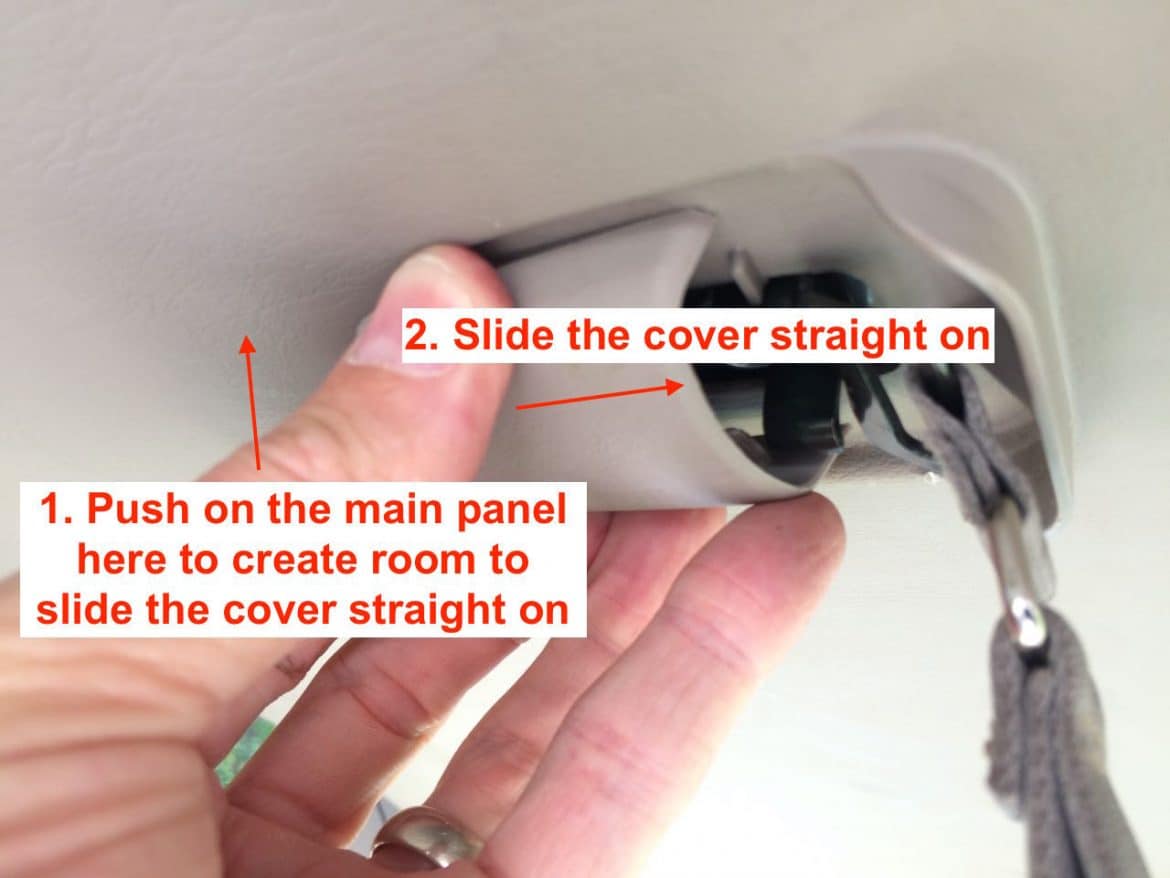
I found that the space I needed to get the cover started would only be available if I pressed hard on the main trim board as shown below:
Step 16: Reinstall the top trim piece.
This one is pretty easy. Line up the holes and snap into place:
This piece overlaps the two side pieces:
Now you are done!
Amazon Associate Disclosure: As an Amazon Associate I earn from qualifying purchases. This means if you click on an affiliate link and purchase the item, I will receive an affiliate commission. The price of the item is the same whether it is an affiliate link or not. Regardless, I only recommend products or services I believe will add value to Share Your Repair readers. By using the affiliate links, you are helping support Share Your Repair, and I genuinely appreciate your support.
For the clips that stayed in the metal frame when I removed the plastic panel, I used *needle-nose pliers* to pull them out (not a flat-head screwdriver). The pliers damaged the clips a bit, but I was still able to re-use them. So, I didn’t need to buy replacements.
Thanks so much for the walk-through. This is one of the best descriptions I have come across. It’s a pity that Chiltons doesn’t do as good a job. WELL DONE!
This is really nice well described I appreciate your efforts.
Thanks for the feedback.