I acquired a 2005 Hyundai Accent and the dome light would not work. It has a switch on the ceiling dome light fixture that allows you to select three different modes: Off, On, and Door. It wouldn’t work when in the “on” position and when in the “door” position, neither door would turn it on (that is actually the first troubleshooting step–the switch on the dome light itself). I went through a series of troubleshooting steps and was finally able to solve the problem. Follow along so you can get your Hyundai Accent dome light working too…
1999-2005 Hyundai Accent Dome Light Will Not Turn On — Troubleshooting Steps
Equipment:
Tools Needed:
- 10mm socket – get that socket and about all the other wrenches you need in a Stanley 99-Piece Socket Set
- Pocket Knife
- Multimeter, if you want to check a fuse or check the voltage at the dome light–I love my Fluke 177 True RMS Digital Multimeter with Backlight
Parts Needed:
- Assorted Mini Fuses
- dome light bulb: SYLVANIA 6418 (standard bulb)
, (LED Version)
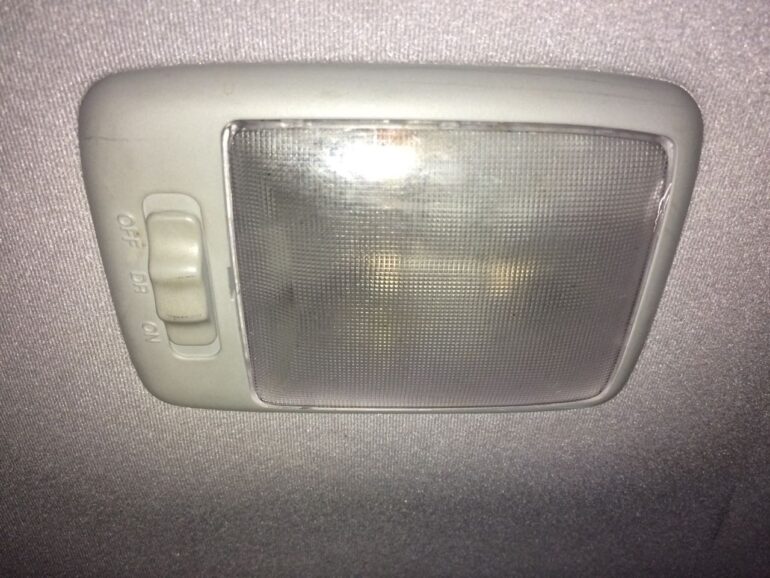
Step 1: Replace the dome light bulb.
The logical thing to try is to replace the dome light bulb. If you have the time, I’d get a LED bulb but I just ran to the local auto parts store and grabbed a standard replacement.
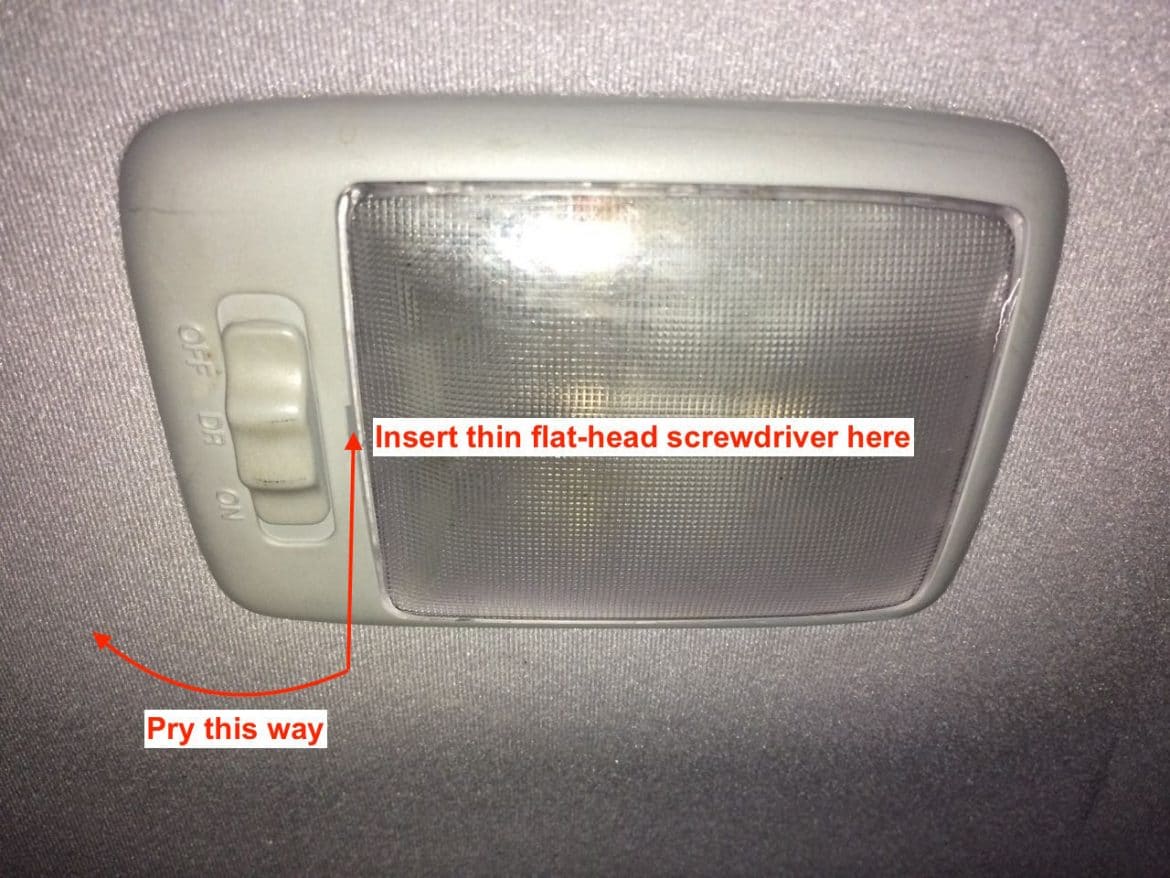
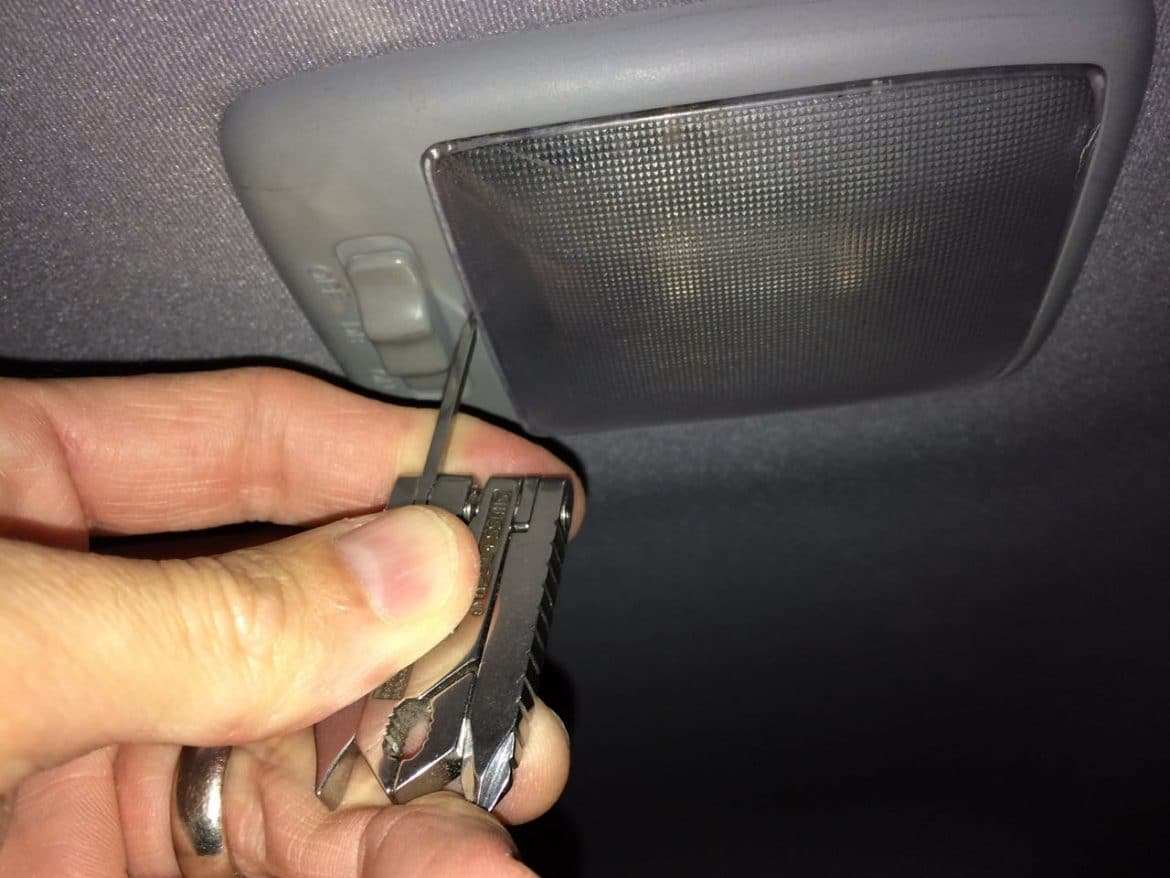
Step 1a: Remove the dome light lens.
To replace the bulb use a pocket knife or a fine flat-head screw driver to pry off the lens of the dome by sticking the tip in the notch shown in the picture below:
Step 1b: Replace the dome light bulb.
Pull down on the rear end of the bulb and it will come right out. Insert the end closest to the front of the car first and then slide the back in up and in to replace the bulb.
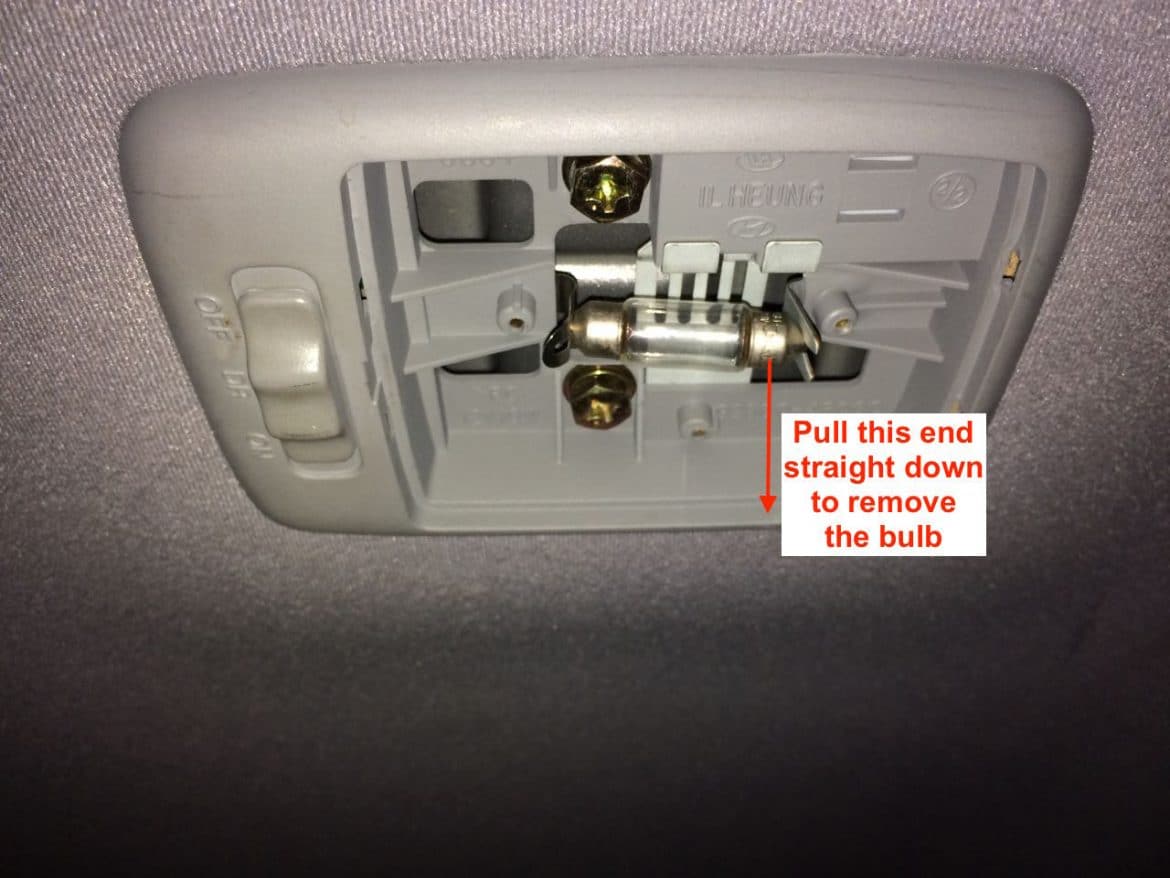
Make sure that you correctly reinstall the dome light cover. The edge that has to two little tabs goes toward the back of the car and is tucked in first before snapping in the other end. This didn’t solve the problem for me though!?!? I tested the two terminals with my multimeter as well and there was no voltage at all.
Step 2: Check the fuse(s).
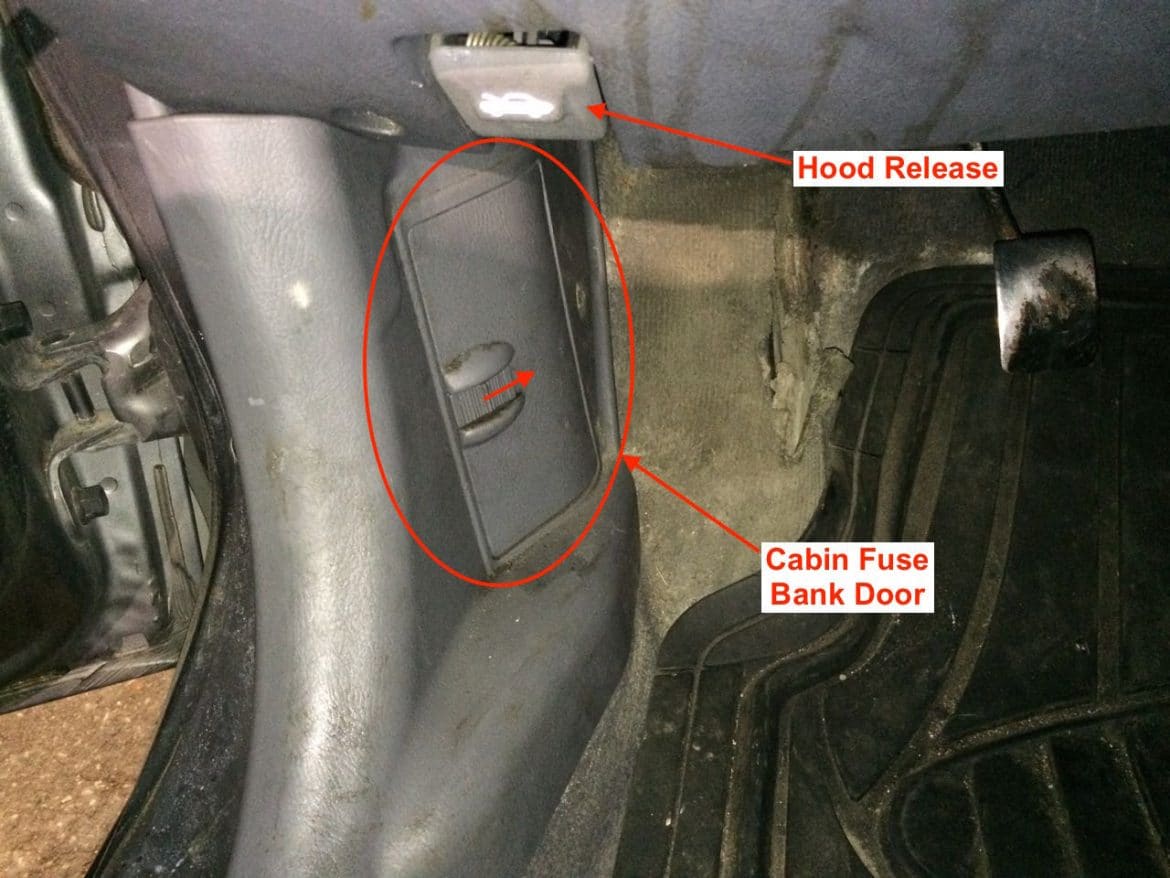
There are two banks of fuses in this vehicle–one inside the cabin and another one in the engine compartment. The cabin fuse bank is located right in front of the driver’s side door, below the hood release latch. It has a plastic latch that must be slid towards the front of the vehicle and the door is hinged on the right side:
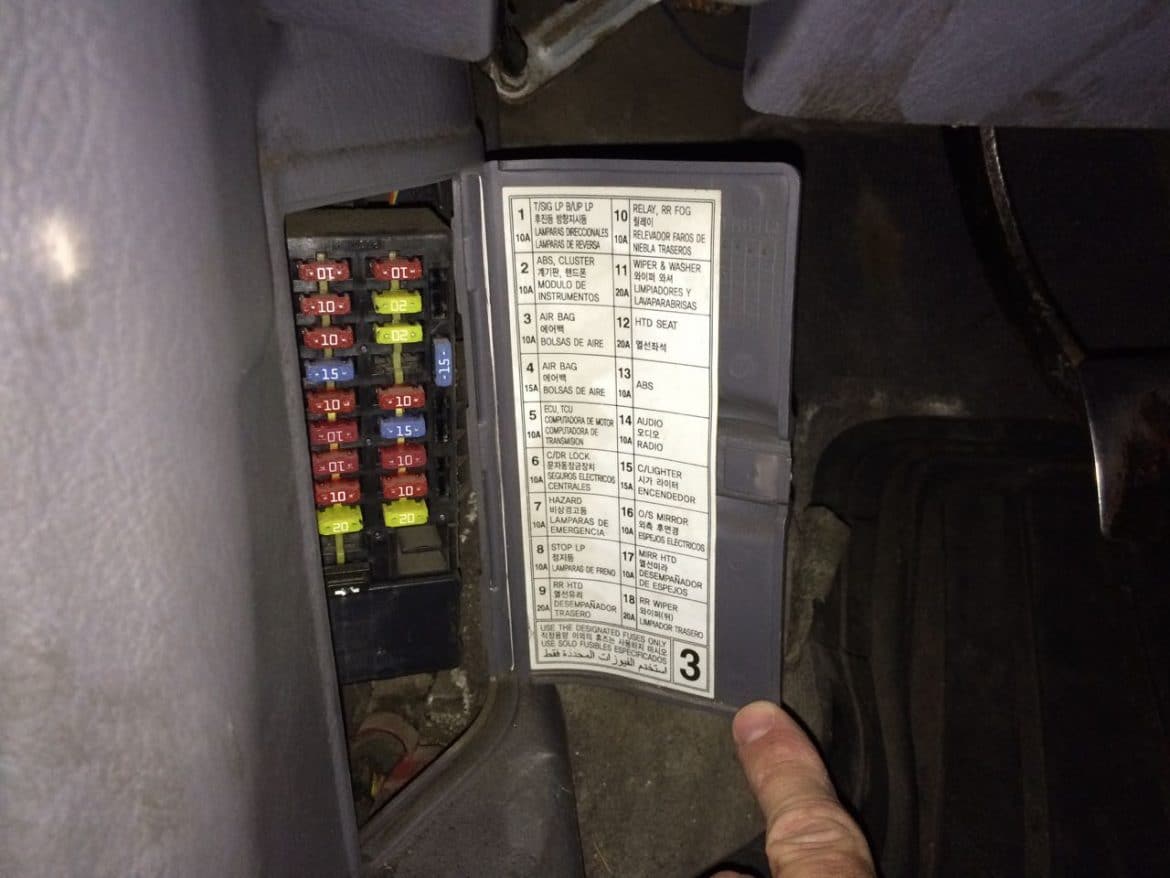
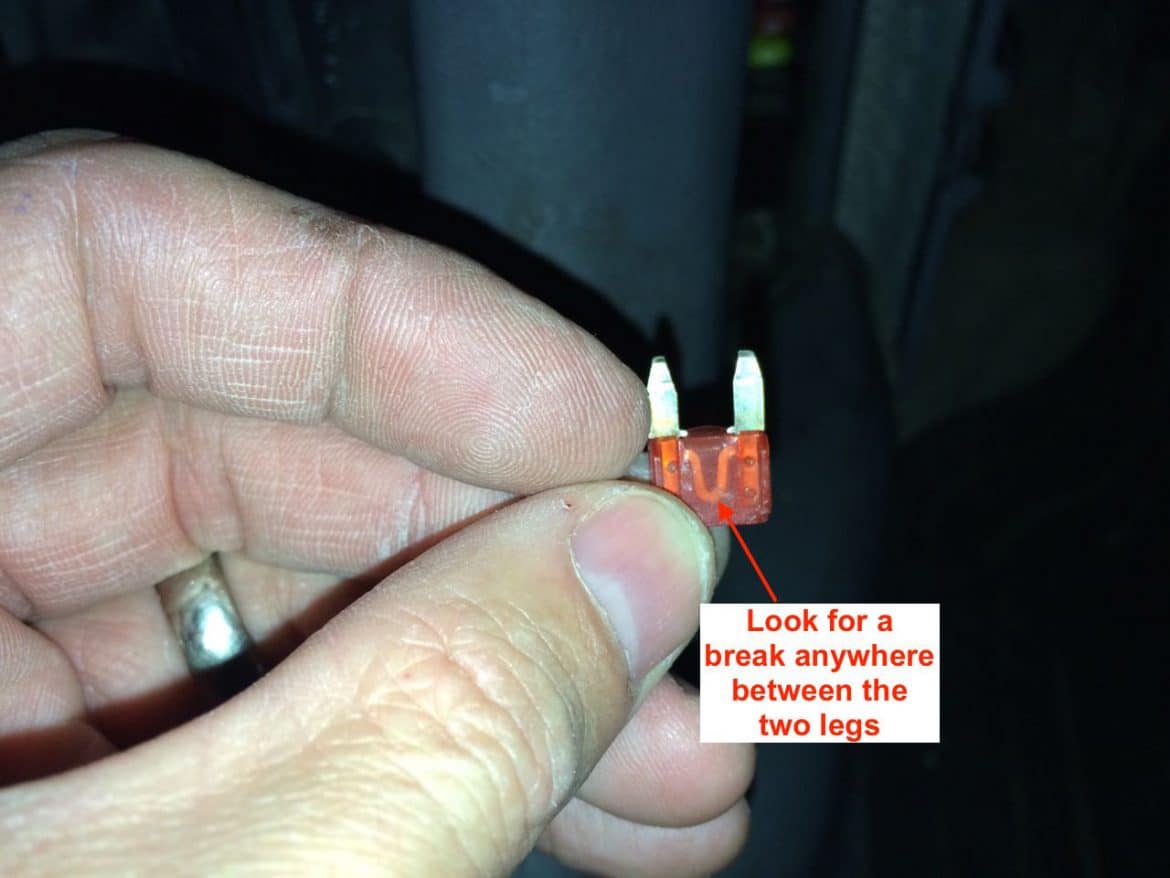
There should be a fuse labeled “Dome” or “Courtesy Lamp” but I couldn’t find a single label that sounded like it was the dome light fuse so I checked every single one and they all were good–so it is not a fuse issue. Check for a break in the u-shaped bridge between the two legs. If the bridge is continuous then the fuse is good like the one pictured below:
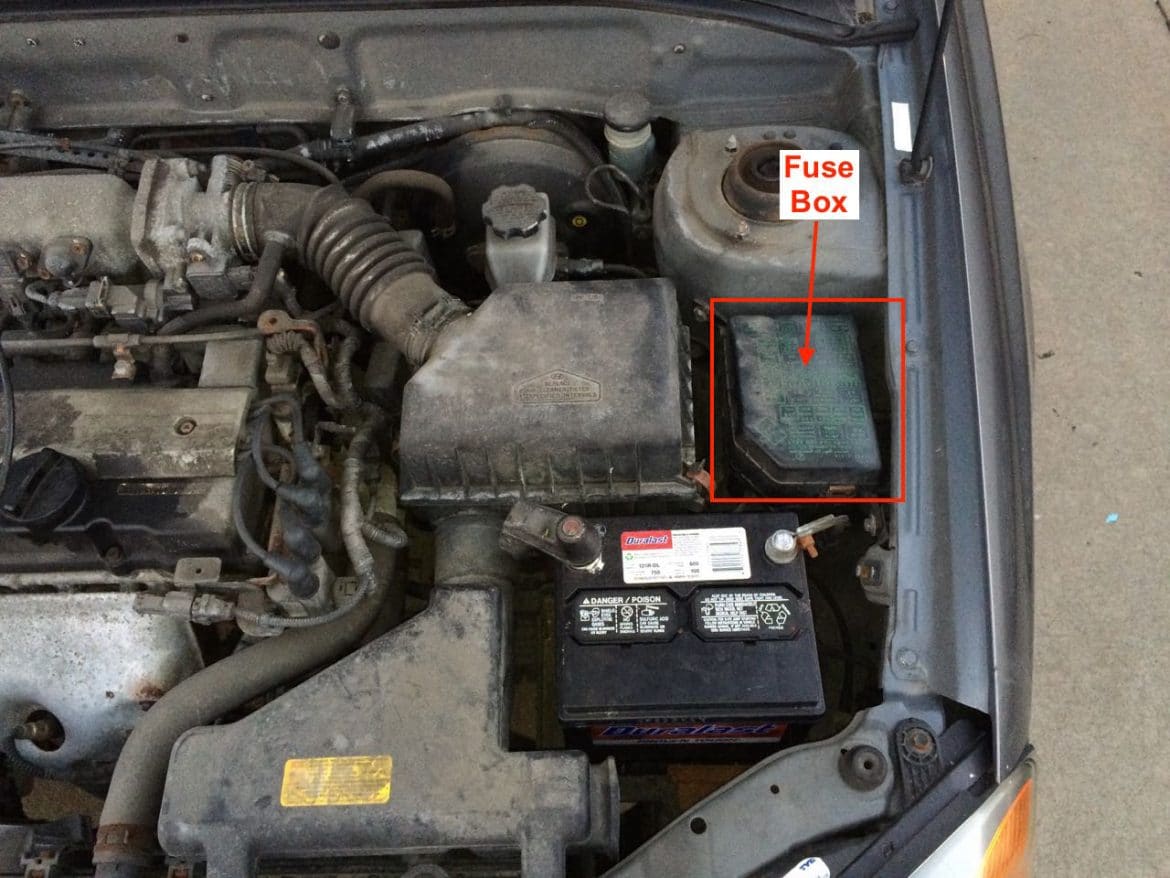
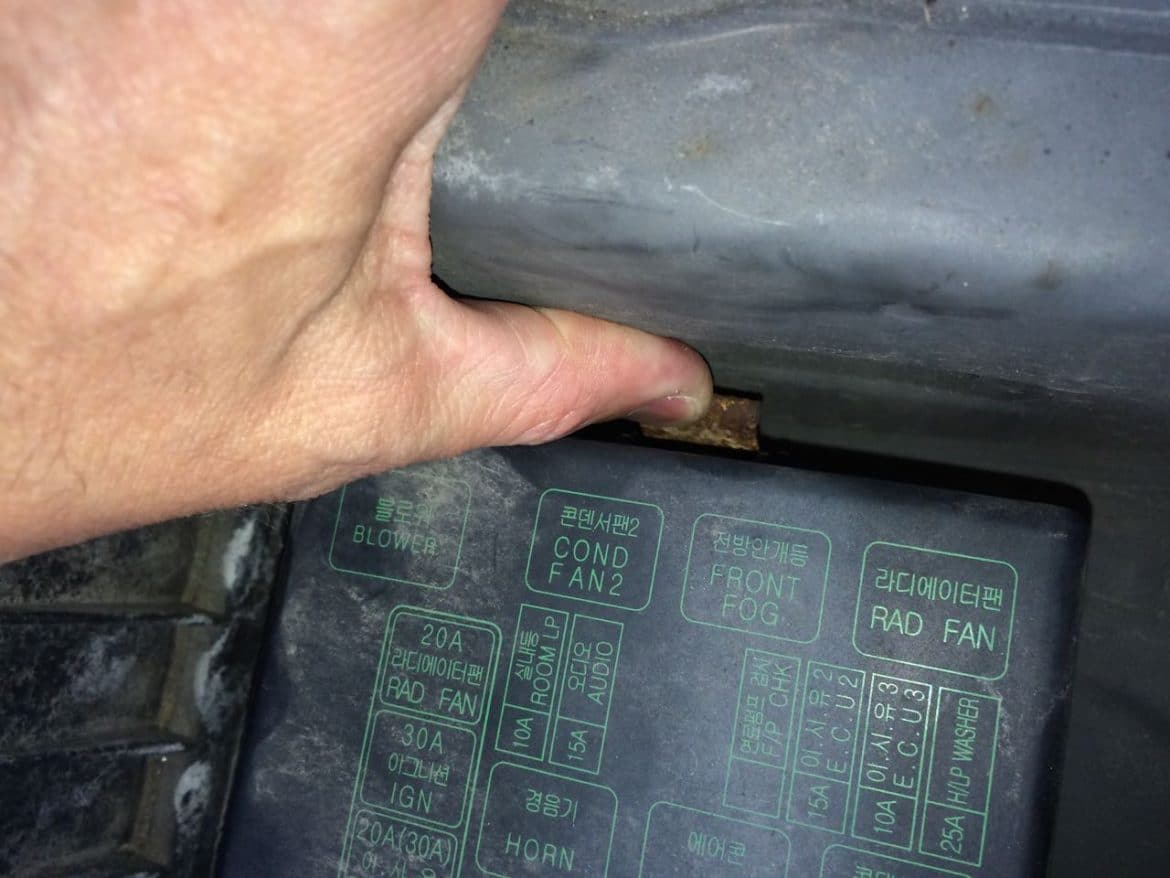
Update 11/8/15: I figured out where the dome light fuse is located. It is in the engine fuse box:
The fuse for the dome light is located in the engine compartment fuse box:
There is a spring-loaded metal catch on the front and back of the lid that holds it on:

I would pry the back one away from the lid and lift up on the back of the lid:
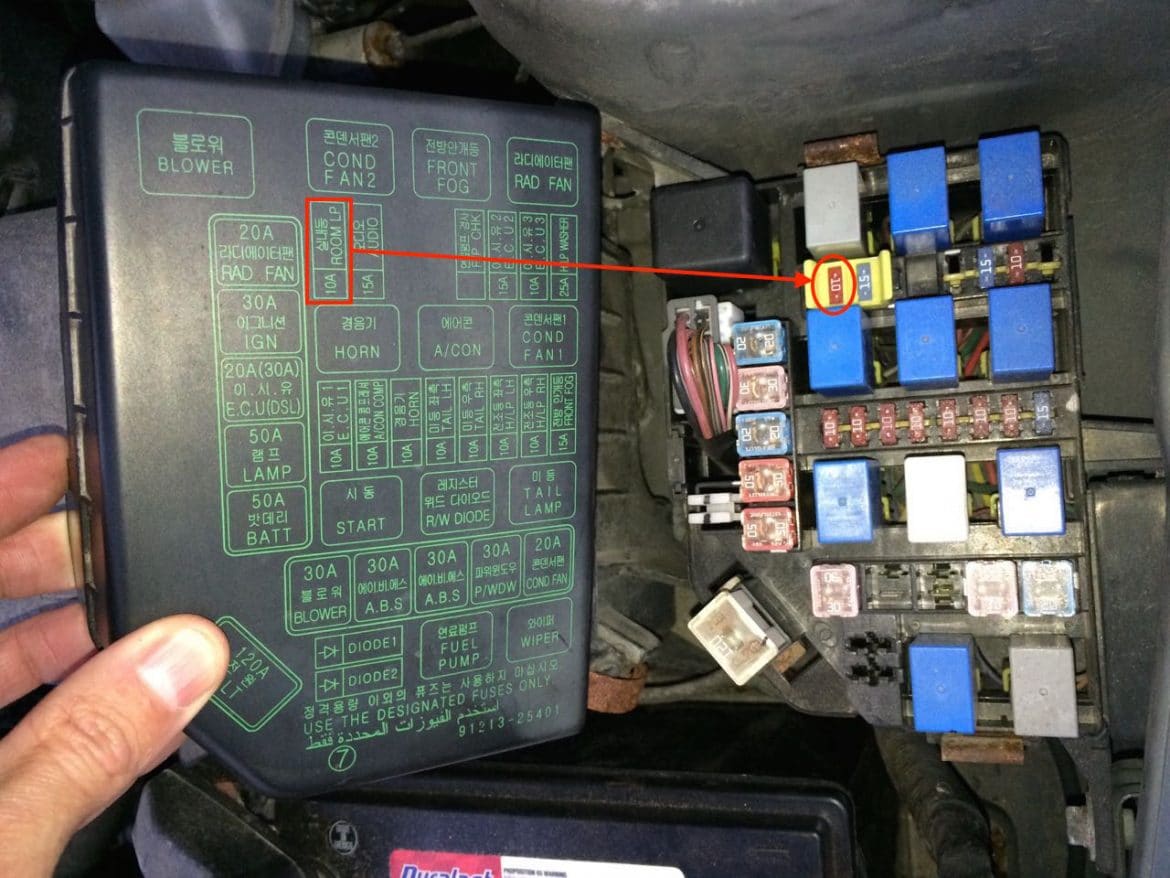
The dome light fuse is buried in a weird yellow plastic piece. If you pull the yellow plastic piece out by the tabs the fuses may or may not come out with it but once you pull it out you can get the fuse out to check to see if they are good. This fuse was good so it’s not a fuse issue (and I had checked that fuse previously when I was checking all the fuses).
Step 4: Check the door switches.
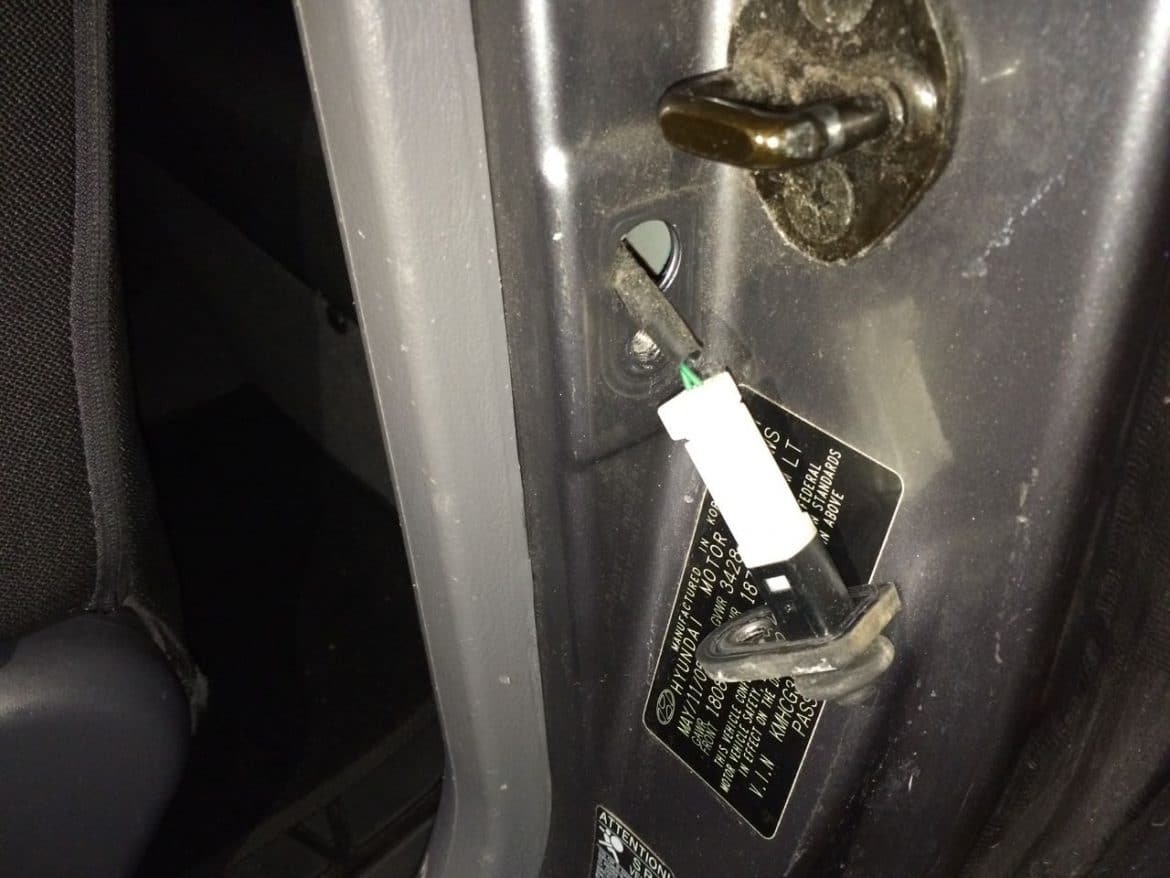
In order for it to be a door switch issue you would need to have both the passenger and driver’s side door switches BOTH be bad, but I wanted to eliminate that as an option. Also, the dome light would not come on when the switch was in the “ON” setting so that really eliminates the door switches as an issue but I checked them just to be sure. There is one phillips screw that was in there very tight that I had to remove and then I took out the switch and checked the switch with my multimeter to see if it was shorting the connection and it was, so that wasn’t an issue. I didn’t take any pictures of that step but here it is removed:
Step 5: Check the dome light assembly wiring connections.
At this point I was concerned that there might be a broken wire somewhere that would be impossible to find or that the previous owner had messed something up when they installed the satellite radio that was in here when I got it. As a last result I decided to take the dome light assembly down and see if per chance there was a broken wire or the connector was bad. Remove the dome light lens as described in Step 1a and then remove the two 10-mm bolts from the dome light assembly:

Once you have both mounting bolts removed the entire dome light assembly will come down from the ceiling, tethered by the wiring connector. I disconnected the wiring connector and in messing around with the wiring, the dome light flashed on. I thought it was the connector and then saw a tiny spark where the screw holds the wiring connector in place as shown below:
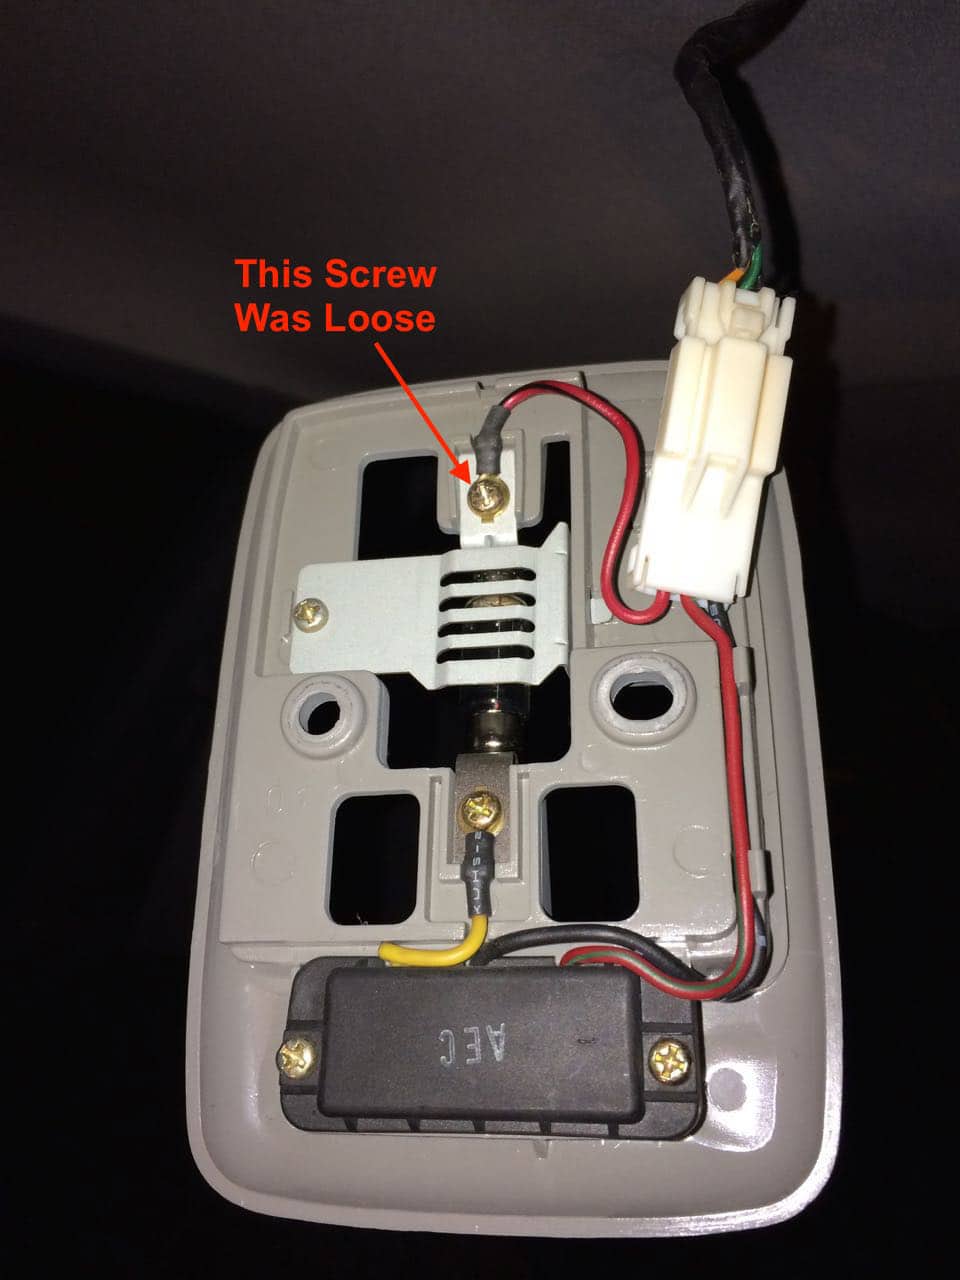
After tightening that top screw the dome light worked perfectly. You might try the screw holding the yellow wire too if that doesn’t do it for you. Problem solved! Hopefully you are able to get your dome light working again too with these steps.
Step 6: Place the dome light assembly back up in place and reinstall the two mounting bolts.
Step 7: Reinstall the dome light lens.
Make sure you insert the end with the two tabs into the end of the dome light towards the rear end of the vehicle and then snap the other end in place.
Amazon Associate Disclosure: As an Amazon Associate I earn from qualifying purchases. This means if you click on an affiliate link and purchase the item, I will receive an affiliate commission. The price of the item is the same whether it is an affiliate link or not. Regardless, I only recommend products or services I believe will add value to Share Your Repair readers. By using the affiliate links, you are helping support Share Your Repair, and I genuinely appreciate your support.