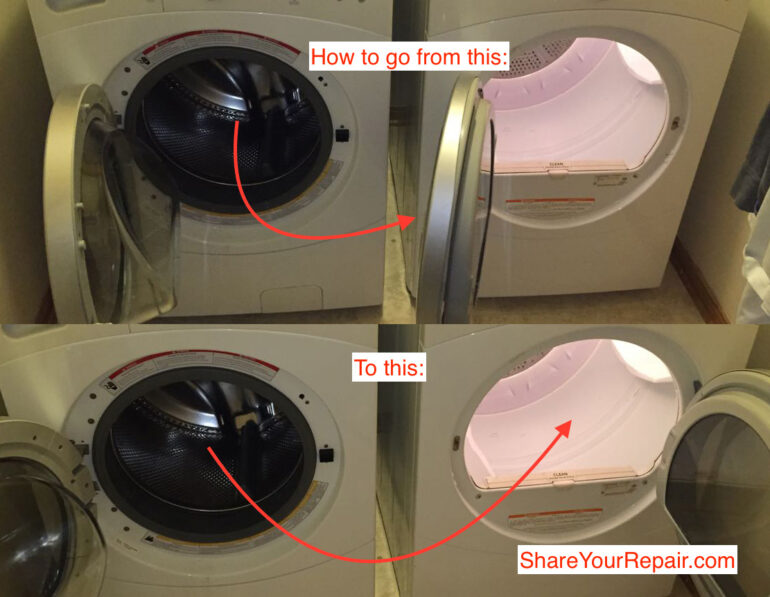
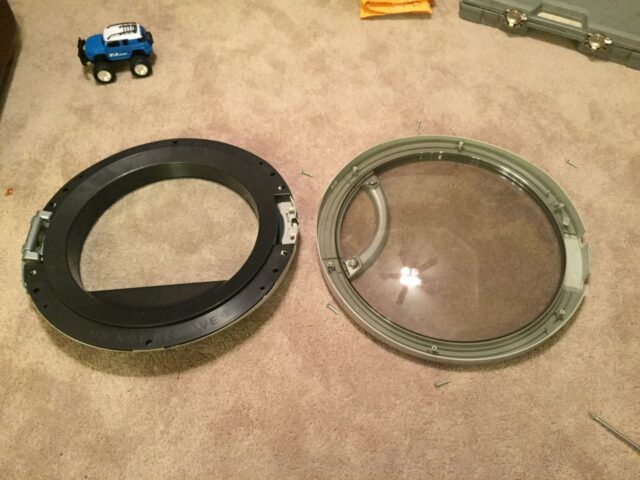
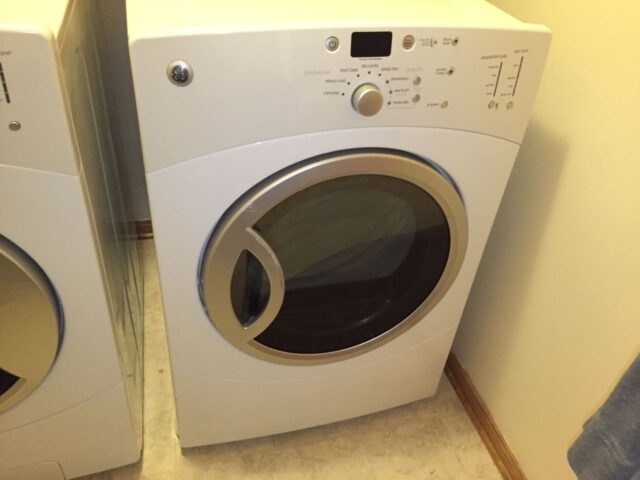
The door of our dryer was hung on the wrong side so it was a pain to transfer laundry from the washer to the dryer. The doors on these dryers are designed to be reversible so I decided to switch ours around. This is how you can do it too…
Equipment:
Parts Needed:
- GE WE12M29 Drum Drive Belt for Dryer
- GE WE12X83 Pulley Idler
- GE OEM WE2X329 Dryer Nut Unit
(optional, you probably can re-use your existing one)
- High Temp Grease
Tools Needed:
- Phillips Screw Driver
- Cordless Screw Driver
(makes all those screws come out a lot faster)
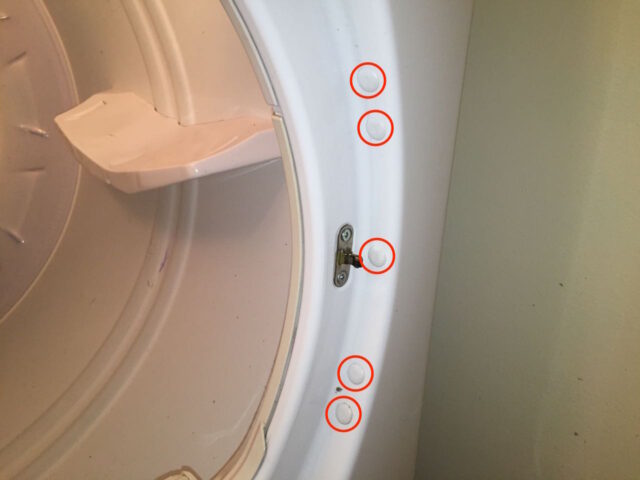
Step 1: Remove the plugs from the screw holes
On the side of the dryer opening that does not have the hinges there are five plastic plugs that conceal the holes we will use to install the hinge on the opposite side:
Caution: We are going to use a knife to get them started but do not pry them completely out. Use a knife to lift the head of the plug up about an eighth of an inch:
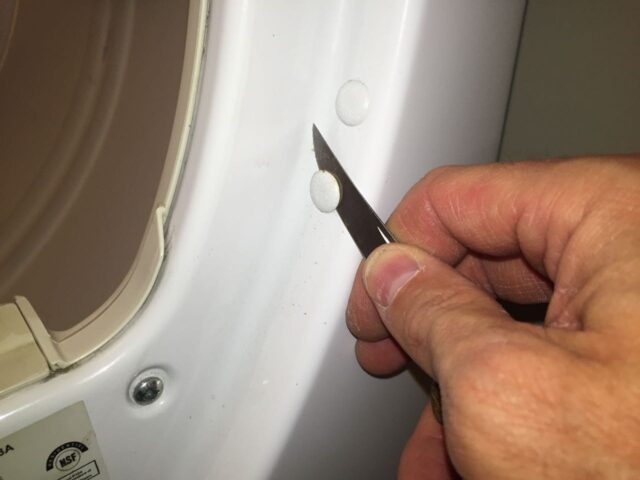
This is how high you should pry them up:
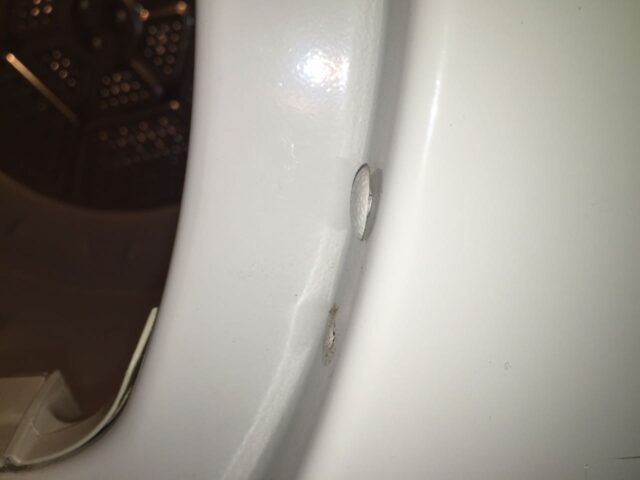
Once you have the heads pried up you can unscrew them by turning them counter-clockwise. You can bend the head to one side to get a better grasp on one edge of the head. This is what they look like when they are removed:

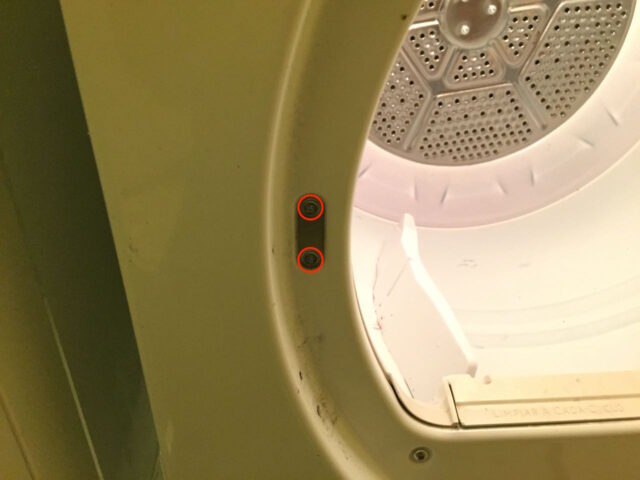
Step 2: Remove the door strike assembly.
Remove the two Phillips-head screws from the door strike assembly and set the assembly and screws aside:
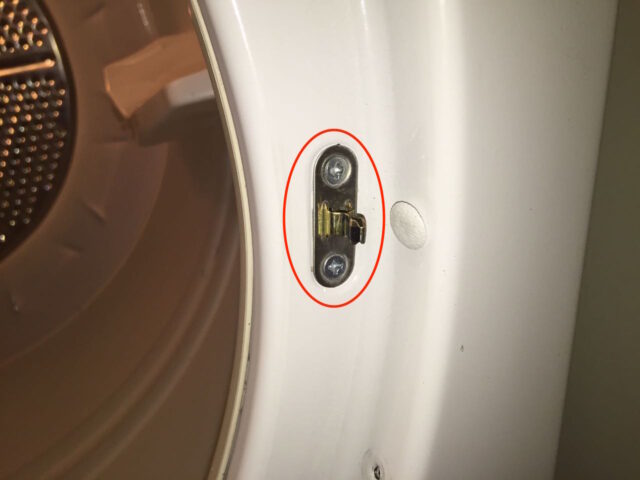
Note: in the image above one of the plugs is still installed. If you do things in the order I suggest in this tutorial you will have removed that plug already.

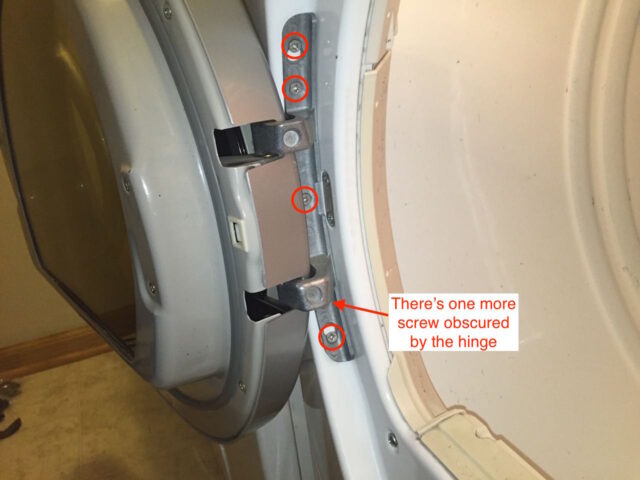
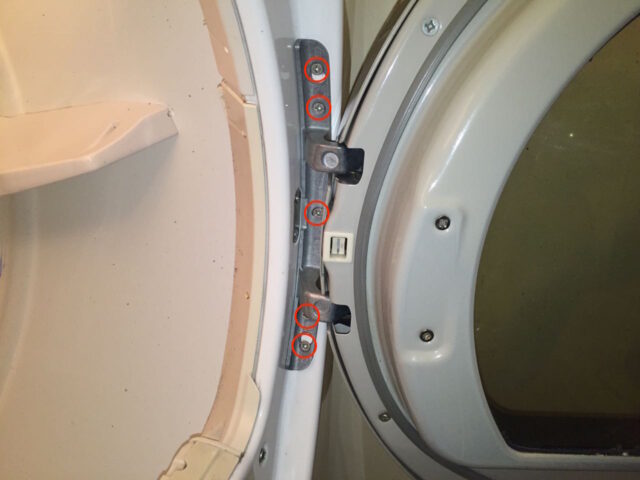
Step 3: Remove the five hinge screws.
There are five Phillips-head screws on the hinge of the door. One of the screws cannot be seen in the picture below because it is hidden by the hinge itself. I would remove the lower four first and then loosen the top one and then simply lift the door up and off the final screw.
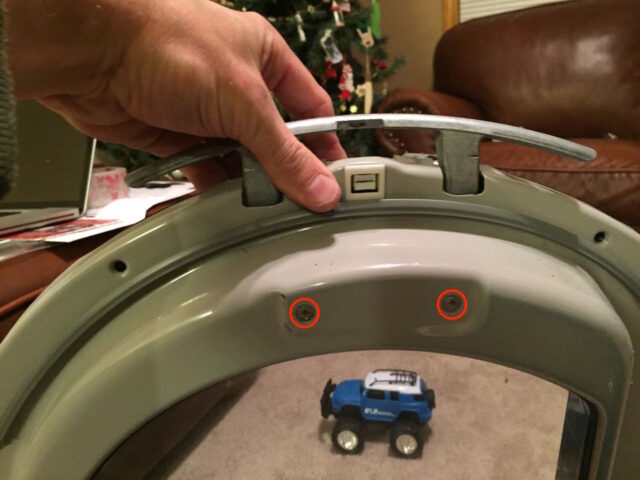
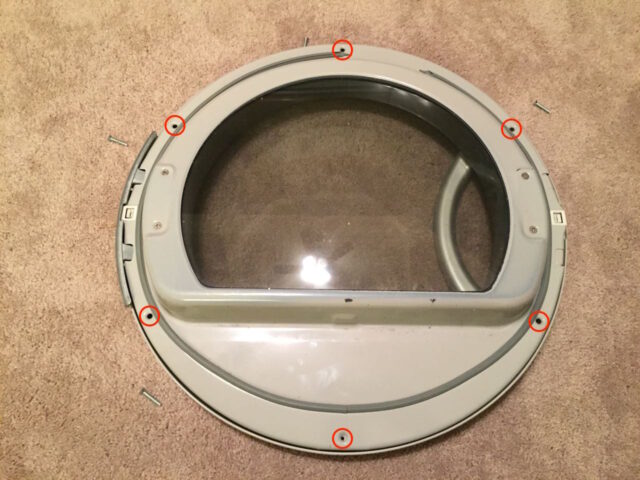
Step 4: Remove the back of the dryer door.
Remove the six Phillips head screws from the back of the door as indicated below:
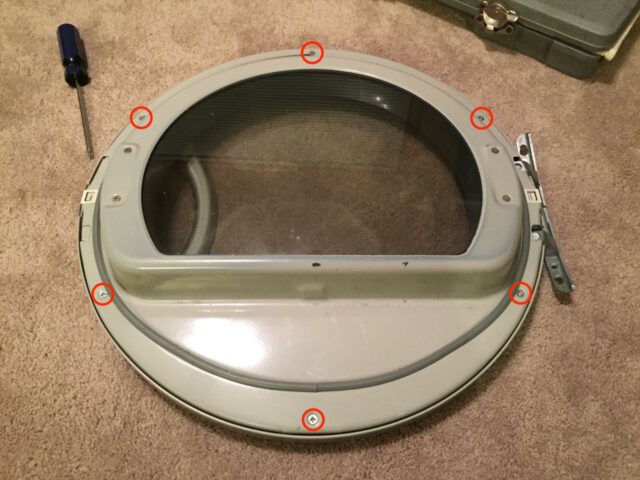
Lift out the door panel off the door:
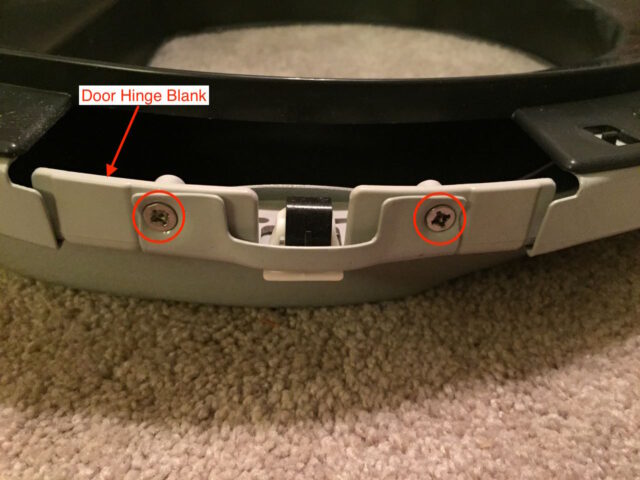
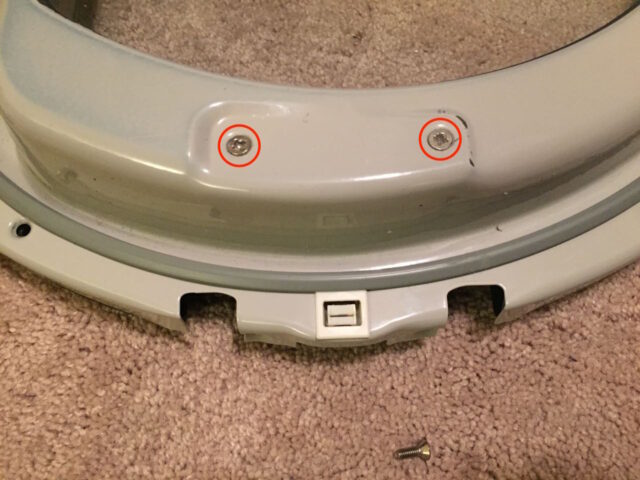
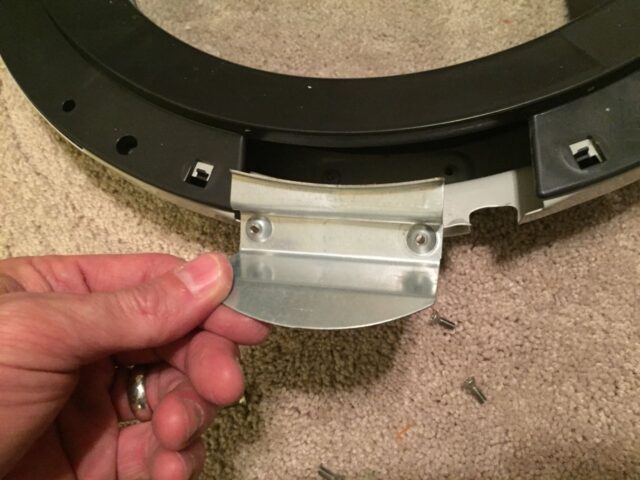
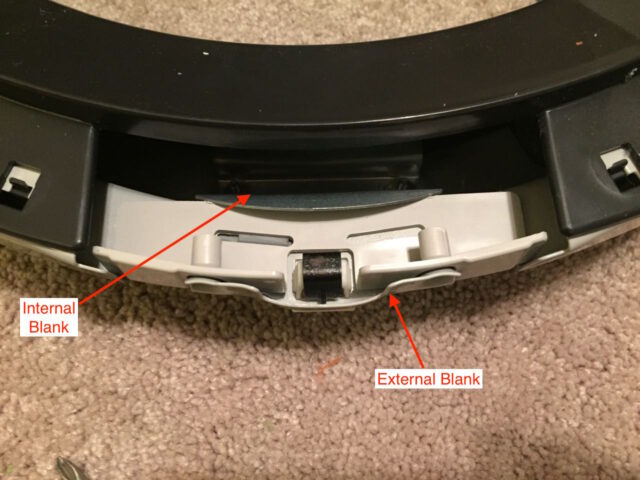
Step 5: Remove the door hinge blanks.
Remove the two screws from the edge of the door hinge blank and remove the external blank.
Lift the external door hinge blank up and out of the door:

Now remove the internal blank:
Step 6: Remove the hinge screws.
Remove the four screws from the hinge:
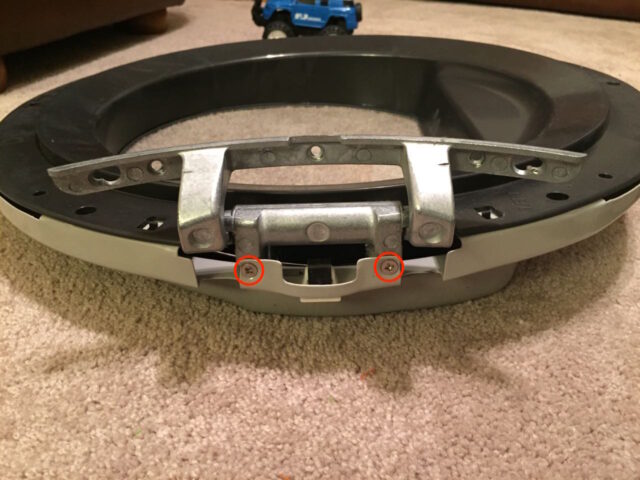
Remove the hinge and get ready to transfer it to the other side.
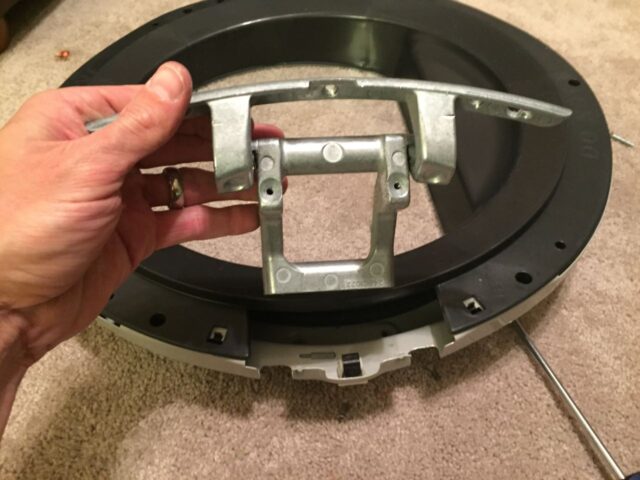
Step 7: Install the hinge on the other side.
Now while you remember which edge the hinge came off of move it to the other side and reinstall the four screws:
Step 8: Install the blanks on the other side.
Install the internal blank with its two screws and the external blank with its two screws as seen below:
Step 9: Flip the outer shell so the handle is on the other side
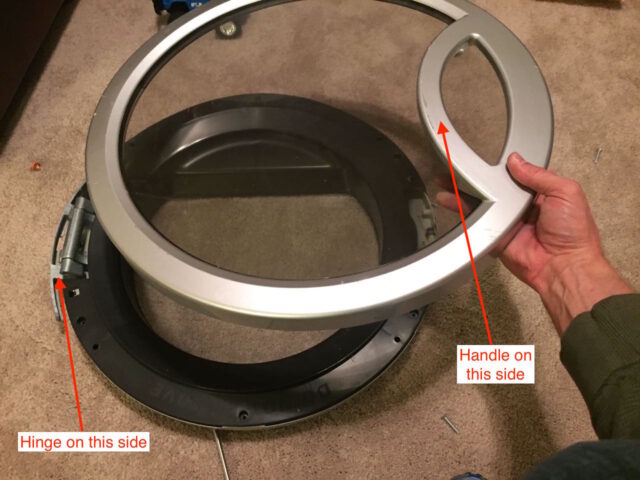
Make sure the cover is seated all the way down on the door. This is how it will appear from the top edge:
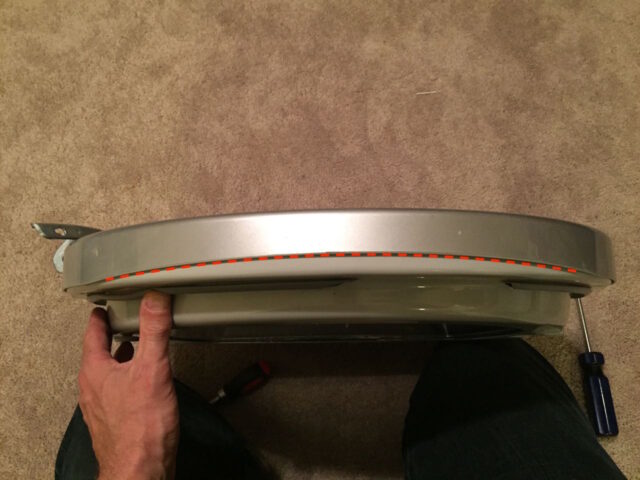
Then reinstall the six screws:
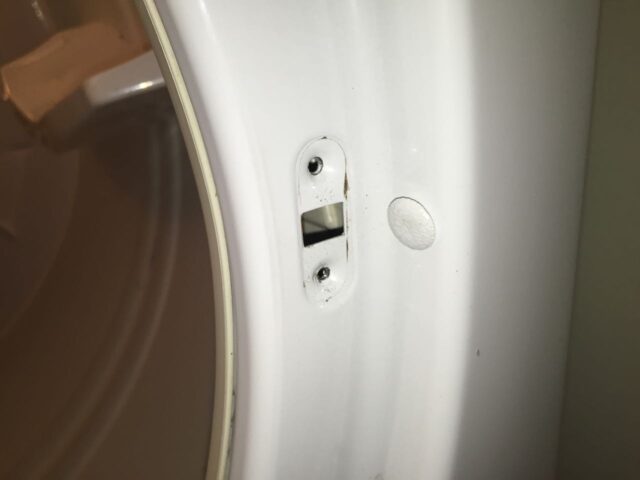
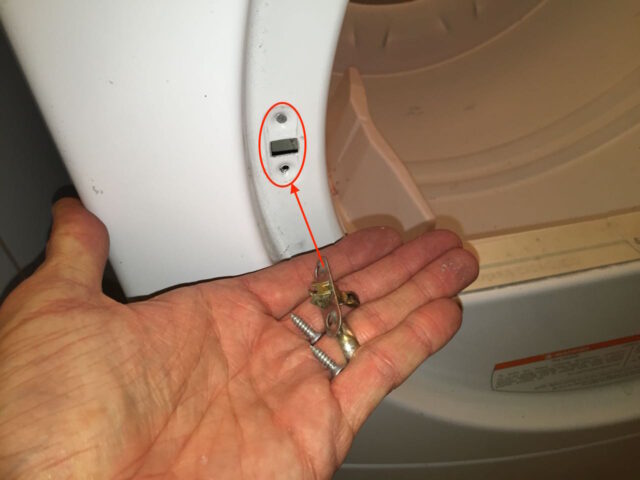
Step 10: Move the door strike assembly to the other side of the door opening.
I hadn’t moved these because the hinge was in the way. Remove the blank from the side where the hinge was originally installed:
Install it on the other side:
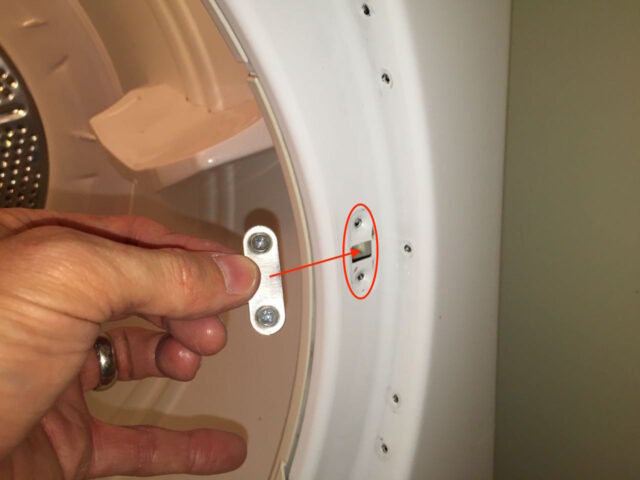
Install the door strike on the other side:
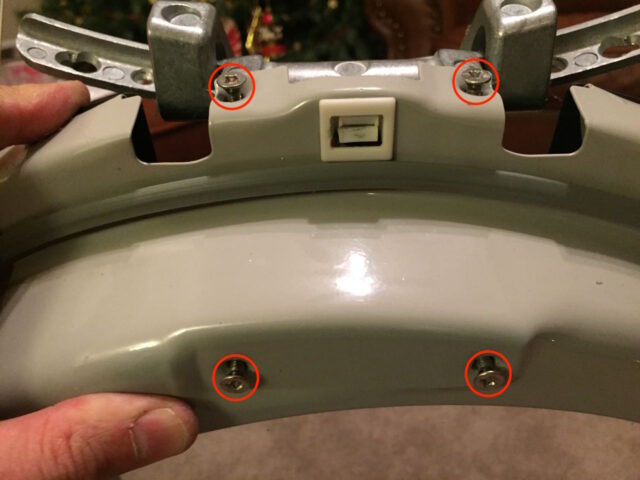
Step 11: Install the door on the other side.
Partially install the top screw so you can hang the door from it:
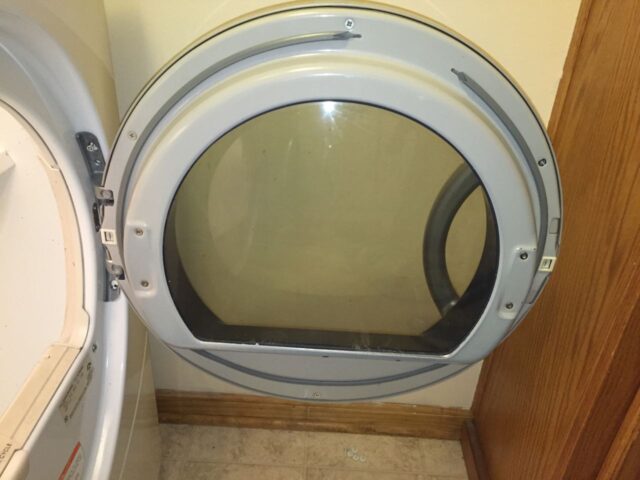
Reinstall the five hinge screws:
Step 12: Install the plugs on the other side.
They push straight in:

Now your door is hinged on the right side:
Amazon Associate Disclosure: As an Amazon Associate I earn from qualifying purchases. This means if you click on an affiliate link and purchase the item, I will receive an affiliate commission. The price of the item is the same whether it is an affiliate link or not. Regardless, I only recommend products or services I believe will add value to Share Your Repair readers. By using the affiliate links, you are helping support Share Your Repair, and I genuinely appreciate your support.
I have a different ge dryer, but I think the question I have is for any dryer. I reversed everything as necessary, but now the door sticks and is very hard to pull open.. It also needs a lot more force to close. Any ideas?
It seems that the hinges are misaligned and it is putting more force on the latch. I would loosen slightly the screws on the hinges and see whether the door will shut better and then play around with the angle of the door when you tighten the hinges and you should be able to get it to close/open easier.