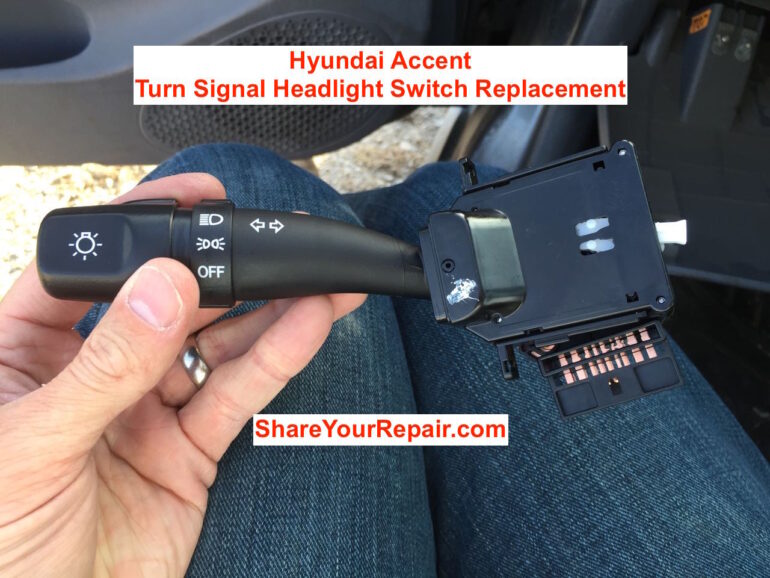
My low-beam headlights would not come on but my headlight bulbs were new and I couldn’t find a blown fuse or a bad relay so I opted to change out the lighting and turn signal switch assembly. This assembly controls the turn signal and headlights including low and high beams. Here’s how you can do it too…
How to Replace Turn Signal Headlight Switch on Hyundai Accent
Automobile:
Parts Needed:
Tools Needed:
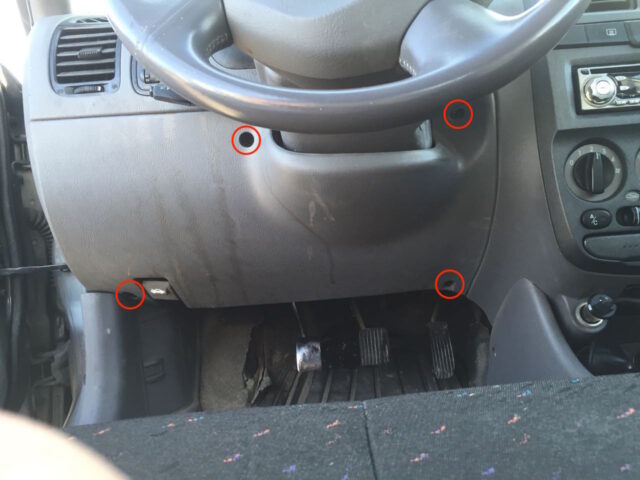
Step 1: Remove the four phillips head screws from the dash panel below the steering wheel.
By removing this panel you will give yourself room to pop apart the two halves of the steering wheel collar. Here is where the screws are located:
Step 2: Partially remove the dash panel.
I say “partially remove” because the panel is going to be retained on the lower left edge by the hood latch and On-Board Diagnostic connector and we don’t need to completely remove the panel to do what we need to do. One important thing to note is that the panel has a finger on the right edge that tucks into the the adjoining panel so DO NOT pry the panel straight off on the right edge. Pry along the far left edge and work your way around. The left edge has two snap-in connectors that you can pry straight out as seen below:

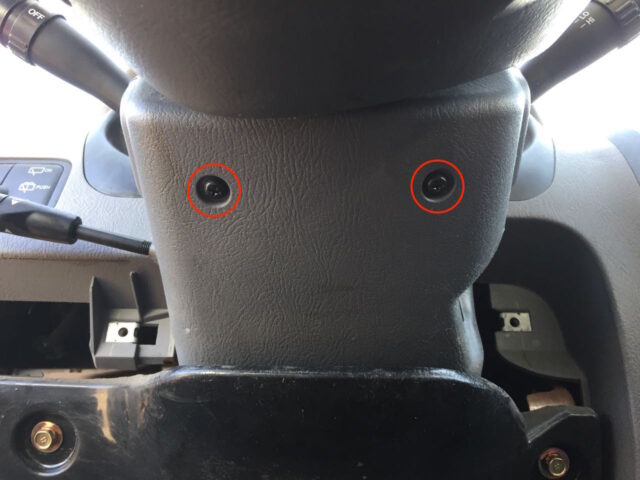
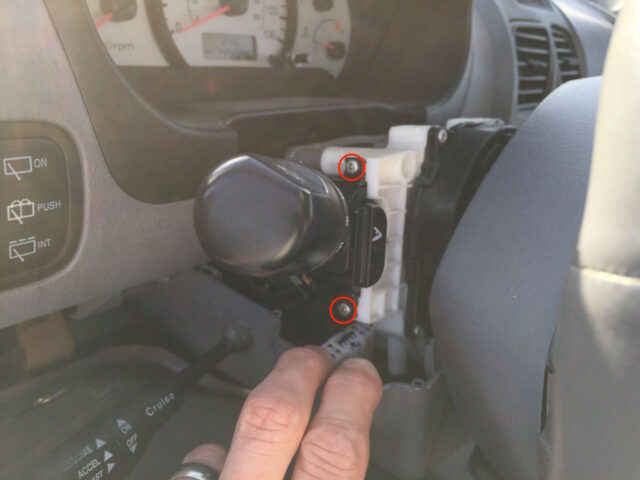
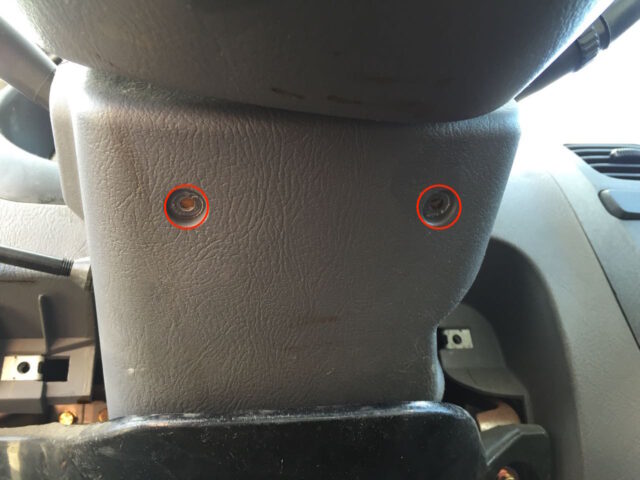
Step 3: Remove the two screws from the steering column collar.
They are phillips headed and can be seen below:
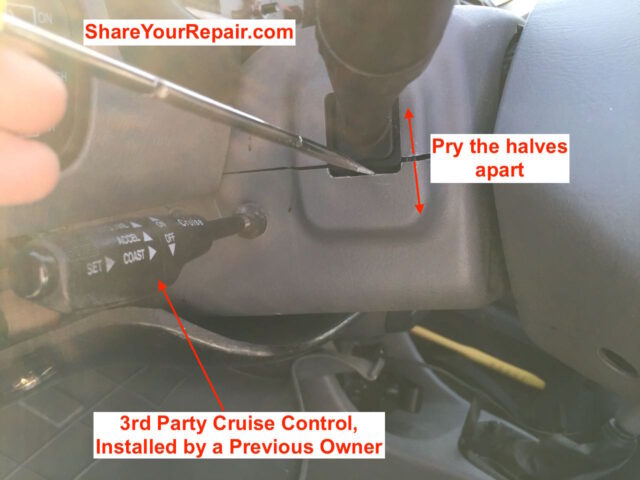
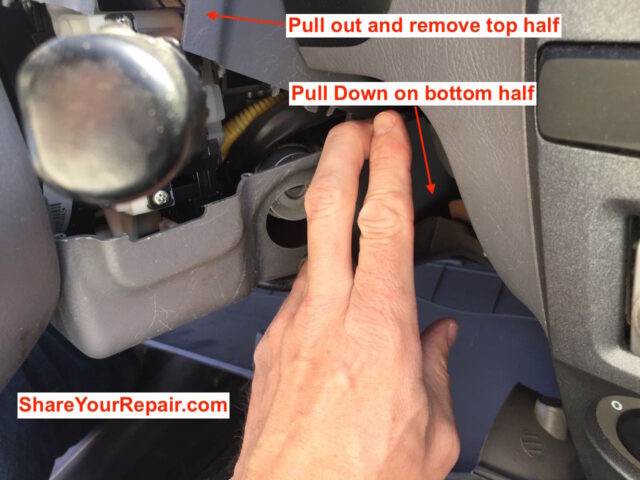
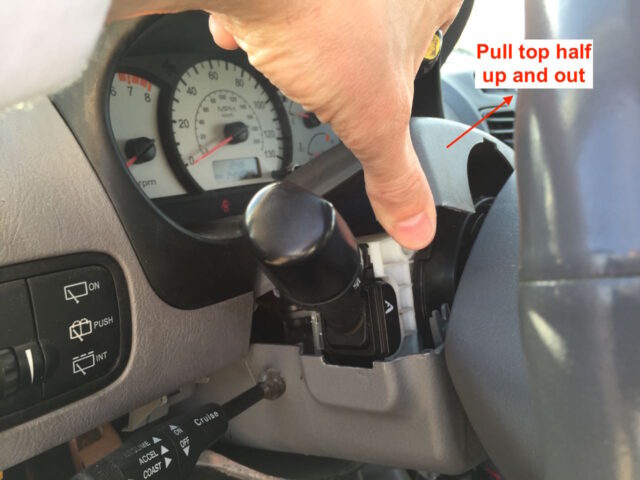
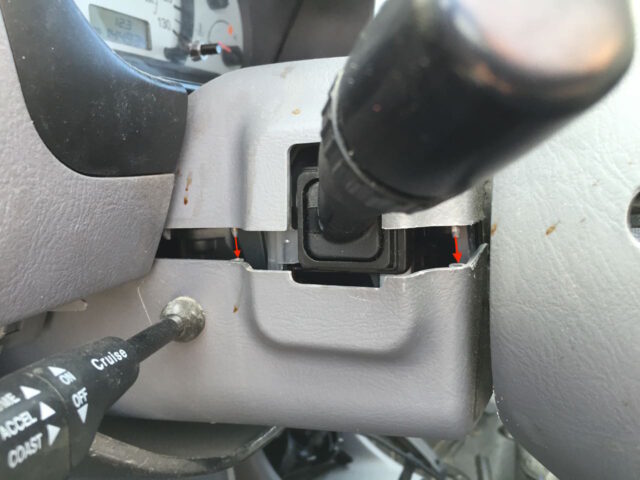
Step 4: Pry the two halves of the steering wheel collar apart.
You are going to remove the top half but it is helpful to be able to lower the bottom half so you can get the top half out of the opening of the dash. The collar is attached to the sheering assembly by the bottom screws that you just removed and the top and bottom simply snap together. You will need to pry the two halves apart and I chose the left side near the turn signal:
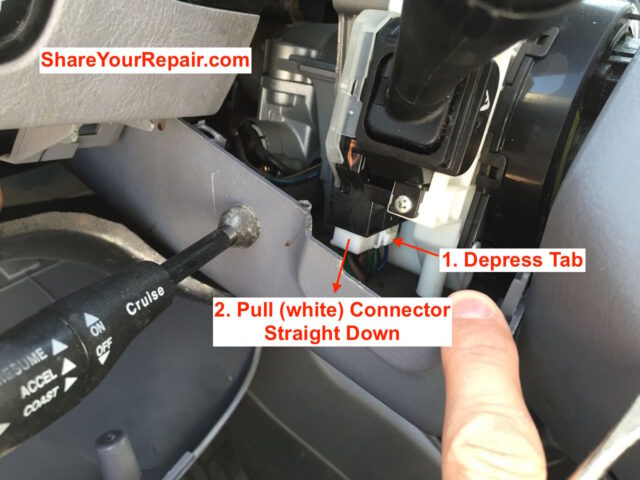
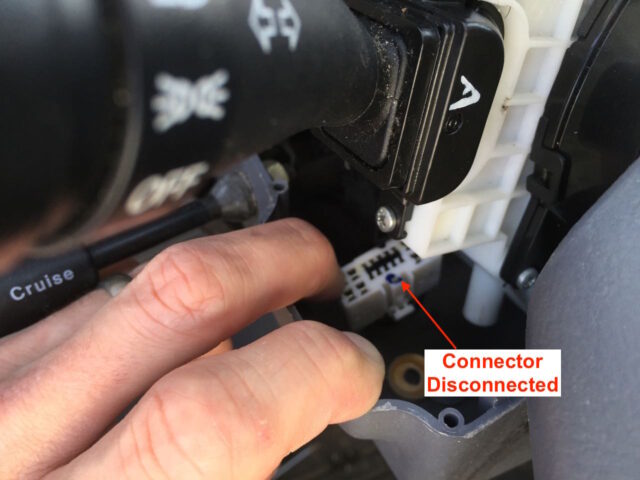
Step 5: Disconnect the Lighting and Turn Signal Switch connector.
There is a white tab that must be depressed to release the connector:
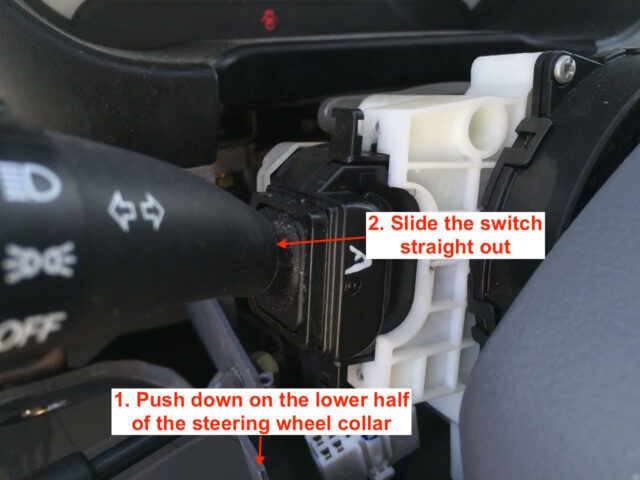
Step 6: Remove the two screws and remove the Turn Signal Headlight Switch.
Remove two small phillips-head screws that hold the switch in place:
Be careful to not drop them. I did drop one of them and it landed on the lower half of the steering wheel collar. I magnetized my screwdriver and reached down there with the tip and retrieved the screw. Once you remove those two screws you can slide the switch assembly straight out. The switch fits in a slot and will run into the lower half of the steering wheel collar so pull down on the collar and pull the switch straight out:
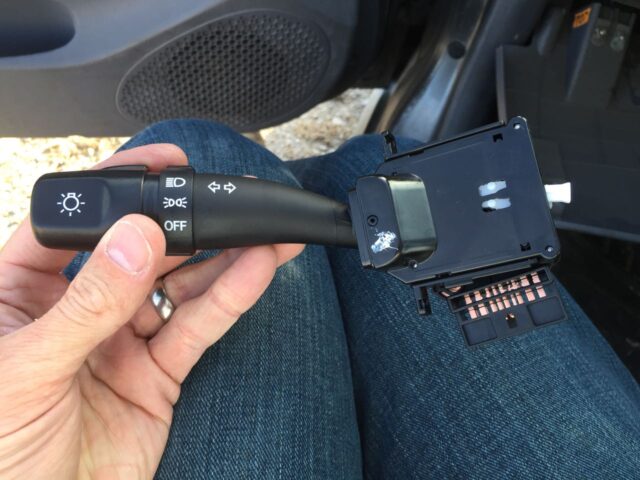
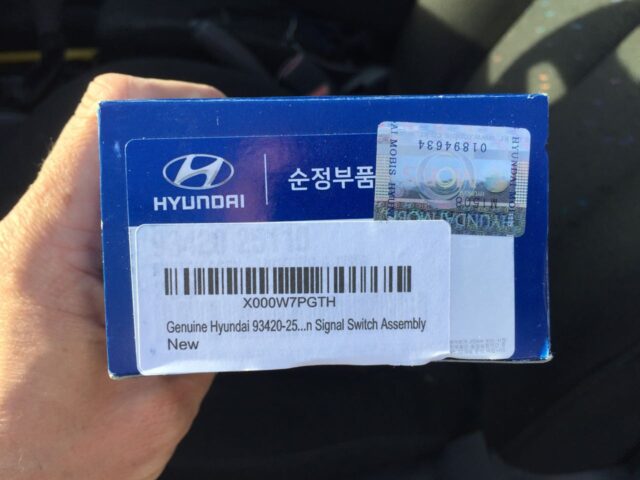
Step 7: Prepare the part for installation.
Here’s the box it came in:

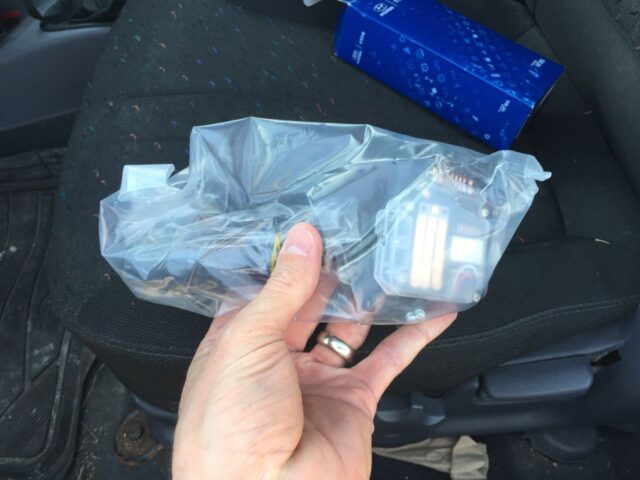
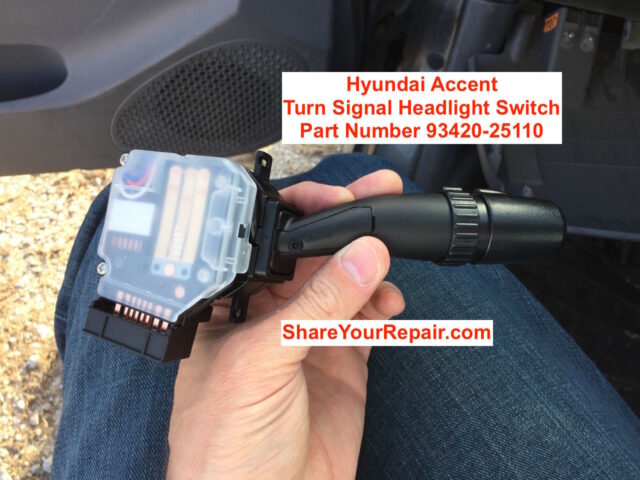
Here is the new part unwrapped and ready to install:
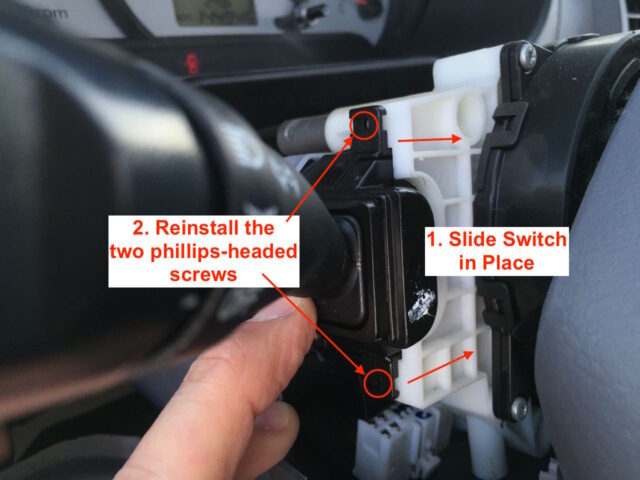
Step 8: Insert new turn signal headlight switch and reinstall the two phillips headed screws.
There is a slot that the switch slides into, which you’ll need to line up:
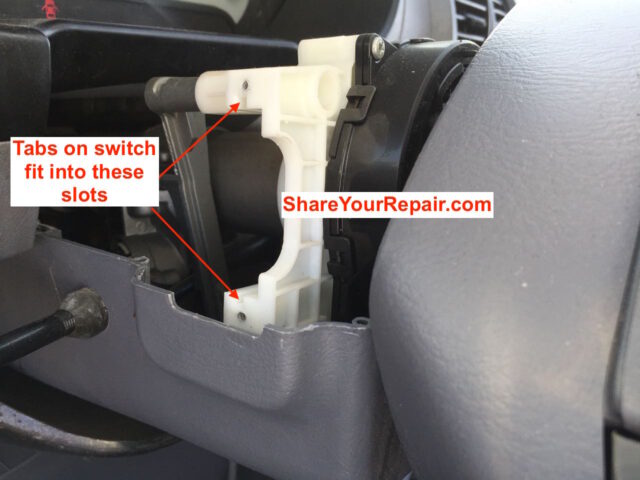
I needed to pull down the lower half of the steering wheel collar in order to make room for the switch to slide in to place.
Step 9: Reconnect the electrical connector
Insert the electrical connector up and into the socket in the bottom of the switch until it snaps in place:
Step 10: Test your installation.
At this point you can test your new part before you go to all the work to put it back together. If you have a manual transmission like me you’ll want to be careful because that lower panel is connected to the hood latch and on-board diagnostics connector. The tests you would want to perform are:
- right and left turn signals
- low beams
- high beams
- high beam momentary flash (pull back turn signal)
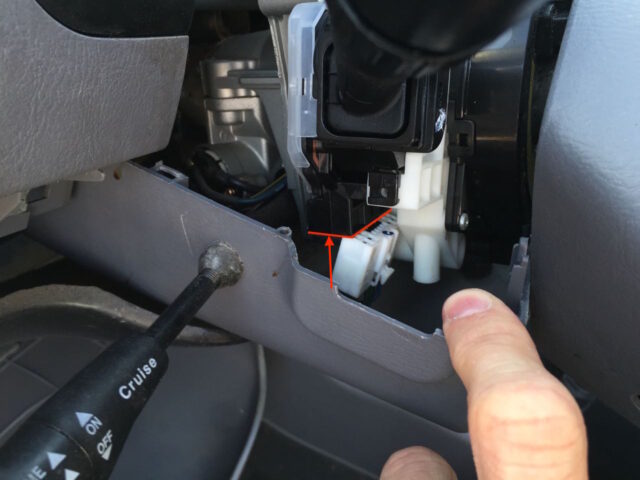
Step 11: Reinstall the steering wheel collar halves.
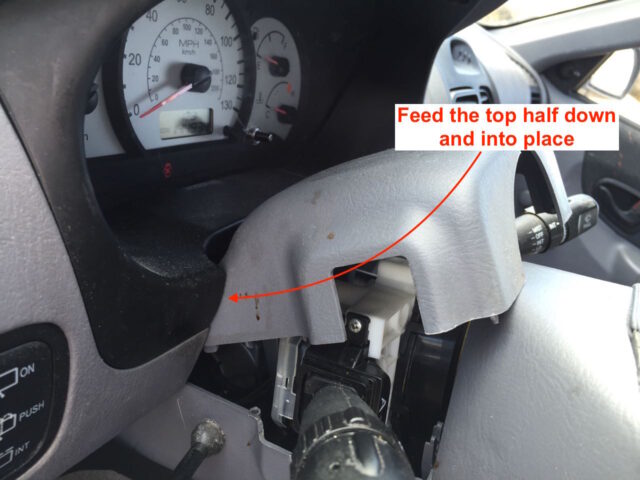
Guide the top half back into place. It is easiest to do this if you are pulling the bottom half down and out of the way because it is a tight space back in there.
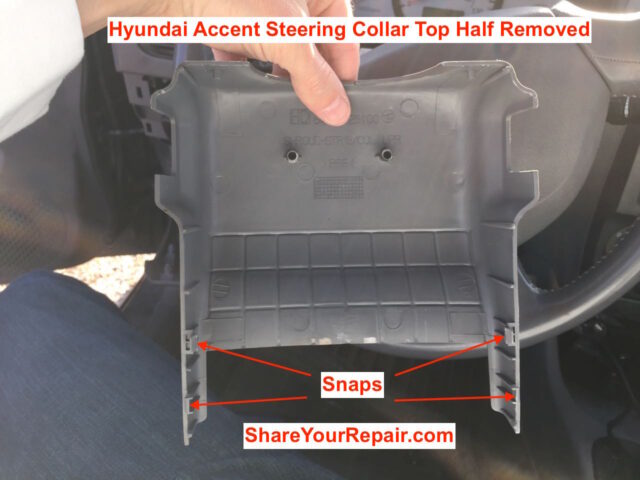
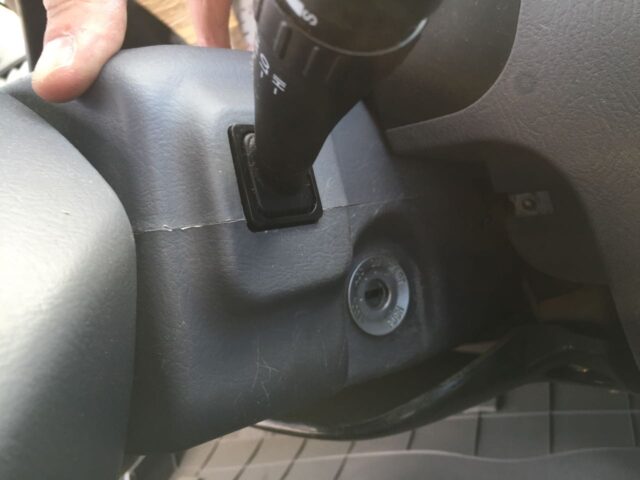
The lower half snaps fit inside the top half and the seam should be tight when the halves are snapped together:
You may need to line up the collar with the holes before reinstalling them:
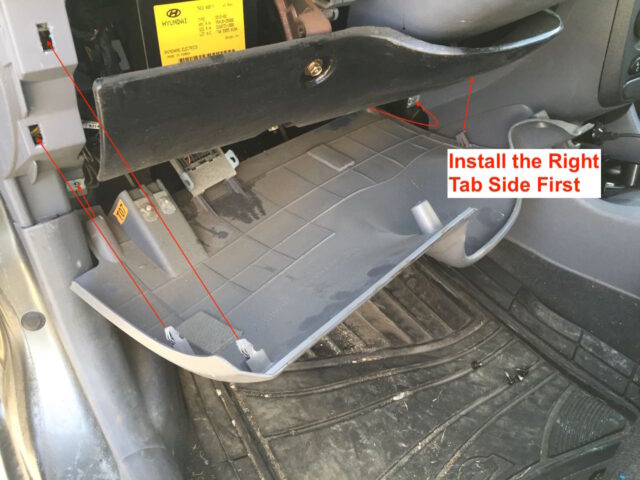
Step 12: Reinstall the lower dash panel.
Start by installing the right tab side first:
After you’ve snapped the panel in place, reinstall the four screws:
Now you are done! You did this all by yourself and saved a lot of money over paying a dealer to do it.
Amazon Associate Disclosure: As an Amazon Associate I earn from qualifying purchases. This means if you click on an affiliate link and purchase the item, I will receive an affiliate commission. The price of the item is the same whether it is an affiliate link or not. Regardless, I only recommend products or services I believe will add value to Share Your Repair readers. By using the affiliate links, you are helping support Share Your Repair, and I genuinely appreciate your support.
Thanks I’ll give it a shot.
Hello, thanks for the detailed informative post. Question, is the installation the same for an older 1998 Hyundai Accent Headlight/turn signal switch? Thanks and have a good day.
Kelly
They changed the model in 1999 and I’ve never worked on a ’98 so I can’t tell you. I would look at your car and use this as a guide and see how closely the two line up. They may be similar and they may not but you should be able to tell as you compare them.
This guide is great, thank you for the thorough and easy-to-follow explanations! Including the Amazon link for the needed part was especially helpful. My local mechanic, who I trust to a reasonable extent, quoted me something like $200 for this job; using your guide I was easily able to complete it myself for a fraction of the price. Thanks again, I appreciate it!
Thanks for the feedback, great to hear–good job on the repair!