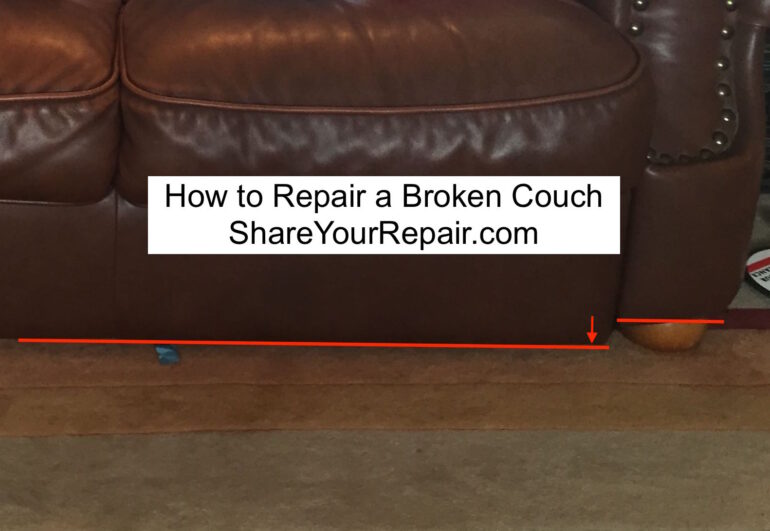
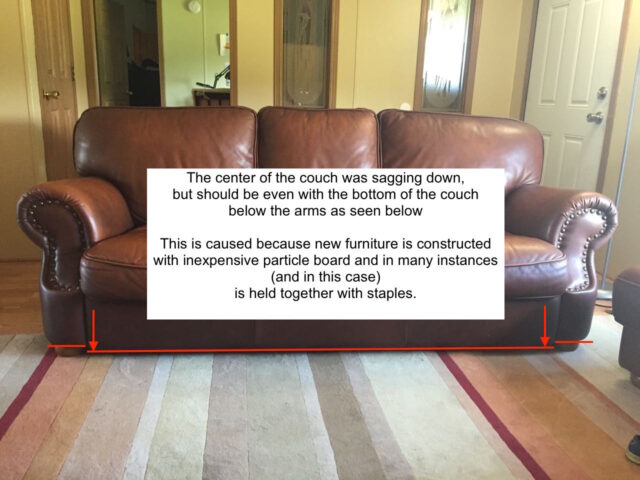
I noticed the other day that the inner seat portion of our full-size leather couch was sagging down–too much throwing ourselves down on the couch I guess. I had already repaired our love seat so I knew what was happening and knew I could fix it. Finally I’m documenting the process so you can fix your couch too. Follow along to learn how to repair a broken couch frame. If nothing else, this article will give you the confidence to go ahead in tear into your couch and take a shot at repairing it instead of replacing it.
Hardware:
- Any upholstered wood-frame couch, love seat, or chair.
Tools Needed:
- Staple Gun
- Staples
- Flat-Head Screw Driver
- Pliers
- Cordless Drill
- Drill Bit Set
- Fine-Threaded Drywall Screws: 2 Inch
, 1-1/4 Inch
- Quick Grips
How to Repair a Broken Couch Frame
Step 1: Turn your couch over.
For this repair I simply laid our couch on its back. The main goal is to give yourself access to the material that covers the bottom of the couch, so you can pull the necessary staples to give yourself access to the frame inside.
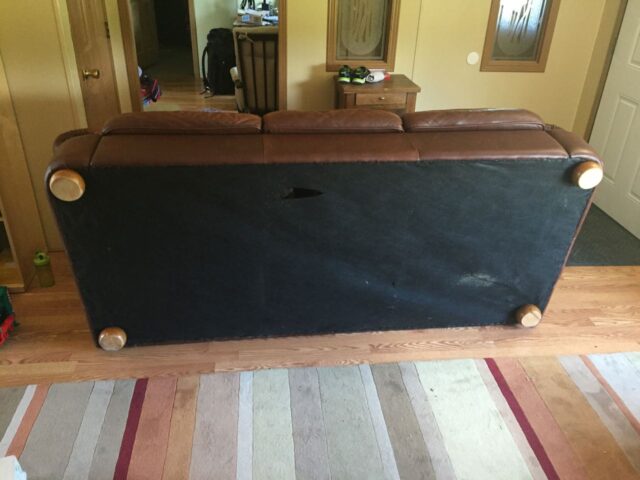
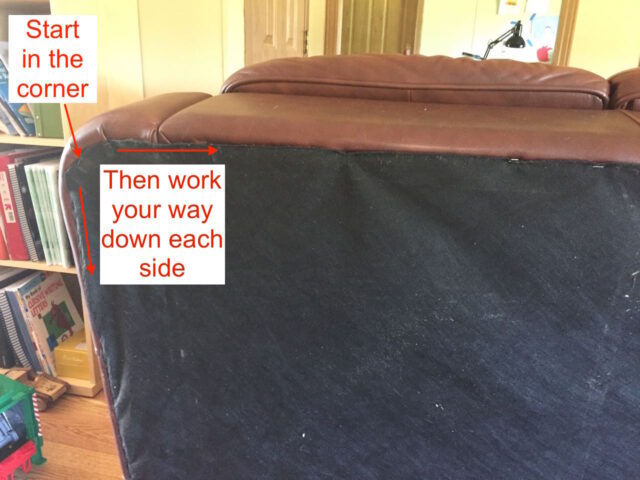
Step 2: Remove the legs from the areas you will be working.
Because I will be working on the top two corners as seen in the picture above, I unscrewed the two front legs.
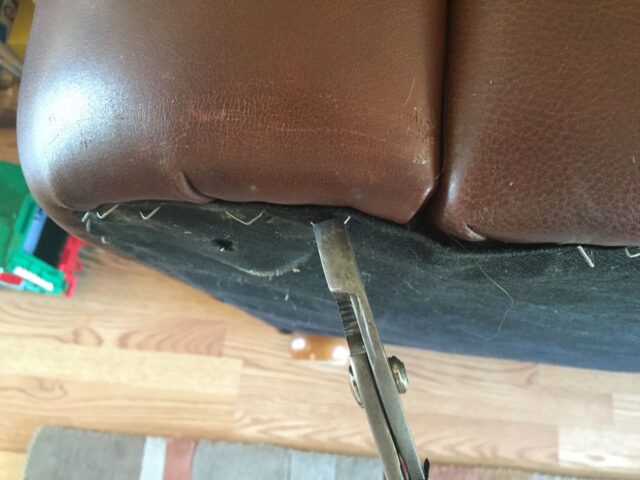
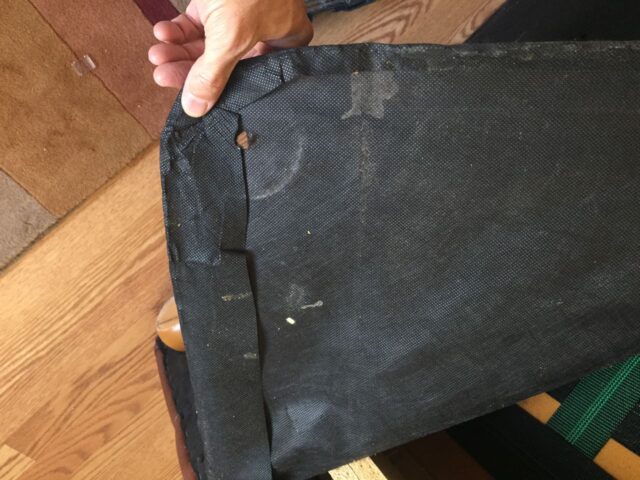
Step 3: Pry out the staples from the edge of the bottom covering material.
I used a thin flat screwdriver to get under the staples (pardon the slightly blurry picture but you get the point).
Be careful not to jab into the leather (or whatever material your couch is covered with). If I was very careful I could completely pull the staple out but often I was only able to lift one side of the staple out. In that case, simply pull the staple out with a pliers:
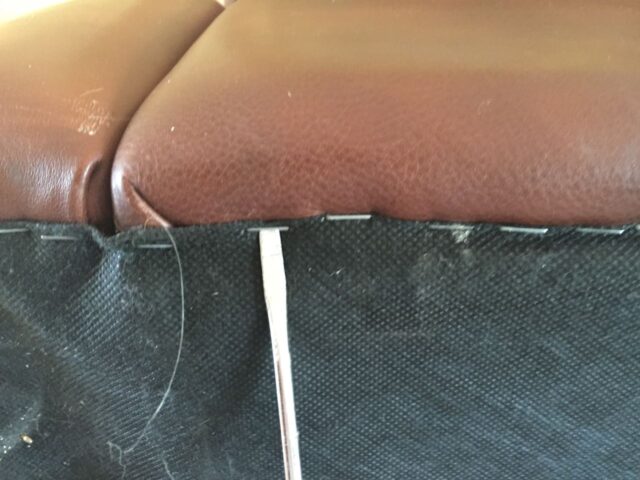
Once you get enough staples out you can lay back the material and get a look inside. Below I show how the couch was shifting inside–the middle portion of the couch was essentially held in place by one bolt on each side along with some staples, not enough:
I would be generous about pulling staples so you can have easy access to the insides of the couch. I ended up removing more, to give more access, multiple times and you can always go back and remove more later and you can easily remove them all if you had a serious repair to do.
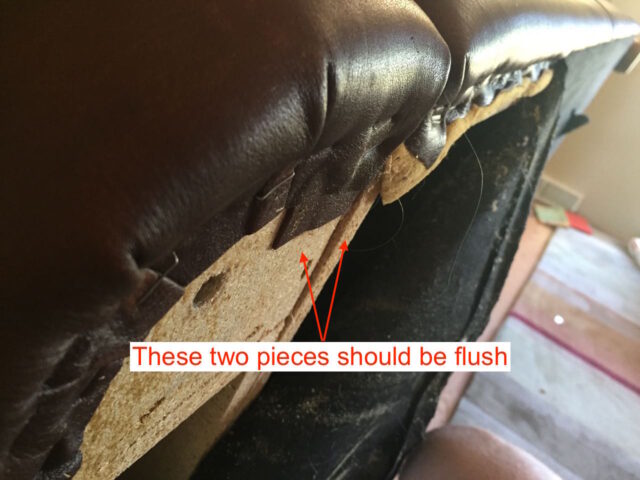
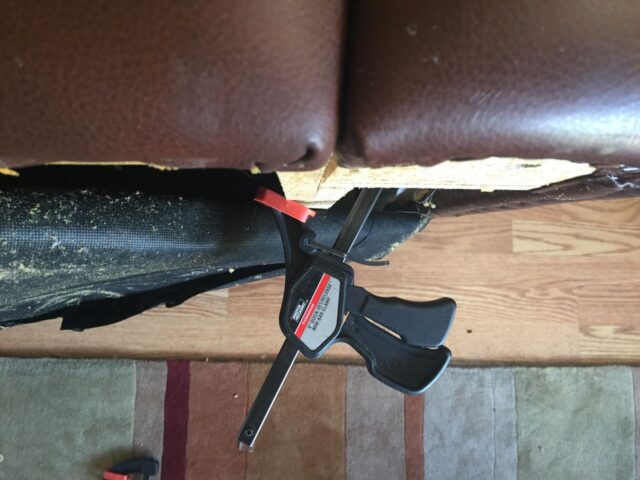
Step 4: Do what you need to do to re-align the couch frame.
I used a quick grip to diagonally pull from the outside board to the bolt on the inside to re-align the two parts, as seen in the two pictures below:

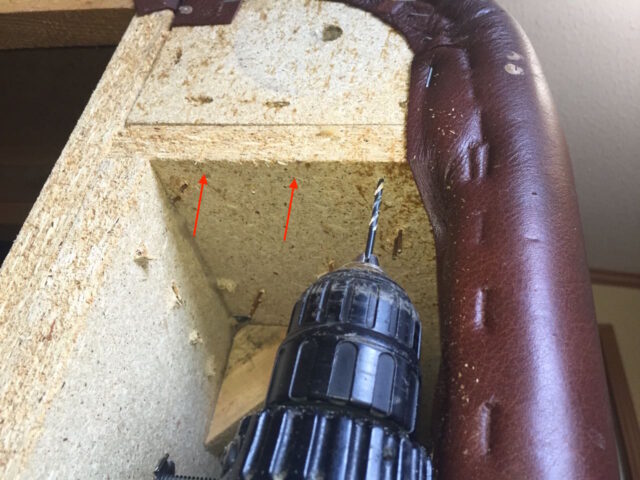
Step 5: Drill pilot holes for your screws.
We are working with particle board here so you really should drill pilot holes for your screws. This is especially important for screws that are near the edge, because you could blow out the edge of the board because particle board is fragile. I used a 3/32″ drill bit to drill the pilot holes. Important note: Make sure the frame is correctly lined up BEFORE you drill the holes.
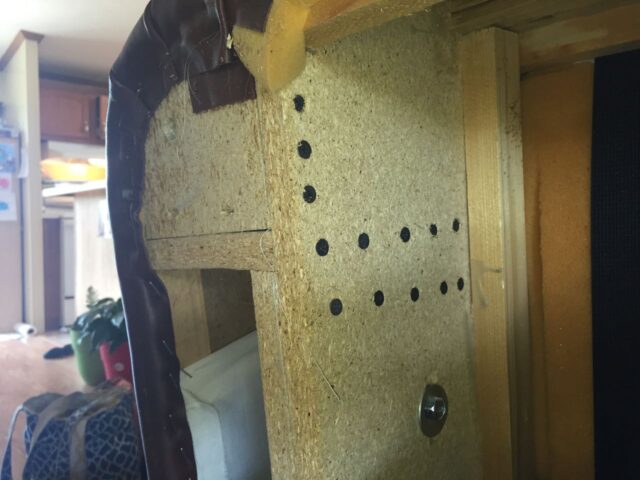
It was very difficult to see the holes in the particle board in the pictures so I started all the screws so you could see where I placed the rest of them below:
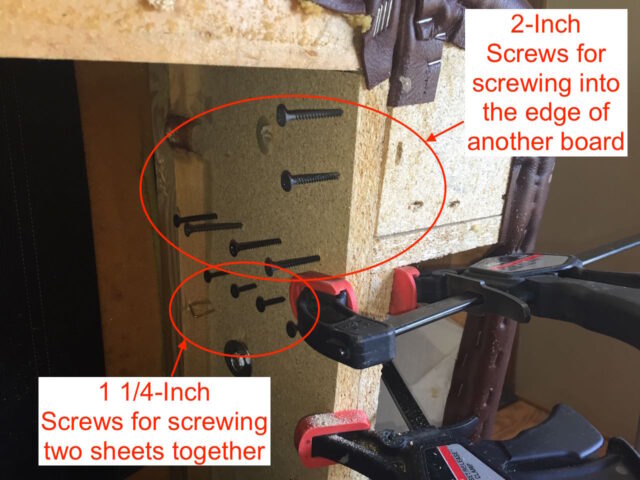
I chose 1 1/4″ drywall screws for connecting two parallel sheets together and 2″ drywall screws for screwing through a sheet into the edge of another board as diagramed above.
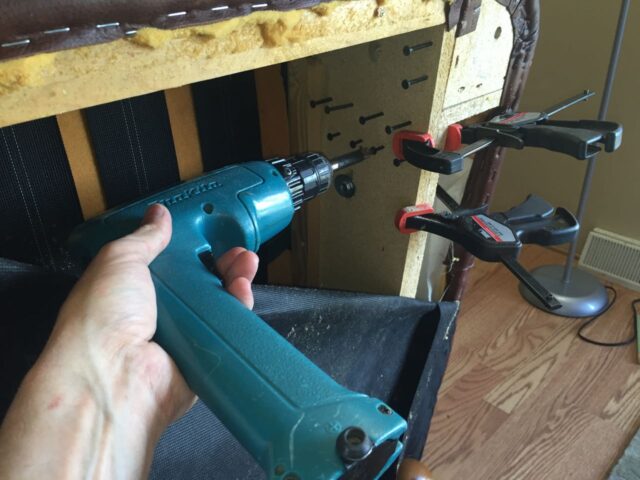
Step 6: Drive your screws.
I used my beloved 20-year-old Makita 9.6 V cordless drill to drive the screws.
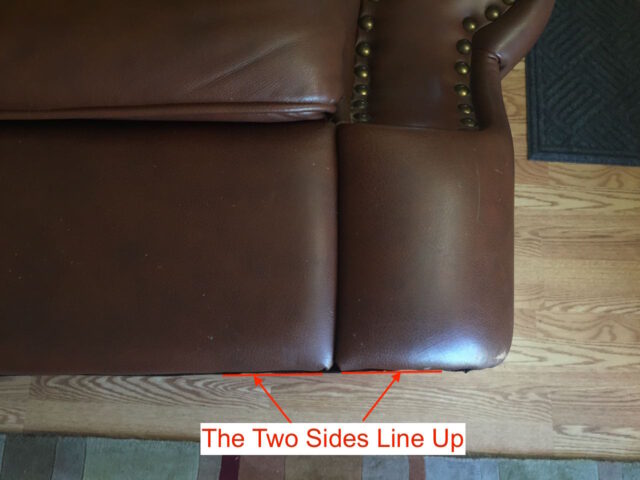
The seams lined up and the gaps tightened up nicely for me:
Step 7: Repeat as necessary.
I would be liberal with your screws 🙂 You don’t want to have to do this again so now is the time to fix your couch now and forever. If your couch is damaged worst than mine you place 2×2’s along the seams and screw them in place to add strength. My couch was in good enough shape that what I did above was sufficient. I fixed both sides of my couch.
Step 8: Reattach the upholstery onto the bottom of the couch.
Fold the edge of the material over, like it was originally:

Then start in the corner and tack into place.
Now you can see the difference of aligning the internal frame of the couch:
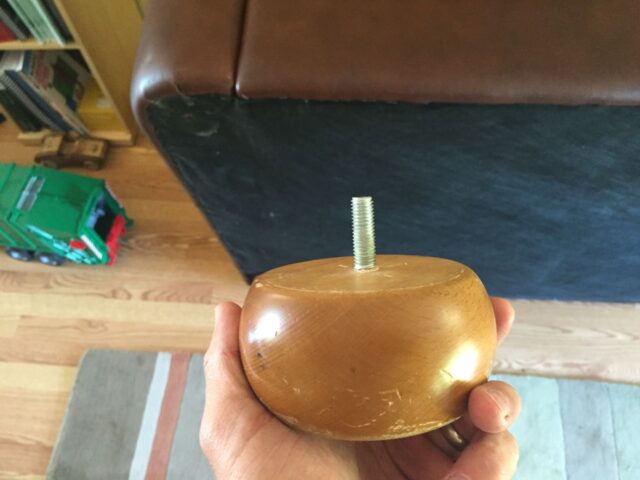
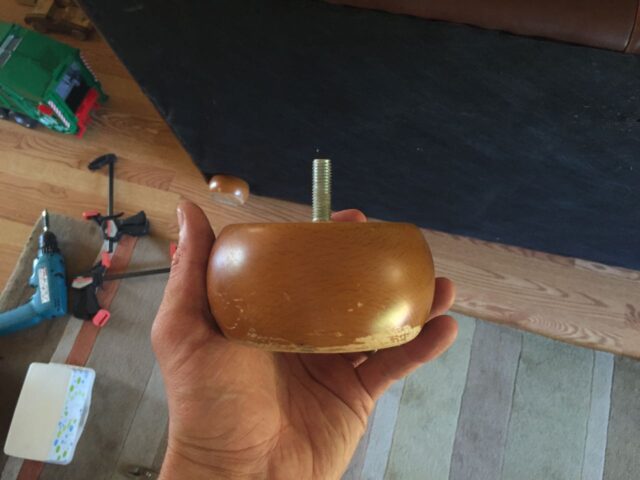
Step 9: Reinstall the couch’s feet.
Screw the feet back on.
Now you have given more life to your comfy couch!
Successful with this repair? Do you have a tip to add? Please leave a comment!
Were you able to repair your couch with the help of this article? Please leave a comment and encourage others to fix theirs too. If you have a question or a tip please help the Share Your Repair community out by sharing it as well. I respond to most questions within 24 hours.
Please note: if you do not have any approved comments on this site then your comment must be personally approved by me before it will appear. I do this to keep my site 100% free of spam comments. I read them all and almost always review and respond to all comments within a day. I look forward to hearing from you.
Amazon Associate Disclosure: As an Amazon Associate I earn from qualifying purchases. This means if you click on an affiliate link and purchase the item, I will receive an affiliate commission. The price of the item is the same whether it is an affiliate link or not. Regardless, I only recommend products or services I believe will add value to Share Your Repair readers. By using the affiliate links, you are helping support Share Your Repair, and I genuinely appreciate your support.

I’m late to the party, but I’m glad I finally arrived. My old Natuzzi leather sofa, that I bought 15 years ago needs fixing. The wood that holds the 5 th leg cracked again. My 1st Natuzzi was replaced for the very same reason by Carson’s many years ago, so I’m on my 2nd couch. I decided there is no way I’m letting a $2000 sofa go, that I only paid $600 for at the Carson’s outlet. Ive looked up many videos for info on the repair but not until I saw your article did it all come together for me. In reading about couch construction , I read one article that mentioned screws in lieu of staples for sturdier construction. There were no videos showing that process, thank goodness I found your article just as I’m about to go purchase the lumber. The pics are great and I feel empowered to fix my couch now! Thank you!
Another brillaint D.I.Y. I like your reference to your “beloved” 20-year-old Makita. I’ve been using my 34-year-old (Model 9601, 9.6v)that has never quit. I replaced the motor only once and still use the original chuck key (yeah, your 20-year old is keyless!). I also use a 2000mAh battery, which sometimes forgets it ever needs a charge. You are my inspiration!
Thanks for the comment and for subscribing Vin! I’ve talked to subcontractors who long ago “upgraded” their Makita cordless from the model I have, which had lasted a long time for them, and now their new models don’t last near as long. Although you can buy after-market replacement batteries for this model, for the love of repairs, I wrote an article on how to refurbish the batteries for them: Refurbish a Makita 9.6V NiCad Battery if you are interested.