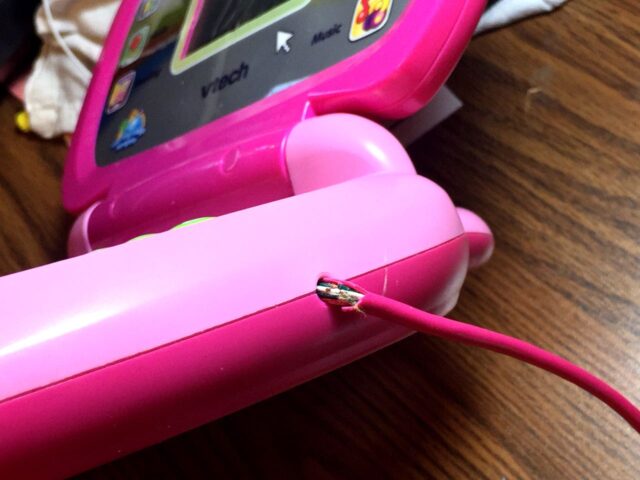
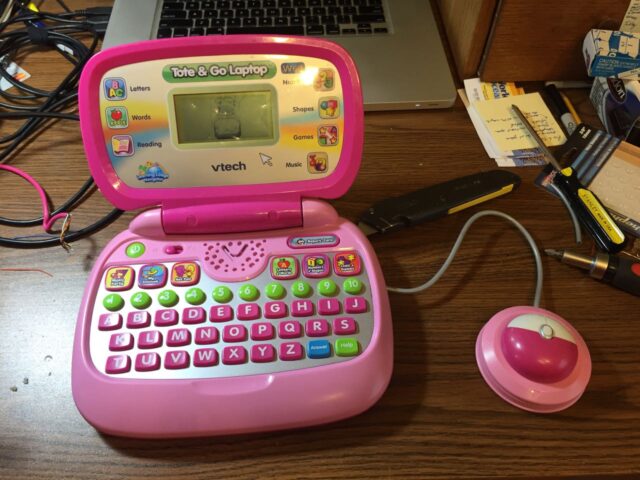
My daughter received a Vtech Tote & Go Laptop for a gift and the kids have really enjoyed playing with it over the years. Over time the mouse began not consistently responding and recently completely stopped working. Upon closer inspection I can see that the mouse cable has frayed. It is a cheap toy but I’m always up for a challenge so I decided to see if I could replace the mouse cable. Read on to learn how you can too can fix Vtech tote and go Laptop mouse not working…
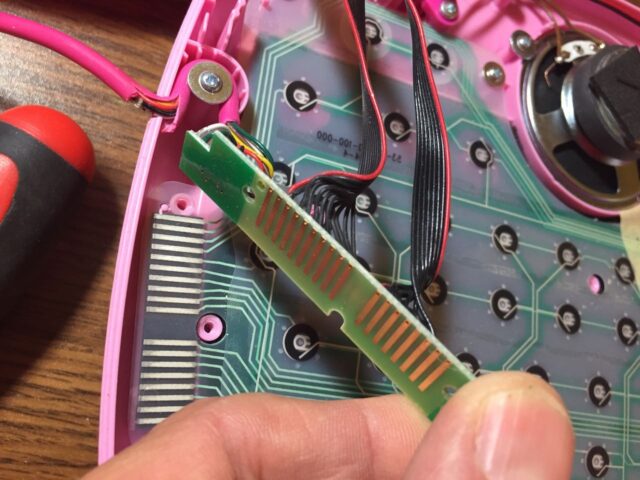
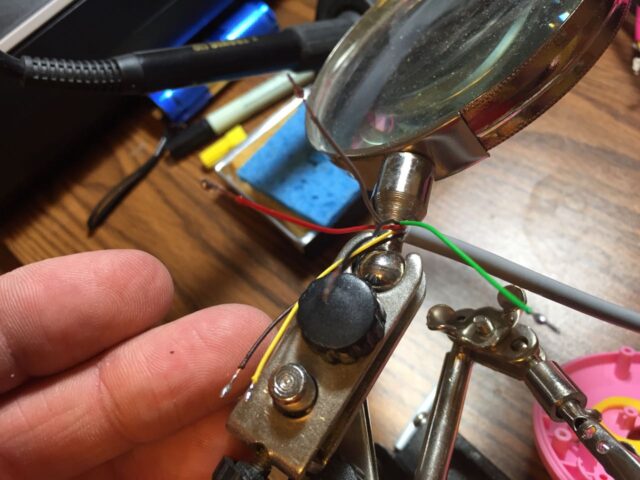
One definite sign it was a bad mouse cable:
Equipment:
Tools Needed:
- Small Phillips-Head screwdriver
- Soldering Iron (I really like my X-TRONIC 4000 Series)
- Wire Stripper
- Flush-Cut Nipper
- Solder Sucker
- Precision Tweezer
- Extra Set of Hands
Parts Needed:
- Fine Solder
- Soldering Wick (optional)
- 3-Foot Ethernet Cable
or similar network cable with at least 6 strands
How to Fix Vtech Tote and Go Laptop Mouse Not Working
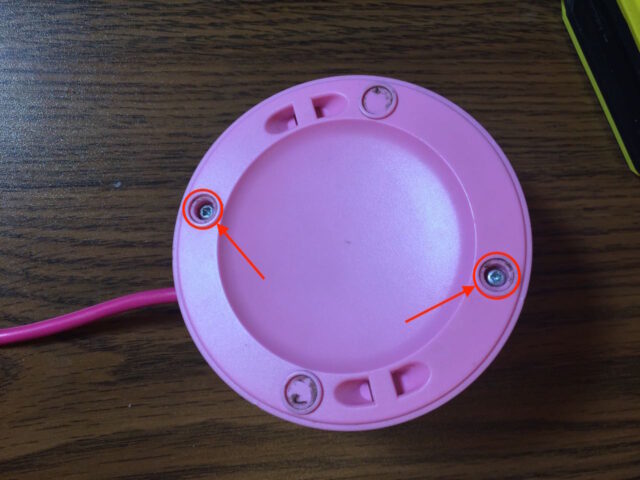
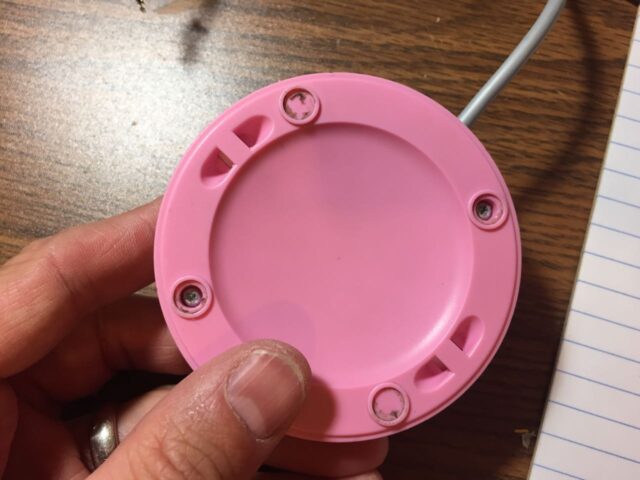
Step 1: Disassemble the mouse case.
Flip the mouse over and remove the two Phillips-head screws:
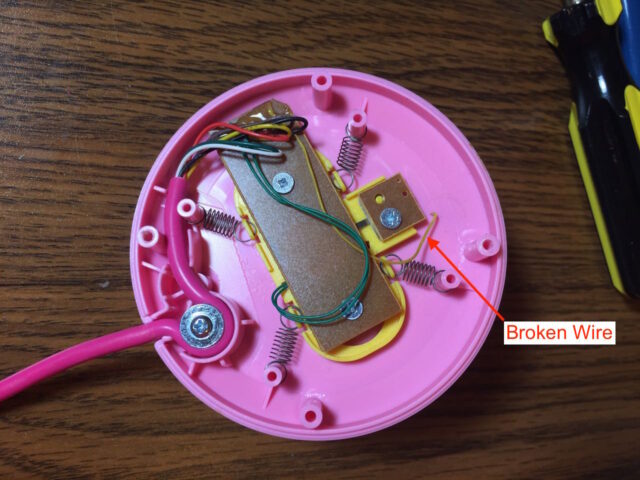
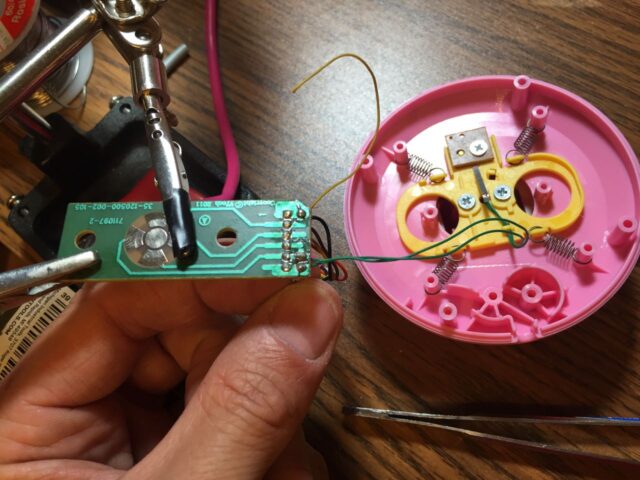
There are only about three different size screws we will remove but you will want to keep track of which ones go where. I kept all the mouse screws together. Once you have the two lower mouse case screws out you can take off the bottom of the mouse to reveal the insides. One of the first things I noticed (after the cheap construction and the hot glue) was the yellow wire that was not connected to anything:
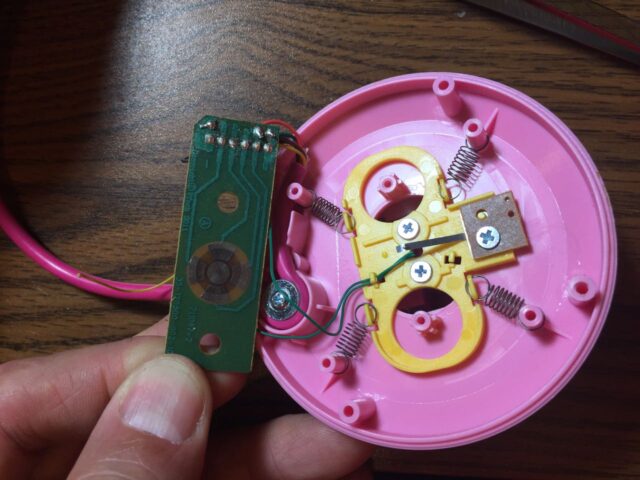
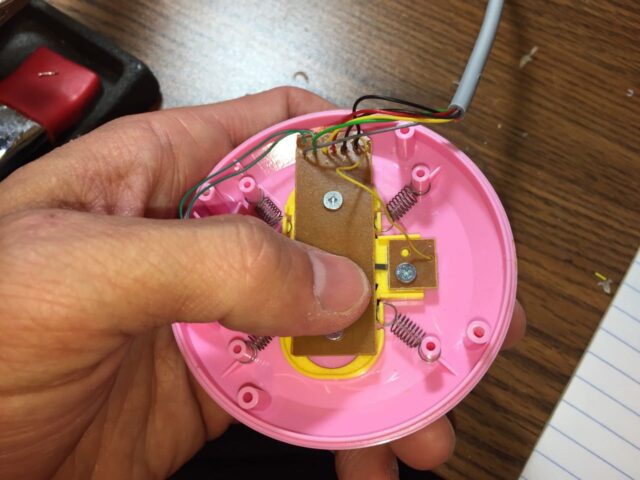
Step 2: Remove the mouse circuit board(s).
Now I only removed the large circuit board at this point because the wire was disconnected from the small circuit board. Depending on your situation, you can remove the two screws from the big board and (or not) the single screw from the smaller one. Note: if you remove the smaller circuit board (with one screw), there will be a little metal plate with a spring arm on it that will come loose–make sure to keep track of it.
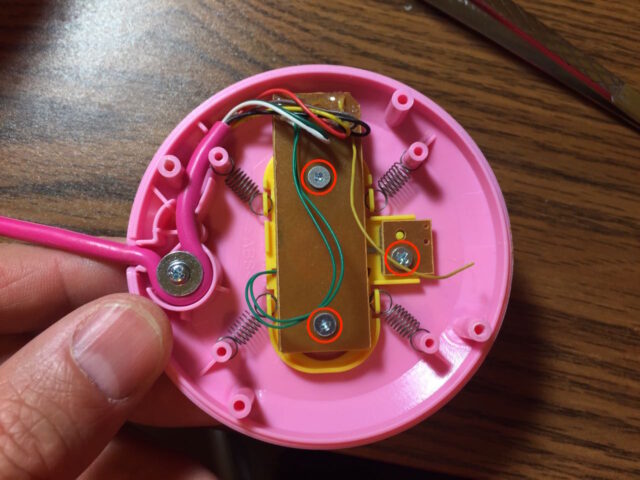
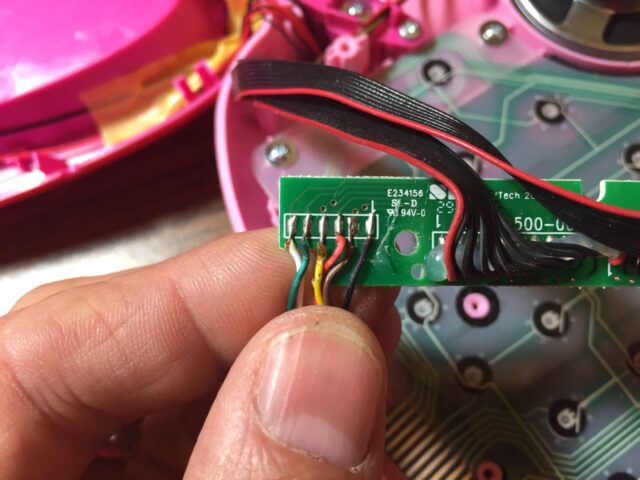
There are nine wires soldered to the large circuit board:
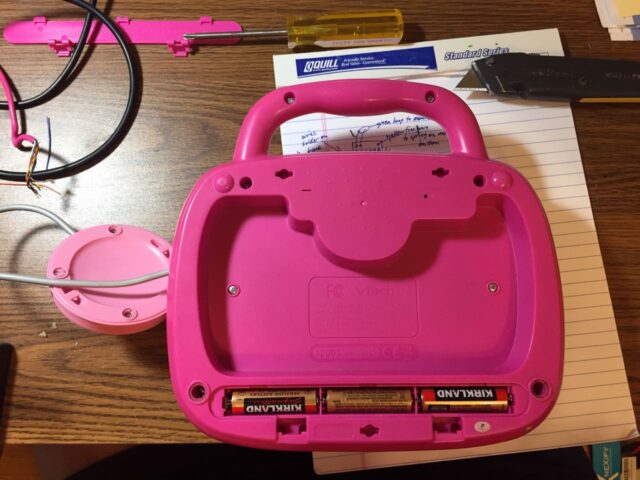
Step 3: Disassemble the laptop main case.
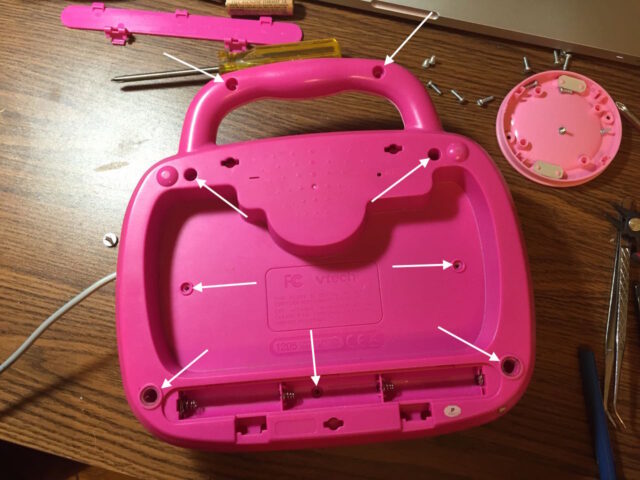
Carefully flip the laptop upside down, remove the battery cover and batteries, and then remove the nine Phillips-head screws:
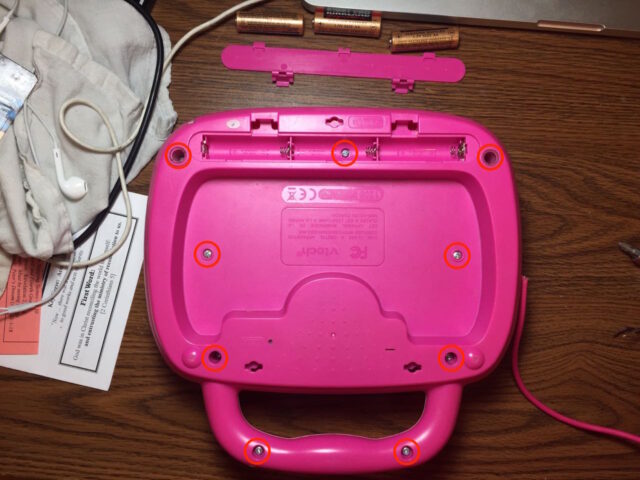
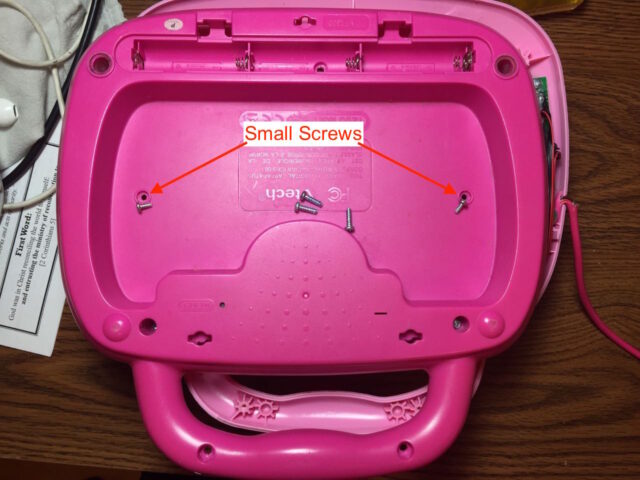
There are two shorter screws, take note of their location:
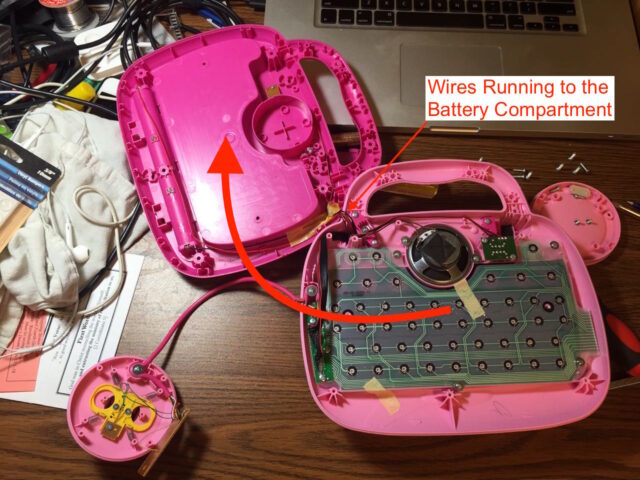
Step 4: Carefully flip over the lower half of the case.
Important Note: the lower case has wires connected to it so do not force it off. Keep track of the screws as some of the ones that are in the deep holes may fall out.
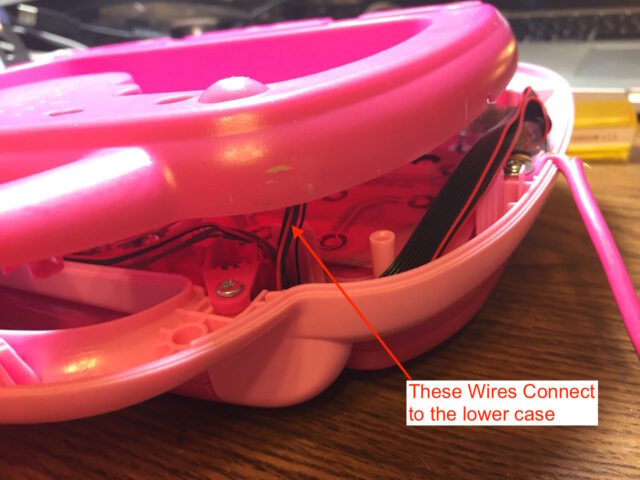
Flip the lower shell of the laptop case over like this:
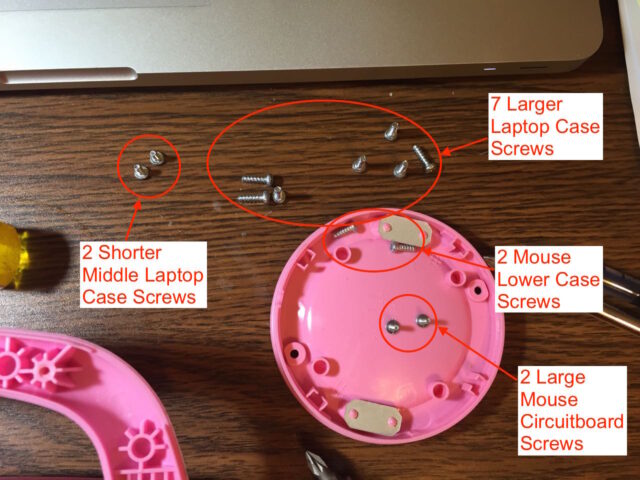
Here’s an accounting of the screws I’ve removed so far:
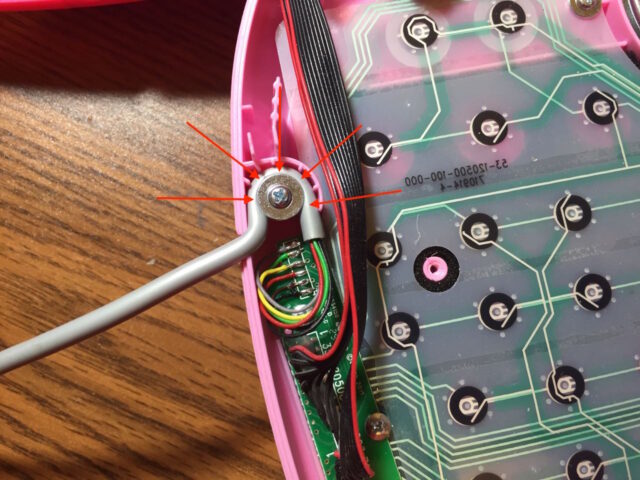
Step 5: Remove the 3 screws from the small laptop board and the single mouse cord retainer screw.
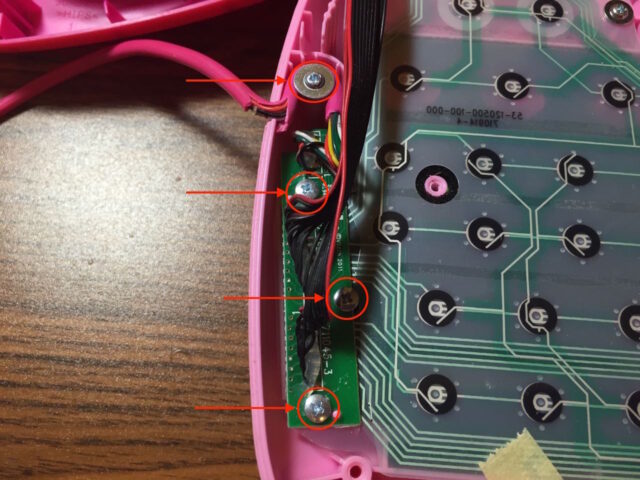
This small circuit board doubles as a connector and only the screw pressure holds the two halves together–talking about cheap construction!?!?!
Step 6: Clean up the board in preparation for de-soldering the wires.
Carefully pick off the hot glue:

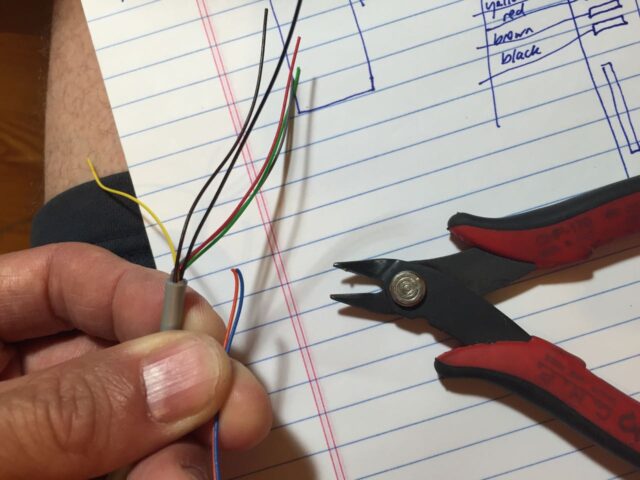
Step 7: Choose a replacement mouse cable.
There are a couple qualifications for this cable:
- It needs to be around the same diameter as the existing cable.
- It needs to have at least 6 wires in it.
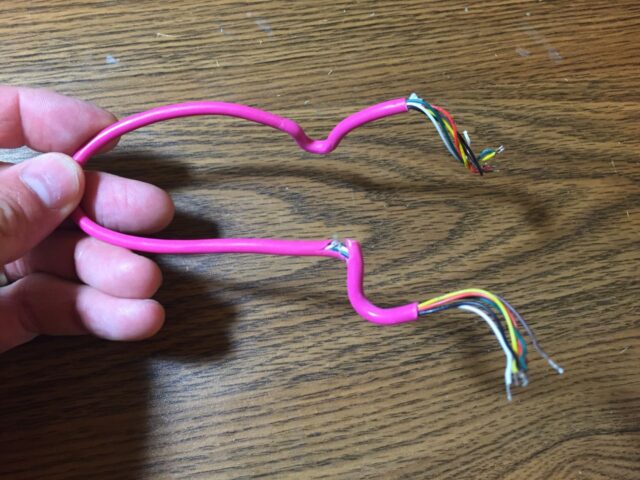
I had some extra Cat5 ethernet cables and they are the same diameter:
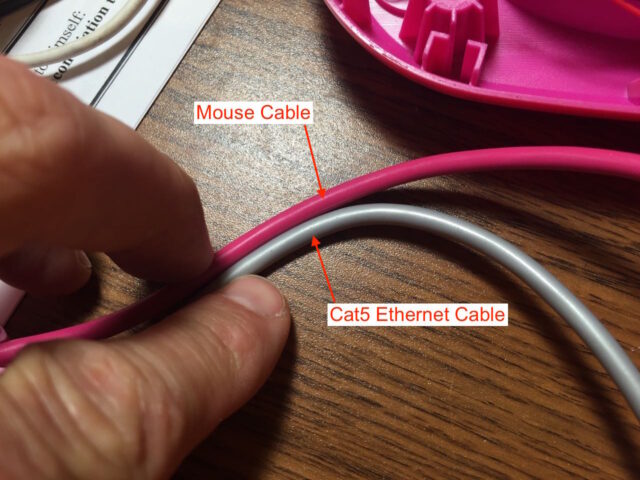
An ethernet cable with ends on it will have a nicer cable than bulk ethernet cable, so this seems like a good choice:
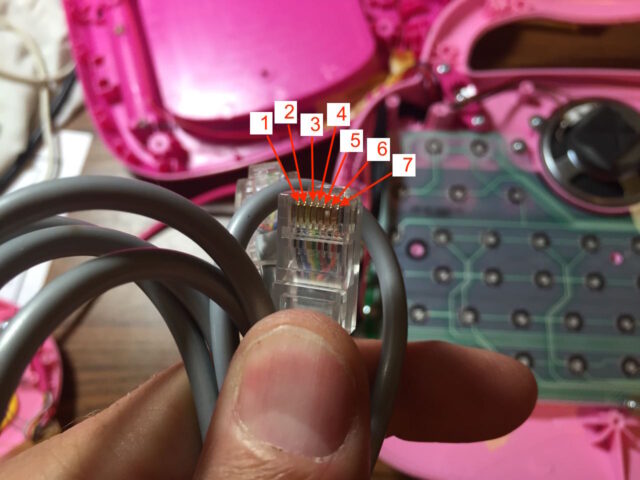
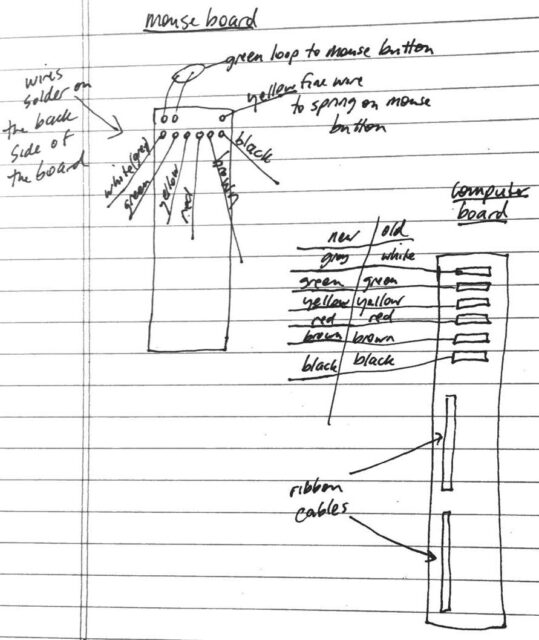
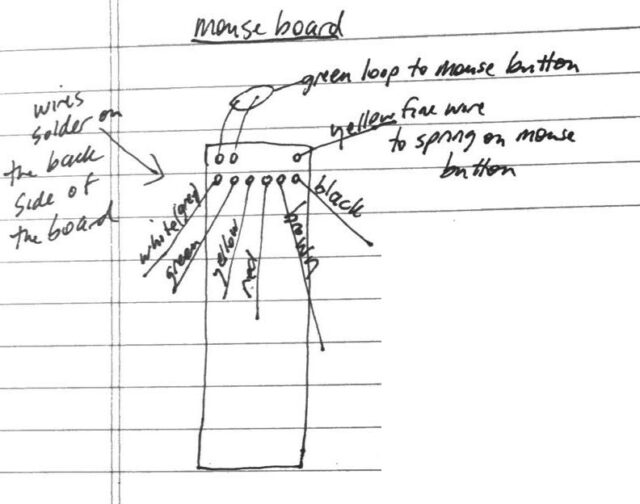
Step 8: Map out the wiring connections.
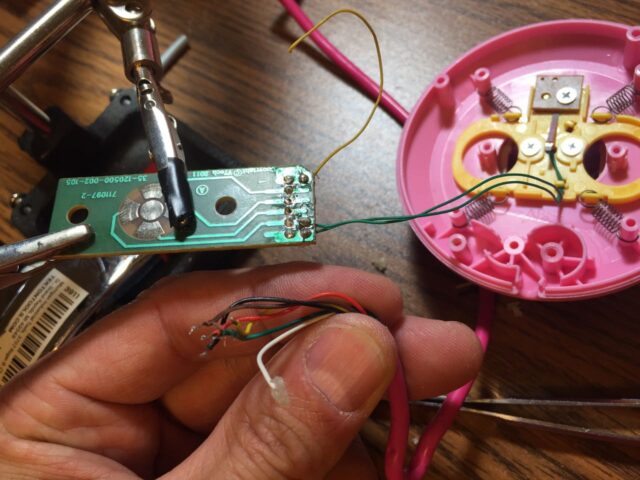
Since we are going to replace this mouse cable we need to make sure we connect the correct wires to the right pins on the boards. I took some close-ups of the connections first:

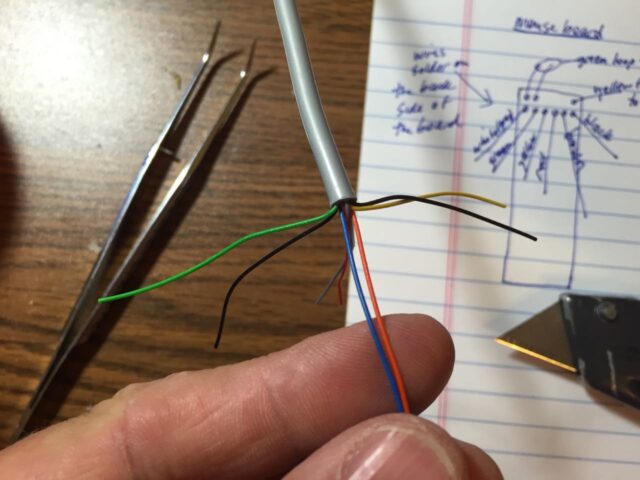
Here is my map of the wiring connections, along with the newly assigned wire colors, since my ethernet cable did not have a white wire (I substituted grey for white). Note: the Vtech mouse cable has an orange wire that I took for red when I first looked at it so I call it red throughout this article but later I realized it was actually orange.
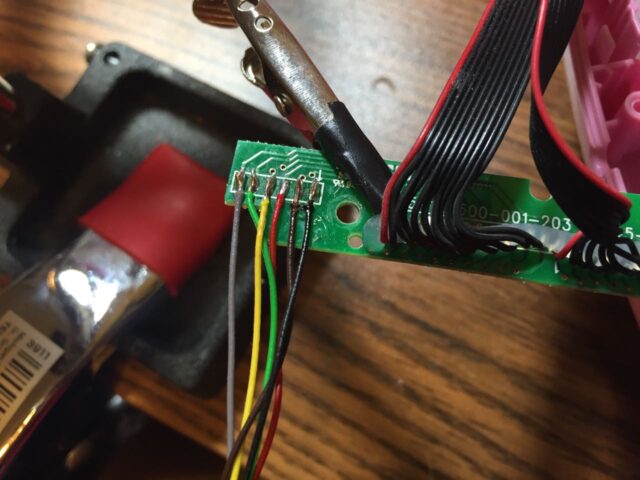
Step 9: Un-solder the mouse cable from the small laptop board.
This is a perfect time to use my extra set of hands to hold to board still while I heated up the solder joints. Here I am holding the small laptop board (the easier of the two to un-solder):

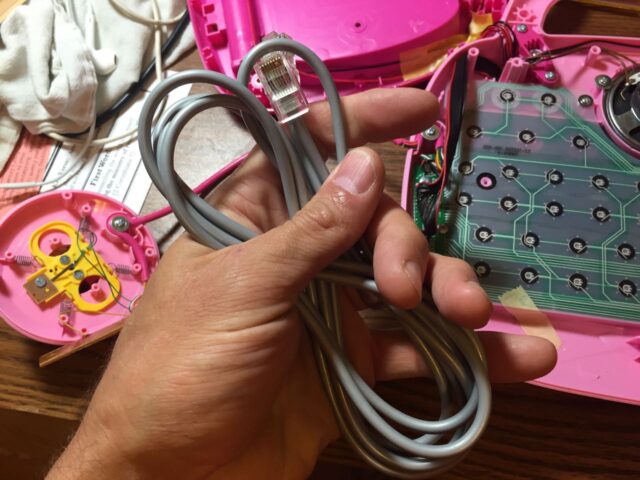
Step 10: Prep the ethernet cable for reconnection:
Clean off the outer cable so it looks like the mouse cord, I cleaned plenty off:
Strip about an eighth of an inch of insulation off the end of each wire:
Tin the ends of the conductors so they solder easier:
Step 11: Solder the new mouse cable to the laptop small board.
Be careful not to bridge between two pads on the circuit board:
Step 12: Mount the board into the laptop.
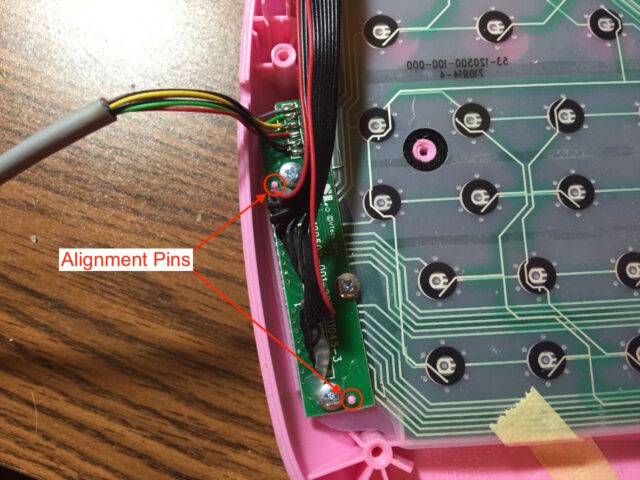
Reinstall the three screws into the circuit board. Note there are two pink pins that stick up from the plastic case that must fit into small holes in the board. These pins ensure that the board’s pads line up with the flexible circuit boards pads below and make a good connection:
Step 13: Mount the cable into the case.
Insert the mouse cable into the laptop’s channel and install the cable retention screw:
Step 14: Reinstall the lower half of the laptop case:
Install the 7 large screws around the outside and the 2 shorter screws in the middle recessed area (refer also to picture in Step 3):
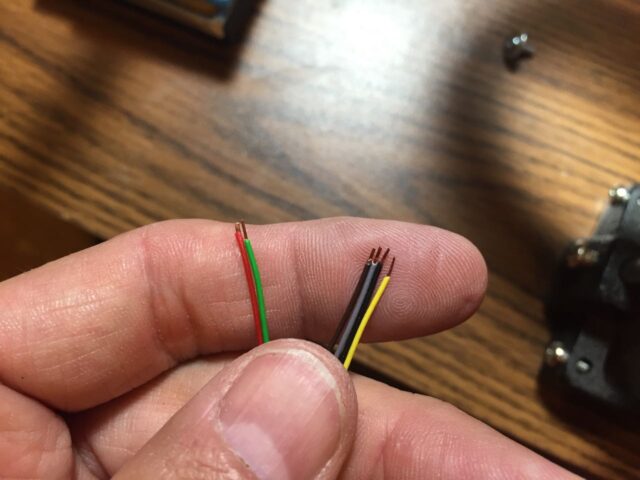
Step 15: Cut the new mouse cord to length and prepare the wire for soldering.
I ended up cutting it a little longer than the original. There may have been some child safety choking rule that determined that it needed to be so short before (or that they were just cheap):

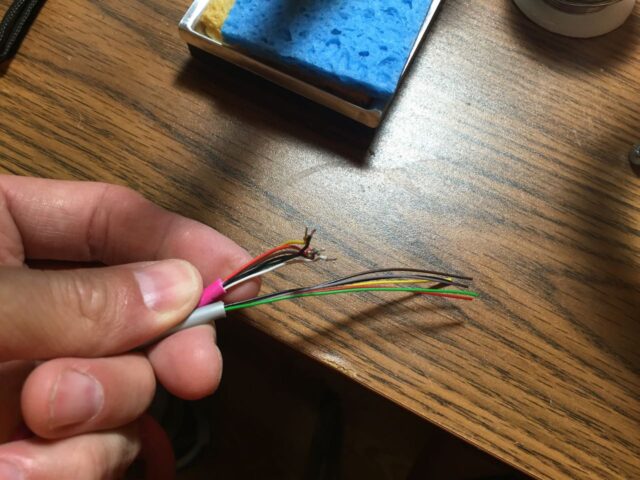
Strip off some of the outer conductor and clip off the 2 wires we are not going to use:
Strip the insulation off about 3/16″ off the end and tin the ends. Make sure you don’t have a big ball of solder on the end because we are going to need to be able to push them through the hole in the top of the circuit board:
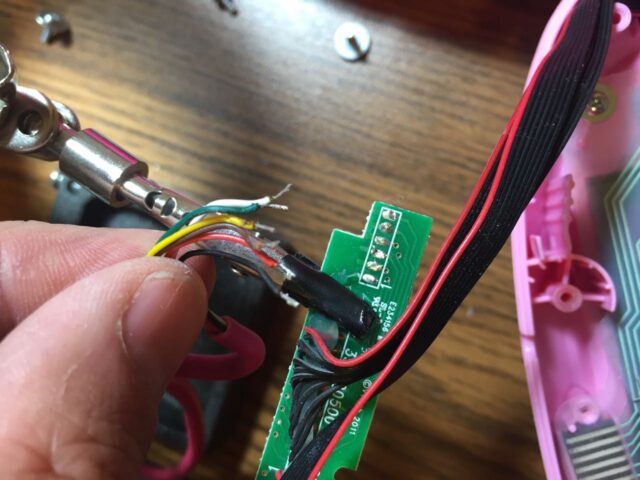
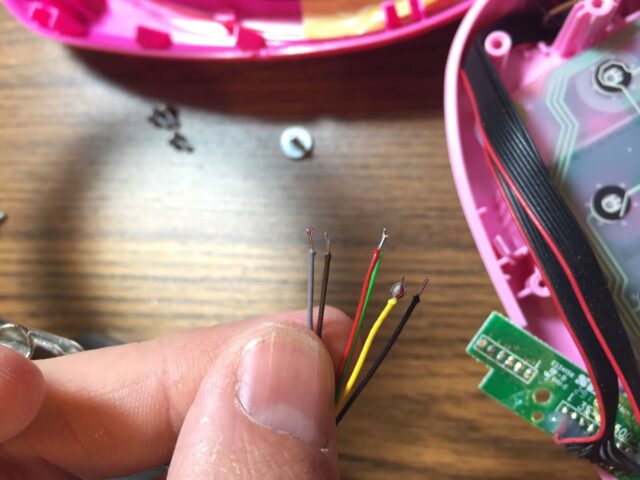
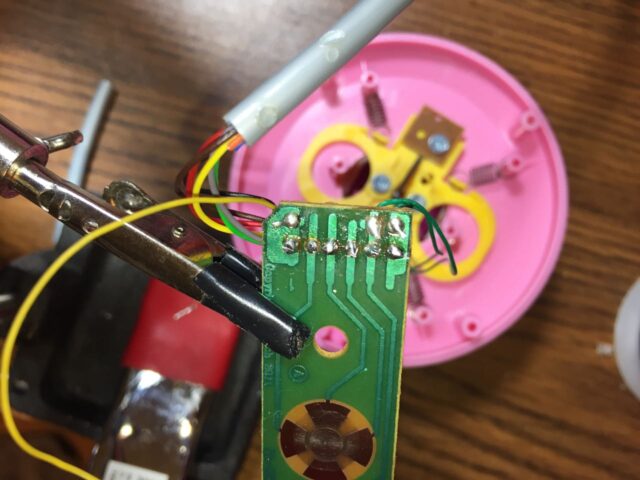
Step 16: Un-solder the old cable from the mouse board.
I held the board with my extra set of hands, solder joints up, and heated one at a time, pulling the wire out the bottom with my tweezers:
You don’t need to worry about getting all the solder off because we will heat the joint as we push the new wires through and it won’t matter. Here’s a picture of the old cable removed from the board:
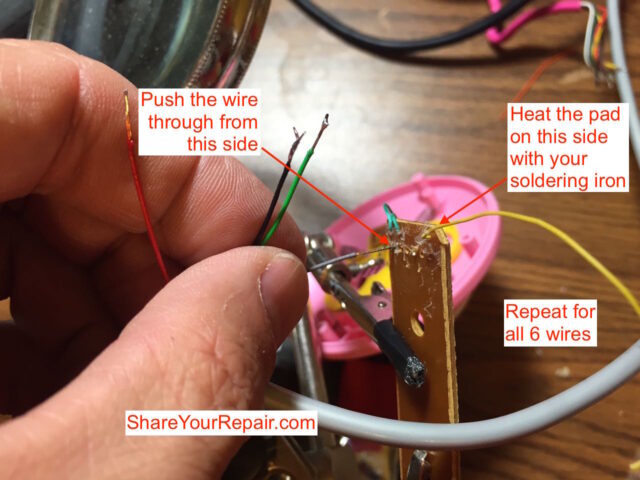
Step 17: Solder the new cable into the board.
I carefully referred to my diagram to install the new cable on the board:
Clip the board into the jaws of your extra set of hands and arrange as seen below. Push the wire through the hole while simultaneously heating up the pad on the opposite side. The wires might not immediately hold in place as there may not be enough solder. Either bend the wire over to keep it in place or add some solder:
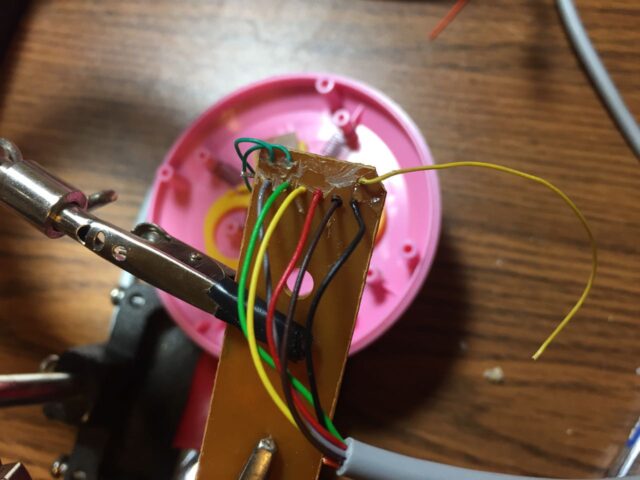
Repeat the above process for all six wires. Below you can see all the wires pushed through the board:
Carefully solder the wires in place with additional solder as needed, being careful not to bridge adjacent pads/wires:
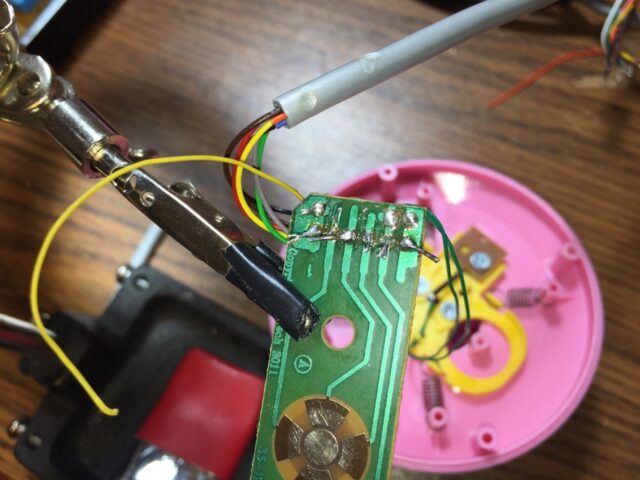
Trim the wires off neatly with flush-cut nippers:
Step 18: Install the board back into the mouse.
Reinstall the two screws:
Step 19: Repair the small mouse board.
This is only necessary if your small mouse board wire was broken off like ours was. If not you can skip to Step 20.
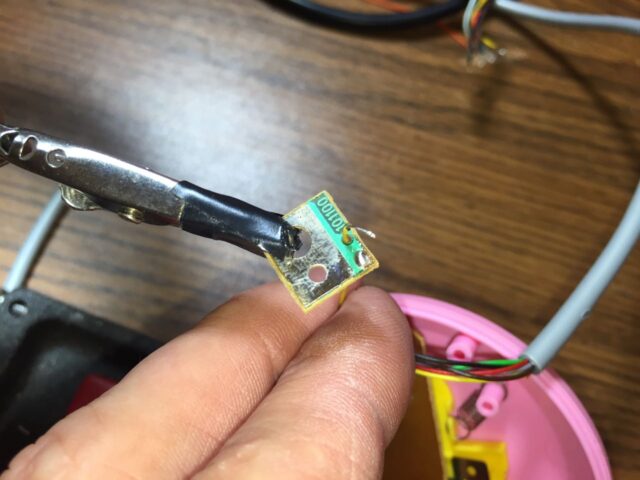
Step 19a: Remove the single screw.
Flip the board over to reveal where the wire was soldered.

Step 19b: Prep the wire and re-solder in place.
Insert the wire from the top side and solder in place:
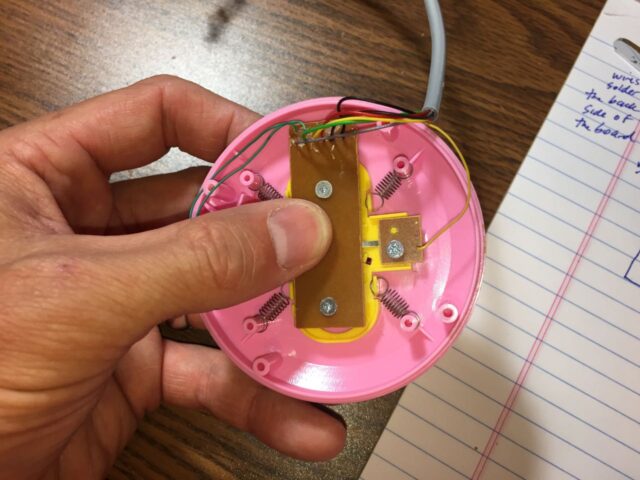
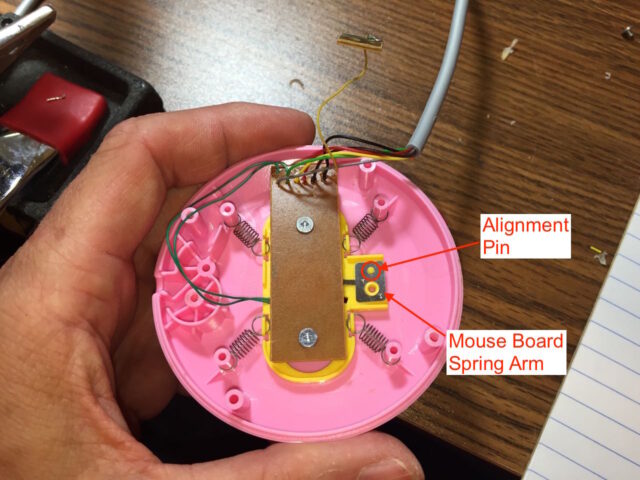
Step 19c: Reinstall the small mouse board.
make sure the hole in the metal piece is over the alignment pin that sticks out of the case:
Reinstall the single screw:
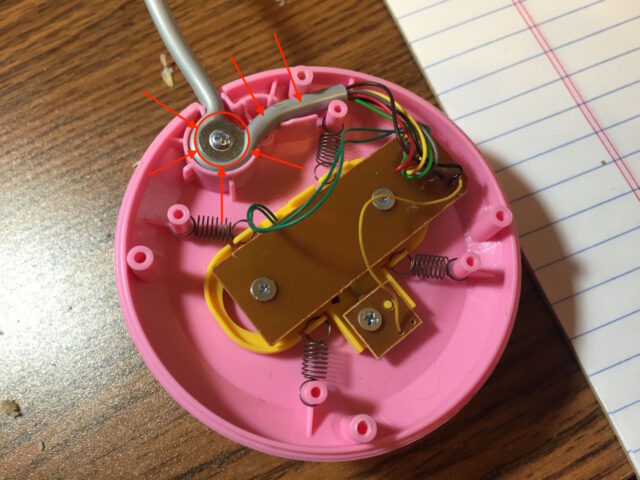
Step 20: Reinstall the mouse cord into the mouse case.
Push the cord down into the channel that makes a 270-degree arch around where the set screw holds it in place:
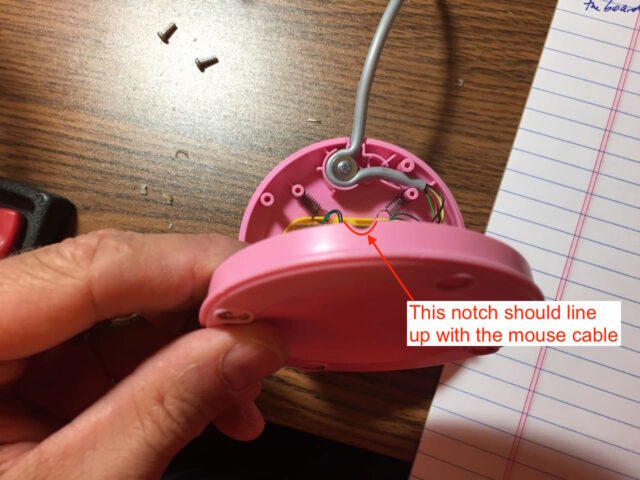
Step 21: Close up the mouse case and reinstall the two screws.
Make sure to align the notch in the lower case with the mouse cable:
Reinstall the two screws:
Step 22: Power up you newly refurbished laptop.
Reinstall the batteries and battery cover:
Enjoy what would have been thrown away:
My kids have been playing with this all day since I fixed it.
Successful with this repair? Do you have a tip to add? Please leave a comment!
I’m guessing that most people just throw away these little computers when the cords go bad. If you were able to repair your kid’s vtech laptop with this article’s help please encourage another to do the same by sharing in the comments. If you have a question or a tip please share that too.
Please note: if you do not have any approved comments on this site then your comment must be personally approved by me before it will appear. I do this to keep my site 100% free of spam comments. I read them all and almost always review and respond to all comments within a day. I look forward to hearing from you.
Amazon Associate Disclosure: As an Amazon Associate I earn from qualifying purchases. This means if you click on an affiliate link and purchase the item, I will receive an affiliate commission. The price of the item is the same whether it is an affiliate link or not. Regardless, I only recommend products or services I believe will add value to Share Your Repair readers. By using the affiliate links, you are helping support Share Your Repair, and I genuinely appreciate your support.

hi there! This was a great post! My little one’s Tote and Go works fine except the up-down, left-right cursor keys wont work. Even the mouse’s centre select button works fine. Any help would be great! Thank you! 🙂
Sounds like you are going to need to take it apart and check for disconnected wires first, and if they are disconnected you will need to solder them again. If not, you have a broken wire inside the cable. In that case you’ll need to replace the entire cable like I did.
A similar repair is possible for the Tote & Go Laptop that has the mouse cable connected to the screen. There are 7 screws to remove, all on the screen assembly. Use an awl or small screwdriver to pop out the two round pegs on the front of the hinge of the laptop, there is a screw underneath each peg. There are 5 more screws, which you cannot see because they are behind the sticker around the screen. Those 5 screws: there is one near each corner, one at top center. You can find the screws by running your finger along the sticker and feeling for the screw holes; you’ll feel a small round indentation at each screw hole. I didn’t think there was a way to peel off the sticker without destroying it, so I just made small cuts in the sticker over each screw hole so that I could unscrew the screws. That does leave little permanent holes in the sticker around the laptop screen, but they are symmetrically placed and do not look too bad in the final product. Removing the 7 screws should allow the laptop screen assembly to be taken apart without force, separating the ouside lid and the inside screen.
For what it is worth, in my case I did not need to replace the entire mouse cable. There was only one tiny black wire from the mouse cable that had broken free of the solder connection to the circuit board. When I re-soldered that black wire with a tiny drop of new solder, the mouse worked again and I then just screwed the whole lid back together and my daughter’s Tote & Go laptop worked perfectly again. Plus she enjoyed watching me fix it and learned a little about tools, soldering, and liquid vs solid phases of metal 😉
Thanks for sharing your repair Bobby–maybe someone with the alternative style laptop will come by and be helped by your insights. Good work!