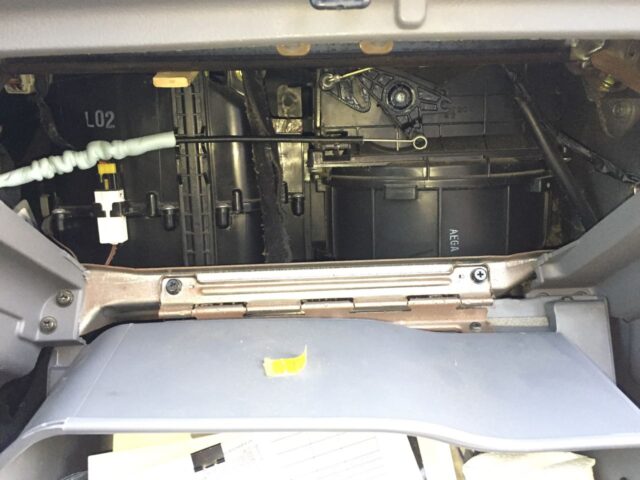
My Hyundai Accent’s fan never has blown enough air out the top vents. The AC has actually never worked since I owned it so it was only the vent that I used, but it’s always been pitiful. I finally broke down and got the AC compressor that had seized up replaced so I was really excited to have cold air–but after the repair I had nothing more that a weak cold breeze. I asked the Hyundai service guy if he thought it was enough air flow and he didn’t think it was either. I asked about an air filter and even unlatched the glove compartment to look but I didn’t see a filter–and besides, a cable runs straight across the whole area behind the glove compartment so how would you get a filter out of there? Well, now I know there’s a filter in there and I’ll show you how to change it.
Vehicle:
Parts Needed:
- Hyundai Accent Replacement Cabin Air Filter
(this filter comes in two pieces)
Tools Needed:
- None!
How to Replace Hyundai Accent Cabin Air Filter
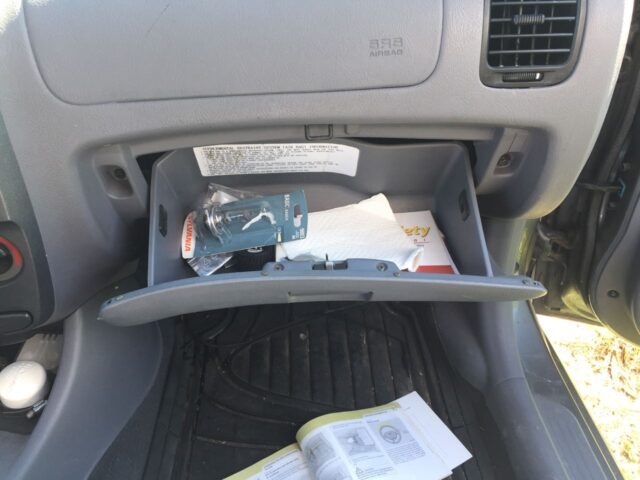
Step 1: Open the glove compartment.
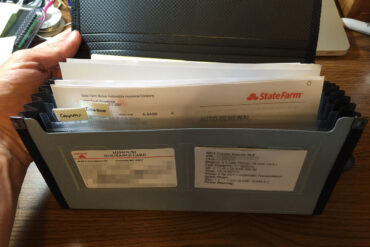
Yes, they hide the air filters in the glove compartment. No! They hide them behind the glove compartment. Now I must say that if you don’t want all the contents of your glove compartment dumped on your floor then you should carefully empty your glove compartment now.
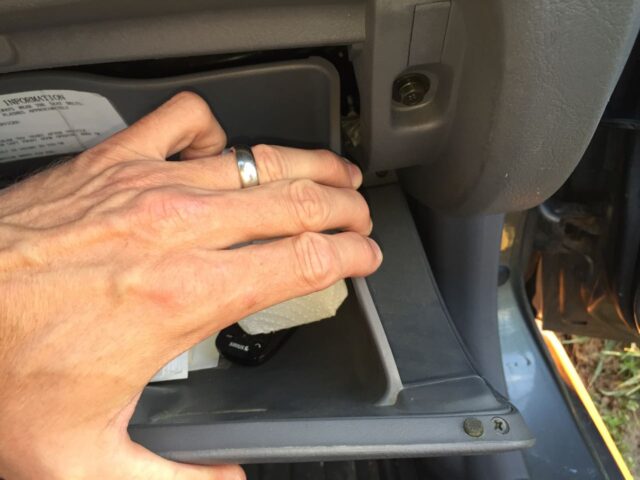
Step 2: Release the “catches” on the sides of the glove compartment box.
These catches double as the bumpers when you open the glove compartment and hit on the frame of the glove compartment when the door opens all the way. You can release them both at the same time or one at a time. If you release one at a time then you’ll need to hold that side out while you release the other side. Here I am releasing the right one:
Once you get the catch to clear the edge of the opening, position it like this and hold it in place:
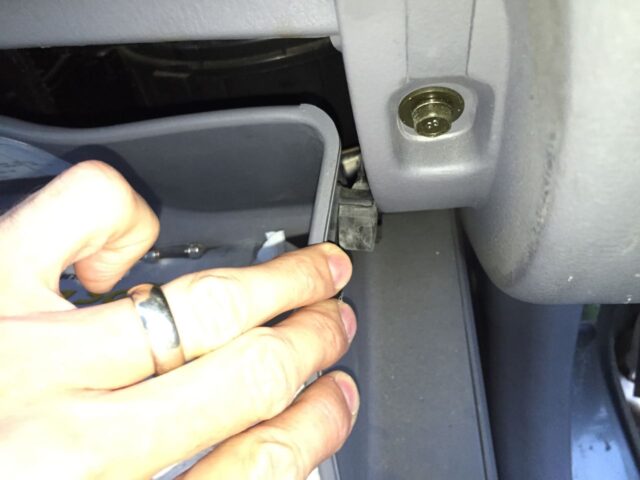
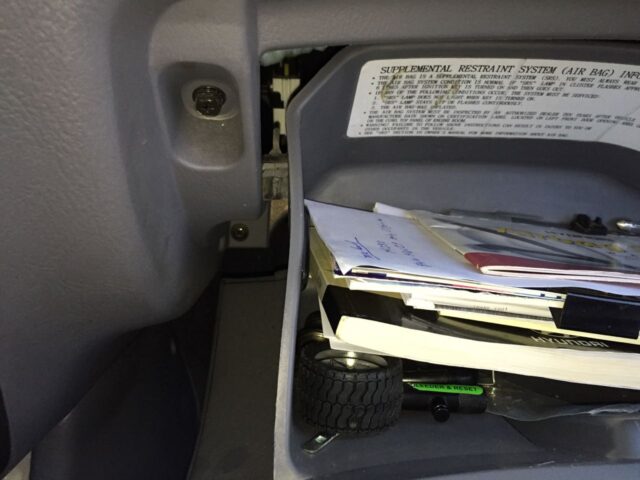
Once you have done one side, repeat on the other side and you will be able to open the glove compartment ALL the way open:
Step 3: Disconnect the fresh/outside air cable.
This was what duped me when I first looked back here–there’s a cable cutting straight across the opening?!?! I mean–how are you going to get a filter in and out of here?? Well, there is actually a way and shame on Hyundai for not explaining and/or engineering this better. The instructions in the owner’s manual are TERRIBLE:

I’ll walk you through it though…
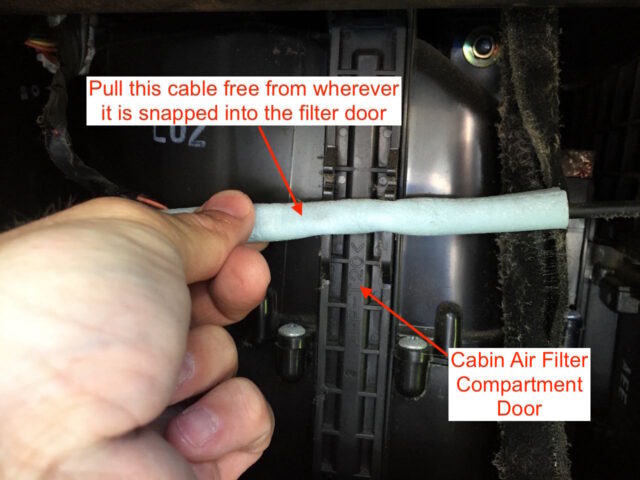
Step 3a: Release the cable from the front of the air cleaner door.
One thing to note is that piece of foam may be off to the left in your case:
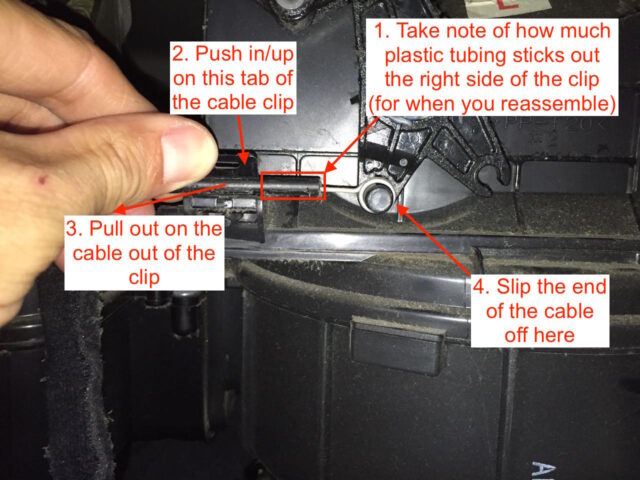
Step 3b: Release the air damper cable.
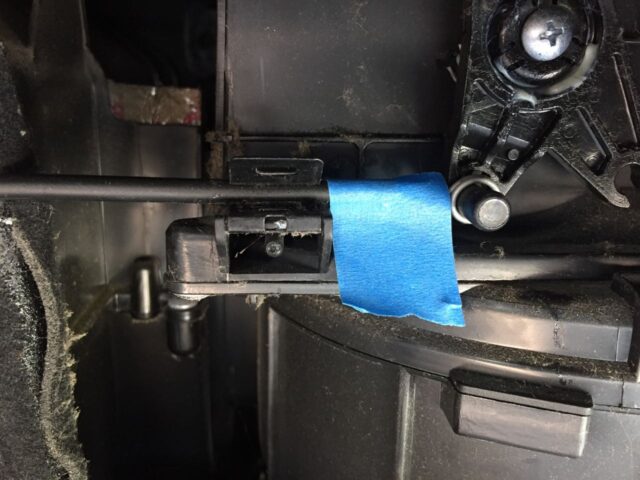
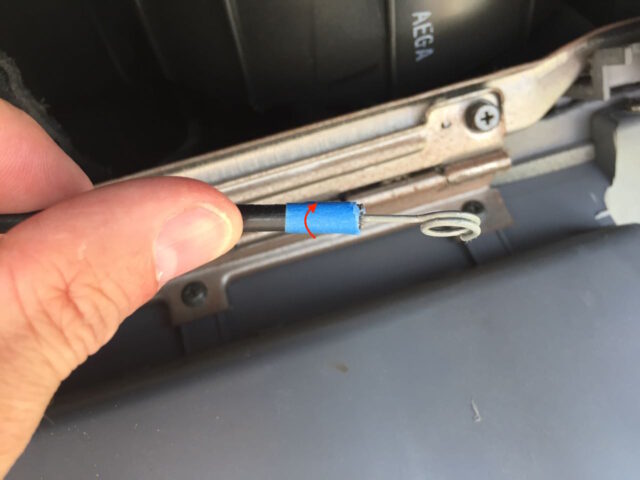
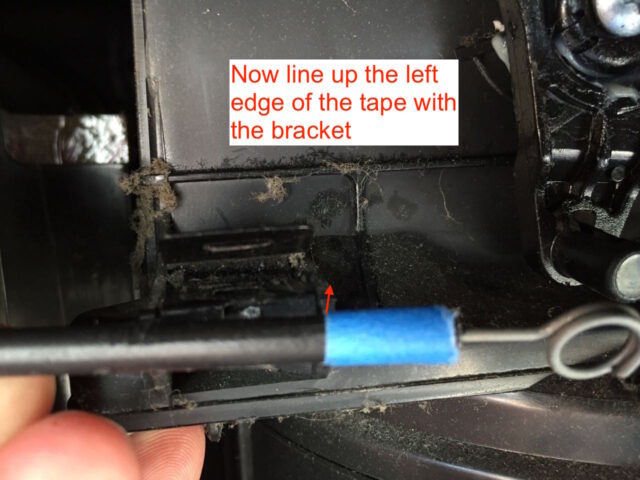
First take note of the position of the cable in the metal clip. Now that I have done this once I have a tip to make this so much easier to put back together–you can make it easy on yourself by taking my advice. If I were you I would place a piece of masking tape on the black plastic tubing to mark where the edge of the metal clip was located so you know exactly the location when you are re-assembling (and I’ve gone back and demonstrated for you):
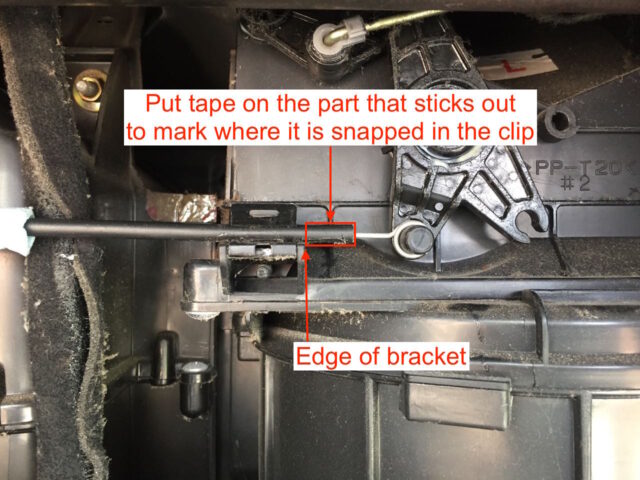
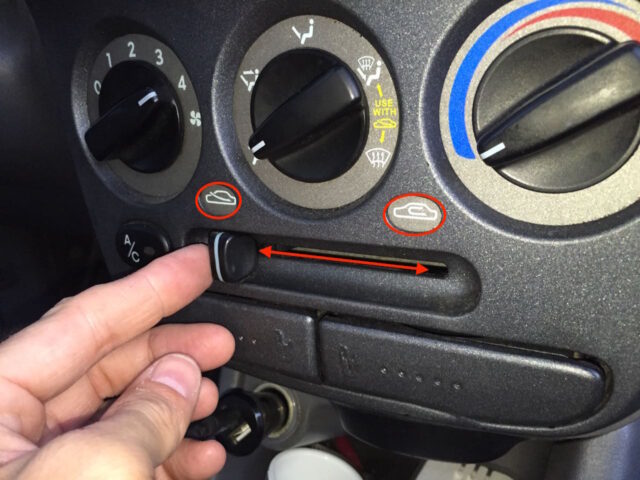
It is possible to figure out where it goes by cycling the fresh air/recycled air lever on the AC controls but it is smarter to mark it ahead of time 🙂
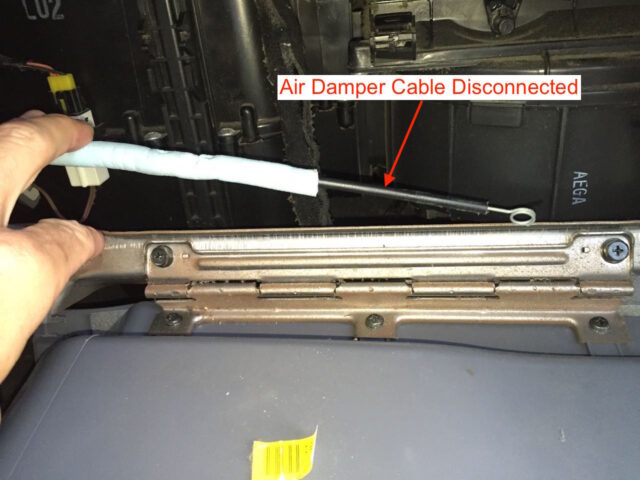
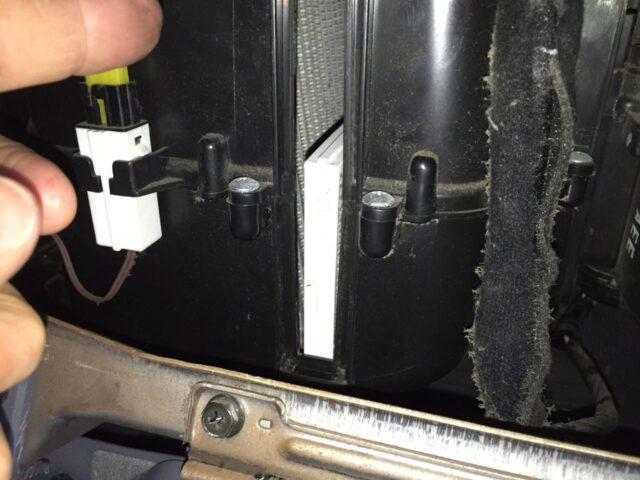
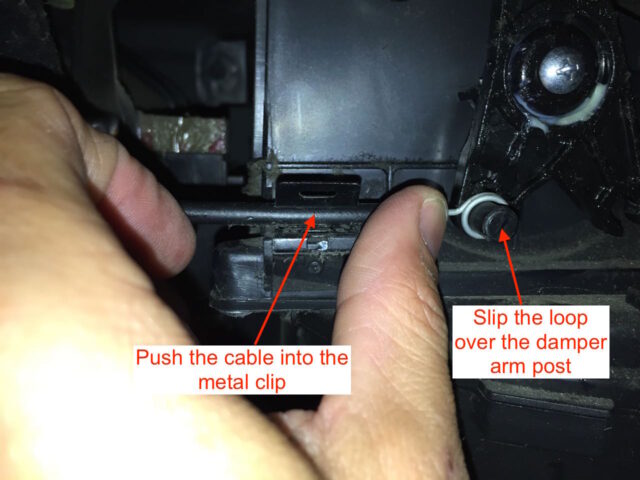
Press the metal clip open with your thumb while pulling the cable out with your fingers. Then slip the loop on the end of the cable off the post on the end of the damper arm as seen below:
Once you have removed this arm you will have a lot of room to work and get out those filters:
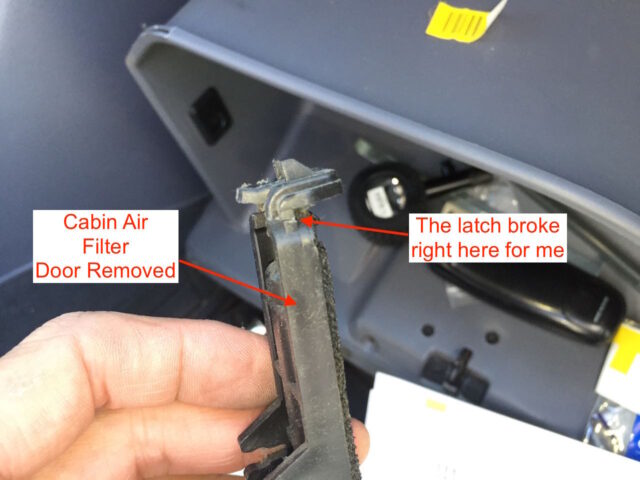
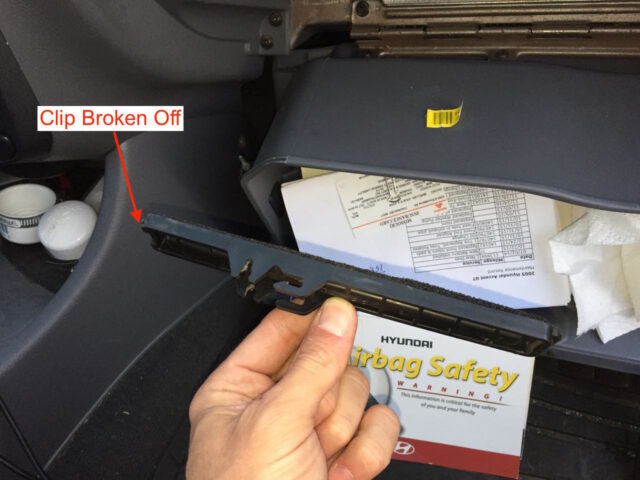
Step 4: Remove the air filter door.
I have to admit that I didn’t even read the instructions before hand and broke my door. I fixed it, well, I figured out a way to keep it shut, but let’s just all learn from me how not to do this and do it correctly. Here’s the instructions from the owner’s manual:
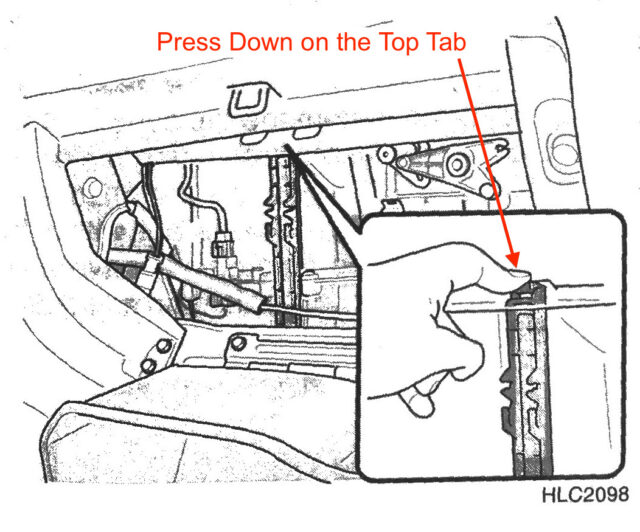
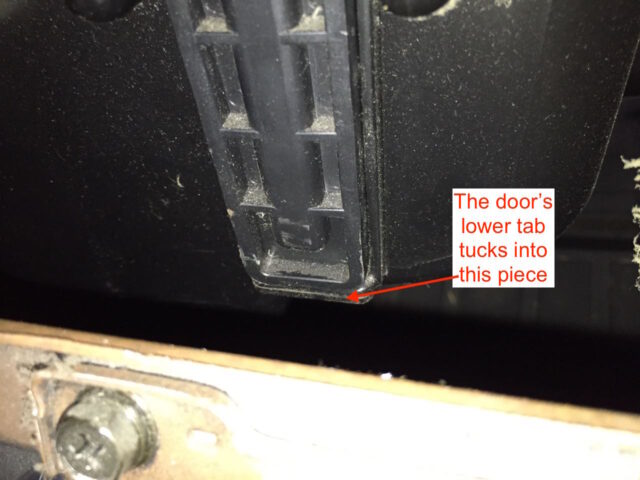
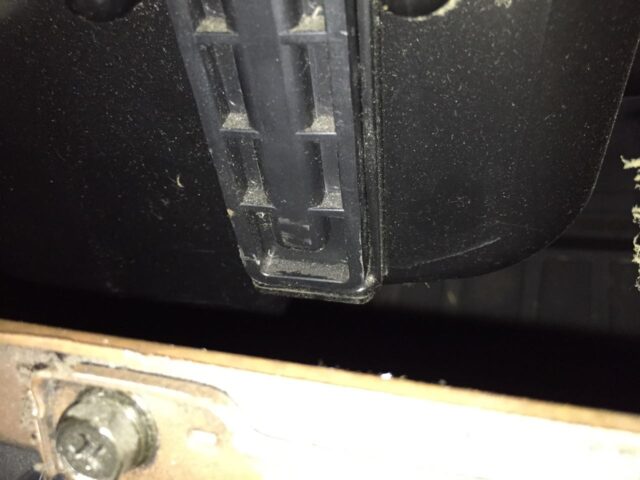
The latch is hidden up under the metal plate on top so you will have to feel up in there to find it. Press down on the tab that sticks out while pulling the top of the door towards you. The door tucks in at the bottom so once the top is free then you want to lift the door up and out of the slot it is tucked into on the bottom end. This is what the bottom end looks like:
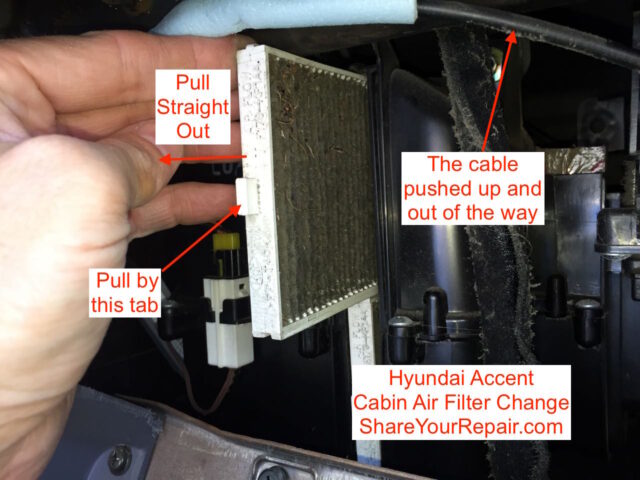
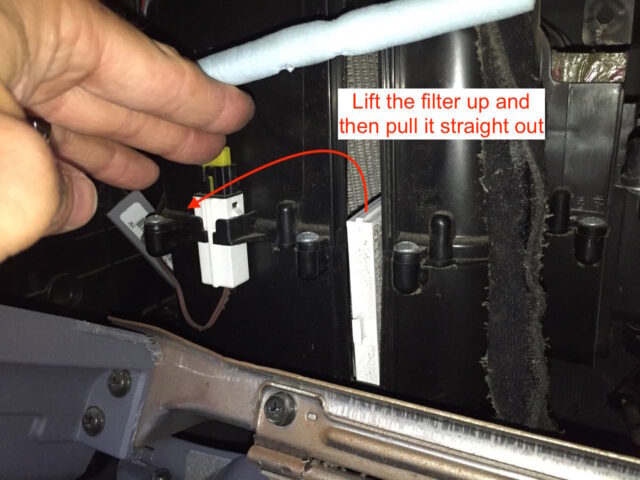
Step 5: Remove the top air filter.
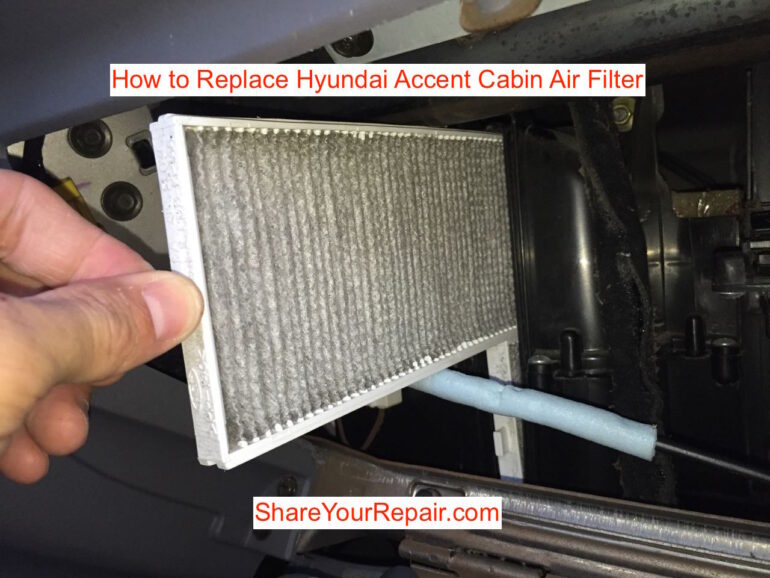
This filter is in two pieces, a top and bottom. The bottom one tucks down into a slot so it cannot be pulled straight out. There is a little tab on the front edge of the filter that you can grab a hold of. Remove the top one first, moving the cable out of the way so you can pull it straight out.
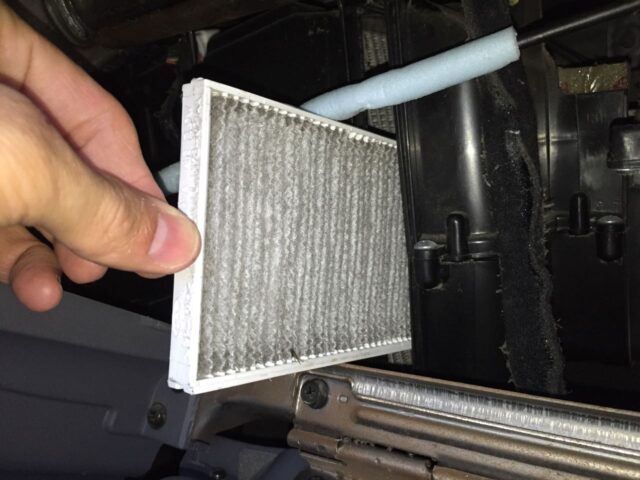
Step 6: Remove the lower air filter.
Once the top one is out you can lift up and remove the bottom filter:
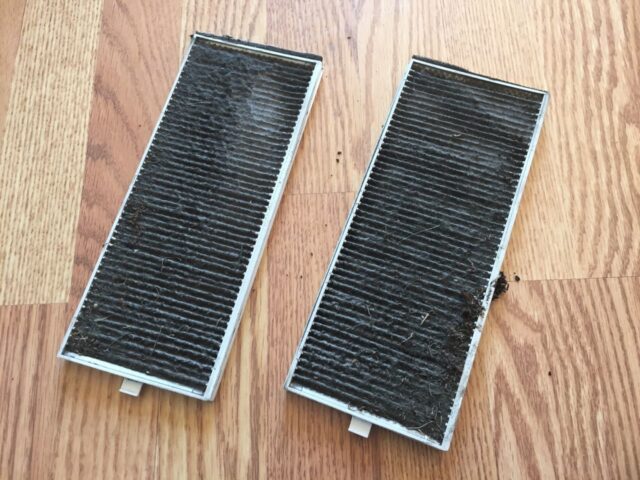
The dealership didn’t even tell me that this car had a cabin air filter when I had the AC condenser replaced and the previous owner must not have ever changed it either, it was like mud on the front:
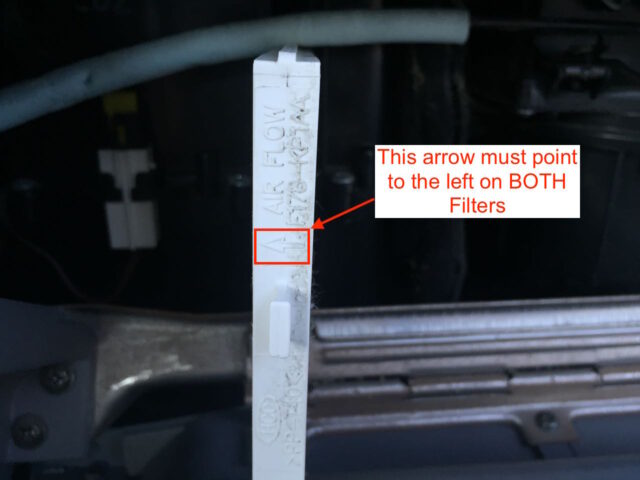
Step 6: Reinstall the lower (new) filter.
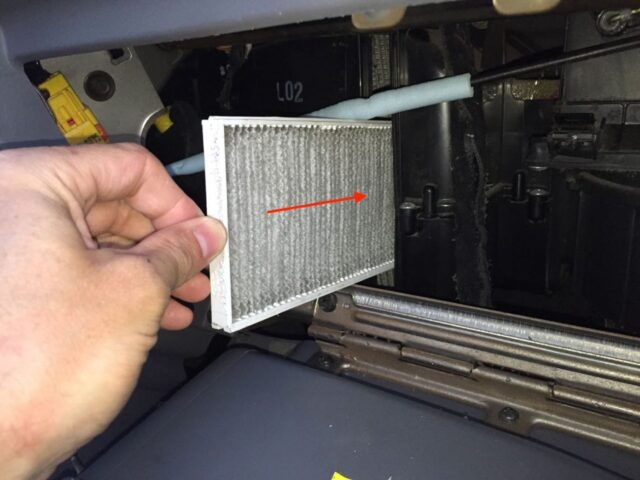
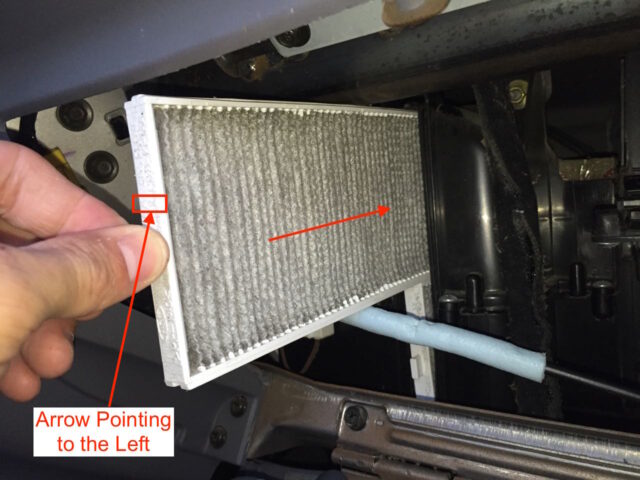
Make sure you orient the filter correctly. The direction of air flow is from right to left. There is an arrow on the outside edge that should point to the left:
Step 7: Install the upper (new) filter.
The top filter will fit tightly on top of the lower filter. If you don’t find room for the top filter, you may not have the bottom filter installed correctly. The groove in the bottom of the top filter will slide on top of the notch of the bottom filter:
The two filters should be flush on the front when they are both installed properly.
Step 8: Reinstall the filter door.
First, slip the lower end down in the retainer:
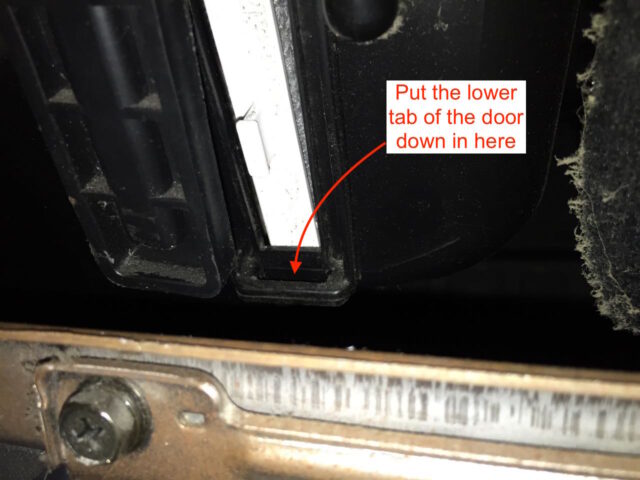
This is what it will look like installed:
Then snap the top into place. I cannot show you a picture of that but hopefully my advice and instructions saved you from making the same mistake I did!
Step 9: Reconnect the air damper cable.
Slip the loop at the end of the wire over the post on the damper arm and snap the cable into place, leaving the same amount of plastic tubing sticking out of the right side of the clip as you noted in Step 3b. If you took my advice and marked the cable location with tape it will be easy:
You can test the damper at this point and I was able to hear the damper shut as I cycled the sliding switch:
Step 10: Close the glove compartment back up.
Press in on the middle of the right side and shut the door until the rubber bumper is inside the glove compartment frame opening:
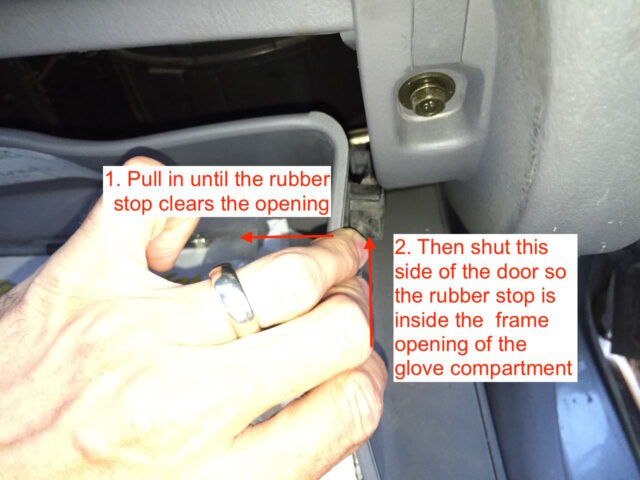
Hold the right side in this position:

Now repeat the steps on the left side:
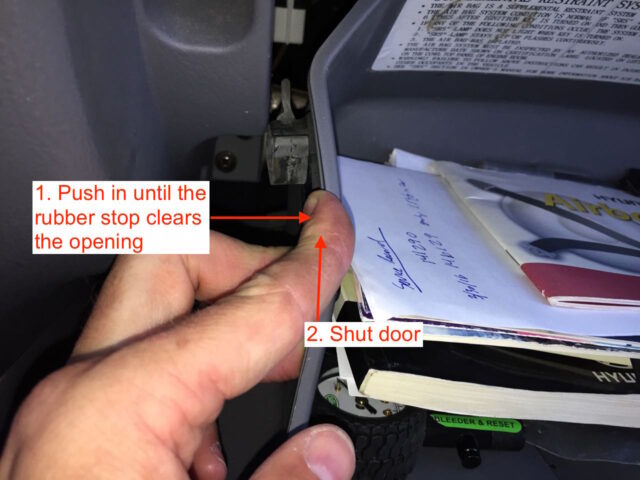
Once the left side gets wedged you can just shut the door:
Now you will have plenty of air coming out of those vents. Good job!
Successful with this repair? Do you have a tip to add? Please leave a comment!
I wonder how many people are driving around with plugged Hyundai Accent cabin air filters? If you were able to change yours will you please drop a note in the comments? If you have a tip or question please leave that too!
Please note: if you do not have any approved comments on this site then your comment must be personally approved by me before it will appear. I do this to keep my site 100% free of spam comments. I read them all and almost always review and respond to all comments within a day. I look forward to hearing from you.
Amazon Associate Disclosure: As an Amazon Associate I earn from qualifying purchases. This means if you click on an affiliate link and purchase the item, I will receive an affiliate commission. The price of the item is the same whether it is an affiliate link or not. Regardless, I only recommend products or services I believe will add value to Share Your Repair readers. By using the affiliate links, you are helping support Share Your Repair, and I genuinely appreciate your support.
hi John, thx for posting. great production and steps. talk about procedure. just bought 09 accent and replaced the filter(s) with a
hepa sys and its washable. I see why people pay to have it changed !
all i can say car engineers need to be forced to repair cars before designing them