When I installed my new programmable thermostat I could not get it to turn on the AC. I wanted to verify that the connections to the thermostat were the same as the terminals on the furnace itself. Follow along to see how I checked my thermostat wires and for some good steps for thermostat wiring troubleshooting.
Hardware:
- Honeywell RTH2300B Programmable Thermostat
- Evcon Industries (Coleman) Direct Vent Forced Air Furnace Model DGAT075BDD
- Evcon Thermostat 7670-368-A 65A-753-662
Thermostat Wiring Troubleshooting
I thought this installation would be pretty straight-forward because the wiring labels on the old thermostat matched the labels on the new thermostat. When I installed it, as detailed here, I expected it to work right away, so when it didn’t I checked the wiring.
Step 1: Double-check the original wiring connections.
I always take pictures before I take something apart and this is the wiring of the original thermostat:
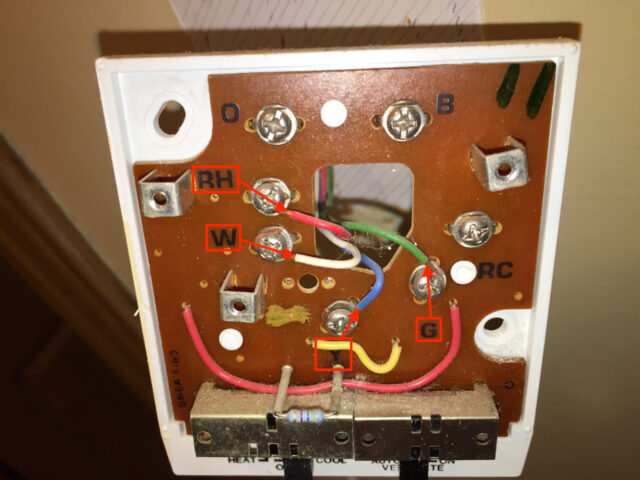
I had everything wired correctly so I wanted to trace the wires back to the thermostat and verify that the red wire was actually connected to the furnace’s RH connection, that the white wire was actually connected to the W connection, that the blue wire was connected to the Y connection, and the green wire is connected to the G connection.
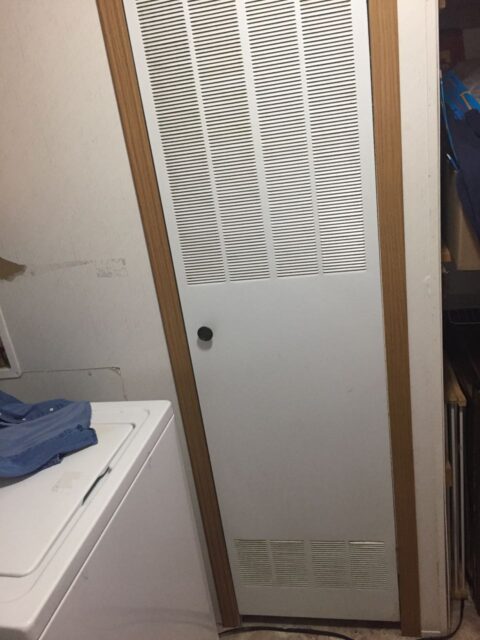
Step 2: Locate your furnace.
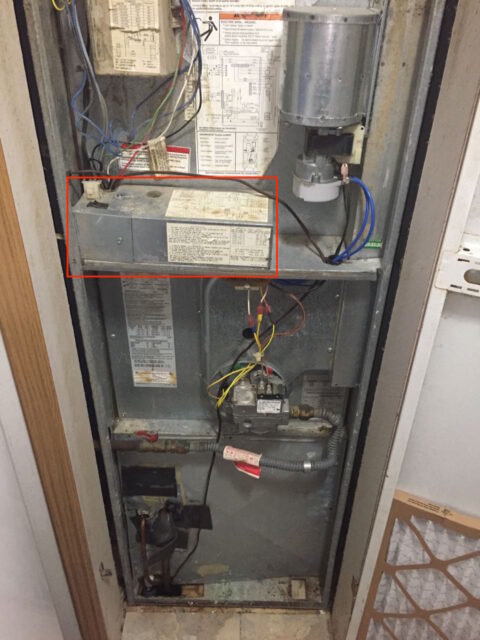
This manufactured home has a mobile-home type furnace that is located off the kitchen and has a metal door:
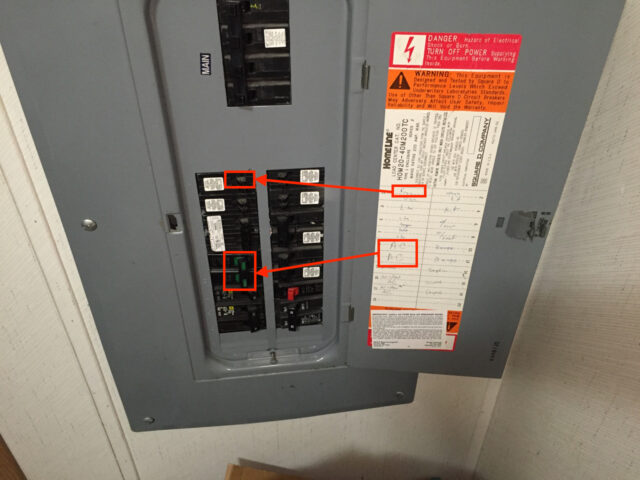
Step 2: Shut off power to the furnace.
Caution: It is not recommended that you go any further without turning off the electricity to the furnace. Turn off power to the furnace at the circuit breaker:
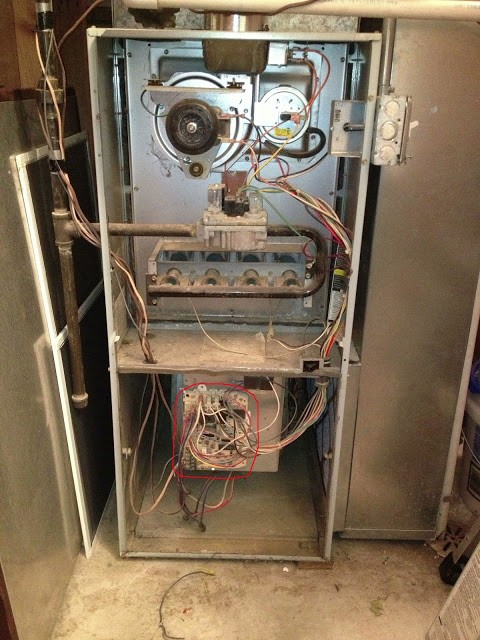
Step 3: Find the location of the control board in the furnace.
When you open the door, you can see where the control board is located based on where many of the wires converge:
I wrote another article on running an extra wire for thermostats that require power (or the “C” wire), which you can read here, and it shows you another furnace configuration:
Step 4: Remove the cover from the control board.
There is a small panel with one screw on the front left and one screw on the top left:
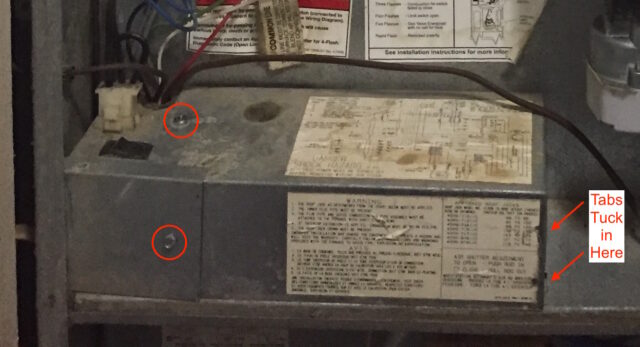
Once you remove the two screws, the cover tucks into the furnace in two places as seen on the right of the picture above. Careful lift up on the left side and untuck the tabs and remove the cover to expose the furnace electronics:
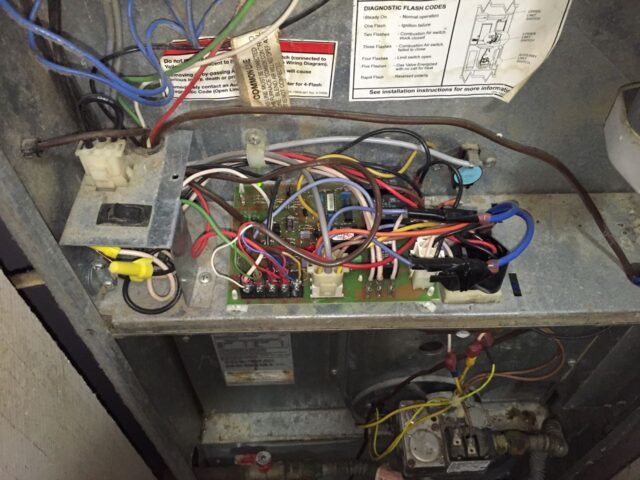
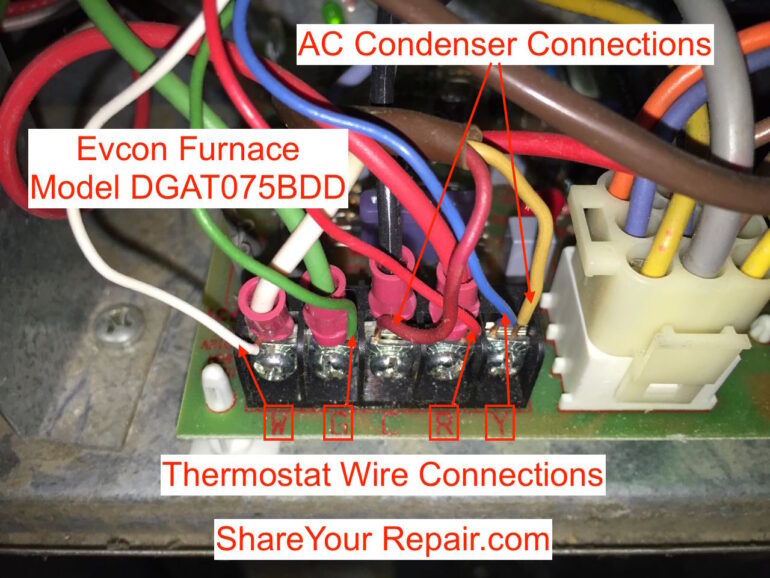
Step 5: Locate the thermostat terminals on the lower left:

The W to white wire, G to green wire, R to red wire, and Y to blue wire matches the connections on the thermostat, so we have that correct. So, it turns out that the wiring wasn’t the issue.
Step 6: Check the thermostat wires for an open circuit.
I didn’t perform this step because my old thermostat still worked so I felt like there wasn’t anything wrong with the wiring. But if you thought you had a broken wire you could check your thermostat wires for an open circuit by first carefully noting what color wires connected to what terminals at the furnace and then disconnecting them all. Then twist two wires together and then check the resistance of that “loop” from the other end. If one of the wires is broken you will measure infinite resistance. To narrow down which of the two wires is actually the open circuit you can switch the pair of wires you are checking and then if it shows a closed circuit you know it was the other wire.
Step 7: The conclusion.
I ended up sending the thermostat back after consulting an HVAC technician and feeling like my wiring was correct and thinking that the thermostat was bad. This thermostat also had dust behind the LCD display, which made me want to send it back anyway. When the second one came it had dust behind the LCD too but when I hooked it up, I learned that you need to give it more time while “Cool” flashes before the furnace actually kicks on. Well, you learn something every day and it wasn’t all lost since I can share what I learned with all of you.
Did this help you fix your furnace? Do you have a tip to add? Please leave a comment!
Please help the Share Your Repair community by adding your insight and tips. Did this help you do something you didn’t think you could do on your own? Please leave an encouraging comment to others that they can repair their home with a little help. Also, if you have any questions, please post them in the comments and I’ll do my best to get right back with you.
Please note: if you do not have any approved comments on this site then your comment must be personally approved by me before it will appear. I do this to keep my site 100% free of spam comments. I read them all and almost always review and respond to all comments within a day. I look forward to hearing from you.
Amazon Associate Disclosure: As an Amazon Associate I earn from qualifying purchases. This means if you click on an affiliate link and purchase the item, I will receive an affiliate commission. The price of the item is the same whether it is an affiliate link or not. Regardless, I only recommend products or services I believe will add value to Share Your Repair readers. By using the affiliate links, you are helping support Share Your Repair, and I genuinely appreciate your support.
I installed 2 wires of rth2300 to a camper.
There are two wires, white and red.
Voltage is 12v.
The gas FF heater operates according to the settings, but the display backlight does not light up.
Please tell me how to turn on the backlight.
That is way outside the scope of this repair, I don’t know anything about your camper installation, sorry.
I am curious if you can help me decipher the heater you have listed above, I’m having heater problems (mine looks very similar to the top photo) What exactly does the black switch by the control box do, obviously runs some sort of fan or blower? Helpp
Thanks for the question. Let me know if this helps… There are two black switches on our furnace. The top one, facing out, on the box entitled “Standard Blend Air II,” is a three-way-switch. It is an air ventilation control box. If switched to the left it puts the furnace ventilation in auto mode, in the middle it is on fresh air only, and when switched to the right it is off. There is a table on a sticker that shows what the furnace does in each mode under different conditions. The other black switch on the top of the lower box is the main system switch to turn off the furnace. On the left side it is printed into the metal “OFF.”
On the top of the lower box is a little viewing window. That window is there so you can read the error code on the furnace motherboard. If that light in there is flashing you can count how many consecutive times it flashes and then look up that code on the table to determine what is wrong with your furnace. Let me know if any of this helps.
