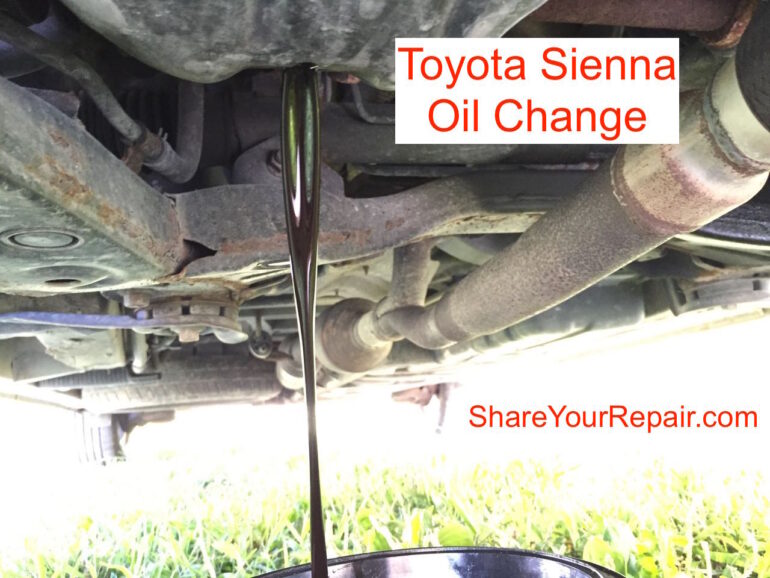
Changing your Toyota Sienna’s oil and filter is something you can easily do with my detailed step-by-step tutorial. The time you save by doing it yourself versus driving to an oil change shop and then waiting for a half hour, will make you want to do it yourself again. We live out in the country, so driving anywhere to do it makes me want to DIY. Follow along while I walk you through all the steps in detail on the Toyota Sienna oil change…
Automobile:
- 2004-2010 Toyota Sienna with 3.3L Engine (note: this article does not apply to the 3.5L engine as it has a different type of oil filter)
Tools Needed:
- Oil Filter Wrench
- 14mm socket and ratchet for oil plug (get this and much more in a 210-Piece Stanley Tool Set
)
- Oil Drain and Storage Pan
- Pair of Vehicle Ramps
- Funnel
- Oil Filter Wrench (make sure to get one that is hinged–it is so much easier to use)
- Large sheet of cardboard (it is a lot more comfortable to lay on cardboard than concrete)
Parts Needed:
- 5 Quarts of SAE 5W-30 Oil
- Toyota Sienna 3.3L Engine Oil Filter
- Gojo Hand Cleaner (this stuff is GREAT at removing grease and oil from your hands)
Toyota Sienna Oil Change
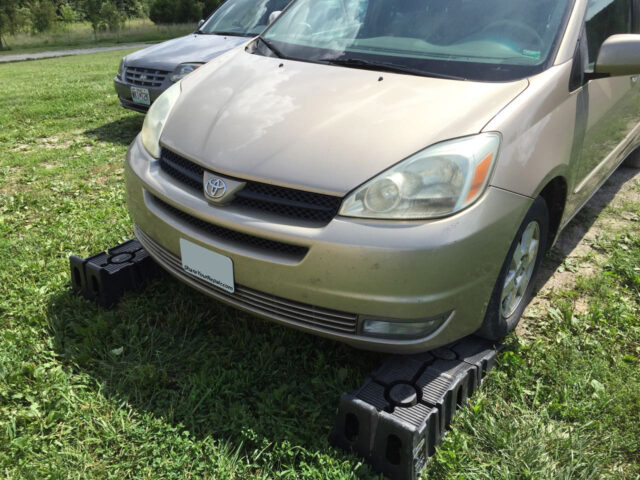
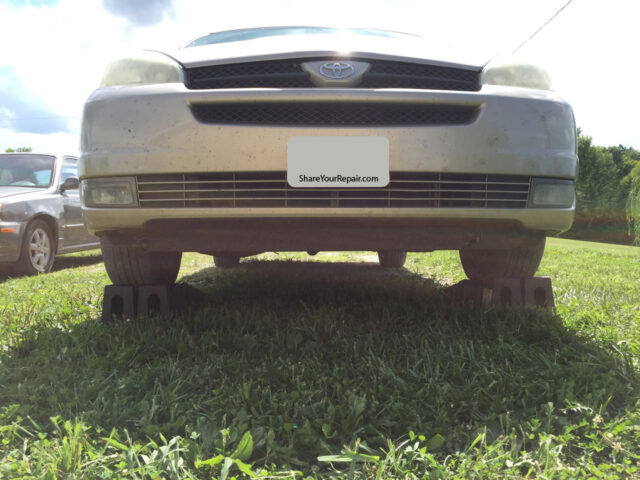
Step 1: Drive your Sienna up on ramps.
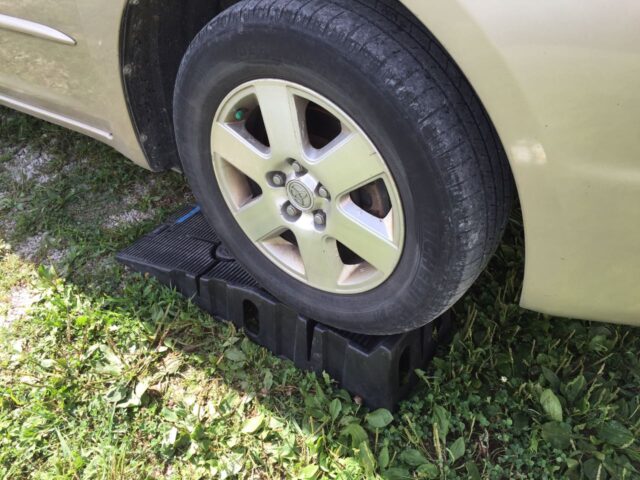
With your wheels straight, wedge the ramps up under your front tires. Make sure the tire is centered on the ramp and that the ramp is aligned with the direction the wheel is pointing. Note: if you try turning your wheels while pulling up on the ramps, the ramp will turn with the wheel, so you must get them straight to start out.
Caution: I would not do this in the middle of your yard on grass–your ramps may sink into the soil. I’m doing it on the edge of our driveway which is crushed rock (but weeds are growing up in it). Also you want to be on a level surface. Ideally you want to be on level concrete.
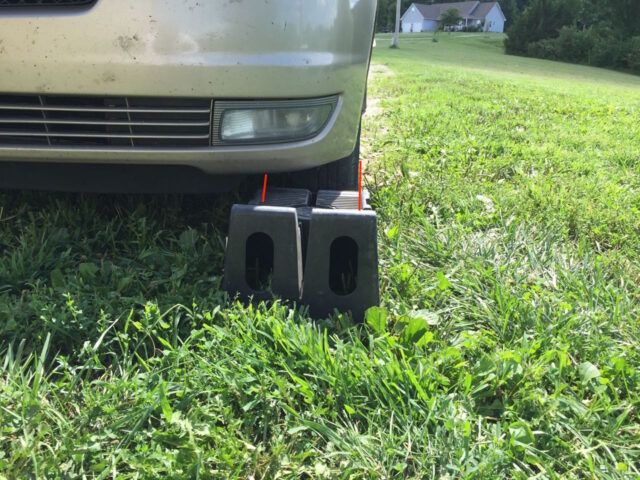
There are ridges on the outside edges of these ramps that your tire should be inside, marked with red lines below:
When driving the van up on the ramps, roll down your window and look out so you can see where you are on the ramp and know when to stop.
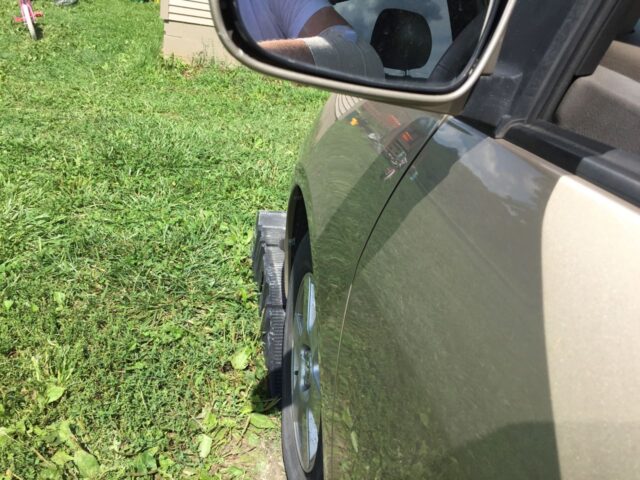
I put one foot on the gas and one on the break so that I can stop right when I want to. Put the van in neutral for a second and take your foot off the brake so you know you aren’t pushing against the stop at the end of the ramp. This is what you should have on each side:
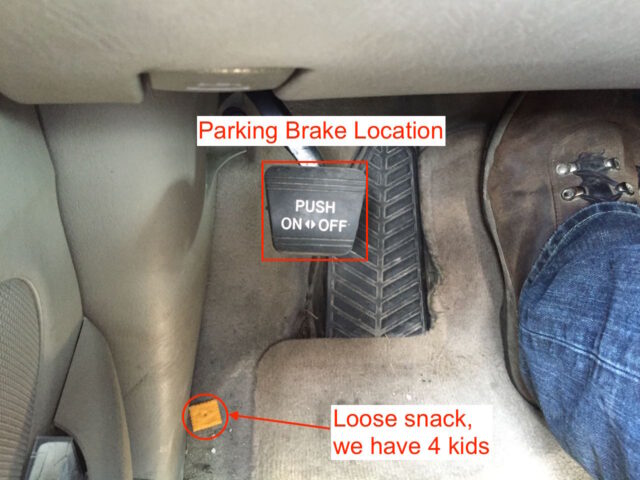
Step 2: Set the parking brake.
With the van in park, set your parking brake.
Step 3: Put the hood up.
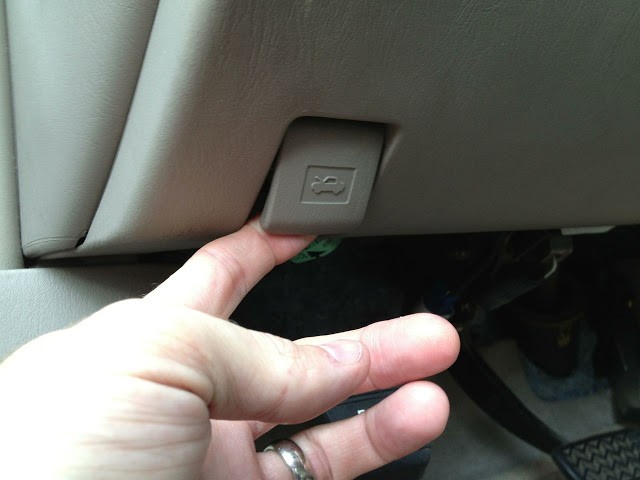
Step 3a: Pop the hood.
You pop the hood by pulling out the lower edge of the hood latch, which is located right above the parking brake on the very lower edge of the dash as seen below. You know you have pulled it far enough when you hear the latch release.
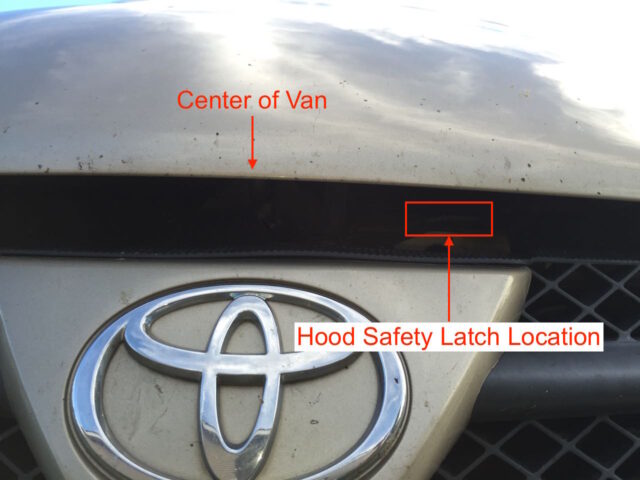
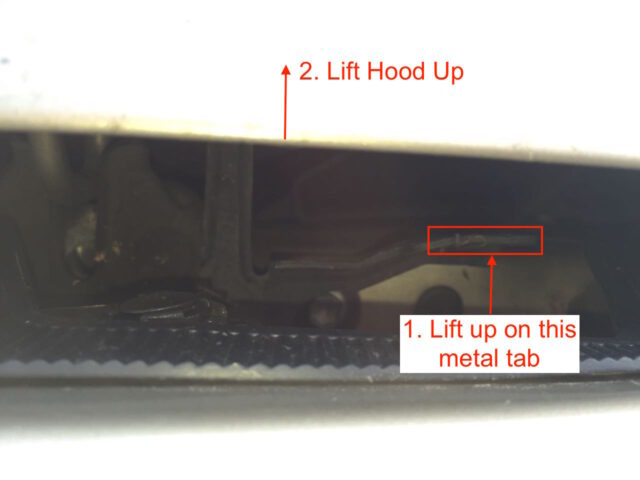
Step 3b: Release the hood safety latch and lift the hood.
Even though you pop the hood, the hood is still safety latched. This is to keep the hood from being caught by the wind if you were to pull the latch while driving down the road. The hood safety latch is located just to the right of the center in the opening that is created between the hood and the grill when you pop the hood as seen below:
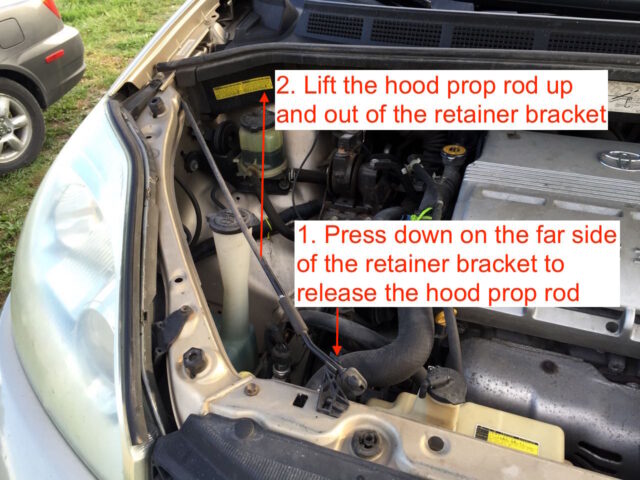
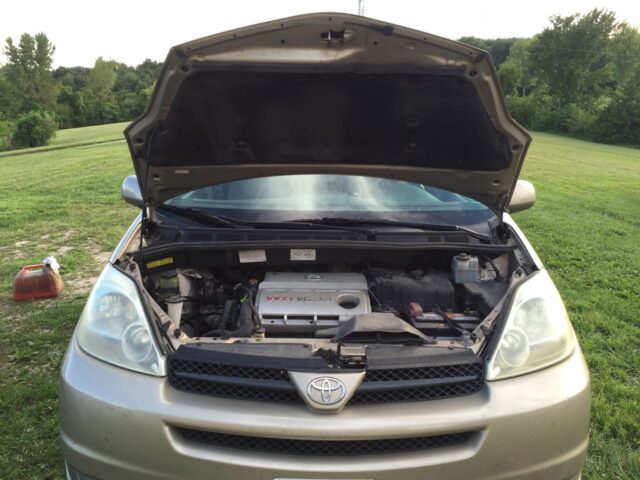
Step 3c: Secure the hood with the hood support rod.
Release the hood support rod from its storage clip and lift it up:

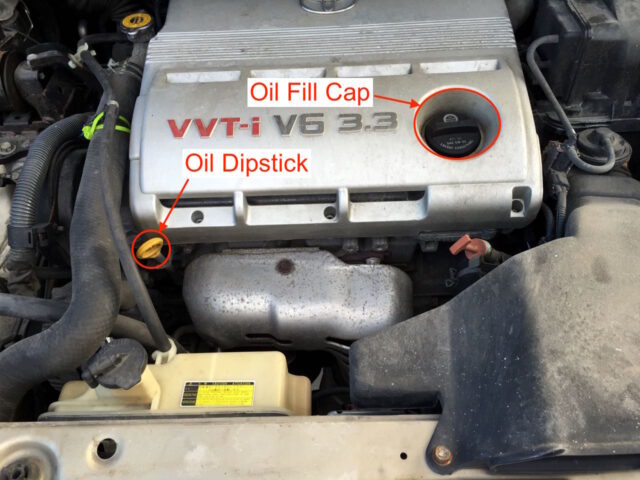
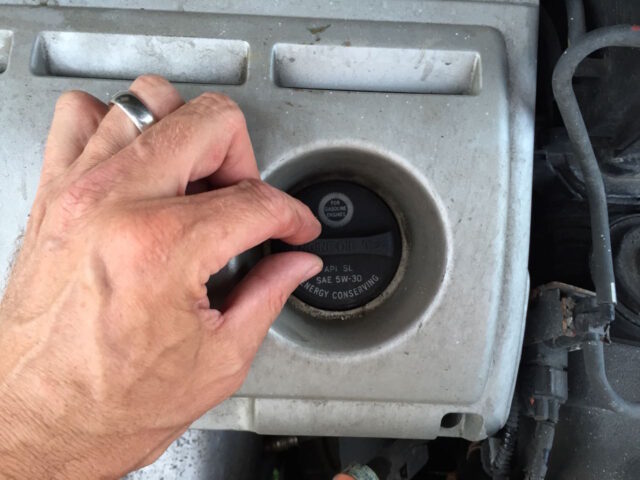
Step 4: Remove the engine oil cap and pull the dip stick.
Because we are going to drain the oil out the bottom of the engine you want to open up the top side of the oil system so it can draw air, otherwise the oil will drain out slowly and you possibly will get less of the oil to drain out. Here is the oil dip stick and oil fill cap locations:
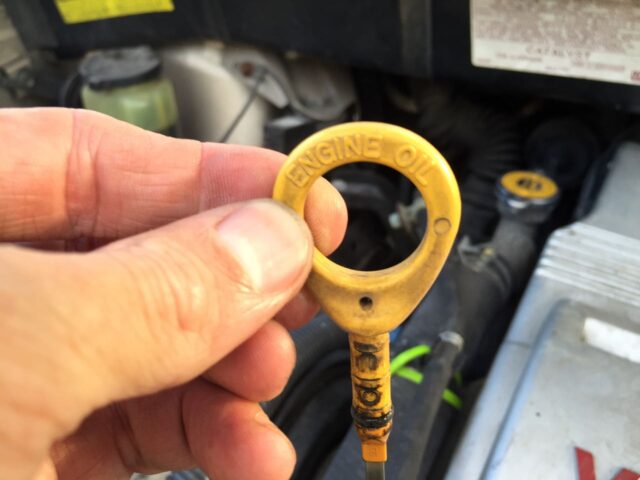
You can actually leave the dip stick in, but just pull it out a couple of inches:
Turn the oil fill cap counter-clockwise a quarter turn and then remove and set aside:

Step 5: Drain the oil.
Step 5a: Place the oil pan under the drain plug.
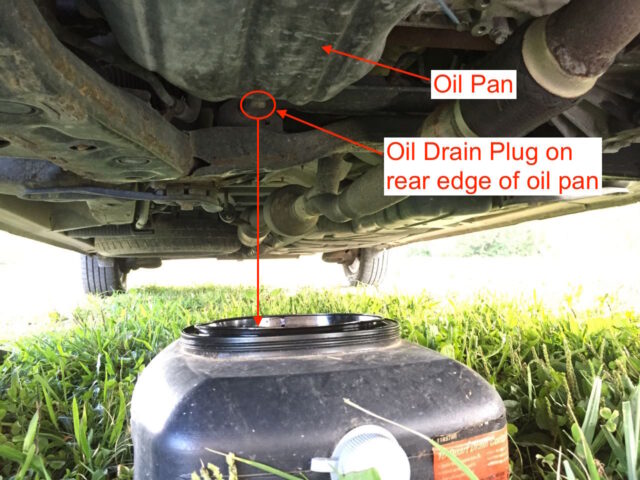
The oil plug actually is on the back edge of the oil pan and is at about a 45-degree angle.
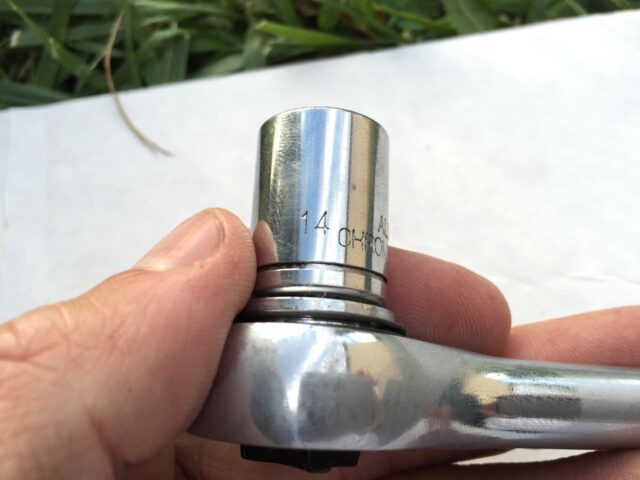
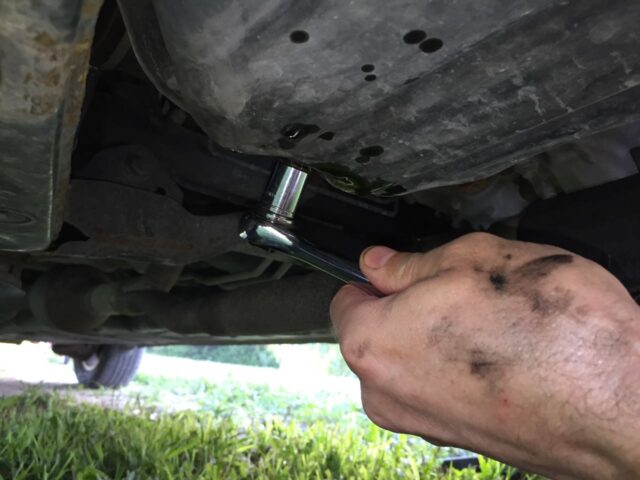
Step 5b: Remove the oil drain plug.
The drain plug takes a 14mm socket:
Here I have the wrench on the bolt:

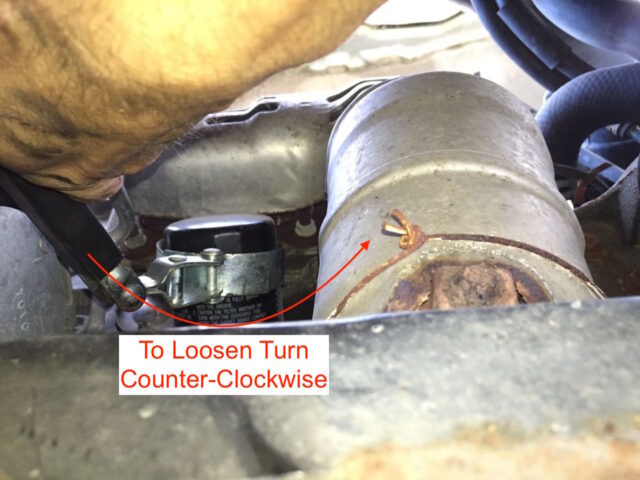
I would break the drain plug free with the wrench (which would be done by pulling the wrench towards me in the picture above–counter-clockwise as viewed from below) and then turn it by hand the rest of the way:

I unscrew the drain plug by hand slowly until it begins to leak oil and then I unscrew it the rest of the way, carefully holding it pressed up into place as seen below:
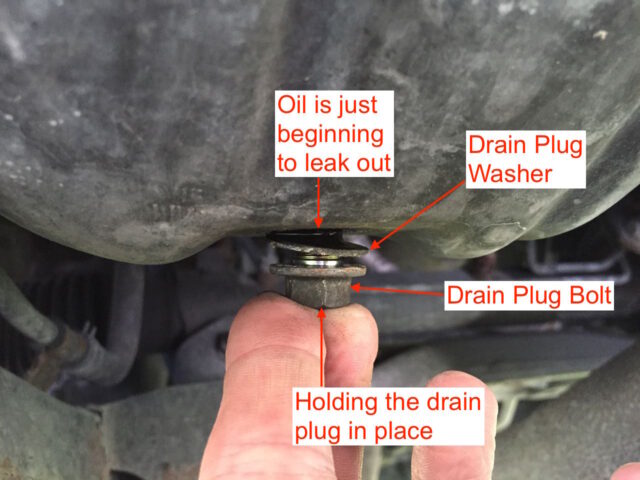
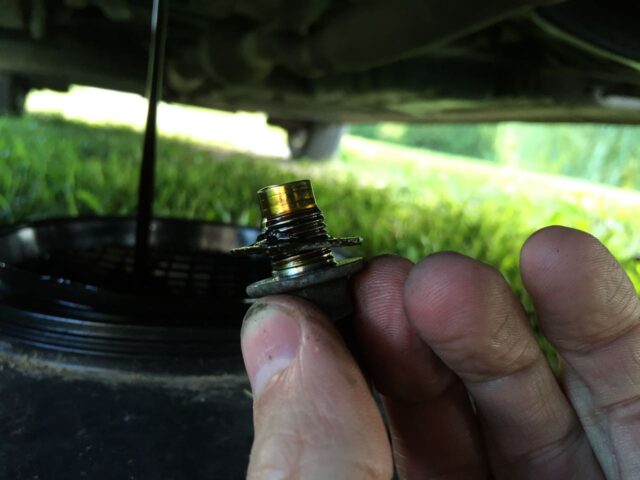
I then get a hold of the plug and pull it out and hang on to it because I’m going to reuse it. You want to make sure to keep track of the washer (and make sure it doesn’t stick on the oil pan and then fall off later):
Step 6: Remove the oil filter.
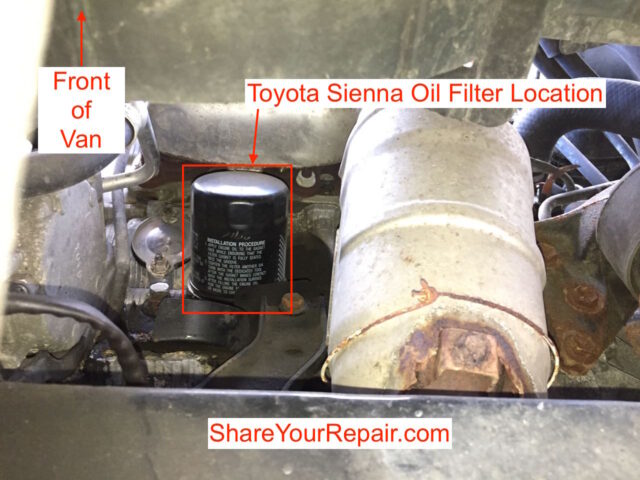
Unless you have two oil catch pans you will want to wait until the oil from the drain has stopped dripping before you move on to this step because you will need to move the oil pan over to below the oil filter location. The oil filter is located on the front side of the engine, as viewed from the underneath side:
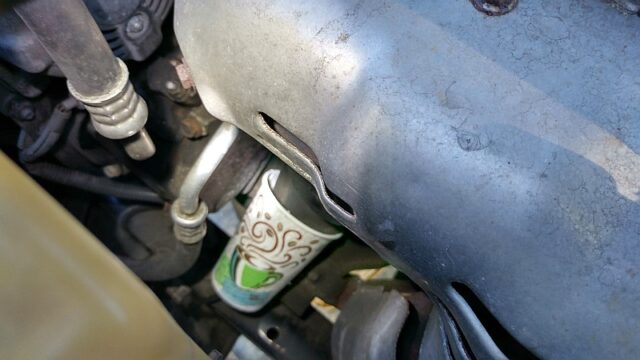
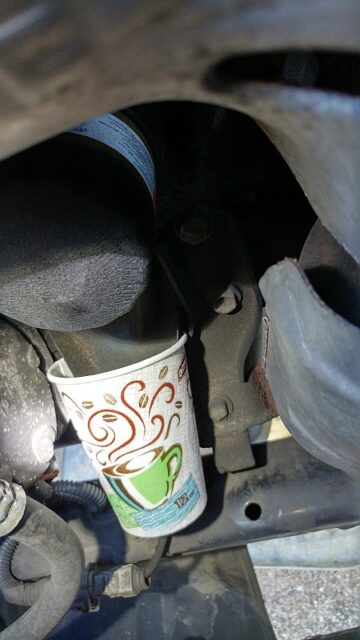
One of my readers Ed M. shared a repair tip that on his Toyota Sienna you can insert a coffee cup under the oil filter to help catch the oil (versus it running down the side of the engine). Here are two pictures demonstrating it:
I use an oil filter wrench to remove the filter:
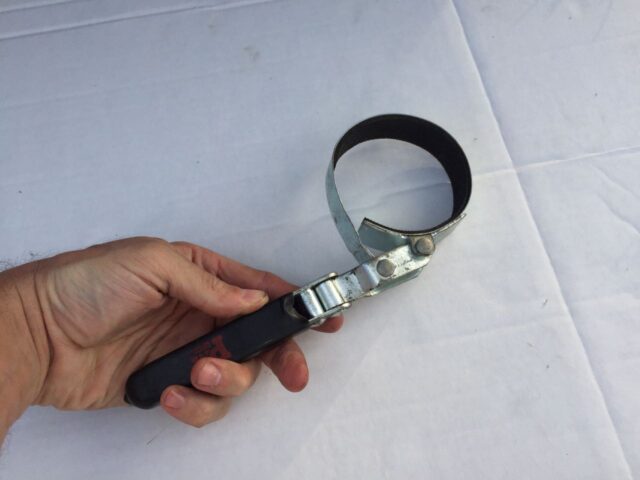
You must put the correct end of the oil filter wrench onto the filter in order to have it loosen the filter. I would put the top of the wrench onto the filter as the wrench is seen above to loosen the filter (because it tightens the band around the filter as you loosen it). You also can see how handy the hinged oil filter wrench with the location of the filter on the Sienna–it would be much more difficult to get it on there without the hinge. Below you can see the wrench on the filter:
Once you have the oil filter turning, you can loosen it the rest of the way by hand. I just set the oil filter down into the oil drain pan once I remove it. Make sure to move your oil drain pan before finishing unscrewing the oil filter.
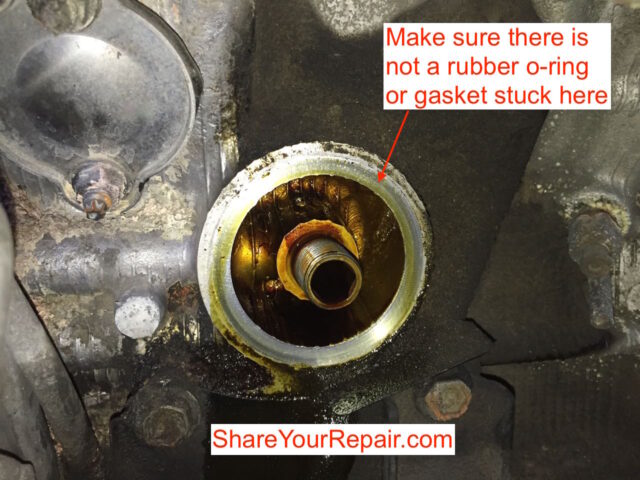
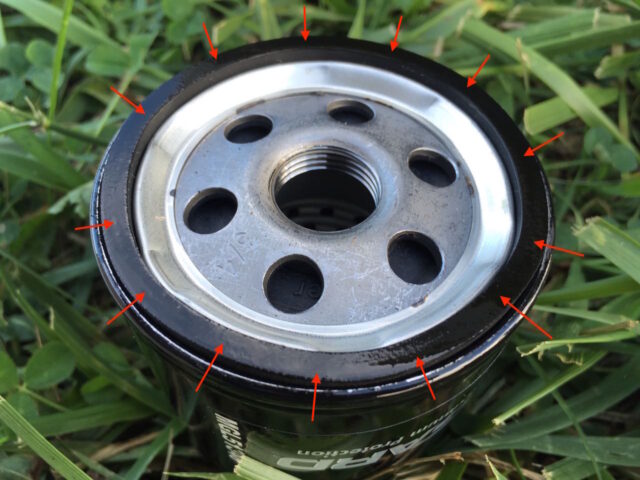
Step 7: Check that the oil filter gasket did not stick to the engine.
One disastrous thing you can run into is if the old o-ring/gasket sticks to the engine. If you install the new oil filter on top of the old gasket it can leak. It is not enough just to make sure that the gasket is on the old filter you just removed (because someone else could have left one stuck on from before). You should look at the surface where the oil filter mounts to make sure it is shiny silver and that there is not an old gasket stuck there:
It would not hurt to take a shop rag and clean off the smooth mounting surface if you think about it but I did not.
Step 8: Reinstall the oil drain plug.
Make sure the washer is on the drain plug before you reinstall it. Start the drain plug by hand to verify that you are not cross-threading it. Tighten it with the 14mm socket and wrench. I don’t torque my drain plug and it doesn’t need to be tight like your lug nuts, just snug it up.
Step 9: Install the new oil filter.
Important first step: smear a layer of oil over the entire surface area of the gasket of the new filter. This helps the gasket to seal. You can use some of the used oil:
One tip I’ve heard of is that you can pour some oil into the filter at this point. By doing this, you give the engine some oil faster than if it has to draw it up all the way from the pan. I didn’t remember to do this.
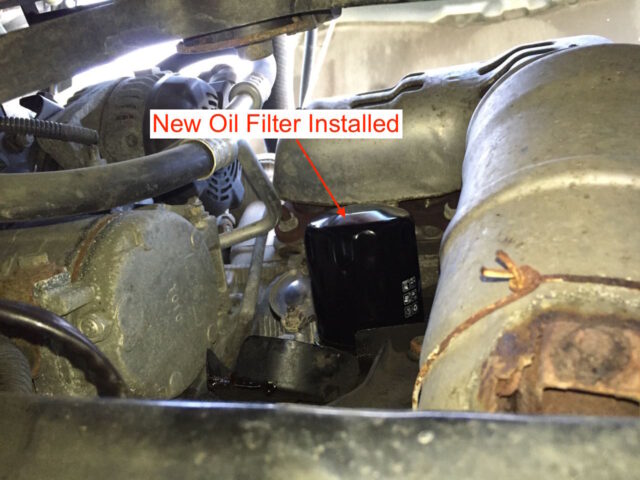
Install the new filter by hand. Once it tightens down and becomes difficult to turn, turn it another quarter turn, by hand, and that is it:
Step 10: Double Check
This would be a good time to verify that you have reinstalled the oil plug and installed the new filter. If you miss one of those, in the least you will pour out your new oil onto the ground, and at the most will drive off and damage your engine for lack of oil.
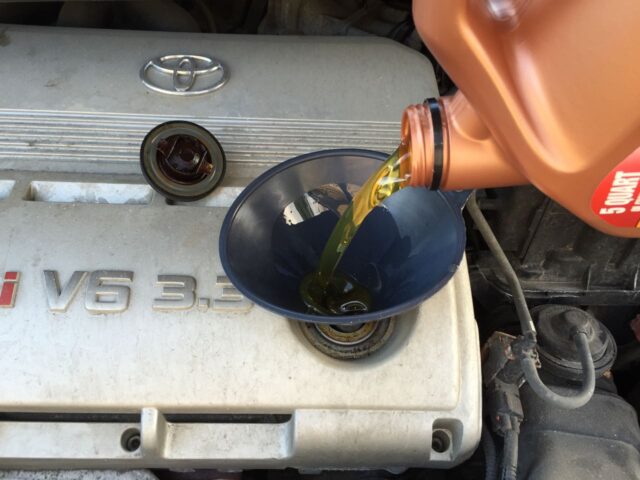
Step 11: Fill the van with oil
My Toyota Sienna with a 3.3L engine in it takes 5 quarts of SAE 5W-30 motor oil. The engine oil type is written on the oil fill cap. One thing I’ll mention is that it is MUCH easier and cleaner to pour the oil in with a funnel–I’ve tried to do it without and you will definitely spill. You can pour close to 4.75 quarts in and then run the van, let it set, check the oil, and then add some as necessary, but I just put in 5 quarts, and then verify that it is full later. One tip I’d give you is that if you just let the funnel sit in the oil fill opening, the funnel will seal against the flat surface inside the engine. I would lift the funnel up a bit and be careful not to pour it too fast or you will overflow oil onto the engine.
Step 12: Reinstall the oil fill cap and dip stick.
Reinsert the engine oil dip stick. To reinstall the oil fill cap, align the tabs on the underneath side with the notches in the opening and turn clockwise one-quarter turn to lock in place:
Step 13: Drive the van off the ramps.
Holding the steering wheel straight drive the van straight down the ramps. Go slow or the underneath edge of the bumper could scrape the ramps if the shocks compress when you come flying down the ramps (don’t do that). Let the van run for a couple minutes, DO NOT REV YOUR ENGINE, just let it run and circulate the oil. Before you shut it off park it on a level place and shut it off.
Step 14: Check your oil.
After you have shut off the van let let it set and then check the oil. Pull the dip stick, wipe it off, and then reinsert it all the way down and pull it out again and inspect the oil level on the dip stick. The two dots indicate the oil level with the one towards the end being low and the other one, full:
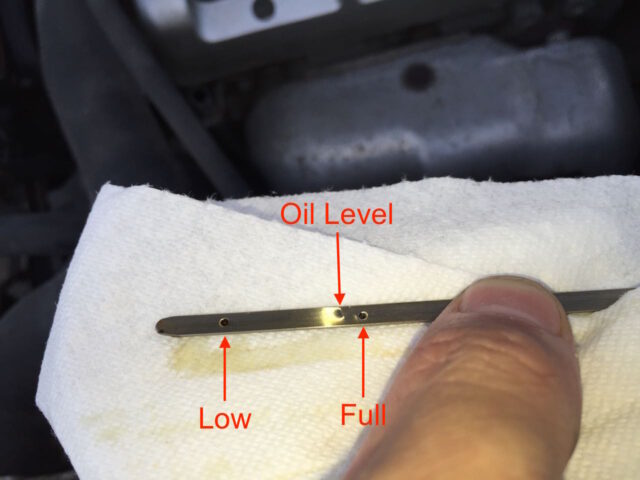
Tip: when the oil is fresh it is difficult to see the oil level. Because of the glare you can see it in the picture above. Another trick, which you cannot see very well in the picture above is that you can lay the dip stick on a paper towel and then move the dip stick straight up (as oriented above) and you should be able to see the oil level as it has soaked into the paper towel and will be more visible.
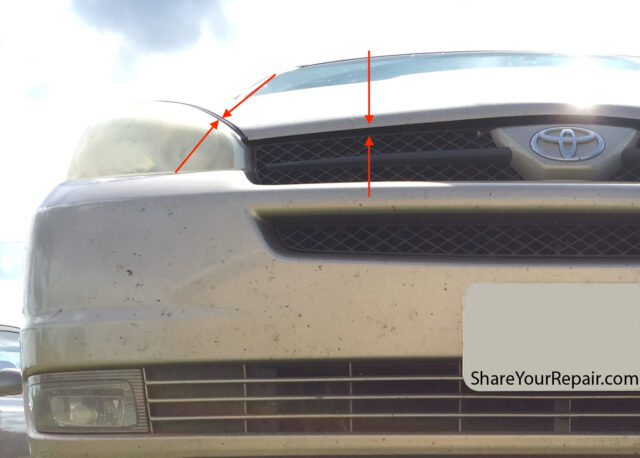
Step 15: Put the hood down.
You will need to lift the hood and guide the hood support rod out of the hole. The tip of the hood support rod is designed so that if a gust of wind quickly lifted up the hood, the tip would hold on to the hood so you have to unhook the end from the hood as you are lifting the hood. Snap the hood support rod back into place. Now shut the hood. I NEVER slam my hood but just drop it from approximately six inches. Make sure it has latched all the way shut as it can just catch the safety latch. If it does just catch the safety latch you can push it down with your palms to latch it all the way shut. The hood should be tight around the headlights as seen below:
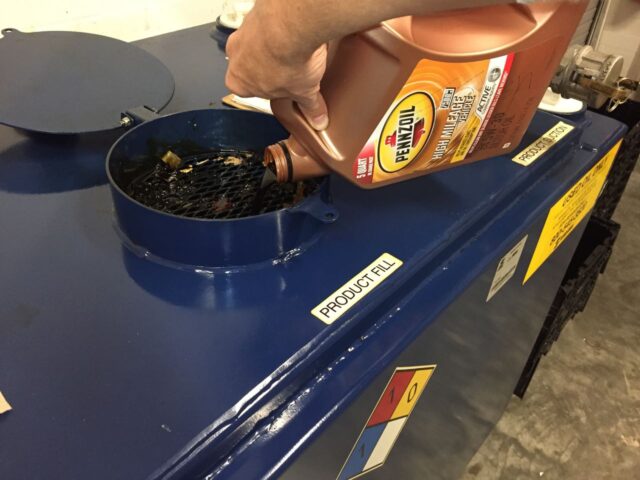
Step 16: Recycle your used oil.
I like the oil pan I have because it is easy to pour the used oil back into the empty oil bottle. I always mark the bottle “USED OIL” before I do it just to be safe.
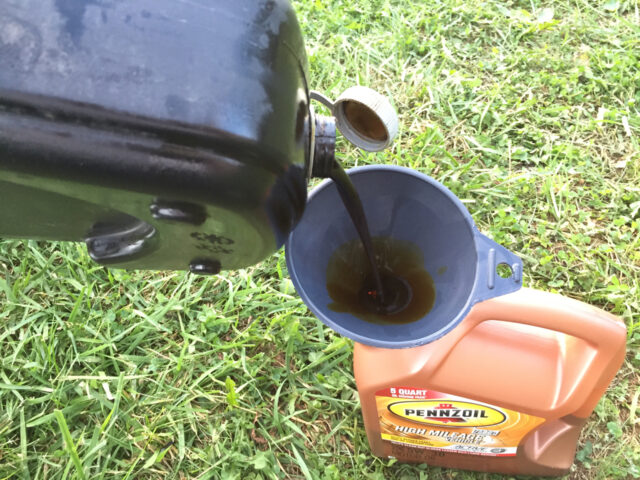
Most auto parts stores will take your used oil so you can just return it when you buy your next filter. Here I am emptying my bottle at the closest auto parts store:
Now you are done. If you have never changed your oil before then you will feel really good about yourself because it is something you can do yourself and save time. Good job!
Did you change your oil for the first time? Do you have a tip to add? Question? Please leave a comment!
Changing your own oil is something almost anyone can do. If you were able to change your oil with the help of this article please encourage someone else to do it too in the comments. If you have a question or you have a tip to improve this article please share that too!
Please note: if you do not have any approved comments on this site then your comment must be personally approved by me before it will appear. I do this to keep my site 100% free of spam comments. I read them all and almost always review and respond to all comments within a day. I look forward to hearing from you.
Other Toyota Sienna Maintenance Articles you should check out:
- How to Change Toyota Sienna Engine Air Filter (every 30,000 miles)
- How to Change Toyota Sienna Cabin Air Filter (every 30,000 miles)
- How To Reset Toyota Sienna Maint Reqd Light
Amazon Associate Disclosure: As an Amazon Associate I earn from qualifying purchases. This means if you click on an affiliate link and purchase the item, I will receive an affiliate commission. The price of the item is the same whether it is an affiliate link or not. Regardless, I only recommend products or services I believe will add value to Share Your Repair readers. By using the affiliate links, you are helping support Share Your Repair, and I genuinely appreciate your support.

My 2009 Toyota Sienna engine is 3.5 L and holds 6.4 qts of oil. It uses a replaceable oil filter element, which is a little more complex to change as compared to a spin off type. Your instructions above would need to be modified for the newer Siennas.
Love your site.
Ezra, thank you for sharing the differences between the 3.5L and 3.3L engines–I was not aware of that difference. I will modify the details at the beginning of this article to differentiate this repair from what will be necessary with the 3.5L version. Someday hopefully I’ll have a newer Sienna and I’ll be able to write about the filter element version.