Sometimes you want to transpose a survey plat over the satellite image. When you are house shopping, lot lines become very important. I recently looked at a house where the plat they provided did not show the location of the house. I wanted to take the satellite image and transpose it on top of the google satellite image. If you would like to do this then read on and I’ll show you one way to do it…
Software:
How to Photoshop Plat on Satellite Image
Step 1: Scan your plat.
I used the iPhone app Genius Scan. There is also an Android version. Genius Scan turns your phone into a great scanner. You can export your scans as a pdf or jpg and it whites out the background of black and white images just like expensive copiers do when they scan an image. Use your camera to scan the image:

When you have the boundaries selected as seen above tap Done and it will convert it to a pdf-like document:
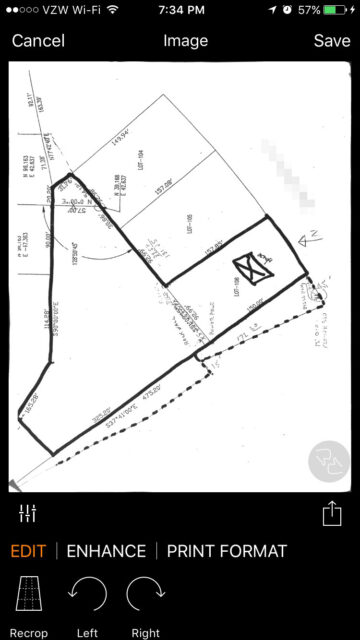
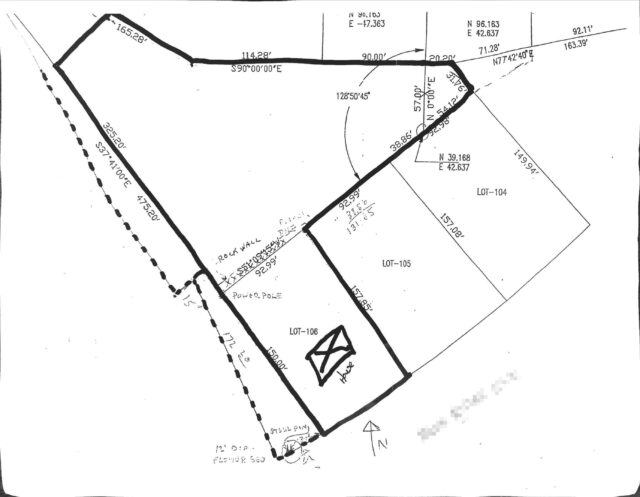
You can rotate or re-crop at this point. Once you have it the way you like it then save it and then you can send it to yourself in various ways (email, dropbox, etc). I emailed it to myself as a jpg. One thing to note is that you must be viewing one page of the pdf to export as a jpg. If you can see multiple pages when you tap export it doesn’t give you an option to export as a jpg (because jpg doesn’t support multiple pages). This was the final result:
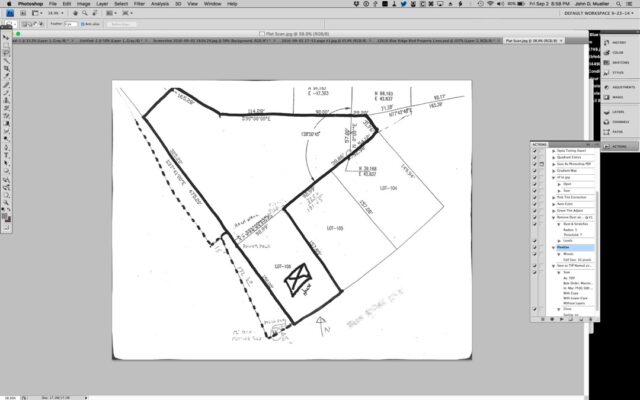
Step 2: Open the plat in Photoshop.
The first time I did this I opened the satellite image first, but the plot image will be of higher resolution so you want it opened first so you are starting with a bigger canvas.
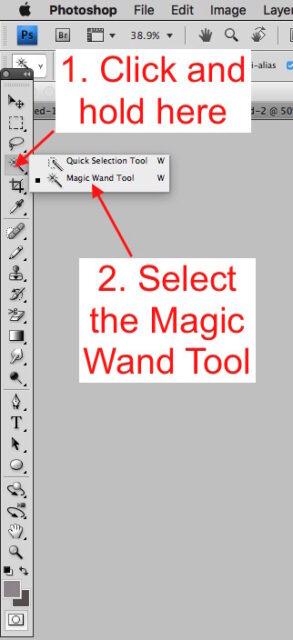
Step 3: Change to the magic wand tool.
The magic wand tool is hidden behind the default Quick Selection Tool. Select it as seen in the steps below:
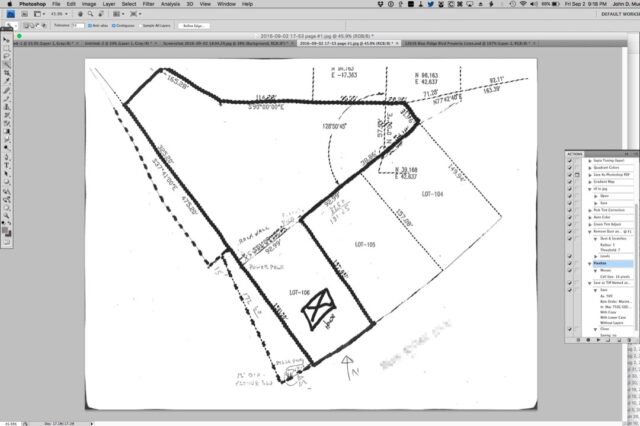
Step 4: Select and copy the dark black solid line of the plat border.
If your plat border is thin it may be difficult to use this method. There are other methods for getting the lot lines by themselves including deleting the white background but since the lot line was already thick, this method worked great for me. You could even trace the lines with a sharpie and re-scan or use Photoshop to darken the lines first to make it easy to select them. When I clicked on the lot line it selected them nicely (in dotted lines):
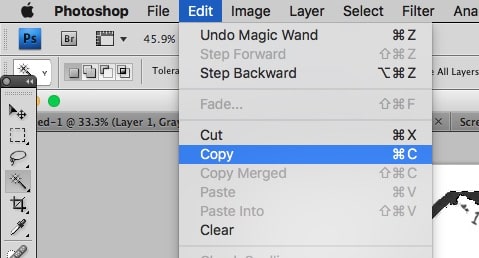
Once the border lines are selected copy them by using the keyboard shortcut (Mac: Command-C, Windows: Control-C) or from the Edit > Copy menu at the top of the screen.
Step 5: Create a new image.
Since you have an image in the clipboard, when you create a new image it will, by default, create a new blank image at the same resolution/size of the clipboard image. To create a new image you can use the keyboard shortcut (Mac: Command-N, Windows: Control-N) or the File > New… menu item.
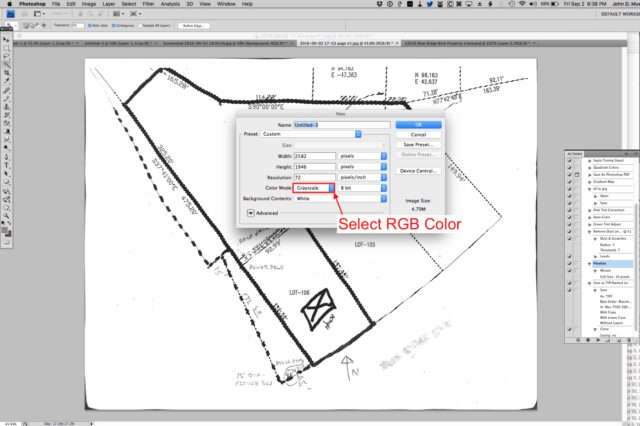
You can save yourself a step later if you change the image to a color image now. Select “RGB Color” from the Color Mode menu. Then click the “OK” button and you will get a blank (color) image.
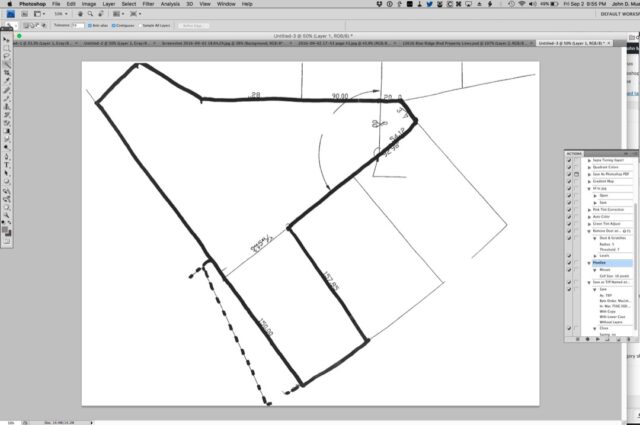
Step 6: Paste the plat boundaries into the new image.
Select Paste from the Edit menu or use the keyboard shortcut (Mac: Command-V, Windows: Control-V). This is something like what you should have at this point:
Step 7: Get the satellite image for the lot.
I like Google maps a lot and that is where I went to get my satellite image. If you have a slow Internet connection like I do it may take a while for the full-resolution imagery to download–just give it some time. On a Mac you can take a screenshot by using the keyboard shortcut Command-Shift-4, which gives you cross-hairs to select the area you wish to capture. On a PC you can simply push the Print Screen key, which will place a copy of the entire screen in the clipboard.

On a Mac open the image in Photoshop (or Preview) and select the entire image (Command-A) and then copy it to the clipboard (Command-C). On a PC, you can simply go to the next step.
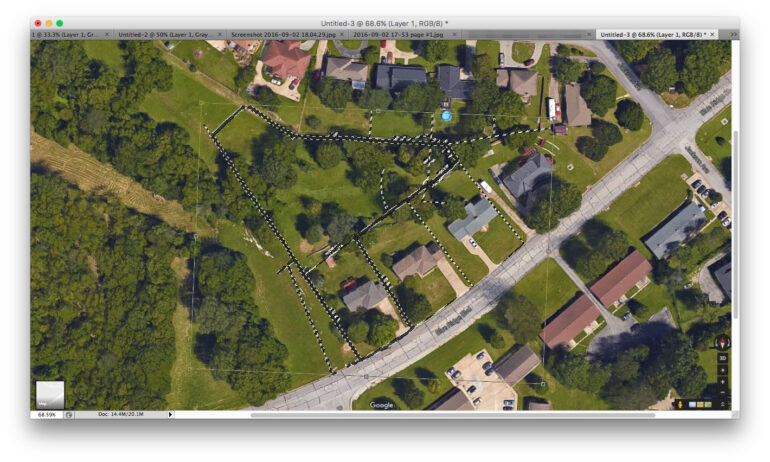
Step 8: Paste the satellite image into the plat border document.
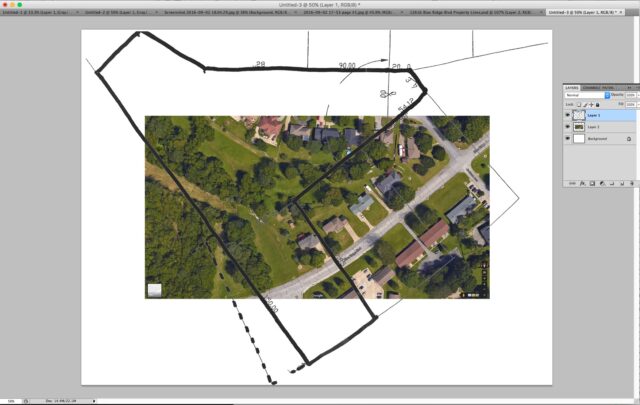
Switch in Photoshop to the plat boundary only image (the one we created in Step 6). Use the keyboard shortcut to paste the satellite image into the document (Mac: Command-V, Windows: Control-V). You will have something like this:
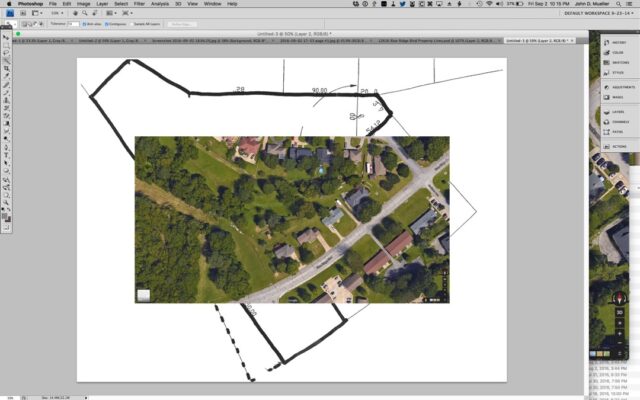
Note that the plat is BELOW the satellite image. We will take care of that in the next step.
Step 9: Place the plat border layer on top of the satellite imagery layer.
In the extras menu (if you don’t see it select Window > Extra and it will appear) click on LAYERS:
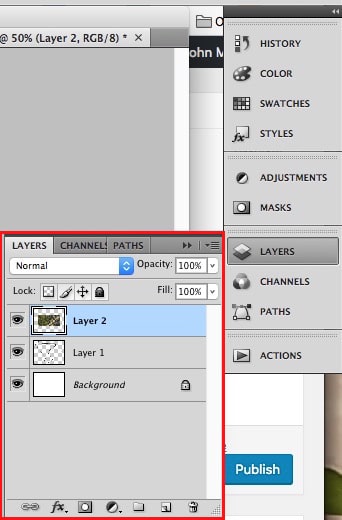
Click and drag Layer 1 above Layer 2:
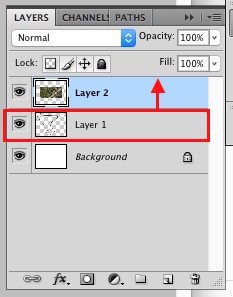
Now you will see this, the plat layer on top of the satellite image:
Step 10: Resize and rotate the boundary layer to the correct size.
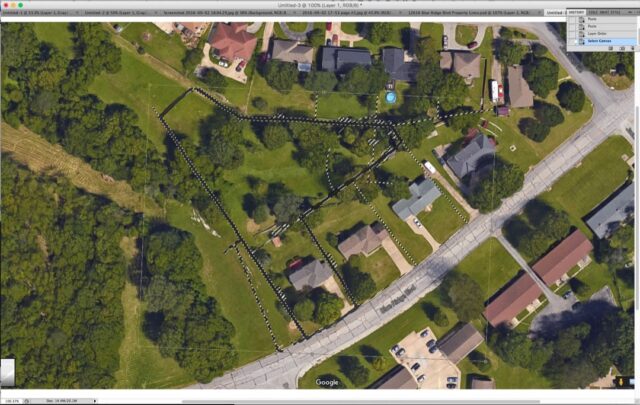
Make sure the boundary layer is selected (it will be highlighted) in the layer menu (same as is in the image above) and then select the entire layer by using the keyboard shortcut (Mac: Command-A, Windows: Control-A). Now use the keyboard shortcut for the Photoshop Transform tool (Mac: Command-T, Windows: Control-T). You can also find it under Edit > Free Transform.
Tip: if you scale the layer by clicking on a corner you will distort the image. When scaling, hold down the shift key before clicking on the corner and it will maintain the perspective. When using the transform tool you can click drag and move the layer to better decide if it is the correct size and orientation:
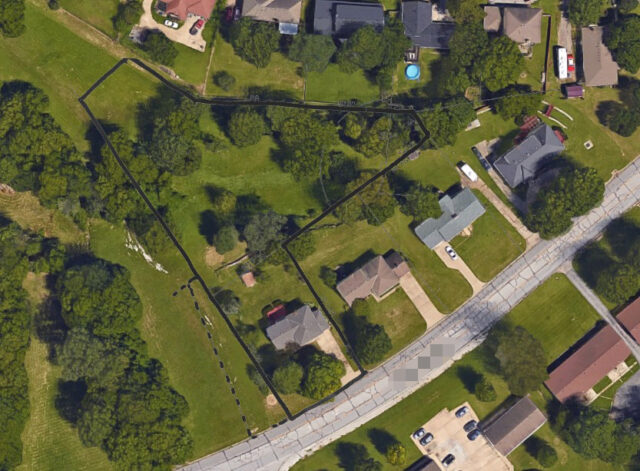
Hit the Enter/Return key to apply the transform when you are done. Now you have transposed your survey boundaries on the satellite image:
If you can master these steps they have LOTS of other application.
Did this tutorial help you? Do you have a tip to add? Please leave a comment!
I learn a ton from others online and am always looking to improve my articles. If you have a tip on how to make overlaying images over other images or selecting things like I do in this article, please leave a note in the comments.
Please note: if you do not have any approved comments on this site then your comment must be personally approved by me before it will appear. I do this to keep my site 100% free of spam comments. I read them all and almost always review and respond to all comments within a day. I look forward to hearing from you.
Amazon Associate Disclosure: As an Amazon Associate I earn from qualifying purchases. This means if you click on an affiliate link and purchase the item, I will receive an affiliate commission. The price of the item is the same whether it is an affiliate link or not. Regardless, I only recommend products or services I believe will add value to Share Your Repair readers. By using the affiliate links, you are helping support Share Your Repair, and I genuinely appreciate your support.