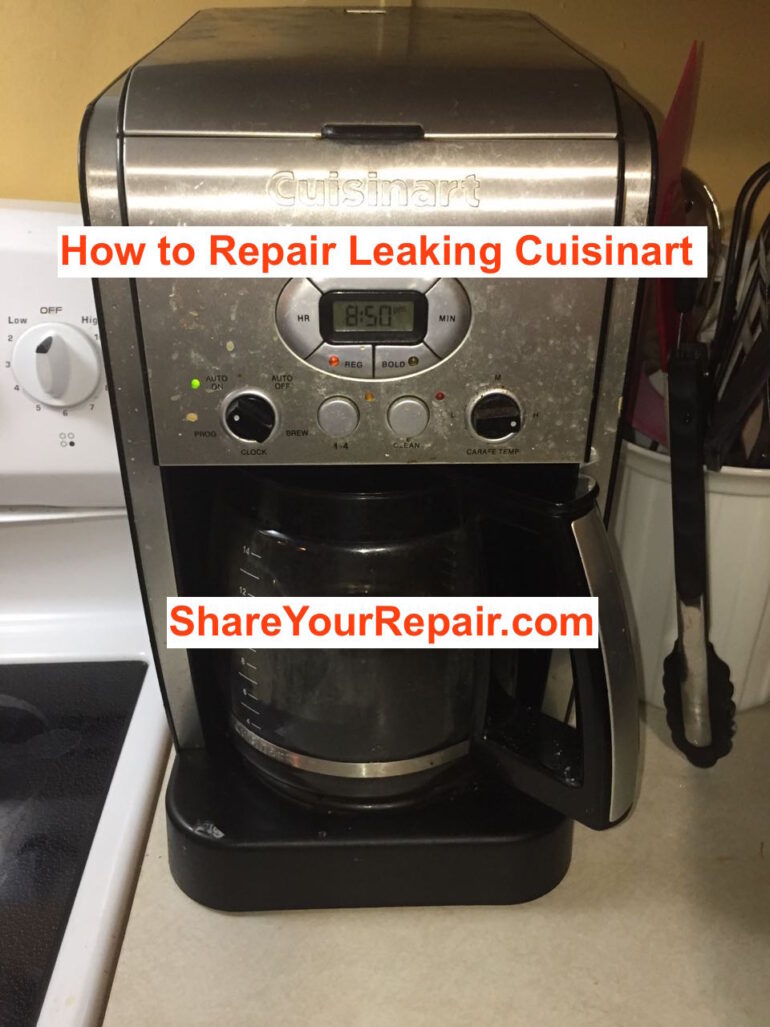
Do you have a Leaking Cuisinart Coffee Maker? Our programmable Cuisinart coffee maker began to leak water out on the counter top overnight and the pot would come up 2-3 cups short. I don’t want to buy another coffee maker if I can fix it. I figured out how to get those security screws out of the bottom cover and fix that leaky hose. Read along to learn how you can too!
This repair is how to fix your coffee maker without replacing the hoses. IMPORTANT UPDATE: I have identified an equivalent replacement hose and I recommend you order replacement hoses and follow the steps in the article linked here instead:
Cuisinart Water Leak Repair-Replace Cracked Water Hoses
How to Repair a Leaking Cuisinart Coffee Maker
Equipment:
- Cuisinart DCC-2600 Brew Central 14-Cup Programmable Coffeemaker with Glass Carafe (now replaced by the DCC-2650 model)
Tools Needed:
- Needle nose pliers (for removing the hose clamp)
- CR-VT10 Security Torx Driver (get as a set or individual tool) (must have a thin shaft to fit down into the recessed hole)
- Size 3 flat precision screwdriver (this can be used to remove the security torx screws)
- Cordless Drill (I love my Makita)
- Drill Bits (if you end up demoing a bit of the internals to re-use your old hose)
- Wire nipper (for clipping out the plastic webbing to make the path for the old hose shorter–this is a great tool if you do any electronics work)
Parts (optional, I repaired mine with no parts necessary):
Repair Instructions:
Step 1: Unplug the coffee maker.
We are going to open it up so you definitely do not want it plugged in as you could be shocked.
Step 2: Empty any water out of the tank.
I just turned mine upside down over the sink.
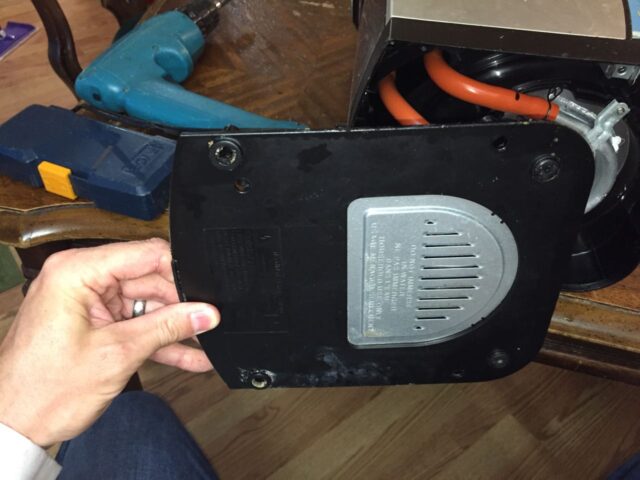
Step 3: Lay the coffee maker on its back so you can access the screws on the bottom.
We want to remove the bottom plate. The screws are located in recessed holes located as indicated below. You do not need to remove any of the rubber feet to access the screws, btw.
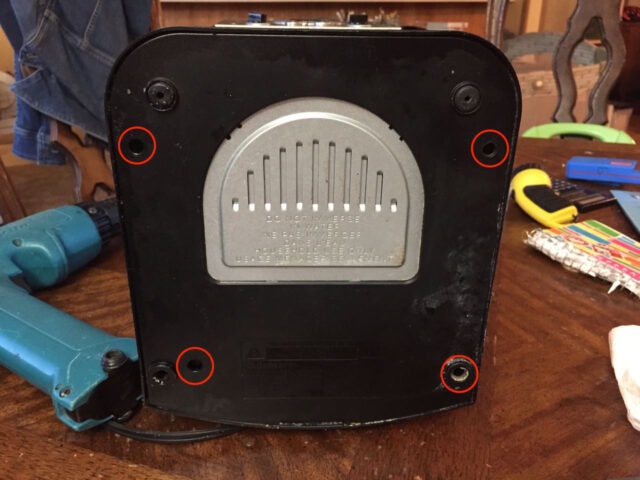
Step 4: Remove the 4 bottom screws.
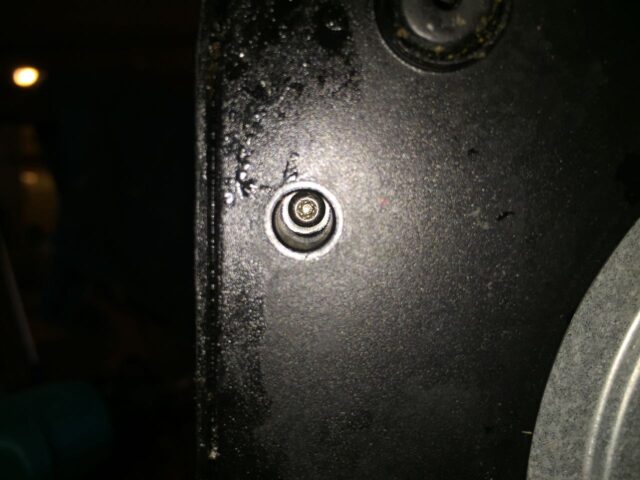
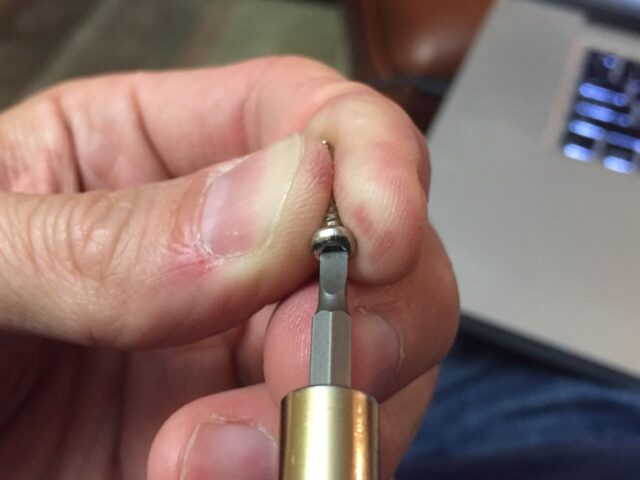
These screws are security Torx-10 headed screws. This means they are Torx-10 with an additional pin that sticks up in the middle of the screw head. Here you can see a close-up of the screw head:
The bit tip for these screws looks like this, a torx with a hole in the middle:
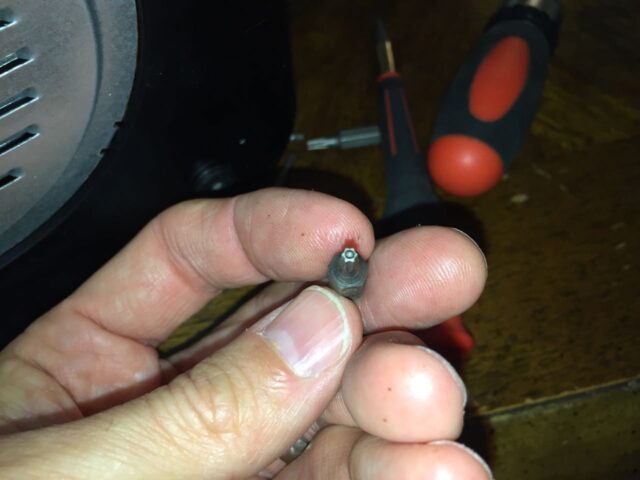
Unfortunately, the hole in the case is too small to use a bit tip like the one pictured above, as it won’t fit deep enough into the narrow-diameter hole. Lucky for us, you can use a 3mm precision flat-tip screwdriver bit instead, which barely fits down into the corners of the star shape:
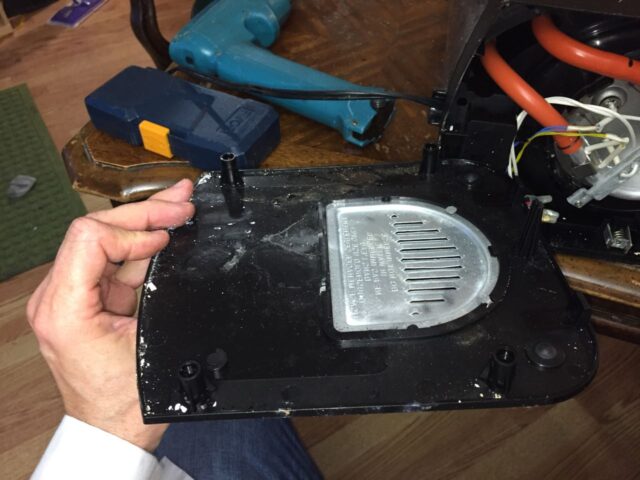
I also discovered that you can alternatively use a smaller flat-tip screwdriver bit, which will slip past the security post and sink down into the head. Once you remove the four screws, you may need to slip a flat-head screwdriver up into the seam to get the bottom out. Here the lower cover has been removed:
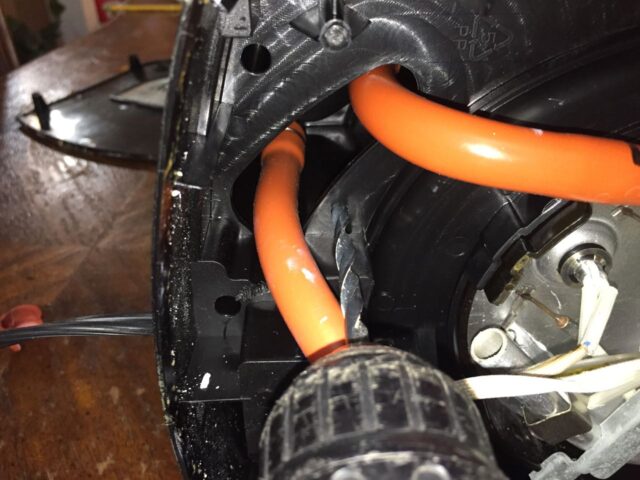
Here is what it looks like inside:
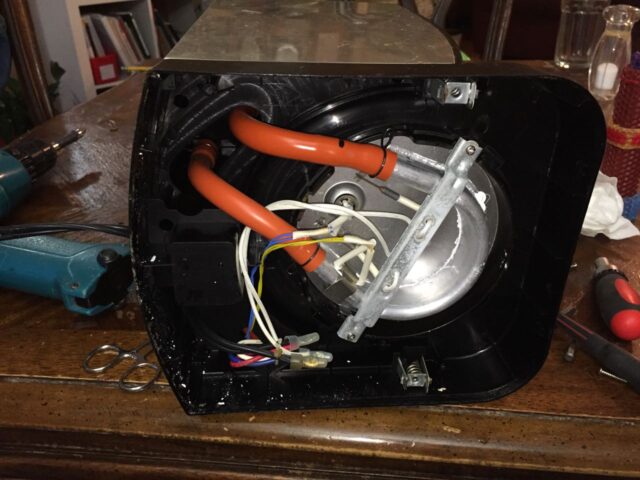
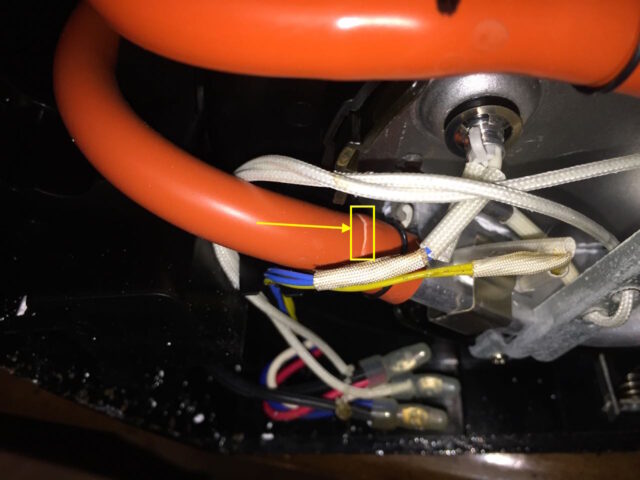
Step 5: Find the coffee maker leak location.
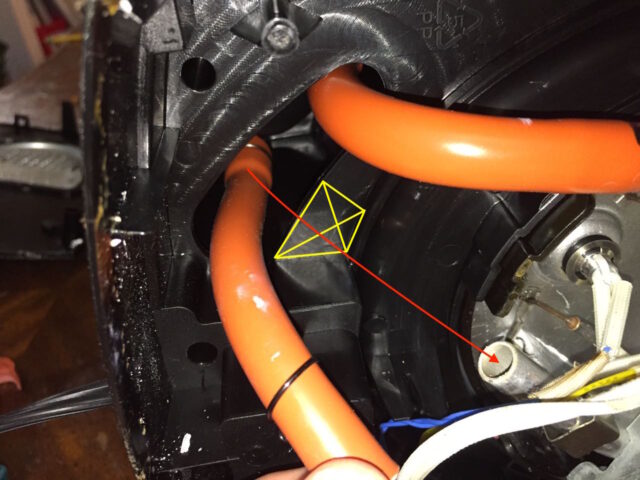
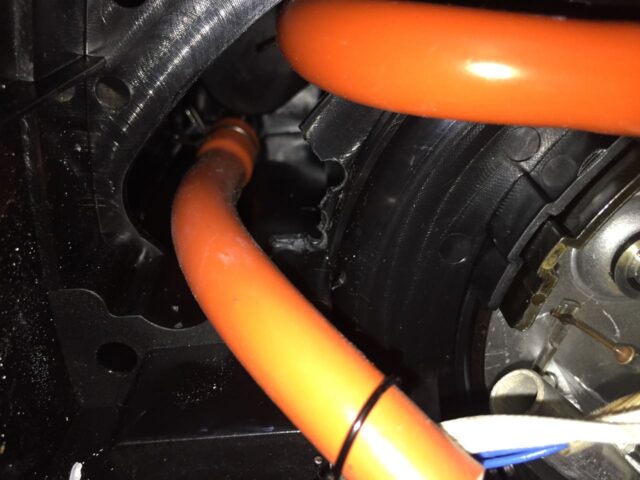
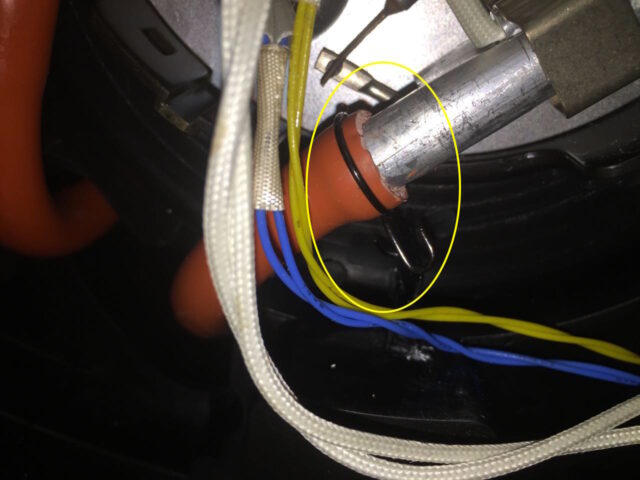
Once you have the bottom cover off you can search for the leak. I’ve heard of people discovering a leak in the aluminum heating element as well as the rubber tubing. Quickly I was able to see a light-colored line on the top side of one of the hoses, just above where it connects to the heating element:
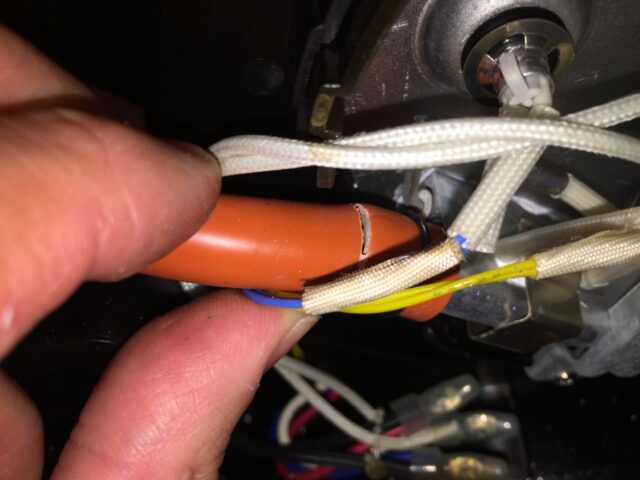
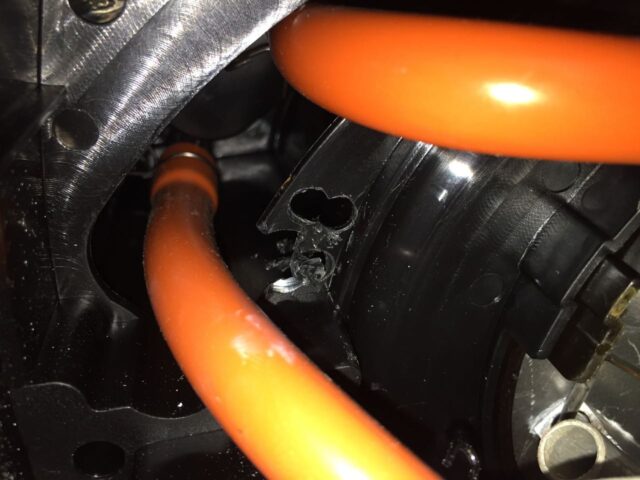
With a little pressure on the hose you can definitely see that it is cracked all the way through–definitely the root cause of this leaking Cuisinart coffee maker:
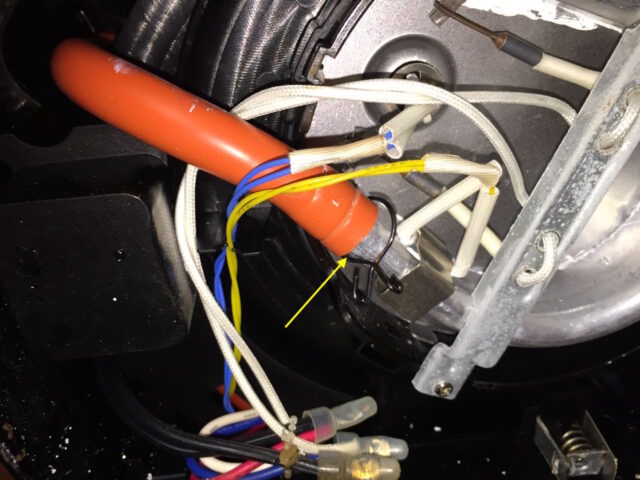
Step 6: Remove the wire hose clamp.
Squeeze the hose clamp and push it back on the heating element, as seen below:
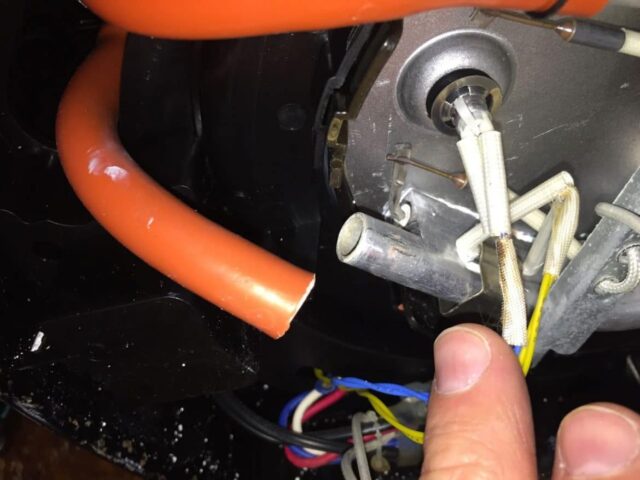
Step 7: Remove the heating element end of the cracked hose.
If yours cracked just at the end of the heating element connection you can likely just bend the hose and it will break off. Alternatively you could cut it off with a carpet knife..

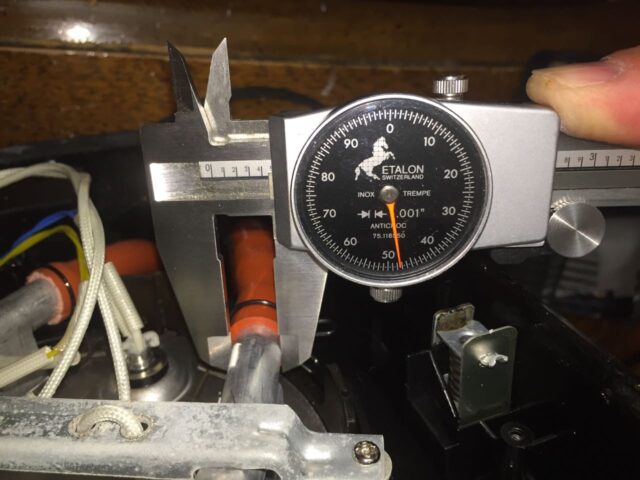
For those of you who want to replace the hose, I measured the heating element pipe at 0.447:
I estimate that the replacement hose should have an ID of 7/16″ = 0.4375 or 11 mm. I was not able to easily find a replacement hose online.
Step 8: Make room to re-use the old hose.
I didn’t have any 7/16″ ID (inner-diameter) high-temp food grade hose lying around so my first idea for solving my early morning pre-programmed caffeine addiction was to put the old hose back on. I thought about cheating the hose off the other end where it connects to the tank but I don’t know how I would get up in under the tank in order to get it off and I was pretty concerned about damaging the brittle hose in the process. The hose is a half-inch shorter now but it seemed like there was enough hose left to get it pushed on there far enough to make it work. To give the hose a shorter path I decided to cut out some of the webbing inside the coffee pot:
I drilled some holes with my cordless drill and then clipped out the plastic pieces remaining with my wire nippers:
Step 9: Reinstall the shorter hose on the heating element and reinstall the hose clamp.
You’ll want to put the hose clamp on first, before reinstalling the hose. I had to bend the hose clamp closed a bit because it seemed to have opened up in the removal process. I used some spit on the heating element pipe before attempting to push the hose on. I was only able to get the hose on about a maximum of 3/8″ on. WARNING: I would not use any tools to squeeze the hose our you will likely damage what little hose you have left. Once you have the hose on, position the hose clamp in the middle of the hose as seen below:
Step 10: Reinstall the bottom cover.
I actually didn’t put the screws back into the bottom cover yet as I wanted to test it out for a while and am still shopping for a replacement hose source. Let me know in the comments if you find a good source where you don’t need to pay half the value of the coffee maker for 10 feet of hose when all I need is about a foot.
And again, you can use a flat-tip screwdriver to reinstall those security torx screws!
The coffee maker is working just fine now so that is nice to be able to breathe life back into what could have been the end of this appliance.
Share YOUR repair!
Have you repaired your leaking Cuisinart coffee maker? Did you figure out a better way to repair it? Have you found a good place to purchase replacement hoses? Comments? Suggestions? Please leave them in the comments below!
Amazon Associate Disclosure: As an Amazon Associate I earn from qualifying purchases. This means if you click on an affiliate link and purchase the item, I will receive an affiliate commission. The price of the item is the same whether it is an affiliate link or not. Regardless, I only recommend products or services I believe will add value to Share Your Repair readers. By using the affiliate links, you are helping support Share Your Repair, and I genuinely appreciate your support.
Thank you for the extremely clear and helpful text and pictures. I wouldn’t have been able to identify my problem without your article. Unfortunately in my case there was a crack in the metal tube adjacent to the heating element so I was not able to repair it. But thanks in any case!
That’s unfortunate Matt–I haven’t had to deal with that problem, yet. It might be possible to solder the aluminum tubing if you are careful not to destroy any of the electrical (thermal couple) or heating element parts while soldering. You would want to use lead-free solder. I have never tried soldering aluminum (and I’m no good at copper pipe soldering either). I do see that these elements have sold on ebay and here is a search for them.
Thanks for this tutorial. I have a different model from Cuisinart, but was able to repair the leaking hoses with your advice.This was the second repair to the same coffeemaker, so re-using the old hose was no longer an option (both were cracked, and the previously repaired one was now too short to fit – no matter what I tried). So I couldn’t follow your process as shown. Here are the main things I did differently:
1) I searched (Amazon etc.) for “Food grade high temp silicone tubing”, and didn’t worry about what colour it was. I just made sure that what I bought was 8mm internal and 12mm external diameter, and replaced both hoses. The few listings for “red” tubing were either sold out or no longer available, but clear tubing was readily available.
2) I used an ordinary yellow pencil pushed into the centre of the tubing to assist with getting it onto the recessed fittings up inside the coffeemaker body. Simply slipping the pencil up the tubing to withing about an inch of the end, with that holding most of the length rigid, made it fairly easy to push the tubing over the plastic molded spouts.
3) I used the same pencil to push the check valve into the new tubing. Easiest part of the whole repair!
4) When I was closing things up, I replaced the Torx screws (mine weren’t “security” Torx, but still…) with ordinary #6 self-tapping screws. They’re a little larger than what I removed, but they bite into the plastic just fine, and it’s going to be a lot easier for the next guy (who will be me) to find a standard screwdriver to remove the bottom. Being in Canada, I used some Robertson [square drive] screws I had lying around, but any Philips screw would of course work just as easily.
Thanks for the tips Rob. At the top of the article I share a link to another article I wrote where I replace the hoses and have links to where to buy them.
Hi Matt – the downsized hose spec’d in the item list won’t work for this repair, it is too small. It won’t fit the heat aluminum line nor will it accept the stop valve. I would suggest you remove it.
I don’t know who Matt is but I’m John, the author of this site 😉 Which size hose are you saying will not work (what is the measurement)?
just double check – you spec .312 ID hose in the parts list then .4375 ID in the text. I guess the latter is correct. If so can you correct the parts list at the beginning of the article?
Well, the .4375″ measurement is the exact measurement of the outside of the aluminum pipe. You want your rubber hose inner-diameter (ID) to be (slightly) smaller than that so it fits tightly on the pipe. We’re not talking an exact science here, there is some room for the hose to stretch. You want a hose that fits but not too small. I purchased the 8mm ID hose linked here.
Thank you so much for writing this article! My coffeemaker has a leak, and I thought it might be a hose, but Googled to make sure, and found you. I had three of these machines a couple of years ago, one for my home, two for my business, and all three quit working just a little over a year after purchase. I would never have bought another Cuisinart, and the one I have now was free, from a “buy nothing” site. My Capresso is 10 years old and still works, but I wanted the coffee grinder that was being given away along with the coffeemaker. The Cuisinart looks good on the counter, and makes a good cup of coffee, when it’s working. I’ll take the time to fix this one, but will never buy one. Thank you again!
In all my years of seeking repair help online, I have never encountered a more thoroughly expert tutorial. Great narrative, excellent, clear photos, useful information. Bravo John Mueller!
great tutorial !!! I wish it fit my situation…
When I opened my coffee maker up… I found a hole in the aluminum pipe at the base of the heating plate that the hoses connect to …What do you suggest I use to close this this breach ??
Chris
9/18/2020
You could try some food-grade heat-rated epoxy, sand it real well before applying. I’ve read of people doing that.
The aluminium heating tube on mine sprang a leak! I used high temperature epoxy to seal it and while I had it open I painted the rest of the tube that was visible with the epoxy as well.I couldn’t get one of the screws out so I drilled it out, they are way down deep in there! Anyways I put it back together again and it has been working fine for over a year now! One thing for sure though!! I will never buy another Cuisinart appliance ever again!!! They once made quality appliances but not any longer!! An over $200 coffeemaker should NOT break down after only 5 years of use!!!
Thank you so much for this easy to follow guide with pictures. I am going to tackle this today!
Used thin blade screwdriver…worked great. The hoses were fine but there was a pinhole in the metal(?) which the hoses connect to. I’m trying flexseal to cover the pinhole. Will find out tomorrow morning how it worked, as it will take overnight for flexseal to dry.
Thanks for help with our favorite coffee maker!
Hi John! I have a Cuisinart DCC-3200 which is my 2nd one; the 1st one had a circuit board fry, after 1 year; I can’t believe I had to pay $10.00 for Warranty Service.
Anyway, as I said this is my 2nd one and it started leaking yesterday. I was dismayed to say the least since it is now 3 years and the Warranty Service period is over…even if I pay an additional $10.00…LOL.
I saw this article you wrote and I am extremely grateful to you. Thank you so much for this, the detailed information, the step-by-step instructions and the pictures. You are the best!
I hope you don’t mind but, I wrote a comment on the Fixya site to a Woman who has a DCC-3200 which is leaking. Her request was 1 year ago but, I linked your Shareyourrepair site (the newer one that doesn’t include the drill) to my comment and stated that you have the fix. Hopefully my comment will help others, since it’s too late for the Woman.
Thanks for everything Sir.
Thanks for the very nice feedback John and good work on giving your Cuisinart more life. Now it can live long enough to have the circuit board go out!?!?! I haven’t had to cross that bridge yet though. Our repaired machine is still brewing up coffee just great, with the replaced hoses, and the repair has added 2 1/2 years (and counting) to ours.
Thanks for the article. I used a simple eyeglass repair kit screwdriver, thin and long enough to remove the screws. The leak was the shorter hose, right at the junction with the element and it split right through. I noticed a little ball filter thing in that end of the hose that I pushed through with a chopstick and flipped the hose as the non-element end was not brittle, put the filter bit into that end, reattached and it works for now…anyway, saved $120 so that’s cool.
Good work Nancy. That piece with the ball you relocated into the other end is the check valve which acts as the water pump to move the water from the tank up into the grounds. It wouldn’t have worked had you not relocated it back down by the heating element and in the correct orientation. So good job on fixing your coffee maker.
I found 7/16th ID tubing on Amazon here: https://amzn.to/2VQh1yV
It worked out great on my Cuisinart DCC3200. Anyway, the design is even worse (if that is possible.) The hot water tube is only about an inch and a half in length, while the two places where it connects are offset by about 1/2 inch, requiring significant bends in the tube which is already so short guaranteeing that this repair will probably be short lived too…
Thanks for sharing Ray. They don’t make this stuff with repairs in mind!!
This could be the hose you need on Amazon.
Thanks for the comment Chris. I actually have that hose linked up in the parts section of this article AND I’ve written a second article (which I also link to at the top of this article), where I show you how to install those hoses and here’s another link to it: Cuisinart Water Leak Repair-Replace Cracked Cuisinart Water Hoses
I have now written an article on how to replace the cracked hoses on this Cuisinart Coffee Maker and have a link for the exact replacement hoses for this coffee maker. Please check out the article here: Cuisinart Water Leak Repair-Replace Cracked Water Hoses
Great write up again. Is the caliper pipe fitting measurement 0.474? That’s what the photo looks like, but article says 0.447. Great stuff. Thx.
Thanks for checking on me Matt. It is tricky to read a caliper and to help my readers I’ve written a tutorial on it: How to Read a Dial Caliper. My reading is actually correct and let me walk you through how to get there:
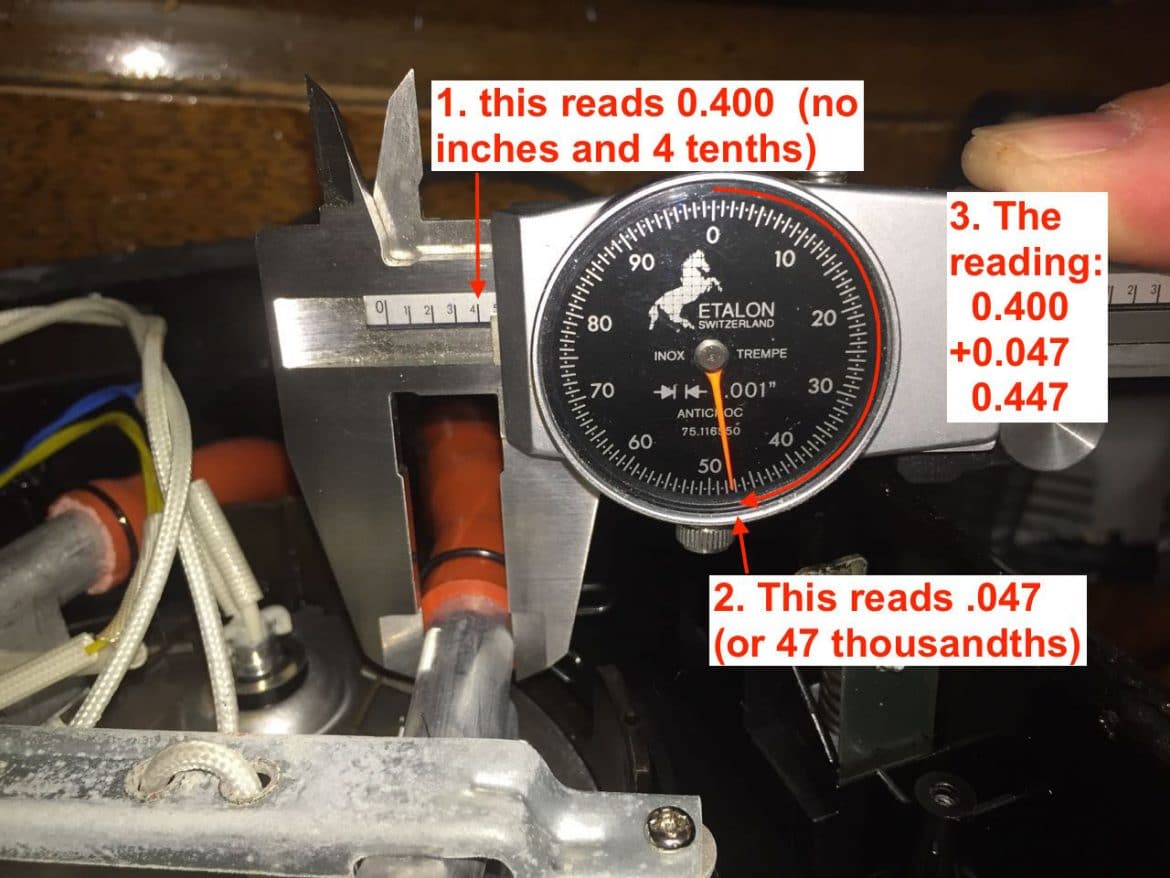 One thing to note about this reading is that the needle was actually slightly above 47 thousandths but I rounded it down since it didn’t appear to be half way to 48 thousandths.