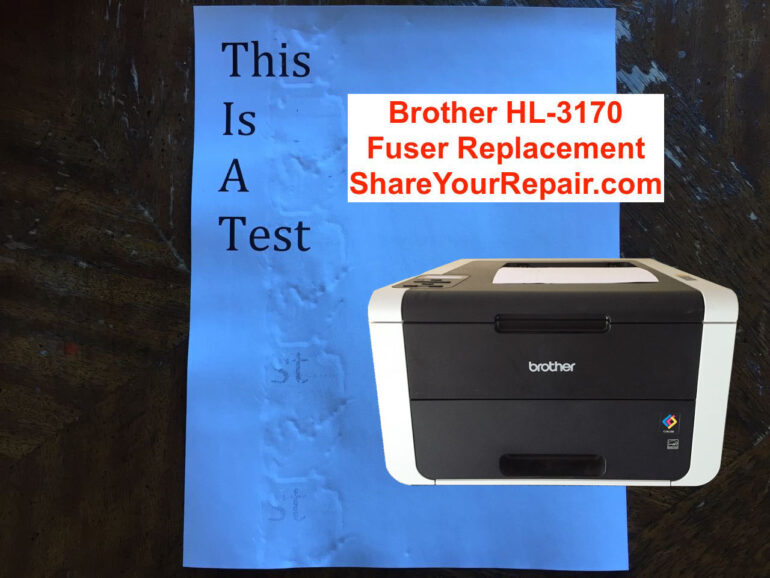
Is your Brother HL-3170 leaving a crumpled stripe down the page? Does the toner smear easily? When you open the back of the printer do you see orange plastic chips? The fuser may need to be replaced. You can replace the fuser on your Brother HL-3170 easily with this tutorial…
Brother HL-3170 Fuser Replacement
Parts Needed:
Tools Needed:
Software Needed:
Step 1: Diagnose the Problem
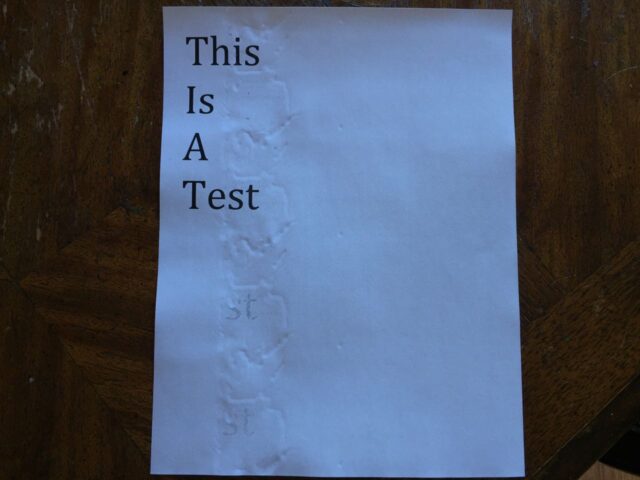
Here is an example of what the print jobs looked like coming out of our printer:
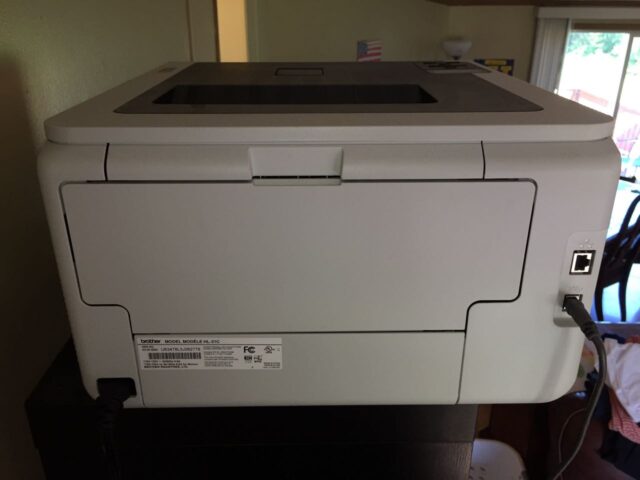
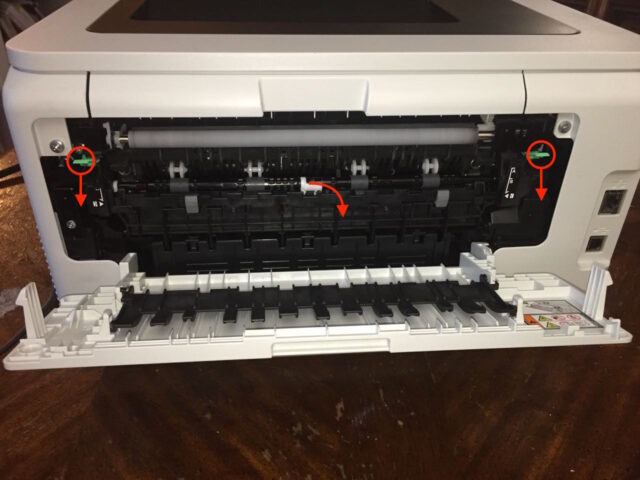
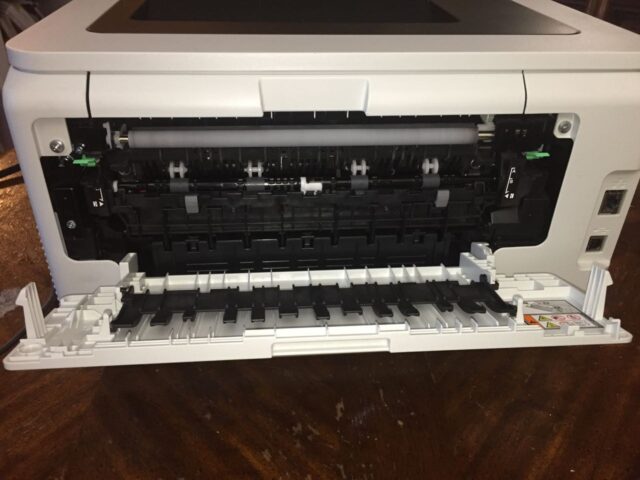
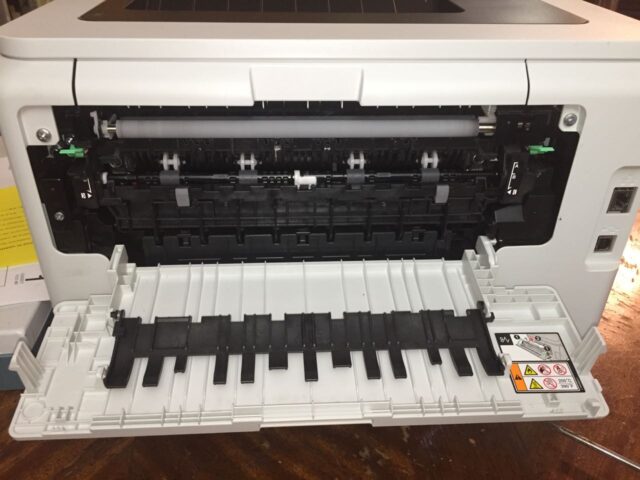
I opened the back of my printer:
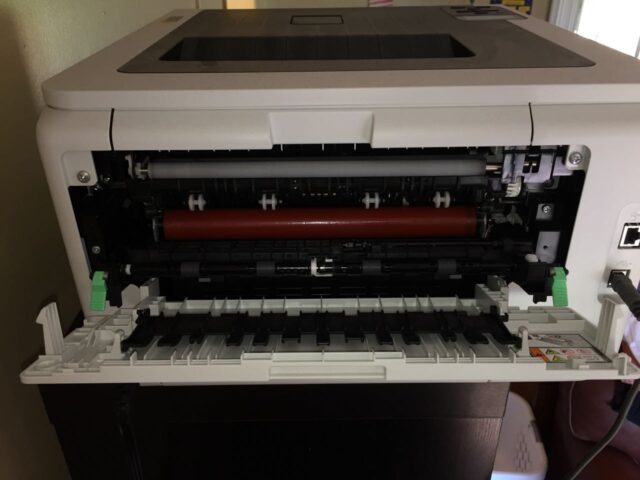
Open the roller tray by pushing down the green tabs and swinging the tray open:
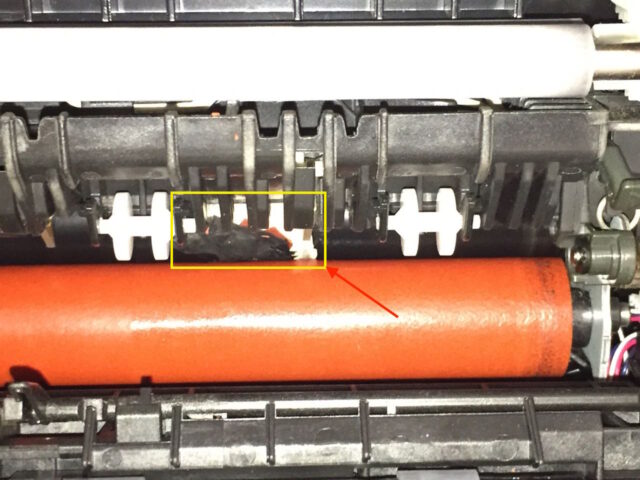
I could see the damage to the black roller in the fuser unit:
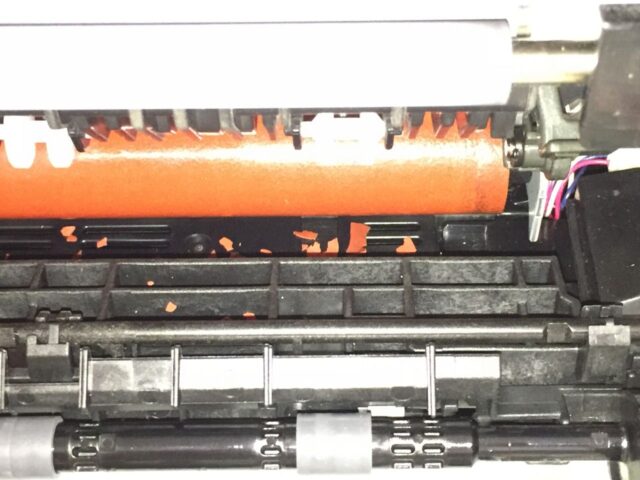
And there was orange chips loose in the printer:
The fuser heats up to fuse the toner to the paper so they eventually wear out and this one is definitely done. Time for another repair…
Repair Instructions
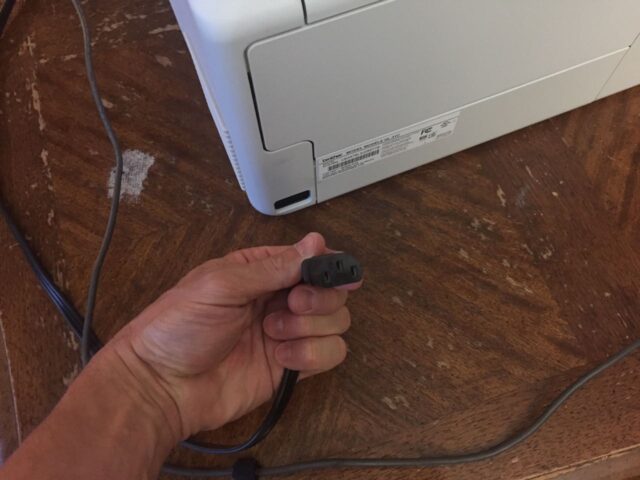
Step 2: Unplug the printer.
You need to unplug the printer to be safe when doing this repair.
Step 3: Open the back door of the printer.
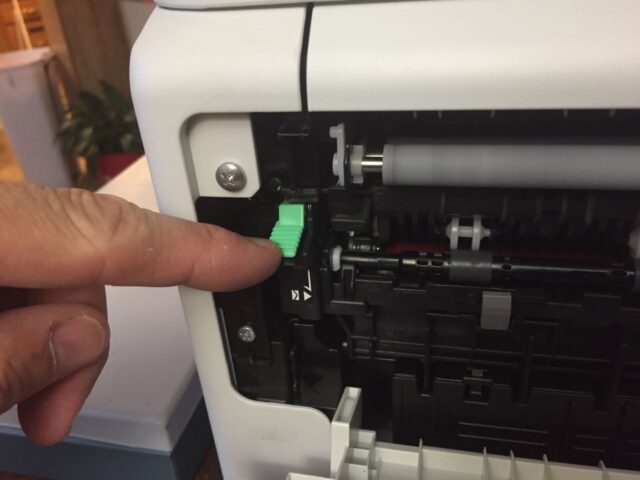
Step 4: Push down the green tabs on each side and fold down the roller door.
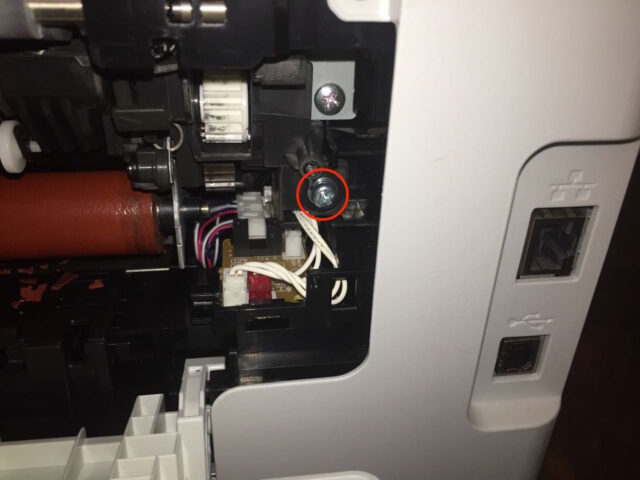
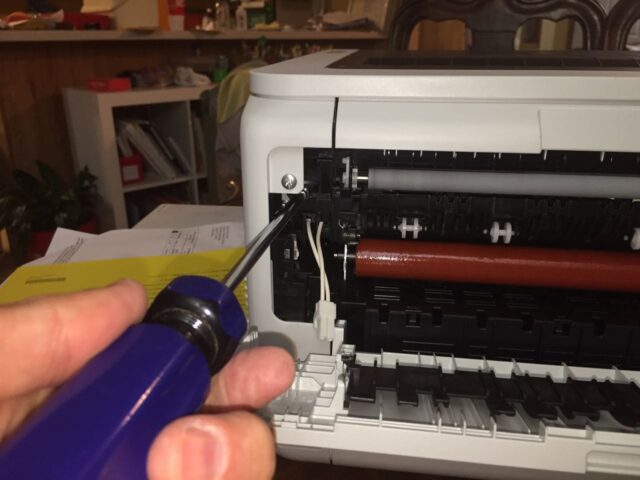
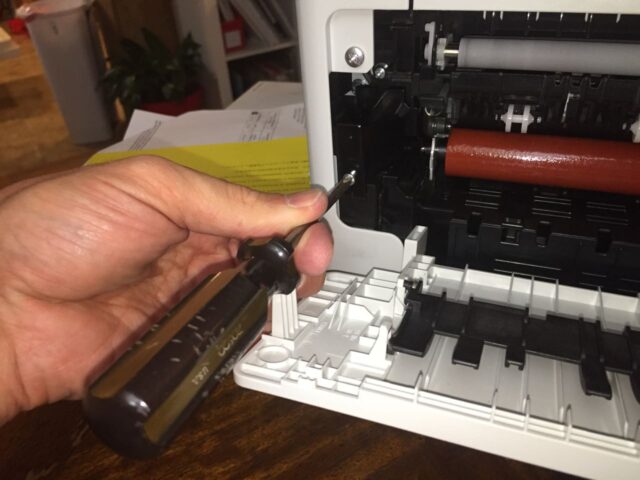
Step 5: Remove the 2 screws from either side of the roller bar covers.
Remove these two phillips-head screws:
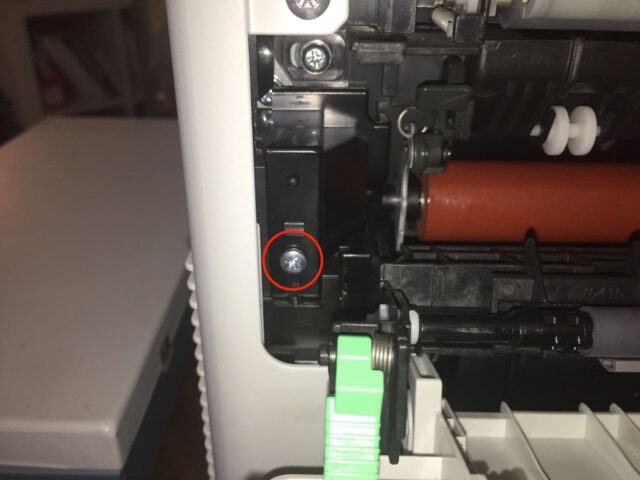
Those two screws above hold two plastic pieces in place that 1. cover the fuser wiring, and 2. hold the roller bar in place.
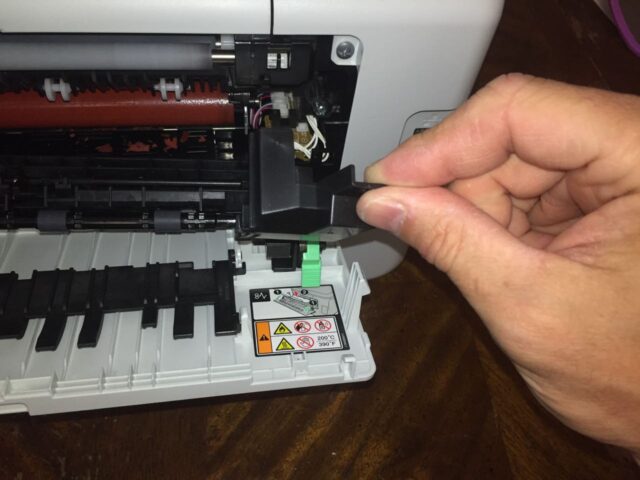
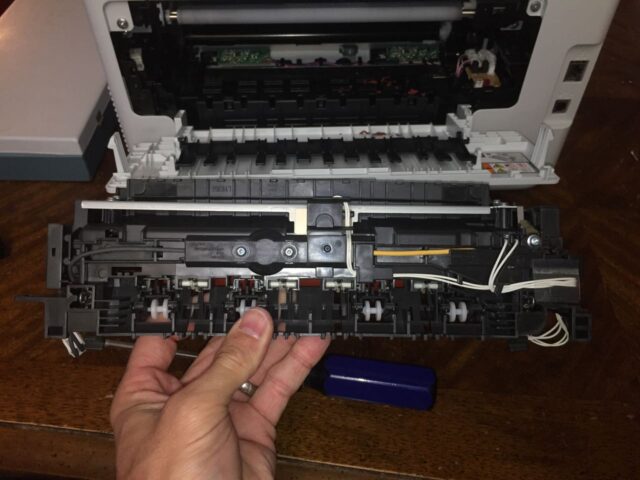
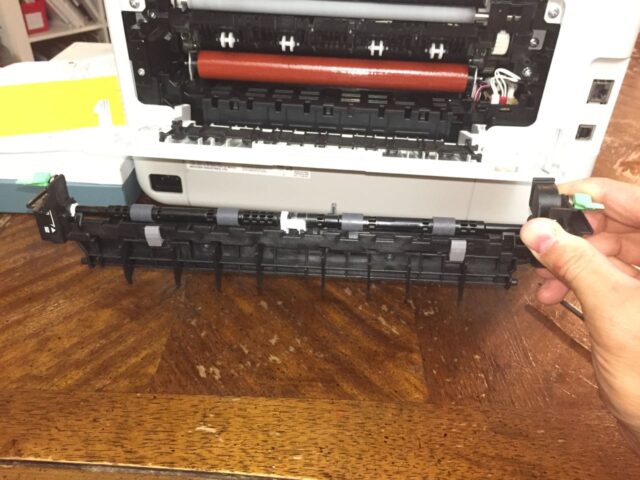
Step 6: Remove the roller bar assembly.
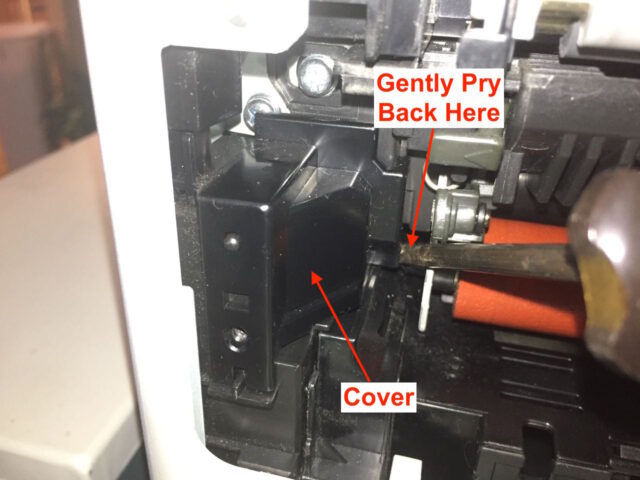
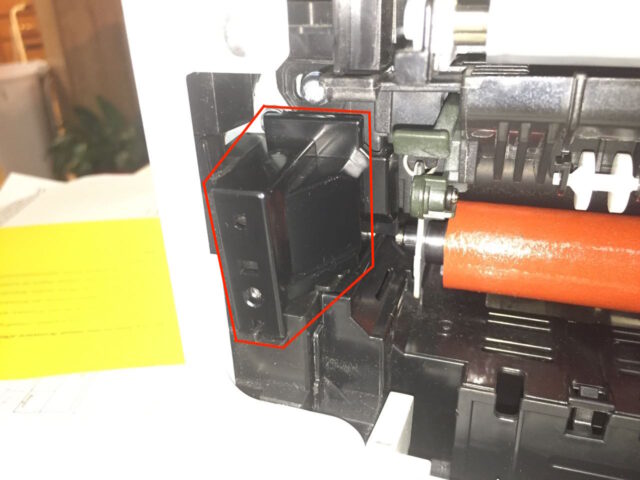
I don’t know what this thing is called so I just call it the roller bar assembly–i.e. the part that has the green tabs on each end and which we just opened up. Remove the right plastic cover as seen here:
Once that right cover is out you can fish the right end of the roller assembly out of it’s place. You need to play around with the angle of the assembly (rotating it open/closed) so the flat edge of the right end of its shaft is oriented correctly to slide out–don’t force it.
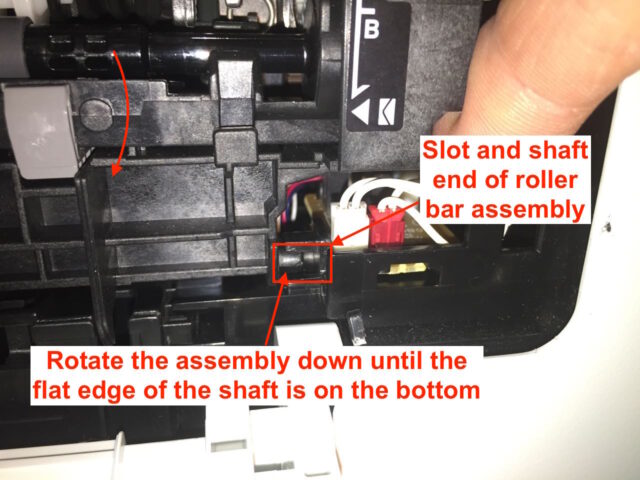
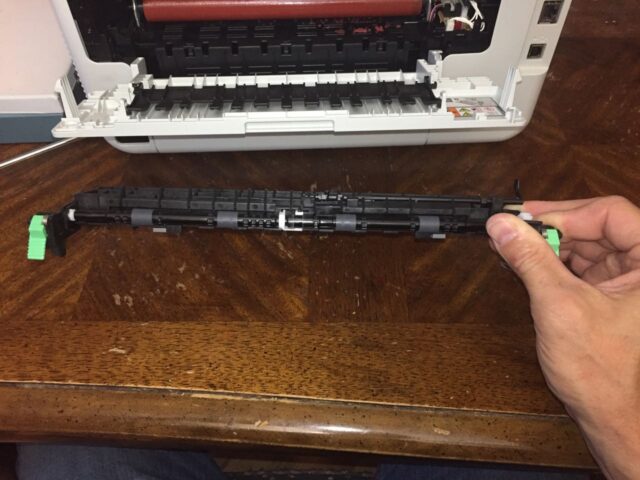
Once the right side is out pull the entire assembly to the right and it will come out:
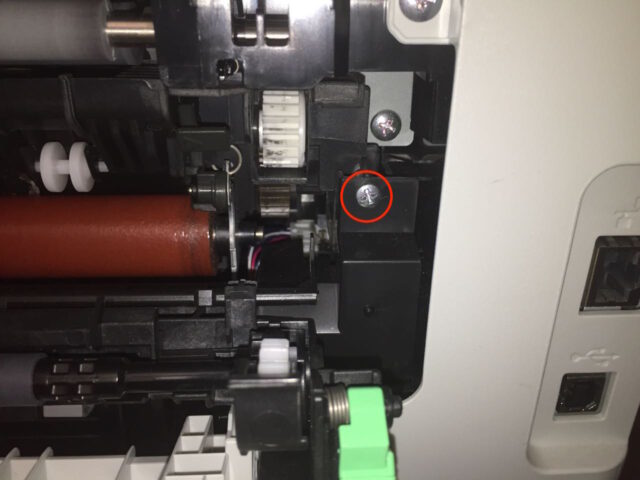
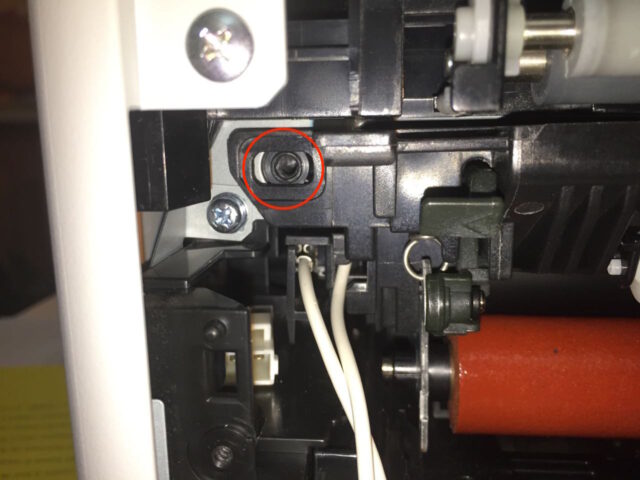
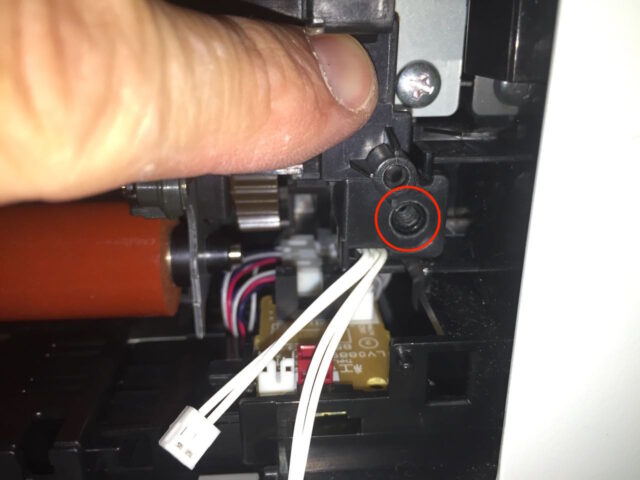
Step 7: Remove the two Fuser mounting screws.
There is one on the right:
And one on the left:

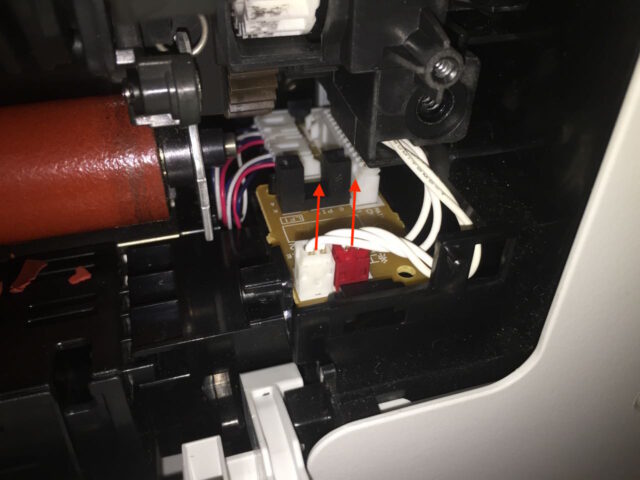
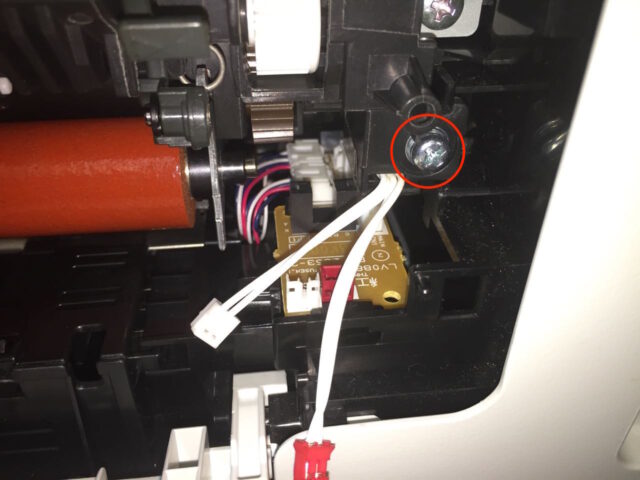
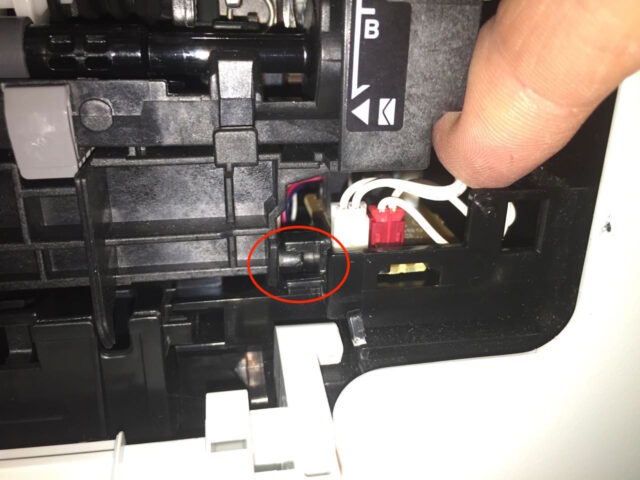
Step 8: Disconnect the three electrical connectors from the fuser.
Carefully lift the two connectors up out of their sockets on the right side. Be careful about pulling on the wires as you don’t want to pull the wires out of the connector.
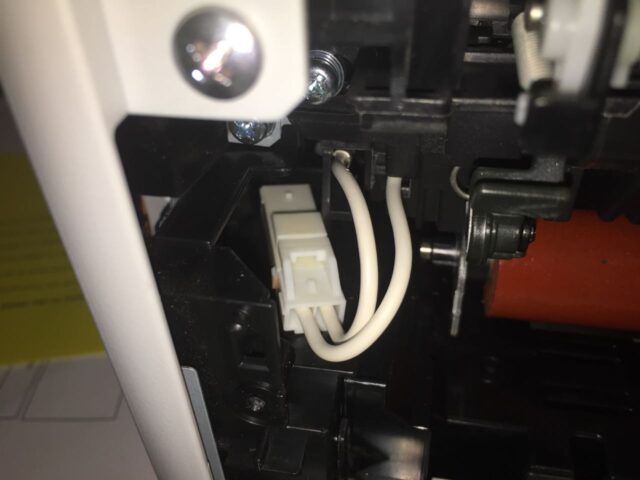
Here’s what the connectors look like when removed:
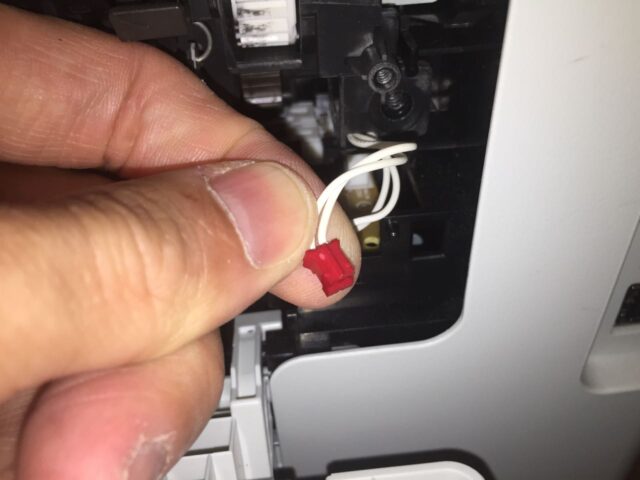
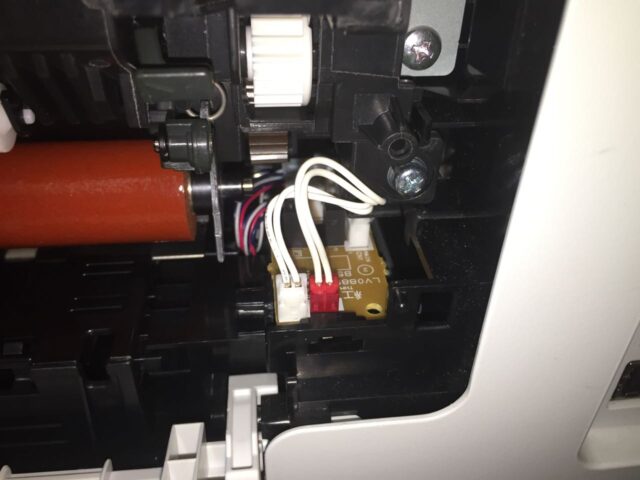
Pull out the left electrical connector:
Disconnect the connector:
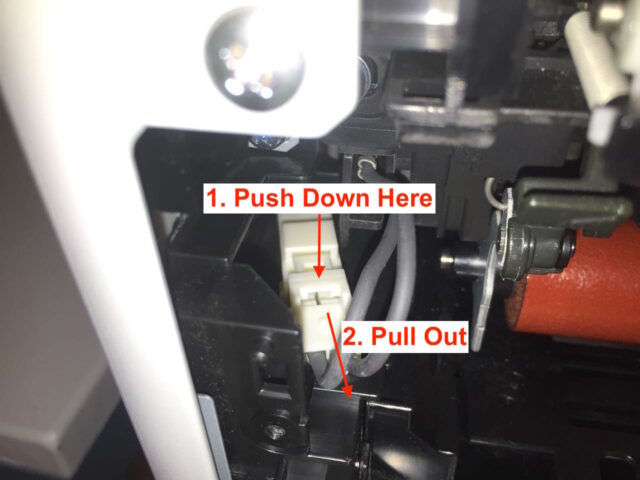
Here is what the electrical connector looks like once you get it disconnected:

Step 9: Carefully remove the fuser.
The fuser will come straight out:
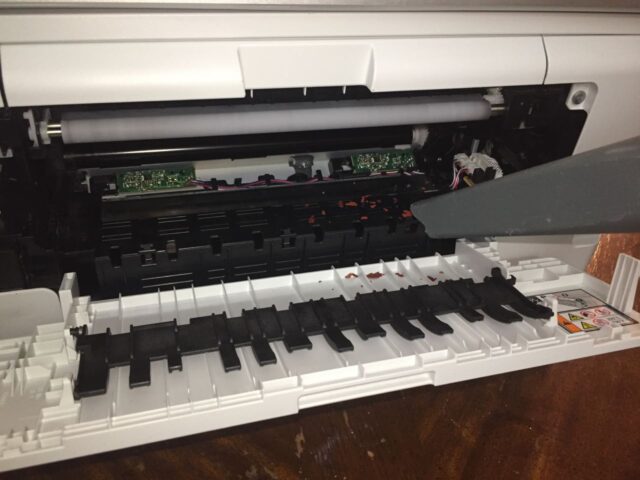
Step 10: Clean out the fuser roller flakes.
There were a bunch of orange toner roller flakes inside the door of my printer. I vacuumed them out. Be careful as you can discharge static electricity from the vacuum hose onto the Printer electronics, so steer clear of the circuit boards where you disconnected the wiring:
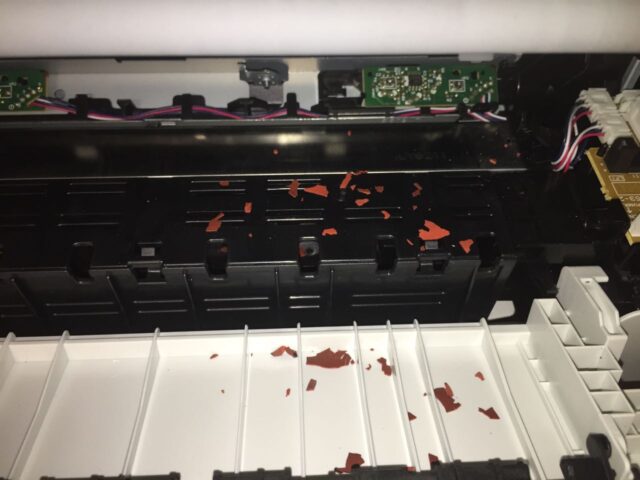
You don’t want to leave any flakes inside the printer so I vacuumed them out. There could be a chance that you could zap some electronics with the static that can generate on a vacuum hose so don’t touch any circuit boards with your vacuum.
Step 11: Insert the new fuser unit and reinstall the screws.
The screw holes should face you and the red roller will be on the outside bottom, as seen below:
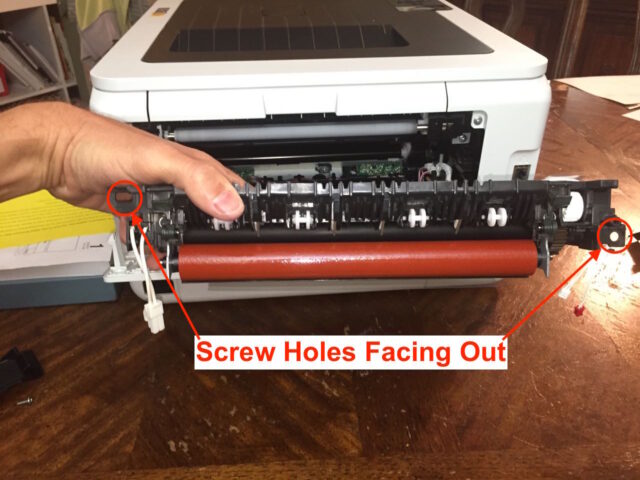
Line up the screw holes:
Step 12: Reconnect the electrical connectors.
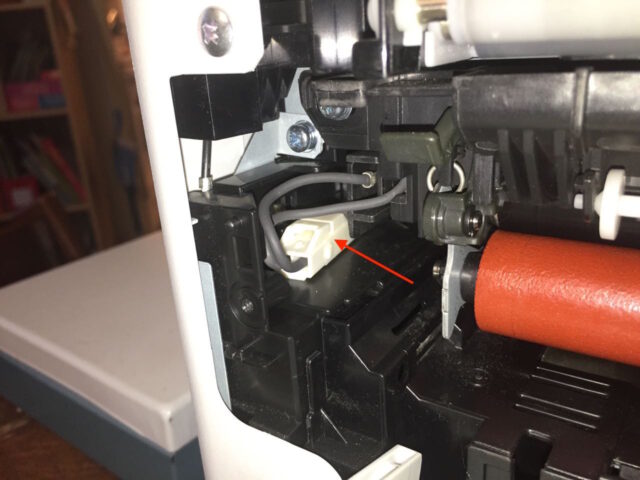
Snap the left electrical connector together:
Reconnect the two right electrical connectors, the white one on the left and the red one on the right, as seen below:
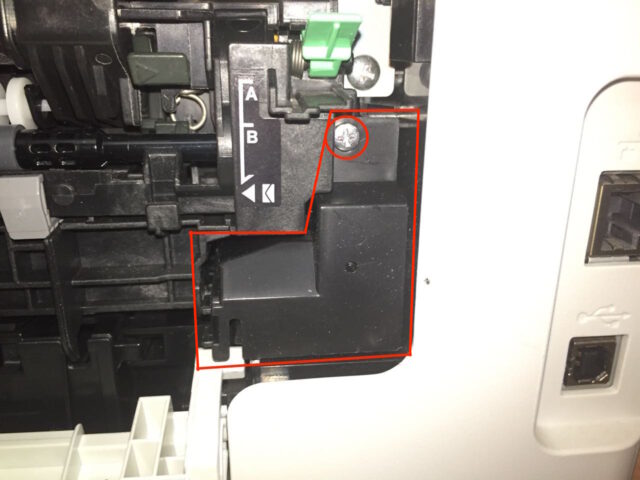
Step 13: Reinstall the wiring cover.
Install it as seen below:
Then install the single screw:
Step 14: Reinstall the Roller Assembly
Insert the left side first, as seen below:

Insert the right side. It doesn’t go into a hole but fits into the opening seen below. The end will be held in place by the plastic cover you will install in the next step.
Reinstall the right fuser wiring cover. It will hold the right side of the roller bar in place. Replace the one screw as seen below:
Now the hardware portion of this repair is complete.
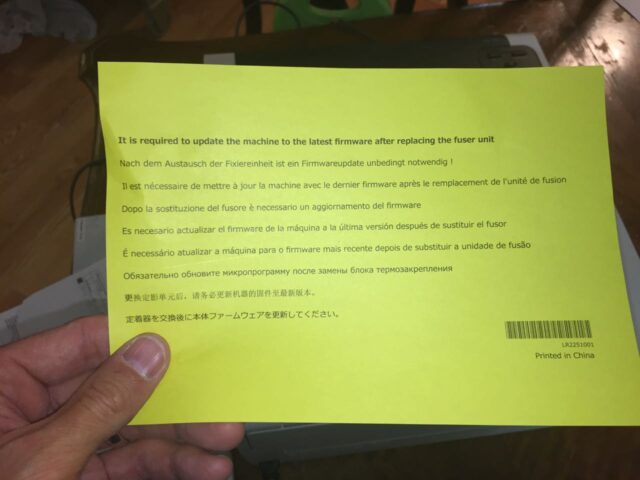
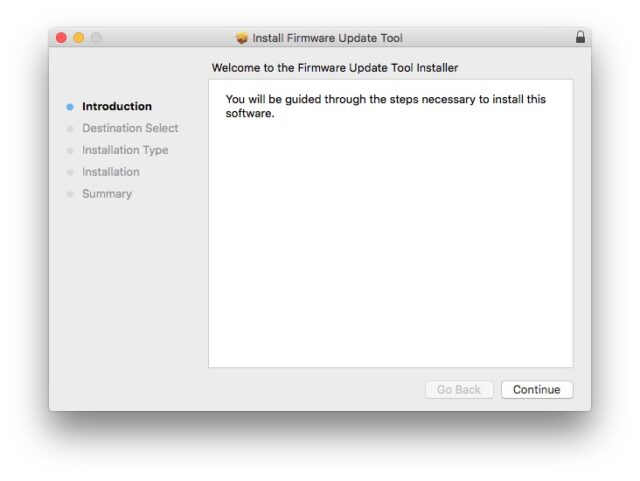
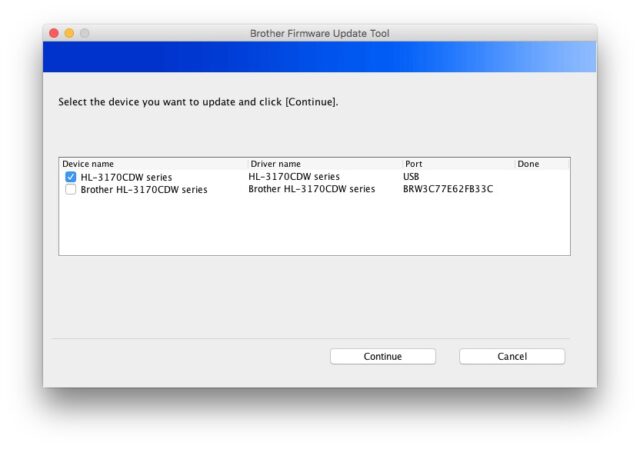
Step 14: Download the printer’s firmware updater.
Replacing the fuser requires you to update the HL-3170’s firmware:
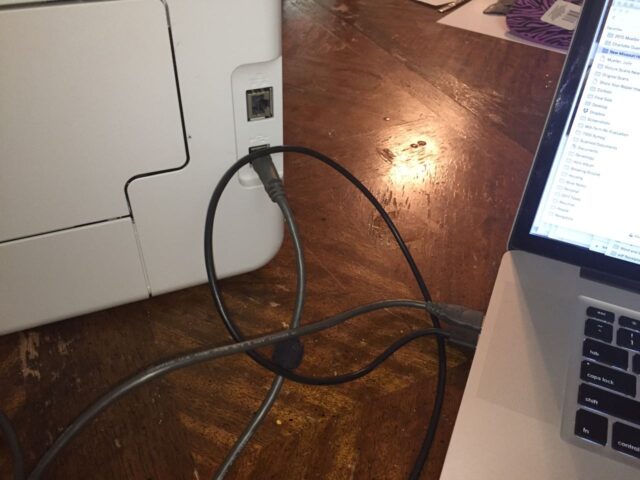
Download the firmware updater at Brother’s website: HL-3170 Firmware Updater Tool. Connect your printer via USB:
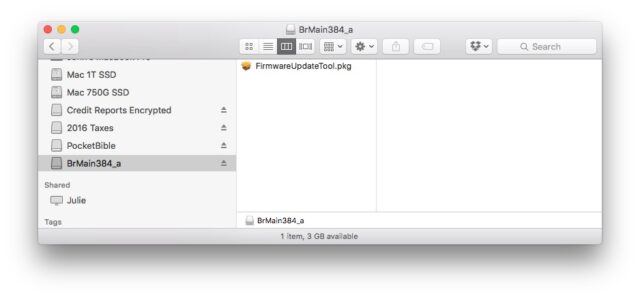
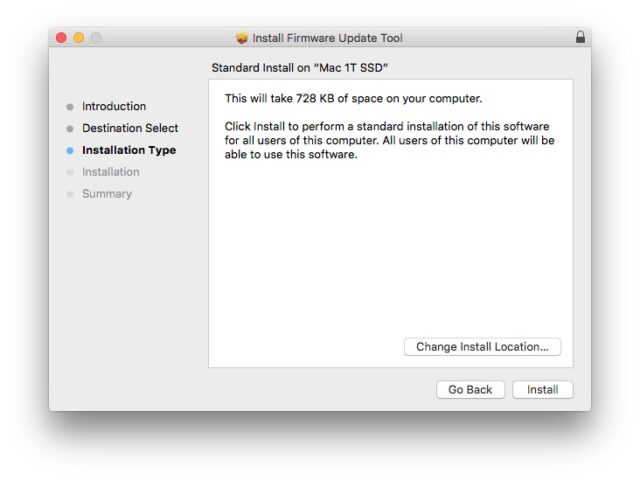
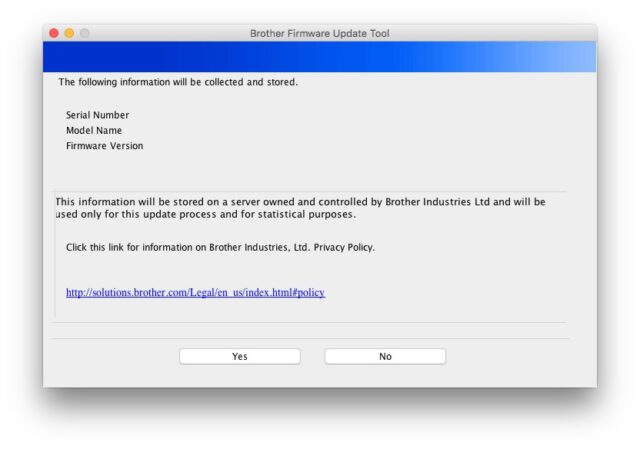
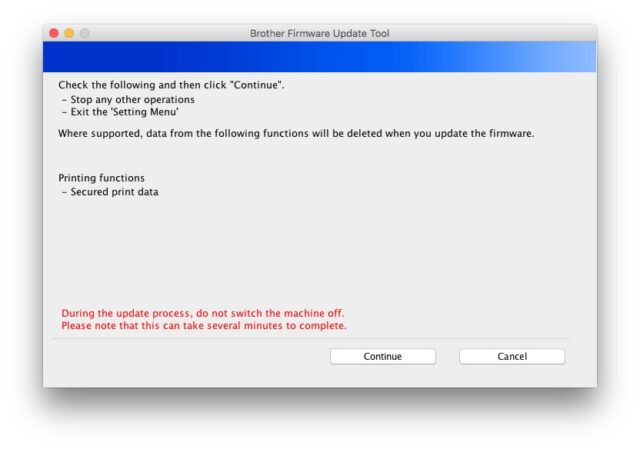
Step 14: Update the printer’s firmware.
Run the updater tool. I updated my printer’s firmware using a Mac. Here are some screenshots from the process:
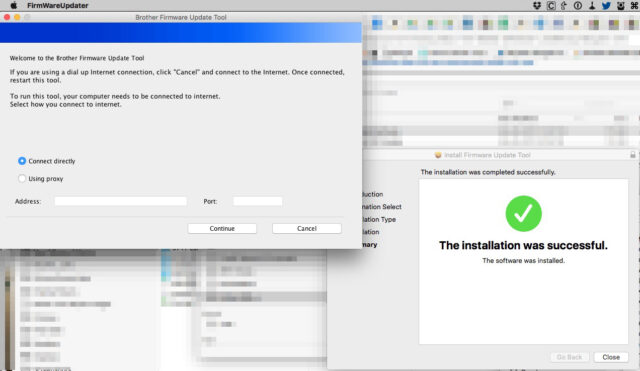

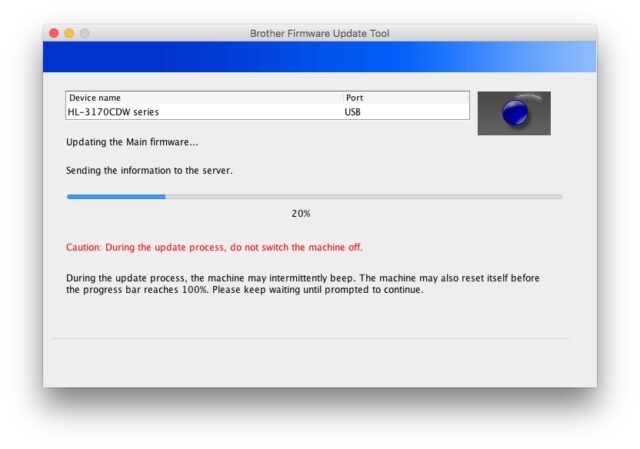

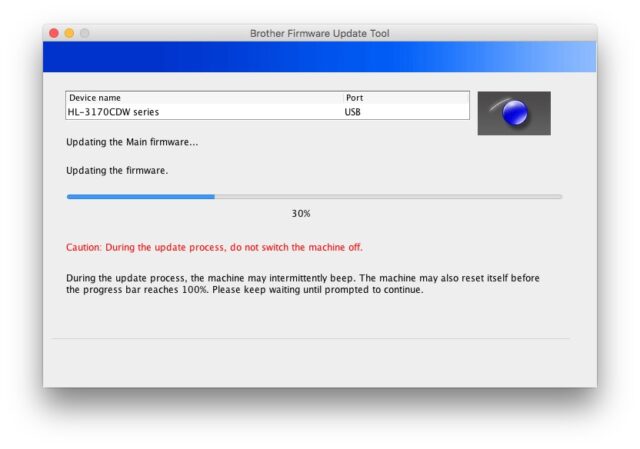
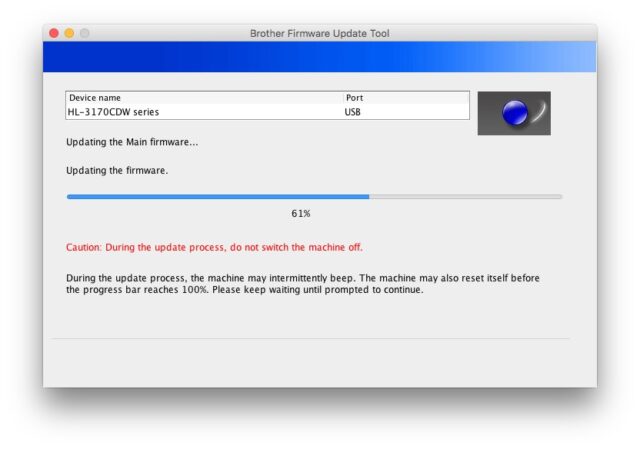
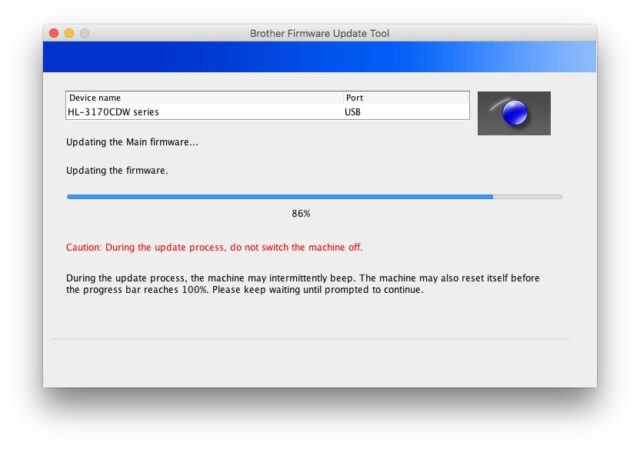
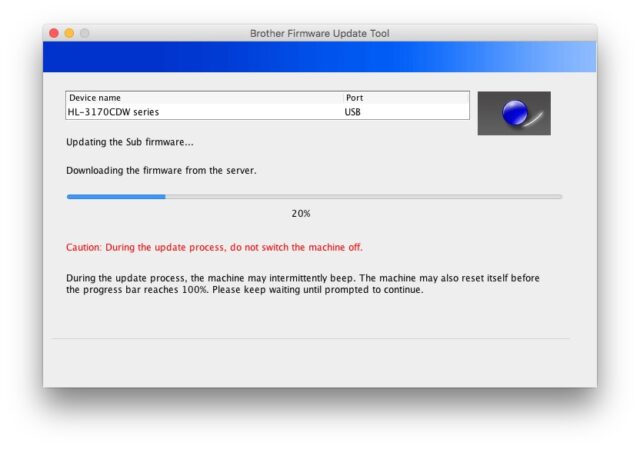

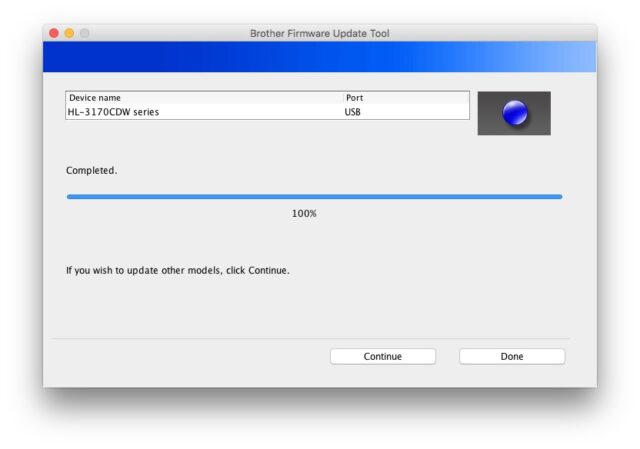
During the update the printer’s fan came on and shut off multiple times. Once you are done updating your firmware your fuser replacement is complete!
Amazon Associate Disclosure: As an Amazon Associate I earn from qualifying purchases. This means if you click on an affiliate link and purchase the item, I will receive an affiliate commission. The price of the item is the same whether it is an affiliate link or not. Regardless, I only recommend products or services I believe will add value to Share Your Repair readers. By using the affiliate links, you are helping support Share Your Repair, and I genuinely appreciate your support.
Actually, instead of using a screwdriver, use an awl with a sharp point. The portion of the connector that is attached to the wires has a “nib” that slides into a groove on the circuit board connector. The awl is placed on this nib and slid upwards.
Follow-up
Step 8 – Those small connectors on the small printed circuit board 0n the right side are fragile. To disconnect the wires, use a small screwdriver and place the corner of the blade in the middle of the connector facing you, then slide the connector upward. Don’t press too hard and don’t use needle nose pliers to grab the top of the connector. If the pliers slip, you risk hitting the wires. Pliers also put too much torque on the connector fastened to the circuit board.
I used these instructions for replacing the fuser on a model 3180 and they were perfect. The hard part was resetting the fuser counter. I finally found the following, which worked.
Brother 9130, 9330, 9340 Replace Parts Fuser Unit Reset
By Kevin Gumpp
January 4, 2021
Instructions for the Brother 3180, 9130, 9330, 9340 Replace Parts Fuser Unit Life Reset Procedure
1) Press the “tools” icon and hold down the Home key until the screen showing serial number with 4 boxes is displayed. (less than 10 seconds for a 3180 printer)
2) Hold down the 4th space, which is blank (last rectangle box) at the bottom of the LCD until the numbers grid is displayed on the LCD. (less than 5 seconds)
3) Press the * on the machine’s numerical pad, then press 2, 8, 6, 4 on the display grid unit in that order. The display will show “Maintenance” and enter maintenance mode.
4) Once in Maintenance mode, press 88. Reset-Fuser Unit will be displayed on the LCD.
5) Press SET key on the touch screen, and Reset-Fuser unit Ok? will be displayed.
6) Press SET key on the touch screen to reset the fuser counter
7) Press Stop key on the touch screen. Press 99 to exit maintenance mode
8) Printer will now reboot and the fuser counter will be reset.
Thanks for the tips.
Thank you for the excellent instructions.
Thanks for an excellent procedure demonstration. In your opinion, is it a viable option to replace just the rollers (from China on e-Bay for $25) instead of the entire fuser assembly ($255)? Thanks
It could be possible. I don’t know the reason why the rollers go bad. It could be because the heating element in the fuser doesn’t keep at the correct temperature but overheats. If that were the case then you would be doing the repair again soon. Let us know what you do and how it goes.
Thank you and yes that was the original issue, exactly like yours. I really appreciate the support!
Many thanks again, we will try reinstalling and going back to supplier.
Let us know how it turns out Melanie.
Just to further update – I finally spoke with a representative at Brother who advised that the fuser roller was not heating up to the proper temperature and that was the cause of the error message. They then advised that repairs should be done by a qualified technician (although they could recommend none in my area) and that improper installation could result in fire or explosion. This is so disappointing as I have invested a significant amount of time and $ in trying to get this machine to work :(. Not a happy ending for me….
Maybe you should work with where you purchased the part and see if they will replace it as defective. The temperature sensor and heater are part of the new part so if it isn’t hitting temperature the part could be bad. Alternatively, and as a last result, I’d uninstall and reinstall it and see if that fixed it. What was the original issue you had with it? Was it a deteriorating roller like mine?
Thanks I will try that! Your support is excellent and the instructions were so well laid out. Cudos!!
I followed all the steps yet my printer is now showing an error Message Unable to Print 05. I have turned the machine on and off multiple times and cannot get the message to clear…..any suggestions please?
Were you able to successfully update the firmware? I searched for that error and found the following article. I would guess that one of the cables didn’t get plugged in fully if I had to make a guess, and would recommend checking them all. https://help.brother-usa.com/app/answers/detail/a_id/142338/~/print-unable-05
Hi John, It looks on my printer that only the top roller is crumbling and damaged. Bits of orange are crumbling into the area. Could I get away with only changing the top black roller and leaving the lower orange roller alone. Do you have a source for the top black roller.
It’s a single part, you need to replace the whole fuser.
John, this page is awesome!!! You did a great job documenting this. It took me < 1 hr to do this with an aftermarket fuser/roller and it all went smoothly. Thank you for all the pictures and detailed instructions!! Have a great day!
Thanks for the feedback Greg and good work on fixing your printer!
Great job, John. Your detailed instructions helped me successfully install a refurb fuser and salvage my printer. Many thanks! Mike M
Awesome!!! Following this super detailed guide made my repair a breeze! Thank you so much for the great work!!
I only had that happen once I believe, I think the paper just crinkled on its own without heat. They jam immediately even coming out of the paper tray, meaning it isn’t even getting to print yet, but it jams about two or three inches going in. If it somehow does begin to put toner down, it will jam in the rear tray. Maybe 1 out of every 7 or 10 pages does not jam. It doesn’t look like they are being heated up. It started with the double sided feature always jamming–that never worked, and now even single sided printing doesn’t work. I’m using quality paper. Doesn’t seem to matter what type. The back roller does not seem damaged or melting. There probably is something wrong with the feeding mechanism. I cleaned all the paths and didn’t find any bits of paper anywhere.
I have this printer and it continually jams. It started with double sided printing, but now every other sheet will jam. I’ve looked inside, followed the method to stick 5 sheets of paper in the rollers to clear them out, nothing works. Any advice on how to fix this, or is this printer junk?
Joe, when you remove the jammed pages are the pages crinkled up like they have been heated up real hot?