A common problem with AC condenser units (I’ve been told by HVAC techs it has become very common) is the starter capacitor going bad. I guess there is a lot of “dirty power,” meaning spikes and extra frequencies in the voltage provided by the power company and this is hard on the starter capacitor of your AC condenser unit. The fan on your condenser unit has a large capacitor that is used to provide the jolt of current needed to get the fan motor going. The dirty power ruins the capacitors and then you get hot. Read on to learn how to replace starter capacitor on AC condenser.
Hardware:
- Carrier Central Air Conditioning Condenser Model 38CKC030330
- GE Genteq Capacitor Dual Run Round 35/5 uf MFD 370 Volt VAC
How to Replace Starter Capacitor on AC Condenser
 |
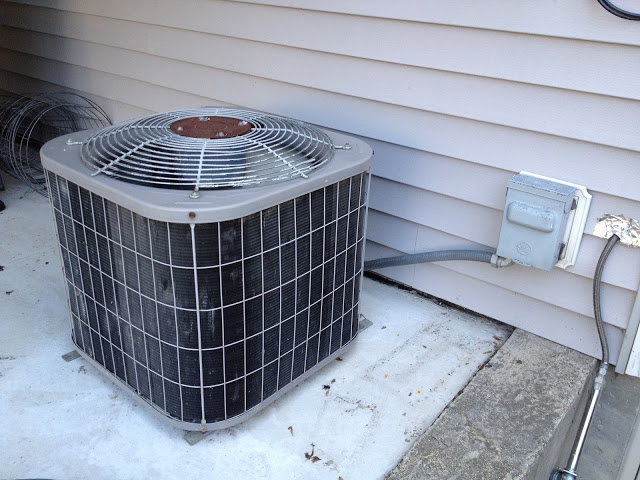
| The shut-off box for the condenser unit |


The part we are going to replace is the capacitor and it looks like a silver pop can clamped to the side of the condenser unit with a metal band. Make sure not to short the leads of the capacitor. If it’s bad it won’t have a charge but you don’t want to mess with large capacitors. You could end up with a molten fireball if you shorted a fully-charged capacitor.
 |
| The starting capacitor |
Now one thing you’ll definitely want to do is take a picture of your capacitor with the wiring in place so you know how to put it back together because I’m not going to go over those details. That’s actually why I took this picture. I also scratched into the capacitor’s can the colors of the wires so I could compare when I get the replacement and would know how to hook it back up.
Now it may not be possible to tell for sure whether this capacitor is bad based on looks but when these capacitors fail many times they will bulge up on the top. You can see that my capacitor is bulging (verses inset like a pop can’s bottom). If you take it to a HVAC parts store they can test it for you and let you know whether it is bad too. If you are in the Chicago area a good place to go is Sundberg Company Appliance Parts and that’s where I got my replacement. If you don’t mind waiting for delivery (or maybe it’s going to be cool for the next few days) you can get them on amazon.com too for real cheap.
Back to the repair. Once you’ve taken good notes as to how things are connected, pull off the connectors and then loosen the screws holding the band tight to the frame of the condenser. Slip in your new capacitor and reconnect the wires, tighten the band screws, replace the panel and screw it back on, and then turn your power back on by reinserting the paddle in the disconnect box (pay attention that the right side of the paddle is up to turn it on) and then you can go inside and cool off. You just probably saved yourself over $150 in repair costs for not much work.
Other thoughts:
- I’ve heard of situations where the furnace and/or the air conditioner will not come on simply because the battery in the thermostat had run low enough that it didn’t have the juice to switch the relay in the furnace. That’s something else to check out (and real simple at that).
- The relay is another common thing that goes bad on these condenser units. Mine hasn’t gone bad but when it does I’ll document it on this blog.
Amazon Associate Disclosure: As an Amazon Associate I earn from qualifying purchases. This means if you click on an affiliate link and purchase the item, I will receive an affiliate commission. The price of the item is the same whether it is an affiliate link or not. Regardless, I only recommend products or services I believe will add value to Share Your Repair readers. By using the affiliate links, you are helping support Share Your Repair, and I genuinely appreciate your support.