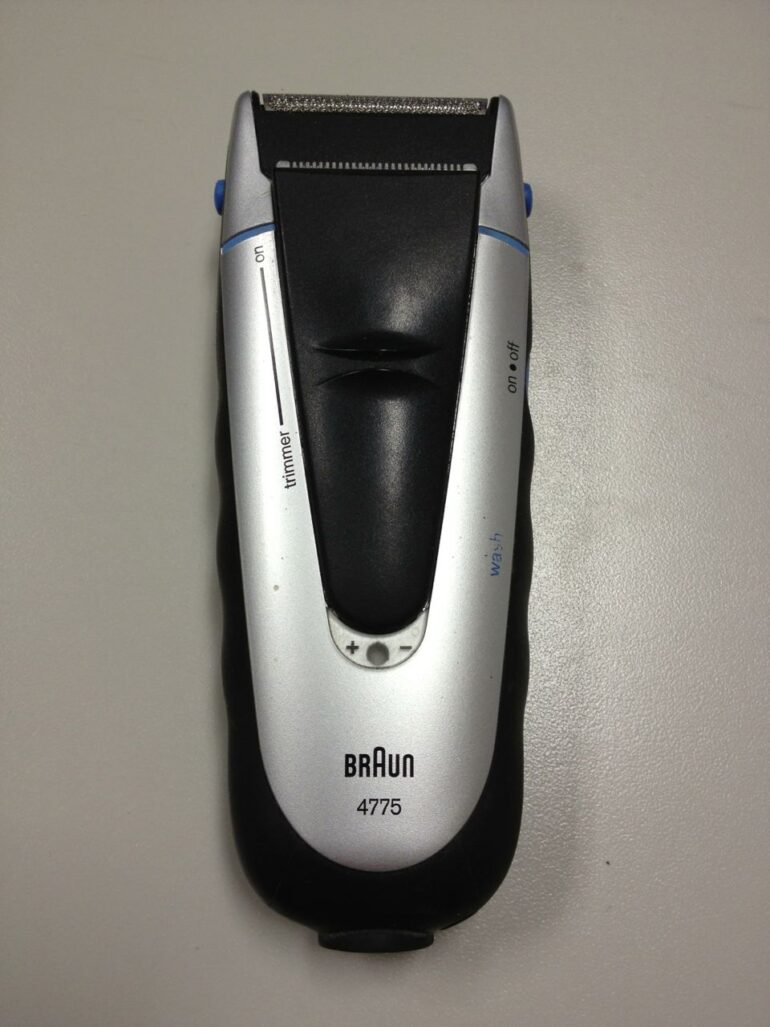
I have a Braun 4775 electric razor that won’t hold a charge anymore so I decided to tear into it to see if I could put a new battery in it. Follow these steps to replace the batteries…
How to Replace the Batteries in a Braun 4775 Electric Razor
Step 1: Remove the two plastic plugs that cover the screws on the cord end.
Use a fine flat screwdriver or a knife to pry out the plugs:
Pry the two plastic plugs out that cover up the torx-headed screws
These will expose the two screws:
Remove the two T8 Torx headed screws on either side of the power connector
Step 2: Unscrew the two screws.
They are 8mm torx headed. Unscrew them. They didn’t come all the way out for me but that’s ok–leave them retained in razor body.
Step 3: Slide off the outside cover of the razor.
The corded end plastic cover slides off once you have the two torx screws unscrewed.
The case slides off (to the right)
With the case removed:
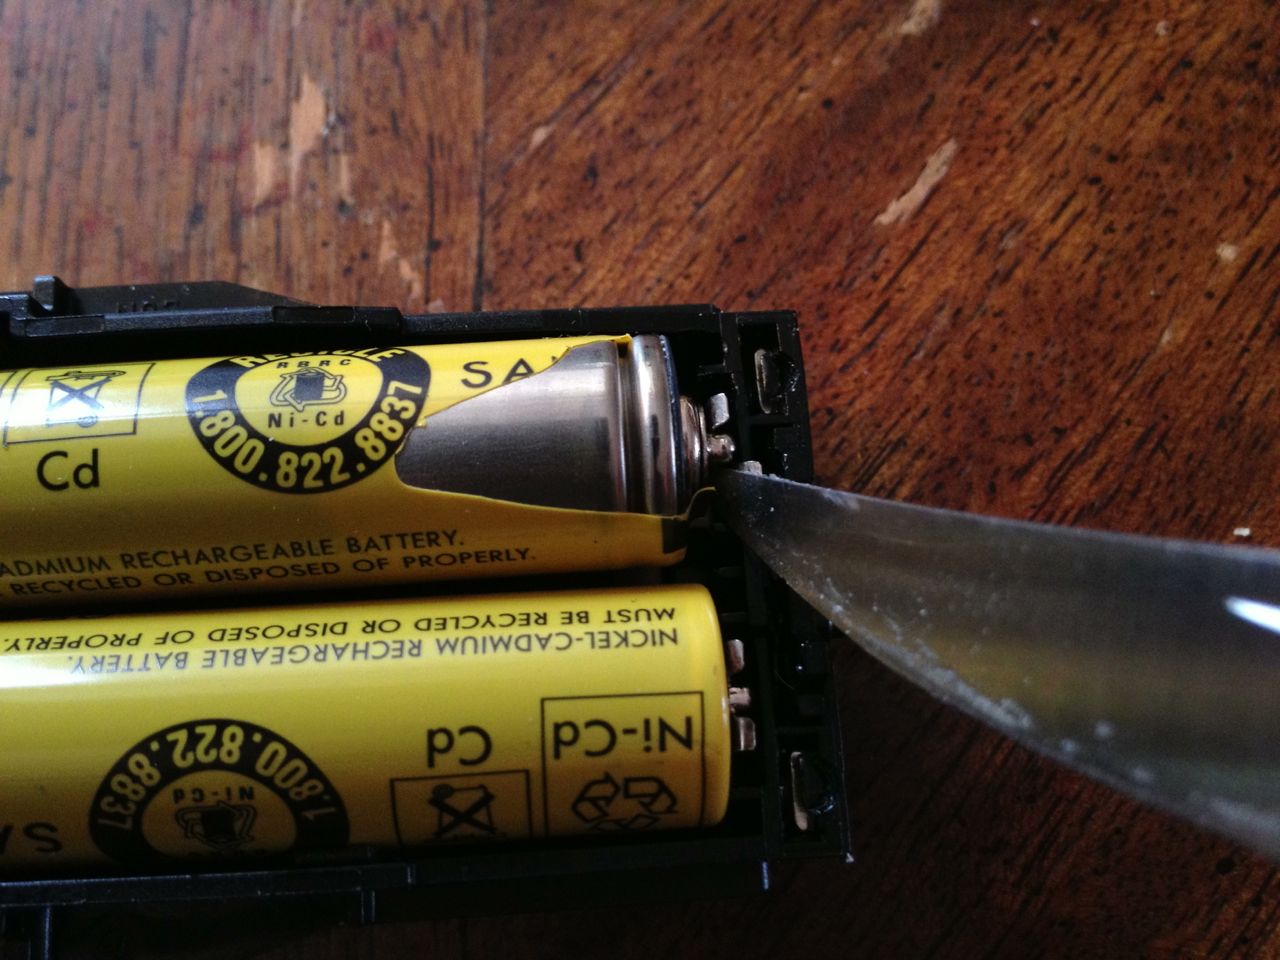
Step 4: Remove the 2 Ni-Cd batteries.
Each end of the AA Ni-Cd’s have a little nipple spot welded on the end of them that slides in-between the battery terminals on each end. I needed to use my knife in order to pry the ends of the battery out. The plastic on the battery below is slightly torn off because I wanted to see if there was a brand-named battery underneath the plastic wrapping that had a part number (but it didn’t).
Carefully prying the batteries out.
Step 5: Order replacement batteries.
There wasn’t a part number on these batteries so I had to go by the fact that they are 1.2 volts, Ni-Cd, and AA size. A google.com search turned up tons of results, of both Ni-Cd’s and NiMH batteries. Nickel Metal Hydride (NiMH) batteries are much higher capacity and are superior to the older Ni-Cads but the charging process is different for each. I researched for whether you can charge the NiMH’s with a charger meant for Ni-Cd’s but opted to stick with the originals. I guess Ni-Cds most likely charge using a timer or at a very slow rate that would take forever to actually get the NiMH’s up to full charge (or never). I opted to try some Ni-Cd’s meant for solar lights because there were more of them available and they were cheap. You can buy them on amazon.com here.
Moonrays 97125 Rechargeable NiCd AA Batteries for Solar-Powered Lights
Step 6: Modify the new batteries to fit.
I tried putting the new batteries in the razor but they do not fit tight because they do not have the little tips (spot welded) on each end of them like the original batteries:
The replacement batteries don’t fit tight at all out of the box.
The tips (on both ends):
The original batteries have a special “buttoned” tip on each end. This is the positive end.
After reading a bit online about soldering to the end of batteries I decided it was possible and decided to pop off the tips from the original batteries and then solder them on the new ones. The trick to pulling this off is:
Sanding the chrome off the ends of the battery
Applying flux to the metal before trying to apply solder
“Tinning” each metal part before trying to solder them together (but don’t add too much solder–just do it lightly)
Use a high wattage soldering iron so that you don’t have to heat up the battery for long (2-3 seconds) so you don’t damage the battery.
I ended up soldering the button/tip on the negative end and then simply putting a ball of solder on the other end. Here’s what the button looked like when I got it soldered on the first battery. It wasn’t quite centered but since I can line it up with the center by turning it, it doesn’t matter:
The tip I soldered on the new battery (it’s not quite centered but it will work)
Below is the little ball of solder I placed on the other end. It is fully adhered to the end of the battery because I sanded it and put down flux before dropping the solder on it.
The ball of solder I applied to the positive end of the battery.
I repeated this for the other battery as well.
Step 7: Install the new (modified) batteries.
Pay attention to the polarity of the batteries. The razor’s case has the positive and negative marked on it and your batteries are marked as well:
The polarity is marked on the black plastic.
Don’t force the batteries in because you may have put too much solder on the end… I had to adjust it at least once before they fit right.
The modified batteries fit snugly.
Step 8: Test the razor.
You can turn the razor on without reassembling the case by pressing the button on the side:
The power button on the side.
The batteries should already have a charge so it should work right away.
Step 9: Re-assemble the case and reinstall the screws.
You’re done! Now you’ve saved yourself at least $50.
Update 2/28/13:
After a full charge these Moonrays NiCD batteries lasted over 2 weeks so I’d say they are a good deal and the replacement of the factory batteries was a big success.
Update 5/1/16:
My batteries began getting hot when I would leave it on the charger so I replaced the two NiCd batteries using the same method above except I simply just put a dot of solder on each end instead of transferring the ends from the old batteries and this seemed to work fine.
Amazon Associate Disclosure: As an Amazon Associate I earn from qualifying purchases. This means if you click on an affiliate link and purchase the item, I will receive an affiliate commission. The price of the item is the same whether it is an affiliate link or not. Regardless, I only recommend products or services I believe will add value to Share Your Repair readers. By using the affiliate links, you are helping support Share Your Repair, and I genuinely appreciate your support.
Thank you for your excellent write-up. For my part, I have the Braun SmartControl3 4775 (Type 5742) but my issue is not with the batteries. Rather, the start/stop button just fell off of the shaver while I was using it yesterday.
My previous shaver was the Braun Flex XP 5614 (Type 5723), which I believed the batteries had failed in, so I used your instructions to transfer my known good batteries from the 4775 to the 5614. Unfortunately, I did not meet with success. I then put the old batteries (Sanyo Brand) into the 4775 and they made it work.
So, now I have two sets of good batteries for the 4775 and still need to repair its start button. My best guess is that the rubber washer that sits behind the metal button has deteriorated to the point that the button falls out. Any idea how to fix this issue?
Any idea how to test the motor in the 5614?
I also wanted to share that I was able to get some parts information at this link: https://braun.encompass.com/model/BRA5742. There are two batteries identified on the site. A yellow style, as in your photos, is Braun Part Number 67030921—Rechargeable Battery, NiCD, AA. A green style is Braun Part Number 67030923—Rechargeable Battery, Nimh, AA. Neither of which can be purchased on the site, but I did find them available here: https://www.electricshaverstore.com/search?q=5742. They can be had for $9/$10 each.
Thanks again for getting me started in the right direction. Any further guidance appreciated.
Same here. Worked fine for me. One tip: On mine, the guts would not budge from the body until I tapped on the body, all around, with a rubber mallet. They were in there TIGHT.
Thanks for the feedback Jeff and good job at breathing new life into your razor. Batteries only last so long and I’ve repeated this repair probably 3 times now on my Braun, so come back again!
I had the same issue with my Braun 4775 type 5742. I found the answer on this Russian YouTube video: https://www.youtube.com/watch?v=nFB_dzVGGLk&feature=youtu.be
The key things learned is that you have to remove the two Torx screws from the bottom PLUS the two in the top head. You pull the top head off and then use a screwdriver to pry the guts up through the top of the body. He was just off-camera for that but you can tell that’s what he did. All the other 4775 videos say you can pull everything out the bottom of the shaver. Not true for mine.
Wish John had figured this out. I have the same issue with a Braun 4775 Tri-Control Type 5713. The plastic casing simply won’t budge once the two Torx-8 screws are removed from the bottom. Have spent a couple hours prying, twisting, etc. Don’t want to break it apart to figure it out so am putting it away for now. If anyone know the secret, please share.
Hummm, that’s interesting–there shouldn’t be anything holding it back except for the rubber gasket that makes it water resistant. One thing you might try is cramming a flat head screwdriver down into the seam where the blue rubber gasket is and twist a bit, working your way around. It’s probably gummed up with stuff. Let us know how it turns out.
They charge, that is, the green light comes on, then after a few minutes, flickers. Using the shaver, they run down after a few minutes and the light shows red.
As long as you used 1.2V AA Nicads, you installed them in the correct orientation polarity-wise (the positive end on the correct end), there is electrical continuity between the batteries and the terminals, then it should charge them. If you put your multimeter across the two ends of the batteries on the motor end, you should get somewhere around 2.4 volts, since they are in series. If it still does not charge, then I’d say you need to replace the razor. I’d certainly check over your installation before throwing in the towel.
I used 2 small steel washers for spacers and they work well. My problem is that the charger doesn’t seem to put a “full charge” on the batteries and they don’t last but a couple of minutes.
I installed new alkaline rechargeable 1.2v batteries and used the foil shims rather than soldering. Initially for a few seconds, then stopped. I wiggled the battery with the positive terminal pointed toward the bottom end making it start on and off. Thinking the problem was poor contact with that battery I checked the foil shim and secured it. Now nothing happens. It seems that it doesn’t like alkaline batteries or the switch is now faulty. Any thoughts?
Thanks for sharing Greg. I would caution you about changing battery types in your razor. The Braun has a built-in charger designed specifically for NiCad batteries. Each different battery chemistry requires a unique type of charger in order to properly reverse the reaction and sense when the charge has completed. If you take one type of charger and put a different kind of battery on it, you could ruin the battery, if may not charge at all, it may overcharge, or even cause a fire. Here’s an article that does a pretty good job of describing the way different battery chargers work, I’d encourage you to read it: Battery University – All About Chargers
Well thanks for very detailed guidance, could you now kindly lead me to replace the charger , where it could be available, for braun series 4700 model 4775
John, this was helpful. However, I have a Braun 4775, Smartcontrol3. I removed the two screws from the bottom and the grip came off. But, have not been able to find out how to remove the body to access the batteries. Any ideas?
Thanks, Tom
I’m sorry to say that I don’t have that version, yet, so I can’t tell you how to repair it. I tried googling that model and wasn’t able to find anything for you either. It looks like you’ll have to pave the way. Check back in if you figure it out and share the trick.
Yes. You need to tap on the body, all the way around and up and down, pretty vigorously with a rubber mallet. That let the body free itself from the guts for me.
Many thanks John for your guidance – I had a go and the shaver now works and charges well. “Micro”- soldering is not something I do, so I cut some foil to size and squeezed/packed it behind the battery contacts to ease them forward to connect with the batteries (which I happened to have as standbys for solar lights) – and bingo ! Perhaps not a professional job, but the shaver remains cool while charging and the light flashes appropriately. As you suggest, I’ve saved a bob or two – or a new shaver. Many thanks – it was fun. Will follow your site.
Great job on the repair Stuart. Thanks for sharing about the foil trick–I had not thought about trying that but that may be helpful for other people to read and might help someone who would rather shy away from soldering. Thanks for following, I’ll try to keep ’em coming 🙂
(or if you don’t want an Amazon add-on item, try these)
)


Thank you for your excellent write-up. For my part, I have the Braun SmartControl3 4775 (Type 5742) but my issue is not with the batteries. Rather, the start/stop button just fell off of the shaver while I was using it yesterday.
My previous shaver was the Braun Flex XP 5614 (Type 5723), which I believed the batteries had failed in, so I used your instructions to transfer my known good batteries from the 4775 to the 5614. Unfortunately, I did not meet with success. I then put the old batteries (Sanyo Brand) into the 4775 and they made it work.
So, now I have two sets of good batteries for the 4775 and still need to repair its start button. My best guess is that the rubber washer that sits behind the metal button has deteriorated to the point that the button falls out. Any idea how to fix this issue?
Any idea how to test the motor in the 5614?
I also wanted to share that I was able to get some parts information at this link: https://braun.encompass.com/model/BRA5742. There are two batteries identified on the site. A yellow style, as in your photos, is Braun Part Number 67030921—Rechargeable Battery, NiCD, AA. A green style is Braun Part Number 67030923—Rechargeable Battery, Nimh, AA. Neither of which can be purchased on the site, but I did find them available here: https://www.electricshaverstore.com/search?q=5742. They can be had for $9/$10 each.
Thanks again for getting me started in the right direction. Any further guidance appreciated.
Same here. Worked fine for me. One tip: On mine, the guts would not budge from the body until I tapped on the body, all around, with a rubber mallet. They were in there TIGHT.
Amazing help. I just used regular NiCads and bent the metal contacts so the touched the ends of the battery and it worked fine! Thanks.
Thanks for the feedback Jeff and good job at breathing new life into your razor. Batteries only last so long and I’ve repeated this repair probably 3 times now on my Braun, so come back again!
I had the same issue with my Braun 4775 type 5742. I found the answer on this Russian YouTube video:
https://www.youtube.com/watch?v=nFB_dzVGGLk&feature=youtu.be
The key things learned is that you have to remove the two Torx screws from the bottom PLUS the two in the top head. You pull the top head off and then use a screwdriver to pry the guts up through the top of the body. He was just off-camera for that but you can tell that’s what he did. All the other 4775 videos say you can pull everything out the bottom of the shaver. Not true for mine.
Thanks for sharing Chuck, I’m guessing there will be others who will be able to benefit from your tips.
Wish John had figured this out. I have the same issue with a Braun 4775 Tri-Control Type 5713. The plastic casing simply won’t budge once the two Torx-8 screws are removed from the bottom. Have spent a couple hours prying, twisting, etc. Don’t want to break it apart to figure it out so am putting it away for now. If anyone know the secret, please share.
Hummm, that’s interesting–there shouldn’t be anything holding it back except for the rubber gasket that makes it water resistant. One thing you might try is cramming a flat head screwdriver down into the seam where the blue rubber gasket is and twist a bit, working your way around. It’s probably gummed up with stuff. Let us know how it turns out.
They charge, that is, the green light comes on, then after a few minutes, flickers. Using the shaver, they run down after a few minutes and the light shows red.
As long as you used 1.2V AA Nicads, you installed them in the correct orientation polarity-wise (the positive end on the correct end), there is electrical continuity between the batteries and the terminals, then it should charge them. If you put your multimeter across the two ends of the batteries on the motor end, you should get somewhere around 2.4 volts, since they are in series. If it still does not charge, then I’d say you need to replace the razor. I’d certainly check over your installation before throwing in the towel.
I used 2 small steel washers for spacers and they work well. My problem is that the charger doesn’t seem to put a “full charge” on the batteries and they don’t last but a couple of minutes.
Thanks for the question Mike. Let me make sure I understand–after you installed NEW batteries, your replacement batteries don’t charge?
I installed new alkaline rechargeable 1.2v batteries and used the foil shims rather than soldering. Initially for a few seconds, then stopped. I wiggled the battery with the positive terminal pointed toward the bottom end making it start on and off. Thinking the problem was poor contact with that battery I checked the foil shim and secured it. Now nothing happens. It seems that it doesn’t like alkaline batteries or the switch is now faulty. Any thoughts?
Thanks for sharing Greg. I would caution you about changing battery types in your razor. The Braun has a built-in charger designed specifically for NiCad batteries. Each different battery chemistry requires a unique type of charger in order to properly reverse the reaction and sense when the charge has completed. If you take one type of charger and put a different kind of battery on it, you could ruin the battery, if may not charge at all, it may overcharge, or even cause a fire. Here’s an article that does a pretty good job of describing the way different battery chargers work, I’d encourage you to read it: Battery University – All About Chargers
Well thanks for very detailed guidance, could you now kindly lead me to replace the charger , where it could be available, for braun series 4700 model 4775
The cord is available on amazon here.
John, this was helpful. However, I have a Braun 4775, Smartcontrol3. I removed the two screws from the bottom and the grip came off. But, have not been able to find out how to remove the body to access the batteries. Any ideas?
Thanks, Tom
I’m sorry to say that I don’t have that version, yet, so I can’t tell you how to repair it. I tried googling that model and wasn’t able to find anything for you either. It looks like you’ll have to pave the way. Check back in if you figure it out and share the trick.
Yes. You need to tap on the body, all the way around and up and down, pretty vigorously with a rubber mallet. That let the body free itself from the guts for me.
Many thanks John for your guidance – I had a go and the shaver now works and charges well. “Micro”- soldering is not something I do, so I cut some foil to size and squeezed/packed it behind the battery contacts to ease them forward to connect with the batteries (which I happened to have as standbys for solar lights) – and bingo ! Perhaps not a professional job, but the shaver remains cool while charging and the light flashes appropriately. As you suggest, I’ve saved a bob or two – or a new shaver. Many thanks – it was fun. Will follow your site.
Great job on the repair Stuart. Thanks for sharing about the foil trick–I had not thought about trying that but that may be helpful for other people to read and might help someone who would rather shy away from soldering. Thanks for following, I’ll try to keep ’em coming 🙂