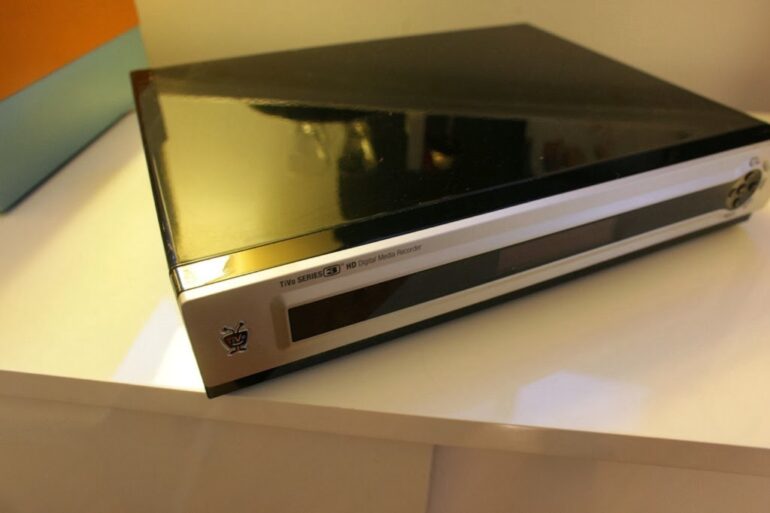
I purchased a used TiVo Series 3 with a lifetime subscription off ebay but it only had a 250 Gig hard drive in it and that’s not big enough for me. I’m looking for any excuse to take it apart too, so I decided to open up the case and explore. There’s a big TiVo hacking community out there and there are services such as www.weaknees.com who will upgrade your TiVo for you, for a price. I don’t want to pay that price so I figured I’d dive in, and with the tools freely available out there I figured I could do it.
How to Upgrade the HDD in your TiVo Series 3
Hardware
- TiVo Series 3 Model Number: TCD648250B with lifetime service on ebay
- Western Digital WD2500BS Caviar original TiVo Drive
- Western Digital 2.0TB WD20EARS
IMPORTANT NOTE: the TiVo drive cloning tool, WinMFS, will suggest that you not enable any more than 1TB, so don’t make the same mistake I made and buy a 2T disk if you are going to use WinMFS).
Step 1: Buy a bigger drive.
Not all HDD’s make good TiVo drives. You want a quiet running drive and it doesn’t need to be fast for AV use. I found lots of people suggesting the Western Digita Green line (AV-GP) of hard drives and decided on a 2 TB disk. The 2 is not much more expensive than the 1 so why not.
Step 2: Download WinMFS.
There’s a link to download it on the Quick Start Guide. The download link will have multiple versions on it, download the latest version Beta Build 9.3 was the one I used.
Step 3: Connect the drives to your PC.
This is the step that gave me the most problems. I’ve read that you can use SATA to USB adapters to hook up your bare drives via USB and I have a couple of them but I couldn’t get WinMFS to see the drives when I did that. So I connected them via SATA.
 |
| The SATA connections on my Dell motherboard labeled |
SATA1 was my CD drive so it was already on but I just borrowed it for the time being because I didn’t have enough SATA cables. Make sure these are the connectors you connect your drives to. SATA0 should be the boot drive. You can see the locations in the picture above.
This is where I ran into more problems. The SATA drives were all turned off in the bios so I needed to turn them on. If you are using a Dell computer, reboot it and press F2 during the boot process to go to the bios. Go to the Drives section and turn on SATA1 and SATA2 (SATA0 will already be on because it is the boot drive).
 |
| Temporarily enabling the SATA ports for the additional hard drives |
And here was the mess of a setup:
 |
| My drive cloning rig–what a (temporary) mess |
Step 4: Boot your PC and run WinMFS.
Following the Quick Start Guide download and install WinMFS.
Step 5: Run WinMFS, Troubleshoot the formatting of your New Drive so it shows up in WinMFS (in my case).
If you follow the Quick Start Guide it will first have you select the source drive. This is the TiVo drive if you are copying your TiVo drive to a bigger drive (like in my case). At first it didn’t list any drives and that was because I had SATA2 shut off in the bios. Once I turned that on it showed up. BUT, then the new, bigger, drive didn’t show up when I was trying to select the destination drive. I messed around with things trying to figure this out and then I figured it wasn’t finding it because I had formatted the drive for windows and windows had got a hold of it. I had used this drive previously for a backup. If it’s a new drive for you, you shouldn’t have this issue. So, I formatted it on my mac as Mac OS Extended (Journaled) and then hooked it back up to the PC, booted, ran WinMFS, selected the TiVo drive as the source drive, and then the new 2T disk did show up so I could select it as the destination drive. Click the Start button. What you see now should look something like this:
 |
| Drive cloning in progress |
Step 6: Wait Patiently.
There’s no pausing it or stopping it at this point so grab a cup of coffee and wait.
Step 7: Select “Yes” to expand the drive.
In short, the data has been copied now but the file that tells the OS how much total space is available hasn’t been modified. If you plugged your new drive in to your TiVo at this point you would not have any additional space from what you had on your original drive. Click yes to have the hard drive space expanded for you.
 |
| You have extra capacity on your Hard drive. Do you want to expand? |
Step 8: Find Out that 2T drives are NOT supported by Stock TiVos (or WinMFS can’t modify the TiVo enough to make it work).
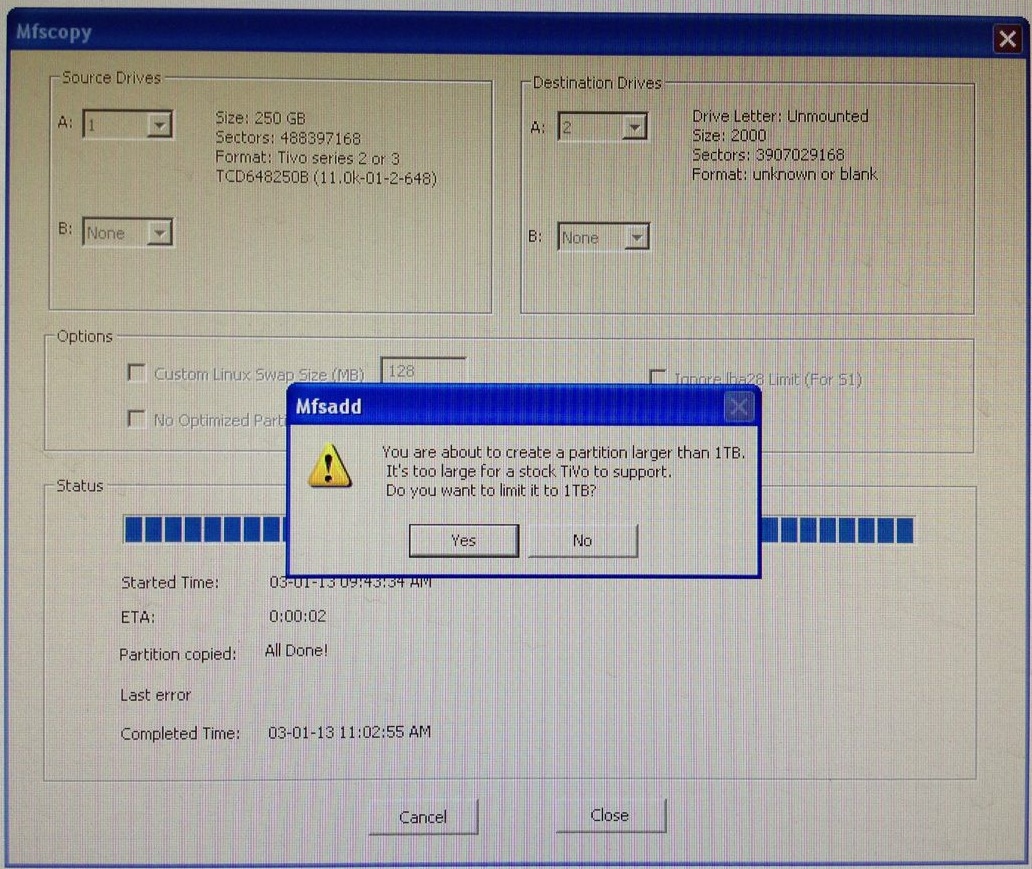
I went ahead and limited it because I didn’t want any problems and therefore wasted half a drive. I checked in with the TiVo upgrading website weaknees.com and they said they can get any TiVo to accept 2T but that they don’t use the WinMFS tool to do their upgrades. They don’t share their tool either, of course.
Step 9: Reinstall the new upgraded but neutered hard drive in to your TiVo.
Step 10: Test it out.
Connect everything to your TV, plug in your TiVo, and cross your fingers (crossing fingers doesn’t help though). If you plug it in and see what I did, that’s good:
 |
| A good sign |
And we have success, kind of. 1TB worth of video, 193 HD hours, or 1687 SD Hours. Wish it was 386 HD hours, but for now it’s working and I’m happy about that. Anyone know of an easy way to get all 2T out of it?
 |
| 193 HD Hours |
Step 11: Go back into your PC’s bios and disable the extra SATA drives.
While you wait the 8 or so minutes it takes to boot your TiVo you might as well take care of this so it doesn’t give you an error when you boot up.
All my DVR Posts:
- Cutting the Cord–How to Use a DVR Without Cable and With No Monthly Fees
- How to Upgrade Your TiVo Series 3 Hard Drive (this post)
- How to Reformat the Hard Drive on a Channel Master CM-7000PAL DVR
- Program a Channel Master CM-7000PAL DVR Remote to run a Vizio TV
- Upgrade the Hard Drive on a Channel Master CM-7000PAL DVR
Amazon Associate Disclosure: As an Amazon Associate I earn from qualifying purchases. This means if you click on an affiliate link and purchase the item, I will receive an affiliate commission. The price of the item is the same whether it is an affiliate link or not. Regardless, I only recommend products or services I believe will add value to Share Your Repair readers. By using the affiliate links, you are helping support Share Your Repair, and I genuinely appreciate your support.
There is a way to get the 2 TB drive to expand and work.
First: The Series 3 HD much be running version 11.0h or later of the TiVo software/operating system. So if the original is running “11.0h” or “11.0k” or “11.0m”, etc. you’re good to go.
Change Steps 7 & 8 above with these steps:
1] After the copy when it asks “You have extra capacity … Do you want to Expand?”
Reply with NO.
2] Then exit out of the WinMFS program and restart WinMFS.
Then go back to File, and Select Drive, and this time select the 2TB drive.
3] Now run mfsadd and it should allow you to successfully expand the drive.
Thanks for the tips. I do still own a Series 3 but it’s on a shelf in the basement. I’m running a Roamio that I haven’t had to work on yet, apart from replacing the cooling fan.