 |
| How to remove and replace keyboard keys on your MacBook Pro |
Hardware:
- Unibody MacBook Pro (any size: 13″, 15″, 17″)
- any Macbook Pro (older aluminum MacBook’s keys work the same way actually)
Parts:
I was using a staple remover at work and one leg of a staple broke off and jumped onto my keyboard. In trying to pick it up I accidentally pushed it down the crack along the edge of the key. Being afraid I might short something out I immediately shut down my MacBook and went to work at removing the little metal wire from my keyboard by popping off the key. I got a little more practice than I wanted because I accidentally popped off the wrong key at first. Here’s how to remove and replace keys on your MacBook. BTW: there isn’t any chance of shorting anything out under the S or X keys because the unibody MacBook Pro isn’t assembled in that way (like some previous versions were, but only along the very edges of the keyboard).
How to remove keys from a MacBook:
Step 1: Use a fingernail or knife to lift up the bottom or top left corner of the key. You want to pry up on the left side of the key because that is the side that the scissor mechanism snaps onto (versus being tucked underneath, like the right sides of the scissor mechanism):
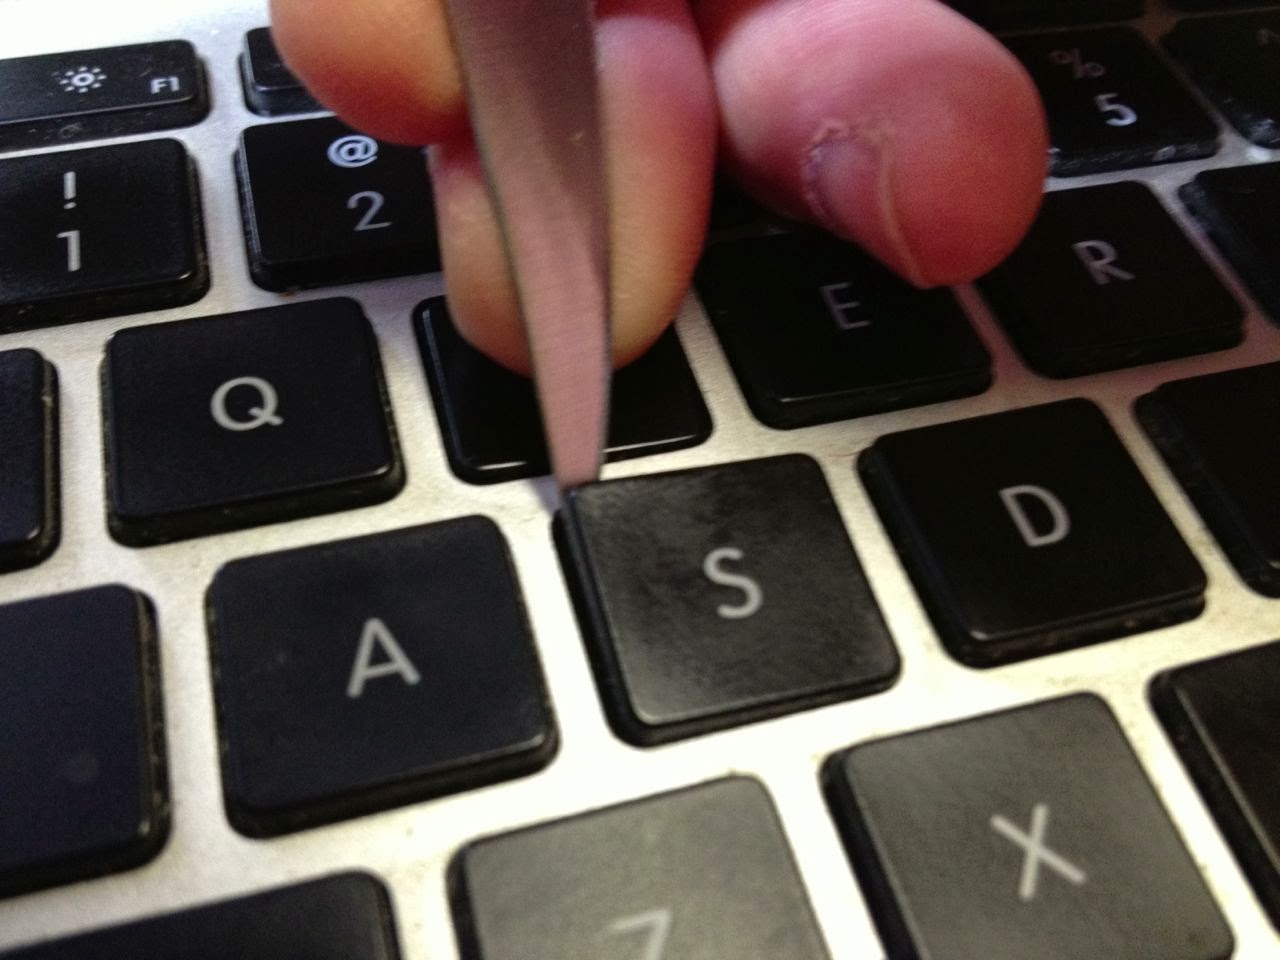 |
| Pry up on the top or bottom left corners of the key (and grit your teeth a bit because it feels awful to do this to a key) |
It will feel like you are going to break something but as long as you pull straight up on the left side it will pop off. You may have to pry up on the bottom corner as well to get the bottom side to release.
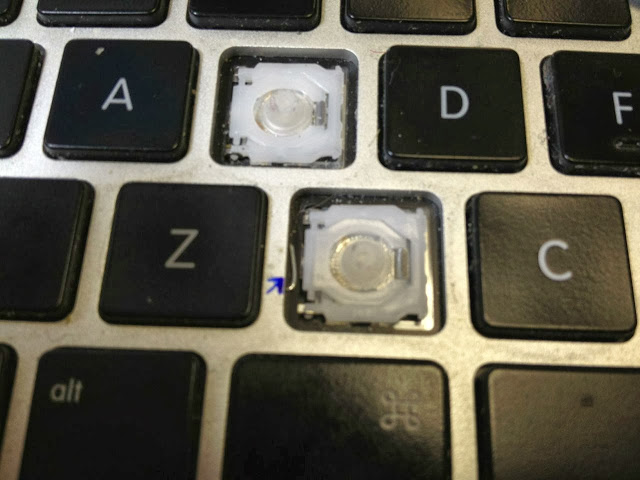
Step 2: Take care of your business under the key. The last time I did this I was cleaning up Mountain Dew I spilled on my computer. This time I retrieved the leg of the staple I lost:
 |
| The arrow marks the staple leg. Even though I marked it, I still accidentally removed the wrong key!?!?! |
How to Replace Keys on a MacBook:
Step 1: Understand how the keys hold onto the computer. Each key hooks over the right side of the scissor mechanism and snaps down onto the left side of the scissor mechanism. You must hook the key and get it “seated” on the right side FIRST so that when you proceed to the next step the left side is aligned up over the snap.
Step 1: Understand how the keys hold onto the computer. Each key hooks over the right side of the scissor mechanism and snaps down onto the left side of the scissor mechanism. You must hook the key and get it “seated” on the right side FIRST so that when you proceed to the next step the left side is aligned up over the snap.
Step 2: Hooking the right side of the key. Holding the key by its edges, lower it left of where it actually will be when seated and hook the right side of the scissor mechanism into the hooks on the right side of the key.
 |
| The scissor mechanism will hook into here |
The hooks of the key will hook under the ends of the scissor mechanism shown below:
 |
| The right side of the scissor mechanism hooks into the key from the inside |
Placing the key:
 |
| Hooking the key onto the right side of the scissor mechanism from the left side |
CAUTION: Take your time in making sure the key is placed and hooked on the scissor mechanism correctly before you move on to the next step. You can verify that it is placed correctly by trying to lift up on the right edge of the key while holding it to the right. If both the top and bottom of the right side are “hooked” then you are good to move on. If you are not on correctly and you move to the next step and “press down” hard, you may bend the part of the key that snaps on the scissor mechanism and you’ll need to order a new key (which you can actually do and here’s a link to find replacement keys on Ebay ).
).
Step 3: Snap down the left side of the key. Once you have verified the the right side is hooked in correctly, hold the key in place and press straight down in the top left quadrant of the key to snap the top left side in. NOTE: You must press down pretty hard to get it to snap and you should hear it snap on.
 |
| Snapping the top left side of the key |
Repeat for the bottom left quadrant. Again, you must hear/feel the key snap down.
Here was the culprit, successfully extracted:
 |
| Staple leg that went into my keyboard |
Amazon Associate Disclosure: As an Amazon Associate I earn from qualifying purchases. This means if you click on an affiliate link and purchase the item, I will receive an affiliate commission. The price of the item is the same whether it is an affiliate link or not. Regardless, I only recommend products or services I believe will add value to Share Your Repair readers. By using the affiliate links, you are helping support Share Your Repair, and I genuinely appreciate your support.