I’m always wearing out my iPhone sync cables and they always go bad right where the lightning connector connects to the cord. The flexing and bending causes the shielding to break and then the wires soon follow.
How to Extend the Life of iPhone or iPad Lightning Sync Cables
Hardware:
Tools:
- Ryobi Variable Temperature Heat Gun
(I own a Ryobi HG500 but the current one is a HG600)
- Extra Set of Hands
(optional)
Parts:
- Heat Shrink Tubing Assortment
(you specifically will need some 10mm in diameter)
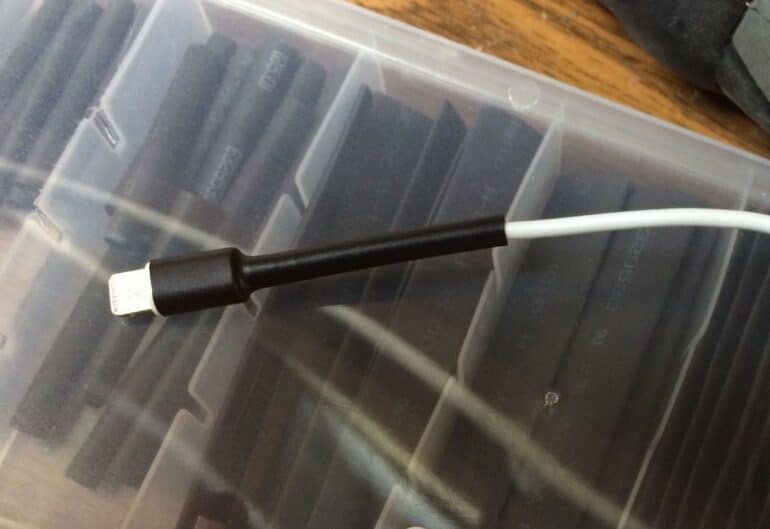
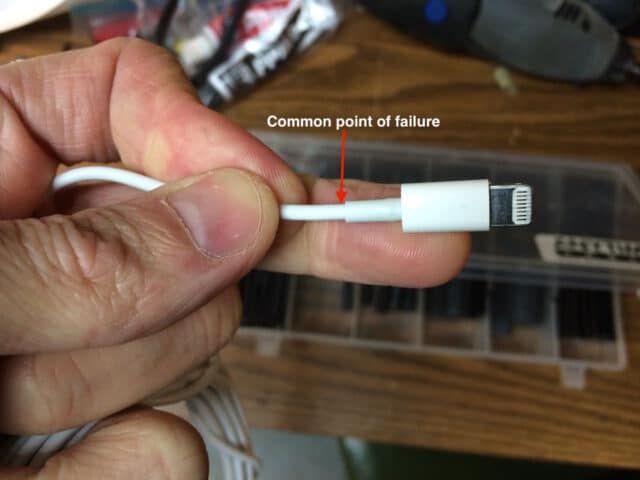 |
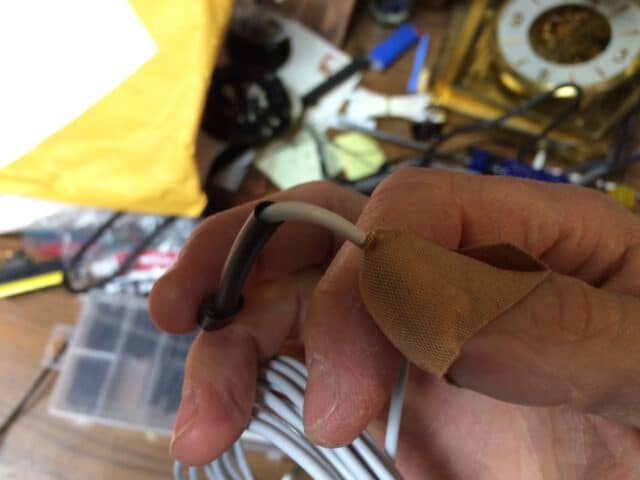
| The common point of failure–where the cord enters the connector |
Although I’ve heard that if you have an OEM Apple sync cable, they will replace it for free if it frays–but you must schedule a Genius Bar appointment to do it. I don’t have the time to mess with that. You can EXTEND the life of your cables by adding a layer of heat-shrink tubing where the lightning connector meets the cord and here is how…
Step 1: Find the right size heat shrink tubing.
You want it just big enough to slide over the lightning connector and not any bigger if you can help it because heat shrink tubing only shrinks a certain percentage and we want it to shrink as much to the cord as possible.
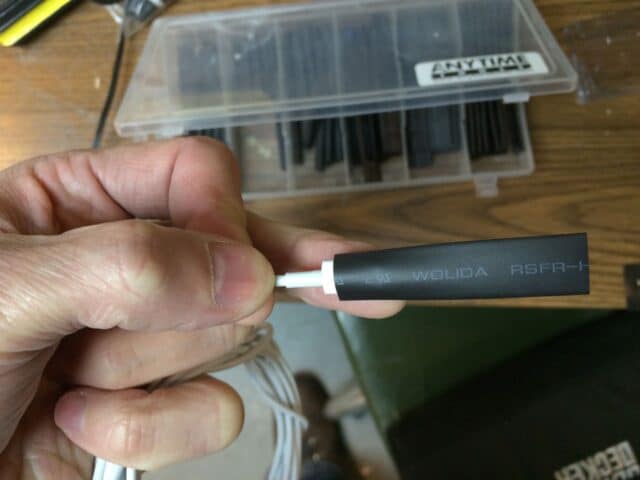 |
| Pick the smallest heat shrink tubing that will fit over the lightning connector |
Step 2: Place the cable somewhere where you can access all sides with the heat gun.
I used my extra set of hands tool for a couple reasons. First, you’re going to be using a heat gun which will burn you if you are not careful. Secondly, I want the heat shrink tubing to cool straight, because that will be the shape it remains in when I’m done. I lined up the heat shrink tubing all the way with the end of the plastic on the connector as indicated with the arrow below. You could even extend the tubing a tiny bit over the end of the connector because the tubing is going to “shrink” some and you can always trim it off if it still extends over the end of the connector when you are done. Here was my setup right before I applied the heat:
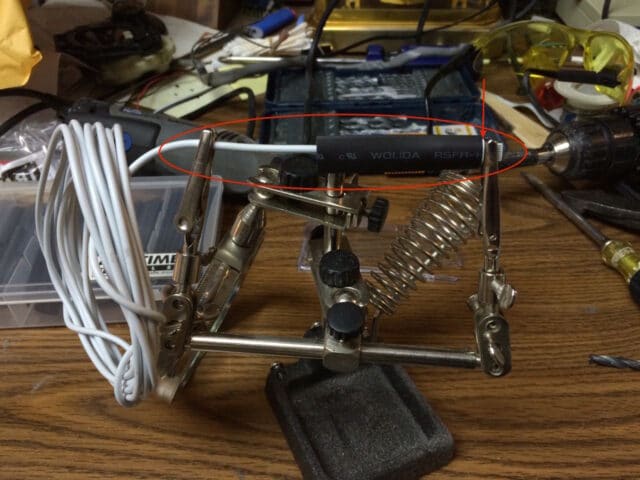 |
| Using my Extra Set of Hands tool to hold the sync cable in place for shrinking the tubing |
Step 3: Use your heat gun to shrink the tubing.
You need to go over both sides of the heat shrink tubing as shown in my video below. I had my heat gun set at 500 degrees Fahrenheit.
Note that the back side didn’t shrink until I went around to the back with the heat gun. One thing to note is that the heat shrink tubing will not shrink all the way down to the cable because it only shrinks a certain percentage and we must use tubing big enough to fit over the big connector on the end but that is ok. This is how it turned out for me:
 |
| The heat shrink tubing won’t shrink all the way down to the cable, but that’s ok |
Now your cables will last longer with a few cents worth of investment!
Amazon Associate Disclosure: As an Amazon Associate I earn from qualifying purchases. This means if you click on an affiliate link and purchase the item, I will receive an affiliate commission. The price of the item is the same whether it is an affiliate link or not. Regardless, I only recommend products or services I believe will add value to Share Your Repair readers. By using the affiliate links, you are helping support Share Your Repair, and I genuinely appreciate your support.