When I was replacing my incandescent interior dome light bulbs in my 2004 Toyota Sienna with LED bulbs I accidentally shorted out one of the sockets and blew the 10-Amp fuse. You can read the entire tutorial on how to replace all your interior dome lights with LEDs here:
How to Replace 2004-2010 Toyota Sienna Dome Light Bulbs With LED Bulbs
If you have blown the dome light fuse here are the steps for replacing it…
How to Replace 10-Amp Dome Light Fuse on 2004-2010 Toyota Sienna
Hardware:
- 2004-2010 Toyota Sienna
Parts Needed:
Tools Needed:
Step 1: Open up your hood and locate the fuse box.
I’ve written up how to pop your hood and prop it open in another tutorial I’ve written and so if you don’t know how to open the hood you can check out steps 1-3 on the following page:
How to Change the Air Filter on a 2004-2010 Toyota Sienna
Once you get the hood open you can locate the fuse box above and to the right of the battery:
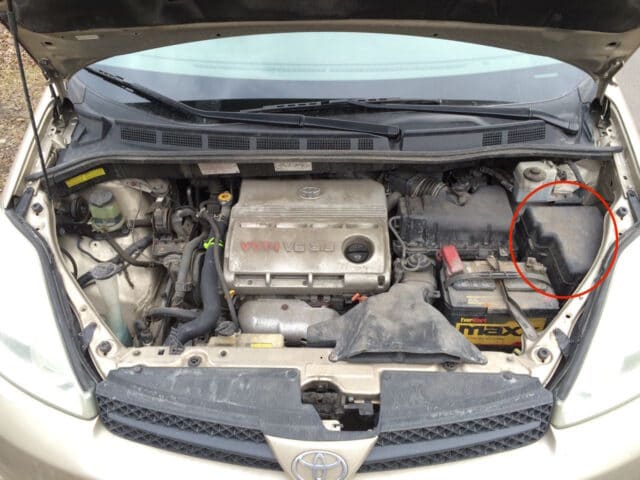 |
| Engine compartment fuse box location |
Step 2: Remove the fuse box lid.
The lid hooks onto the fuse box body on the back edge of the lid and has a little latch on the front edge that may need to be depressed to lift the front edge of the lid up. Here is the location where you should press:
 |
| Fuse box lid tab location |
Here I am pressing in the tab while lifting up on the front edge:
 |
| Pressing in the tab that locks the fuse box lid on |
Once you can lift up the front edge you can slide the lid towards the rear of the vehicle and then the lid will come off. This is what the lid looks like removed:
 |
| Fuse box lid removed, showing the fuse diagram on the inside |
Step 3: Locate the dome light fuses.
From the diagram on the back of the fuse box lid you can see that the dome light fuse(s) are towards the top right of the bank of fuses.
 |
| Close-up of fuse diagram on the back of the fuse box lid |
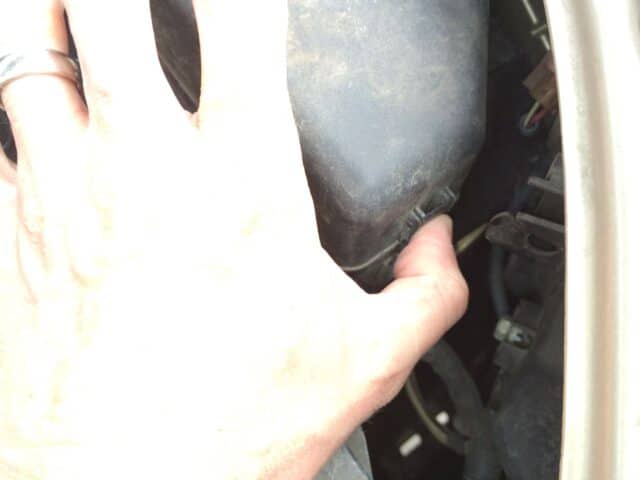
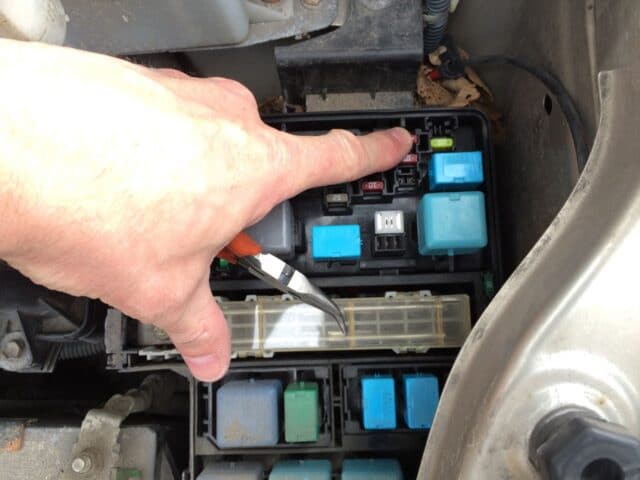
In real life the fuses are located here, under the tip of my finger:
 |
| Dome light 10-Amp fuse location |
Step 4: Use a needle nose pliers to remove the fuses one at a time to look to see if they are blown.
They pull straight up and out. Here I am removing the top dome light fuse:
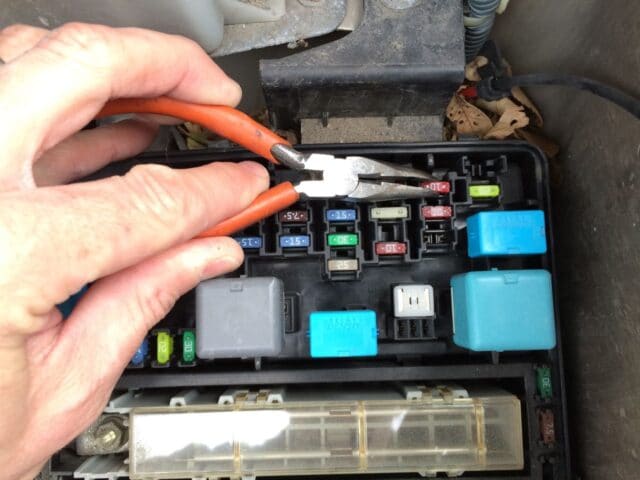 |
| Removing the top 10-Amp dome light fuse |
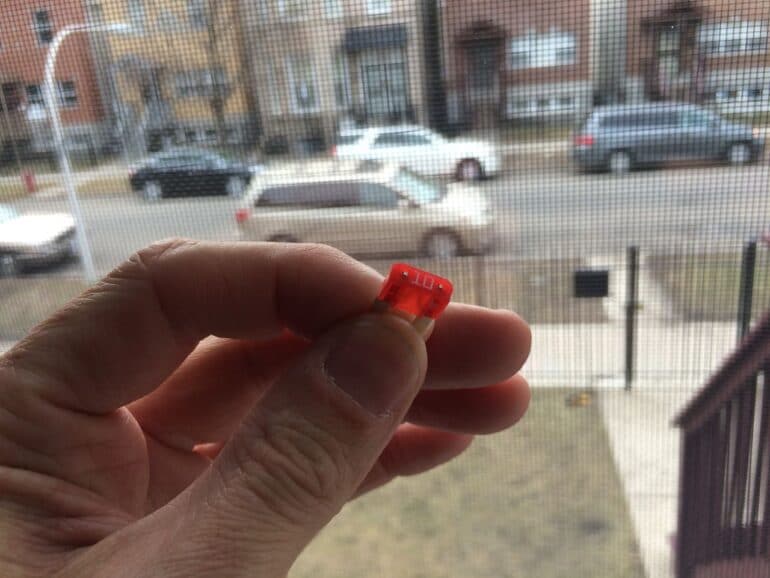
This is what a blown fuse looks like:
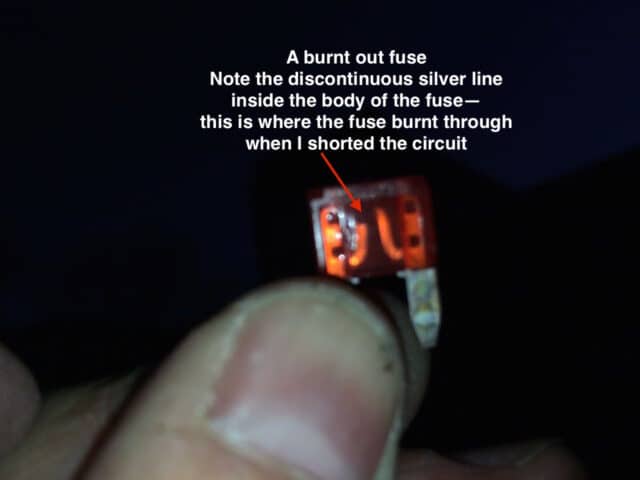 |
| A blown fuse |
A good fuse will have a continuous line inside:
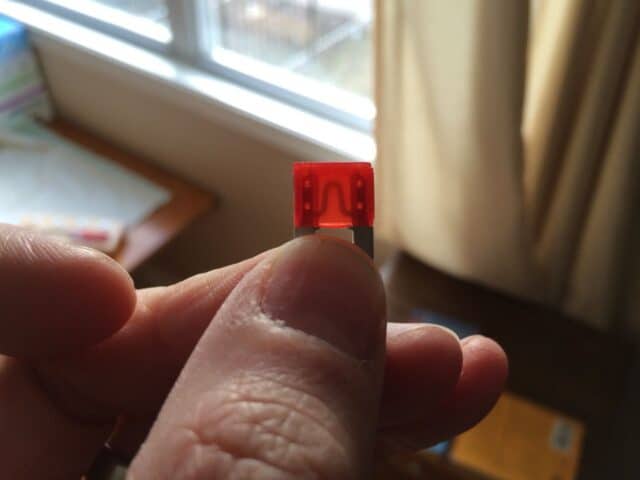 |
| Here you can see the the continuous “arching” connection between the legs of a good fuse |
Step 5: Replace the burnt out fuse with a new one.
These type of fuses don’t have a “polarity” so you can put them in either way. Once you have discovered which fuse is bad you can replace it with a new one.
 |
| Pressing the new fuse down into its socket with my finger tip |
Step 6: Reinstall the fuse box cover.
Lay the cover on the top first hooking the loops on the back edge and then hinging the front edge down and into place:
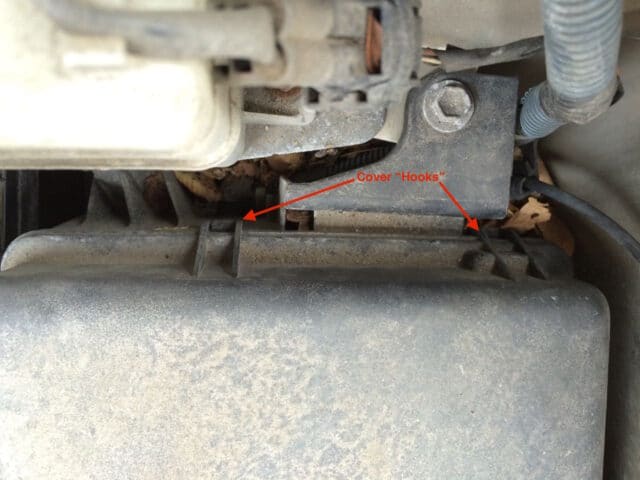 |
| The hooks on the back edge of the fuse box lid |
There are two tabs on each side, the left one which you can see and the right one which you cannot see, that need to be inside their own little slot in the plastic body of the fuse box.
 |
| Fuse box lid reinstalled |
Step 7: Close the hood and enjoy your dome lights again!
Amazon Associate Disclosure: As an Amazon Associate I earn from qualifying purchases. This means if you click on an affiliate link and purchase the item, I will receive an affiliate commission. The price of the item is the same whether it is an affiliate link or not. Regardless, I only recommend products or services I believe will add value to Share Your Repair readers. By using the affiliate links, you are helping support Share Your Repair, and I genuinely appreciate your support.

I’m trying to remove the ATL 140A Fuse link in a 2004 Sienna, having a heck of time depressing tab and pulling out, suggestions would be greatly appreciated. Car won’t start, I’ve replaced starter, this appears to be the remaining problem
Can you visibly see that a segment of the fuse link is melted? I would make sure to know that it is bad before I mess with replacing it. I have no experience in removing that link so I’m not going to be any help unfortunately.
Thanks! Great lesson. Worked for me after changing a light. I ended up using two fuses because I blew a 2nd when changing a different interior light. This system is temperamental.
Glad you were able to replace your fuse and get your lights working. The system really is not temperamental at all, it is protecting you from overheating your wiring when you short circuit it. The fuse is easy to replace, the wiring would be extraordinary difficult. The deal is, the lights should be off when you replace the bulbs.