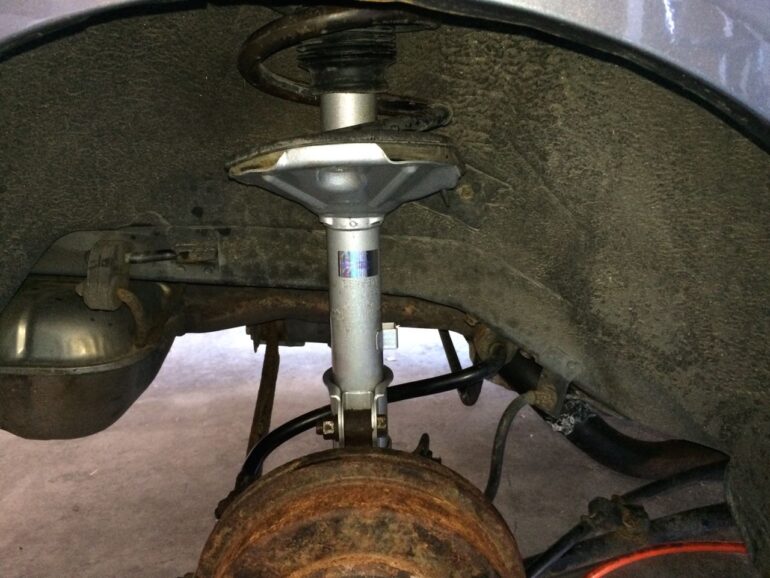
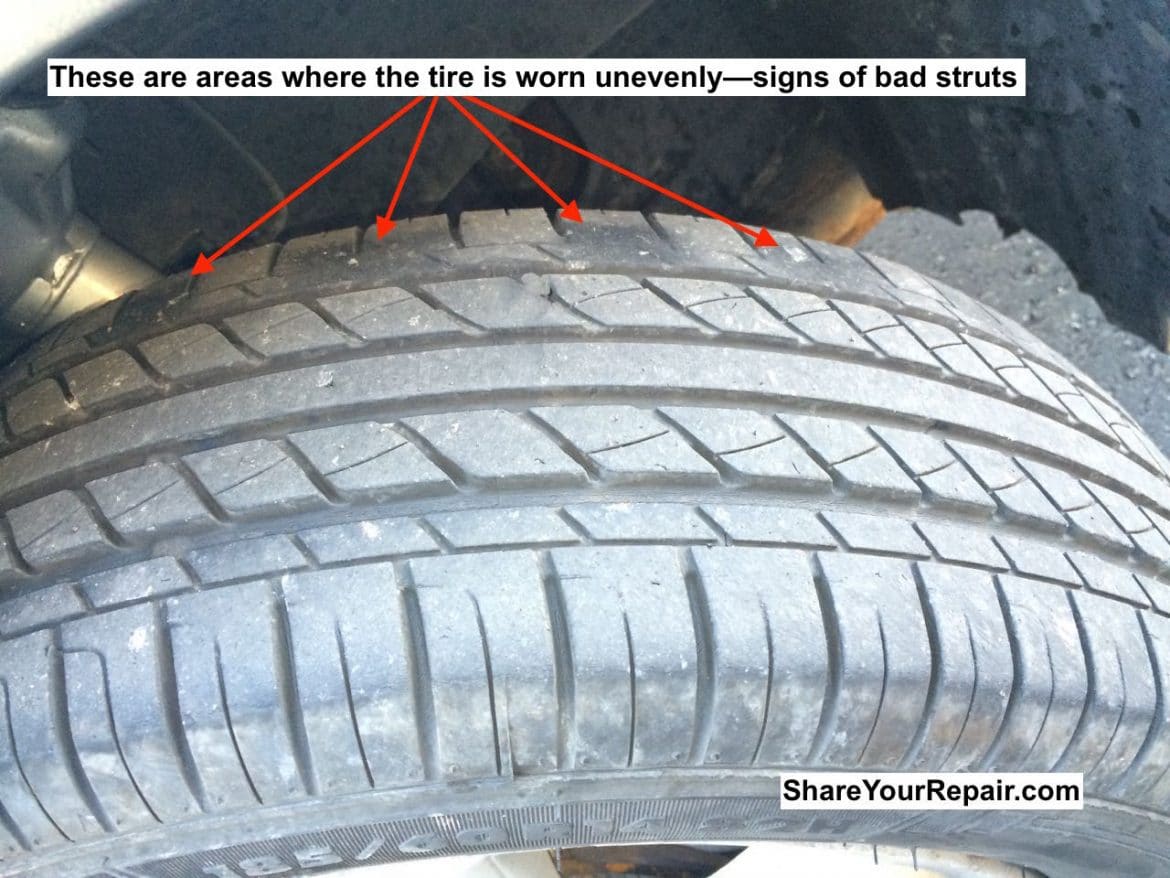
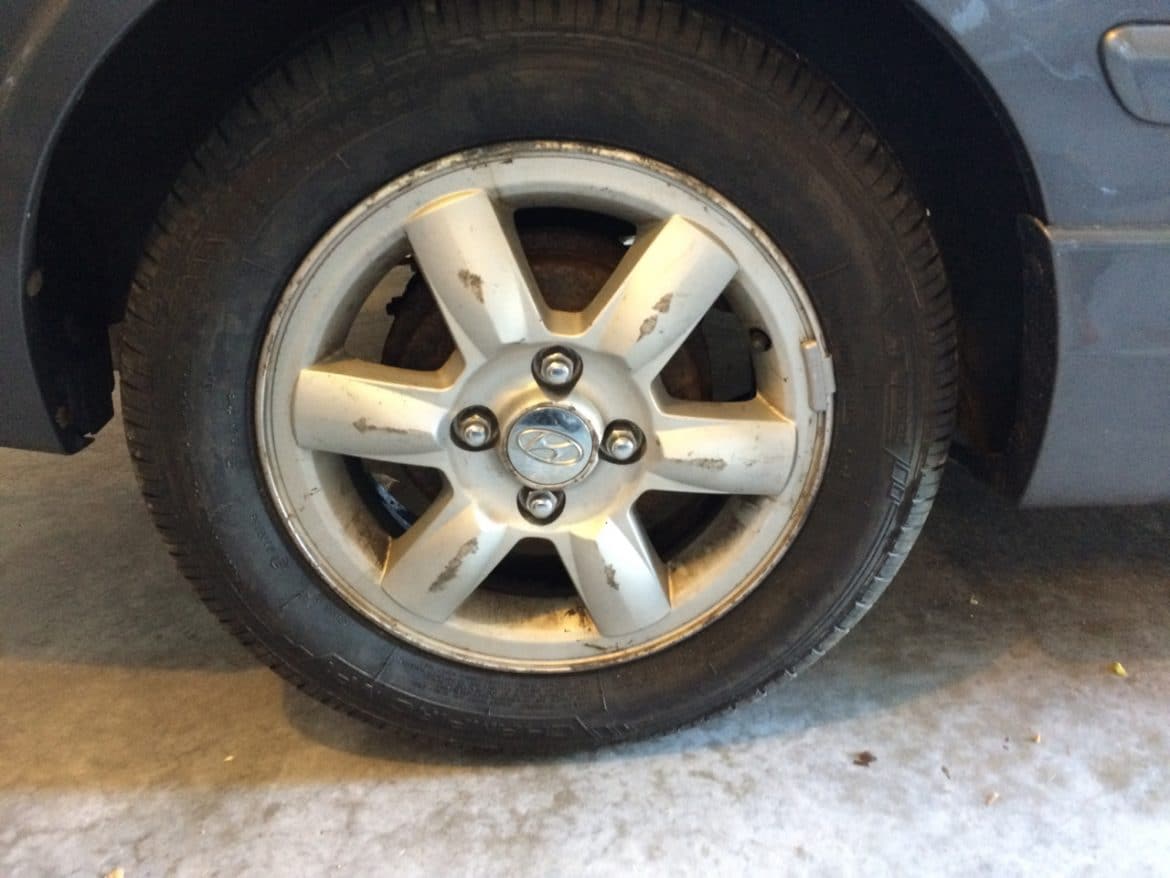
The tires of my 2005 Hyundai Accent were showing “strut wear,” — uneven, lumpy wear, which is a sign that the tires are bouncing off the ground when I hit bumps–a sign of bad struts. Here’s a picture that shows the strut wear on my tires, the dark areas are deep grooves worn into the tire:
The price Midas quoted me for replacement of all four struts, including parts was $1,141!?!!? I was able to buy the four struts for less than $150, so that is like $1,000 in labor! No thank you!! I’m breaking up the front and rear struts into two posts, this is the rear strut replacement. For the front struts see my article here:
1999-2005 Hyundai Accent Front Strut Replacement
Ok, time for another repair. If you want to save yourself a thousand dollars follow along…
1999-2005 Hyundai Accent Rear Strut Replacement
Equipment:
Parts Needed:
- Set of 4 Struts: 7070 – SENSEN Shocks Struts, Full Set, 4 Pieces, NEW, Lifetime Warranty
(these will work on a car with or without anti-lock brakes)
OEM Strut Part Numbers: Rear Right Strut 55360-25650, Rear Left Strut 55350-25650, Right Front (w/ABS, w/sport suspension) 54660-25850, Front Left (w/ABS, w/sport suspension) 54650-25850, Front Left (w/ABS, w/0 sport suspension) 54650-25650, Front Right (w/ABS, w/0 sport suspension) 54660-25750 - Rear Strut Set only (springs not included): 7070-RS – SENSEN Shocks Struts, Rear Set, 2 Pieces, Lifetime Warranty
- WD-40
(for spraying your rusty nuts and bolts ahead of time for easier removal)
- Anti-Seize Compound
(so the bolts come off easier next time)
Tools Needed:
- Hydraulic Jack
- Jack Stands
- Wheel Chocks
- Very good 1/2″ air impact wrench
- Air Compressor
- Lug Wrench
- Phillips Screwdriver
- 12mm, 17mm sockets (1/2-Inch Drive Metric Impact Socket Set
)
- 19mm deep-well socket (1/2-Inch Drive Metric Deep Impact Socket Set
)
- 12mm open-end wrench
- MacPherson Strut Spring Compressor Set
(but most auto parts stores will loan these out for free, with a deposit)
- Small Crescent Wrench
- Large Vice Grip
(for holding spring in place when releasing the spring clamps)
I’m going to change both the front and the rear struts and I’ll start with the rear ones first, here we go… One thing to note is that I’m only going to go over one back strut and one front strut but I may switch back and forth between the right and the left (which are just mirror copies of the others) to give you the best picture of that step.
Step 1: Spray your nuts and bolts with WD-40.
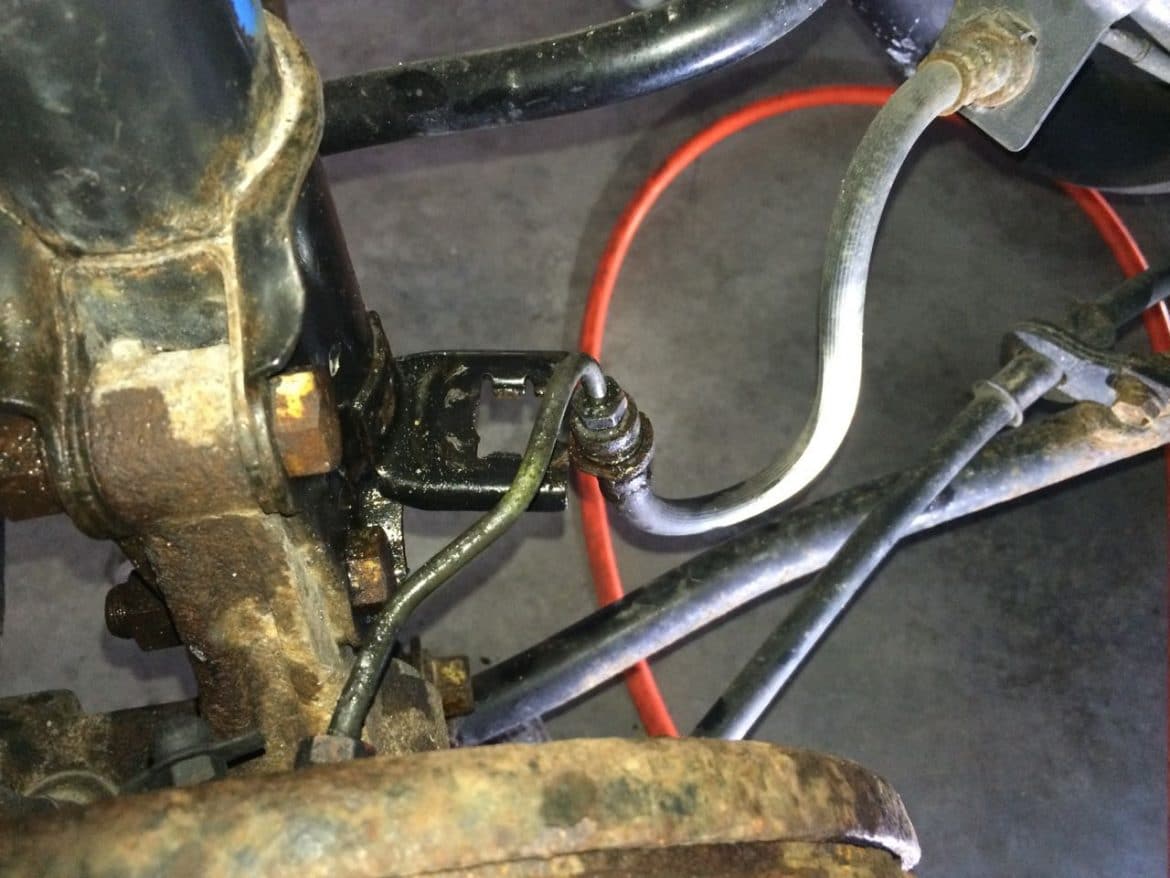
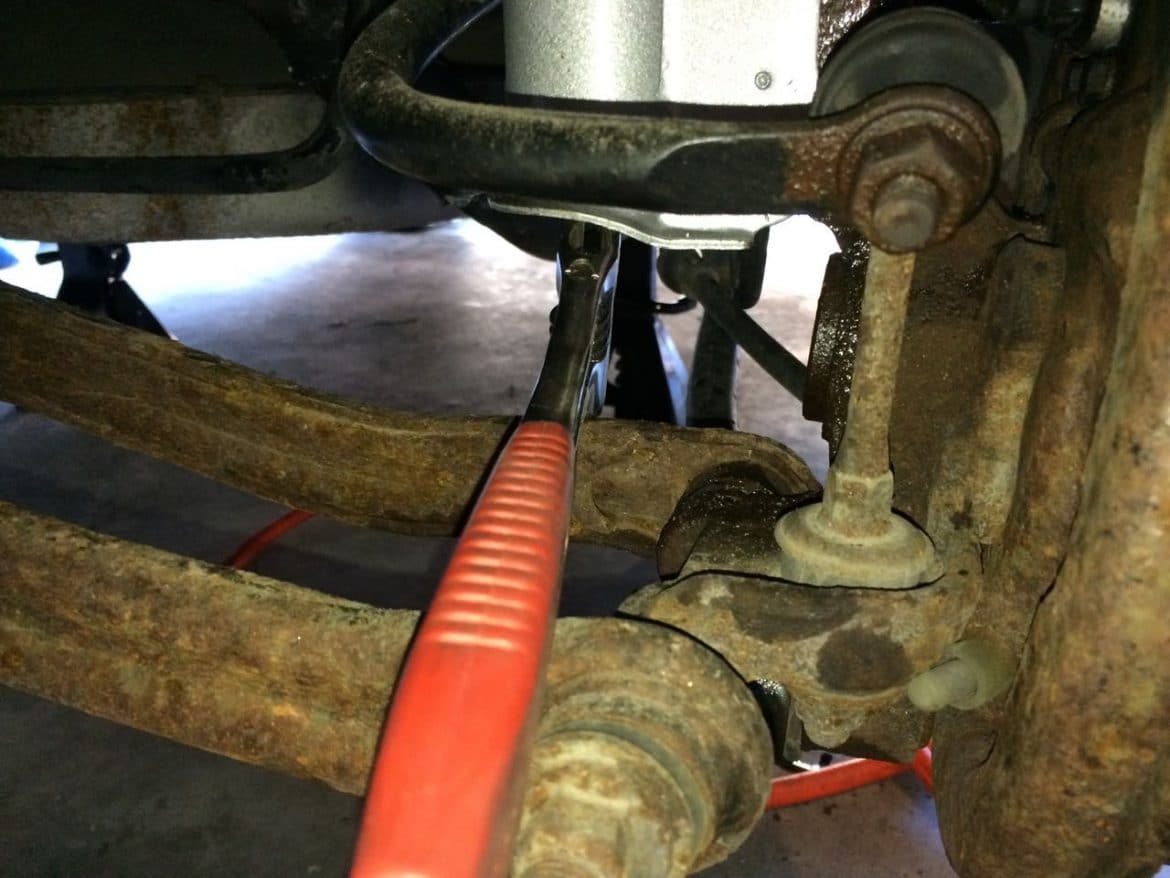
The two main bolts on the lower end of each strut are likely to be stuck fast in place so you want to loosen them up if you can in advance. It may not help at all but it is worth a try. For the rear wheels, you need to look up around the back and front of the wheel to get access to the bolts and the brake line connection:
Step 2: Break free the lug nuts on the back two wheels.
You want to break the lug nuts free while the wheels are resting on the ground because once you jack up the car the wheels will spin when you try to loosen them. Do not do anything but break them free. I used a tire iron/lug wrench to break them free.
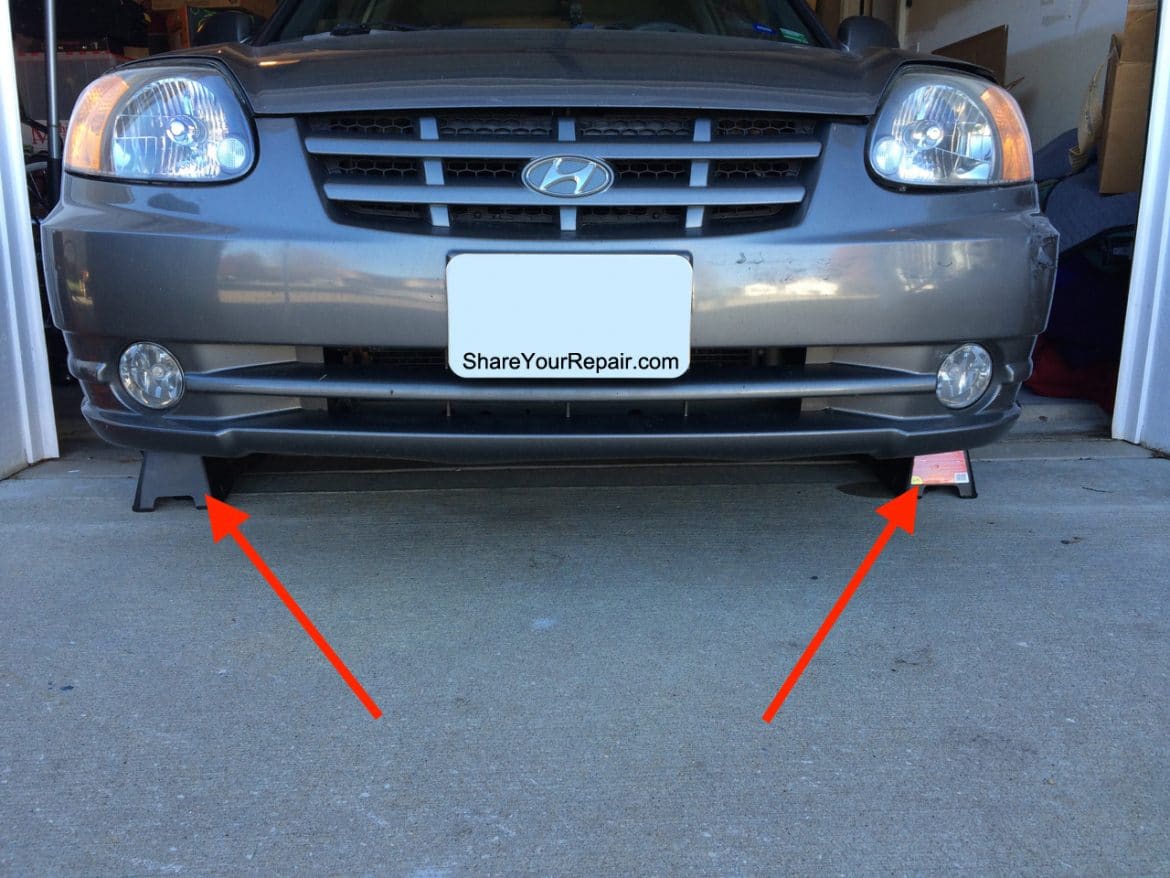
Step 3: Block the front wheels so the car doesn’t roll forward on you.
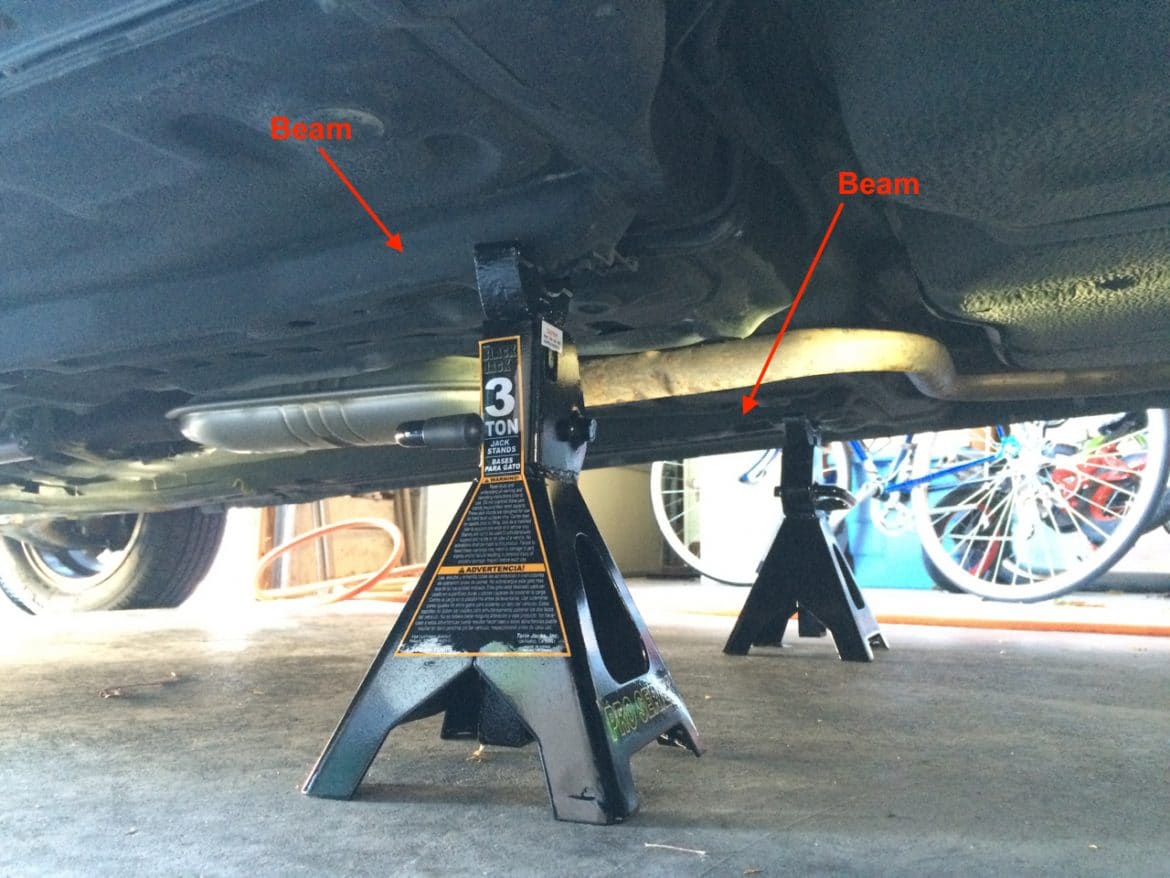
Step 4: Jack up the back end of the car and put it on jack stands.
I put the jack directly between the rear two wheels:
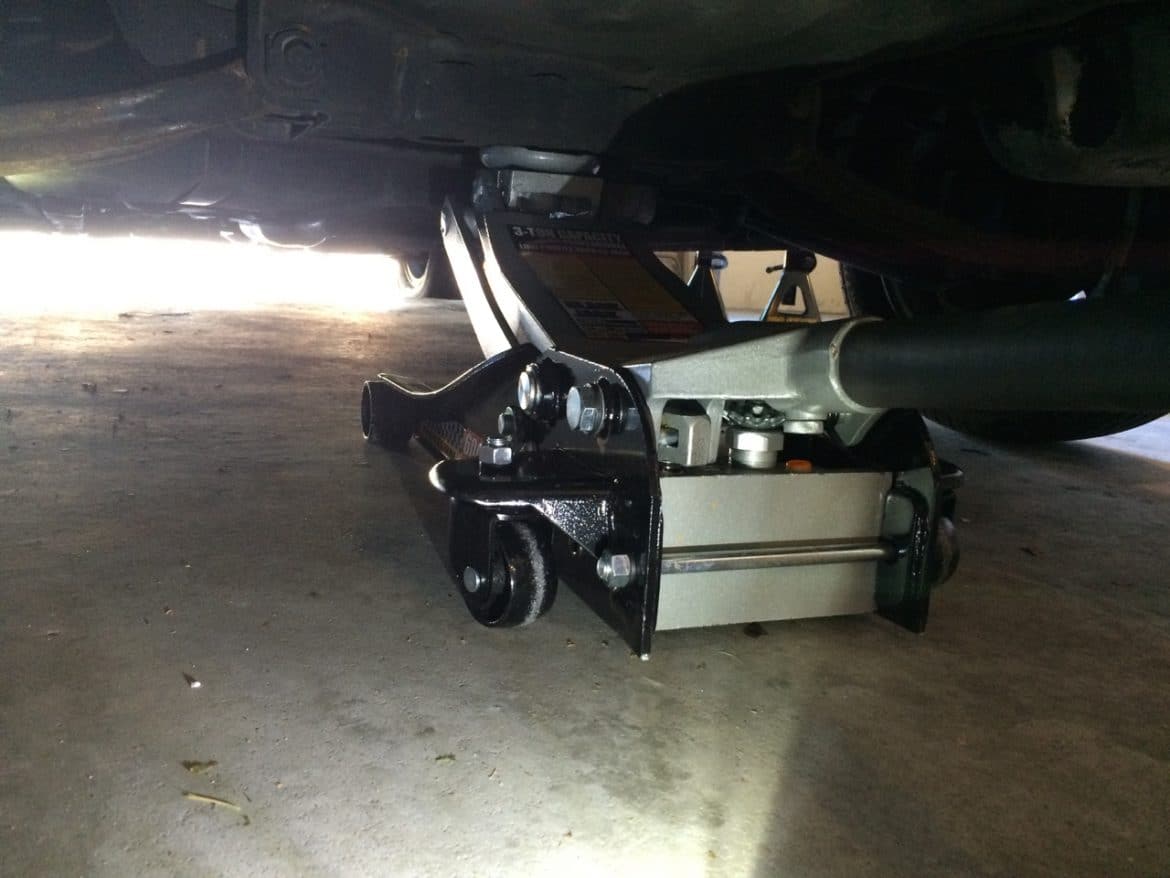
Jacking up the back end:
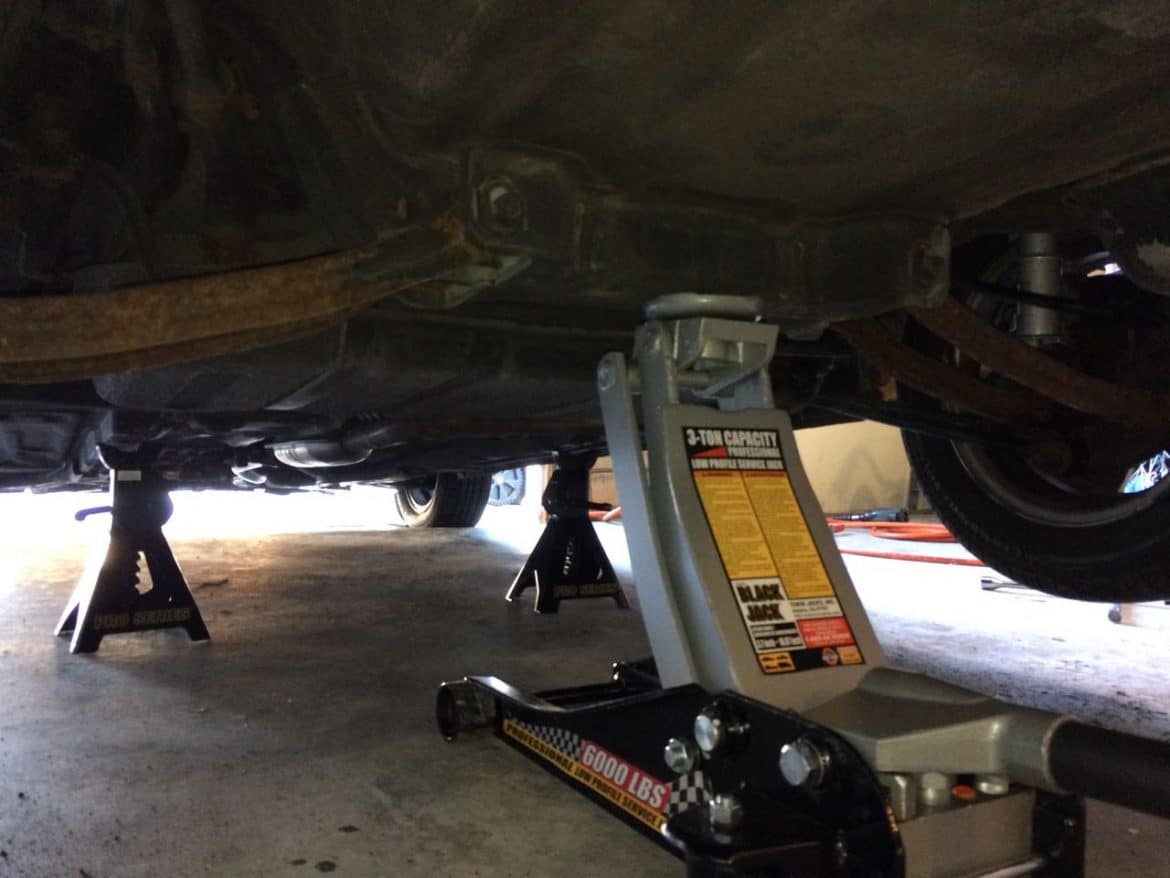
I placed the jack stands under the beams that run the length of the vehicle in the middle of the car:
Step 5: Remove the rear wheels.
Keep track of which wheel goes on the right and left because you will want to put them on the same side when you are done.

Step 6: Jack up the wheel hub assembly to compress the spring slightly.
We are going to remove the upper bolts of the strut assembly (the bolts that attach the strut to the body of the car) so you do not want any pressure on the nuts when we are removing them. Put the jack directly under the drum of the rear wheel and jack it up just enough so that you can see the spring compressing:
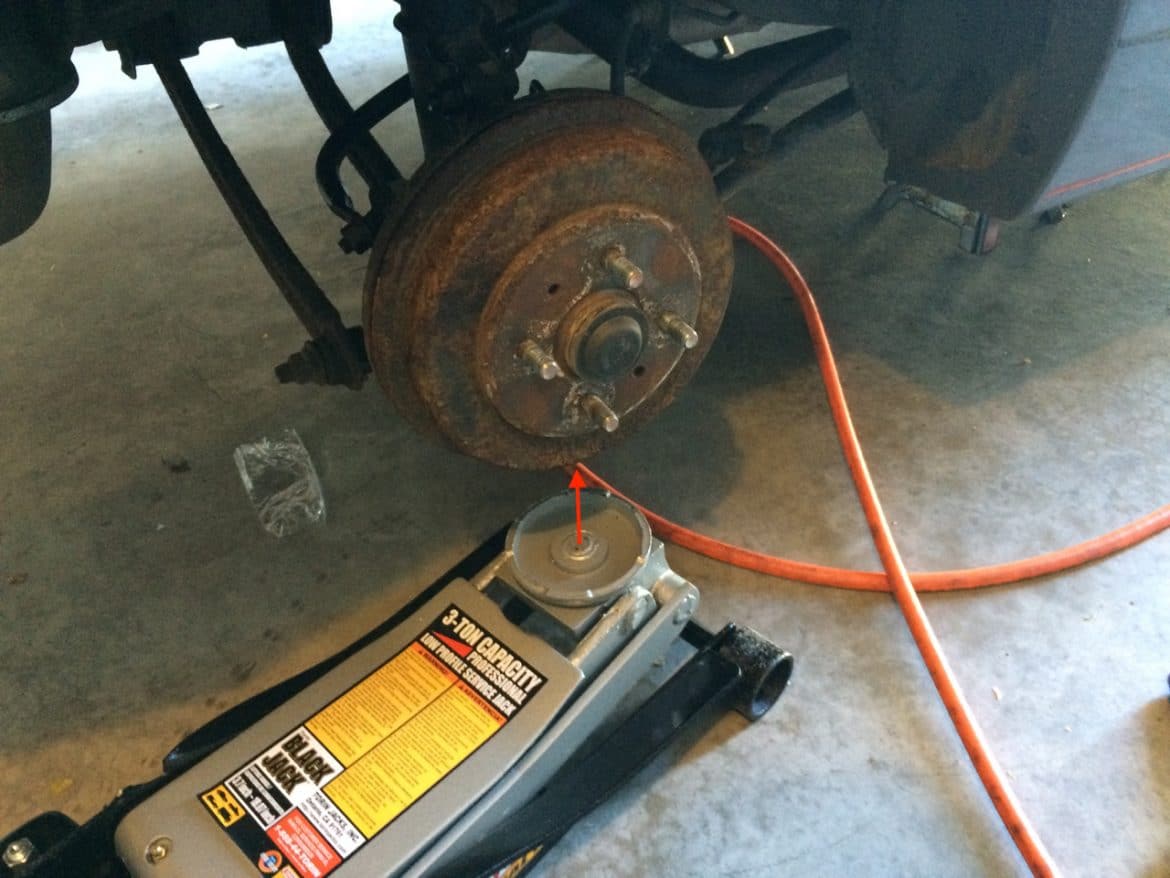
Slowly jack up the wheel until the spring begins to compress:
Step 7: Remove the rear speaker assemblies to give access to the top strut bolts.
Step 7a: Remove the two Phillips head screws from the top cover of each of the rear speakers:

Step 7b: Lift up on the inner edge and pop the speaker cover free.
The speaker cover snaps down onto the vehicle on the inside edge and inserts into the outside of the of the vehicle on the outside edge. Pull up on the edge and then pull the speaker cover towards the inside of the vehicle. The speaker is connected by a wiring connector so don’t pull too hard.
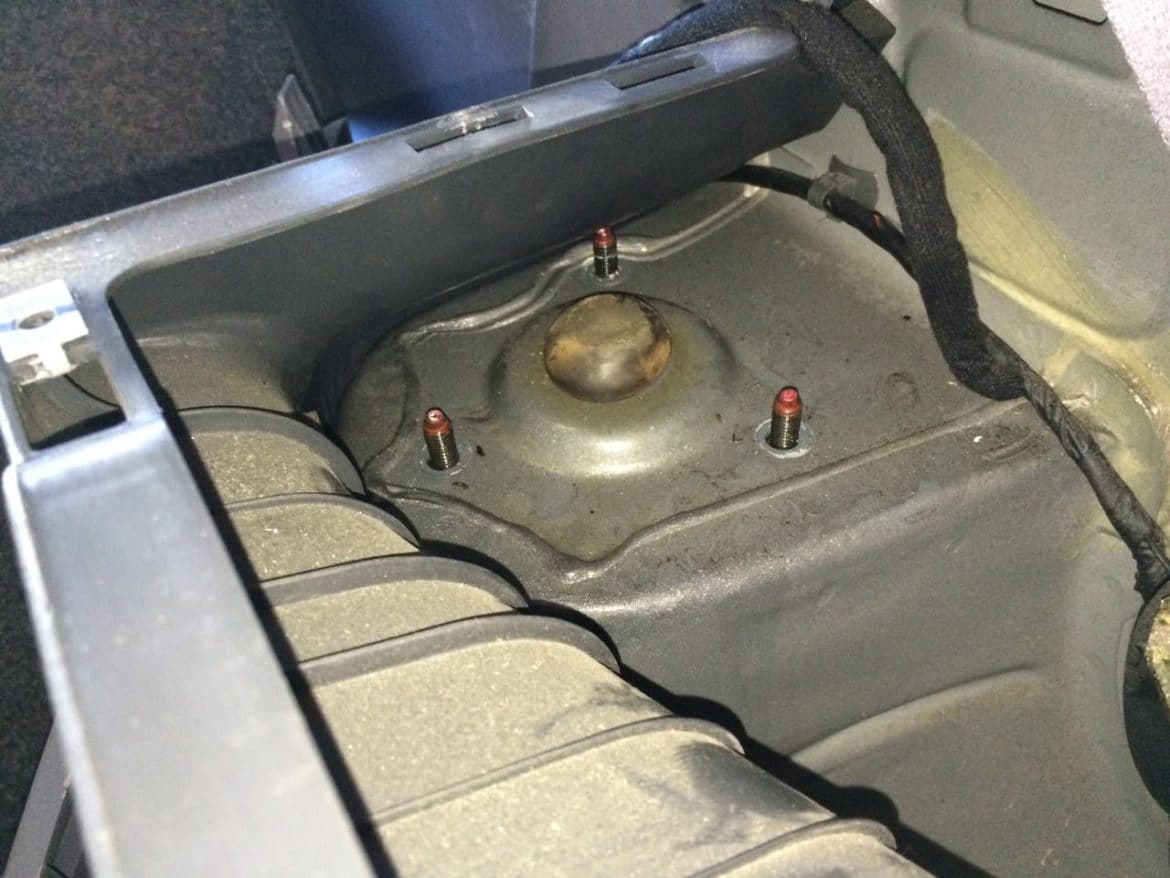
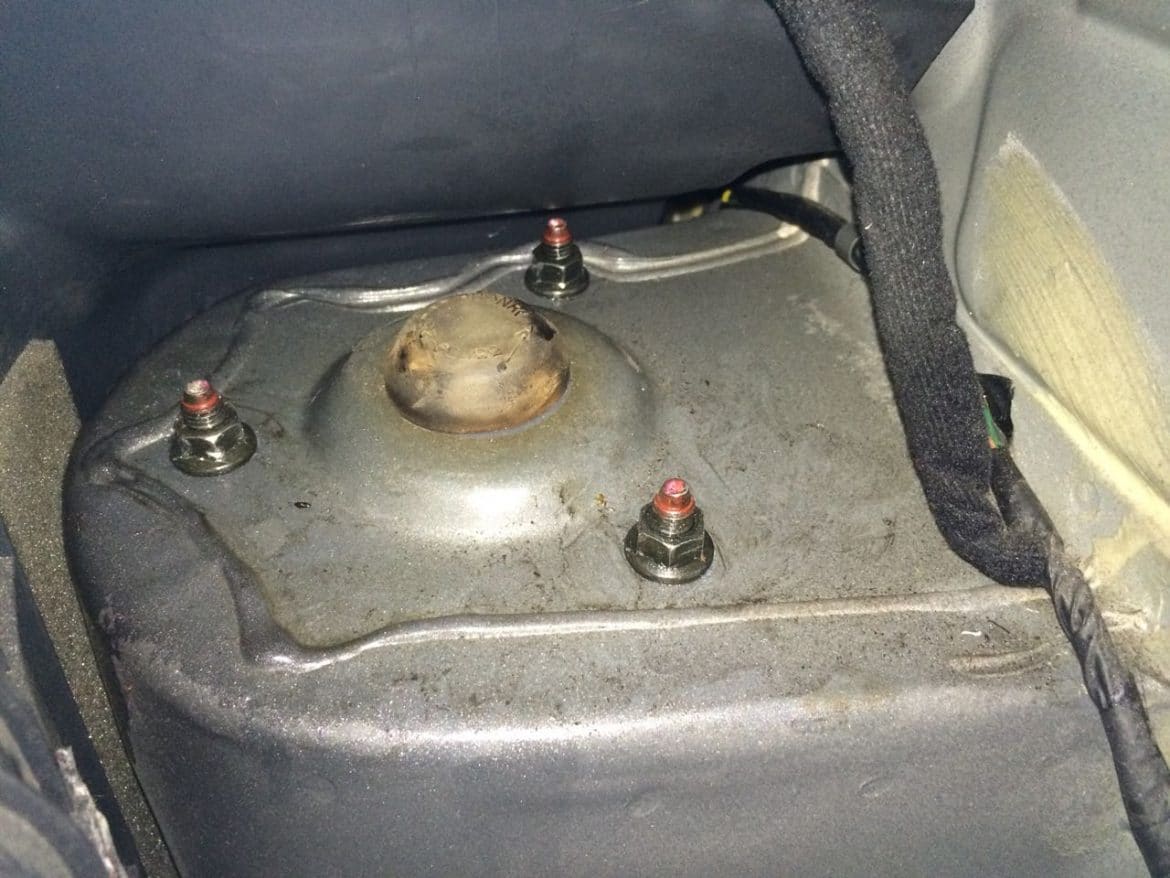
Once you have removed the speaker cover you can see the three upper nuts and bolts of the strut. You can see the speaker assembly where I put it up and out of the way. That plastic piece that is laying by the top bolt actually broke off the speaker cover (it is the part that inserts into the outside of the vehicle):
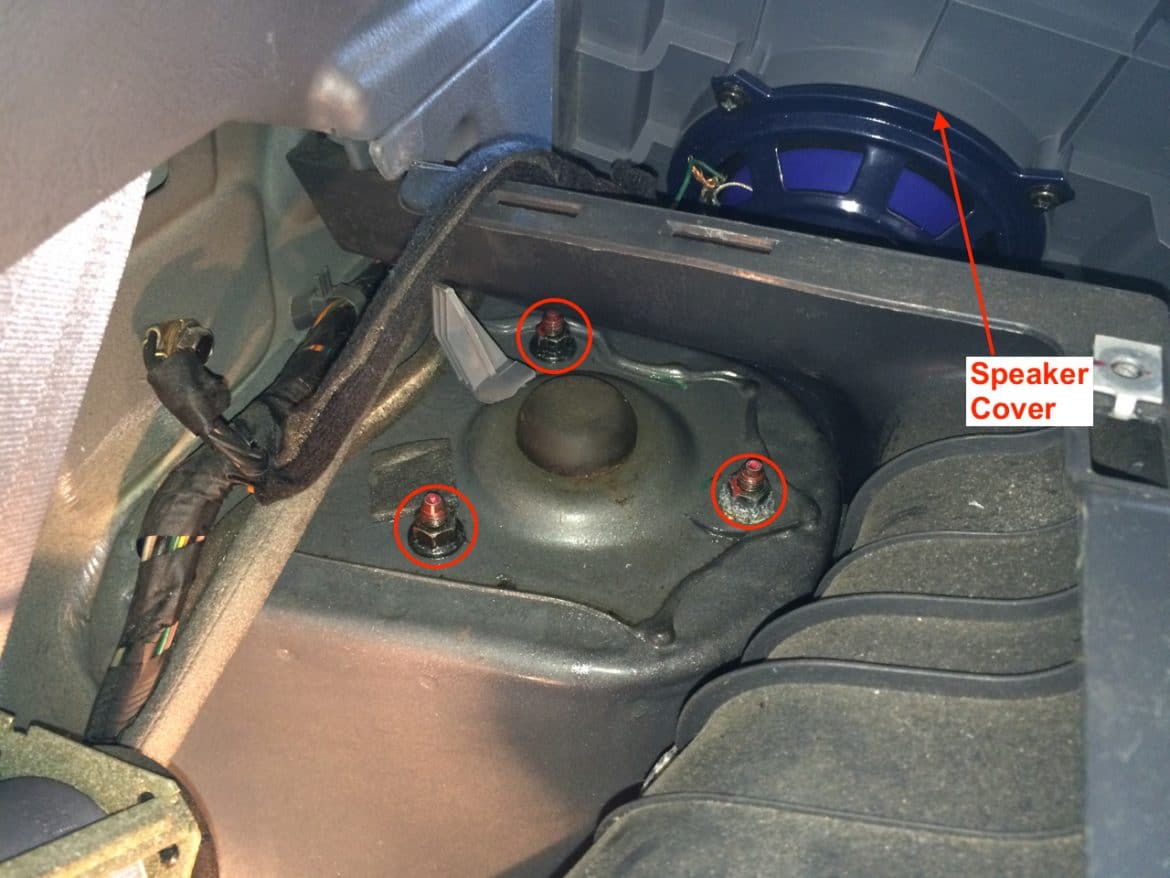
Step 8: Remove the nuts from the upper strut bolts.
The nuts are 12mm. You can use a deep-well socket on the back two but the front one is so close to the plastic panel that you’ll need to use an open-ended wrench. Do not remove the rubber cover from the center of the strut–it can stay on there. Be careful not do drop them down into the space between the body and the panelling.
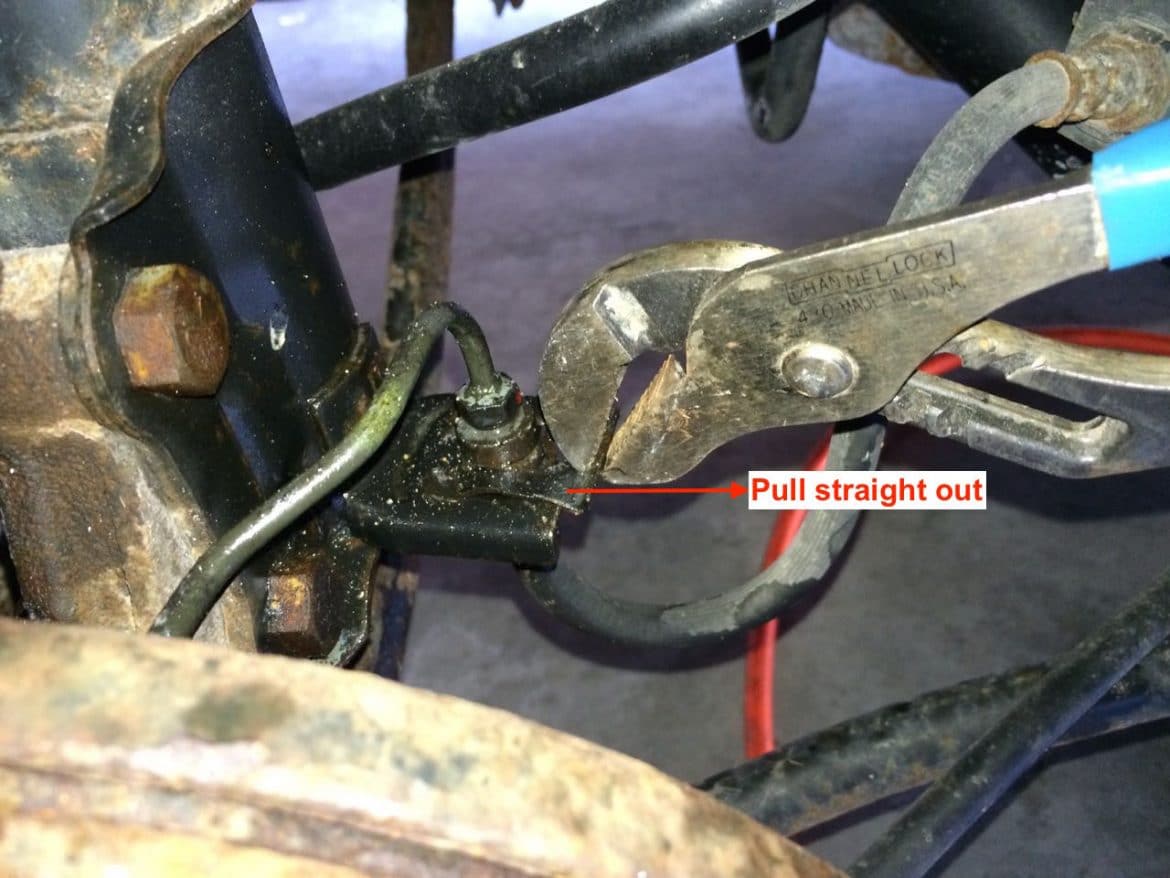
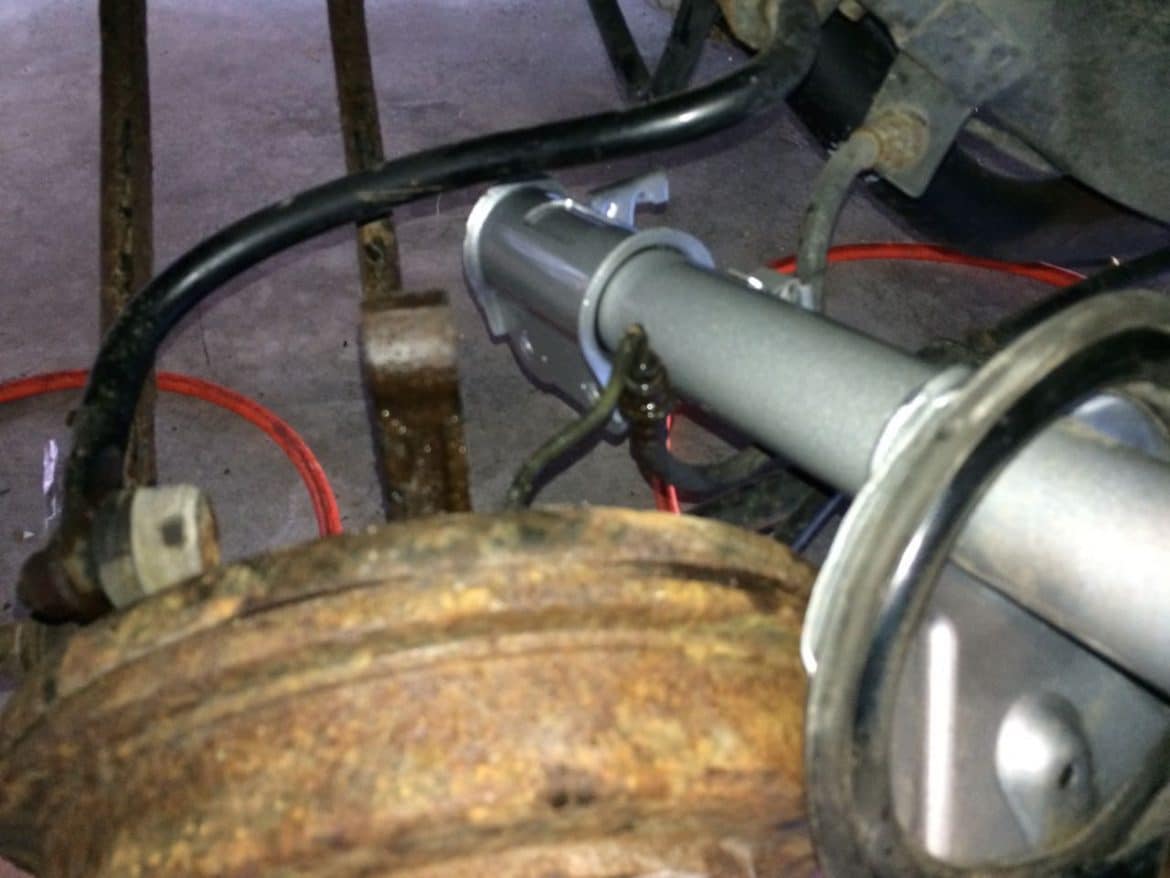
Step 9: Disconnect the brake line from the strut.
When you release the strut from the body of the car you don’t want the strut connected to the brake line because you could damage it. To disconnect the brake line from the strut first pull the spring clip straight out like this:
Here’s what the clip looks like removed:
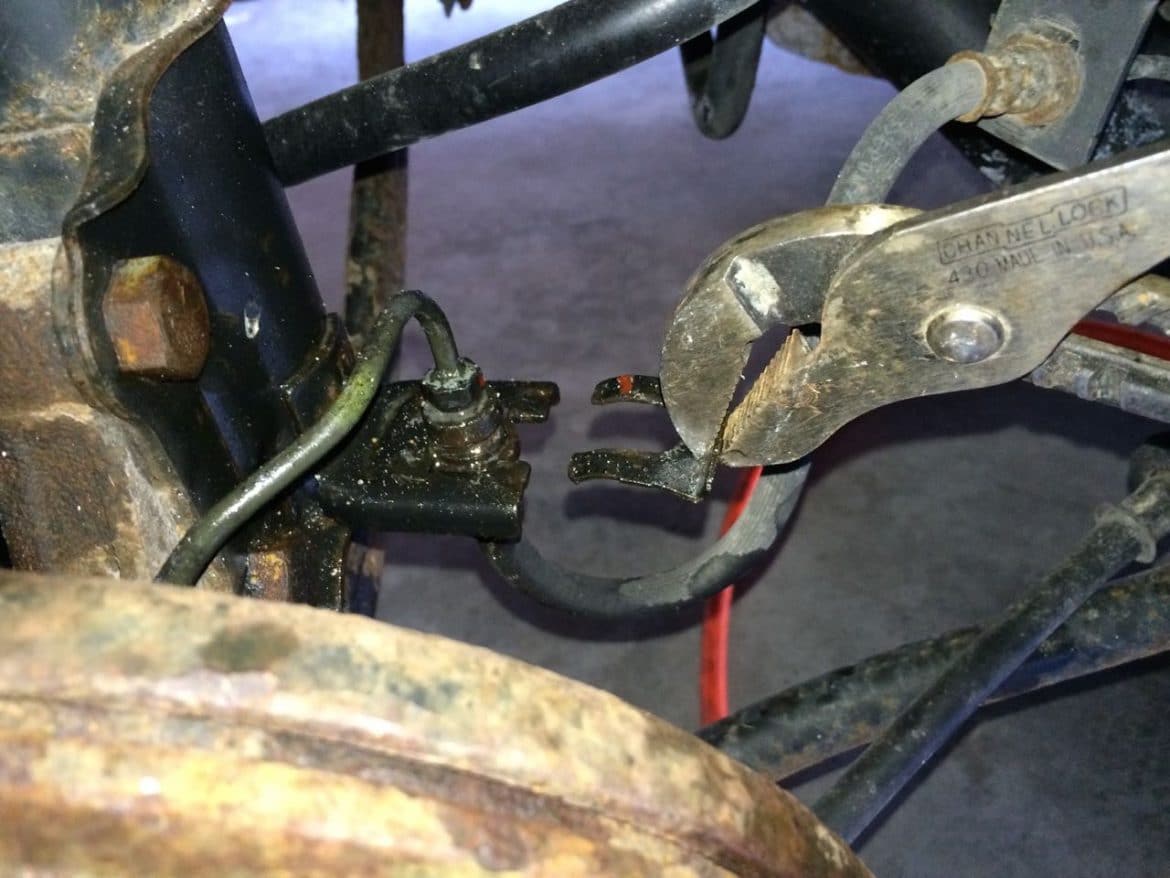
After removing the spring clip you will need to guide the brake line out of the strut bracket where it was clipped in place. The brake line running from the clip to the brake is metal so you will need to very carefully bend it in order to move it out of the tab:
Now when the strut drops down it will not pull on the brake line.
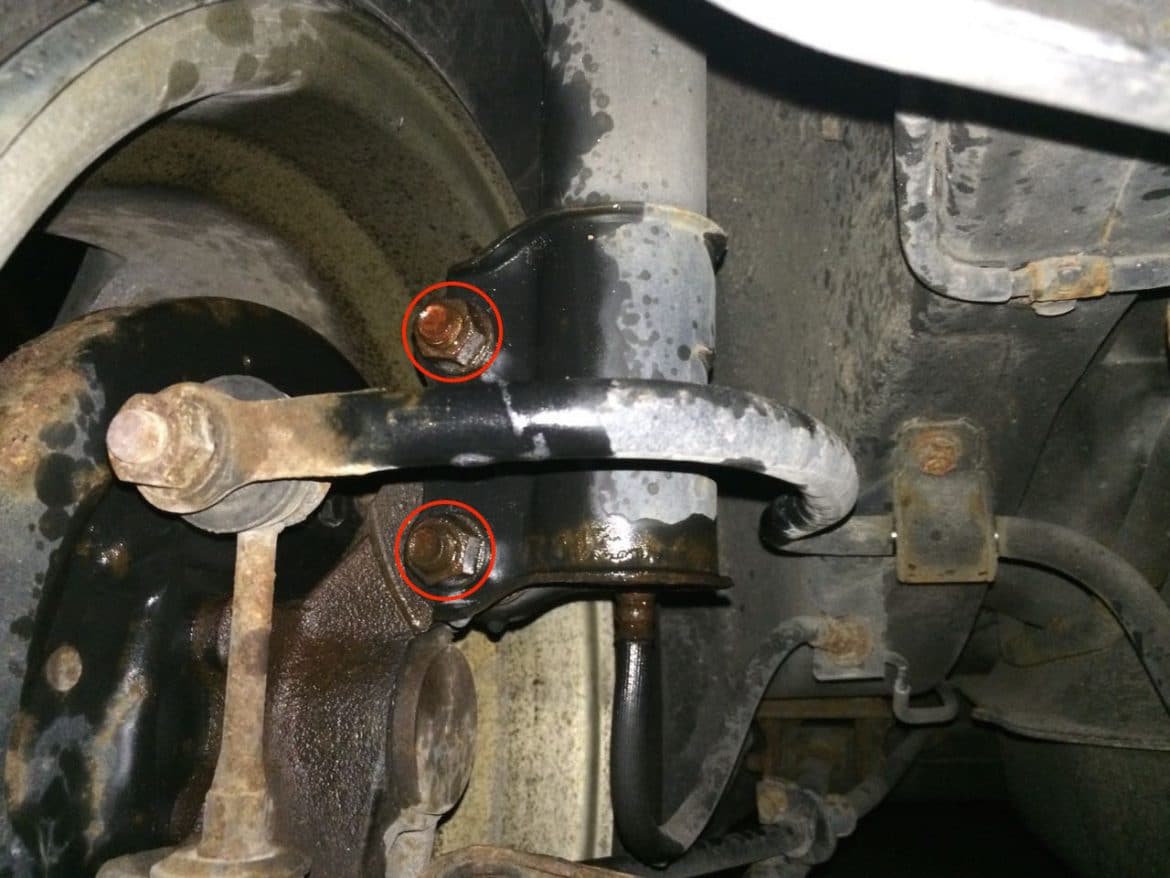
Step 10: Remove the two lower strut bolts.
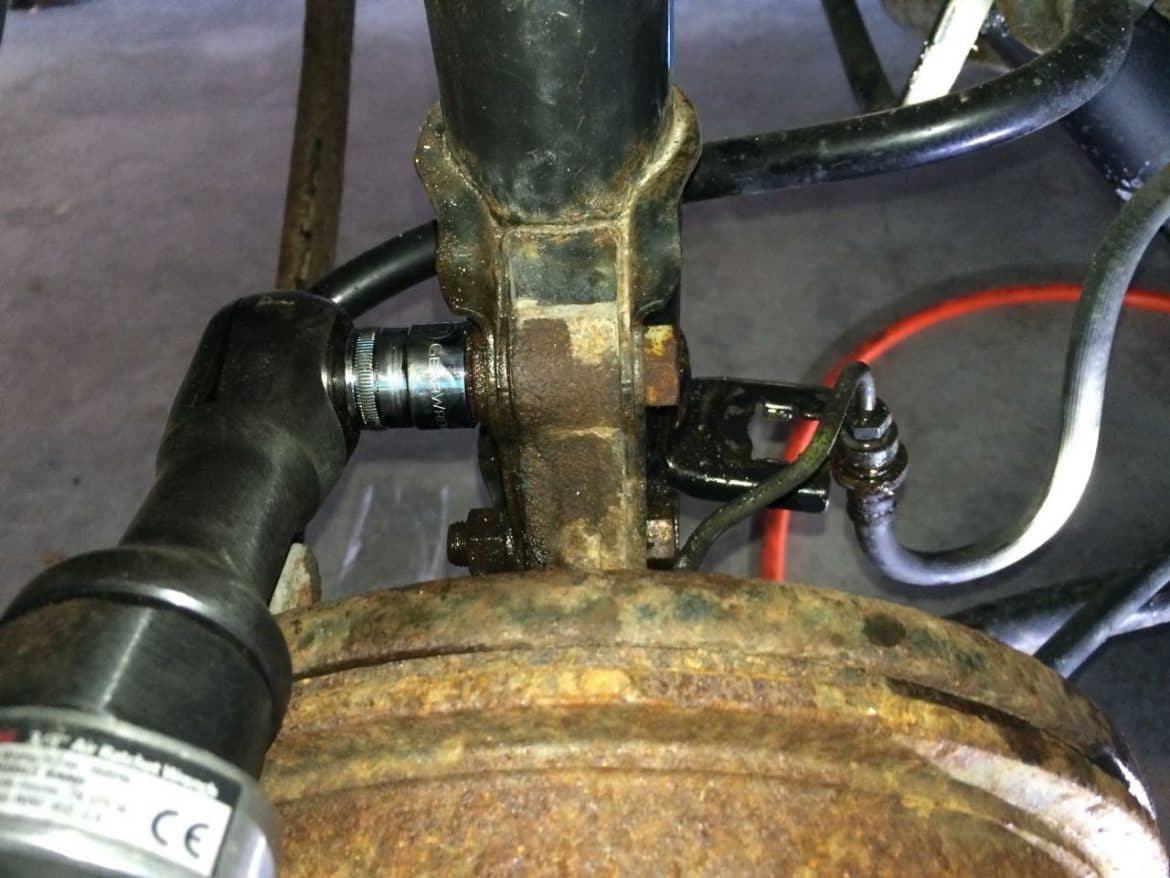
This is probably the hardest part of this job–getting the nuts off the two lower bolts and then getting the bolts out. You must have a good impact wrench and a 17mm socket. I tried using this right handed impact wrench but it wouldn’t even budge them:
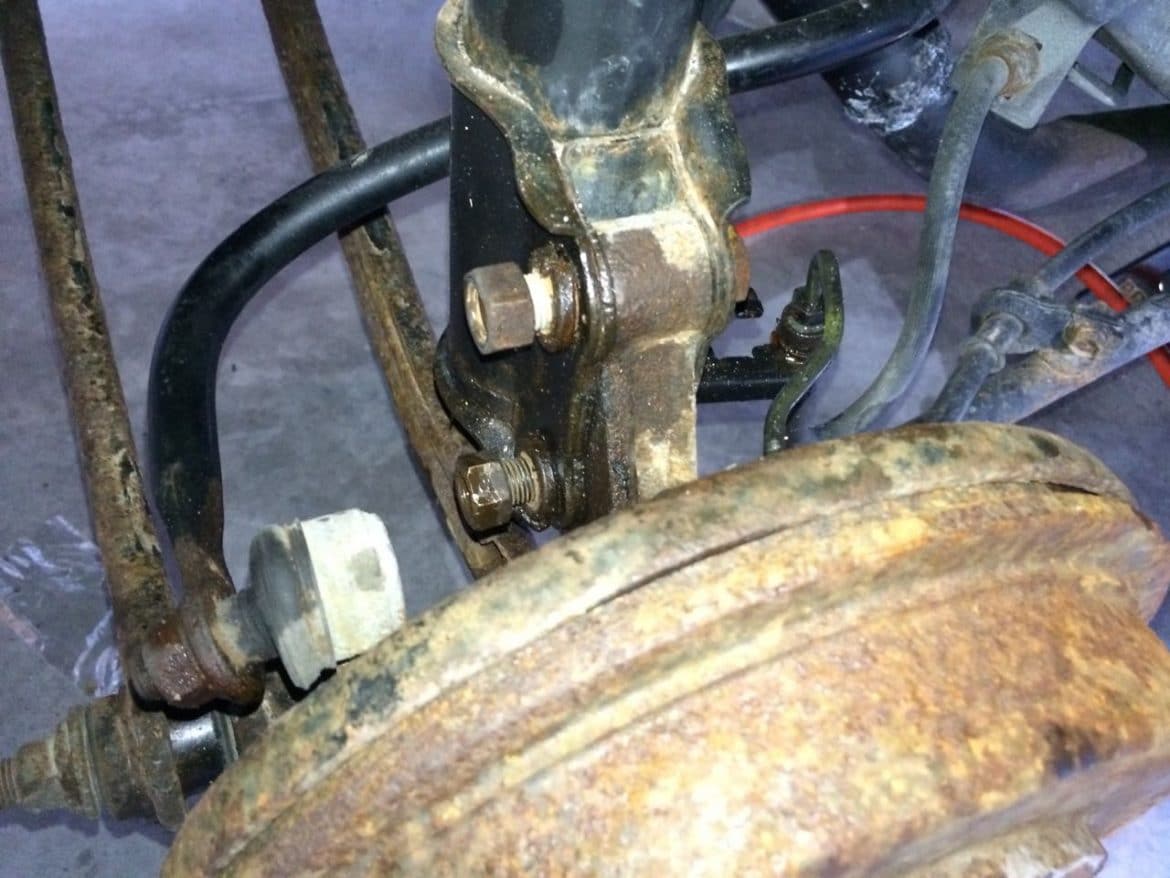
Leave the nuts on the bolts if you are going to tap on them with a hammer to protect the threads; you are going to need to reuse those bolts, lock-washers, and nuts on the new strut:
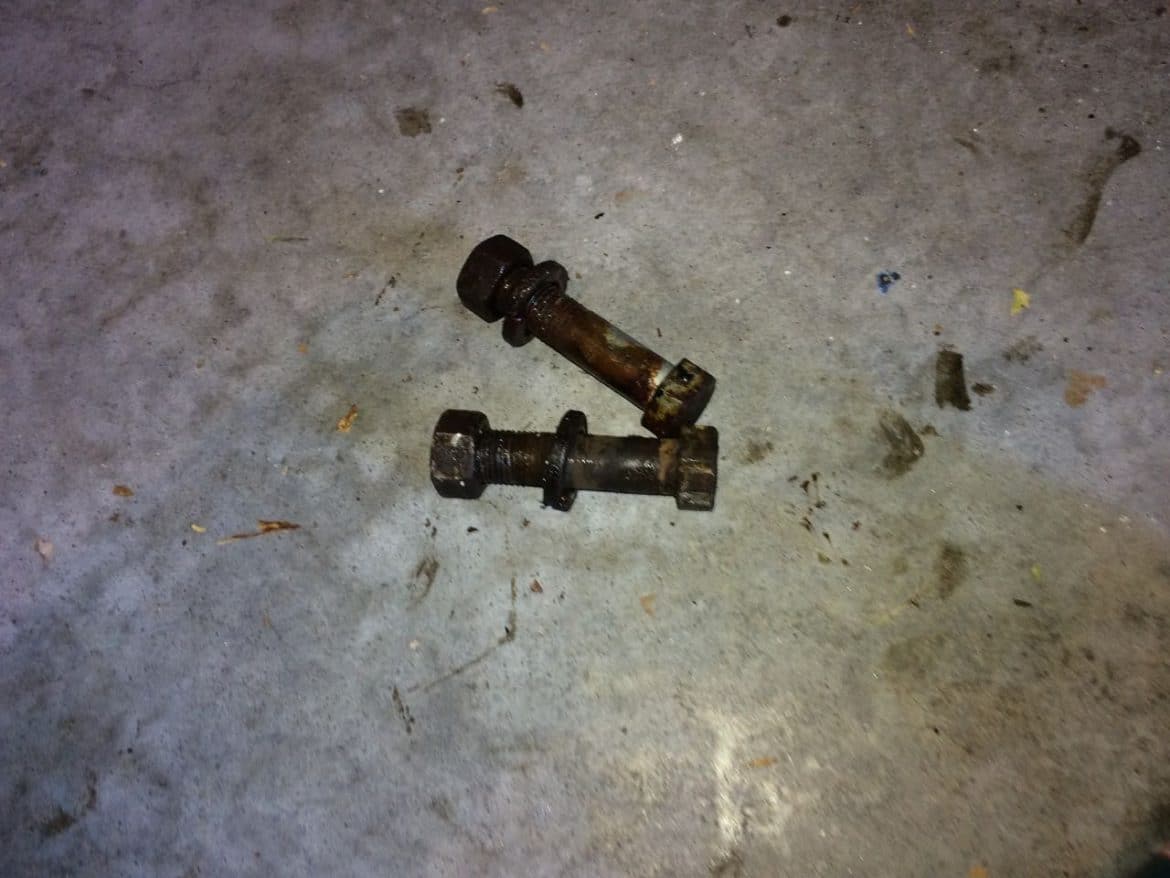
One trick I figured out was that if you cannot get the bolts out you can put your impact wrench on the head of the bolt and loosen it up that way. I wasn’t able to hammer either of the lower bolts out and only could get them out by putting my impact wrench on them. You’ll probably need an extension to get around the tie rod for the steering. Here’s the bolts removed:
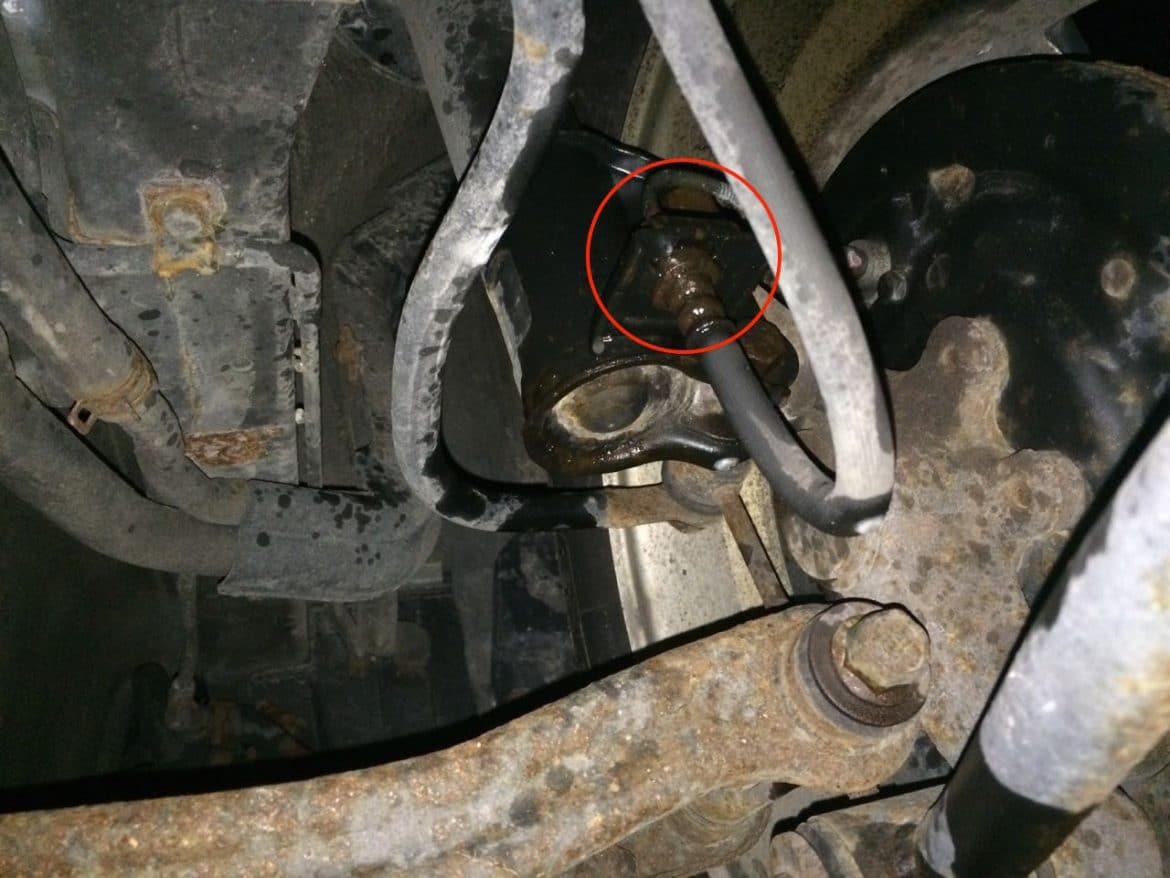
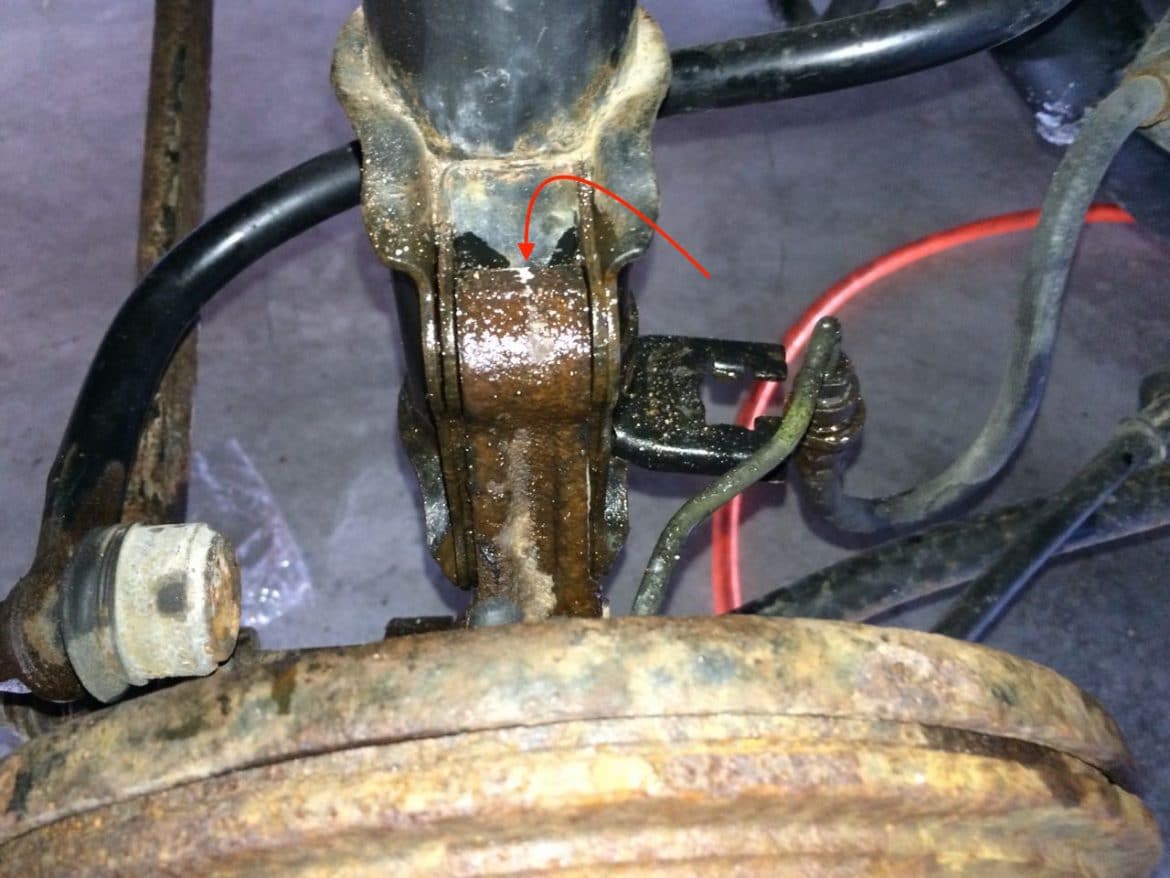
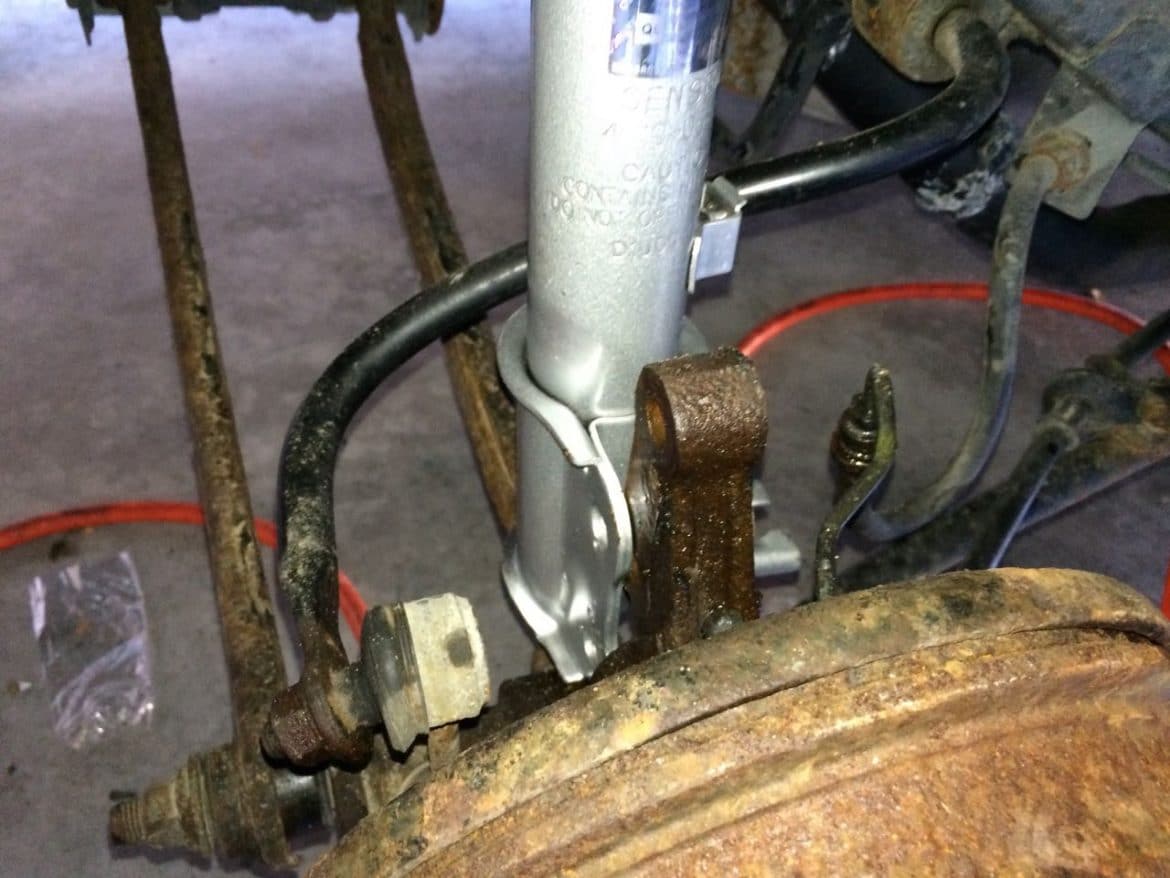
Step 11: Remove the old strut.
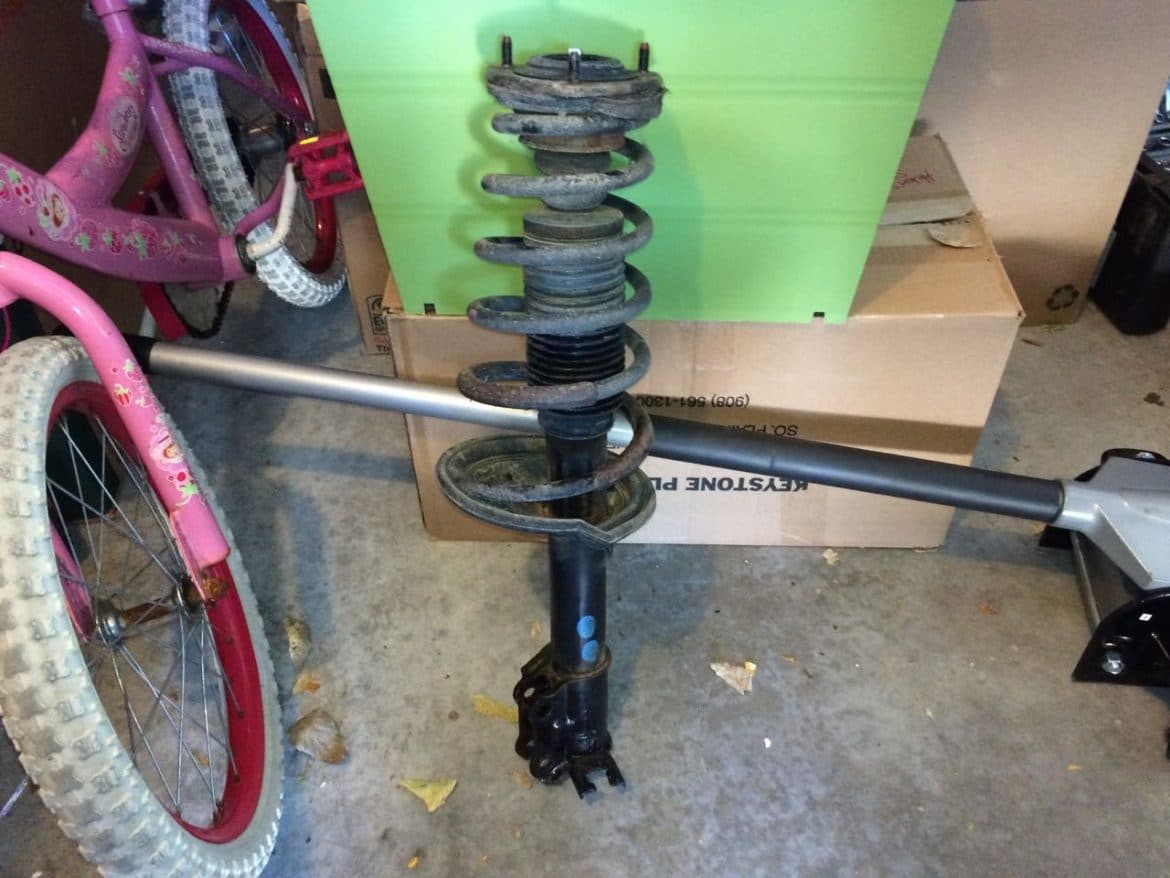
Once you get the two bolts out the strut will probably stay in place. To get it free you can just take a large flat screwdriver and pry the wheel knuckle out of the strut in the location indicated here:
The wheel will fall away from the strut and the strut will drop down. Be careful to support the strut so you can protect the brake line. You’ll also need to feed the lower end of the strut down between the suspension link and the brake line in order to give yourself enough clearance to get the top of the strut out of the wheel well This is what the strut looks like removed:
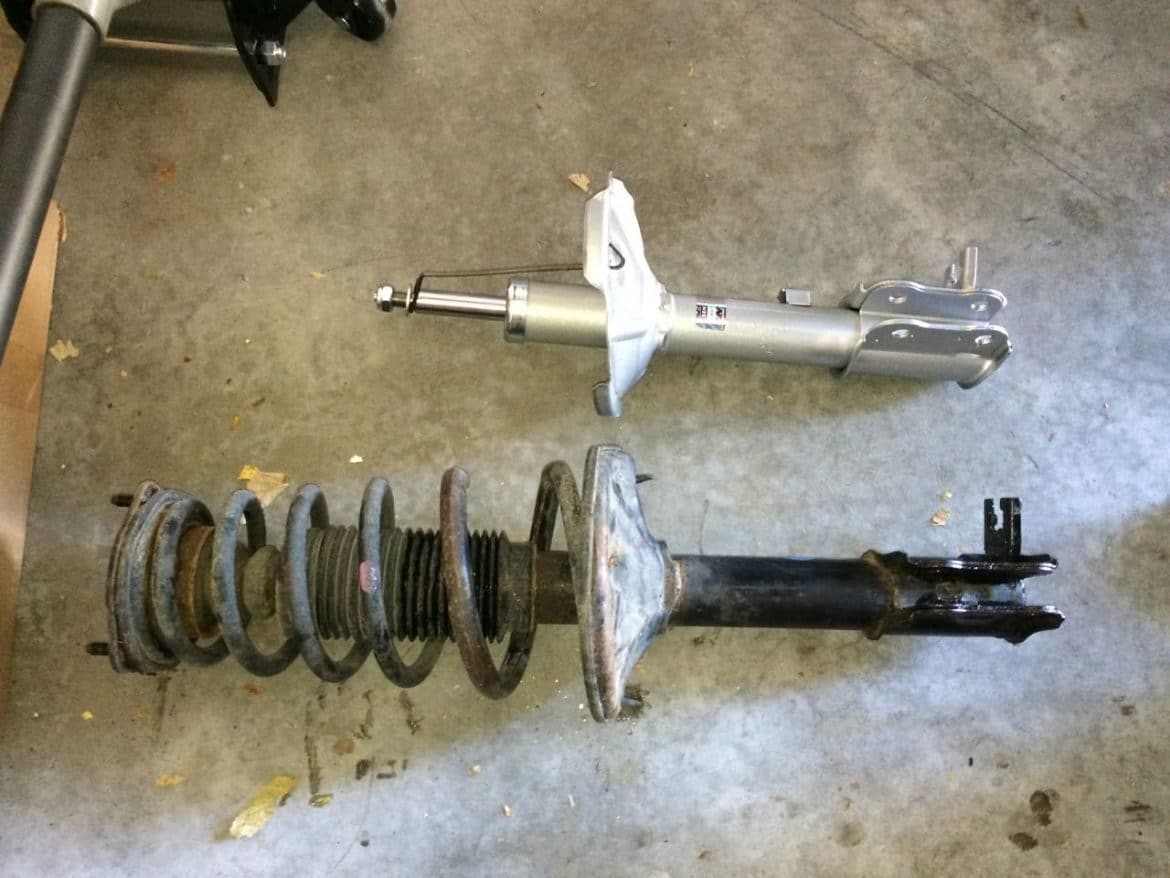
Step 12: Compare the old strut to the new one.
Now is the time to make sure you have the right replacement strut before you take the time to remove the strut from the spring. Below is the old one next to the replacement one, a perfect match. Note that the new one has an extra bracket on it–I think for if the vehicle had anti-lock brakes. That extra bracket is fine even if your Accent doesn’t have anti-lock like mine.
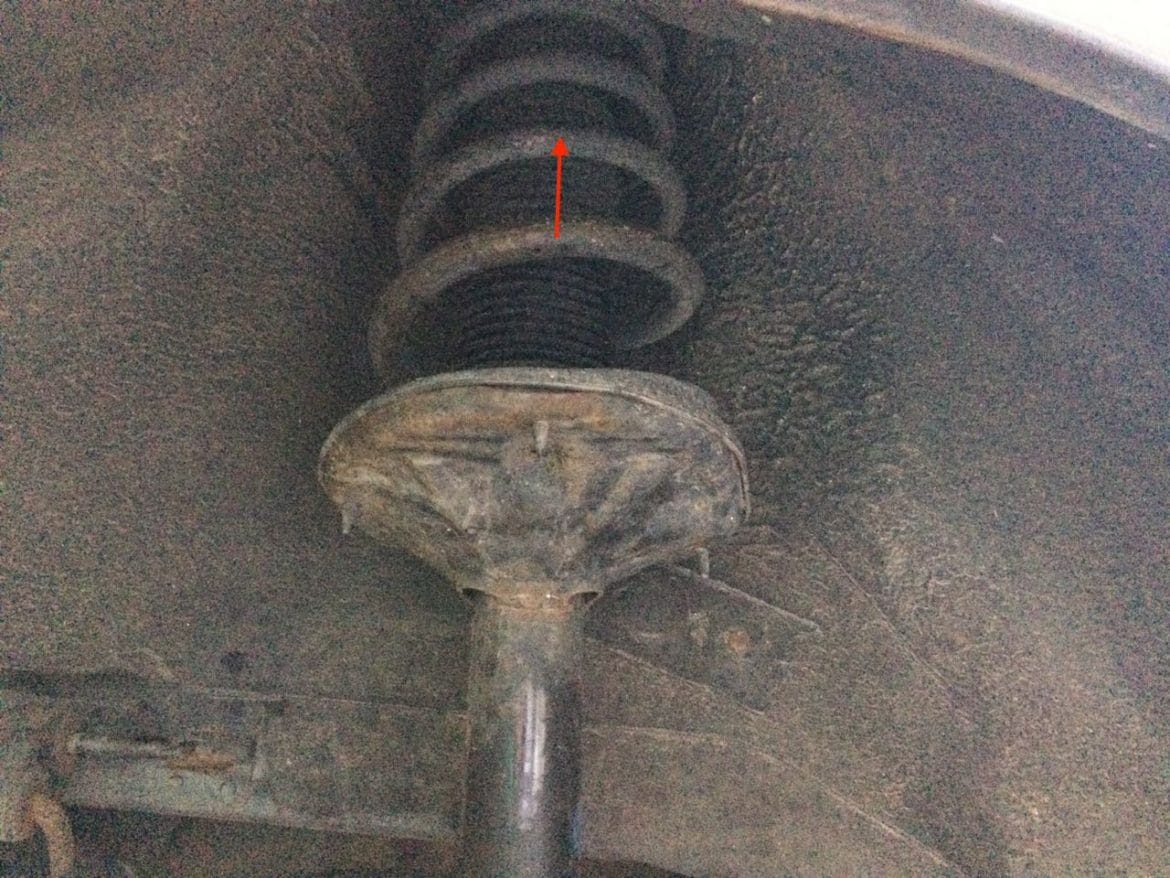
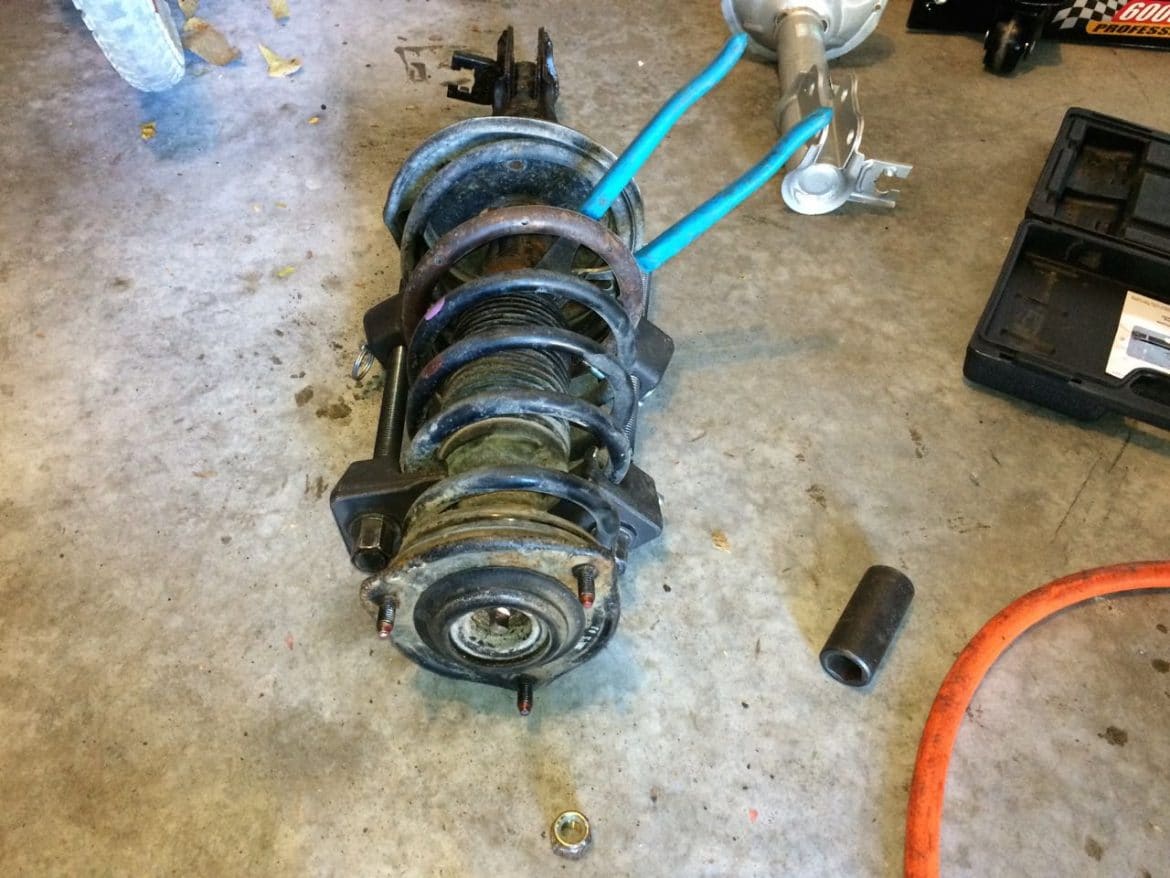
Step 13: Compress the spring.
Although I’ve never known anyone who has had an accident transferring their springs from an old strut to a new one this is a potentially dangerous step so please use caution. That compressed spring holds a lot of potential energy and if you were to compress it and then drop the assembly and have the spring compressor tool break, it could really hurt you, so proceed with caution.
You will need to attach the two spring compressors on opposite sides and attach them on the spring giving yourself enough room to compress the spring sufficiently so that it will be freed from the strut but not so close to the ends of the strut so that it gets pinched in the process and then you can’t get the spring compressor off once you’ve compressed the spring. I had 3 coils of the spring on the right side and 4 on the left (as seen in the image below). I’d use your impact wrench to tighten the spring compressors and make sure to keep the two compressors even so the spring doesn’t lean way to one side. Tighten one a bit and then tighten the other one a bit. Here’s what mine looked like when I was ready to remove the top bolt from the strut:
You will know you have compressed the spring enough when the strut moves free from the spring on the lower end.
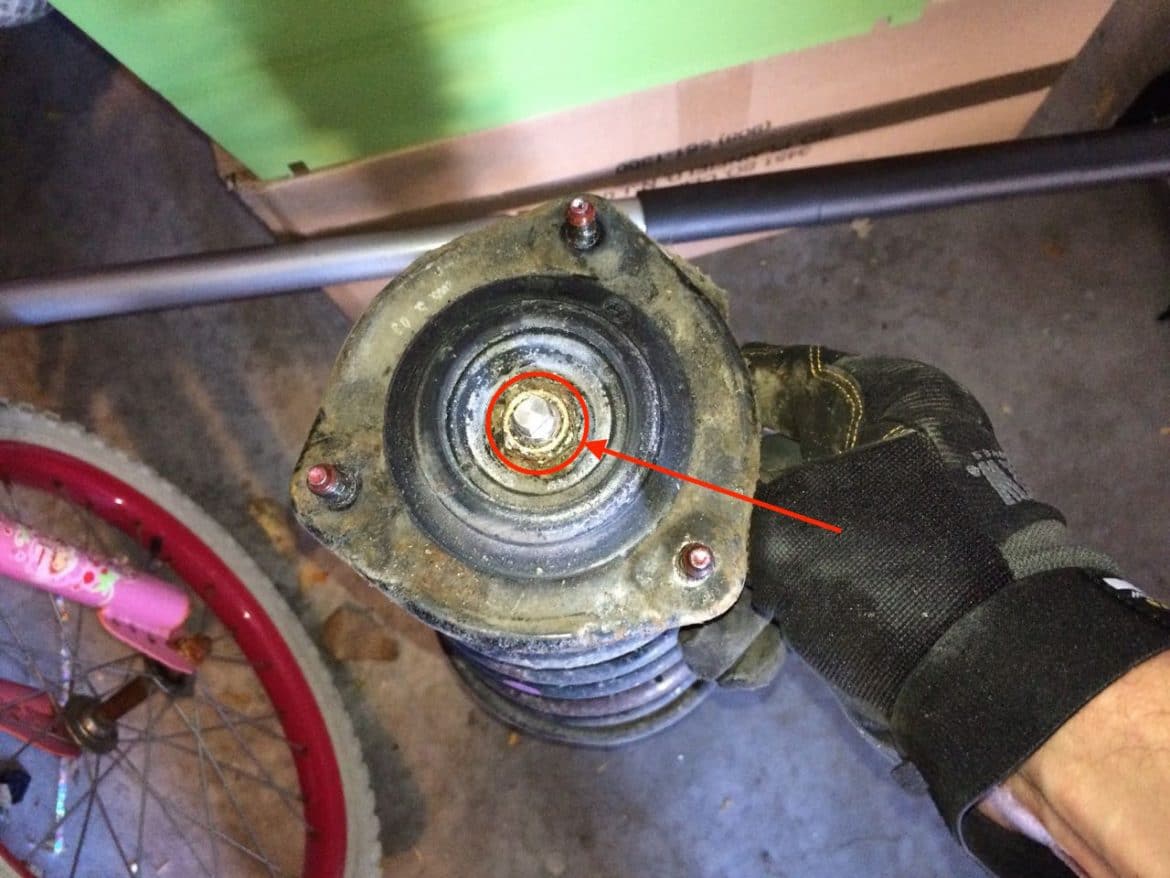
Step 14: Remove the strut mount lock nut.
Caution: Make sure you have compressed the spring sufficiently so that the strut is free. If you don’t compress it enough and remove the bolt on the end of the strut, the spring will shoot out and could injure you.
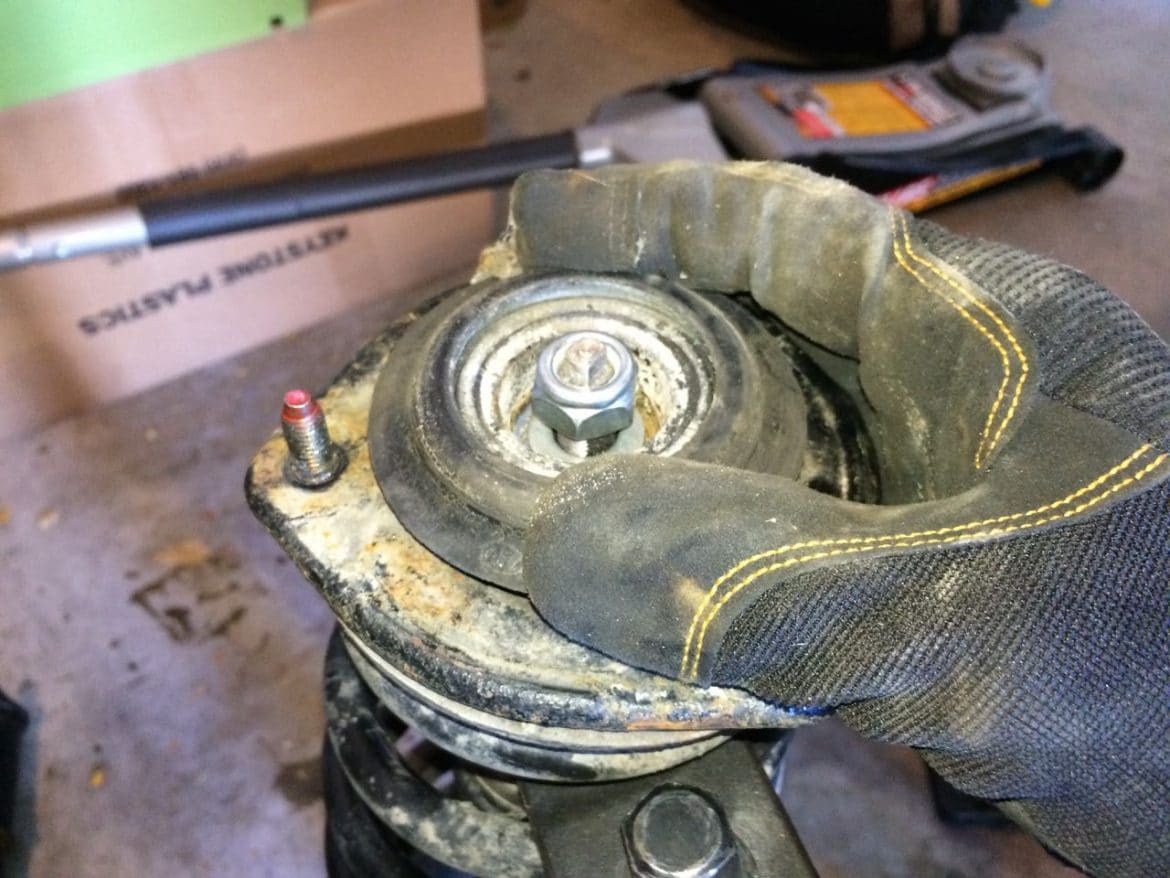
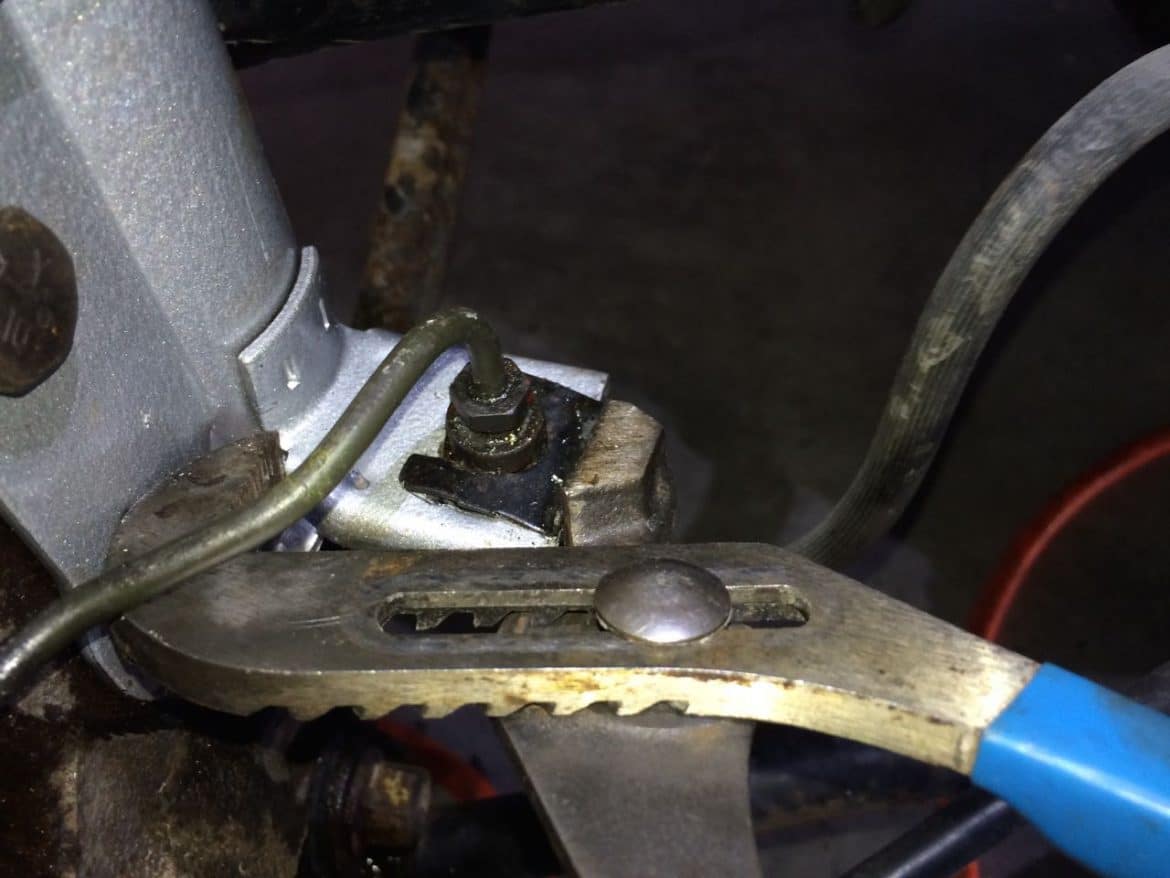
I used a flat screwdriver to clean out some of the grease around the bolt. Then take a deep-well 19mm socket and use an impact wrench to remove the strut mount lock nut:
I pushed the strut damper dust cover out of the way and locked my channel lock pliers on the shock so that it would not turn when removing the nut. You won’t want to do this on your new struts because this could cause the strut to leak but because I will throwing these old struts away, it won’t matter:

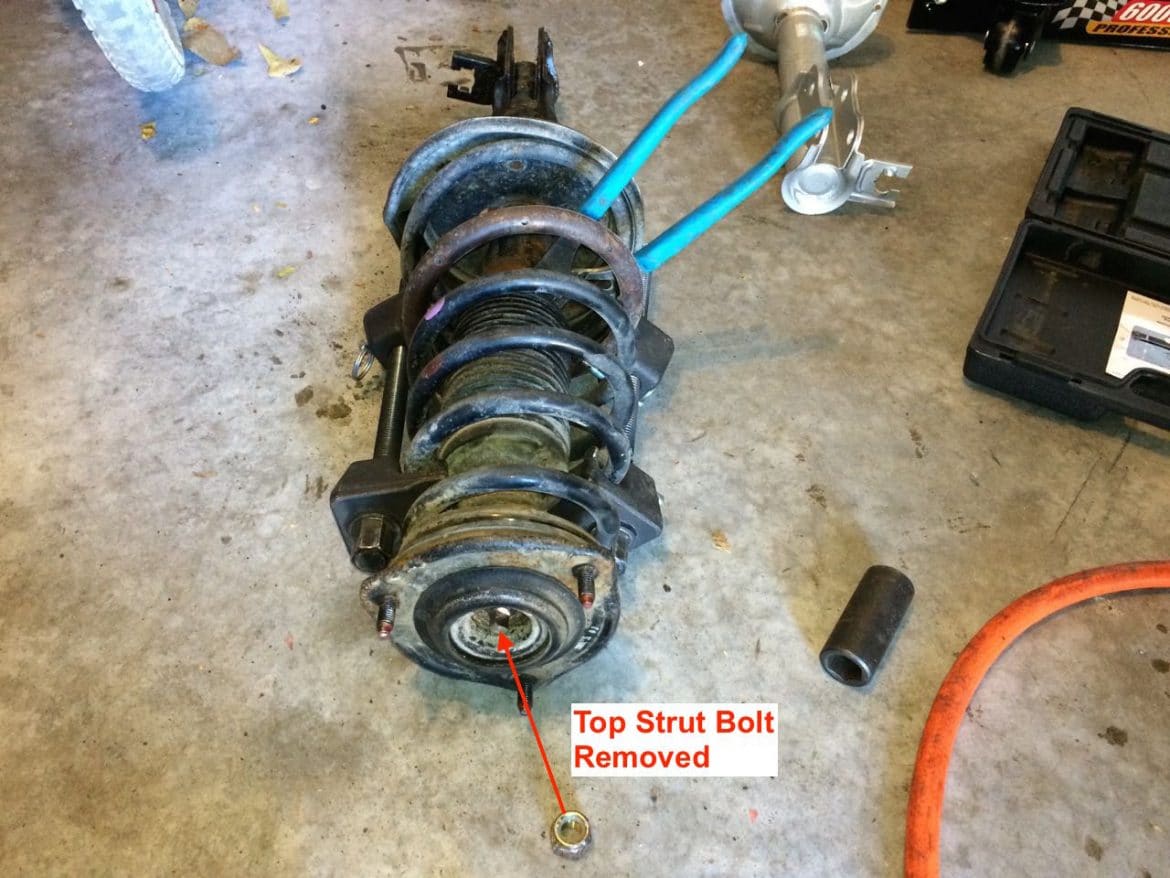
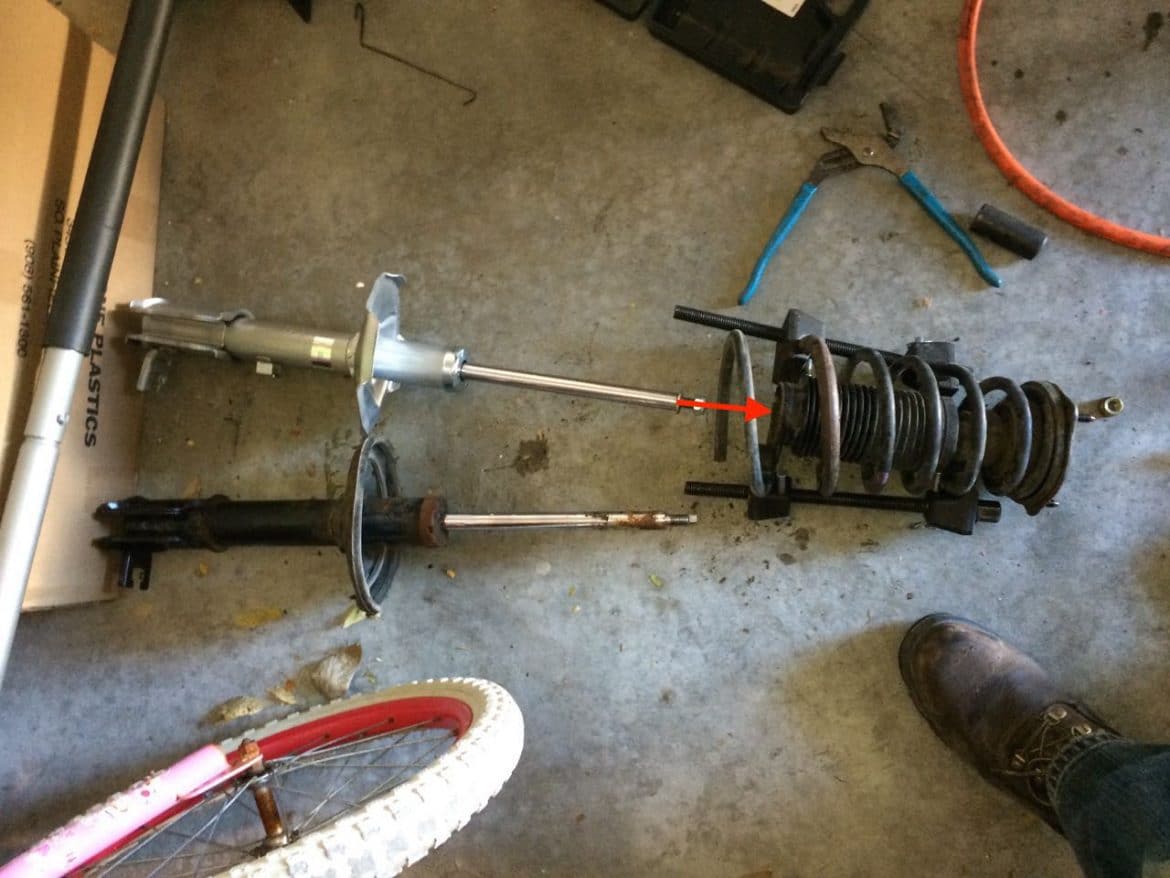
Step 15: Transfer the spring from the old strut to the new.
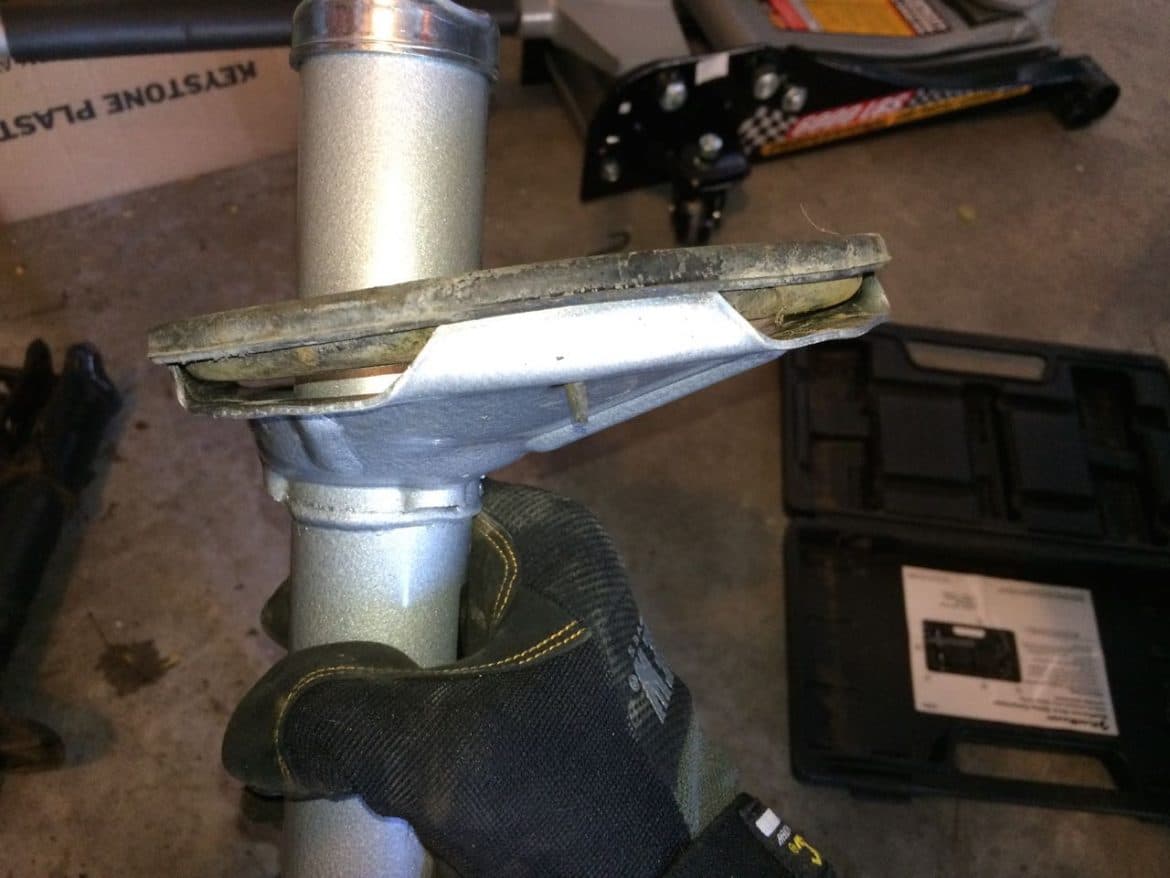
Once you have the strut locknut removed you can slide the strut out of the spring assembly. Here the old strut is out of the spring and the new strut is ready to be installed into the spring, after I remove the nut and washer from the top and transfer the spring pad. One thing I’ll note is that the old washer will probably stay in the end of the strut bearing so be careful you do not add another one. I just re-used the old washer since it sticks in place with all the grease that is in there:
Carefully remove the spring pad (also called the lower insulator) from the old strut and install it on the new strut. I was unable to keep from pulling off the rubber nipples that fit into the holes of the strut but I would not worry about that, it just makes it a bit more difficult to hold in place when you are reinstalling the spring:
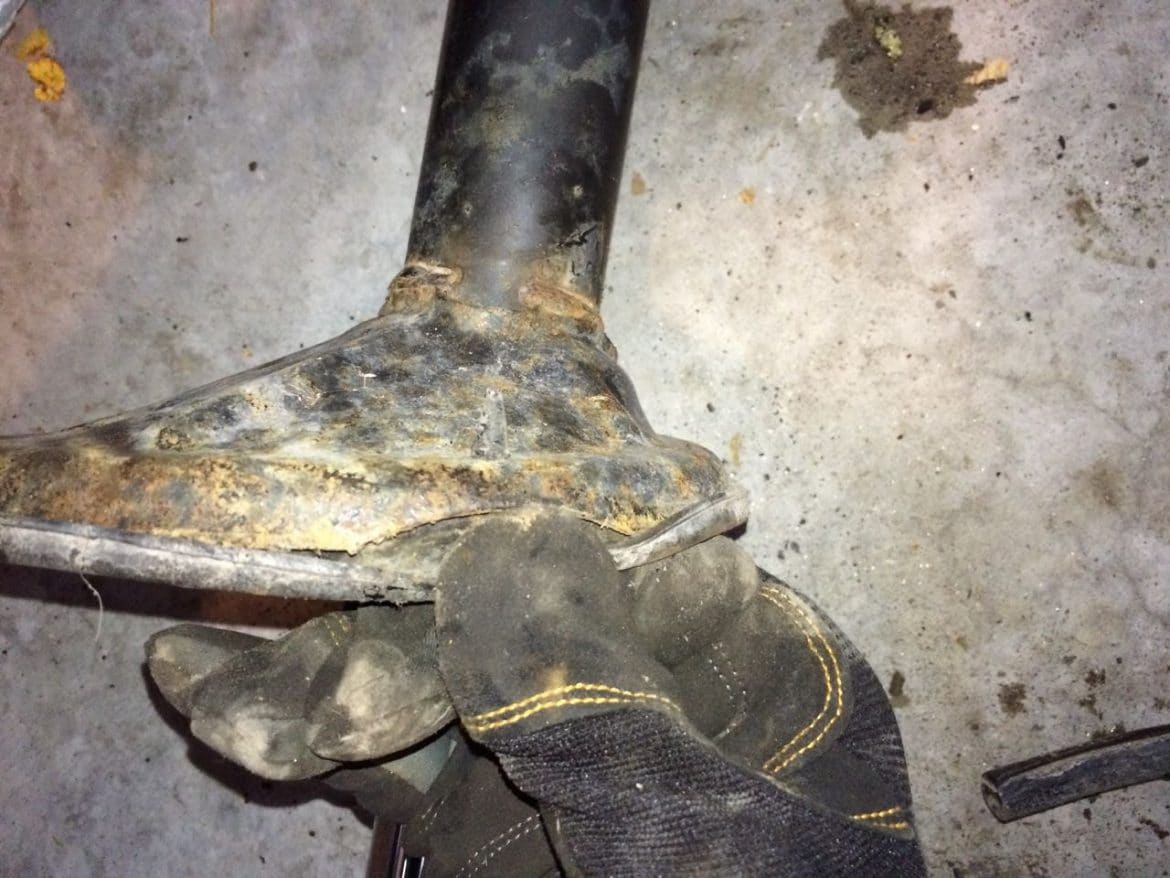
It was not a perfect fit but I did not worry about it:
Insert the new strut into the spring assembly, reinstall the top mount, and reinstall the single nut on the end:
The strut shaft will want to turn when you are reinstalling this locking nut but I was able to tighten it up enough so that I could lock a vice grip on the very end of it to keep it from turning while you are tightening the nut. I tightened it as far as it will go, it is only threaded a ways down. This nut is 19mm. I used a small crescent wrench to tighten it while holding onto the end with a vice grip.
Step 16: Install the strut into the car and install the top nuts.
You will need to feed the lower end of the strut in between the brake line and the wheel so you can get the top end of the strut inside the wheel well.
Once you have the top of the strut inside the wheel well, feed the bolts up through their holes. You also will want position the lower end of the strut over the knuckle:
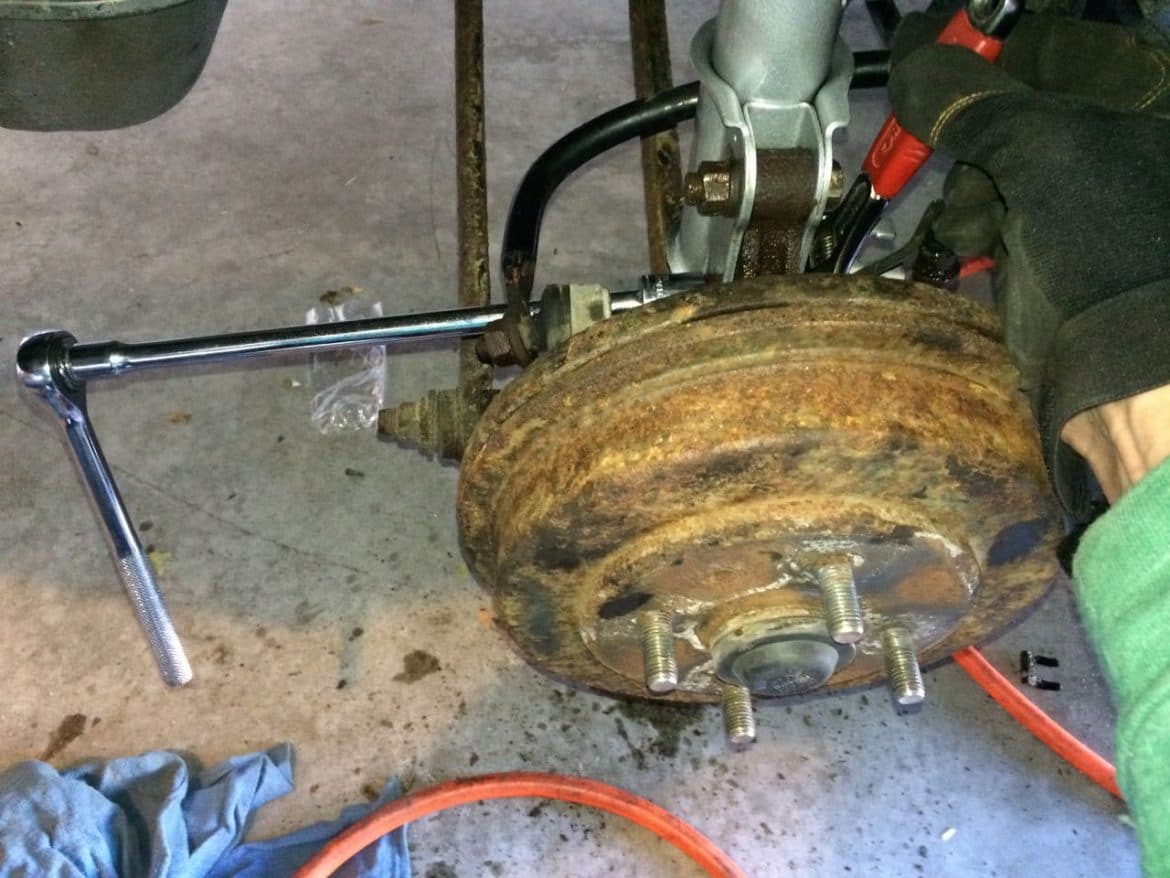
My arms were not long enough to hold the strut in place and put the nuts on the top bolts and hold the strut in place so I took my crescent wrench between the hub and the strut to hold it up in place:
Once you have the strut held in place, reinstall the three nuts:
Step 17: Reinstall the lower bolts, lock washers, and nuts.
Insert the bolts from the front side of the vehicle and put the nut on the rear end side. I put a good coat of anti-seize on the entire bolt before inserting it, just to make it easier for the next person to remove:
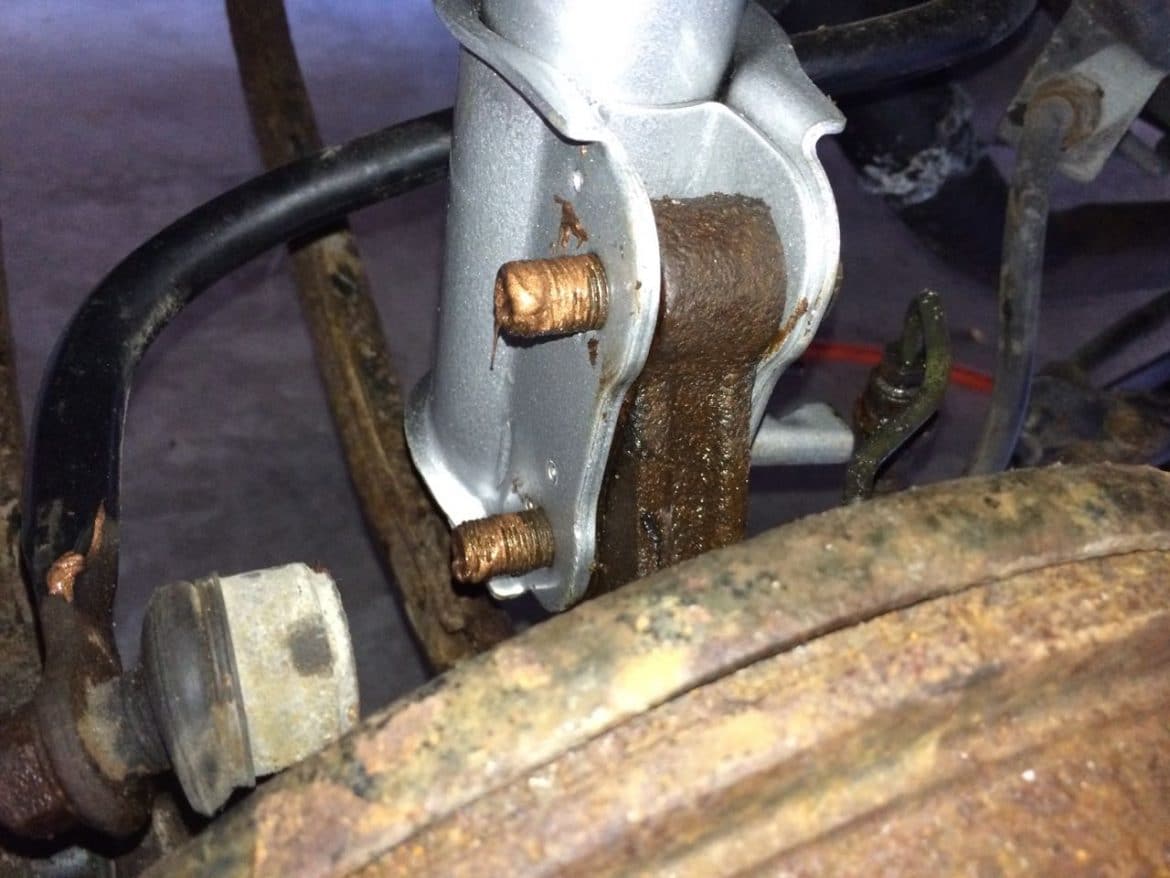
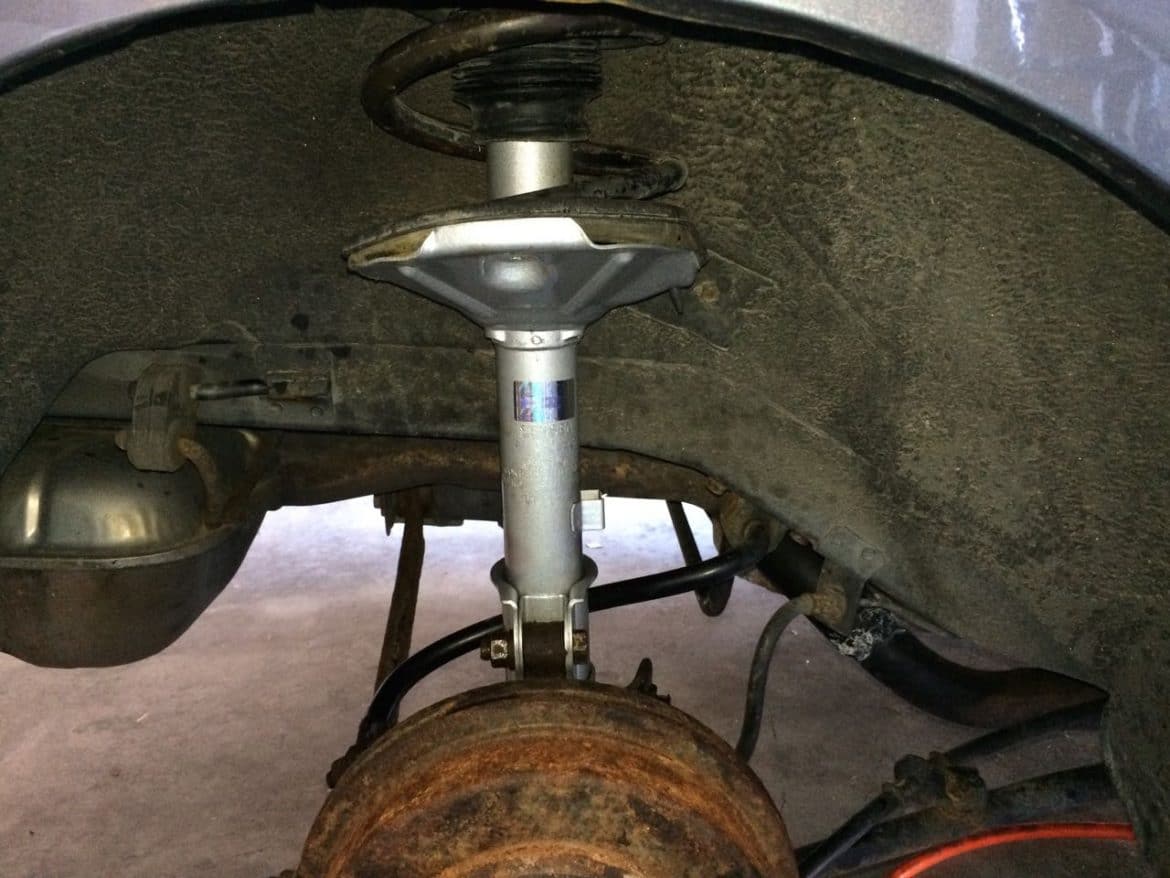
Reinstall the lock-washer and start the nuts by hand so you do not cross the threads. Tighten the nuts with a ratchet, extension, and socket. You will see the strut flanges squeeze tight around the knuckle:
Step 18: Reinstall the brake line on the mounting tab.
I had a difficult time reinstalling the first brake line when I did my struts so hopefully I can help you a lot by sharing the tricks I learned. The difficulty is that the brake line is metal running to the brake and doesn’t flex easily at all. The metal connector between the rubber brake line and the metal brake line must be lined up perfectly to slip into the tab where it is mounted.
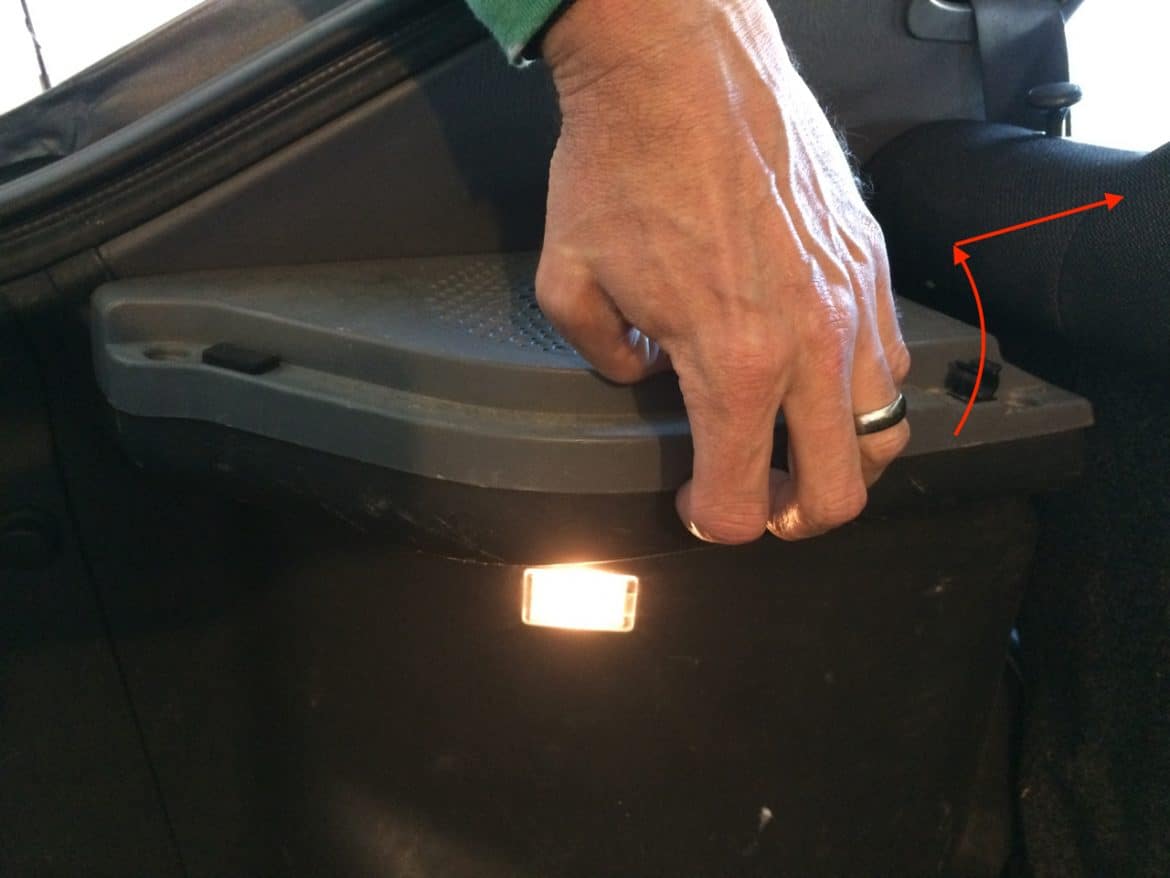
Brake Line Reinstallation Tip 1
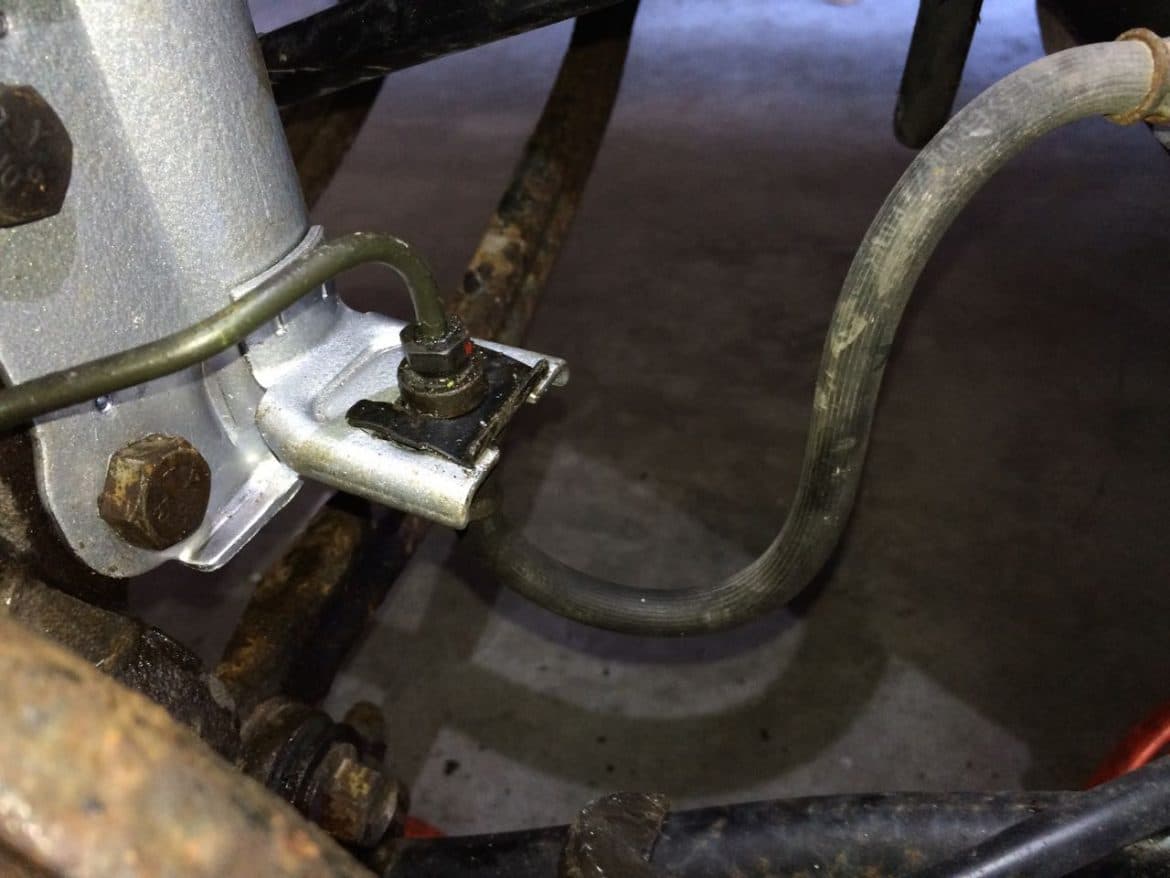
The first trick I found was to bend the two tabs so they make it easier to slide the brake line in. Bend one down and one up (about a 1/8″ each) as seen below:

After you’ve bent the mounting tab you should be able to slide the brake line into the slot on the tab. Once you have the brake line in-between the two tabs you will want to bend each tab straight (from the end).
Brake Line Reinstallation Tip 2
You must lift the brake line up into its slot in order to reinstall the locking tab but the brake line has a flat side on each side that must be aligned to the strut mounting tab and it may require you to turn the brake line.
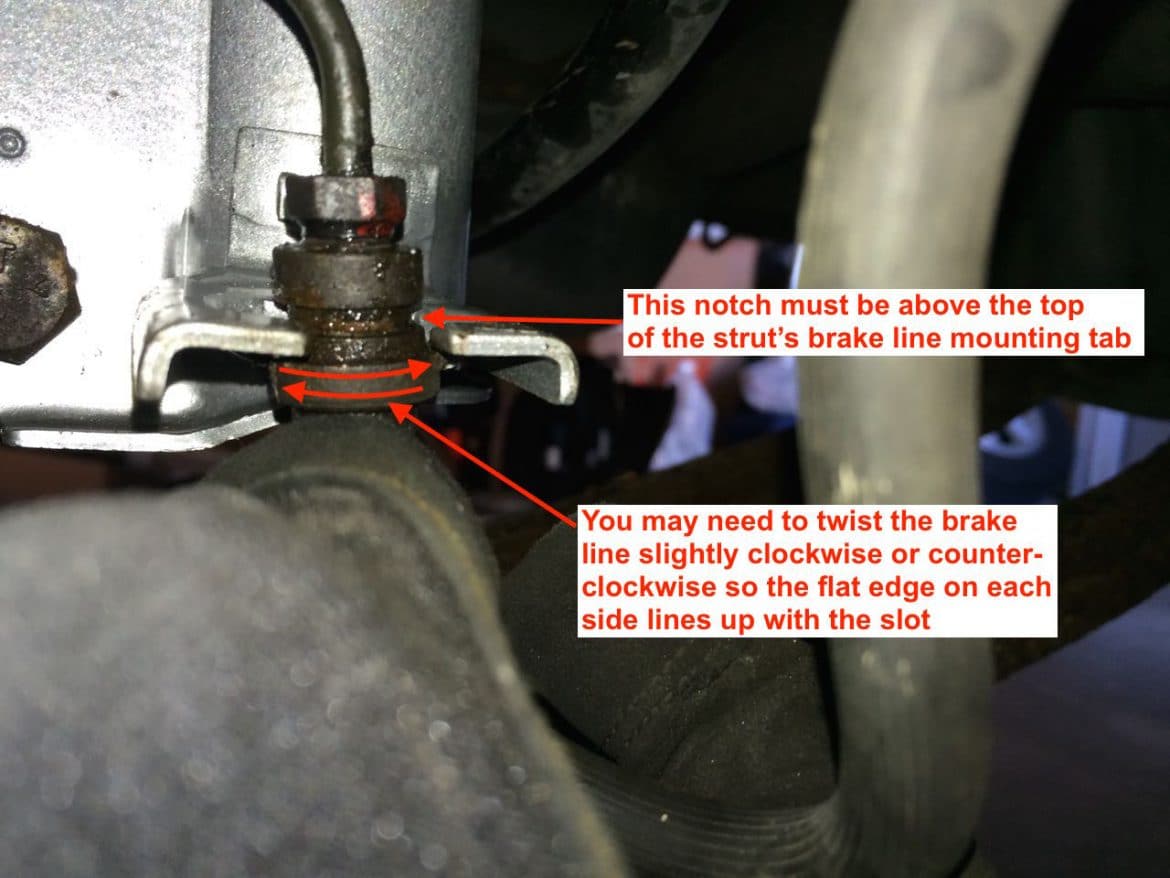
Once you have the brake line reinstalled and it fits up in its notch so that the slot is above the mounting tab as seen in the image above, you will be able to slide the locking spring tab in place:
Once you have the brake line reattached to the strut you are pretty much done!
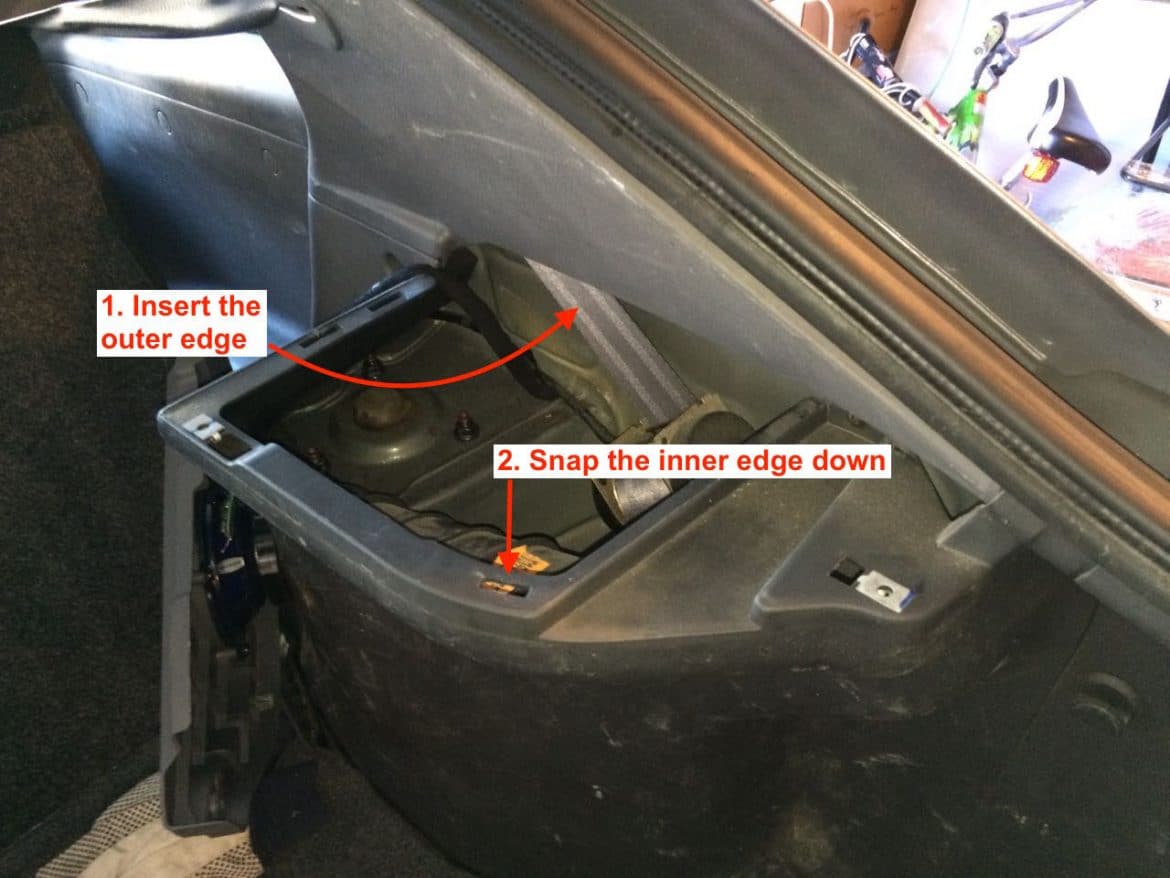
Step 19: Reinstall the speaker covers.
Insert the outside edge of the cover into the vehicle first and then snap the inner edge straight down. Then reinstall the phillips head screws into the top.
Step 20: Reinstall the wheel and lug nuts.
You won’t be able to torque down the lug nuts but get them as tight as you can. If you are doing both struts I’d wait and replace the other strut and then once you have both wheels on you can lift the car off the jack stands with the jack and then lower the car till the tires touch the ground and then tighten the lug nuts.
It is a lot of work to replace struts but it sure felt good when I was done knowing I was saving $125/wheel just in labor (I kept reminding myself of that as I did this repair). If you want to replace the front struts too, see my other article here:
1999-2005 Hyundai Accent Front Strut Replacement
Amazon Associate Disclosure: As an Amazon Associate I earn from qualifying purchases. This means if you click on an affiliate link and purchase the item, I will receive an affiliate commission. The price of the item is the same whether it is an affiliate link or not. Regardless, I only recommend products or services I believe will add value to Share Your Repair readers. By using the affiliate links, you are helping support Share Your Repair, and I genuinely appreciate your support.
Thank you. Quite well written. I mainly wanted to know how to get the speakers out and I was just not getting how it clipped in. It cost me < $500 Australian for the front and rear struts. I could have bought cheaper but I was operating on the premise that you get what you pay for. Done the front two and a huge improvement in handling. I expect a bit more improvement when I get the rear done. Thanks again. I would say about an hour plus for each wheel. I have read that it is not good to use a rattle gun on the spring compressors and using a metric shifting spanner to wind them took some time.