This article was authored by guest author, Kevin Pope. My beater car is a 2003 Ford Escape. My feelings toward this car are mixed. The quality level is akin to an all-you-can-eat for $9.99 buffet. But it costs me so little to operate when compared to a new car payment, that I keep it around.
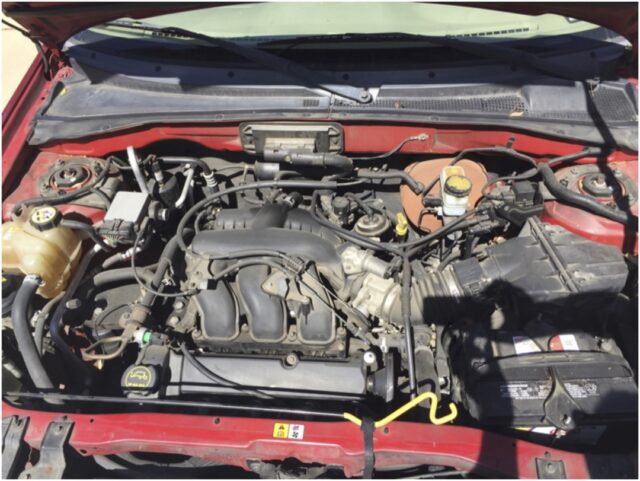
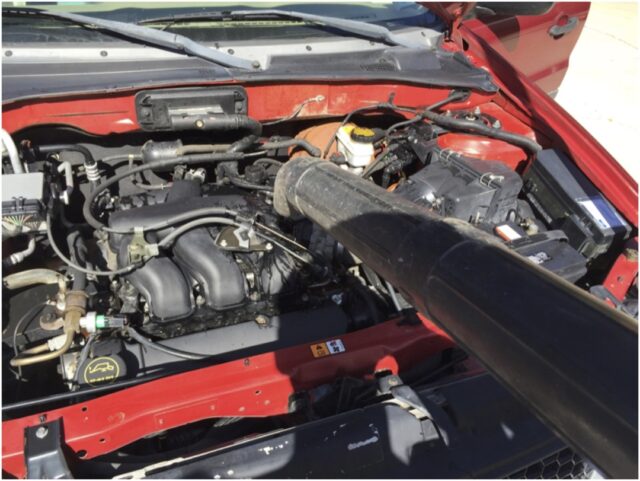
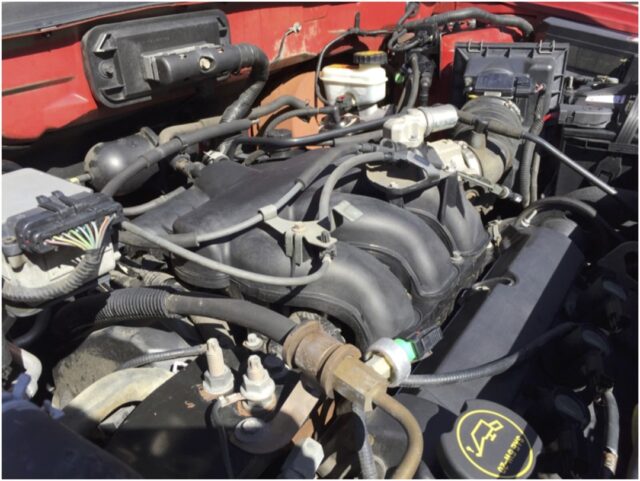
It only has 70,000 miles on the clock, but the engine compartment has never seen the wet side of a sponge. I also recently evicted some rats that were squatting in there too, and they totally trashed the place before they left. It’s certainly not the worst I’ve seen, but it could use a little TLC.
Here’s the process I use to clean up a tired old engine bay.
Vehicle
- Any vehicle with a standard gasoline or diesel engine. (I would exercise caution if performing this on a hybrid vehicle of any sort, considering the vast amounts of electronics and batteries.)
Tools Needed
- Purple Power Industrial Strength Cleaner and Degreaser – 1 Gallon
- Stiff Bristle Scrubbing Brush
- Gunk Engine Shine Protector and Detailer
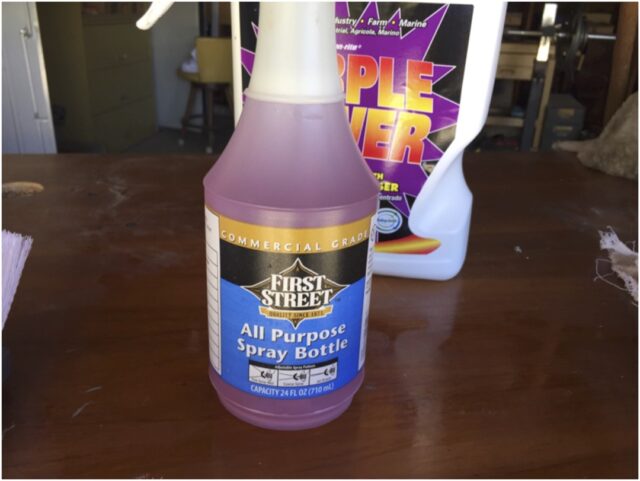
- Heavy-Duty Spray Bottle
- Garden Hose Spray Nozzle
- Shop Towels/Rags
- Rubber Gloves

How to Degrease an Engine Bay
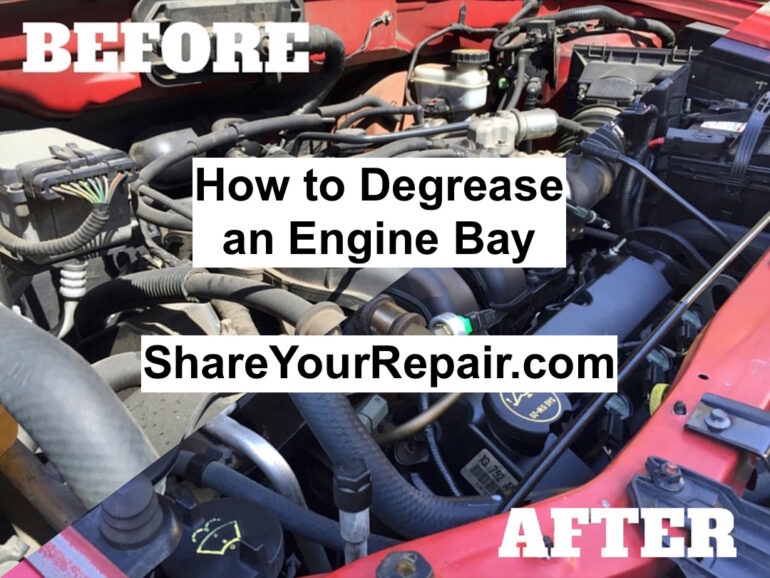
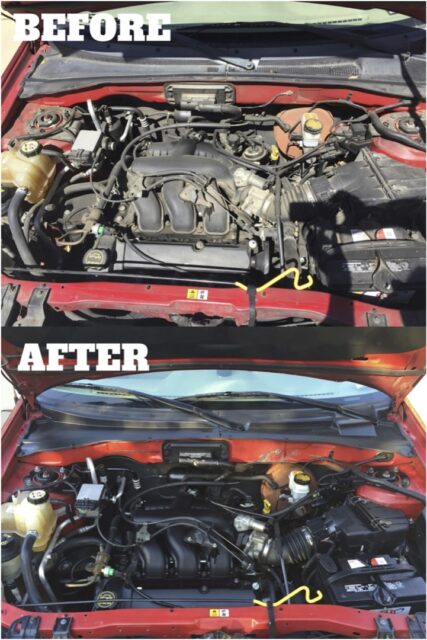
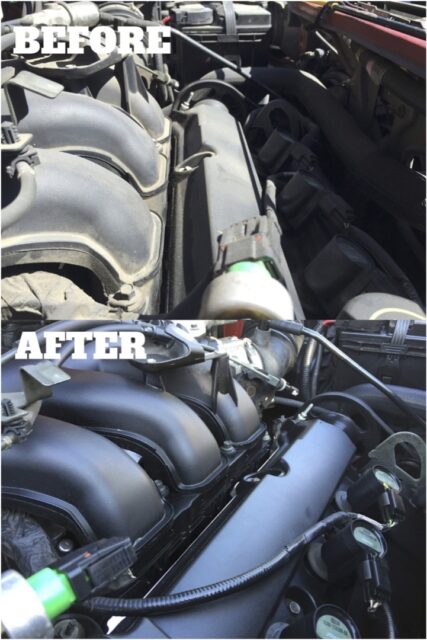
Before Pictures
And because everyone loves a good before and after shot, let me show you the unsightly state of things to begin with:
Step 1: Warm up your engine.
Certainly you’ve noticed how a mop cleans much better with warm water? Well, the same will be true for your car’s engine bay. You don’t want the engine at normal operating temperature, as dousing a hot engine with cool water could cause damage. You just want it slightly warm, not hot.
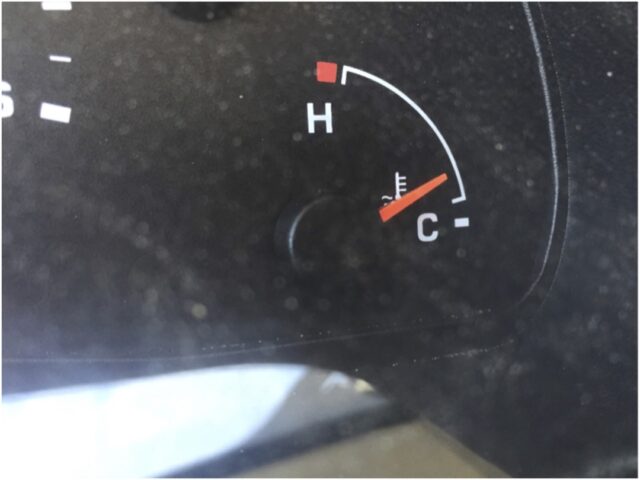
Here’s how to achieve that. If you’ve just finished driving your car around town at normal operating temperature, let it cool down for a couple hours before beginning cleaning. If your car has sat overnight and is completely cold, start it up and let it run just long enough for the temperature gauge to read about 10% or less. It doesn’t need to be exact; you just don’t want the engine blazing hot or ice cold.
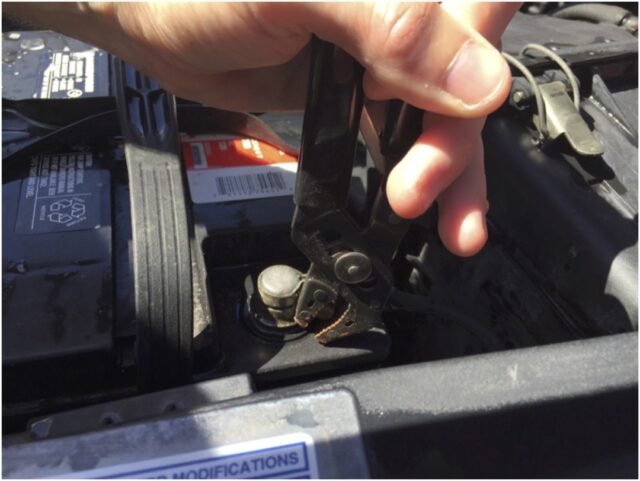
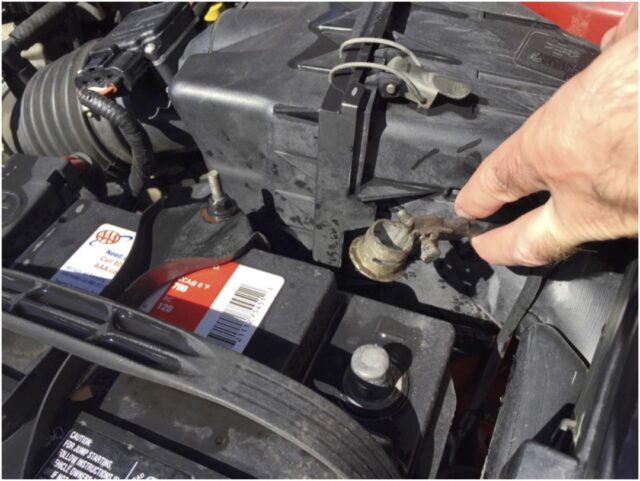
Step 2: Disconnect your battery.
Since we’ll be working with water, it’s a good idea to disconnect your battery so you do not short something out with the water. Simply use a pair of pliers, channel locks, or crescent wrench to remove the negative battery cable from its post.
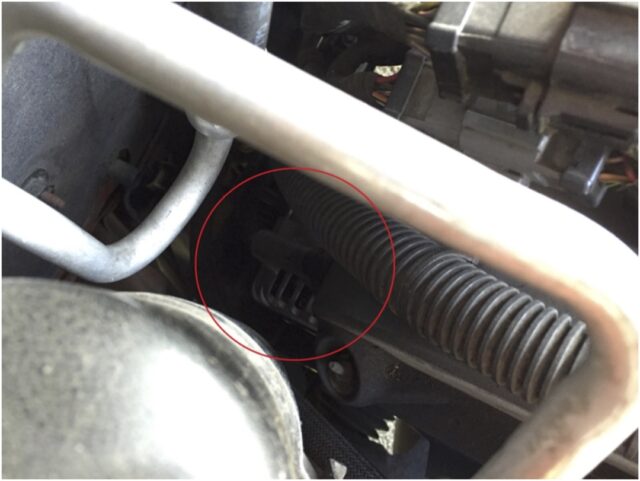
Step 3: Cover sensitive components.
You will find this step debated all over the internet. I’m of the camp that believes this step is unnecessary for MOST modern cars. But for the sake of being more safe than sorry, you should cover your alternator and distributor with plastic bags.
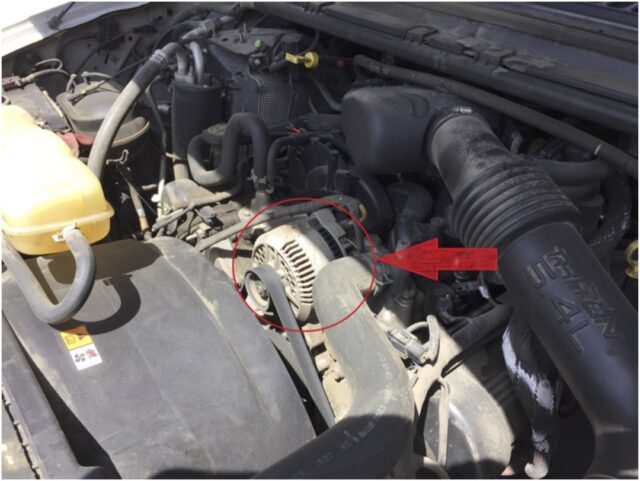
My car’s alternator is buried deep underneath the engine, about 1 foot away from the ground, where it is surrounded by moisture whenever it rains. For this reason, I’m not concerned about covering it before getting it wet. The small amount of water I may shower it with will be no more exposure than it would receive during a normal drive in the rain.
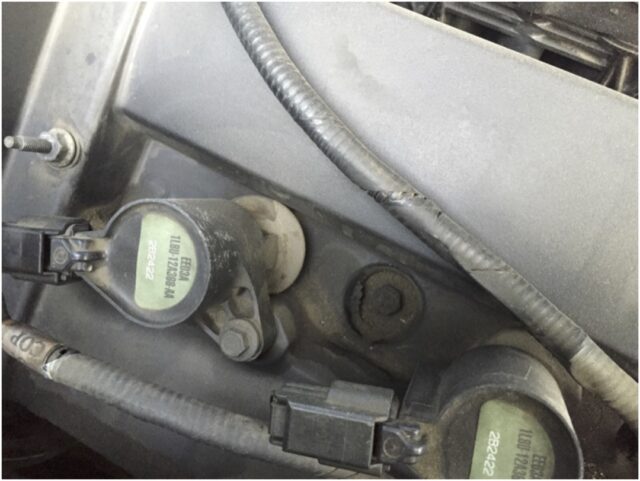
So that you’re aware of what your alternator looks like, I’m including this picture of my work truck. If your alternator is accessible like this one, cover it with a plastic bag.
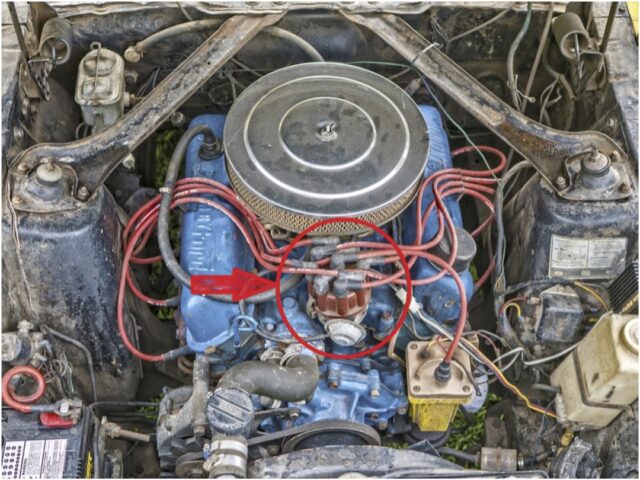
Additionally, my car also does not have a mechanical style distributor, but if your car is older, you can follow your spark plug wires to their source, and cover the device that looks like this.
Now that we’ve covered all the sensitive components, let’s get ready to scrub-a-dub.
Step 4: Prepare your chemical arsenal
I use Purple Power to clean all kinds of stuff around the garage and house. It can be diluted to fit any type of cleaning situation, with a handy chart on the bottle showing the proper mix ratio for various cleaning tasks. Alternatives such as Simple green or Krud Kutter can be just as effective, so use them to your hearts content if you like. For the purposes of this article, all mixing instructions will be specific to Purple Power.
Yes, you should probably wear rubber gloves while working with Purple Power. Will it fry your skin if you touch it? No. But it will dry out your skin quite a lot. If you do get some on your skin, just wash it off with water.
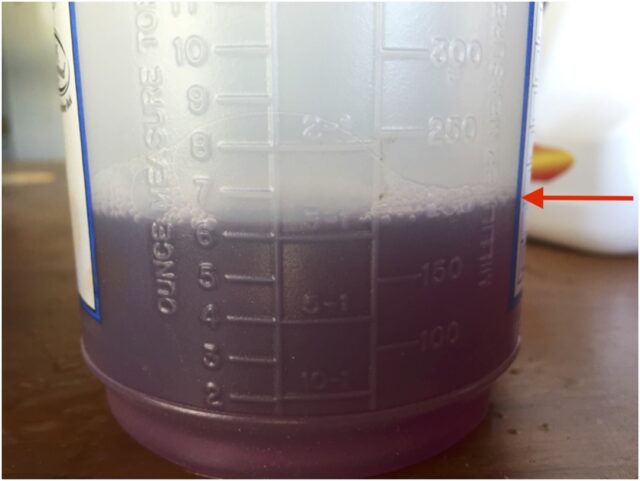
Grab your spray bottle and mix a 3:1 solution of Purple Power and water. That’s 3 parts water to 1 part Purple Power. Simply fill the bottle a third of the way full with Purple Power, and fill the remainder of the bottle with water. It does not need to be exact, just get it in the ballpark.
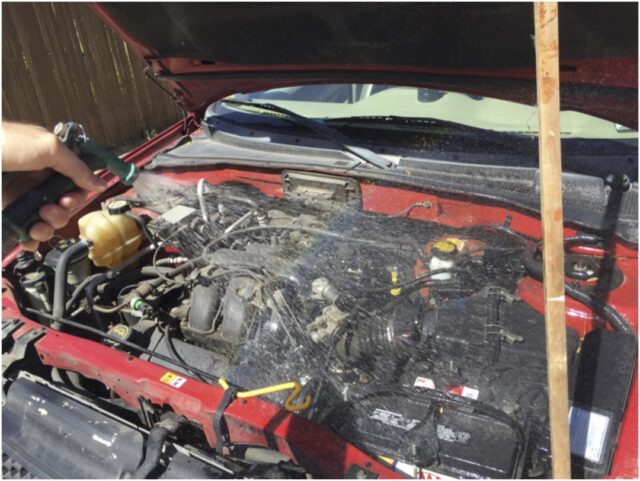
Step 5: Rinse the engine
It is important to wet the engine compartment surface PRIOR to spraying any Purple Power degreaser. Because Purple Power is stronger than normal cleaners, you want a layer of water to further dilute the cleaner to prevent possible discoloration or etching on plastic or aluminum surfaces. Additionally, this light rinse will knock down the more egregious road grime and filth.
To do this, use a simple garden spray gun attached to a normal garden hose. Lightly shower the entire engine compartment with water using a broad spray pattern. Avoid using a concentrated, high pressure spray stream (this could force water into places it otherwise would not enter, like fuse boxes, electrical connectors, spark plug wells, etc.) Take a look at the picture below, and copy the spray pattern shown.
Step 6: Apply the Diluted Purple Power Degreaser
Nothing terribly complicated here. Simply grab your spray bottle with the 3:1 solution of Purple Power and water, and generously spray the whole engine compartment. Don’t be shy here. Your trigger finger should be hurting by the time you’re done. Avoid getting the cleaner on your car’s finish, as it will strip off any wax coating you may have. Let it soak for a minute or two.

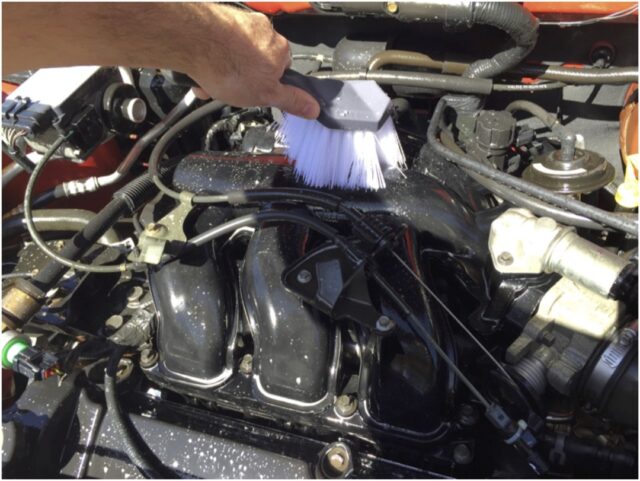
Step 7: Scrub
Take the stiff bristle brush and scrub down the entire engine bay. Try and work from top to bottom, and be careful to not damage or pull any wiring or rubber hoses while scrubbing. You should see some nice suds forming as you scrub.
Step 8: Rinse
Using your garden hose and spray nozzle attachment, rinse the engine again with a light spray pattern as you saw above, washing off any remaining Purple Power cleaner.
Step 9: Repeat
You will inevitable notice areas that you missed, so simply repeat steps 5-7 until you could eat a steak dinner off your valve covers.
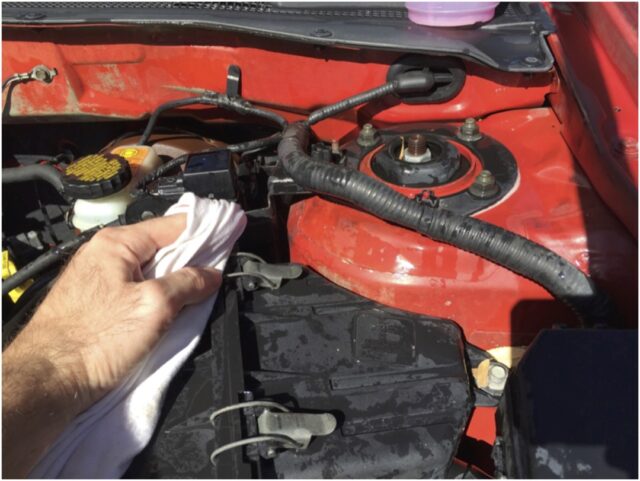
Step 10: Detail work
There are areas that you simply won’t be able to clean any other way than by hand. For this, grab an old towel, spray on your Purple Power solution, and get scrubbing. Follow up with clear water to rinse as usual.
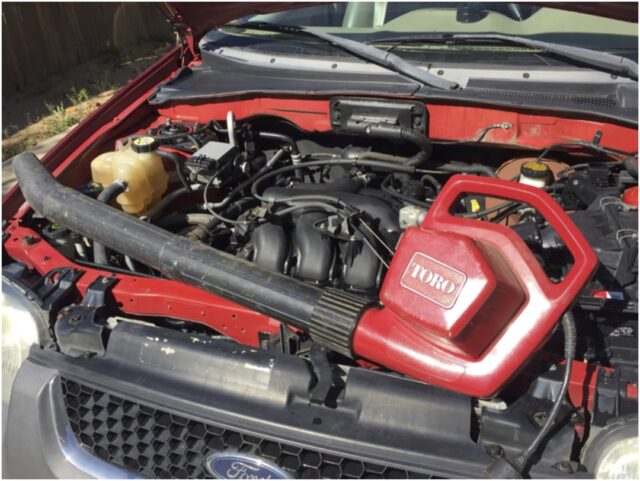
Step 11: Blow Dry
Water is great for cleaning, but it’s not your engine’s friend. I’ve used an air compressor to dry things off in the past, but my hands-down-favorite tool for this job is a leaf blower.
The air pattern is broader and will have the engine dry very quickly.
Take your time doing this and make sure that everything is good and dry
NOTE: Pay special attention to the area around your spark plugs. Make sure that there is no water in the spark plug wells. Mine are covered with rubber boots to prevent water from entering, but it doesn’t hurt to double check. Water in the ignition system could leave you with an ugly misfire.
Step 12: Shine
Now that the dirt, grease, and grime has been removed, your engine bay will look clean, but with a dry, maybe even sun-parched look. To really make your engine compartment look new, follow up with an “engine dressing” product.
I’m using Gunk Engine Shine Protector and Detailer. A little goes a long way, and I think it provides a very nice sheen, without being overly greasy and wet feeling. I’ve heard of people using tire shine products with success, too. But again, to play it safe, let’s stick with what we know works.
Give the can a good shake and lightly mist your engine bay components.
This isn’t a spray-and-walk-away product. You will need to follow up with an old (but clean) rag or t-shirt and simply spread out the product across all surfaces. You can also apply the product directly to your rag and “shine out” each component.
This will take you 15-20 minutes to do right, but take your time and the results will be worth it
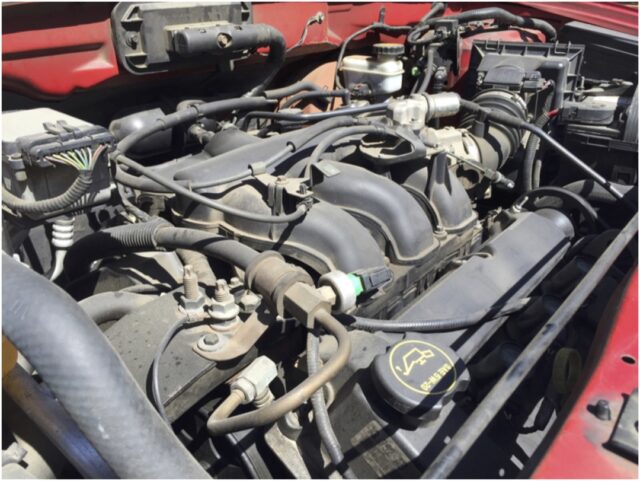
Step 12: Marvel
Stand back and behold your cleaner-than-you-thought-possible engine bay.

Amazon Associate Disclosure: As an Amazon Associate I earn from qualifying purchases. This means if you click on an affiliate link and purchase the item, I will receive an affiliate commission. The price of the item is the same whether it is an affiliate link or not. Regardless, I only recommend products or services I believe will add value to Share Your Repair readers. By using the affiliate links, you are helping support Share Your Repair, and I genuinely appreciate your support.