We have a stroller that has tires with inner tubes and my wife pushes the kids around a lot and therefore we get flats from time to time. I had been buying new tubes but I did the math and patching them is a lot cheaper (and greener) so now I’m going with patches. Here’s how to apply a patch to an inner tube.
How to Put a Patch on an Inner Tube
Hardware:
Tools needed:
- Adjustable wrench (crescent type), to take off the bike wheel, get one here

Its contents:
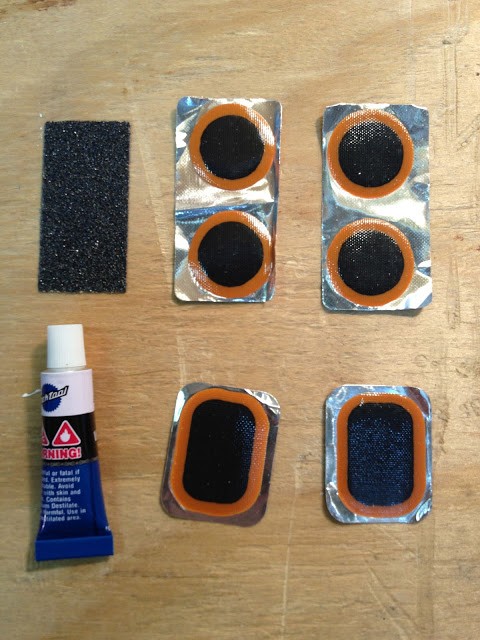 |
| Glue, sand paper, and 6 patches |
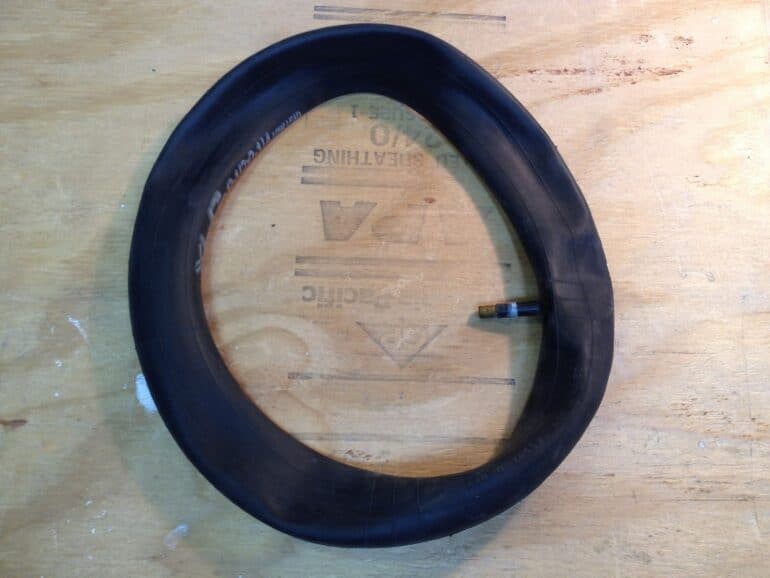
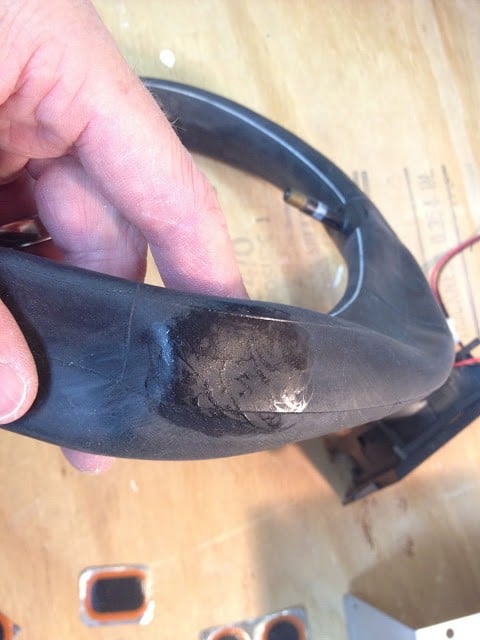
Step 1: Locate the hole(s) in the tube.
This may be very obvious but if not you can fill up the tube and put it in the sink. The hole in this tube was obvious (I thought–more on that later). It’s a bit tricky to mark a wet inner tube unless you have a
tire crayon (which can write on rubber when it’s wet).
Step 2: Dry the tube.
The only real important part is that the area around the hole is dry.
Step 3: Sand the area around the hole.
Either use the included sandpaper with your patch kit or use something around 80-grit sandpaper to rough up the surface where the patch will be applied. This will give the adhesive more to hold on to.
Step 4: Apply the glue.
Put down a thin layer of glue over the entire area where the patch will be placed. I laid down the patch just to get a feel for how big an area I’d need to cover:
Here is the glue freshly applied:
 |
| Glue applied |
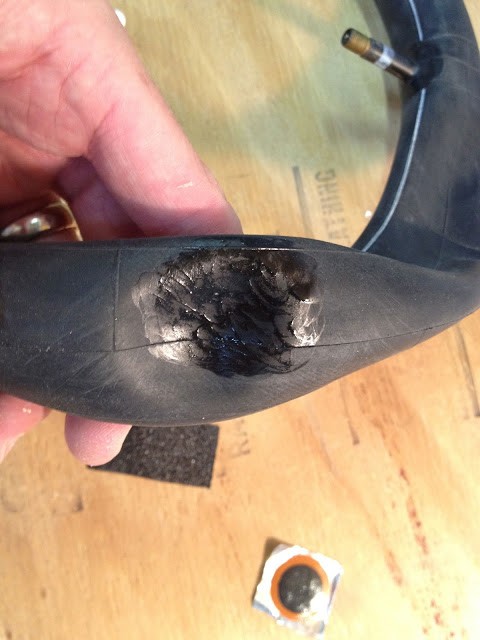
Step 5: Let the glue dry.
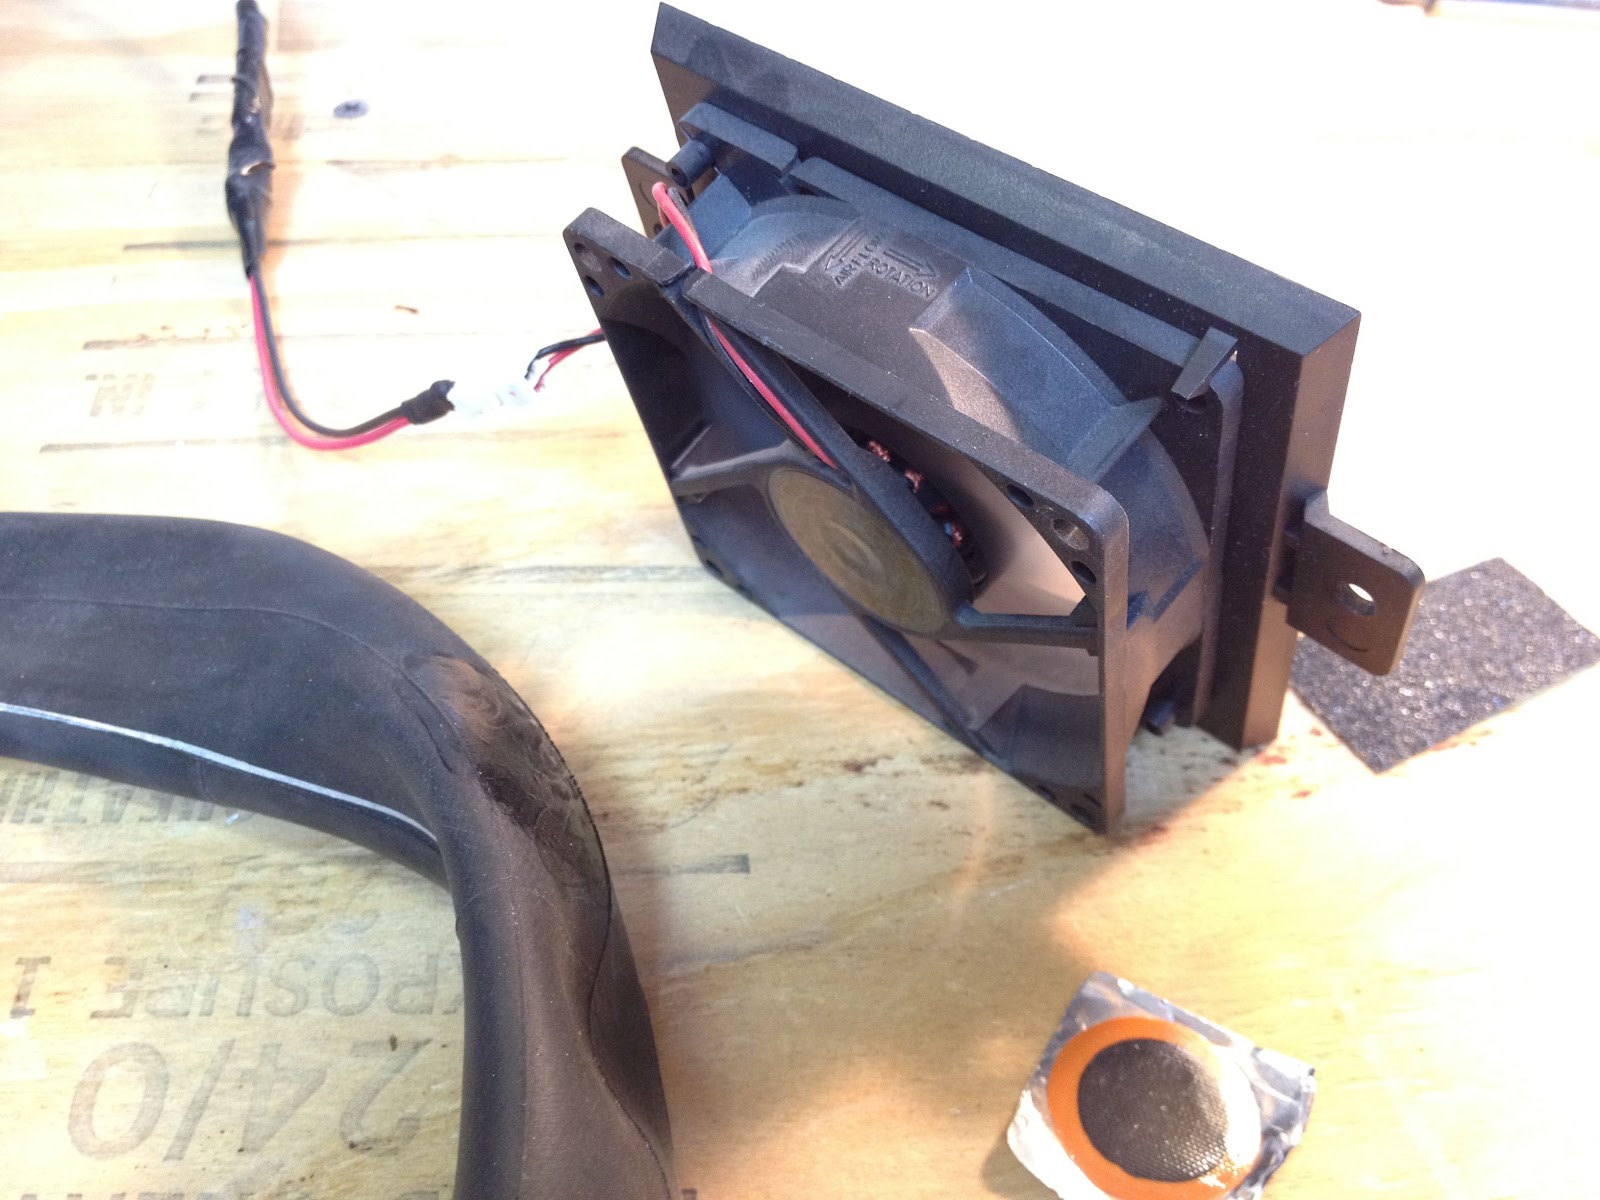
My kit didn’t tell me how long to wait. I put down the glue and then went and did some other things. It didn’t seem to be drying very fast so I used a fan I tore out of an old computer to help the drying process:
This is what it looked like after an hour and 15 minutes:
 |
| Glue dried |
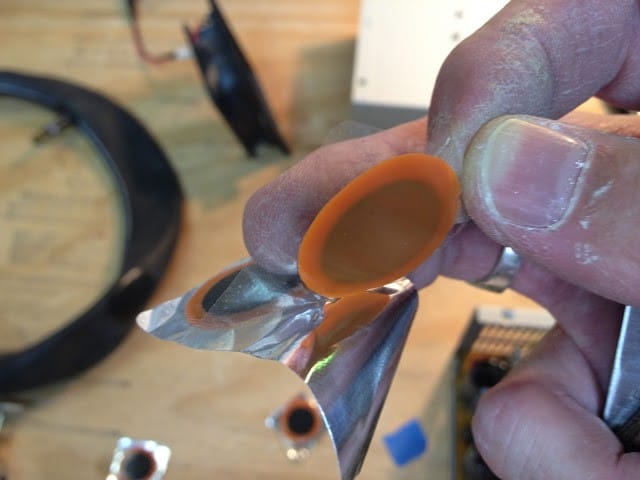
Step 6: Apply the patch.
Important Note: the layer of plastic over the patch should remain on the patch until after you have already placed it AND burnished it. Do not peel it off at this time. It is for protecting the patch when you are burnishing it. Peel off the patch from the plastic or foil:
 |
| Peeling off the patch — be careful not to peel off two! |
Another thing to note: Make sure to cut the patches apart from each other because the clear sheet of plastic over them is all one piece. When you peel one off all the others on the sheet will come with it.
Place the patch on the tube, centered over the hole. Again, don’t remove the clear plastic.
Step 7: Burnish the patch.
Pick something that is not going to “dig in” when you rub it on the surface of the patch. I used the flat end of a punch I had laying around. This makes sure the patch makes a good connection with the tube.
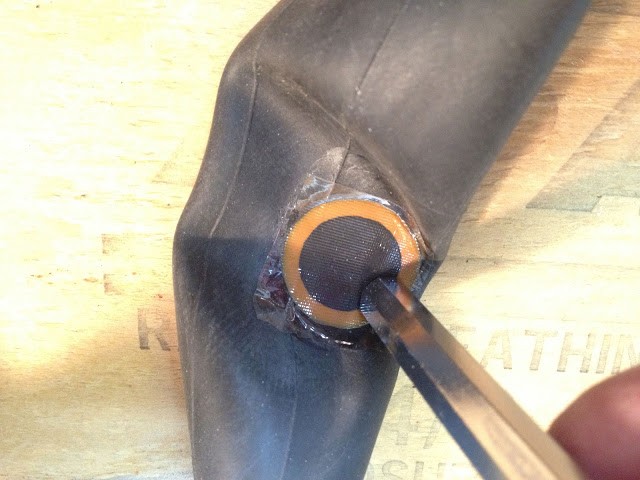 |
| Burnishing on the patch |
Step 8: Remove the protective plastic.
Peel off the clear plastic and you are done. You might want to let the patch sit for a few minutes before you fill it up but it should be good to go.
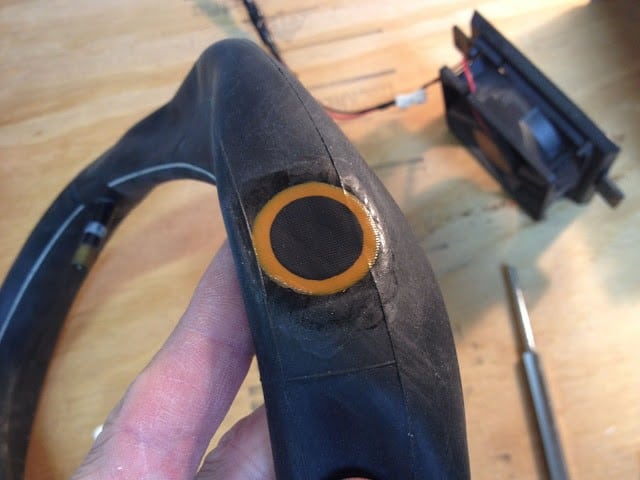 |
| Tube successfully applied |
Outtakes:
I did not thoroughly look for holes in this tube because the first hole was so obvious. I filled it up after patching this hole and it deflated very quickly. I put the tube under water and found 4 more holes in various places. It turns out that a new tube was the best solution in this case.
Amazon Associate Disclosure: As an Amazon Associate I earn from qualifying purchases. This means if you click on an affiliate link and purchase the item, I will receive an affiliate commission. The price of the item is the same whether it is an affiliate link or not. Regardless, I only recommend products or services I believe will add value to Share Your Repair readers. By using the affiliate links, you are helping support Share Your Repair, and I genuinely appreciate your support.
Related