My wife walks a lot with our two kids and once in a while we get flat tires in the “buggy” as she like to call it. Last time the culprit was the post of an ear ring, this time it was something different. Luckily I bought a spare tube. To be nature conscience I’m going to patch the next one and I’ll write that up too. Here’s how to change the inner tub on your stroller (if the stroller has inner tubes in its tires–our City Mini stroller has foam wheels).
Hardware:
- Mountain Buggy Urban Double Stroller (in our case)
- XLC Boxed Tube – 12-1/2″ x 2-1/4″, SCHRADER
(valve)
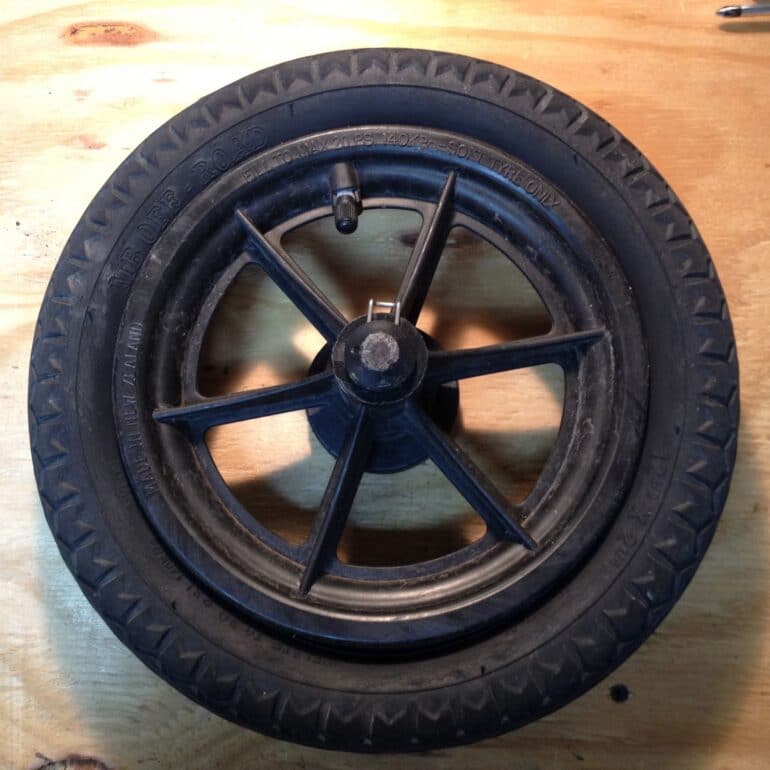
Step 1: Inspect the tire and remove the source of the flat.

Here you can see the “thorn” removed:

Step 2: Let out all the air in the tire.
This probably isn’t necessary since you have a flat tire but if it has a slow leak and it hasn’t all leaked out then you’ll want to let all the air out as possible.
Step 3: Squeeze the tire to one side.

Step 3: Pull the tub out from under the tire.
You probably can remove the tube without taking either side of the tube off the rim. If it is a brand new tire this may not be possible. If it is too tight you will need to pry one side of the tire up and over the rim. I was actually able to do this by hand but if it’s tight you will need to use two large flat screwdrivers spaced 3-4 inches apart and pry with both of them to lift the tire up and over the rim. With one side of the tire over the rim you will be able to easily change the tube.

Step 4: Pull out the valve stem and completely remove the inner tub.
Pull the tub out and then finally you’ll need to remove the valve stem. Don’t forget to take the valve stem cap off if it’s on because it probably won’t fit through the rim. Pull the tire over to one side to give yourself room for the valve stem to come on out of the rim.
 |
| Pull the inner tub straight up to remove the valve stem. You may want to push with one hand on the valve stem. |
Step 5: Carefully inspect the tire to make sure there is nothing else poking through it.
Step 6: Install the new tube.
Start by inserting the valve stem through the hole in the rim. Then tuck the new inner tube under the tire.
Step 7: Lift the tire onto the rim (if you pried one side over the edge of the rim before).
You may need to use your two flat screw drivers to do this again. Simply start the tire on the rim on one side and work your way around, finally using a couple flat screwdrivers to lift the last part of the tire over the rim.
Step 8: Make sure the valve stem is straight and fill the tire with air.
Make sure that the valve stem is not at an angle so the rim cuts into the valve stem. In our case it is impossible for the valve stem to be crooked because of the design of the rim.
 |
| Filling up the new inner tube with my portable 12-volt air compressor powered by an old computer power supply |
Now you probably saved yourself $20-30 from going to a bike shop.
Amazon Associate Disclosure: As an Amazon Associate I earn from qualifying purchases. This means if you click on an affiliate link and purchase the item, I will receive an affiliate commission. The price of the item is the same whether it is an affiliate link or not. Regardless, I only recommend products or services I believe will add value to Share Your Repair readers. By using the affiliate links, you are helping support Share Your Repair, and I genuinely appreciate your support.
Great article! Thanks for the instructions as I’m about to change two flats on my dual buggy.
Suggestion: in Step 1, instead of “end back up right where you began”, i think it flows better as “end up back right where you began”
Thanks for the feedback Katie and I clarified my sentence in Step 1.