Hardware:
- Kenmore Coldspot Side-By-Side Refrigerator, Model 106.59282990
- Dispenser Door Flap (if you were to replace the door versus repairing the foam like I’m doing)
- Dispenser Parts (if you want to replace the entire set of parts)

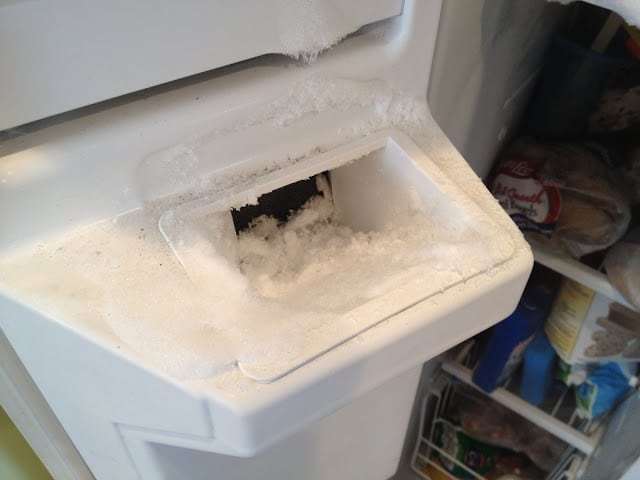
We were getting tons of frost around the inside of the ice dispenser on our Kenmore Coldspot Side-by-Side. After inspecting a little more my feeling was that the foam on the inside of the door that I believe is supposed to insulate and seal the door shut was chewed up quite a bit from over a decade of use and that is where the (hot moist) air was getting in and causing all the frost.

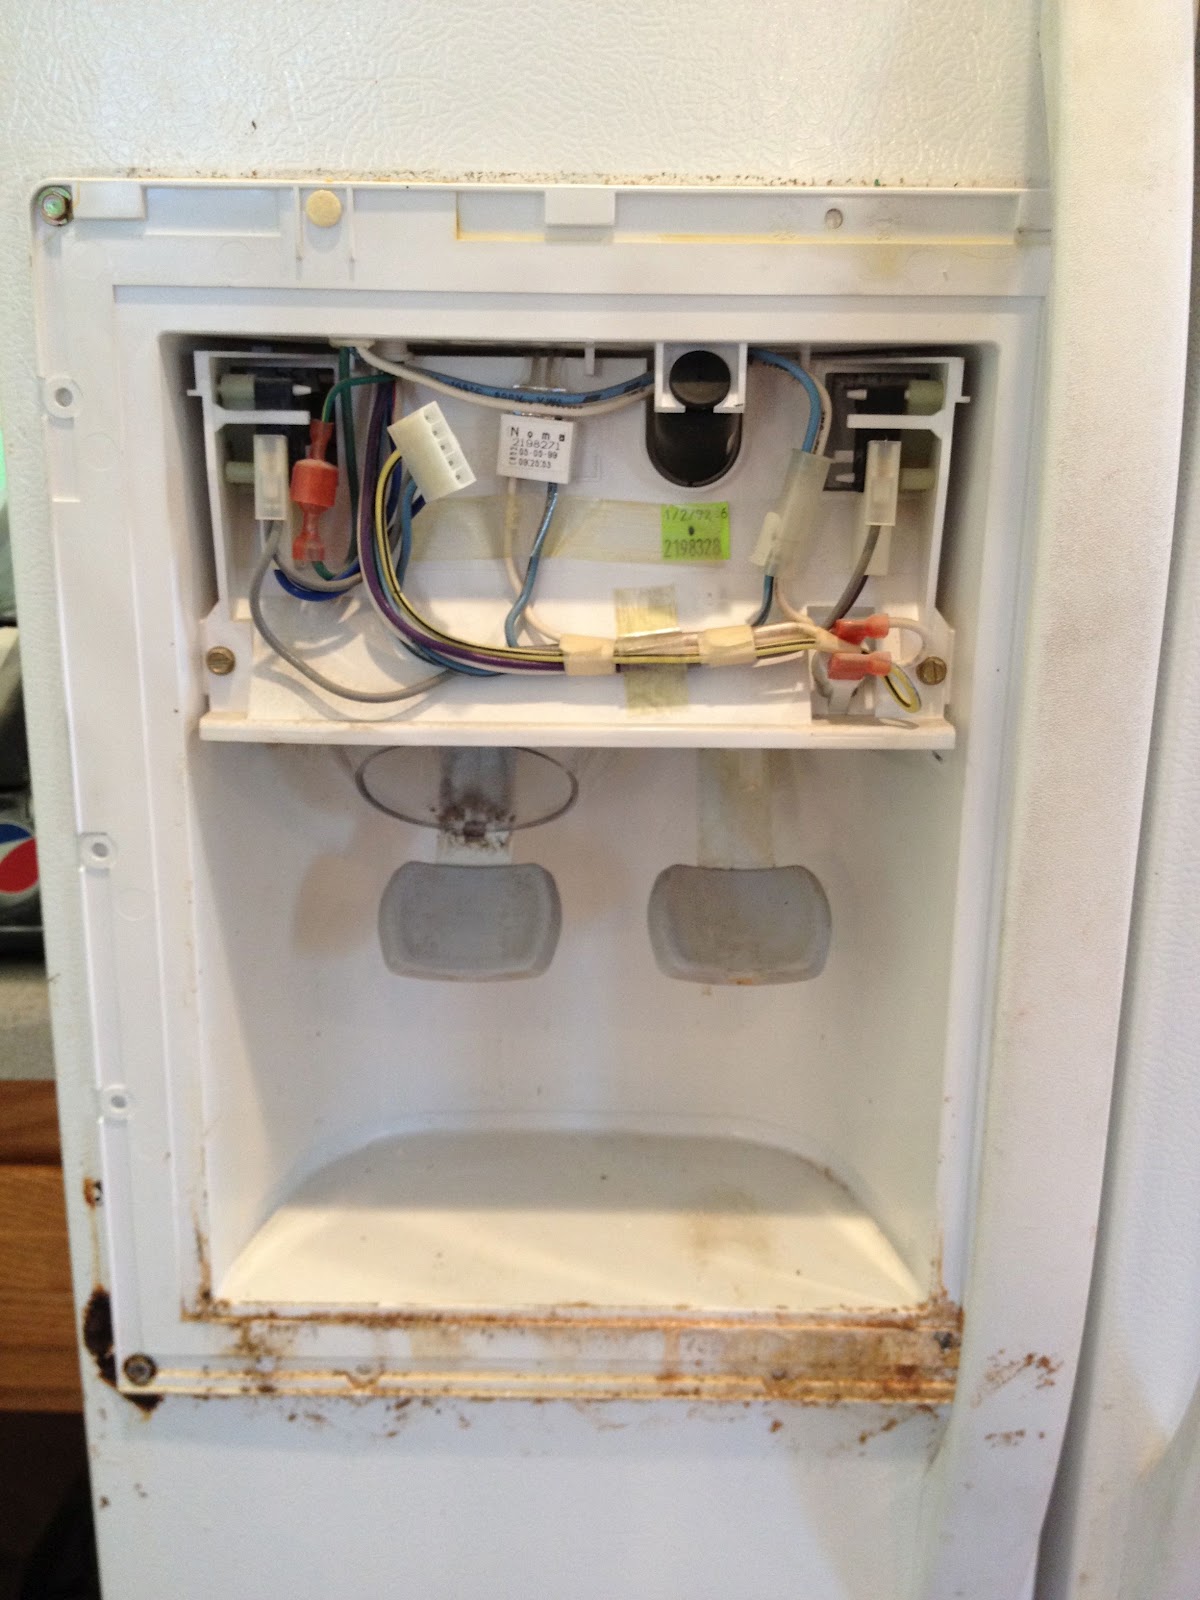


The top of the bracket slips into notches.
 |
| The notches that the top of the control bracket slipps up into. |
Step 4: Move the control bracket out of the way and secure it with tape. This isn’t necessary but I wanted to be able to work without the obstruction of this mass of plastic hanging in my way. I forgot to take a picture but I just used clear packing tape and wrapped it around the bracket and then taped it up and to the right as far away as the wiring would allow.
Step 5: Remove the clear plastic ice funnel. It is hooked on the bottom and locks into place on the top. Carefully pull the top away from the door and then once it has unsnapped lift it up and unhook it from the bottom catch:

As you can see from the pictures above, I removed the screw that holds the retainer spring on the inside side of both the ice dispenser lever and the water dispenser lever. I don’t think this is necessary. But, I did remove both dispenser levers and cleaned them real good because they were real dirty.
Step 6: Disconnect the door (vacuum) damper. This is the little black cylinder with a wire attaching it to the white part of the door and a rubber grommet holding the other end in place. It is what slows the door down when it is shutting (and adds that strange noise it makes when you are done dispensing ice–like those toys that sound like a farm animal when you tip them back and forth–this thing works in the same way). Anyway, pull it straight out:

Step 7: Remove the ice dispenser door. Before I did this I stuffed a plastic bag in the ice dispenser hole to keep all the hot air from getting in there:

BTW: You are taking a risk when you remove the door because the plastic is brittle and there’s a chance that this will happen:
 |
| The left side of the part that snaps the door onto the arm broke off. |
I first super glued the piece in place and then used 5-minute epoxy to bolster it up (since it would surely never stand the pressure with super glue alone):

Step 8: Rebuild the foam seal. Now this is where we have to ad-lib. I just so happened to have some foam tape that I’d been itching to use on some special project for a long time. I decided to cut out the bad foam along the outside of the door and replace it with however many layer it takes. I used an exacto knife to cut the foam and then carefully removed all the glue too:
 |
| bottom edge of the foam seal removed |
Now I cut a piece of my self-adhesive foam and put it in place:
 |
| bottom foam replaced (one layer) |
I did this all the way around and put 3 layers of my foam tape on each edge:

A side note: I believe the clear plastic in the center of the door is to protect the foam from getting torn up when ice cubes hit it over and over again.
Step 9: Follow the steps in reverse order to reassemble.
One other thing: I also thawed the ice maker ice bin and noticed that there was ice up inside the front cover so I took it off by first unscrewing the 5 screws that hold it on the face (one inside the bin towards the top and 2 on each side around the lip of the ice bin.
 |
| 3 of the 5 screws are circled–the other two are on the left behind the side |

All that ice that had built up under the cover was keeping it from dispensing ice for sure.
Amazon Associate Disclosure: As an Amazon Associate I earn from qualifying purchases. This means if you click on an affiliate link and purchase the item, I will receive an affiliate commission. The price of the item is the same whether it is an affiliate link or not. Regardless, I only recommend products or services I believe will add value to Share Your Repair readers. By using the affiliate links, you are helping support Share Your Repair, and I genuinely appreciate your support.
I live in south Korea, and I am having the same problem as you. Thanks to this, it was easy to solve. Thank you.
How bout an LG sidebyside frosting up like this?
Sorry Will, but I can only repair the equipment I own and solve the problems I have at hand. I don’t even own this refrigerator anymore.
Would these steps work on a Whirlpool?
We don’t know the model number, the labels have been removed – it was bought second hand.
Whirlpool manufactures Kenmore appliances so if your frig looks the same as mine then it may be identical except for a few plastic pieces.