
I finally upgraded from a iPhone 4S to an iPhone 5 and didn’t realize that the iPhone 5 takes a smaller sized SIM card than the 4S. So I was surprised when it came and I couldn’t put my old sim in my new phone. After doing some research online I realized I can make it work with a little trimming…
How to Cut a Micro Sim into a Nano Sim
Tools Needed:
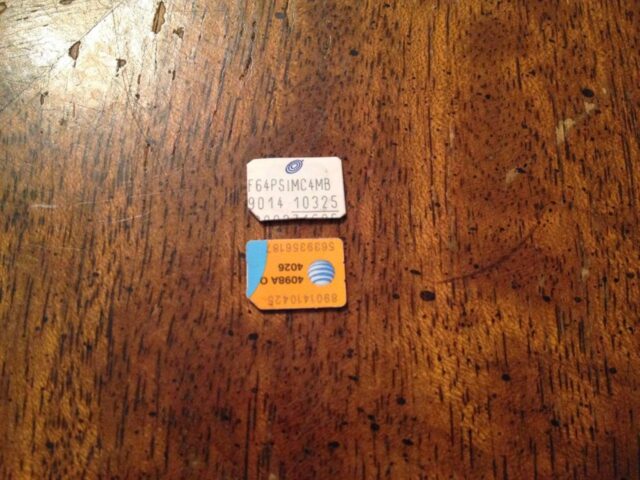
The 4S takes what is referred to as a micro SIM and the 5 takes a smaller nano SIM. Here’s a comparison picture I took of some different sized SIMs I had laying around (the nano sim came with the phone but was not any good for me):
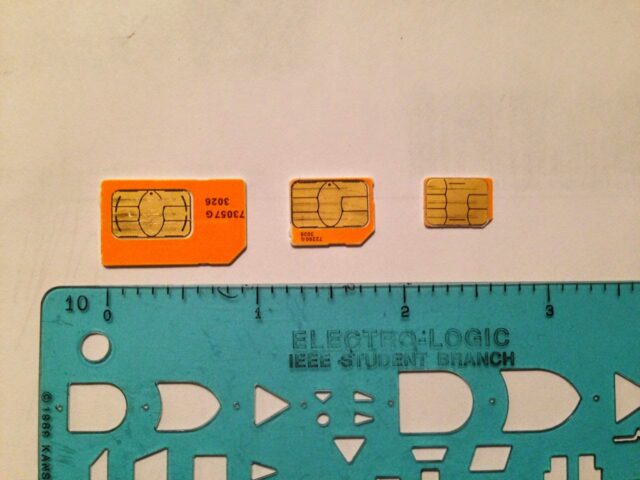 |
| L to R: Mini-Sim, Micro-Sim, Nano-Sim |
At first I didn’t think you could cut a Micro-Sim down to be a Nano-Sim because you will need to cut some of the metal traces off but after after Googling the idea for a while I realized you can. Here’s how…
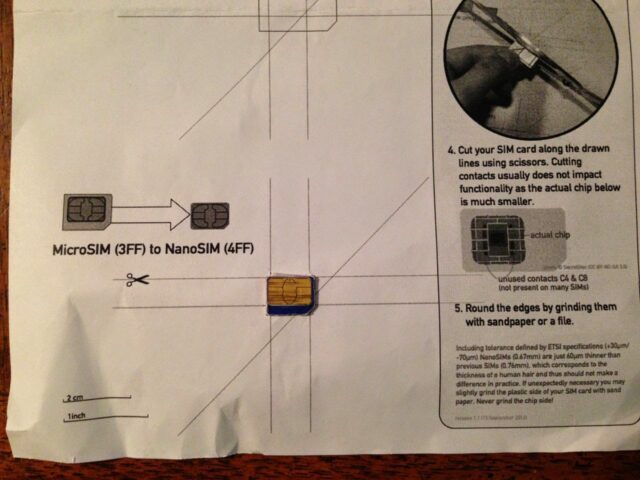
Step 1: Download a template. There are many templates but some are much better than others. I found a great template for drawing lines on the Micro-SIM to cut it down here. That link actually has an image they borrowed from someone else but all the links to the original file are bad because the domain does not exist anymore. Here’s the template:
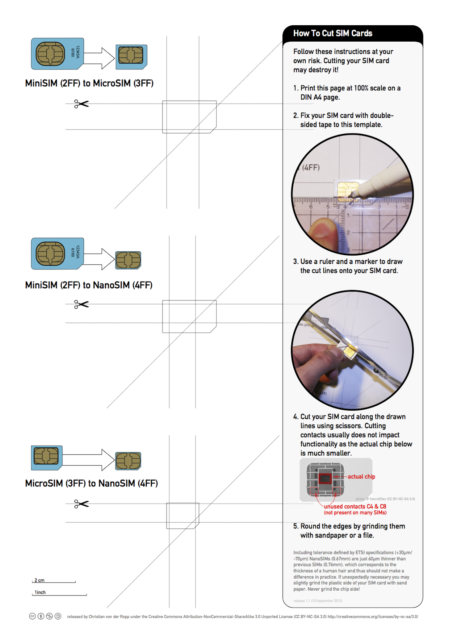 |
| Sim cutting template |
You can download the image file directly here.
Step 2: Print the image at 100%. If you are using a Mac, open up the image in Preview and then use the keyboard shortcut command-p to bring up the print dialog. By default Preview will try to adjust the size to best fit the paper size but make sure to click on the “Scale” radio button and enter 100 in the box as seen below. It won’t matter if it can’t fit the entire image on the page (if it gives you a warning) because the stuff along the edge isn’t important. The important thing is the scale.
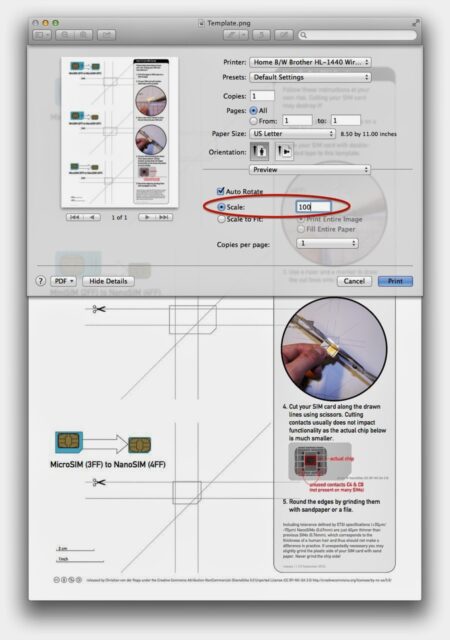 |
| Set the scale to 100% |
You will know it printed at the correct scale when your sim sits right down over the template and is the same size as the outline on the page.
Step 3: Tape your Micro-Sim to the template. I didn’t have any double stick tape so I just rolled up some regular tape and cut it so it would be smaller than the sim:
 |
| You can make yourself some double-stick tape like this |
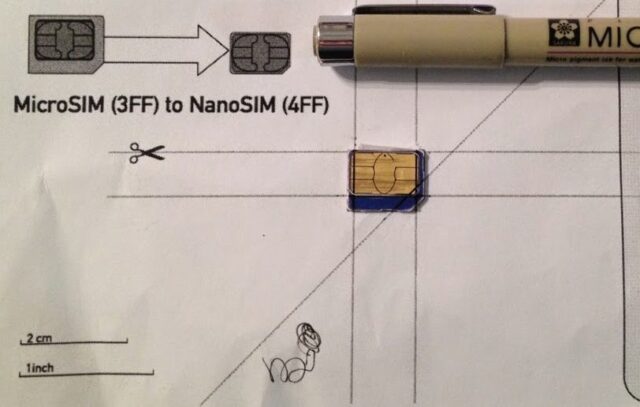
And here it is on the template:
 |
| My Micro-Sim Taped to the template |
Step 4: Use some kind of straight edge and a fine permanent marker and draw the lines on the Sim to mark it for cutting. I used my old circuit schematics template as the straight edge but I’ve seen where people just used a credit card.
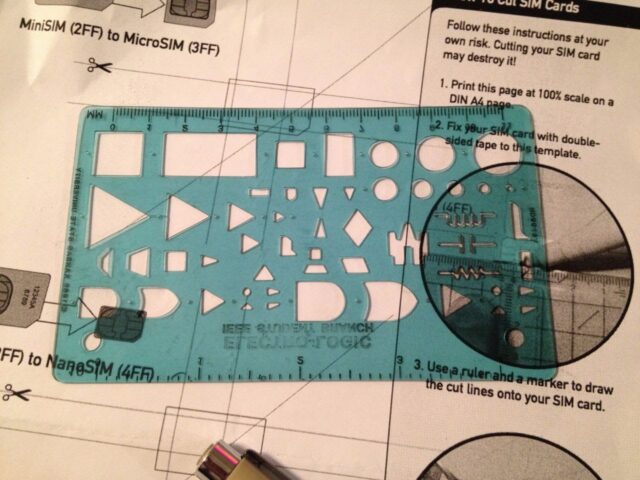 |
| My good old college straight edge circuit schematic template |
Make sure the sim doesn’t move around and is centered over the outline of the sim on the paper.
Step 5: Cut the Sim on the lines with a sharp scissors. This is the kind I used:
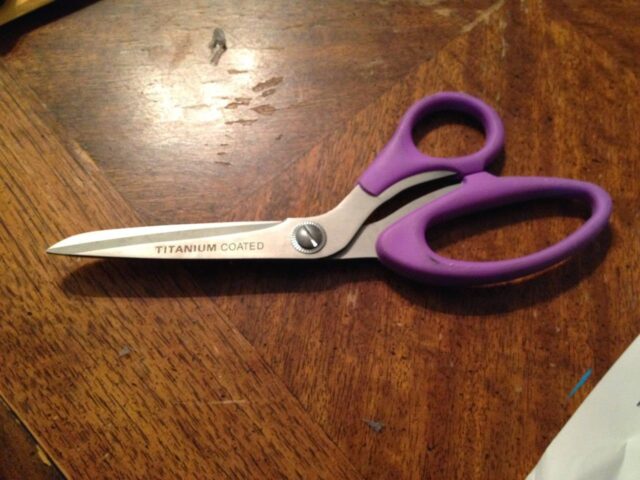 |
| Heavy-Duty Scissors |
Here I have made a couple cuts:
 |
| 2/5 done |
I kept referring back to the example I had of what size it should be:
 |
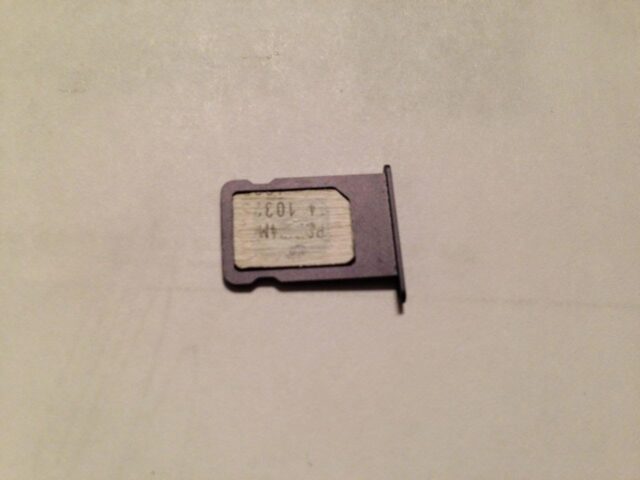
| I was lucky to have a real nano sim to refer to but you can use the sim tray of your phone for reference |
Step 6: Put the cut sim in the tray of your iPhone to check for size and cut a little more off if necessary. If it is a tiny bit you need to cut off you can just use your sandpaper to take off a little more from the edge. I also cut the corners off just a tiny bit to make it not so sharp.
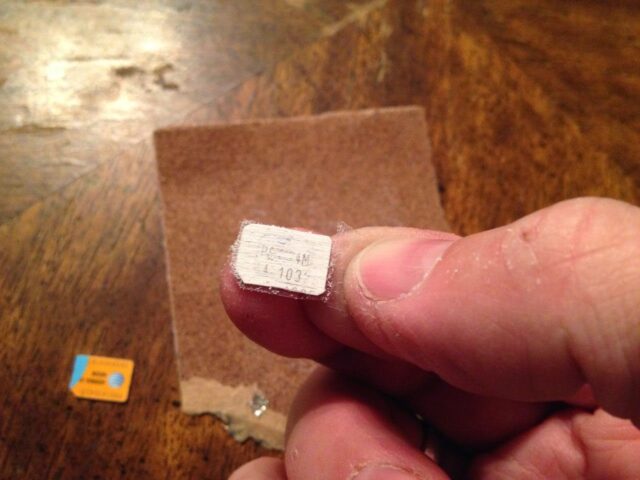
Step 7: Sand the Sim’s plastic side so that it is the same thickness as a nano sim. NOTE: don’t sand the contact side! I used 100 grit sand paper because that is the first sandpaper I came across in my workshop. I wouldn’t use anything less than 100. I would have preferred 200 actually but 100 worked fine. An easy way to hold the Sim while you sand it is to fold the end over on a piece of tape and then place the sticky side on the sim.
 |
| My tape tab for easy sanding |
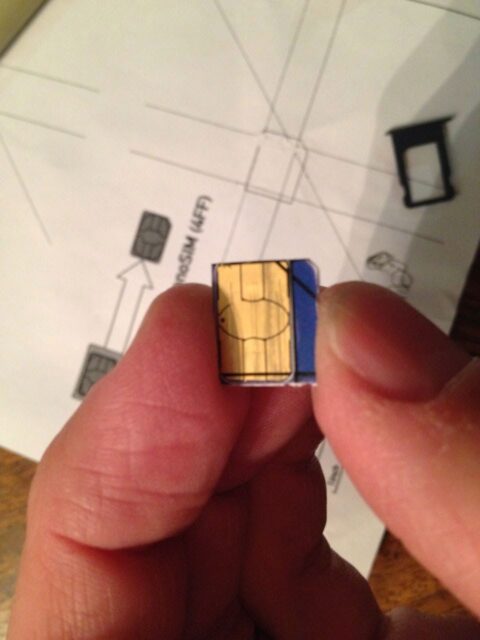
Use the tape tab to drag the sim across the sandpaper slowly (in the same direction each time) while pressing it down with my other fingertip, checking each time to make sure you haven’t taken too much off. You will be able to vaguely see the Sim’s chip begin to show through the plastic as you sand but make sure to stop short of exposing it. Here’s what mine looked like when I stopped:
 |
| My sanded sim |
I also sanded the edges and the corners a bit to make them nice and smooth.
Step 8: Clean up the sim and put it in your iPhone. Piece of cake. Here’s my finished product:
 |
| Straight Talk iPhone 4S Micro Sim cut down and sanded thin to fit in a iPhone 5 Nano Sim tray |
All my “Sim Trimming” posts:
Amazon Associate Disclosure: As an Amazon Associate I earn from qualifying purchases. This means if you click on an affiliate link and purchase the item, I will receive an affiliate commission. The price of the item is the same whether it is an affiliate link or not. Regardless, I only recommend products or services I believe will add value to Share Your Repair readers. By using the affiliate links, you are helping support Share Your Repair, and I genuinely appreciate your support.

I was cautious about cutting… so, I ordered a SIM Card cutter from Amazon .. it works beautifully .. no sanding required .. and it only costs a couple of bucks ..