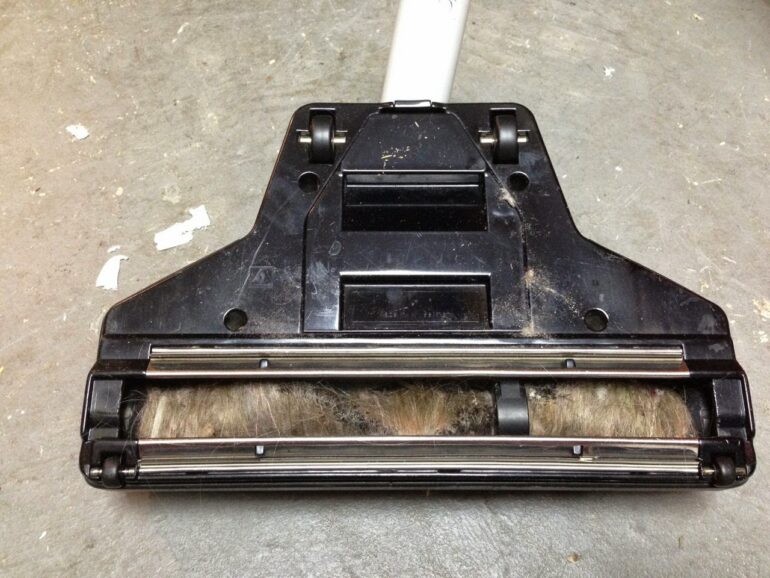
There’s a couple long-haired ladies living with me in my home so our central vacuum beater-brush attachment gets wrapped up in hair a few times a year. When that much hair is wrapped around the brush it doesn’t turn very fast so you need to clean it out. Here’s how…
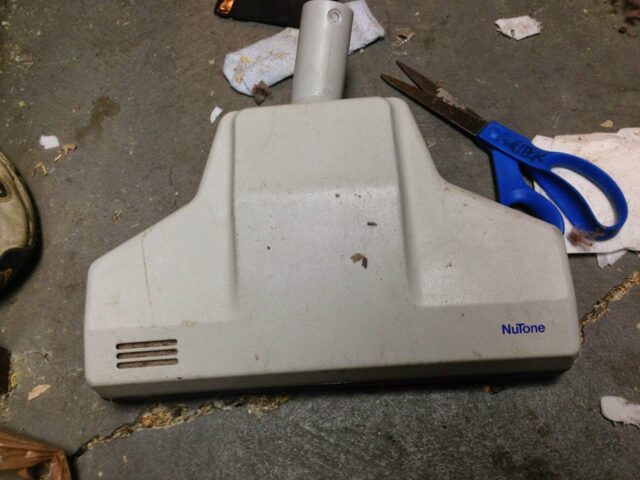
How to Clean Hair out of a Broan-NuTone 343G Twin-Turbine Air-Driven Central Vacuum Brush
Hardware:
- NuTone Central Vacuum System
- Broan-NuTone 343G Twin-Turbine Air-Driven Central Vacuum Brush (newer, current model)
Tools Needed:
Step 1: Remove the turbine access door.
There’s a tab at the top of the door that allows you to remove the door when depressed. Ours is a bit bent so I needed a screwdriver to persuade it to release. Be careful not to break the plastic tab off if you must use a tool to open it.
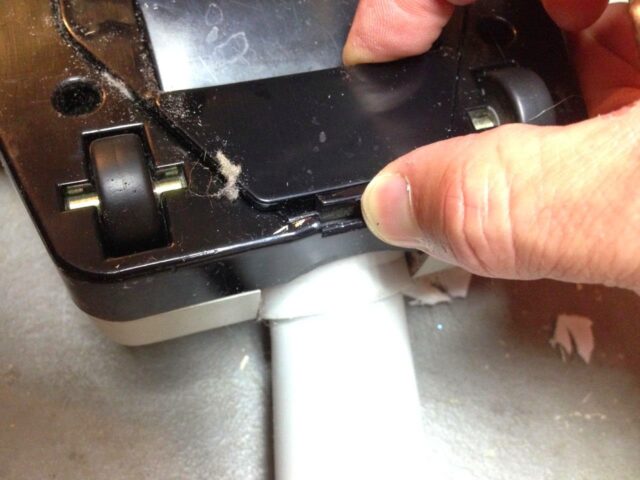 |
| Opening the turbine access door–press the tab and lift |
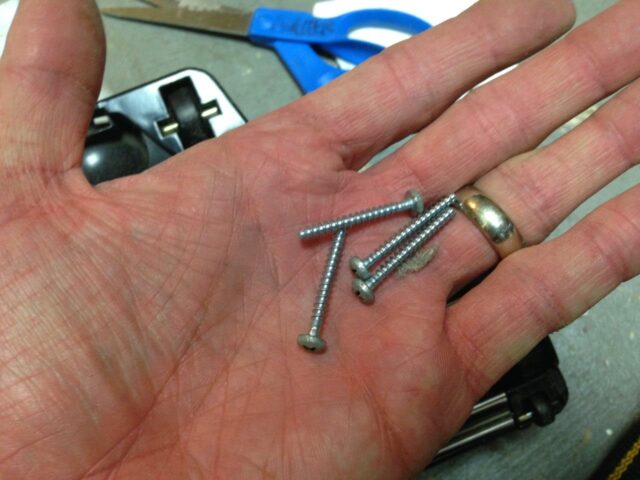
Step 2: Remove the 4 Phillips Headed screws.
If you don’t have a good screw driver set, get one here. They are recessed in holes circled in red below:
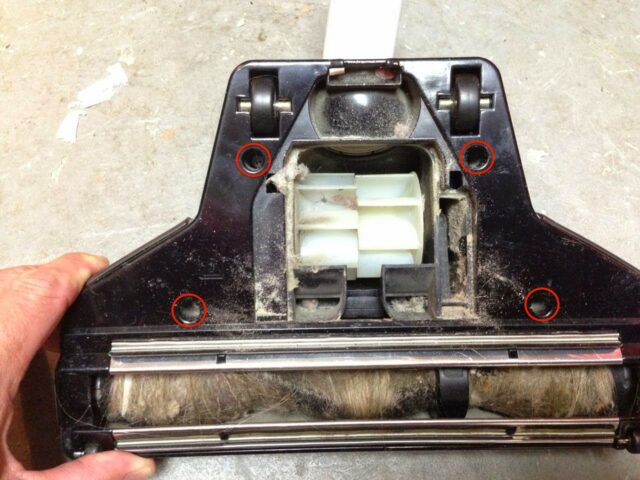 |
| View with the turbine Door removed and the 4 screw locations |
Step 3: Remove the top cover.
Place the brush right-side up and starting with the edge on the handle side lift off the top.
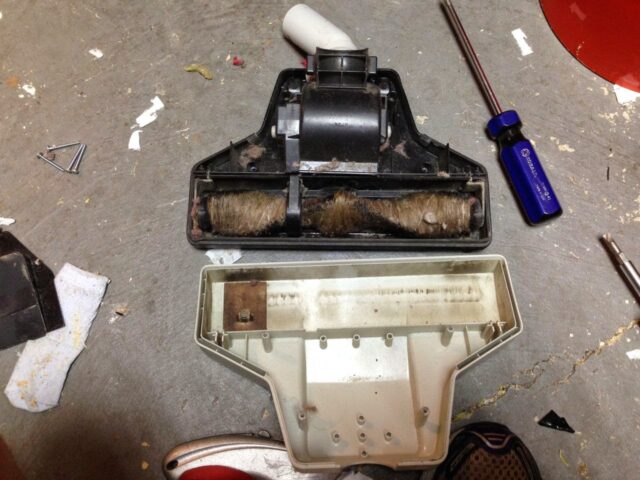 |
| Brush cover removed |
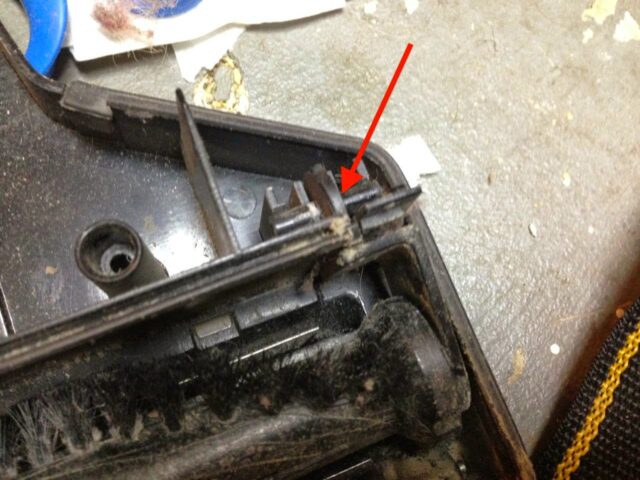
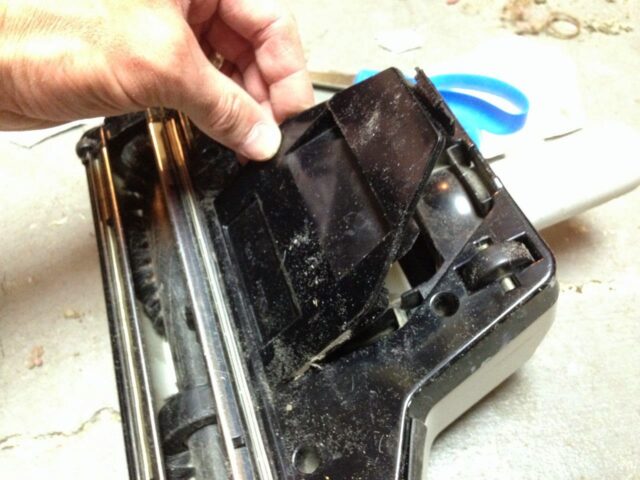
Step 4: Remove the top cover of the turbine chamber.
Look for two black tabs to depress while lifting off the cover. You press them in towards the center.
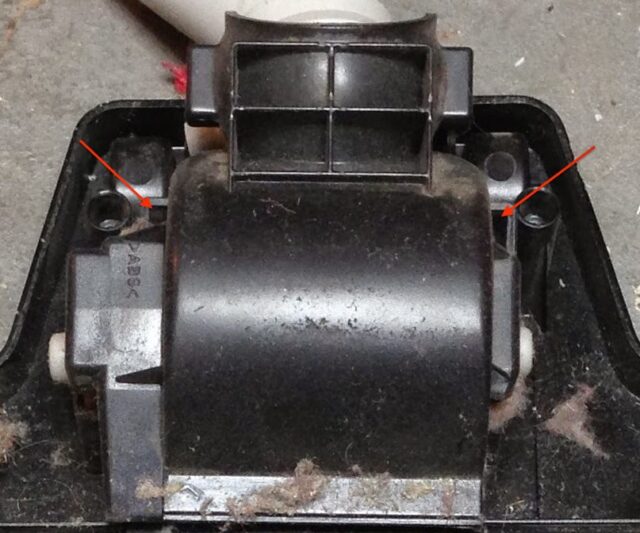 |
| Turbine chamber cover tab locations |
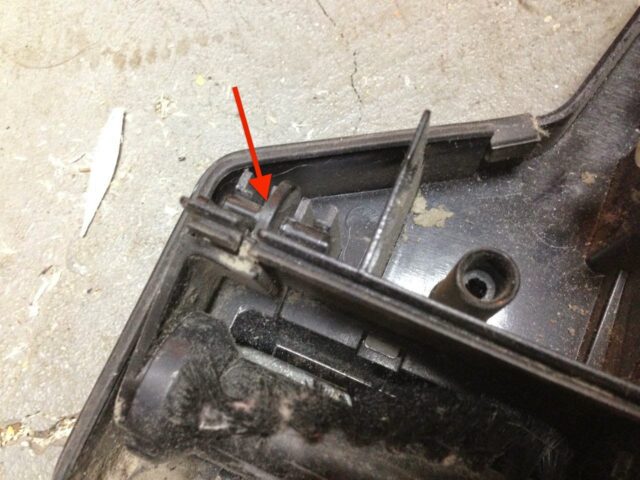
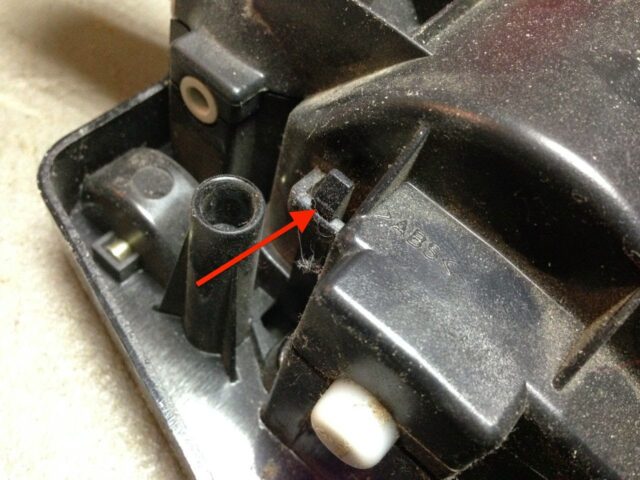 |
| Close-up of left tab location of turbine enclosure |
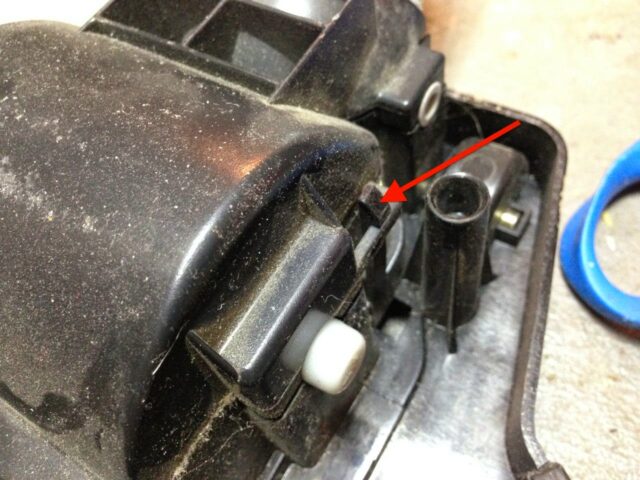 |
| Close-up of right tab location on the turbine enclosure |
Step 5: Remove the beater brush.
Lift the beater brush up and out of the body. The pivot hinges on each end will pop out of their place and the cover that encloses the belt will open up and come off (its hinged on the beater brush end). The Turbine will come right out as well–the piece on each end comes straight up and out. You can then slip the brush out of the belt.
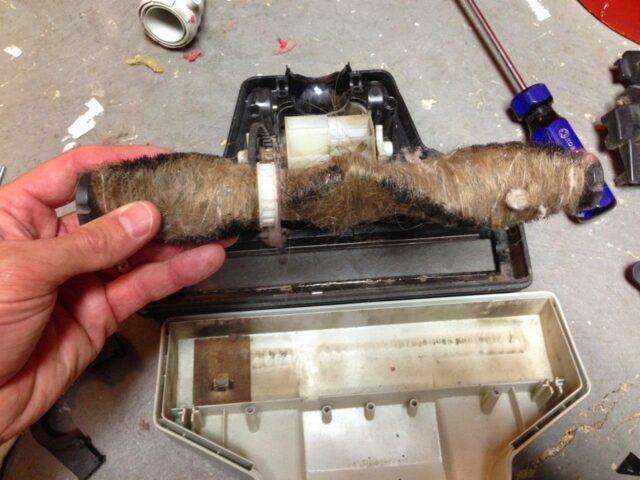 |
| Beater brush removed |
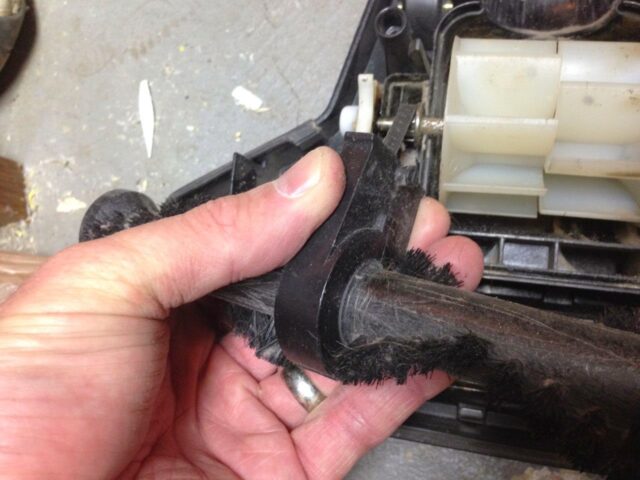
Step 6: Use a sharp scissors to cut the hair off the brush shaft.
If you start along the edge of the bristles you should have the best luck of getting under the hair to begin cutting. I have used a carpet knife to do this in the past but a scissors is a lot safer and doesn’t leave grooves in the plastic.
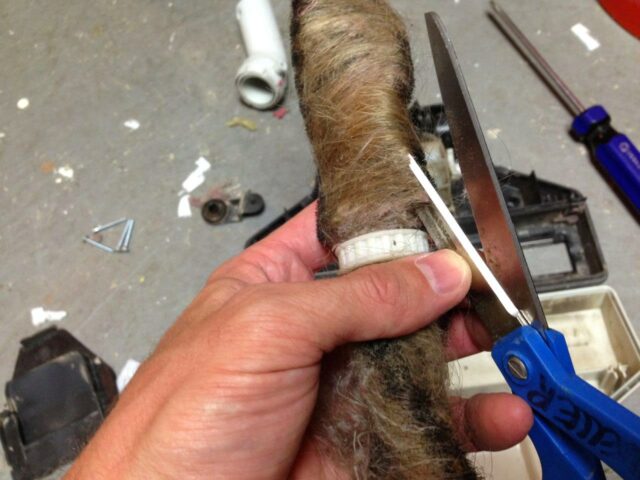 |
| Cutting the hair off the brush shaft |
Step 7: Using your fingertips pull everything out of the bristles.
Now’s the time to get it as clean as possible. Anything extra wrapped around the shaft or imbedded in the bristles is going to inhibit cleaning.
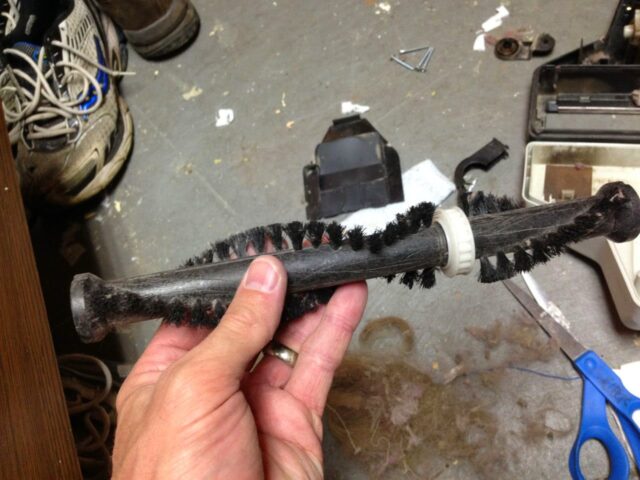 |
| Hair-less brush |
Step 8: Clean out all foreign matter in the brush.
Look on the shaft ends for hair wrapped around the shaft. This includes the turbine. Mine had a bunch of hair rapped around the shaft ends of the turbine:
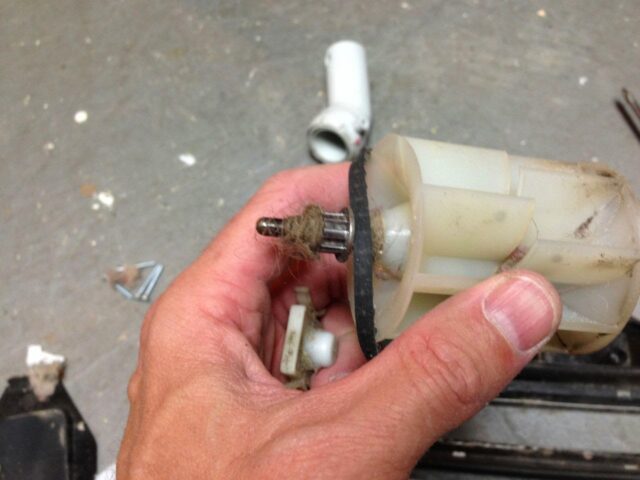 |
| Hair wrapped around the end of the turbine shaft |
Look on the ends of the beater brush too. Use a small screwdriver or knife to slide the wrapped hair off the shaft.
Step 9: Optional: Oil the shaft ends.
While I have the thing torn apart I go ahead and put a couple drops of 3-in-1 Oil 3-In-1 oil on all the shaft ends (or down in in the hole where they will be seated when you reassemble it).
Step 10: Reassemble the turbine.
Slip the belt on the toothed gear and slip the white end on each end. The springy “arms” go on the top and bottom (one goes down in the slot).
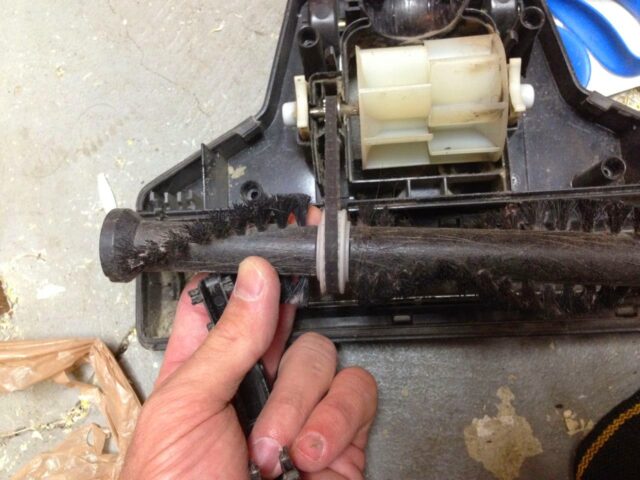 |
| The turbine has been installed and now I’m reassembling the turbine-brush belt assembly |
Step 11: Reassemble the beater brush.
Slip the belt on and put the pivot ends on each end. They can be switched so make sure they are angled correctly (they are angled on the top side and flat on the side the goes in first). Snap the belt cover back on and over the seated belt and brush.
 |
| The belt cover reinstalled |
 |
| Right pivot hinge snaps in here |
 |
| Left pivot hinge snaps in here |
Step 12: Reinstall the turbine chamber.
Before reinstalling the turbine chamber cover you need to put the white hose connector in place.
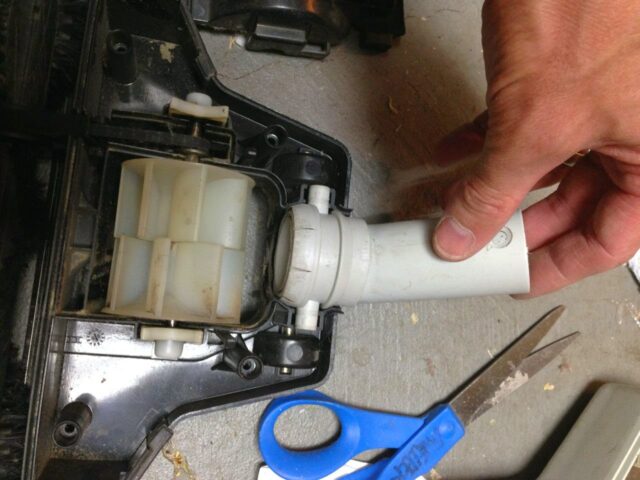 |
| Reinstalling the white hose connector before putting the turbine cover back on |
Step 13: Reinstall the top cover.
Seat the top cover onto the brush and then flip over. Reinstall the 4 phillips head screws.
 |
| Top Cover set on |
Don’t forget the 4 screws:
 |
| Reinstall the 4 screws |
Step 14: Reinstall the bottom turbine access door.
It seats into the one end and snaps down on the other end.
 |
| Reinstalling the turbine access door |
Step 15: Test it out.
Now you should be vacuuming with a beater brush attachment that runs just like new.
Amazon Associate Disclosure: As an Amazon Associate I earn from qualifying purchases. This means if you click on an affiliate link and purchase the item, I will receive an affiliate commission. The price of the item is the same whether it is an affiliate link or not. Regardless, I only recommend products or services I believe will add value to Share Your Repair readers. By using the affiliate links, you are helping support Share Your Repair, and I genuinely appreciate your support.
