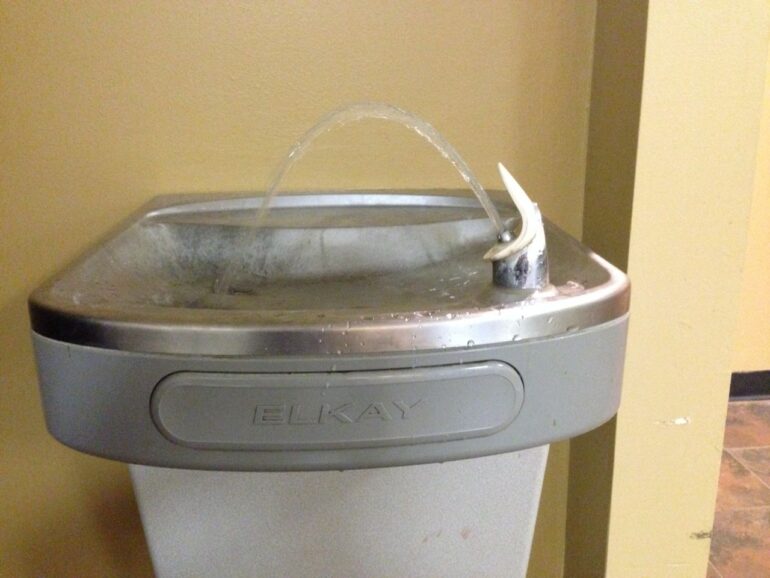
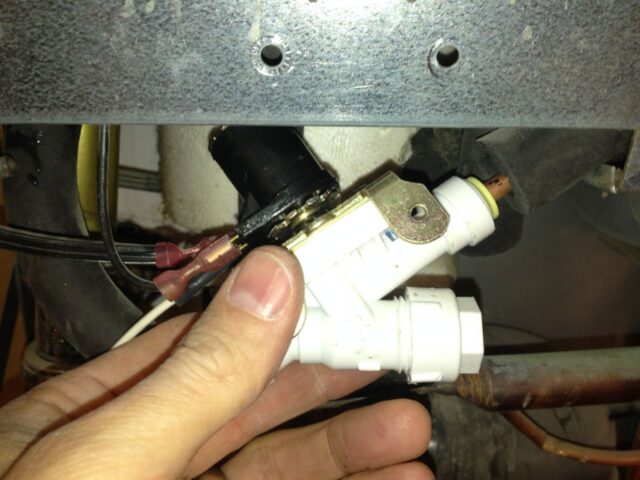
Our office drinking fountain began “sticking” on for almost 30 seconds whenever you would push the button. I wondered if there was maybe a set screw that adjusted the time it stays on. I looked underneath and there is an adjustment screw (but that screw only adjusts the flow rate):
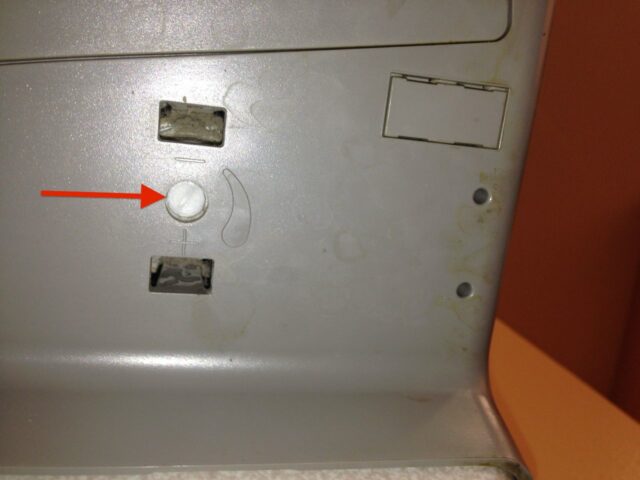 |
| Flow rate adjustment screw |
It turns out that the adjustment screw pictured above controls the flow rate. Turn it clockwise to increase the flow and counter-clockwise to lower the flow. Here is the range I found when I turned the adjustment screw to the minimum and maximum flow:
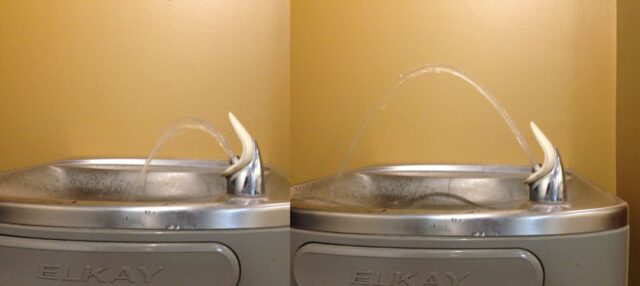 |
| Flow rate comparison: minimum (left) and maximum (right) |
I tried searching for this model, EZFS8_1B, on the Elkay website but couldn’t find a single hit, which was a bit perplexing. So I called Elkay at 630-574-8484 and was eventually transferred to their tech services (you can call tech services directly at 800-260-6640). The one troubleshooting step they had me try was to push the button to turn on the water and then unplug the fountain from the electrical outlet. When I did that, the water continued to flow. This indicates that the solenoid valve is sticking and must be replaced. It is part number 35981C and you can pick it up on amazon.com here
Hardware:
- Elkay Drinking Fountain, Model EZFS8_1B, Part Number EZS8L. Amazon doesn’t have similar Elkay drinking fountains for sale but you can get a comparable drinking fountain here.
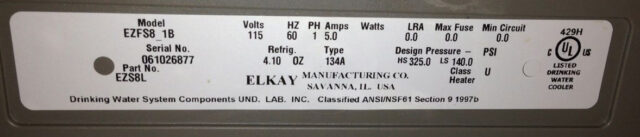 |
| Elkay EZFS8_1B Part No EZS8L Drinking Fountain label (as viewed underneath) |
Parts Needed:
- Elkay 35981C Valve-Solenoid 1/4 – 1/4
(click on the link to order from amazon.com)
- Elkay 98734C Front and Side Push Bar Kit, Gray
(If you need them, I need to replace the front push button too some day)
Tools Needed for the Repair:
- Phillips Screwdriver
- Note: It would be better to remove most of the screws on this repair with a socket driver since they are hex-headed and some were very hard to remove. If you don’t own one you can get a good Stanley brand set here
, which should take care of many of your tool needs.
- Vice Grip
(what I used to remove a stubborn slotted hex head screw)
How To Fix an Elkay Model EZFS8_1B Drinking Fountain that Runs Too Long-Replace Solenoid Valve 35981C
Step 1: Unplug the power from the water fountain.
You are going to be working on an electrical part and you don’t want to short something out or shock yourself. I couldn’t find anywhere where it says the voltage of the solenoid but you should be safe and unplug the drinking fountain.
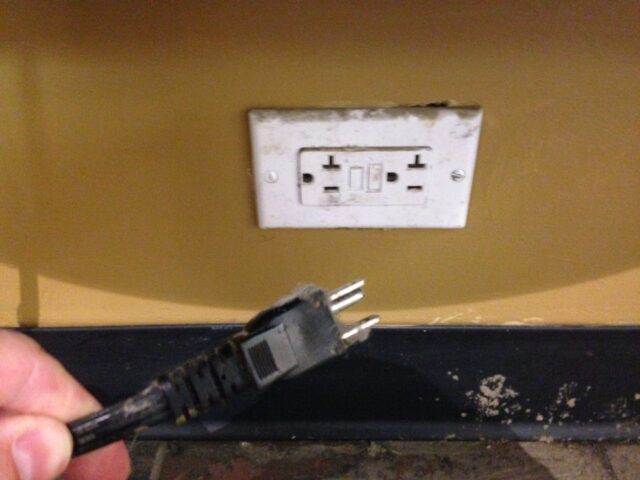 |
| Unplug the power before working on the drinking fountain |
Step 2: Remove the 4 screws from the bottom edge of the wrap-around case.
I used a large flat head screw driver but I’d encourage you to use a hex-head driver because some of them will be a bit corroded and difficult to remove. The case didn’t fall off once I removed all the screws but you should be careful once you have removed the last screw because the case could fall.
 |
| 4 case screws on underneath edge of Elkay Drinking Fountain EZFS81B |
Step 3: Slide the case cover down and off.
This is what you’ll have:
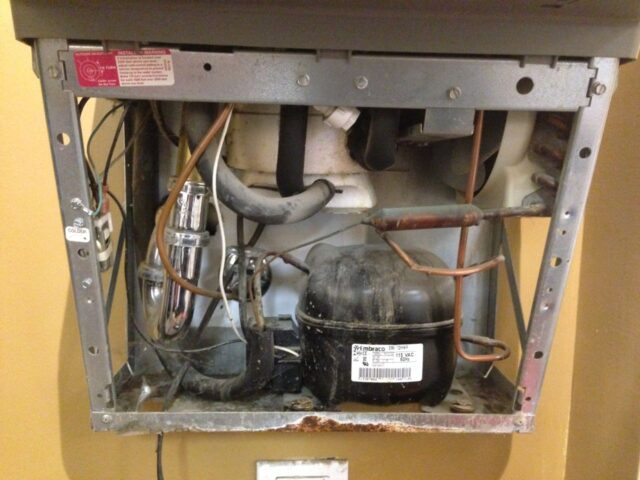 |
| With the Case Cover off |
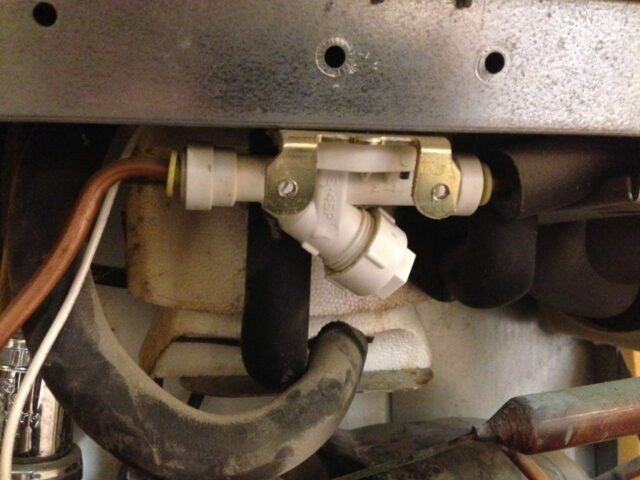
Step 4: Shut off the water supply.
In my case the water valve was right there covered up by the drinking fountain. In your case there may only be a water line coming out of the wall–in that situation you’ll need to track down where the valve is or shut off the water of the building if you can’t find it. For the valve type we have you must turn it clockwise until it stops. Important: do not force this valve because, as you can see below, the shaft is plastic and you can break it. Don’t cause yourself more problems! If your valve only has a little metal nub it is probably a quarter-turn valve and you will only turn it 1/4 turn in the clockwise direction.
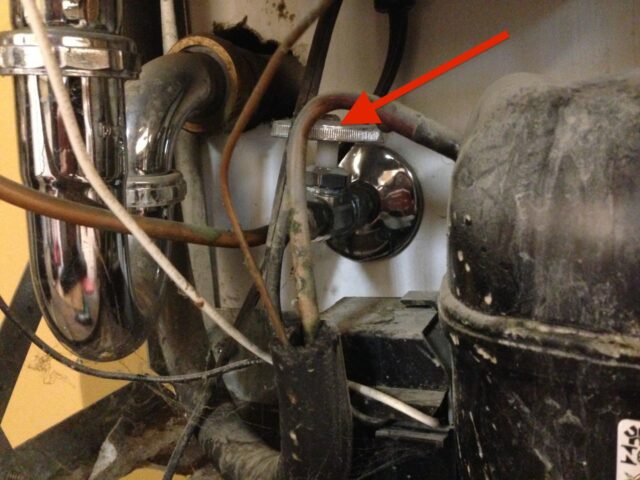 |
| Here’s where our water supply valve was located–nested inside the drinking fountain body |
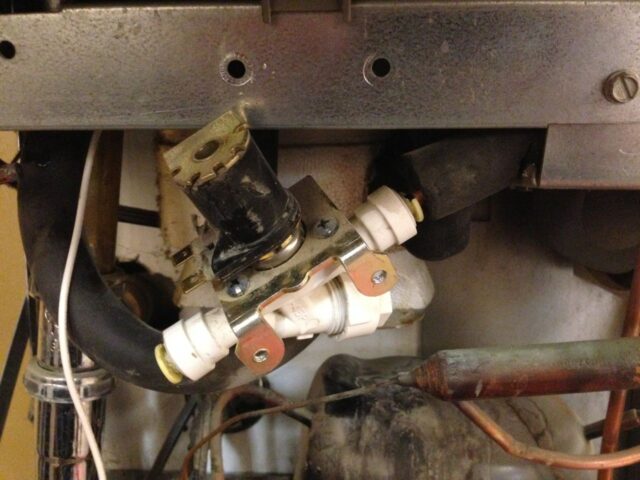
Step 5: Remove the two screws of the solenoid valve.
You can see where they are located here:
 |
| Solenoid valve mounting screw locations |
I tried to remove them with a large flat-head screw driver but one of them I could not get to budge, so I locked a Vice Grip on the head to remove it:
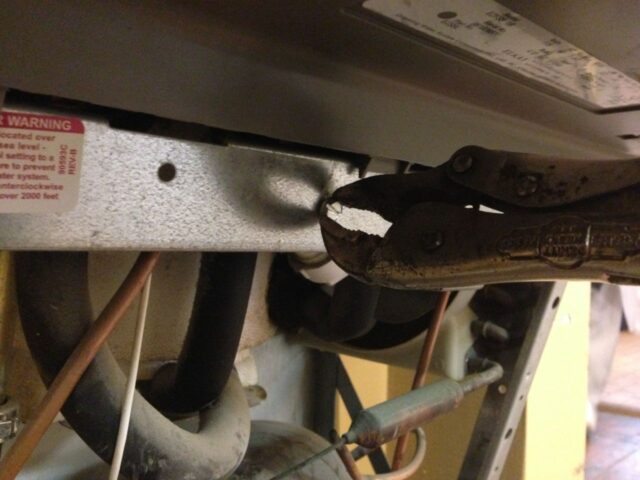 |
| Removing the right solenoid mounting screw with a vice grip |
Step 6: Disconnect the two electrical connectors from the solenoid valve.
They are on the left side and slight straight off to the left.
 |
| The solenoid electrical connectors |
Note: there are two wires leading into the left connector above, but there is only one connection, as seen below (they are bridged together):
 |
| Two wires, one connector |
Step 7: Pull the solenoid valve down and out from behind where it is mounted.
Maneuver the solenoid valve down and out from where it is tucked in behind the metal it is mounted on. That piece of metal has a lip on the bottom that you must clear to get it out:
 |
| The solenoid valve moved down and out from behind where it is mounted |
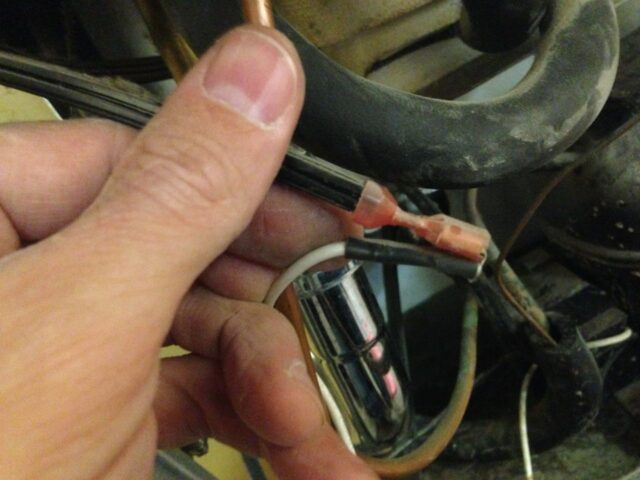
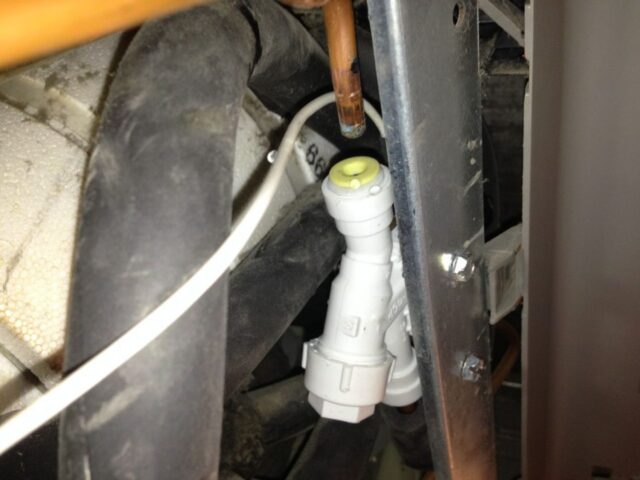
Step 8: Disconnect the two water lines from the solenoid valve.
The inlet and the outlet lines were copper in my case. If yours are copper you must be careful not to kink or smash them. I would not use a tool on them–you should use your hands. This step was probably the most difficult of this whole repair for me. If you have any tips to share with others please place them in the comments. The left water line was easier to access so I removed it first by pulling it straight off. This was not that easy.
 |
| Left (inlet) water line removed |
Once you have the left line removed you can turn and twist the solenoid, while pulling it off, and by doing that I was able to pull it off the line.
Step 8: Connect the two wiring connectors to the new solenoid.
Here is the way it goes–the black/white bridge connector on the top and the single black wire on the bottom:
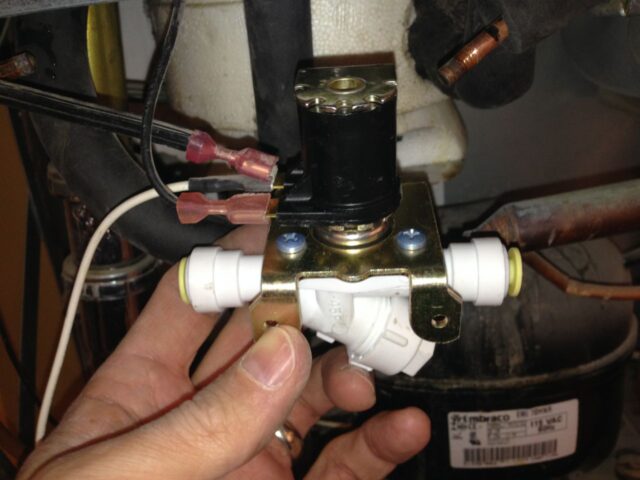 |
| The black and white bridged connector goes on top and the single black wire goes on the bottom as seen above |
Step 9: Insert the solenoid valve onto the right (outlet) pipe.
Slide it back on until it stops.
 |
| Inserting the solenoid valve onto the water outlet pipe |
Step 10: Mount the Solenoid valve with the two screws.
The screws are self tapping and proved difficult to install for me because it seems like the hole is pretty small compared to the screw size so you are really burring the threads into the metal. Because of this I would suggest starting both screws before you really torque down on them so it doesn’t twist the whole solenoid assembly and bend the copper water pipes.
Step 11: Install the left (inlet) copper pipe into the solenoid.
Just slide it in firmly until it stops.
 |
| Inserting the left (supply) water pipe into the solenoid valve |
The water line installed:
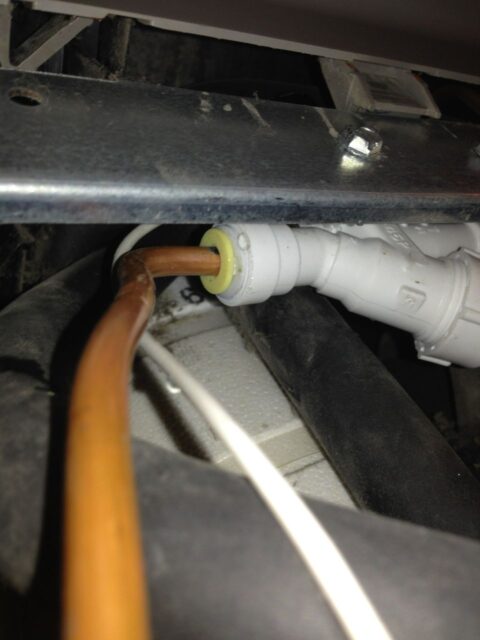 |
| Left water line installed into the solenoid |
Step 12: Turn the water supply back on.
Again, if you have a plastic (cheap) valve like ours make sure you don’t over torque it, you can break the valve or the handle off.
Step 13: Plug the drinking fountain back in and test.
It’s better to find out now that something isn’t working correctly than to move forward and reinstall the cover and then to find out.
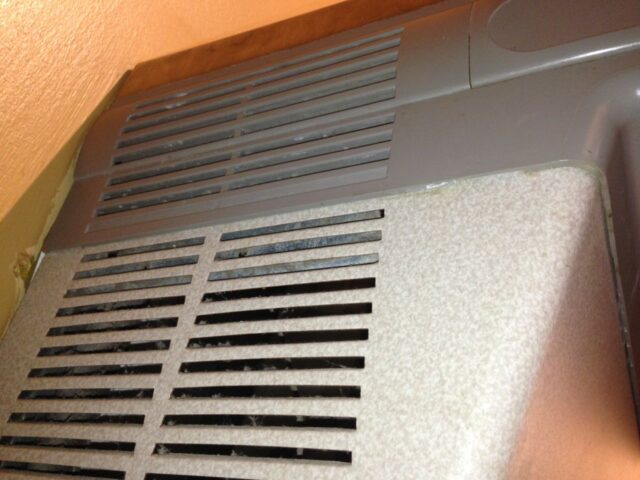
Also, if you wanted to adjust the water temperature, there is a set screw on the left side of the frame that allows you to adjust the water temperature:
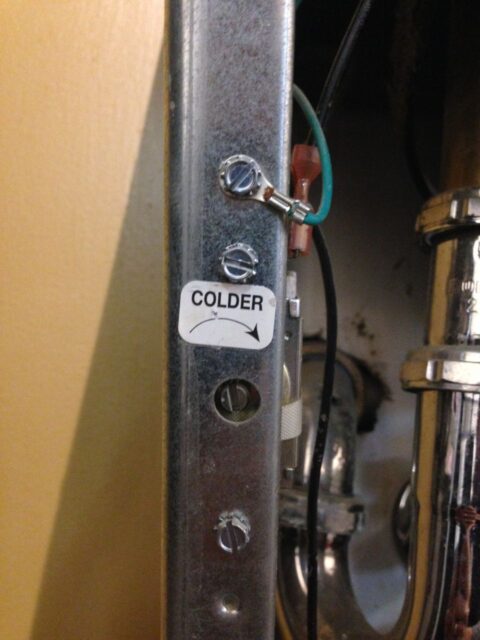 |
| Insert a flat screw driver into that screw head to adjust the water temperature |
There was this sticker giving you instructions on high altitude installation instructions:
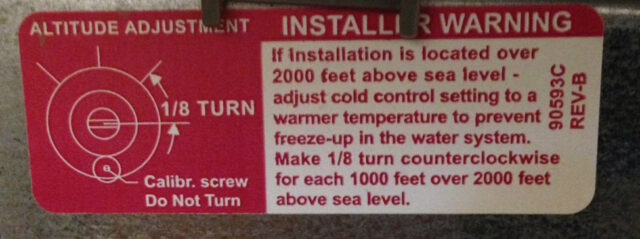 |
| Altitude Adjustment water temperature sticker |
Step 14: Reinstall the metal cover.
FYI: It tucks underneath the upper plastic wrap-around:
 |
| The metal cover tucks underneath the upper plastic housing |
Now you are done! The water should stop flowing immediately after you release either of the buttons.
 |
| Water Fountain Fixed! |
Other Resources:
- Elkay Drinking Fountain Part Breakdown Manual
- Drinkingfountaindoctor Elkay Troubleshooting manual (pdf)
Amazon Associate Disclosure: As an Amazon Associate I earn from qualifying purchases. This means if you click on an affiliate link and purchase the item, I will receive an affiliate commission. The price of the item is the same whether it is an affiliate link or not. Regardless, I only recommend products or services I believe will add value to Share Your Repair readers. By using the affiliate links, you are helping support Share Your Repair, and I genuinely appreciate your support.
Everything went well. The only feed back I have is there is no room up there for an adjustable wrench and long nose pliers didn’t work well either, I ended just using my fingers to release the copper tubing, although I was worried about slicing my hand open on the edge of the sheet metal.
Thanks again!
John, thank you for taking the time to make this repair guide to help folks, I appreciate it.
My solenoid arrives Tuesday and it was good to see this to put my mind at ease. I’ll let you know how my repair went.
John.
You are so welcome John. Please let us know if you have any new tips or feedback on the repair.
We are having trouble with resetting it so that it isn’t shooting and hitting the wall, floor etc. Or being too low
we have an elkay ezs8l . We have recently replaced the solenoid valve. It is cooling the water and the flow is working properly but the fan and/or compressor runs continuously. Can you tell me what might be wrong? Thanks.
Ken, you’ve pretty much reached the end of my knowledge and experience on this appliance. I’m not aware of a temperature setting and I no longer work at the business that had this drinking fountain, so I don’t have access to it anymore. You may try calling Elkay at 800-260-6640 and see what they tell you. They were able to confirm my issue when I went over the troubleshooting steps I did.
Our elkay fountain is continually running. We pulled the plug and then it finally slowlystopped. Is it the solenoid or something else?
Thx
John
Thanks for the question John. Once the valve is opened, it should stop flowing just as fast plugged into the wall outlet or nor, because the valve is not electrically closed, a spring closes it (and the water pressure itself). What happens when these fail is that a rubber diaphragm, which separates the water from the solenoid, springs a leak, water gets inside, which equalizes the pressure on each side of the diaphragm, which slows the closing of the valve. I’d be willing to bet that your problem still is the solenoid valve.
Unplug or turn off the electric due to the automatic fan that your hand will be working around. The key to getting the copper pipes separated from the solenoid is to push the yellow receiver in towards the solenoid while pulling the pipe. If you’re laying on your back the pipe on right should come out easy, then I used a screwdriver to push that yellow receiver piece down while twisting it slowly off the pipe on the left.
after replacing solinoid the line are leaking all of them the t the elbow and the black copperline
I’m sorry to hear that Samuel. Did you smash the pipe (which would make a gap in the seal) or possible bend/crack the copper pipe when you were removing the solenoid?
John, thanks for this Article. You saved us from having to call a plumber! We needed to adjust the flow rate and couldn’t find a manual online.
Thanks for sharing–good work on fixing it yourself!
To pull the copper lines out use a crescent wrench open it so it will just slip over the pipe then pull on the pipe and push on the wrench, it pops right out. Thanks for the repair advice!
Thanks for the tip Brandon! I’m no plummer so I’m figuring it out as I go and any helpful advice is welcome.
how I could I adjust water pressure on Elkay water fountain?
If you look at the introduction on this article I demonstrate how to adjust the flow. There is a white set-screw underneath the fountain that is used to adjust the flow/water pressure.
Hey John, I’m having the hardest time getting the copper water lines out of the solenoid, please help
I remember having a difficult time getting them out as well. What I would suggest is pushing the yellow plastic insert that wraps around the pipe into the solenoid as you are pulling the pipe out (pushing the insert in the opposite direction you are pulling the pipe). You might take a piers and place its jaws on the pipe by the solenoid fitting (but DO NOT squeeze down on the pipe) and use the pliers to push against that fitting while you are pulling on the pipe. Let me know if that helps.
We have a Elkay wall water cooler fountain that continuously flows water [a small flow not a stream in the air]. Serial number is 8909203 – hard to read entire number. The push bar wraps around the front to the sides of the unit [handicap style, 1996? model year. We need advice on how to remove the push bar and to remove the possibly malfunctioning solenoid.
HELP! A web site with instructions for this unit would be most helpful.
Deacon Ward
Deacon, thank you for the question. I’m sorry but I cannot write an article on that model because I don’t have one to fix.
Do you know where I could purchase a replacement solenoid valve for this one – online?
Thanks,
John
I have a link for the part in the "Parts Needed" section at the top of this post. Let me know if you have any other questions!
here's a quick link to the solenoid: http://amzn.to/1fTvcO7
These valves are also serviceable as there is a screen inside of them that accumulates sediment and can be cleaned out along with all the rest of the valve to get many more years of service from them. Or at least to get you through until your new one shows up.
Thanks for the tip Aaron. I took the valve apart that I replaced and it was my feeling that the rubber gasket that separates the plunger from the water was actually perforated and that was adding to the problem–was there water on both sides when you changed yours out? Thanks, John.