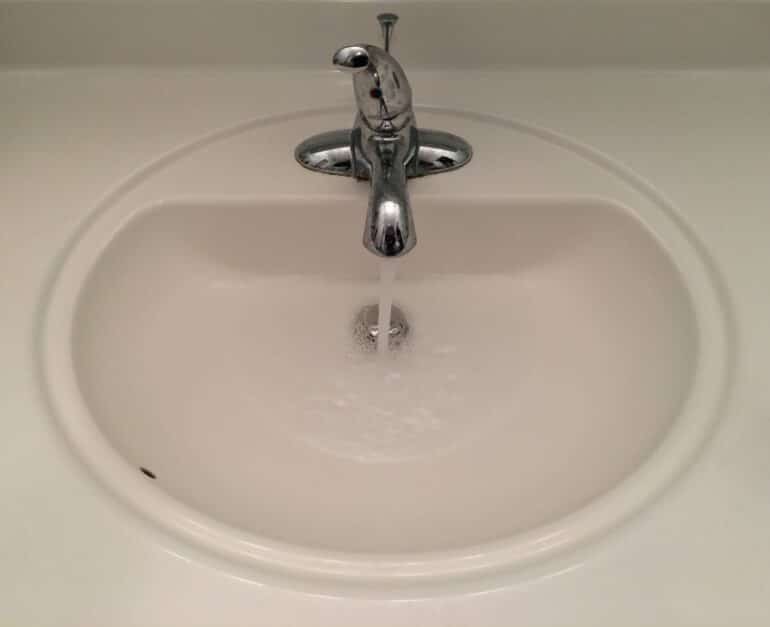
Over the course of about a year our bathroom sink begins to drain slower and slower and I must go through this repair about once a year. Bathroom sinks are unique because most have a built-in drain plug where you can pull up the handle and the drain will close. This feature has an added draw-back in that the mechanics of this drain catches hair and eventually will plug up if not cleaned out. I’m going to walk you through how easy it is to clean out your bathroom sink if it is draining slowly.
It’s best if you understand the mechanics of how this type of drain works and here I’ll show you a diagram drawn over the actual picture of the drain:
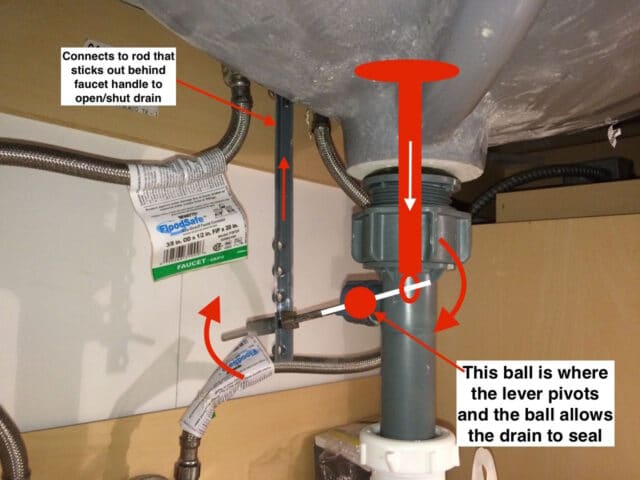 |
| Diagram of bathroom sink drain plug mechanism |
When you pull up on the rod that sticks out behind the faucet handle, this rotates up the rod that sticks into the pluming drain, which goes through a “ball” that seals off the drain, and then allows the drain plug to drop down and seal the drain. This rod that protrudes into the drain is usually the culprit. I’ve seen newer designs of this drain mechanism where the rod was replaced by a cable that ran into a housing that was possibly geared but the idea is about the same. Restoring the drain to full draining capacity involves taking apart this mechanism and here’s how to do it…
How to Fix a Bathroom Sink That Will Not Drain
Tools Needed:
Step 1: Loosen the nut on the drain lever assembly.
You’ll need to think backwards since righty-tighty, lefty loosey is only true when viewing this from the back sight. Turn the nut counter-clockwise to loosen it. You may be able to turn it by hand but if you cannot, use a pair of channel pliers.
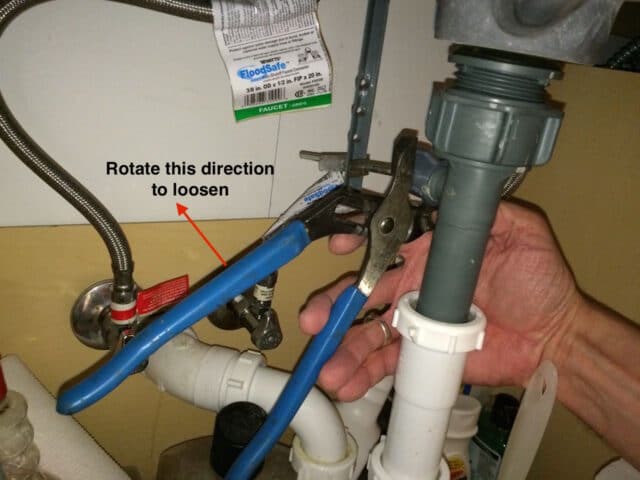 |
| Loosening the nut on the drain plug assembly lever |
Step 2: Remove the drain plug lever rod from the drain.
It will come straight out:
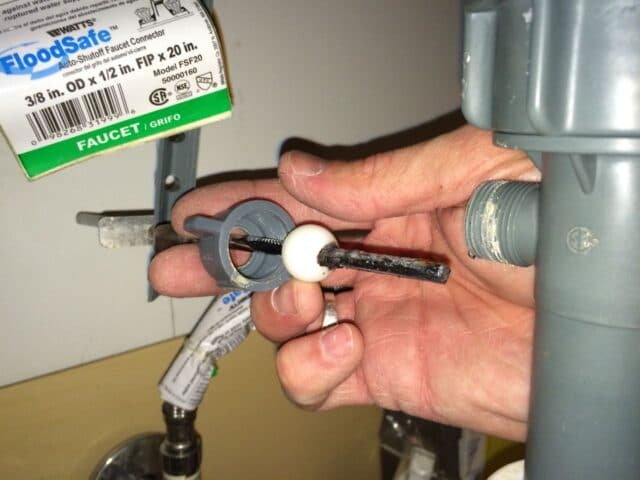 |
| Drain rod lever removed from drain pipe |
Step 3: Remove the sink drain.
The rod inserts through a loop in the bottom of the drain assembly that holds it in place. Once you remove the rod the drain assembly will come straight out:
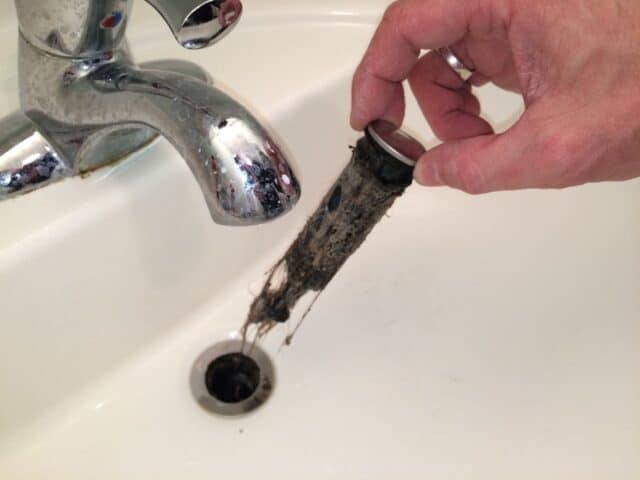 |
| Now you can see why the drain was not draining! Sick |
Step 4: Clean the drain plug.
Get all that hair or whatever off the drain plug. I used a brush to scrub the mold off of it–nasty!!
Step 5: Reinstall the drain lever rod and rinse out the drain.
Do this BEFORE reinstalling the drain. If you don’t reinstall the drain rod assembly you will get water leaking out the back of the pipe into the vanity cabinet. Be careful when tightening the nut because it is possible to cross the threads. I would hand tighten it to get it going and at this point you do not need to put a wrench on it–we’re just temporarily putting it on there to keep it from leaking. Use an old tooth brush and scrub down into the drain hole in the sink and get all that nasty stuff out of their and rinse it down.
Step 6: Remove the drain lever rod and then reinstall the drain plug.
Take note that the “loop” at the bottom of the drain needs to face the back so that the rod can insert through it:
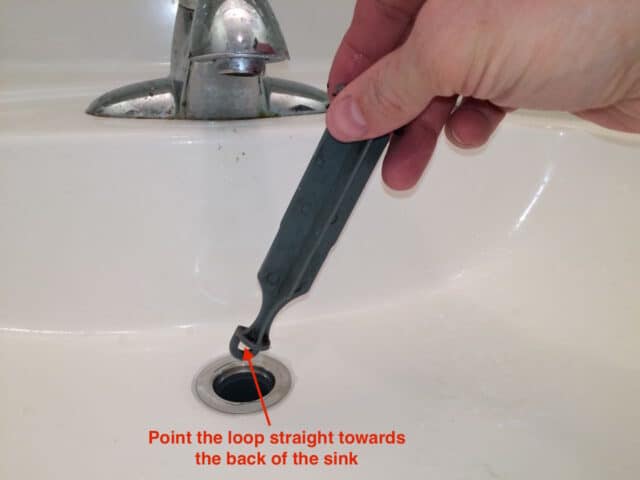 |
| Make sure to align the loop so the rod can insert into it |
Step 7: Reinstall the drain plug rod lever.
Once you have inserted the drain plug back into the drain, then re-insert the drain plug rod lever and then test it by trying to lift up on the drain. If you have inserted the rod through the loop on the end of the drain plug it will be retained. Play around with it until you get it right.
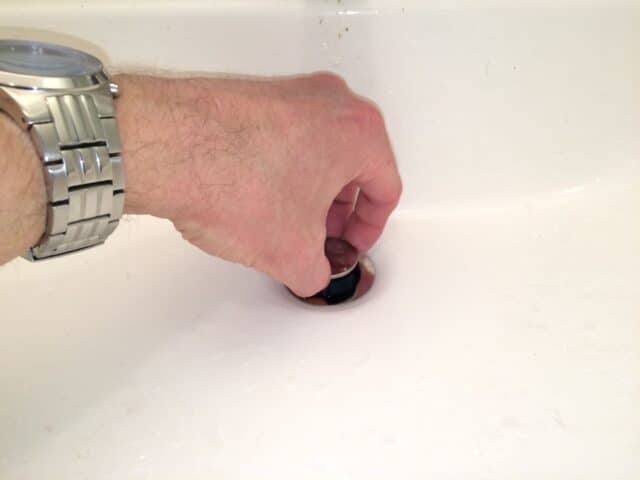 |
| Pulling up on the drain plug to see if it is retained |
You’ve probably been a round a house where the drain plugs were not retained and now you know why.
Step 8: Tighten the nut on the drain plug rod lever assembly.
Hand tight should be enough but you can gently tighten it with your channel lock pliers. Don’t over-tighten because you can break the nut, since it’s just plastic. Now you are done–your sink should drain much better now–like new!
Amazon Associate Disclosure: As an Amazon Associate I earn from qualifying purchases. This means if you click on an affiliate link and purchase the item, I will receive an affiliate commission. The price of the item is the same whether it is an affiliate link or not. Regardless, I only recommend products or services I believe will add value to Share Your Repair readers. By using the affiliate links, you are helping support Share Your Repair, and I genuinely appreciate your support.