The tailgate on our 2004 Toyota Sienna wouldn’t go up all the way on its own so it was about time to replace the shocks. I ordered them from Amazon and you can click on the link below. They are an exact replacement and fit perfectly.
How to Replace the Rear Liftgate Shocks on a 2004-2010 Toyota Sienna:
Equipment:
- 2004-2010 Toyota Sienna (probably about any year though)
Parts Needed:
- Original Shock Part Number(s): 68905-AE013 009757 0610N 175/08 B 15
- Replacement Shock: Maxpow 2X Rear Hatch Auto Gas Spring Prop Lift Support Compatible With Sienna 2004 2005 2006 2007 2008 2009 2010 4590 SG229013 With Power Liftgate
Tools Needed:
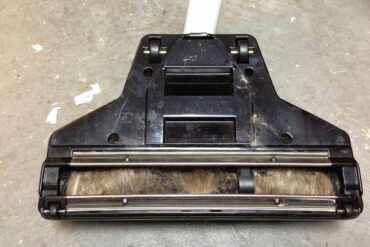
Step 1: Prep the new shocks for installation.

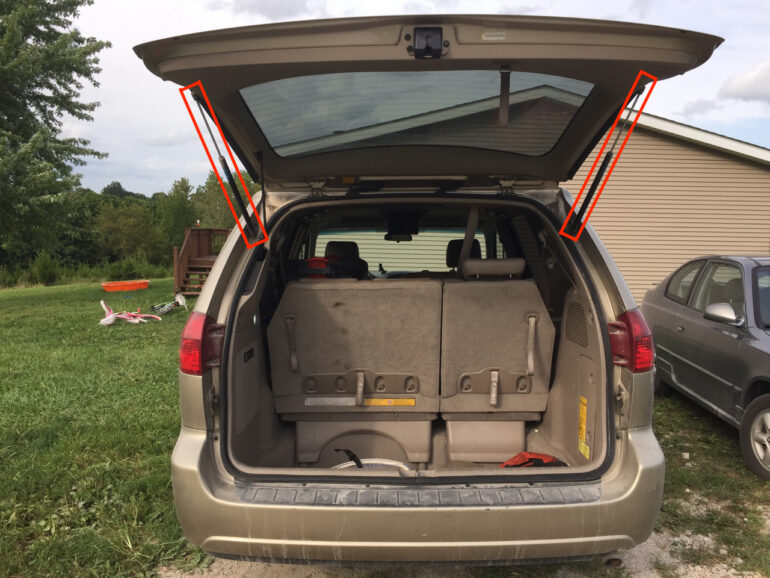
Step 2: Open the lift gate.
You cannot get at them if the tail gate is not open.
Step 3: Remove the spring clips from each end of ONE of the original lift gate shocks.


Step 4: Remove the shock.
Step 5: Install the new shock.
Step 6: Repeat steps 3-5 for the other shock.
Click here to see ALL 30+ of my Toyota Sienna posts.
Amazon Associate Disclosure: As an Amazon Associate I earn from qualifying purchases. This means if you click on an affiliate link and purchase the item, I will receive an affiliate commission. The price of the item is the same whether it is an affiliate link or not. Regardless, I only recommend products or services I believe will add value to Share Your Repair readers. By using the affiliate links, you are helping support Share Your Repair, and I genuinely appreciate your support.
Thanks for taking the time to share all this knowledge. Very kind of you. My liftgate shocks are replaced now and I spent $50! You’re awesome!
Thanks for sharing Jon–good work on the repair!
It is very noble of you to set up this site. Thank you.
Can the sienna 2008 model power operated tail gate struts be replaced as easily ?
The dealer tells me that there is considerable work taking off panels etc to replace them.
I will appreciate your help in this.
Tom
Thanks for the question Tom. The 2008 is identical to the 2004 model and you do not need to remove any panels to replace your liftgate shocks. Follow along with this article and you’ll be able to replace your shocks and save a lot of money. Thanks!