- ProForm Crosswalk Caliber Elite Treadmill Model No. PFTL71505.0
- Tread Front Roller Part Number 238193
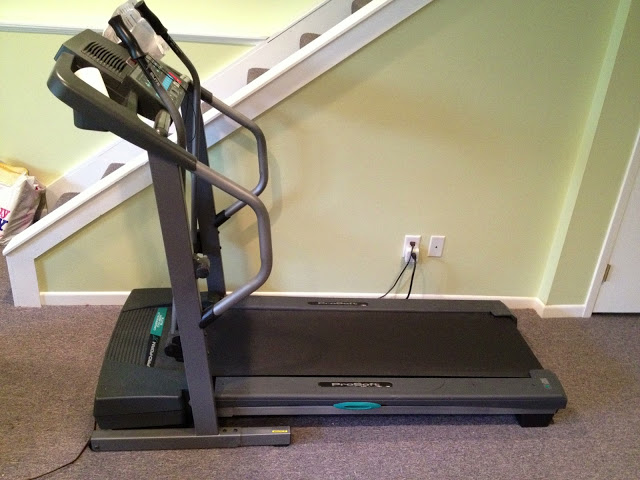
We’ve put a lot of miles on our treadmill and have worn out and already replaced the rear roller and now, finally, the front roller bearings have gone out as well. Here is a video of the treadmill with the front roller with a bad bearing so you can at least hear what it might sound like:
Here’s how to replace your front roller.
1. Unplug the treadmill from the wall. You don’t want to accidentally electrocute yourself.
2. Remove the 5 screws from the plastic case. Three of them are on the front and easy to get to:
 |
| ProForm Crosswalk Caliber Elite Treadmill front case screw locations |
The other two are underneath and not easy to get to. I wish I would have taken pictures when I took them out a long time ago but I’ve had to open up this thing enough times to tighten the drive motor that, finally, I just left them out. With the incline lowered all the way down, lift up the treadmill deck and put it in storage mode. Under either side of the case, obstructed by the metal tubing that runs along the bottom of the frame, the screws are recessed into the case, as shown in the diagram below:
 |
| ProForm Crosswalk Caliber Elite Treadmill underneath case screw locations |
I was forced to use a phillips screw head extension, meant for a drill, placed in a vice grip to be able to access them. The biggest trick for me was getting the screw driver bit into the head of the screw. Once you remove those two screws you can lift off the plastic cover. One thing to note is that there are hooks on the deck side of the cover that hook onto the bottom of the case. To remove the case lift the edge up that had the 3 screws on it and then pull away from the treadmill. This is what you’ll see:
 |
| ProForm Crosswalk Caliber Elite Treadmill with the top cover removed |
3. Loosen the walking belt.
Note: You may want to lift each side of the walking belt in the middle before you loosen it to take note of how tight it feels at the proper tension.
If you don’t loosen the belt it makes it hard to reinstall the roller so you might as well loosen it now. To loosen the walking belt unscrew (counterclockwise) the two bolts that are accessed at the holes at the end of the treadmill deck. Keep track of how many turns you loosen each one so that you loosen it evenly. Here’s a clip from the manual on tightening the belt that you can scan over to know how to loosen it (and the bolt locations). Don’t loosen it too much, maybe 6-7 turns. You can always loosen it more later if necessary.
 |
| ProForm Crosswalk Caliber Elite Treadmill Walking Belt Tension Instructions |
4. Note the tension of the drive belt. I first took note of the tension of the belt by placing a piece of masking tape along the frame to mark where it was before I loosened the two bolts:
 |
| Tape added to mark the original tension of the drive motor belt |
5. Note the groove location of the belt on BOTH the front roller and the motor ends. I didn’t do this when I replaced my front roller and when I was putting it back on I was left to guess whether things were aligned properly in the end. In this picture the drive belt is all the way on the inside of the front roller and on the outside of the motor drive shaft. You should note how yours is installed before you remove it. Hopefully it was aligned properly in the beginning!
 |
| Taking note of the groove locations of the belt |
6. Loosen the two bolts that control the drive belt tension. You will need two wrenches. I used two crescent wrenches. The bolts are circled in red:
 |
| Drive motor bolts that control the tension of the treadmill’s drive belt |
After loosening those two bolts you will be able to rock the motor assembly toward the walking belt giving enough tension so you’ll be able to remove the belt from the front roller.
7. Take note of the front roller location. I measured the location of the front roller before I removed it just for alignment purposes. It was about 1/2 inch from the front edge of the bracket (measuring the distance from 3″ to 2 1/2″). You won’t use this bolt for tensioning the walking belt only for alignment and since I took note at this point I didn’t have any alignment issues when I reinstalled the new front roller.
 |
| Taking note of the alignment of the front roller |
8. Remove the bolt pictured above from the end of the roller. One thing to note is that the other end of the front roller only fits in a hole and is not connected by a bolt in any way. Once you have this bolt out you will be able to lift the roller up and out from the walking belt and drive belt.
9. Replace the front roller. Insert the new front roller through the walking belt and place in the slot on the drive belt side. Carefully set the drive belt back on the front roller pulley, paying attention to the groove locations you noted in the beginning (step 5). It was at this point that I realized I needed to loosen the tension of the walking belt because I didn’t loosen it initially. The tension was too tight to reassemble without loosening the walking belt for me.
10. Reinstall the bolt on the other end of the front roller. Tighten to match the measurement you made in step 7.
11. Tighten the walking belt. Be careful to tighten both sides the same number of turns.
|
| ProForm Crosswalk Caliber Elite Treadmill walking belt tension instructions |
12. Test out the alignment of the walking belt. Before you put the cover back on the treadmill I’d run it slowly (not walking on it) to see that the belt is running straight on the deck and not pulling to one side. You can adjust the alignment by turning one of the rear roller tension screws or the bolt on the end of the front roller. If you carefully noted the front roller bolt alignment you probably should solve all alignment issues with the rear roller tension screws.
13. Test out the tension of the walking belt. With the treadmill running slowly, walk on the treadmill and see if the belt stops when you step. Switch to a jog and test it again. The walking belt should not stop and slide when you step. Make sure the belt is not moving all the way to one edge of the walking deck (left or right). The walking belt may not be perfectly in the center, and that is ok, but just should not rub on either side. If the walking belt shutters when you step then you’ll need to tighten it a half turn or so and try again. Repeat until the belt is the proper tightness.
14. Reinstall the top cover. You are done. You just saved yourself a bunch of money.
Amazon Associate Disclosure: As an Amazon Associate I earn from qualifying purchases. This means if you click on an affiliate link and purchase the item, I will receive an affiliate commission. The price of the item is the same whether it is an affiliate link or not. Regardless, I only recommend products or services I believe will add value to Share Your Repair readers. By using the affiliate links, you are helping support Share Your Repair, and I genuinely appreciate your support.
