I love Microsoft Excel for the most part but there are a handful of things that irritate me about it too. One of those things is that the toolbars I’ve carefully created, arranged, and customized (and have become used to) up and disappear for no apparent reason. I have installed all the updates and it still does it. I haven’t been able to find a solution except to keep a backup of the preference file that holds the toolbar settings and then when they disappear, I replace the bare preference file with my customized one. Lately this has happened multiple times in a week so I decided I wanted to automate the repair. Here’s how you can do it:
Excel Toolbars Disappear-How to Automate Fixing Them With Automator in Excel 2008 For Mac
Software:
- Microsoft Excel 2008 For Mac
- Mac OS 10.9.2 Mavericks
Step 1: Set up your toolbars just the way you like them.
Step 2: Locate the Excel Preference file that contains the toolbar settings.
Macintosh HD > Users > your-username > Library > Preferences > Microsoft > Office 2008 > Excel Toolbars (12)
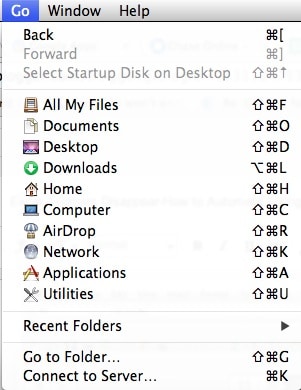 |
| OS X currently automatically hides the Library folder |
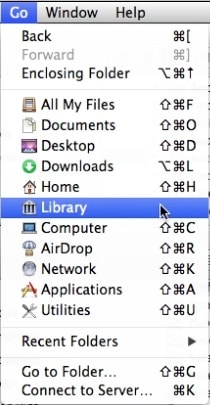 |
| The Library menu item appears when you press and hold the option key |
Macintosh HD > Users > your-username > Library > Preferences > Microsoft > Office 2008 > Excel Toolbars (12)
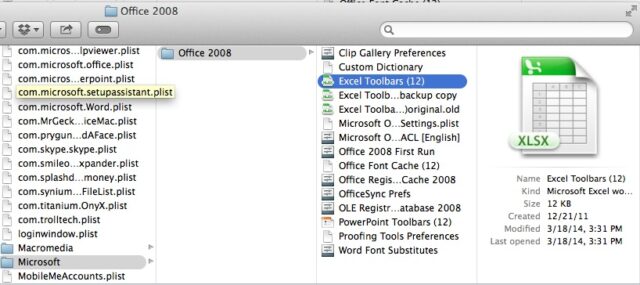 |
| Location of Toolbar Preference file for Microsoft Excel 2008 for Mac |
Step 3: Copy this “Excel Toolbars (12)” file.
- hold down the control key and click on the file and select copy from the menu that pops up
- can click on the file and then use the keyboard shortcut Command-C
- click once on the file and then select it from the Finder’s menu: Edit > Copy.
Step 4: Create a folder in your Documents directory as a storage place for a backup copy of the good toolbar preference file.
- With the folder where you’d like your new folder highlighted, use the keyboard shortcut Command-N.
- With the folder where you’d like your new folder highlighted, click on File and then New Folder in the menus at the top of the screen.
- Hold down the control key and click in white space inside the folder where you want the new folder created and click on “New Folder” in the menu that pops up.
Step 5: Paste the Excel Toolbars (12) file you copied in step 3 into the new folder you created.
| Location of new folder for my “backup” Excel Toolbars (12) preference file |
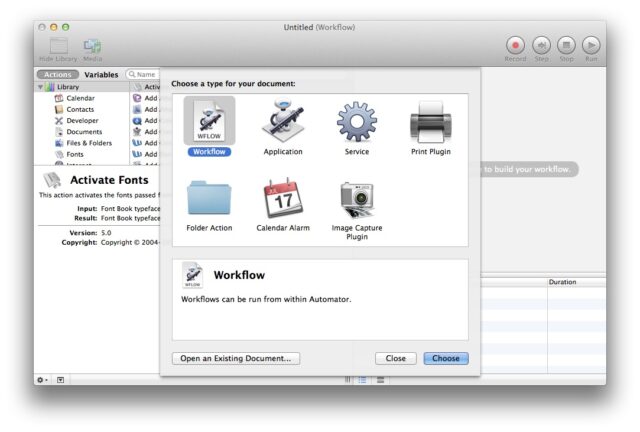
Step 6: Launch the Automator program.
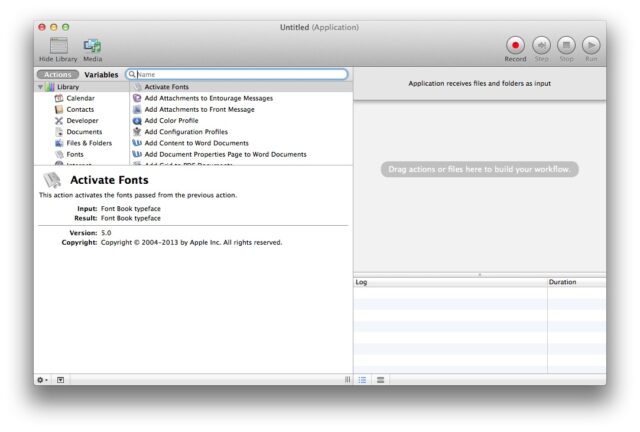
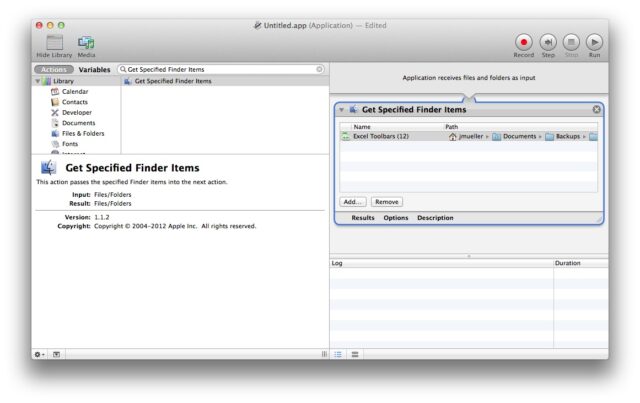
Step 7: Add the “Get Specified Finder Items” to the workflow.
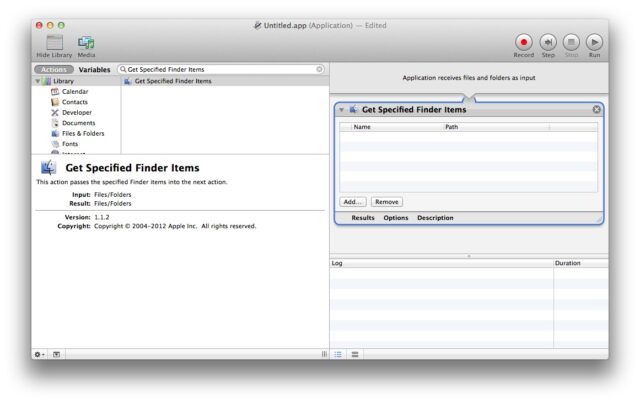
Step 8: Add the backup copy of your preferences to the “Get Specified Finder Items” Action you just added.
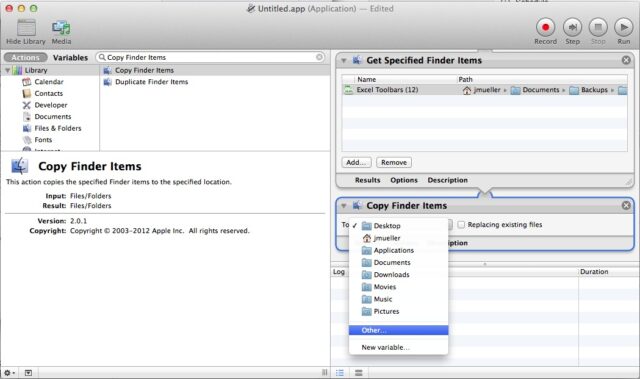
Step 9: Add the “Copy Finder Items” to the workflow.

Step 10: Set the “Copy Finder Items” path.
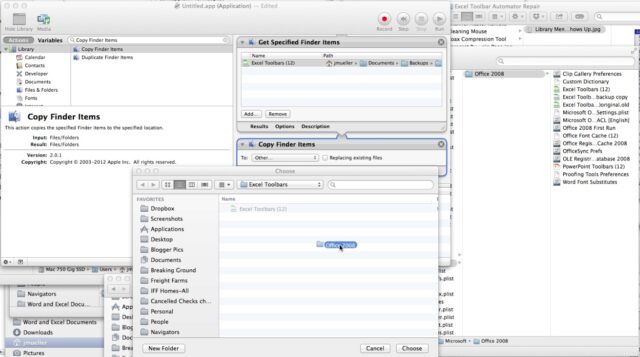
Macintosh HD > Users > your-username > Library > Preferences > Microsoft > Office 2008
Macintosh HD > Users > your-username > Library > Preferences > Microsoft > Office 2008
Drag and drop the “Office 2008” folder to the file browser window you have open in Automator as follows:
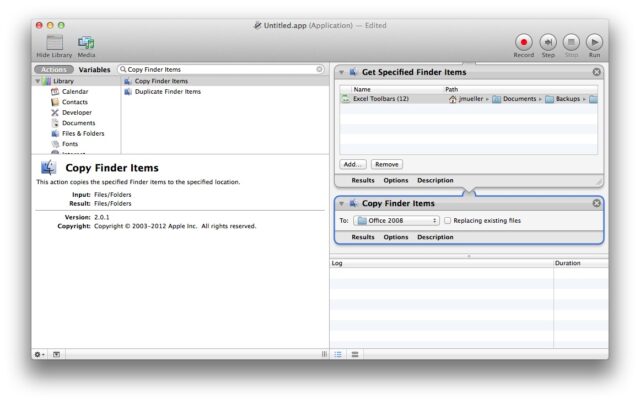 |
| Your workflow is almost complete at this point |
Step 11: Click on the checkbox next to “Replace existing files.”
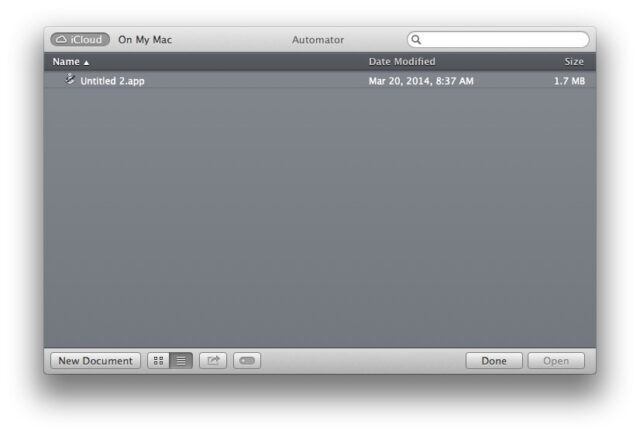
Step 12: Save the Automator application.
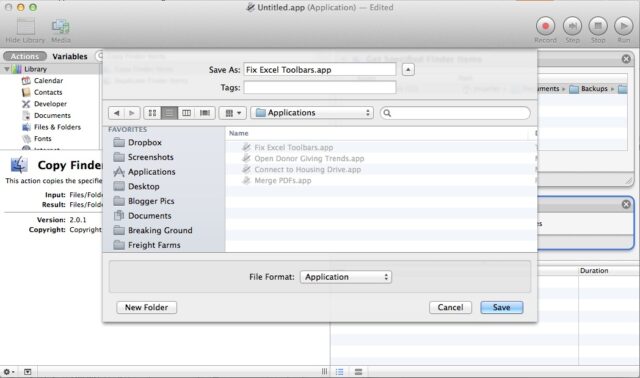 |
| Saving the Excel Toolbar Preference Fix Workflow as an Application |
Step 13: Run this file when Excel forgets your toolbars.
 |
| My Workflow Application is Easily accessible in the OS X Dock |
Another Idea:
If you implement this like I did and then modify your current toolbars (for the better) you will lose those modifications the next time Excel decides to forget your toolbar preferences again. You can make another automation application that copies the current toolbar preference file over top of the backup copy so you can update your backup. Close Excel before doing this.
My other Apple Automator blog posts:
- How to Use Automator and Applescript to Automate Connecting to a Specific SMB Drive (this post)
- How to Create a Custom Print Workflow to Save Printed PDFs to a Folder Automatically with Automator
- How to Create a Folder Action to Resize Your Photos Using Mac OS X Automator
- How to Open Websites on Your Mac From Your iPhone Using Dropbox, a Sendtodropbox.com Account, and Folder Actions
- How to Create a Mac Application to Merge Pdf’s in Automator
- Excel Toolbars Disappear-How to Automate Fixing Them With Automator in Excel 2008 For Mac (this post)
Amazon Associate Disclosure: As an Amazon Associate I earn from qualifying purchases. This means if you click on an affiliate link and purchase the item, I will receive an affiliate commission. The price of the item is the same whether it is an affiliate link or not. Regardless, I only recommend products or services I believe will add value to Share Your Repair readers. By using the affiliate links, you are helping support Share Your Repair, and I genuinely appreciate your support.